
So you’ve been scrolling through those gorgeous dark, moody bathrooms on Pinterest and thinking “I want that dramatic, spa-like vibe,” but you’re worried about ending up with something that feels more like a dungeon than a retreat. You’re not wrong to be cautious—moody bathrooms can easily tip from sophisticated sanctuary into depressing cave if you don’t know what you’re doing.
Here’s the thing about moody bathroom design: it’s not just about painting everything dark and calling it atmospheric. The best moody bathrooms use darkness strategically, layer in warmth and texture, and create genuine luxury through quality materials and thoughtful lighting. They feel intimate and cocooning without being claustrophobic.
Whether you’re renovating a master bathroom or trying to create a spa-like powder room, these steps will help you nail that sophisticated moody aesthetic without sacrificing function or ending up with a space that feels oppressive rather than relaxing.
Understanding What Makes Moody Bathrooms Work
Before diving into the specifics, let’s talk about what separates stunning moody bathrooms from ones that just feel dark and depressing.
Quality Lighting Is Non-Negotiable – Moody doesn’t mean dim. The best dark bathrooms have incredible layered lighting that creates atmosphere while providing adequate illumination for daily tasks.
Texture Saves Everything – In a dark palette, texture becomes crucial for visual interest. Without varied surfaces and finishes, dark spaces feel flat and one-dimensional.
Warmth Prevents Coldness – The right materials, lighting temperature, and accent colors keep moody bathrooms feeling cozy rather than sterile or unwelcoming.
Start With Smart Planning
Step 1: Plan Your Layout, Ventilation, and Focal Point
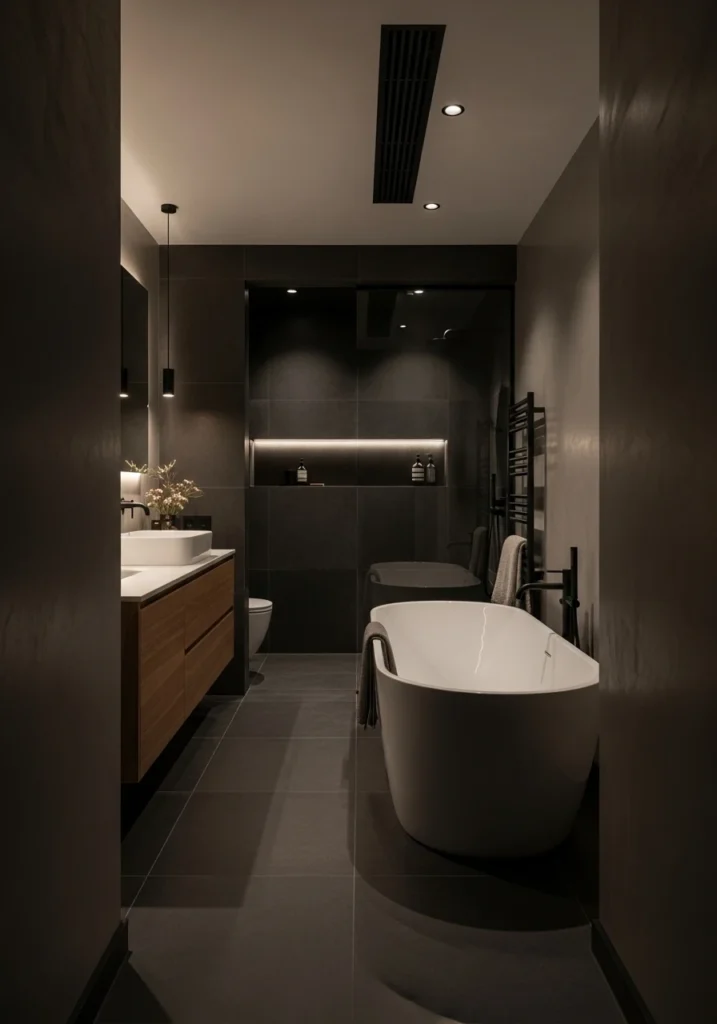
Sketch your footprint and decide whether the tub, vanity, or shower will be your focal point. Create clear pathways from door to your anchor element—maybe a freestanding tub as the centerpiece with a recessed wet-zone shower at the far end.
Ensure mechanical ventilation and heating are planned early, including slim ventilation grilles discreetly integrated above showers and heated towel rails near tubs. Use dark plaster, matte tiles, and warm wood vanity to establish your material intent while planning soft lighting zones throughout.
The room should read as intentionally planned for both atmosphere and comfort, not just randomly dark.
Step 2: Choose Your Deep, Cohesive Color Palette
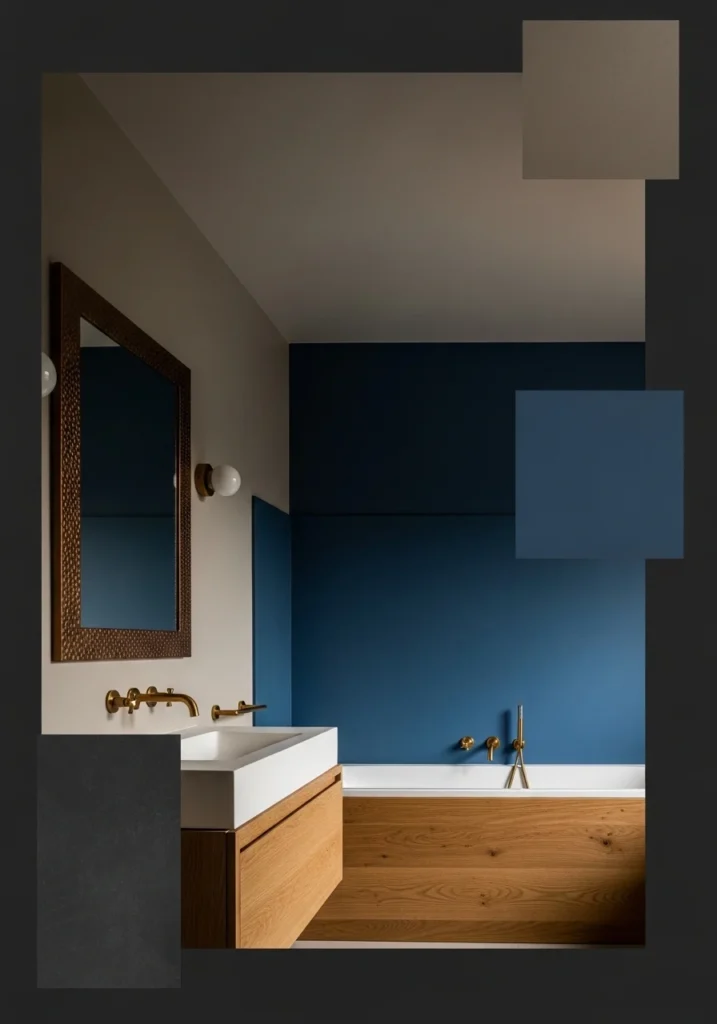
Select one deep base color—charcoal, deep navy, emerald, or oxblood—plus two supporting neutrals and one metal accent. Picture walls in deep charcoal matte plaster with lighter warm-grey ceilings and a single accent wall in deep blue behind the tub.
Add brass taps and bronze mirror frames as metal accents, with natural oak vanity to warm the palette. Keep lighting warm to show how colors read in evening light rather than harsh daylight. The palette should feel rich and intentional, not randomly dark.
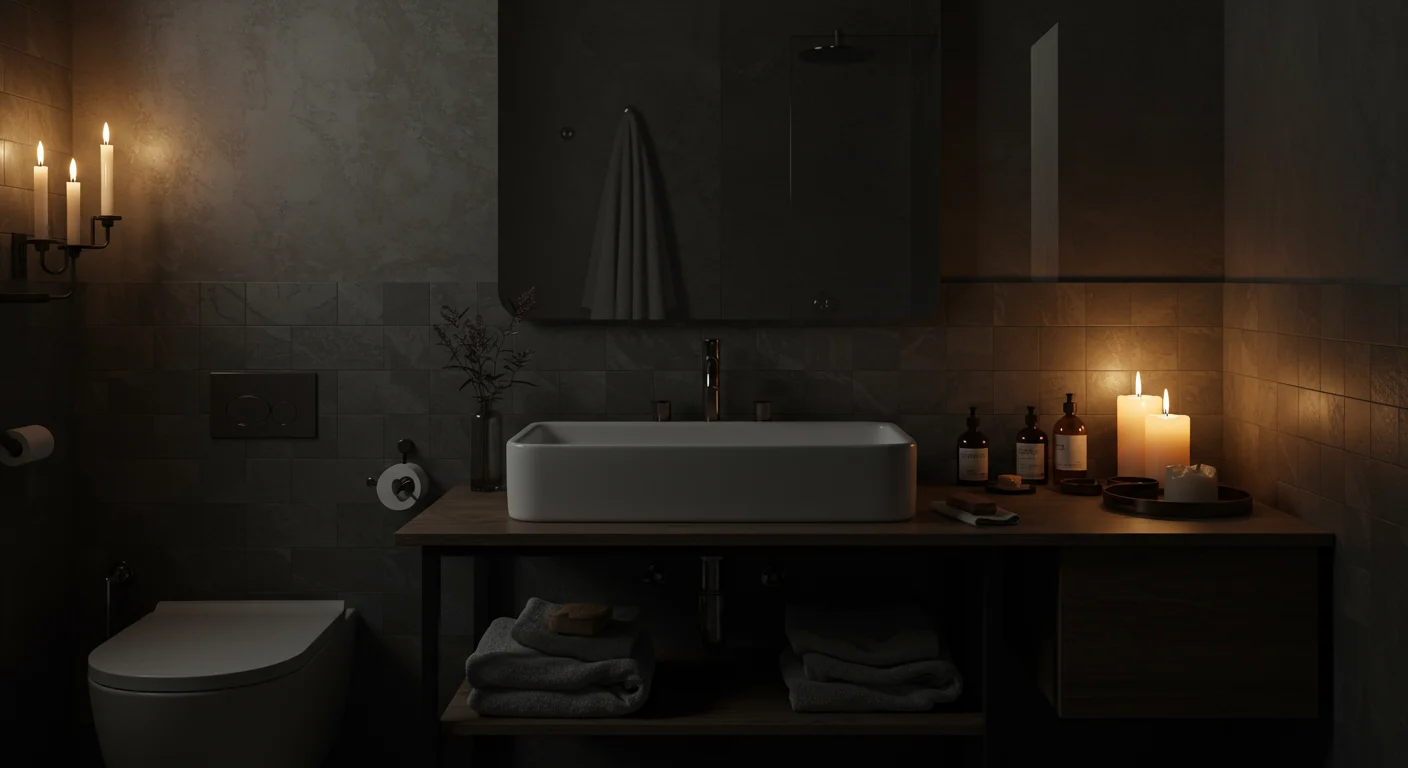
Step 3: Specify Luxurious Materials That Feel Expensive

Choose tactile, low-reflectance surfaces like honed stone, matte large-format tiles, plaster, and aged metals. Think honed black marble countertops, matte basalt tiles on splashes, and soft Venetian plaster walls above.
Use aged-bronze taps and hand-textured wooden cabinets with visible grain and oiled finishes. The materials should feel substantial and expensive to the touch, not just visually dark. Include small details like ceramic trays and linen towels to suggest scale and tactility.
Master the Lighting
Step 4: Design Layered Lighting Zones
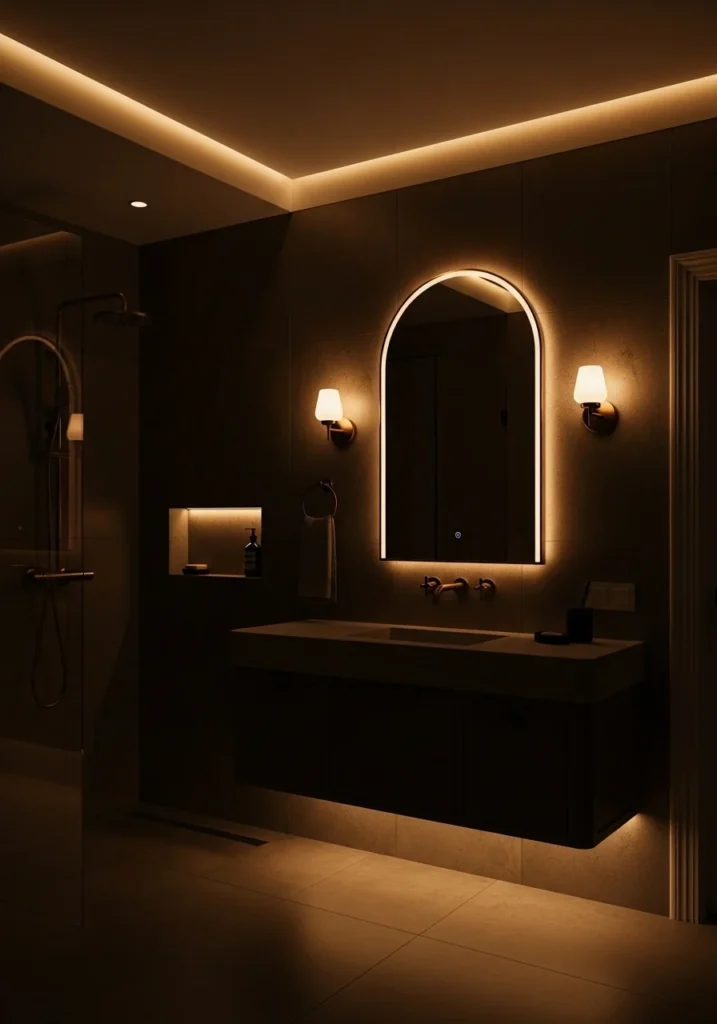
Create three distinct lighting zones—warm ambient, targeted task, and accent lighting—all dimmable. Install soft cove LEDs in ceilings for ambient glow, twin warm wall sconces flanking mirrors for task lighting, and thin recessed strips highlighting shower niches.
Add halo backlighting behind mirrors and low-profile under-cabinet strips at vanities to create depth. Use warm 2700K bulbs throughout for flattering skin tones and rich color rendering. The scene should feel cinematic and intimate, not flat or harsh.
Step 5: Choose One Statement Hero Piece

Invest in one sculptural element—maybe a matte black freestanding tub centered beneath an arched window with an elegant floor-mounted brass filler beside it. Or choose an oversized aged oval mirror that reflects candlelight beautifully.
Keep surrounding elements simple so your hero piece dominates the scene. This prevents the room from feeling randomly dark and gives it a clear focal point that justifies all the dramatic color choices.
Also Read: 14 Backyard Garden Ideas That Make the Most of Your Tiny Space
Design Your Key Elements
Step 6: Create a Refined Vanity and Mirror Composition
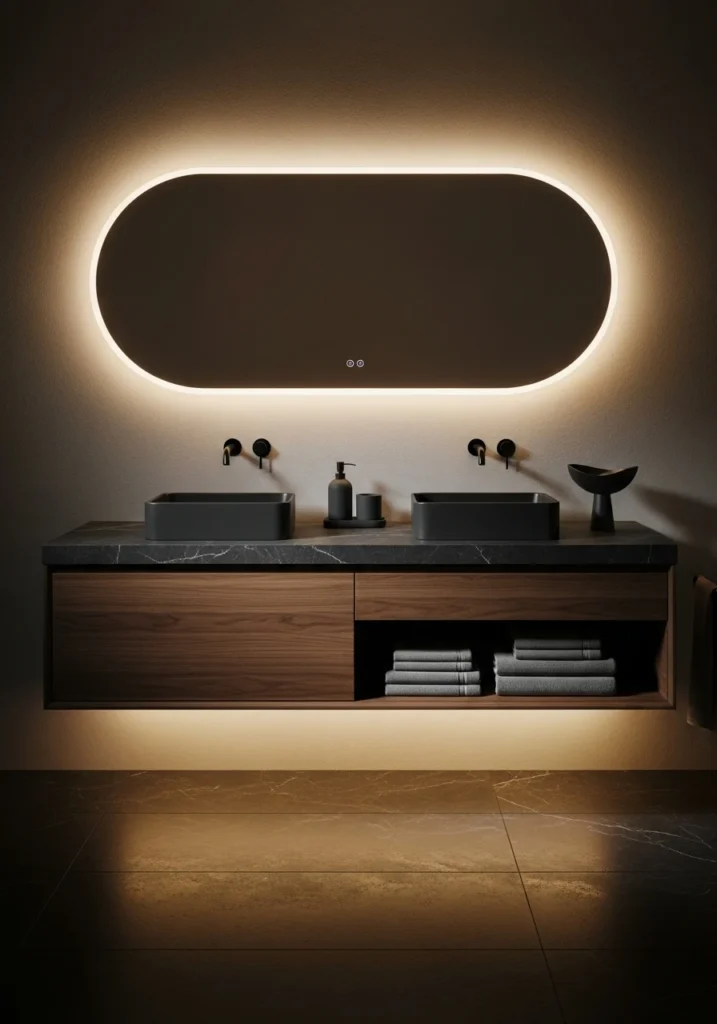
Use a floating walnut vanity with honed stone counter, twin matte-black basins, and an oversized backlit oval mirror with soft halo glow. Under-vanity lighting creates warm floor wash and shadow depth.
Style carefully with matte soap dispensers, folded towels, and small sculptural bowls to show both function and restraint. The lighting should be atmospheric enough to emphasize the halo mirror effect while providing adequate task illumination.
Step 7: Use Tile Strategically for Drama and Texture
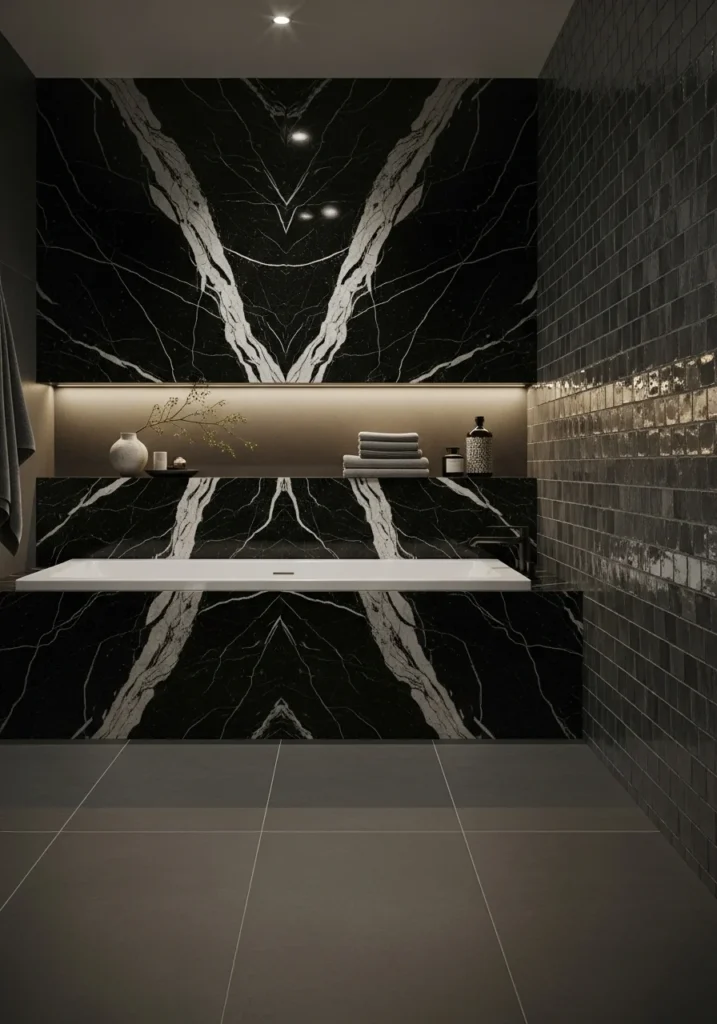
Install bookmatched black marble feature walls behind tubs, with matte charcoal large-format floor tiles and secondary walls in small, hand-textured subway tiles. Use narrow grout lines to keep looks seamless.
Include recessed ledges with accent lighting for curated objects. The scale and texture contrast create depth in dark palettes while preventing everything from reading as one flat surface.
Step 8: Transform Your Shower Into a Dark Sanctuary
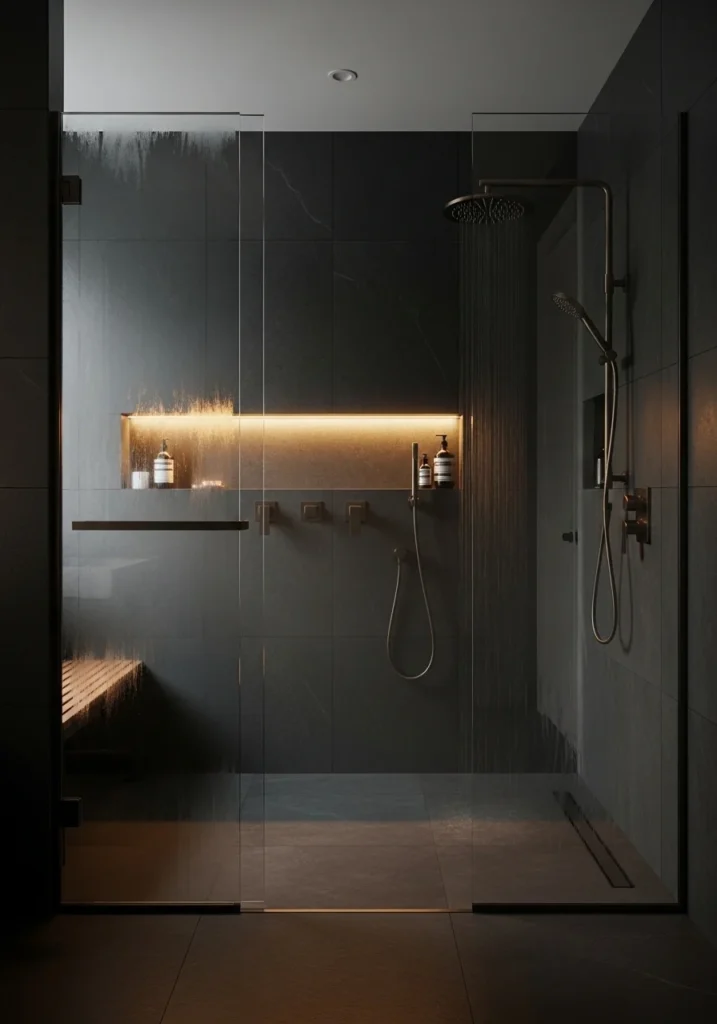
Design wet-zones with frameless glass, deep basalt tile walls, linear drains, and recessed niches lit by warm strip lights. Use matte-black shower fittings with brushed bronze rain heads and secondary handhelds.
Add small teak benches inside wet areas for luxury and function. The shower should feel like a separate retreat within your bathroom retreat, not just a utilitarian washing space.
Add Warmth and Comfort
Step 9: Prioritize Warm, Tactile Flooring
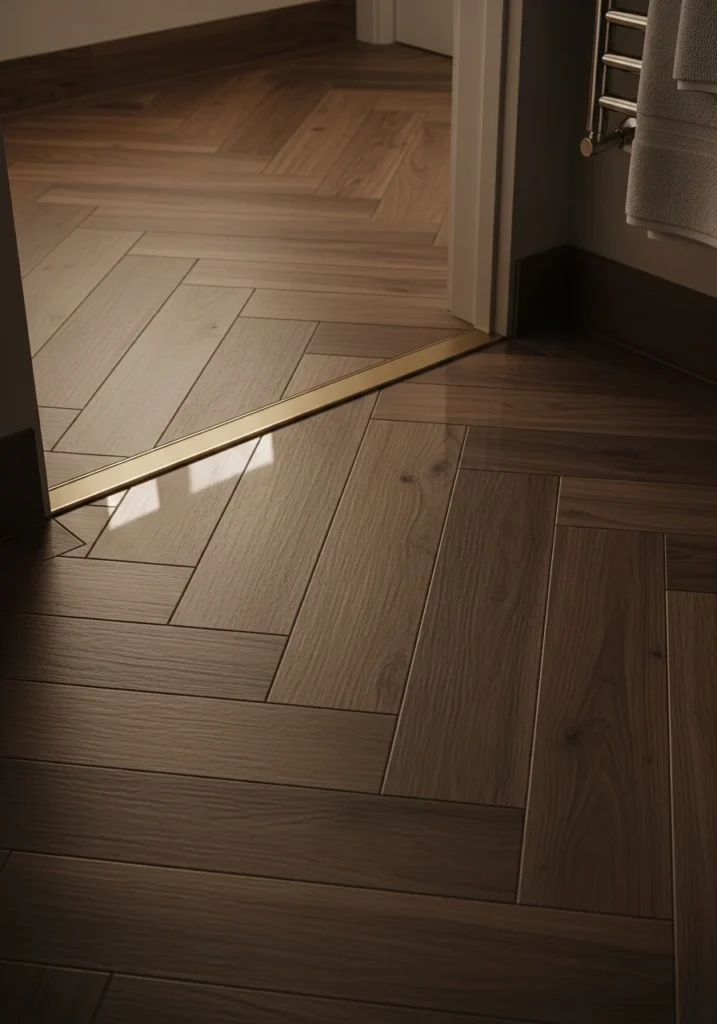
Use wide plank wood-look porcelain in deep walnut tones with underfloor heating for genuine comfort. Include narrow metal threshold trims that align with your metal accent choices.
The flooring should feel warm underfoot and contribute to that cozy, expensive atmosphere rather than being cold and institutional. Underfloor heating is crucial in dark bathrooms to prevent them from feeling cold or unwelcoming.
Step 10: Conceal Storage to Maintain the Mood
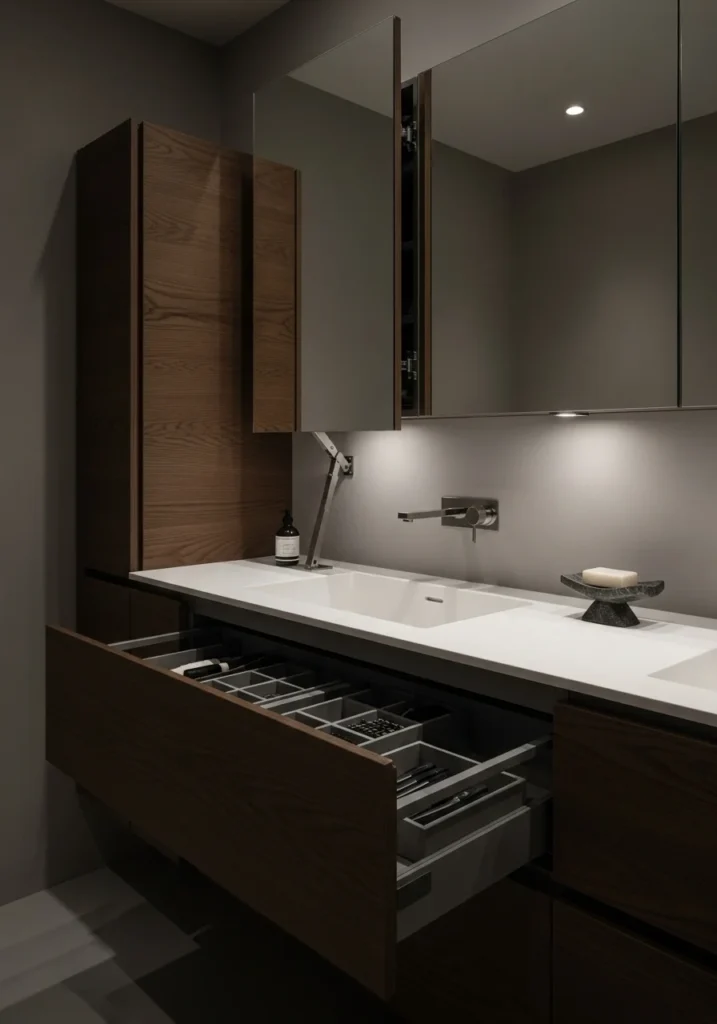
Integrate push-to-open drawers in dark oak, recessed medicine cabinets behind mirrors, and slim linen towers with hidden compartments. Keep countertops mostly clear except for one or two sculptural accessories.
The storage infrastructure should preserve the atmospheric quality while providing genuine function. Hidden organization prevents visual clutter that would disrupt the carefully crafted mood.
Layer In Life and Softness
Step 11: Choose Textiles That Support Your Palette

Select thick charcoal Turkish towels, deep green bath mats with low pile, and looped wool rugs in colors that support rather than compete with your palette. Avoid bright whites that would puncture the carefully planned color scheme.
Show texture and fabric weave details, emphasizing the quality and softness that makes dark bathrooms feel luxurious rather than harsh.
Step 12: Add Plants and Organic Elements
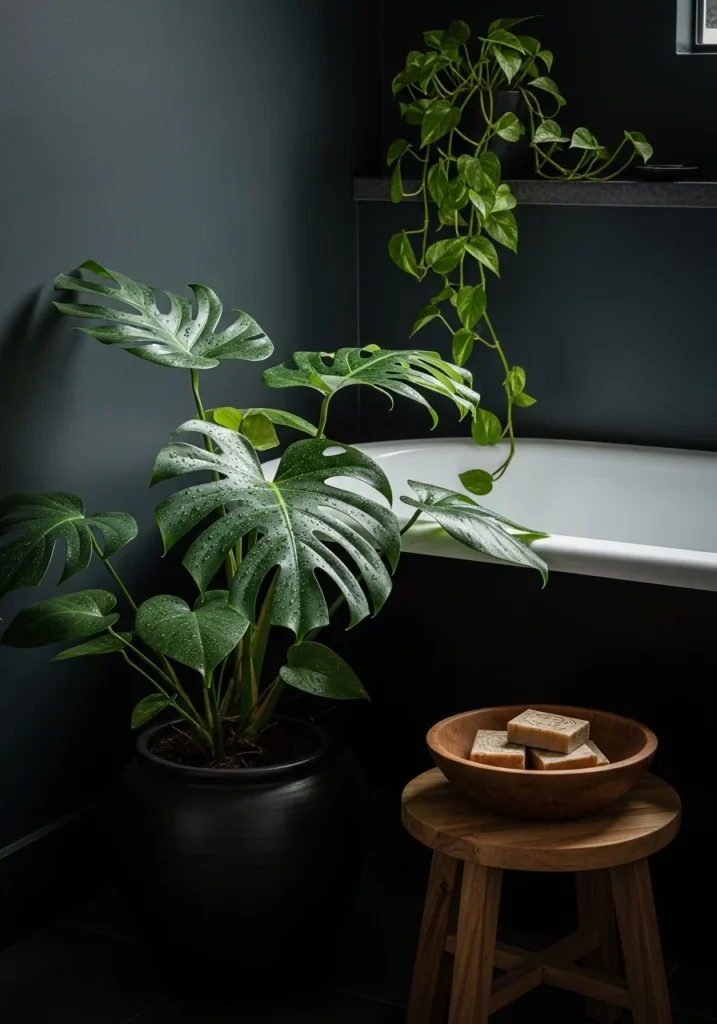
Introduce humidity-loving plants like monstera or ferns in dark ceramic pots, teak bath stools with wooden bowls, and trailing pothos on shelves. The plants should feel curated and purposeful, not cluttered or randomly placed.
Plants soften the darkness and add life while staying true to the sophisticated aesthetic. They provide necessary organic contrast to all the hard surfaces.
Perfect the Sensory Experience
Step 13: Layer Scent and Sound for Complete Atmosphere
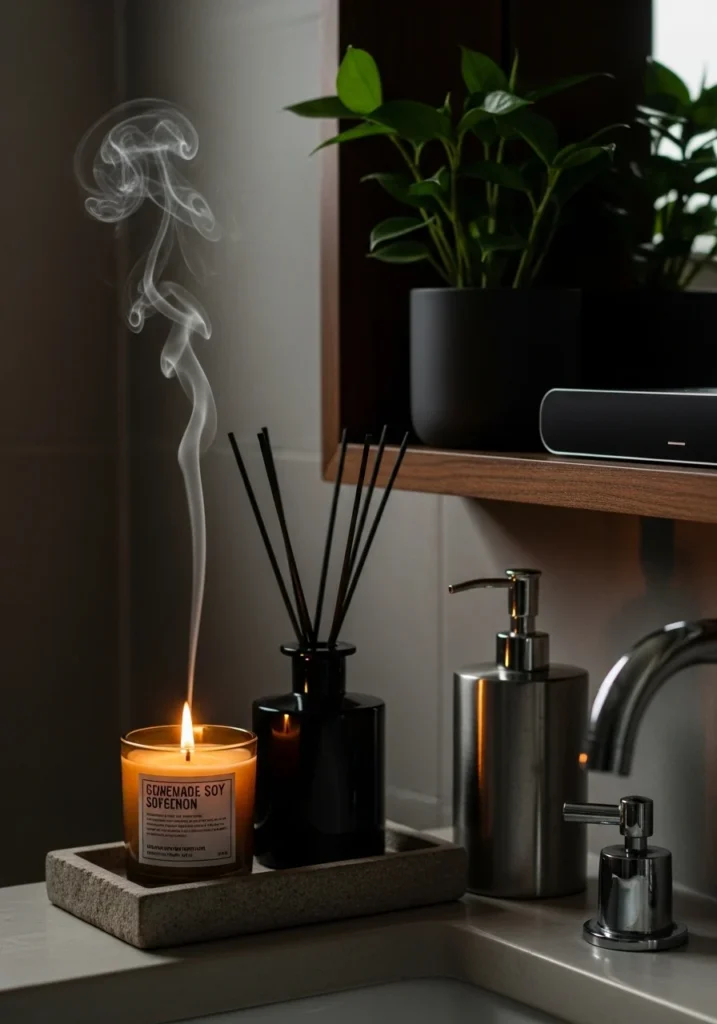
Plan for subtle scenting with reed diffusers in black glass bottles or soy candles on stone trays. Consider hidden speakers for low-volume ambient sound that makes the room feel immersive.
The goal is creating a crafted sensory experience where smell and sound enhance the visual mood rather than competing with it.
Step 14: Curate Art and Metallic Highlights Carefully
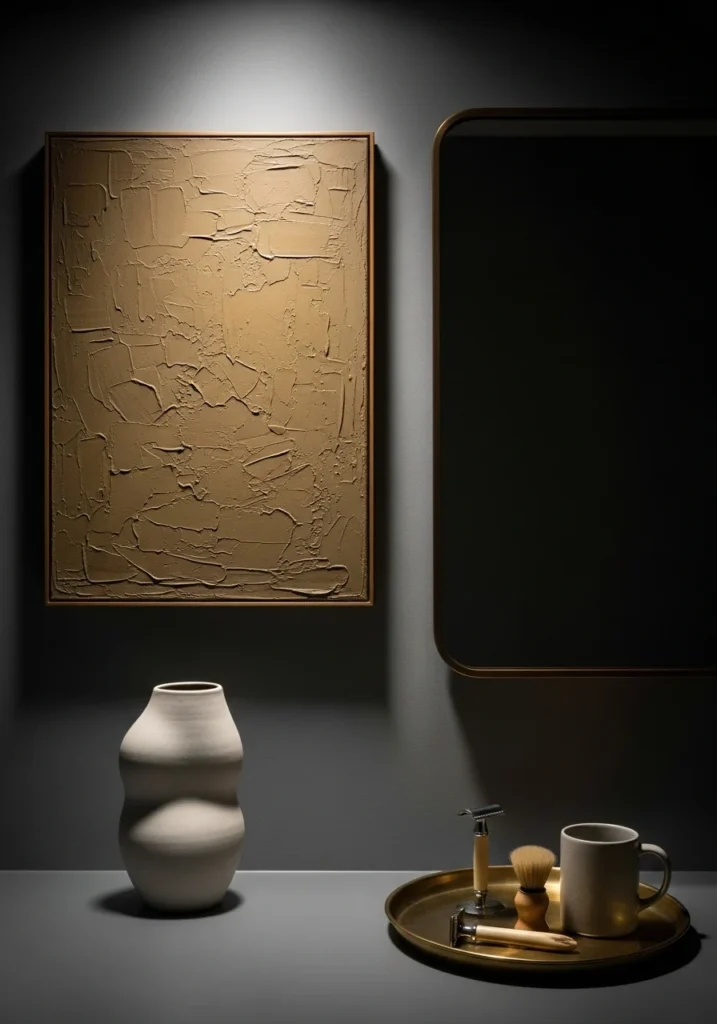
Choose single pieces of tactile art in muted ochre or similar tones, brushed-bronze framed mirrors, and small brass trays for grooming objects. Add sculptural ceramic vases for balance.
Use lighting that grazes artwork to enhance texture while keeping reflections subdued. Every decorative element should feel intentional and support the overall mood.
Step 15: Stage for Both Photography and Real Life

Create lighting scenes that work for both daily use and special occasions. Stage surfaces clean with towels folded artfully, candles lit, and dimmable lights set to warm scenes.
Plan weekly 10-15 minute maintenance routines to preserve the moody look—dark bathrooms show dust and water spots more than light ones, so consistent upkeep is crucial for maintaining that luxury aesthetic.
Avoiding the Cave Effect
The biggest risk with moody bathrooms is creating spaces that feel oppressive rather than cozy. Prevent this by ensuring adequate task lighting, incorporating warm undertones in your color palette, and adding enough texture to keep surfaces interesting.
Natural light sources, even if limited, help tremendously. If you don’t have windows, invest in high-quality artificial lighting that mimics natural light patterns throughout the day.
Making It Work for Daily Life
Moody bathrooms need to function for daily routines while maintaining their atmospheric quality. Consider how different lighting scenes work for morning prep versus evening relaxation.
Ensure adequate ventilation—dark, humid spaces can feel suffocating quickly. Quality exhaust fans and proper air circulation are essential for both comfort and preventing moisture damage to your beautiful materials.
Think about maintenance from the beginning. Dark surfaces show different kinds of wear and water spots than light ones, so choose materials and finishes accordingly.
Final Thoughts
Creating a moody bathroom that feels luxurious rather than depressing requires understanding that darkness is just one tool in your design arsenal. The best moody bathrooms use quality materials, thoughtful lighting, and careful attention to texture and warmth to create spaces that feel genuinely special.
When your bathroom becomes the place you look forward to retreating to at the end of long days, when guests comment on how spa-like and sophisticated it feels, you’ll know you’ve successfully created that elusive moody luxury atmosphere.
The goal is a space that feels both dramatic and welcoming—sophisticated enough for special occasions but comfortable enough for daily use.