
Let’s talk about kids’ bathrooms for a second. Most of them fall into two categories: either they’re so cutesy and themed that they’ll look ridiculous in three years, or they’re so focused on being “practical” that they feel like a public restroom. Meanwhile, parents are trying to figure out how to create something that works for daily chaos while still looking decent enough that guests don’t cringe.
Here’s what most people get wrong about kids’ bathroom design: they think it has to be either super juvenile or completely boring. But the best kids’ bathrooms strike this perfect balance between fun and functional, playful and practical. They’re spaces that kids actually want to use while being designed to handle the reality of toothpaste on mirrors and water everywhere.
Whether you’re renovating a shared kids’ bathroom or trying to make a small powder room work for little ones, these ideas will help you create something that works for your family’s actual life while still having enough personality to make bath time less of a battle.
Think Function First, Fun Second
Before falling in love with any adorable themes or color schemes, you need to nail the basics that will make or break your daily routine.
Safety Can’t Be an Afterthought – Kids’ bathrooms need rounded edges, non-slip surfaces, temperature controls, and storage that won’t fall on anyone’s head. These aren’t optional features.
Independence Is the Goal – The best kids’ bathrooms help children do things themselves rather than requiring constant parental assistance. Think about heights, accessibility, and ease of use for small hands.
Easy Maintenance Is Sanity-Saving – Choose materials and finishes that can handle daily chaos and clean up easily. Your gorgeous bathroom won’t stay gorgeous if it’s impossible to maintain.
Start With Smart Layout Decisions
Step 1: Plan a Layout That Actually Works for Kids
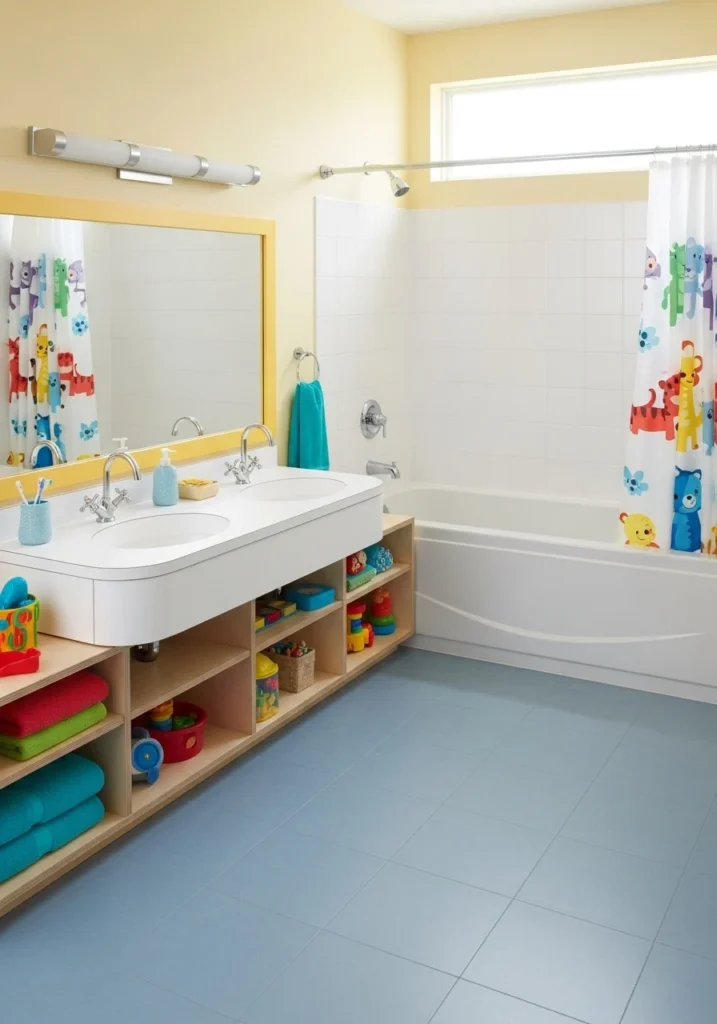
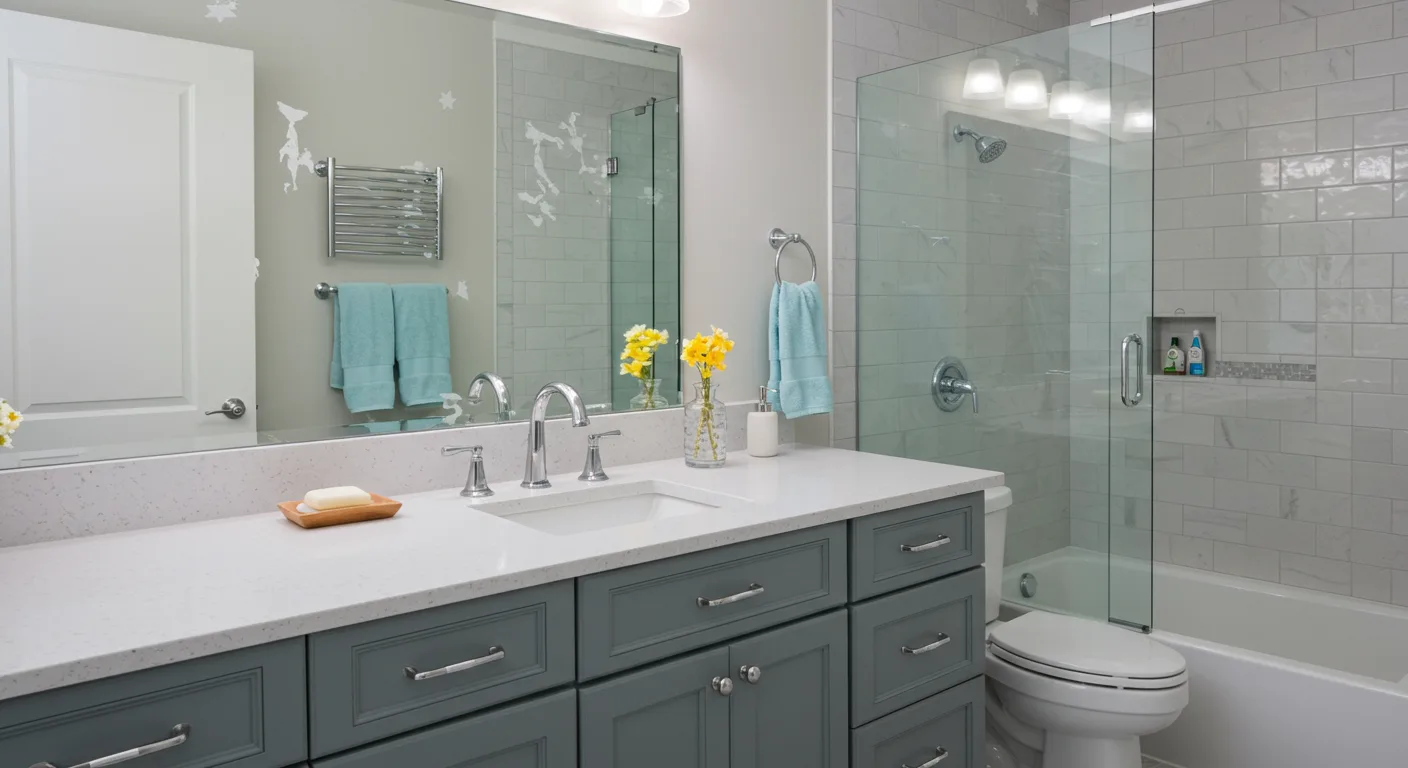
Keep your layout simple with clear zones for sink, tub/shower, and storage so kids can move easily without bumping into each other. Picture a cheerful bathroom with a low double vanity in bright white, tub/shower combo along one wall, and open shelves within reach of little hands.
The space should feel open and airy with room for two kids to get ready simultaneously. Rounded corners on fixtures and clutter-free pathways keep safety in mind while maintaining that playful atmosphere kids respond to.
Step 2: Choose Colors That Spark Joy Without Overwhelming
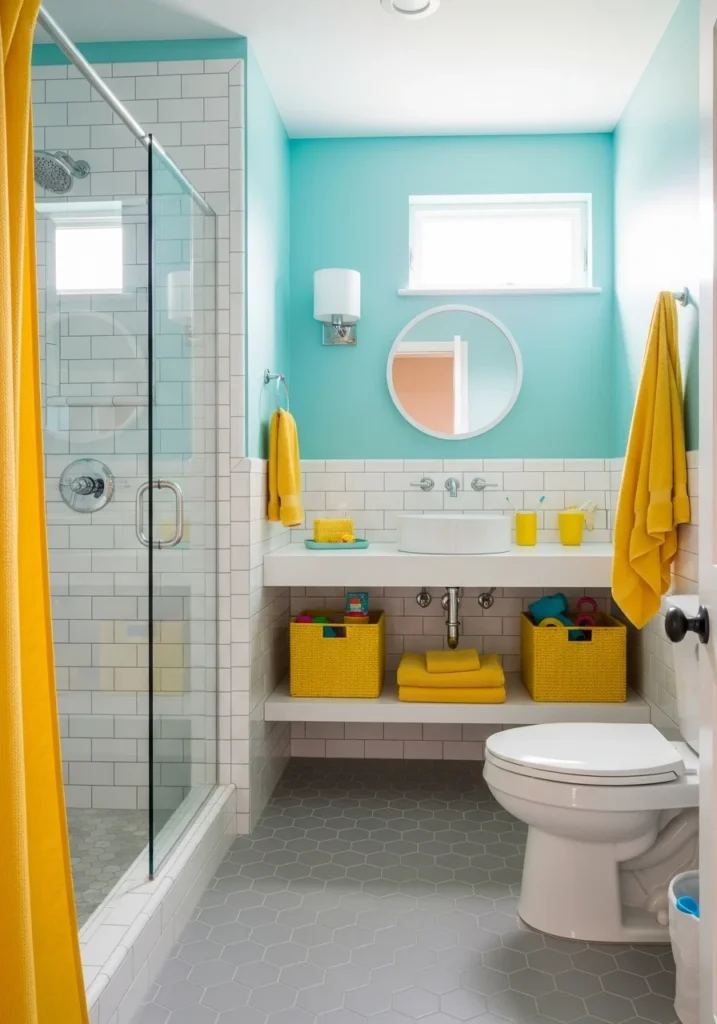
Pick a fun color base like aqua, sunshine yellow, or pastel pink balanced with crisp neutrals. Imagine aqua walls meeting white subway tiles with soft gray flooring, while pops of sunshine yellow in towels and storage baskets make everything feel lively.
The colors should be bright enough to feel cheerful but calm enough for daily routines. You want energy without overstimulation—especially important for bedtime bath routines.
Step 3: Install Flooring That Handles Reality
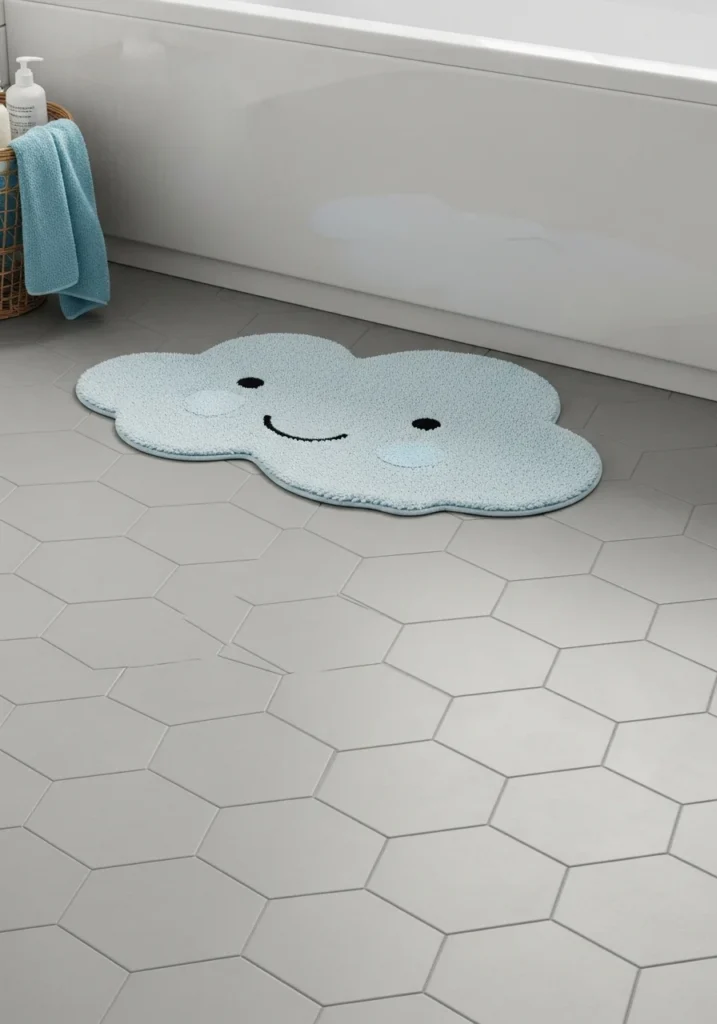
Use slip-resistant hexagon tiles in soft gray that offer grip and style simultaneously. Add playful bath mats shaped like clouds or animals for cozy touches that prevent slips after bath time.
Choose materials that clean easily and handle splashes without damage. Parents will thank you later when the inevitable floods happen and cleanup is simple rather than stressful.
Make Everything Kid-Accessible
Step 4: Design Vanities That Promote Independence
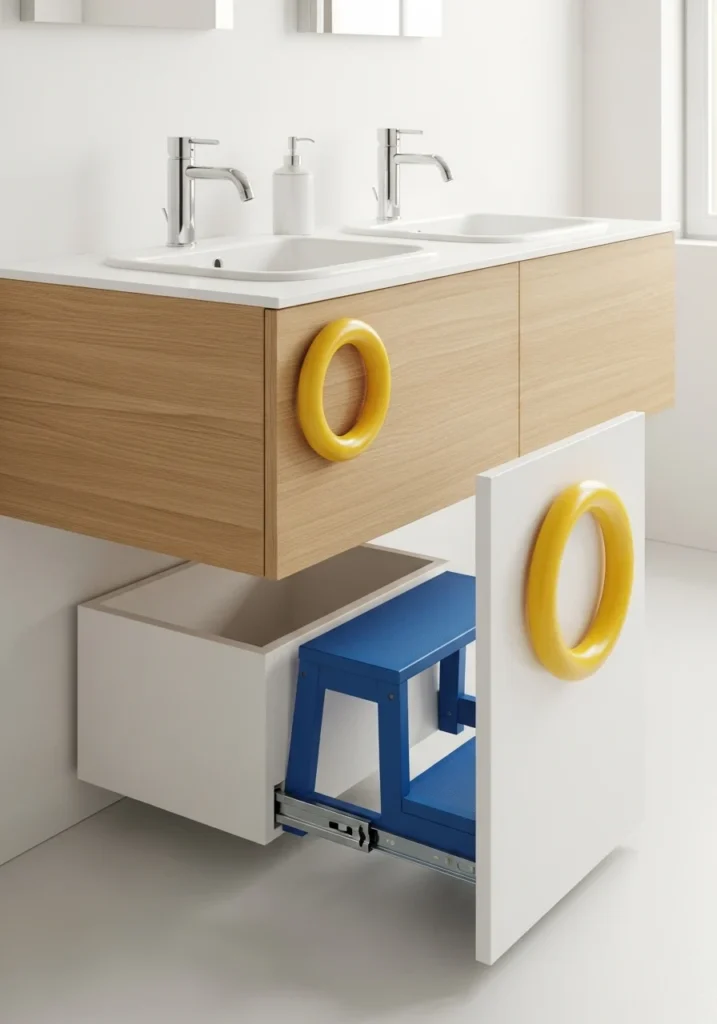
Install floating vanities in pale wood with twin sinks and bright ceramic basins, positioned slightly lower than adult height. Include hidden pull-out step drawers that let little ones reach faucets independently.
Use oversized, colorful handles that small hands can grip easily, making the vanity a playful, interactive feature rather than just functional furniture.
Step 5: Add Character Through Smart Wall Treatments
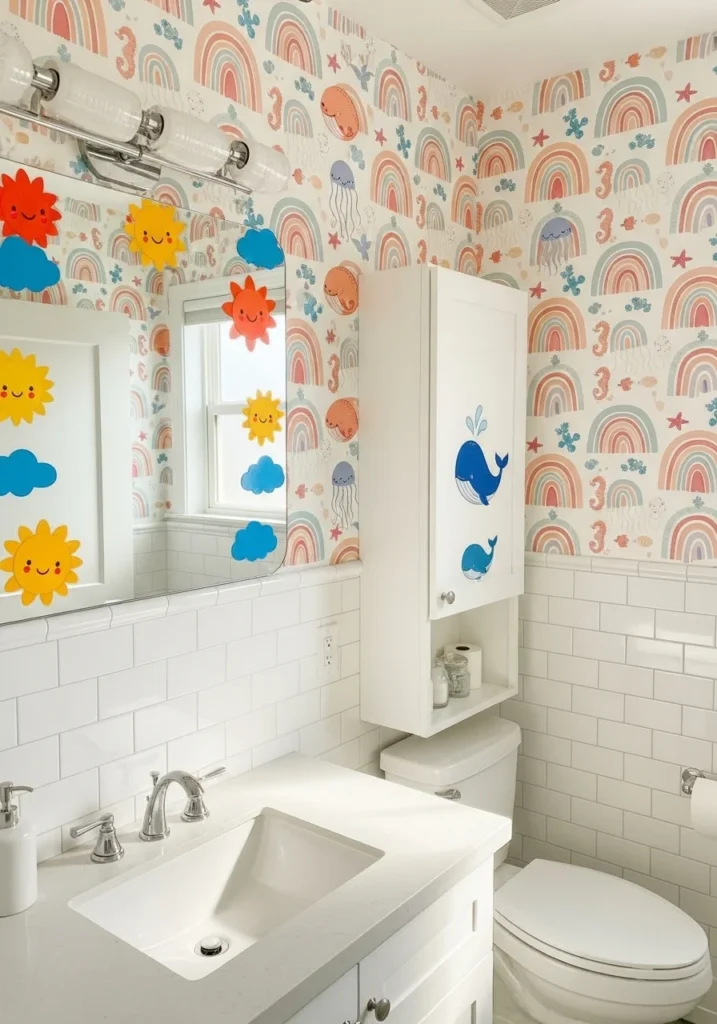
Use white tiles on the lower half where splashes happen most, topped by whimsical wallpaper with rainbow arches or under-the-sea creatures. This brings the room to life while keeping wipeable surfaces where they’re needed.
Add removable decals on mirrors or cabinets for seasonal fun that can be updated as kids grow. This lets you change the room’s personality without major renovations.
Step 6: Create a Bath Space That Feels Safe and Fun
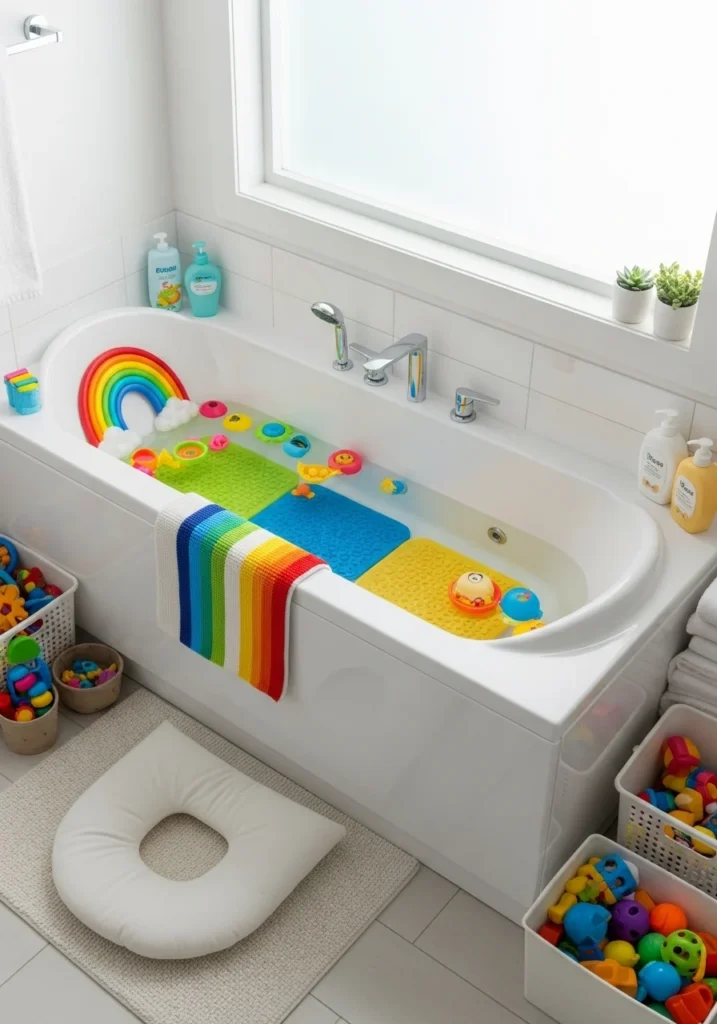
Install a deep white soaking tub with curved edges under a frosted window, surrounded by accessible toy storage and cushioned kneeling pads for parents. Include colorful floating bath toys and fun-shaped bath mats.
Everything should feel like a playful retreat rather than a chore space. The tub becomes the room’s focal point where positive associations with cleanliness develop.
Also Read: 14 Above Sofa Wall Decor Ideas That Turn Blank Walls Into Artful Displays
Layer in the Fun Elements
Step 7: Design Showers That Encourage Independence
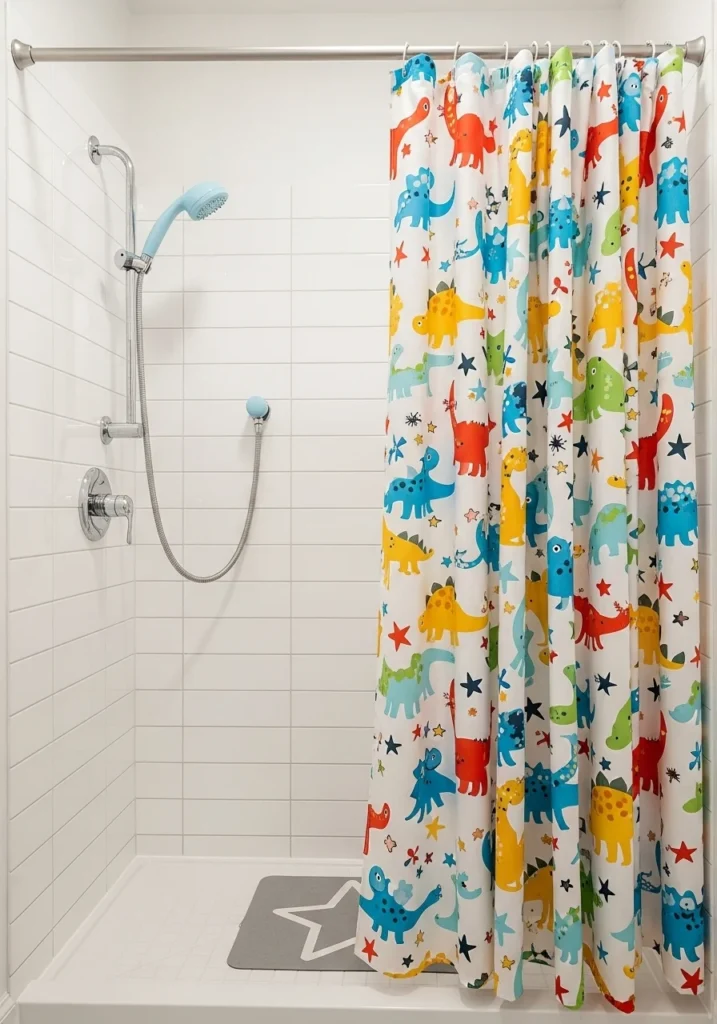
Add handheld shower wands with soft spray settings that make it easy for kids to wash themselves. Use bright shower curtains patterned with stars or dinosaurs that add instant personality and can be changed as tastes evolve.
Keep wall tiles neutral so curtains and accessories can carry the room’s personality. This approach lets you update themes easily without retiling.
Step 8: Create Storage That Kids Actually Use
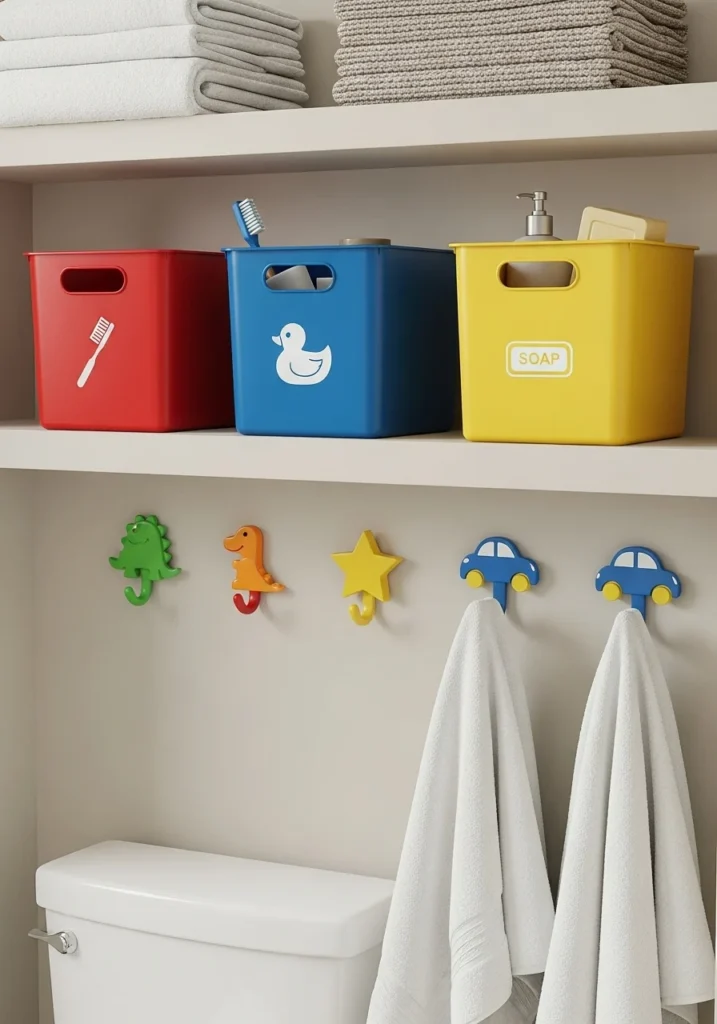
Install open shelving with bins in red, blue, and yellow, each labeled with icons instead of words for easy recognition. Add hooks shaped like animals for hanging towels and robes.
The storage becomes playful design elements that kids enjoy using rather than boring organizational necessities. When storage is fun, kids are more likely to keep things tidy.
Step 9: Choose Mirrors and Accessories That Feel Magical
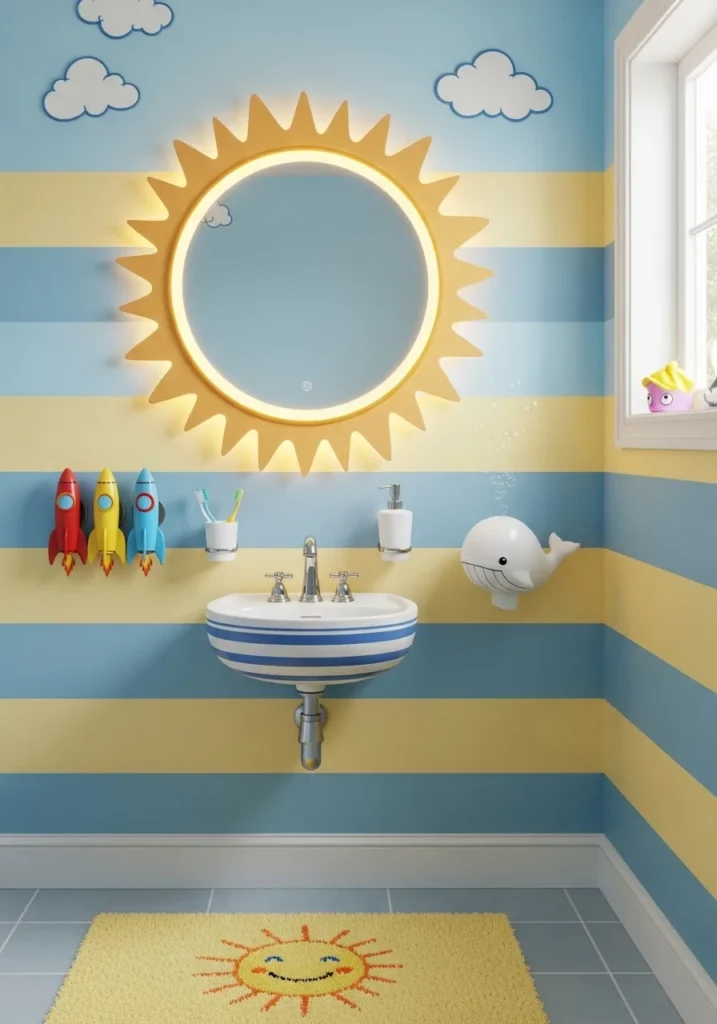
Hang round mirrors with sunburst frames that glow softly under warm lighting. Add toothbrush holders shaped like rockets and soap dispensers shaped like whales to make daily tasks feel like adventures.
These small details transform routine bathroom activities into something kids look forward to rather than resist.
Perfect the Lighting and Atmosphere
Step 10: Layer Lighting for Function and Comfort
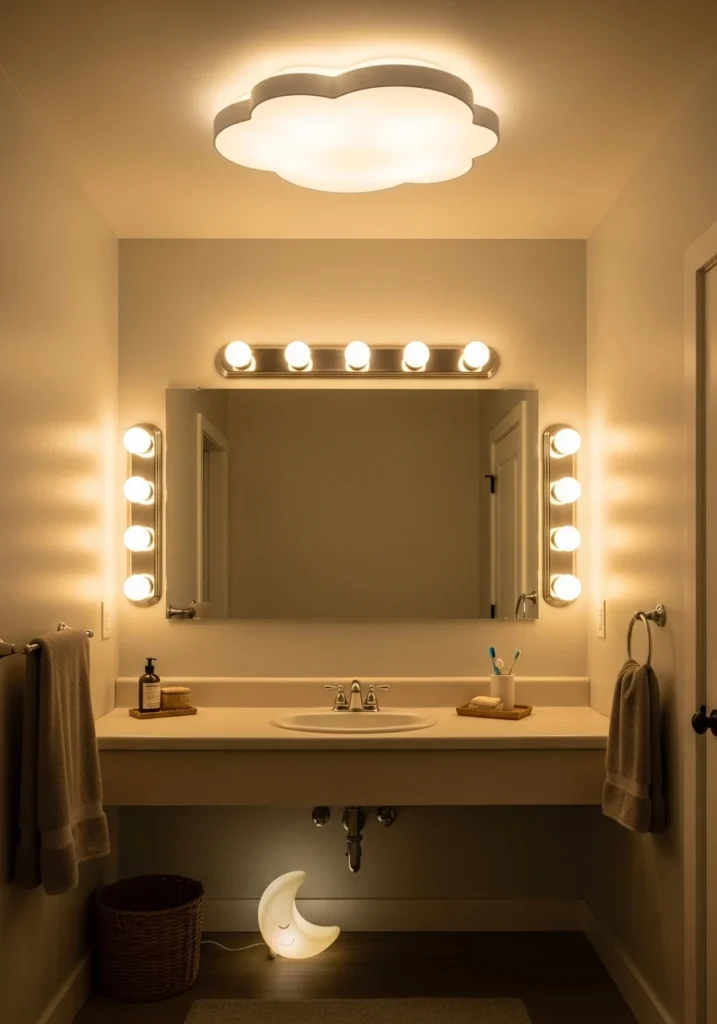
Install flush mount ceiling lights in cloud shapes for soft overall illumination. Add warm task lights around mirrors for clear visibility during teeth brushing and face washing.
Include tiny night-lights shaped like moons near the floor for comfort during nighttime bathroom visits. The layered approach handles all lighting needs while maintaining the playful atmosphere.
Step 11: Add Themes That Feel Personal But Not Permanent
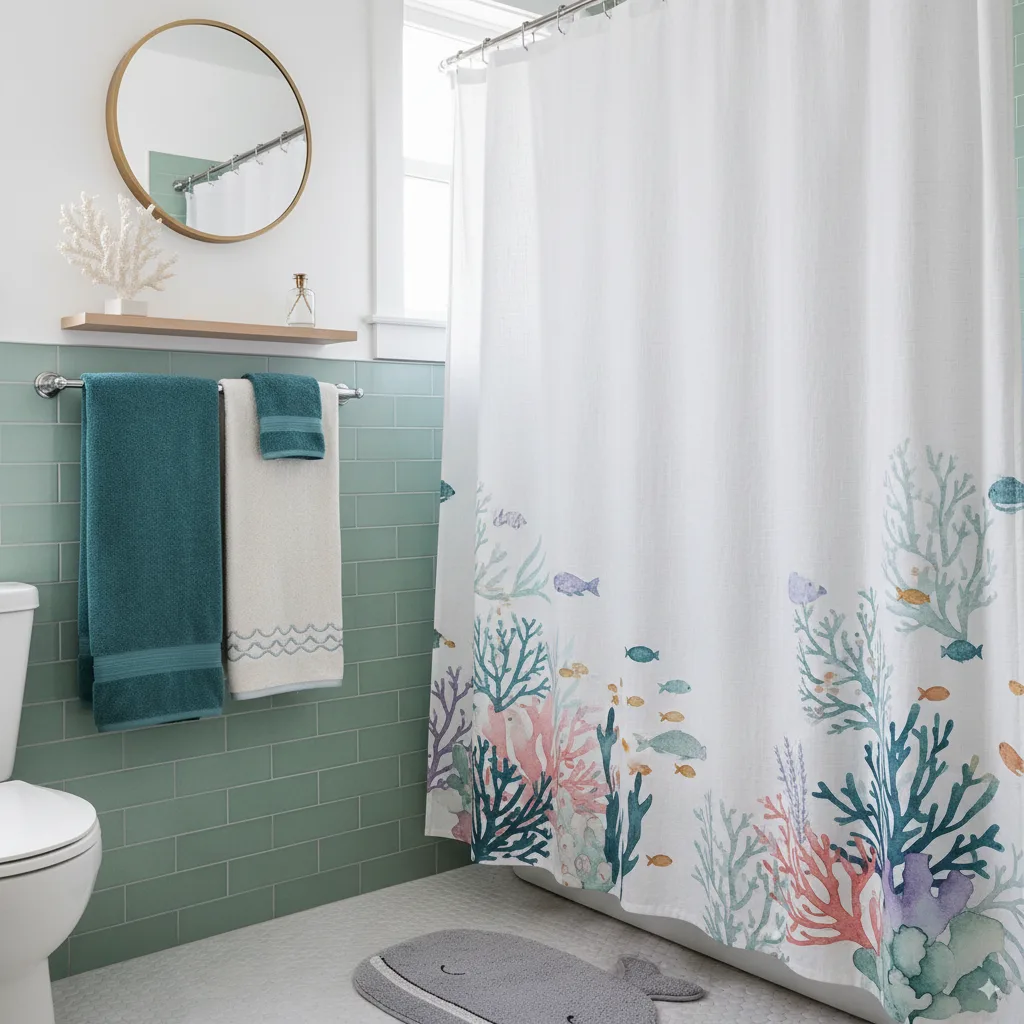
Incorporate subtle themed elements through accessories rather than permanent fixtures. An undersea theme might include sea-green accent tiles, whale-shaped bath mats, and fish decals, with coral and teal striped towels.
Keep themes fun but not overwhelming so they can easily evolve as kids grow older without requiring major renovations.
Plan for Growth and Change
Step 12: Choose Features That Adapt Over Time
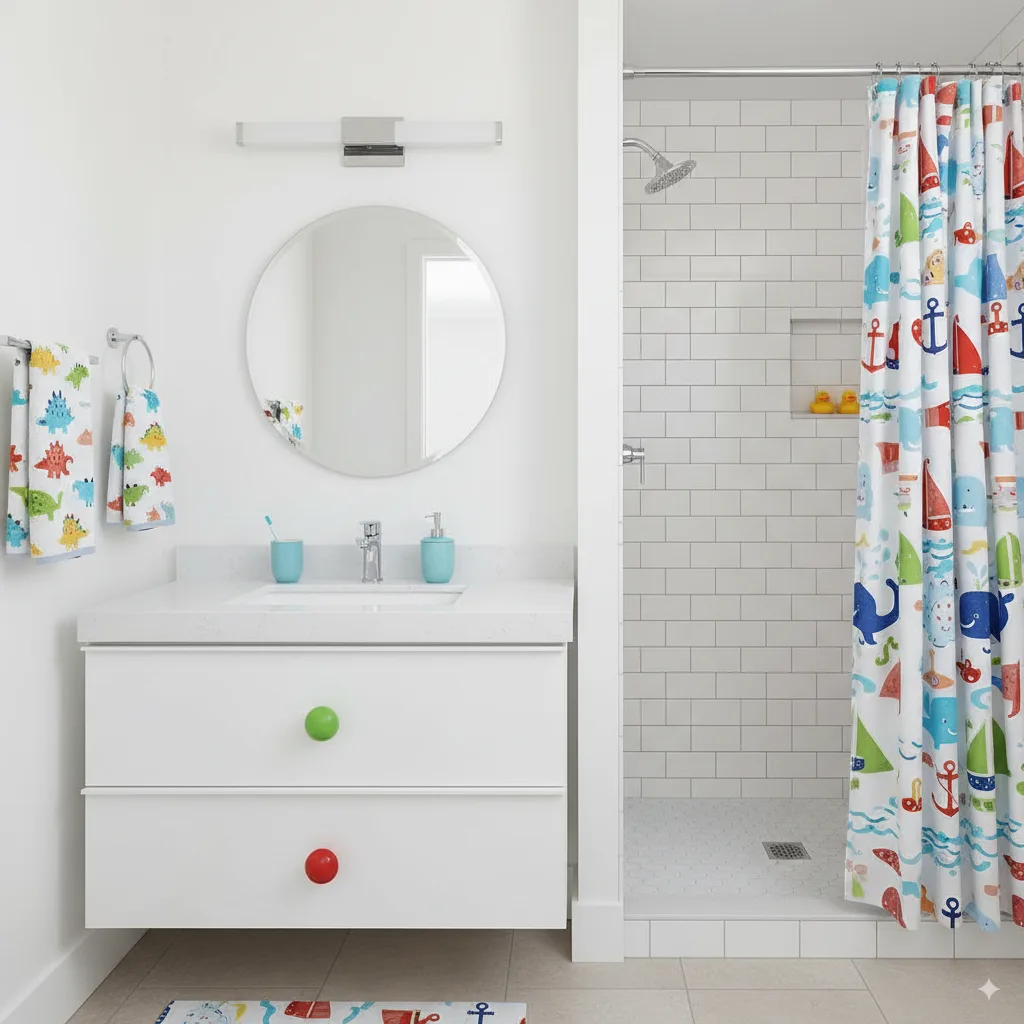
Select simple white vanities with colorful knobs that can easily swap hardware later for more mature looks. Install adjustable-height shower rails that grow with children.
Use neutral base tiles paired with themed accessories to keep spaces timeless while allowing easy updates. This approach saves money and extends the room’s lifespan.
Step 13: Prioritize Safety in Every Decision

Install vanity drawers with soft-close mechanisms that won’t pinch fingers. Use faucets fitted with temperature limiters to prevent scalding. Choose rounded cabinet edges and place safety mats inside and outside tubs.
Parents should be able to relax knowing the space is designed with active little ones in mind. Safety features should be invisible but comprehensive.
Making It Work for Real Family Life
Kids’ bathrooms need to handle morning rushes, evening bath time chaos, and everything in between. Consider how many children will use the space simultaneously and plan accordingly.
Think about storage for bath toys, extra towels, and all those kid-specific products that accumulate. Hidden storage keeps the space looking clean while keeping necessities accessible.
Plan for easy cleaning—kids’ bathrooms get messy fast, so materials and layouts should make cleanup as simple as possible. Smooth surfaces, minimal grout lines, and accessible corners all help.
Avoiding the Common Mistakes
Don’t choose themes that are too specific or trendy—they’ll feel dated quickly and become expensive to change. Instead, use accessories and textiles to add personality to neutral foundations.
Avoid making everything miniature-sized. Kids grow fast, and constantly replacing fixtures gets expensive. Choose adjustable or standard-sized elements where possible.
Don’t sacrifice function for cuteness. A bathroom that looks adorable but doesn’t work well for daily routines will frustrate both kids and parents.
Final Thoughts
Creating a kids’ bathroom that works for real family life while still being a space children enjoy requires balancing practical needs with playful touches. The best kids’ bathrooms grow with families and make daily routines easier rather than harder.
When your kids start taking pride in keeping their bathroom clean, or when guests comment on how functional and cheerful the space feels, you’ll know you’ve struck that perfect balance between cute and practical.
Remember that kids’ bathrooms should serve the whole family. They need to work for little ones learning independence while being maintainable for busy parents and presentable for guests.