
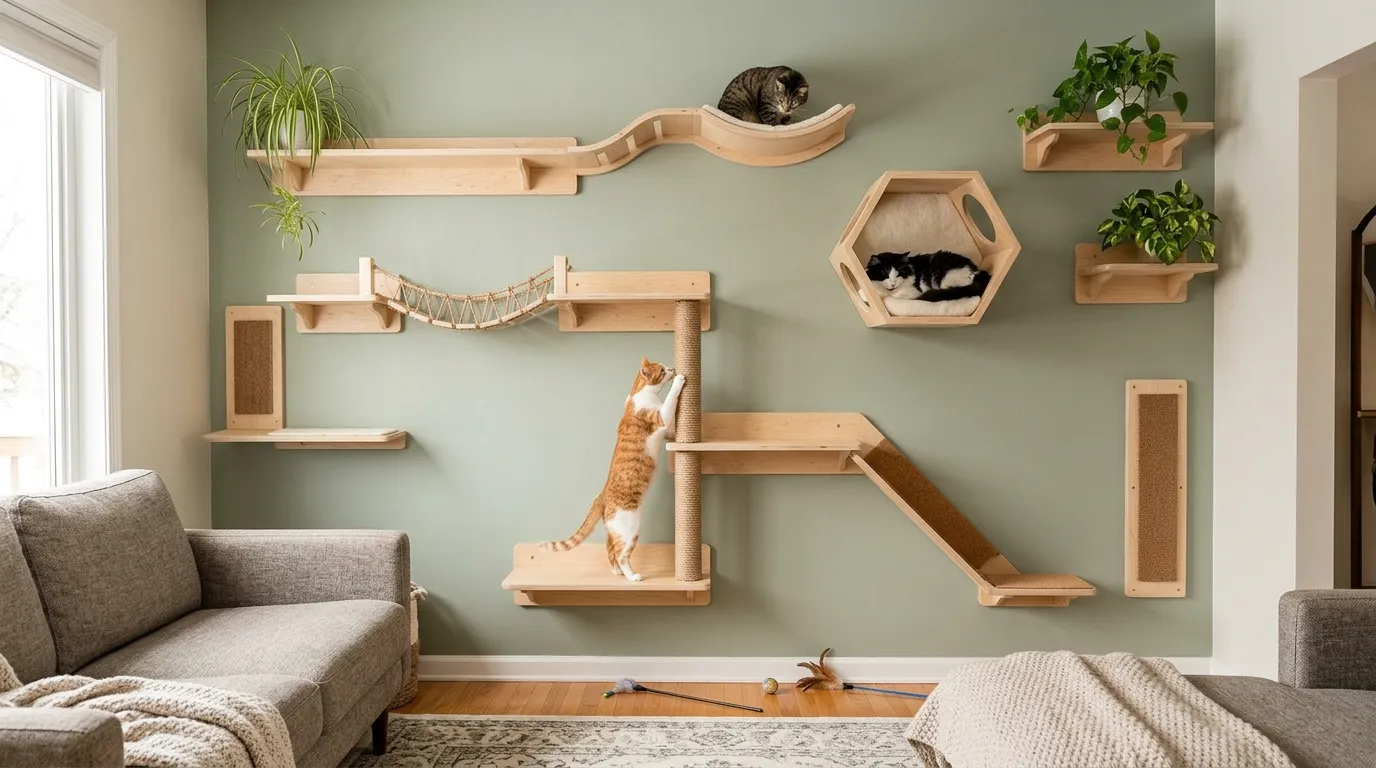
Somewhere in your house, there’s a wall doing absolutely nothing except holding up the ceiling.
Meanwhile your cat spends six hours a day staring at that same wall from the floor, plotting nothing in particular, waiting for a reason to climb something.
Give it one. A cat wall isn’t a novelty project for people with too much time and a table saw. It’s the single most efficient use of vertical square footage in the entire house, and most people are leaving it completely blank.
Here’s how the ones that actually work get built.
Why Most Cat Furniture Looks Like a Compromise
A carpeted tower shoved in the corner isn’t a design decision. It’s damage control.
The Beige Carpet Tower Problem
Every big-box cat tower is built from the same three materials — beige carpet, particle board, sisal rope — assembled into a shape that says “this was the cheapest option,” because it usually was.
That default isn’t a cat’s fault. Cats don’t care what material the platform is made from. The carpet tower exists because it’s easy to manufacture, not because it’s what climbing structures are supposed to look like.
Once you stop treating cat furniture as a separate, ugly category and start treating it as wall-mounted furniture, the whole category opens up.
Floor Furniture Wastes the Best Real Estate
Cats want height, not floor space. A five-foot tower in the corner uses valuable floor area to deliver less vertical range than a single well-placed wall shelf.
Wall-mounted systems reclaim that floor space entirely while giving a cat access to the actual thing it wants — elevation, a vantage point, a route that isn’t at ankle height.
Every square foot of floor a cat tower eats up is a square foot you can’t put a chair, a plant, or anything else in.
One Perch Isn’t a System
A single window hammock is nice. It’s also the ceiling of what most people attempt, when it should be the starting point.
Cats want routes, not destinations — a path from the floor to a high perch with multiple stops along the way, so they can choose their altitude instead of committing to one spot. That’s the difference between a shelf and a wall.
The best builds in this list treat the whole wall as one connected structure, not a scattering of separate objects.
Cat Wall Ideas
Black Circle Perches Among Framed Art
Mix black wall-mounted disc perches directly into an existing gallery wall of framed prints, sized and spaced so the cat platforms read as part of the art arrangement rather than separate from it.
Choose one or two discs deep enough to hold a small cushion or faux fur pad, and leave the rest as flat resting shelves, varying the depth so the wall doesn’t feel repetitive.
Keep the frame styles in the gallery cohesive — matching black or thin metal frames — so the black discs blend into the existing rhythm instead of standing out as an obvious addition.
Position at least one disc at a height and angle where the cat is visible from the main seating area. The whole point of this build is turning the cat into part of the art display.
Built-In Porthole Wall Unit
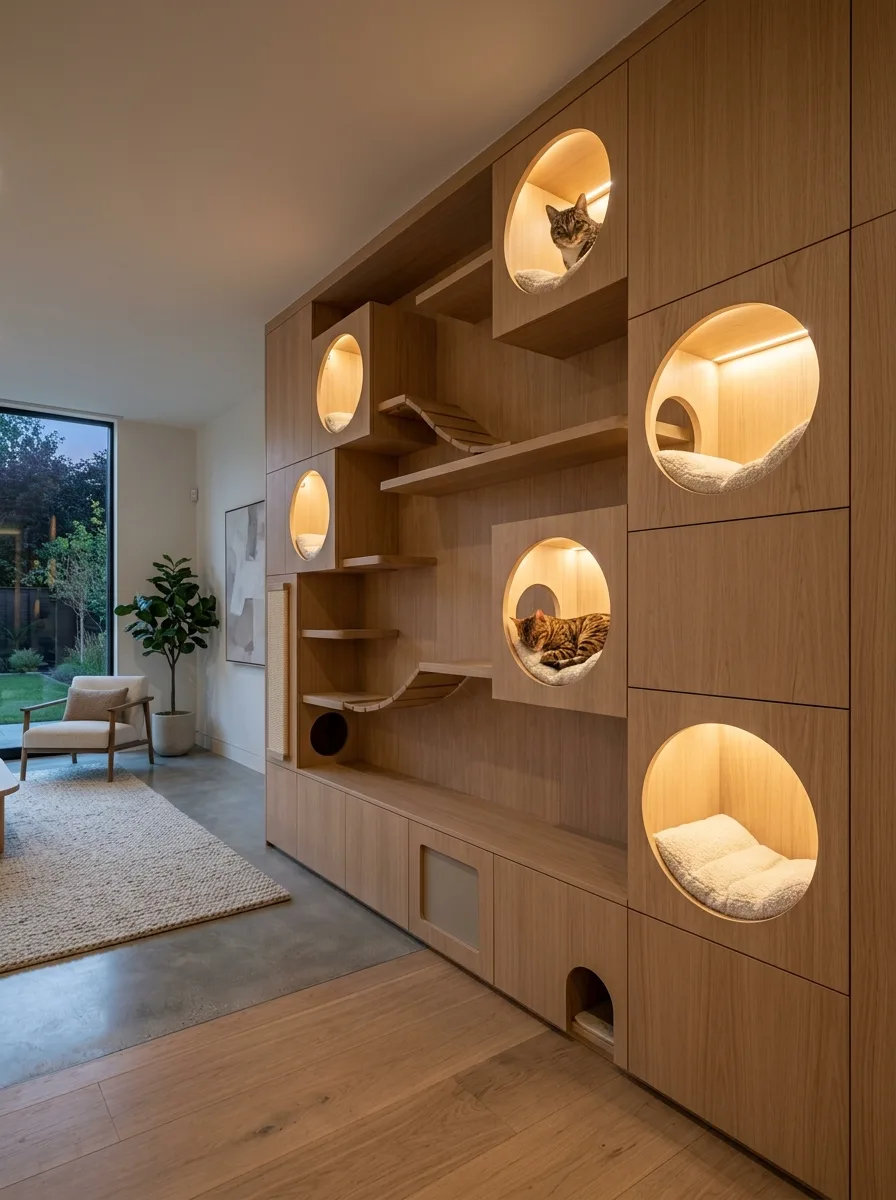
Build a full floor-to-ceiling wood cabinet wall with circular cutout openings at varying heights, each one lit from inside with a warm LED strip along the top edge of the opening.
Fit a soft cushion into each porthole and connect the lower ones with small internal ramps or shelves so the cat can move between openings without leaving the structure.
Include closed cabinet sections below for actual household storage, keeping the litter box access discreet behind a small cutout near the floor rather than a fully open door.
Use the same wood veneer across the entire wall, including the closed sections, so the whole thing reads as one integrated piece of cabinetry rather than a cat structure with storage bolted on.
DIY Bracket Shelf Tower with Under-Lighting
Build a tower of simple wood plank shelves on basic angled brackets, staggered at offset heights on either side of a central sisal-wrapped scratching post that runs floor to ceiling.
Wrap the post sections in tightly coiled sisal rope, securing the ends underneath the shelf lips so the wrapping stays hidden and clean.
Tuck a small battery or plug-in LED puck light under the lip of each shelf, angled downward so each platform glows softly from above the one below it.
Leave one full-length rope hanging beside the tower for an extra climbing route, and keep the wall paint a plain, darker neutral so the light wood shelves stand out clearly against it.
Moody Backlit Staircase Wall
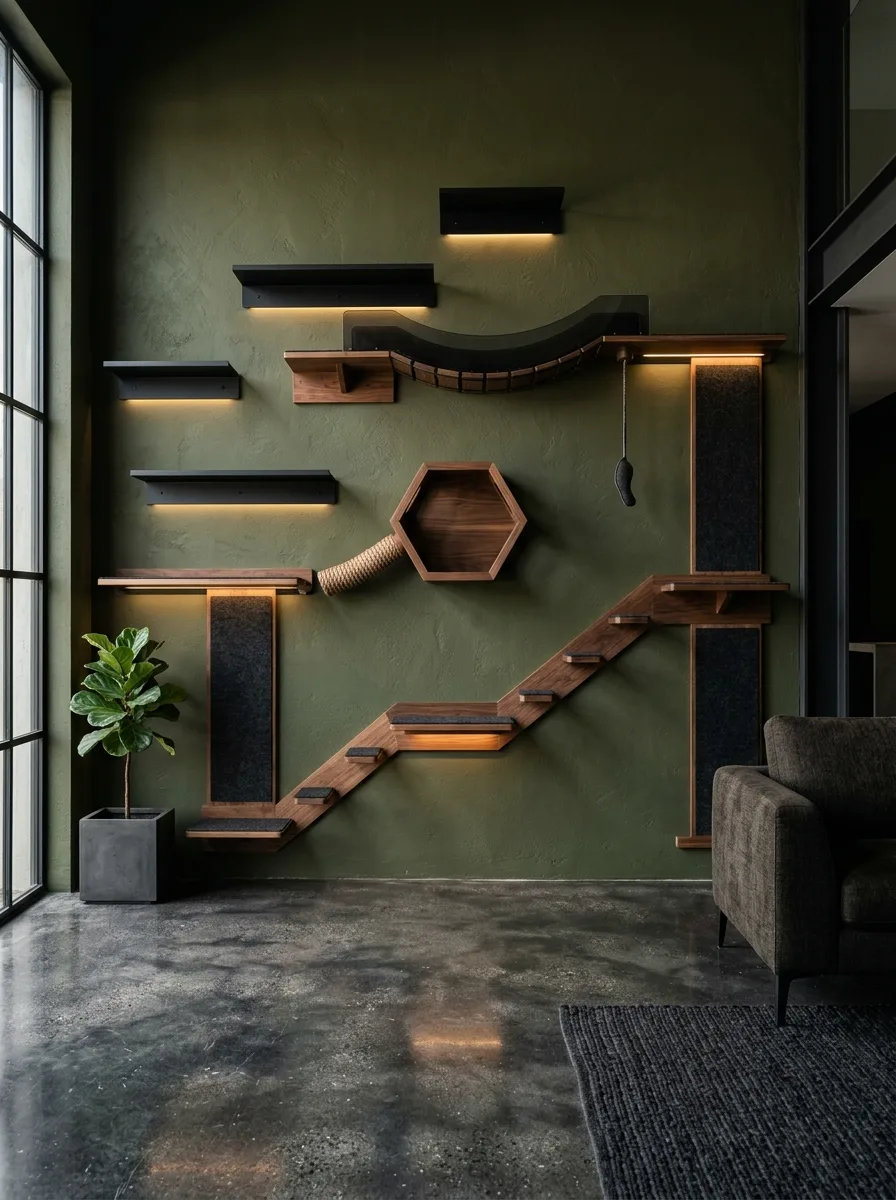
Choose a deep olive or charcoal wall color as the backdrop, then mount black-framed floating shelves alongside a diagonal staircase of wood-and-felt steps, backlighting every edge with warm LED strips.
Add a hexagon wood cubby partway up the run, with a hanging rope toy or wand suspended just beside it for extra engagement.
Use walnut or dark stained wood for all structural elements, and felt padding in charcoal or black on the step surfaces so the whole system reads as one cohesive dark palette against the wall color.
Keep the rest of the room’s furniture in matching dark, moody tones — this build works because it commits fully to a dramatic palette instead of trying to stay neutral.
Wall-Mounted Bridge Between Wooden Cubbies
Mount two square wooden cubby boxes with round cutout entrances on opposite ends of a wall, spaced far enough apart to need a connector, and span the gap with a woven rope-and-slat bridge.
Add a couple of small floating shelves nearby at staggered heights, styled with a trailing plant, so the cubbies don’t feel like they’re floating in isolation.
Run a single pendant light down near the display, positioned to cast warm light across the bridge without shining directly into the cubby openings.
Choose a stain that matches the room’s existing furniture, particularly the bed frame or headboard if this build is going in a bedroom — matching wood tones is what sells the built-in look.
Carved Tree-Shaped Wall Sculpture
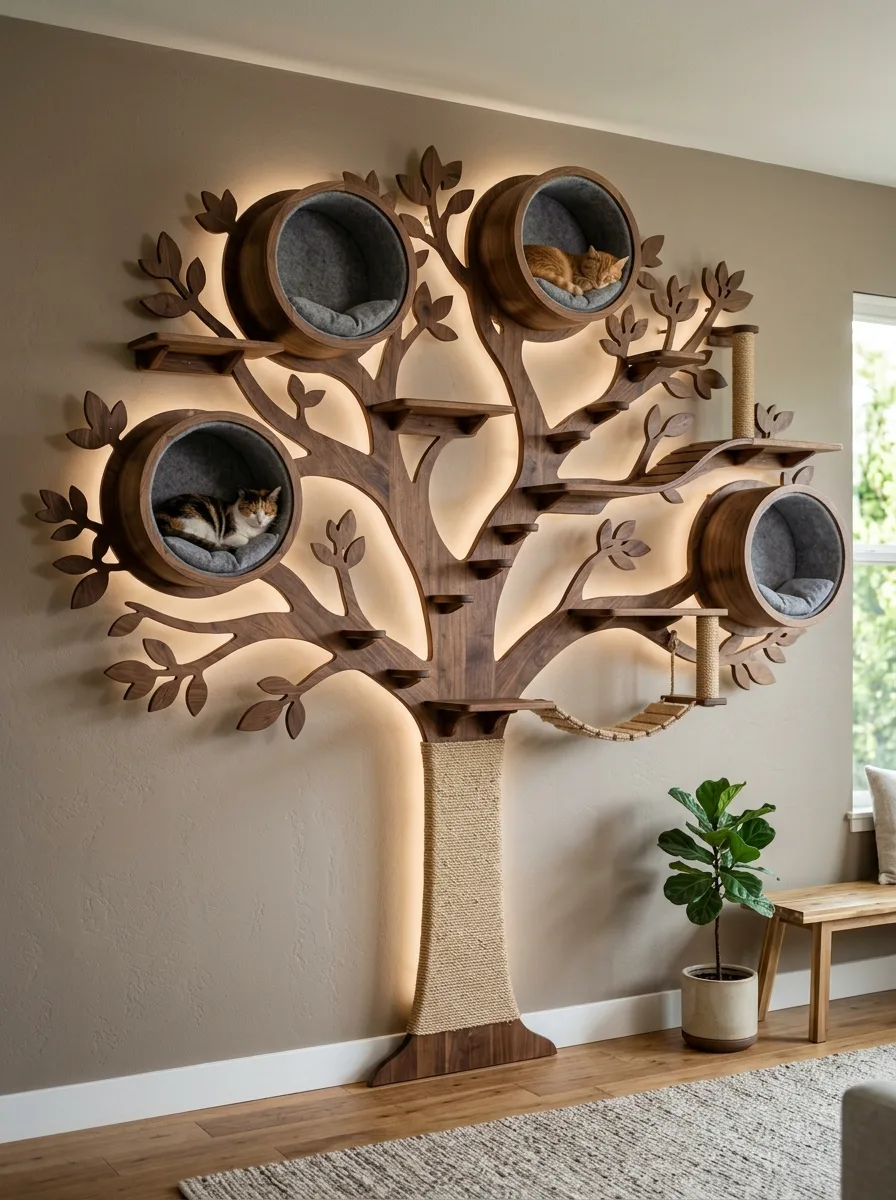
Commission or build a large wall-mounted sculpture in the shape of a stylized tree, with the trunk wrapped in sisal for scratching and the branches carved flat enough to serve as narrow shelves.
Cut circular openings into a few of the “canopy” sections and line them with cushions, so the tree’s leaf clusters double as sleeping cubbies.
Backlight the edges of the branches with a thin LED strip run behind the wood, so the whole piece glows softly against the wall at night.
Keep the wood in a single dark walnut tone throughout, and place a simple potted plant at the base of the trunk on the floor to blur the line between the sculptural tree and an actual living one.
Stairwell Corner Climbing Route
Use a stairwell or high corner as the anchor for a full climbing route, mixing angled wall shelves, wall-mounted sisal posts, and a diagonal ladder of narrow wood rungs leading up toward the ceiling.
Keep every shelf and rung in the same pale, unstained wood tone so the route reads as one continuous system despite the varied shapes.
Add a soft fabric hammock at the highest point as the destination platform, using a lighter canvas material that contrasts gently against the wood.
Leave the wall itself plain white or very pale, so the wood elements are the only visual detail and the route stays easy to follow with the eye.
Window-Frame Climbing System
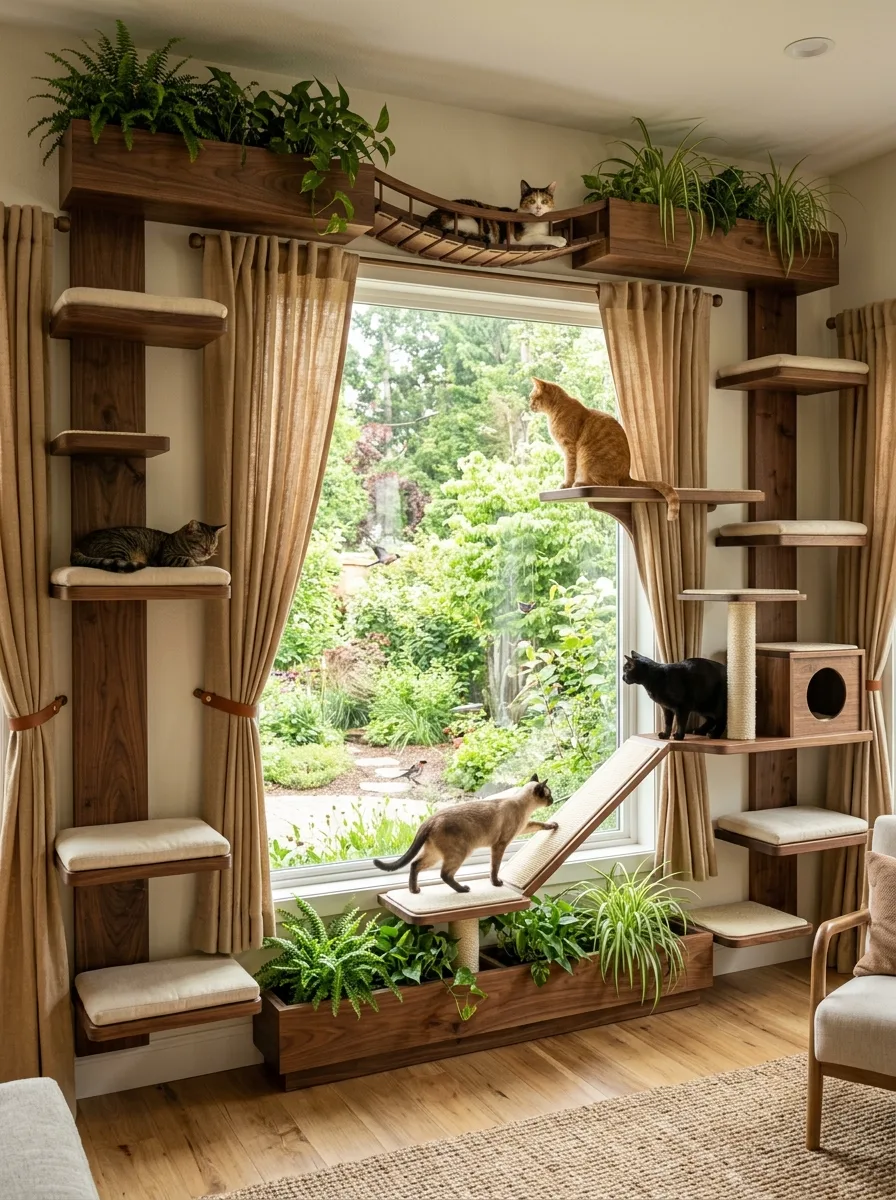
Build a matching pair of wood shelf columns flanking a large window, connected across the top by a shelf planted with trailing greenery and a rope bridge just below it.
Line both columns with alternating cushioned shelves and open plant boxes, keeping the plants low enough that the cat can walk past without disturbing them.
Add a ramp connecting a lower shelf to a planter box at the base of the window, so the climbing route includes a way down as clearly as a way up.
Use woven curtain tie-backs and matching wood tones for the window treatment itself, so the whole assembly — curtains, shelves, planters — reads as one coordinated window treatment rather than furniture bolted onto an existing window.
Floating Corner Shelves with Cushions
Install a stacked trio of solid wood floating shelves in a room corner, wide enough to hold a flat cushion pad on each one, positioned to wrap around the corner angle rather than sitting on a single flat wall.
Add one smaller stepping shelf below the lowest main platform, positioned as a launch point so the jump to the first full shelf isn’t too large.
Choose a warm oak tone that matches existing wood furniture in the room, and dress each cushion in the same or a closely related fabric so the shelving reads as intentional built-in furniture, not an add-on.
Leave the wall around the shelves bare. This build works because of the wood grain and clean lines — busy wallpaper or extra decor would compete with it.
Colorful Hexagon Pods with Rope Bridge
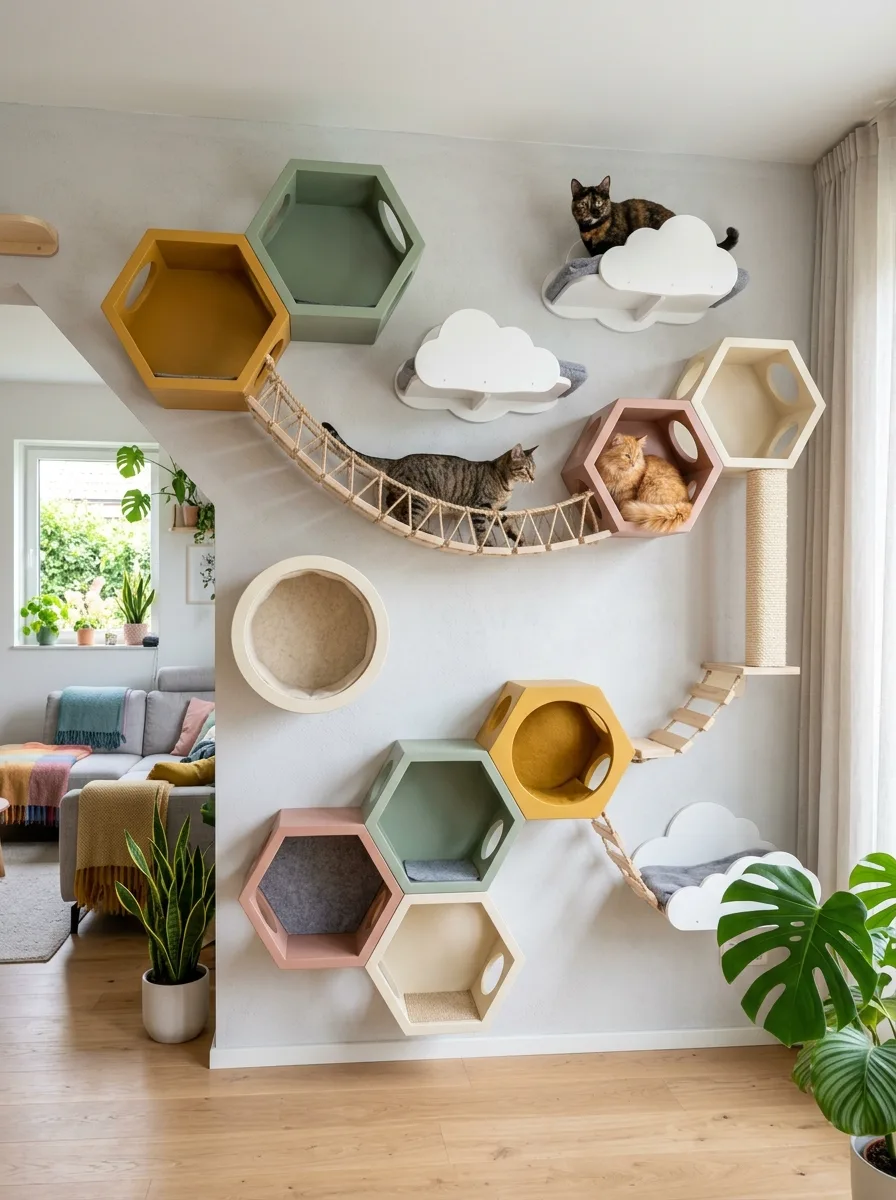
Mount a cluster of hexagon-shaped wall boxes in a mix of soft colors — sage, mustard, blush, cream — at varying heights and angles, some open-fronted as shelves and some enclosed as cubbies.
Connect two of the higher hexagons with a woven rope suspension bridge, and add a couple of cloud-shaped platforms nearby as stepping points between clusters.
Vary the depth of each hexagon so some function as lounging cubbies and others as quick pass-through shelves, keeping the color palette limited to four or five tones so the wall doesn’t tip into visual chaos.
Anchor the whole arrangement with a single floor-to-ceiling scratching post wrapped in natural sisal, positioned where it connects the lowest hexagon to the floor.
Wood Ladder Steps with Rope Bridge
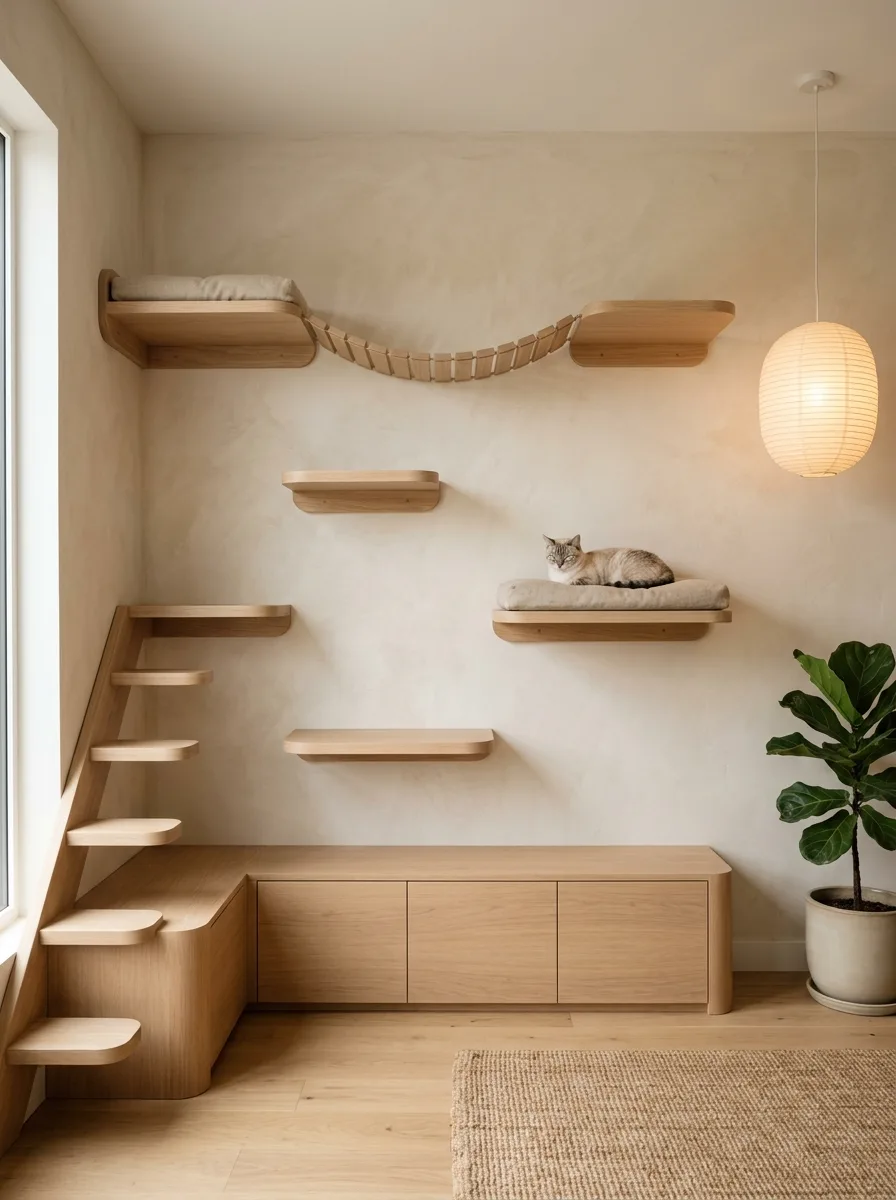
Build a run of stair-step wood platforms rising diagonally along one wall, connected partway up by a rope-and-slat suspension bridge to a matching platform on the opposite wall.
Add two or three simple floating shelves at the top as landing and lounging spots, one topped with a flat cushion for an actual bed.
Hang a paper lantern pendant nearby for warm ambient light, and keep the wall in a soft plaster or lime-wash finish so the pale wood steps stand out with gentle contrast.
Place a low wood console beneath the display for the humans, so the wall still functions as a normal piece of the room and not just climbing equipment.
Natural Wood Shelf System with Hammock
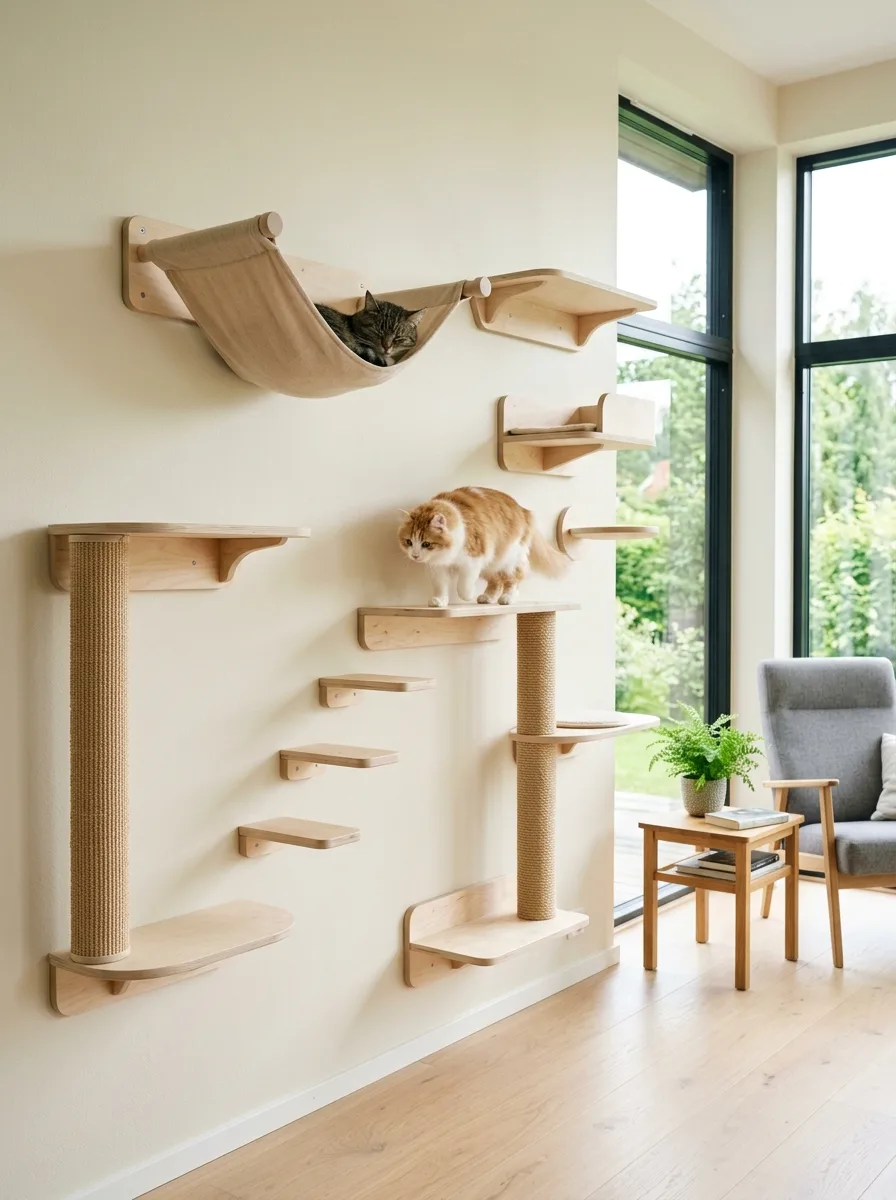
Build a run of light oak shelves and wall-mounted sisal posts, anchored by a canvas hammock slung between two shelf brackets at the top of the arrangement.
Space the lower shelves as a staggered climbing sequence, alternating shelf platforms with short sisal-wrapped post sections so the cat has a clear route from floor to hammock.
Choose a canvas fabric for the hammock in a warm neutral tone that matches the wood, avoiding patterns that would compete with the grain.
Set a small wood side table and chair nearby, angled to face the shelf wall, so the human seating treats the display as the room’s actual view.
Library Wall Cat Walkway
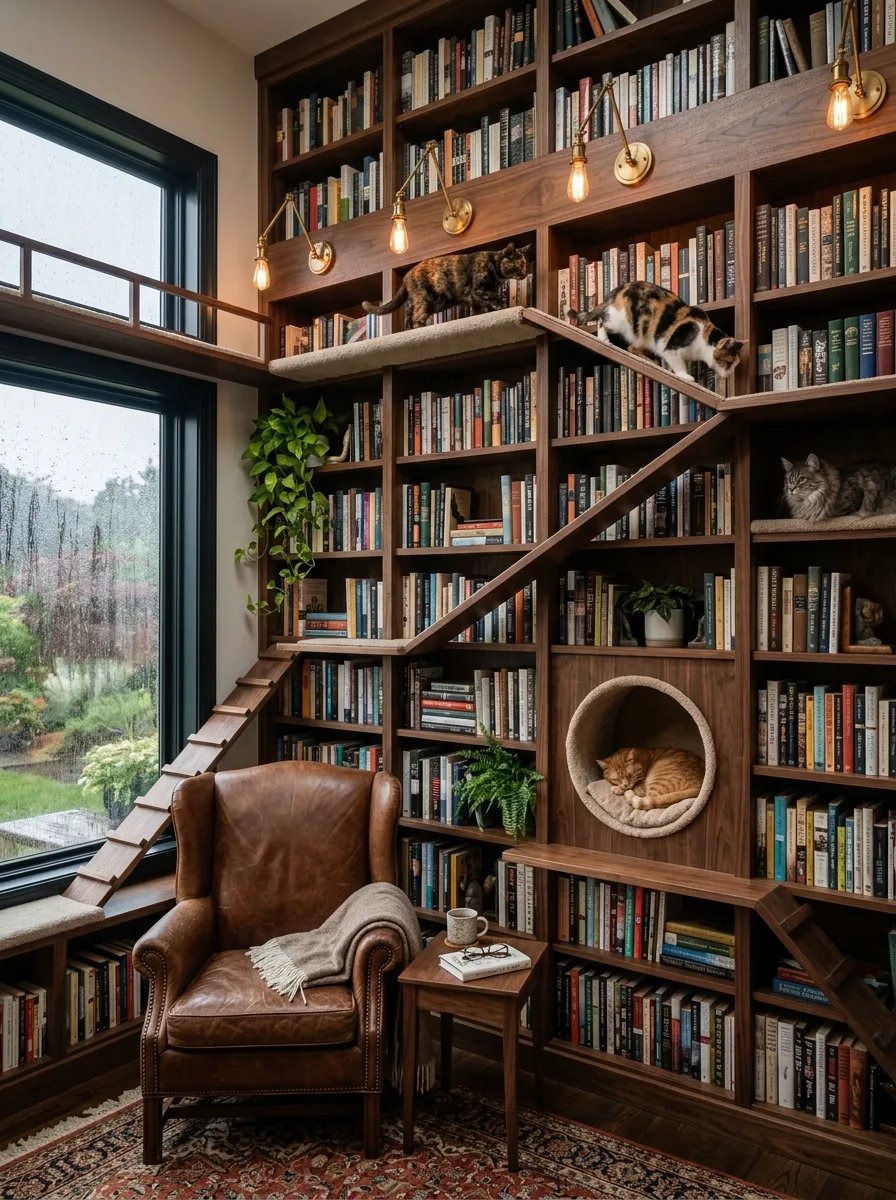
Integrate a narrow wood walkway and diagonal ladder directly into a floor-to-ceiling built-in bookshelf, using the same wood and shelf depth as the surrounding books so the walkway reads as part of the millwork.
Add small picture-light sconces along the top shelf to warmly light the walkway path, and build one circular cubby opening into the shelving at a lower level, lined with a soft cushion.
Leave gaps in the book arrangement at cat height on a few shelves, so the cat can travel through the actual bookshelves as part of the route, not just above them.
Place a leather armchair and side table below the walkway, so the whole wall reads as a proper home library that happens to include a climbing system, not the reverse.
Nature Wall with Moss and Driftwood
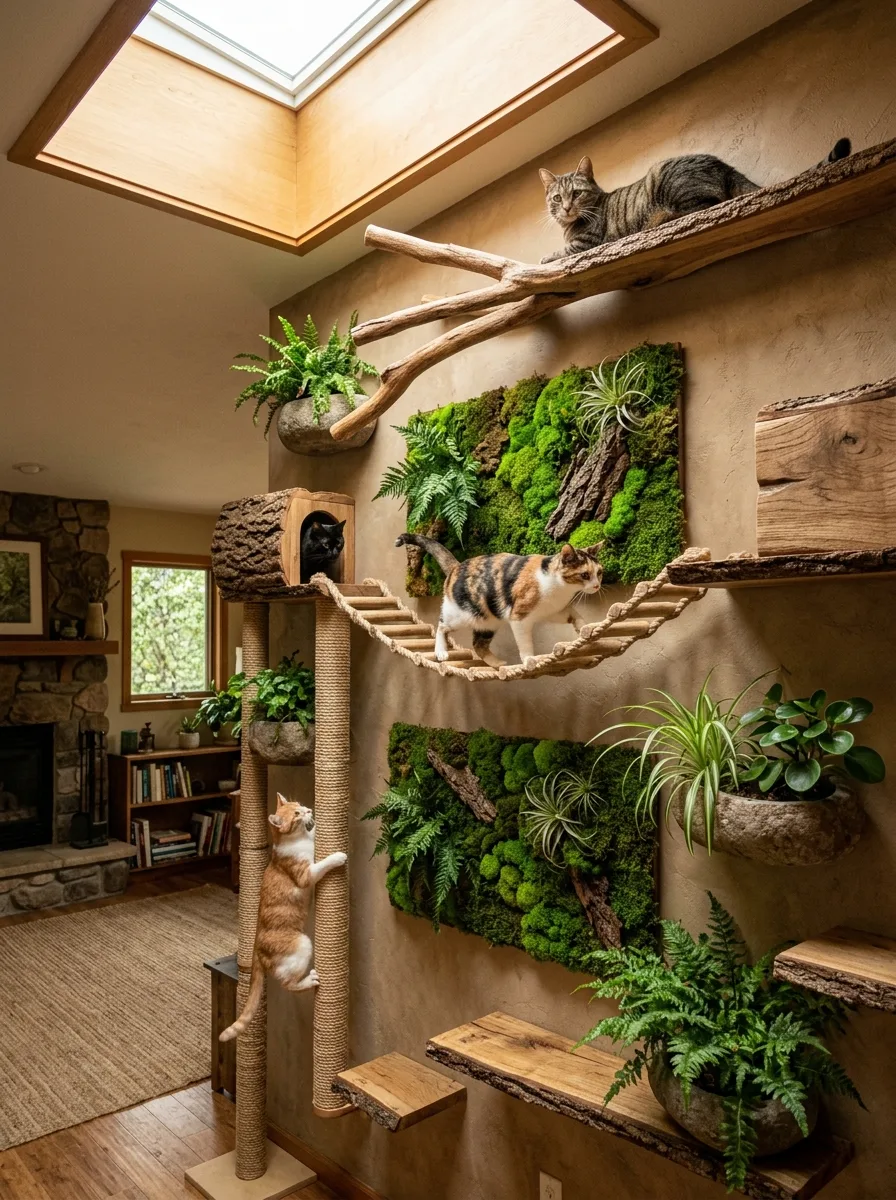
Mount a cluster of moss and fern wall panels between shelves built from raw-edge live-edge wood slabs and actual driftwood branches, creating a vertical garden that doubles as a climbing structure.
Add a hollow log section as an enclosed cubby, positioned at the top of the arrangement, with a woven rope bridge connecting it to a nearby driftwood branch.
Fill any remaining shelf space with potted ferns and trailing plants, keeping the plant varieties consistent with the moss panels so the whole wall reads as one continuous green installation.
Choose a warm tan or clay-toned wall paint behind the greenery, letting the moss and wood tones stand out clearly rather than blending into a busier backdrop.
Marble Wall with Wood Tunnel Slides
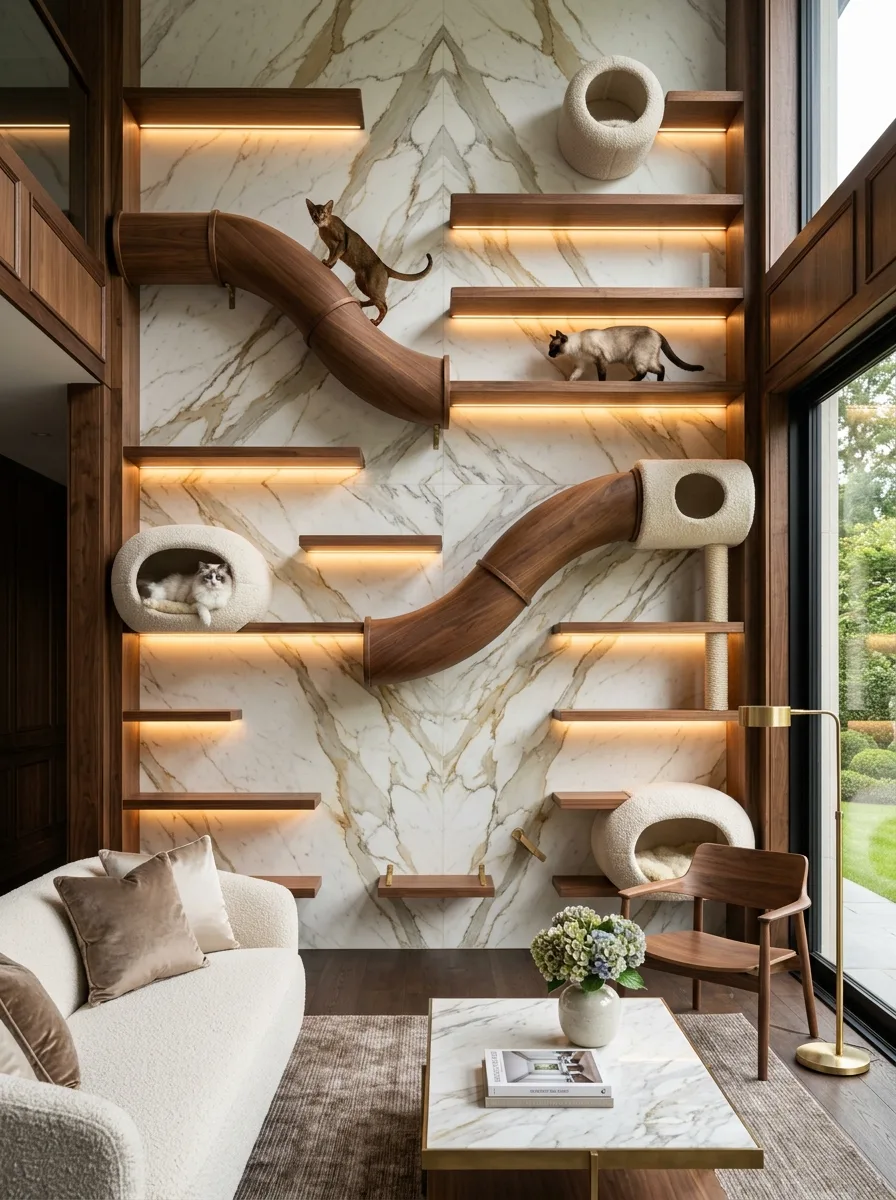
Install a series of thin floating wood shelves with under-lit LED edges against a large-format marble or marble-look wall panel, then run a curved wood tunnel slide diagonally between two of the upper shelves.
Add a couple of round, boucle-covered cubby beds tucked into open shelf sections, choosing a soft cream fabric that contrasts warmly against the cool marble veining.
Keep every wood element in the same warm walnut tone, including the tunnel, shelf edges, and any support posts, so the wood reads as one deliberate material choice against the stone.
Style the room below the wall with matching boucle furniture and brass lighting, so the whole space feels like a single high-end material palette rather than a marble wall with cat furniture added after the fact.
Sky-Themed Cloud Wall
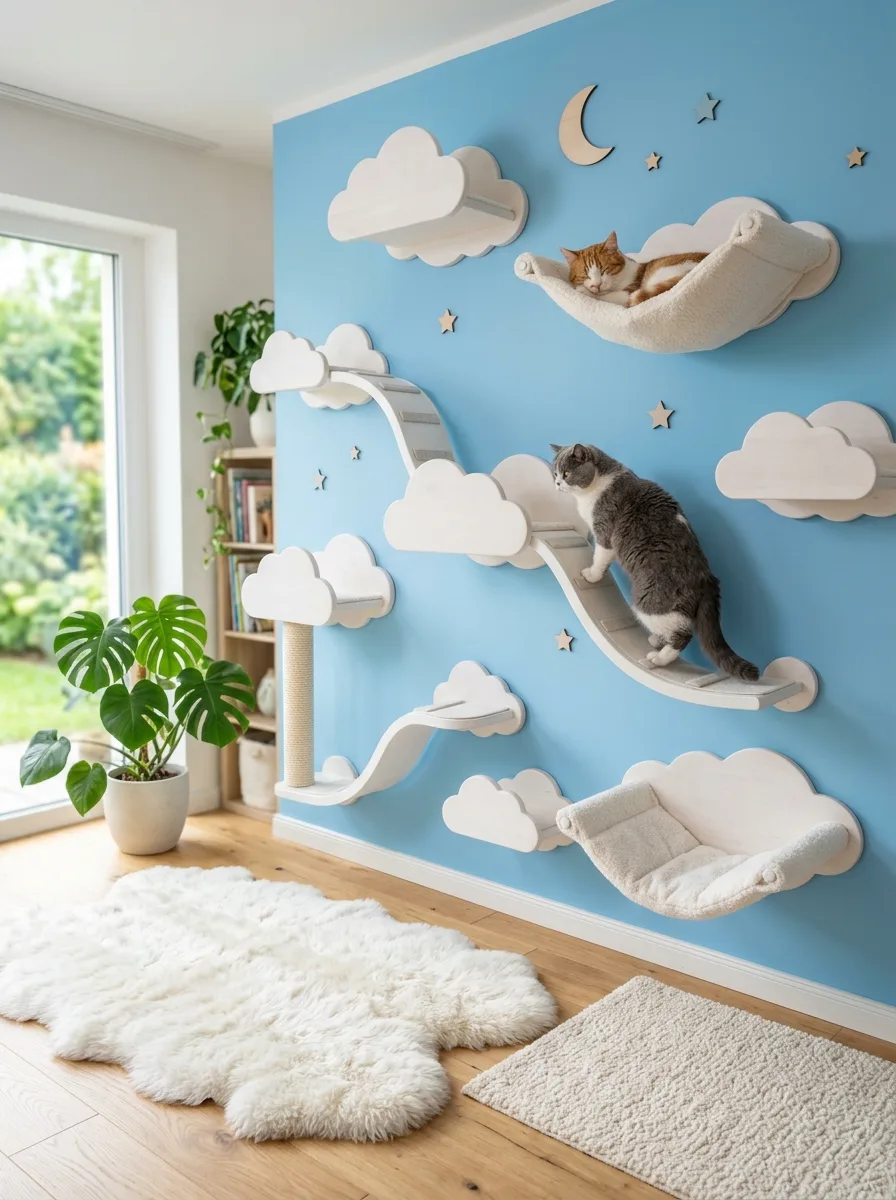
Paint a section of wall a soft sky blue, then mount a series of white cloud-shaped shelves and a canvas hammock in the same cloud silhouette, connected by a winding cloud-shaped ramp.
Add small wood star and crescent moon cutouts scattered across the blue wall between the shelves, keeping them small enough to read as detail rather than clutter.
Layer a plush faux sheepskin rug on the floor directly beneath the display, so the landing zone continues the soft, cloud-like material story down to ground level.
Keep every shelf and the hammock in the same white or cream tone, so the color contrast stays entirely between the blue wall and the white clouds, with no competing wood tones to distract from the theme.
Fireplace Flanking Pod Shelves
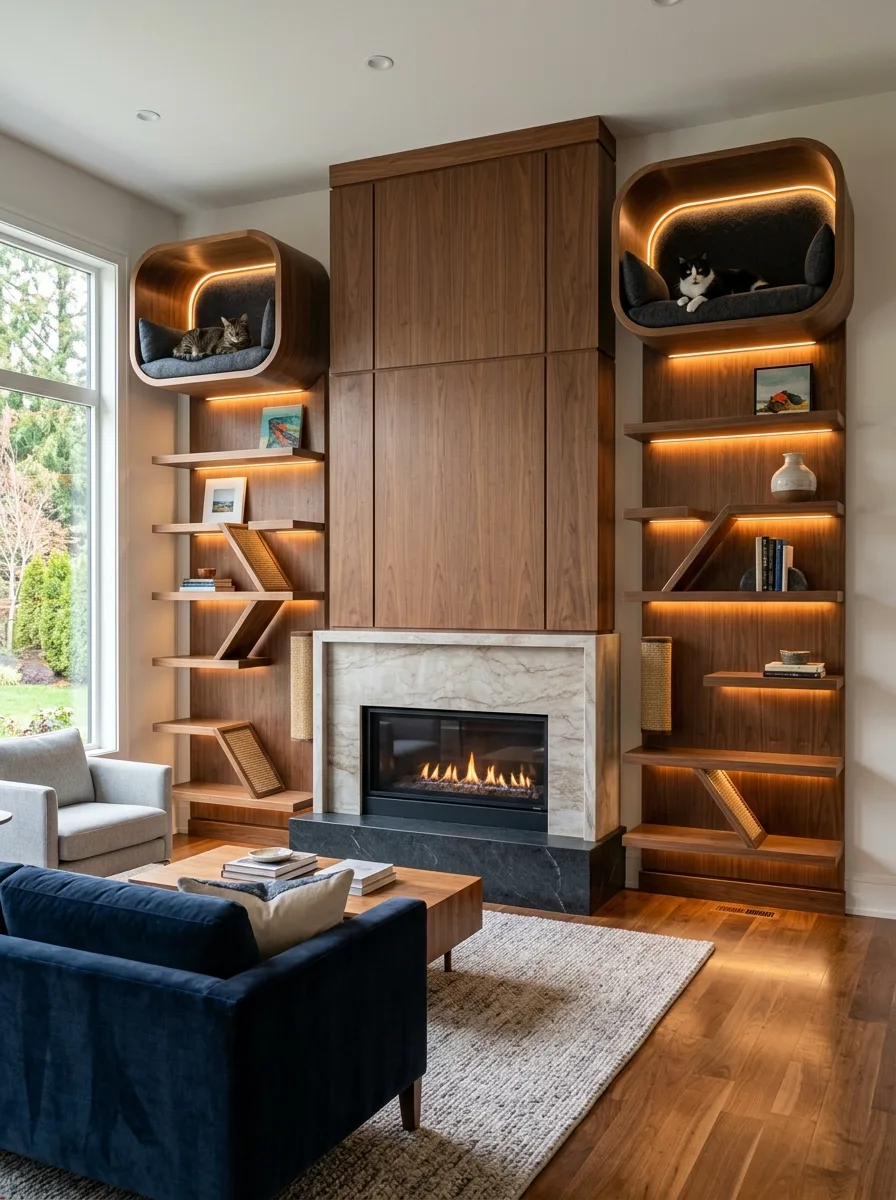
Build a pair of matching rounded wood pod shelves on either side of a fireplace surround, backlit with warm LED strips along the inside edge of each pod opening.
Run a column of open floating shelves beneath each pod, angled slightly for visual interest, and backlight those shelf edges too so the light continues down the full height of the built-in.
Match the wood tone of the pods and shelving exactly to the fireplace surround’s paneling, so the cat structures read as part of the original architectural millwork rather than an addition.
Style the open shelves below with a few books, a small vase, and framed art, keeping the display sparse enough that the lit pods remain the clear visual anchor.
Corner-Wrapped Rope Bridge System
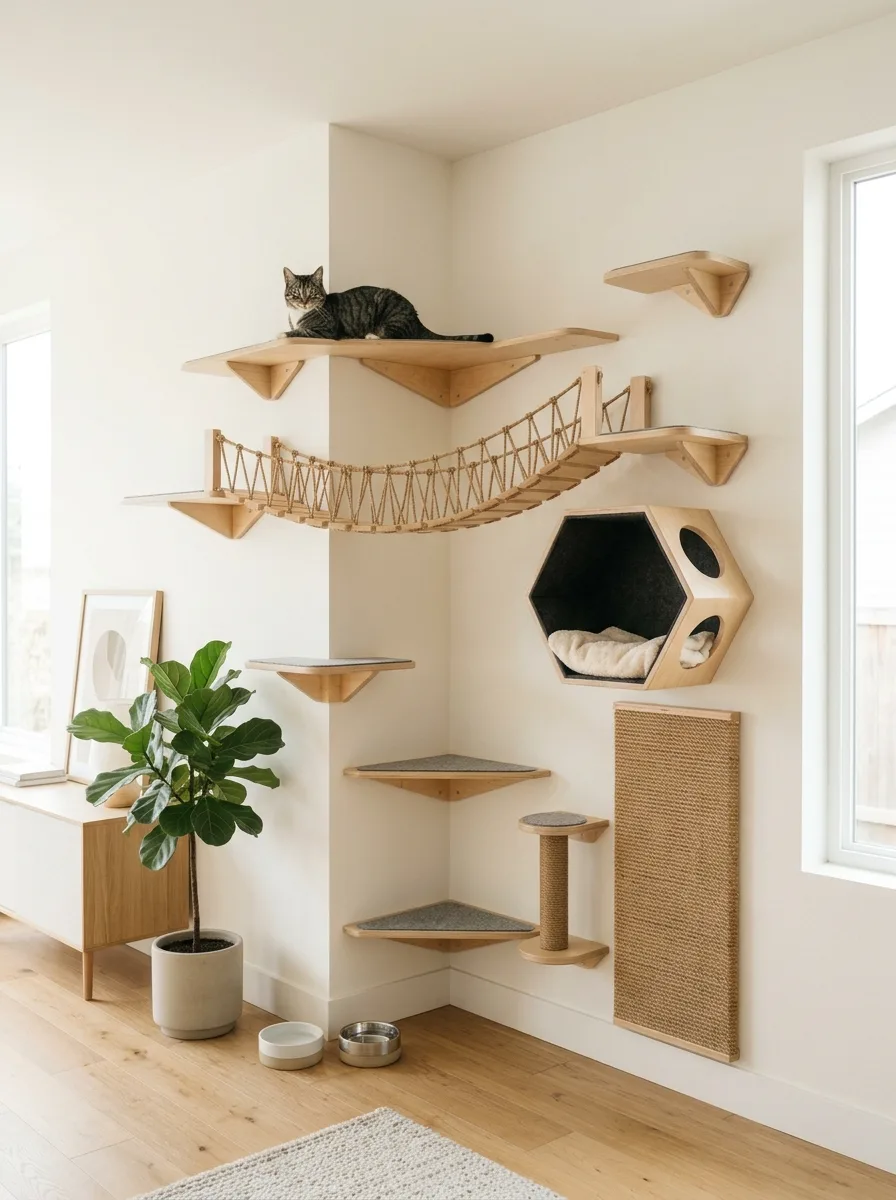
Build a shelf and post system that wraps fully around an interior corner, using triangular corner shelves to make the transition from one wall to the other feel seamless.
Add a rope suspension bridge connecting two upper shelves across the corner gap, and mount a hexagon wood cubby with two cutout entrances just below the bridge as a central hub.
Include a full sisal scratching panel mounted flush to the wall near the base of the system, sized generously rather than as an afterthought accessory.
Keep the wood in a light, unstained finish throughout, and add pet bowls directly below the structure so the whole corner functions as a complete cat zone, not just a climbing feature.
Home Office Shelf System with Toy Storage
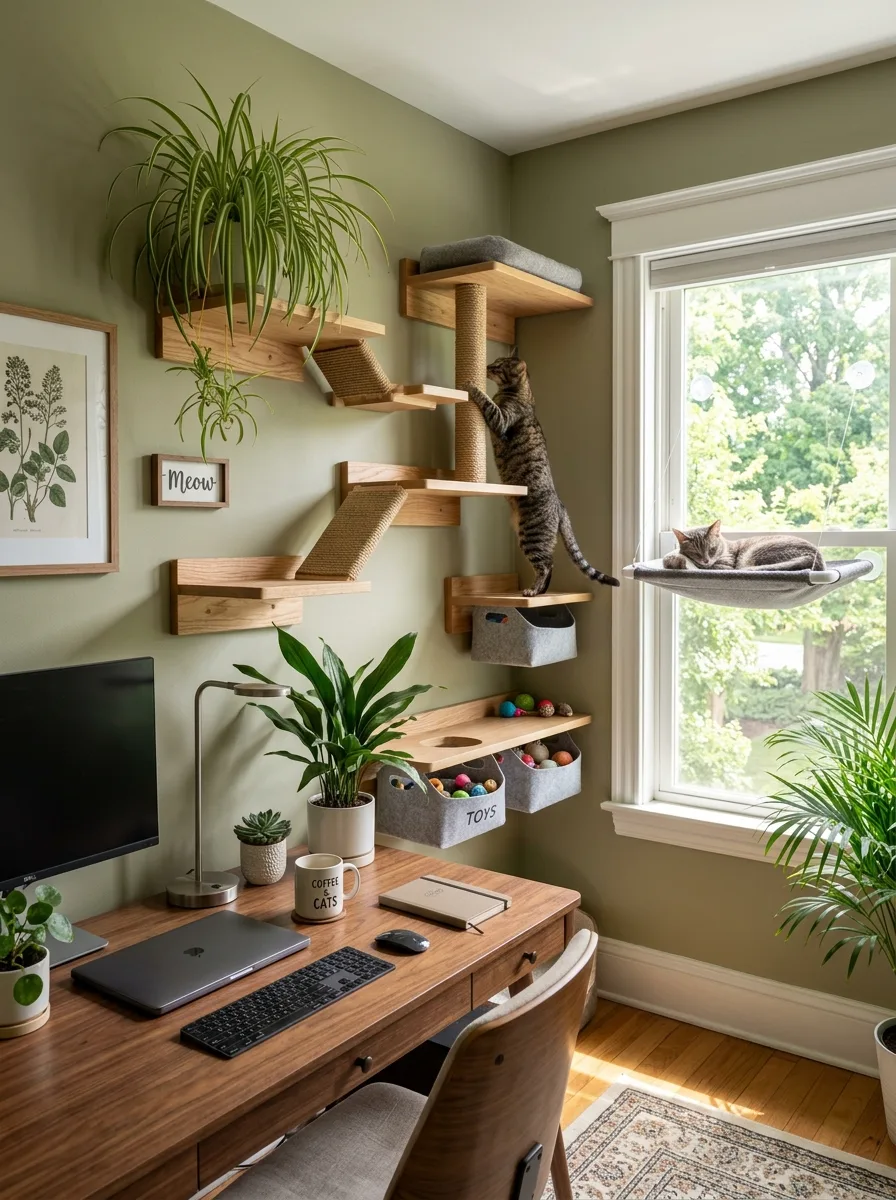
Mount a run of wood shelves and a scratching post directly above a home office desk, using felt-lined bins built into the lower shelves for toy storage that stays out of sight until needed.
Add a wall-mounted hammock just outside the nearest window, positioned so the cat has a clear route from the desk-side shelving to a sunny outdoor view.
Hang one or two trailing plants from small wood shelf brackets at the top of the system, letting the greenery soften the hard lines of the shelving.
Label the storage bins simply — “toys” in plain lettering is enough — so the whole system reads as considered home organization that happens to include a cat’s things, not a separate cat corner bolted onto a workspace.
Sculptural Wave Shelf with Media Console
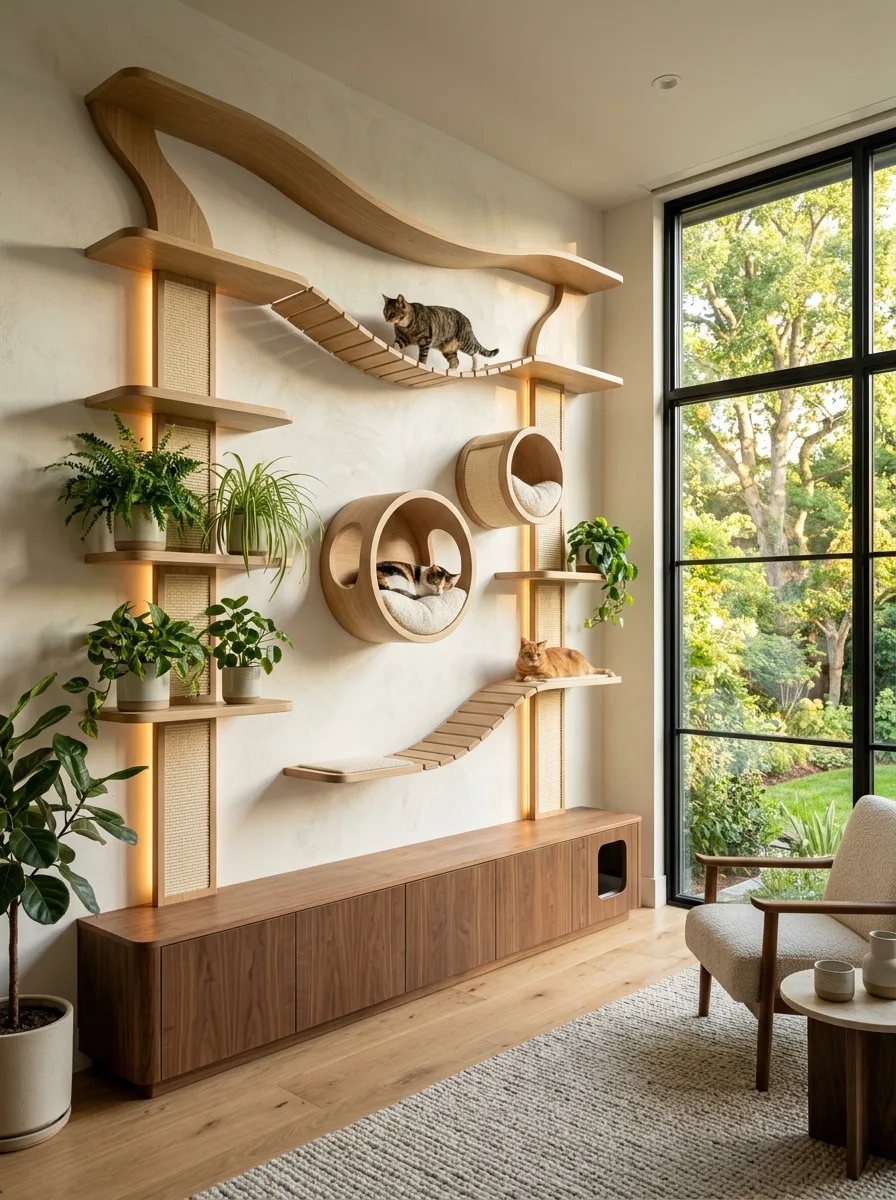
Build a large sculptural wood shelf with a flowing, wave-like top edge spanning the width of a media wall, supported by two sisal-wrapped vertical posts with integrated LED backlighting.
Add a pair of round cubby tunnels mounted mid-height on the posts, cushioned inside and open on both ends so the cat can pass all the way through.
Connect the wave shelf to a lower platform with a narrow rope bridge, and include potted plants on small ledges built into the support posts for a layered, green finish.
Build a low wood media console beneath the entire structure, with a cutout litter box access door built into one end, so the wall functions as full-height furniture for the room, not just a climbing system floating above ordinary storage.
Final Thoughts
None of these walls are actually about the cat. That sounds backwards, but look at what’s happening in every one of them — the wood tone matches the console, the light matches the room’s other fixtures, the shapes repeat like they would in any considered piece of furniture.
A cat wall that gets treated like a design decision instead of a chore gets built once and never apologized for. It doesn’t get hidden behind a door when guests come over. It becomes the thing people ask about.
The cat, for what it’s worth, was never going to care about any of this. It just wanted height and a route. Everything else on this list is for you.
That empty wall isn’t empty because it has to be. It’s empty because nobody’s shown it what it could be holding yet.