
The edge of a garden bed is where a yard either holds together or falls apart. It’s a three-inch strip of ground that tells every visitor whether someone actually cares about this space. And somehow, most people manage to get it wrong for decades before doing anything about it.
The usual excuse is cost. Landscape edging from a hardware store is expensive for what it is — a thin strip of material that does one job. But every single image in this collection proves that cheap edging isn’t synonymous with bad edging. Some of the strongest looks here cost almost nothing. A few of them cost literally nothing.
The rule is not what material you use. The rule is whether the material is installed with intention and maintained with regularity. A wine bottle edge that’s crooked and half-buried is a mess. The same wine bottles installed straight, at consistent depth, with clean soil on both sides, looks like a deliberate design choice. The difference is an afternoon of attention, not a budget.
Here’s how to actually execute each option.
The Edge Decides Everything First
Before you touch a single material, the line itself has to be right.
Curved vs. Straight
Straight edges belong against driveways, patios, and paths. They read as architectural and intentional. Curved edges belong in lawn beds and planting areas where the shape needs to flow with the landscape. The mistake most people make is using a random curve — not a considered one. A good curved edge follows a single, smooth arc. It doesn’t wobble or kink. Mark it with a garden hose laid on the ground first. Step back and look at it from multiple angles before you dig anything.
Curves that look right from ground level often look wrong from upstairs. If you have a second floor, check from there too.
The Trench Changes Everything
Every edging material in this post works better when it’s installed into a clean vertical trench rather than just sitting on top of the soil. Cut a clean edge with a half-moon edger or spade — three to four inches deep, with a vertical face on the lawn side. This trench keeps grass from creeping into the bed, gives your material something to sit against, and makes the finished edge read as permanent rather than temporary.
Skip the trench and even the most expensive material looks like it was just pushed into the ground on a Saturday afternoon.
Maintenance Is the Product
A beautiful edge installed in May looks terrible by August if nobody touches it. Whichever material you choose, plan on re-cutting the lawn edge every three to four weeks during the growing season. A long-handled edger or a half-moon tool does the job in ten minutes for an average bed. Without that maintenance, grass creeps over every edging material in existence.
What Material Tells You About the Garden Behind It
The edging material you choose sets expectations. It signals a style.
Matching the Garden to the Edge
River stone and smooth pebble edging signals a relaxed, naturalistic garden. It works beautifully with loose cottage plantings, croton, and subtropical plants. It reads informal, which is a feature rather than a flaw when the plants behind it are equally relaxed in their form.
Hard, geometric materials — cut timber sleepers, cinder blocks, steel edging — signal a more controlled garden. They work against formal plantings, vegetable beds, and structured flower borders. The material’s rigidity extends a visual promise about what’s behind it.
Mismatching these signals is where many yards go wrong. A sleek steel edge in front of a wild, tumbling cottage border creates visual conflict. Rustic bottle edging in front of a clipped formal bed looks like the joke nobody meant to tell.
When to Use More Than One Material
Using two different edging materials in the same yard is fine as long as each one is used for a clearly different purpose. Timber sleeper edging for the main bed, river rock along a curved garden path — that reads as considered. Two different edging types competing along the same fence line reads as indecision.
Keep it simple. One material per zone.
Cheap Lawn Edging Ideas
River Rock Foundation Edging
In a narrow bed running along a house foundation or wall, install smooth river stones as the edging material by placing them in a double or triple layer along the bed edge, slightly overlapping. The stones should range in size from roughly the diameter of a golf ball to a tennis ball — a consistent size looks deliberate, while wildly varied sizes look random. The key is installing them tightly enough that they lock against each other and don’t migrate. Nestle each stone slightly into the soil rather than just placing it on top. Pair this edging with a layered planting of contrasting textures — sword-leaf plants at the back, a mounding mid-layer, and low groundcover at the front — and the stone edge makes the whole composition feel cohesive rather than improvised.
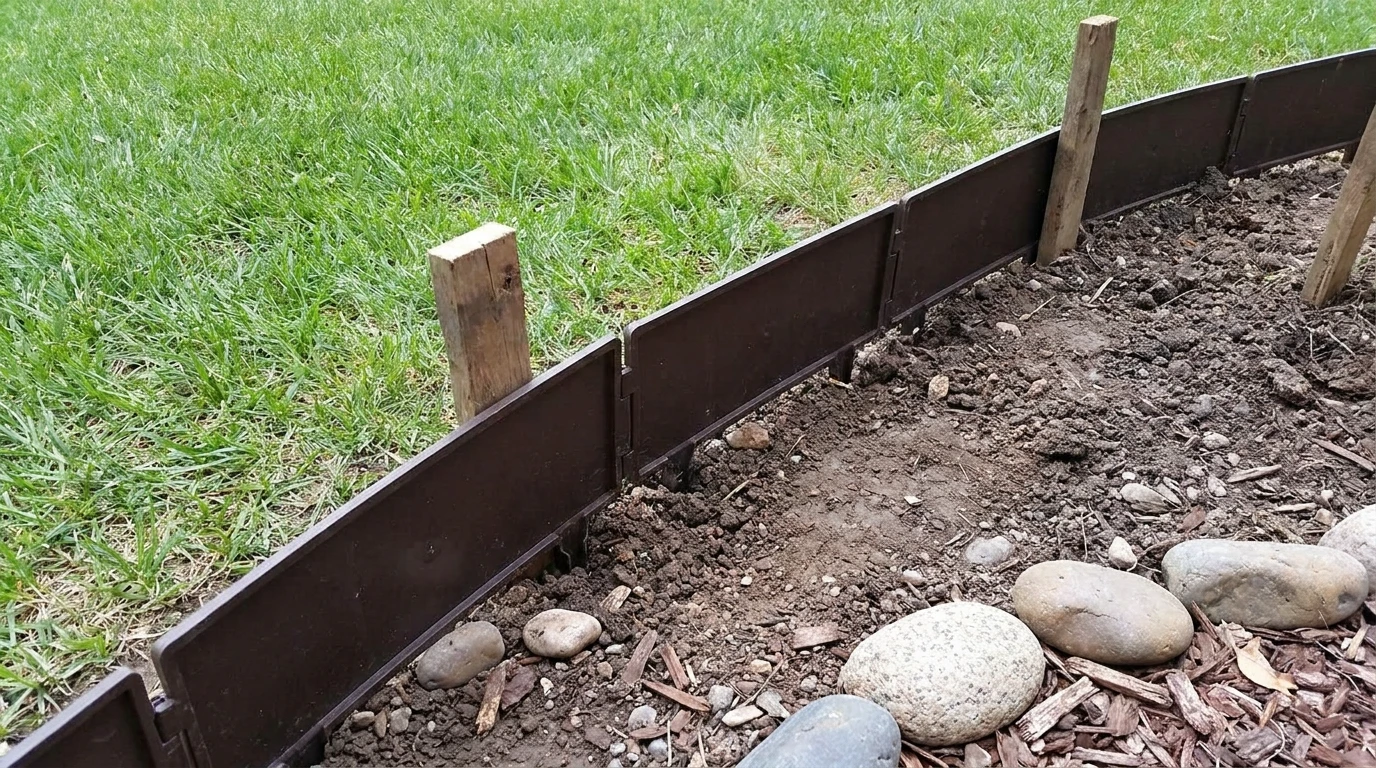
Timber Railway Sleeper Curve
Cut or source new oak or treated pine railway sleepers in uniform lengths — sixteen to eighteen inches works well. Install them upright in a continuous curved line by digging a trench to half the sleeper’s length and setting each piece vertically, side by side with no gaps. The staggered natural tops create a gentle undulating line that reads as organic. Pack compacted gravel or river pebbles along the outside base of the sleeper edge for a transition zone between the formal timber and the lawn. This is the most labor-intensive option in this collection but also one of the most permanent and visually substantial. A raised bed bordered by vertical sleepers looks like a considered landscape investment regardless of the per-unit cost of the materials.
Steel-Edged Annual Flower Bed
Use a low powder-coated steel garden edging strip — the kind that comes in long flexible sections — to create a smooth, continuous curve around a planting bed. Set it so only an inch or two protrudes above soil level. Fill the bed with a relaxed mix of annuals in complementary tones — petunias, marigolds, and hostas work well together and provide different textures at different heights. The steel edge is nearly invisible from a distance, which means the bed reads as a clean floating island of color against the lawn. This is the approach when you want the planting to be the thing that people notice, not the edging.
Fence-Line Gravel Strip With Spheres
Along a wooden privacy fence, excavate a strip two to three feet wide between the fence base and the lawn edge. Lay landscape fabric and fill with medium gravel — grey river gravel or crushed granite, not white marble chip which is too stark. Space shrubs or round-clipped mounding plants at even intervals within the gravel strip, planted through the fabric. Install a single row of brick pavers along the lawn-facing edge of the gravel strip, set flat and flush with the grass surface. The brick defines the transition cleanly. The gravel prevents weeds and eliminates the maintenance headache of mowing tight to the fence. The evenly spaced plants give the whole arrangement a repeating rhythm. Solar path lights pushed into the gravel at every other plant add a warm glow at night for no additional excavation.
Inverted Glass Bottle Line
Collect wine or beer bottles with a uniform shape — dark green glass reads best, clear glass second. A consistent bottle silhouette across the whole length is important; mixing different bottle shapes makes it look collected rather than designed. Dig a narrow trench along the bed edge and push each bottle neck-first into the soil until roughly the bottom third of the bottle is exposed above ground. Press them tightly together so each bottle bottom is touching the next. The goal is a scalloped rhythm created by the curved bottoms of adjacent bottles. This works best bordering vegetable gardens and informal kitchen gardens where the handmade quality matches the spirit of the space. Avoid it along formal beds where it reads out of character.
Cinder Block Planter Edge
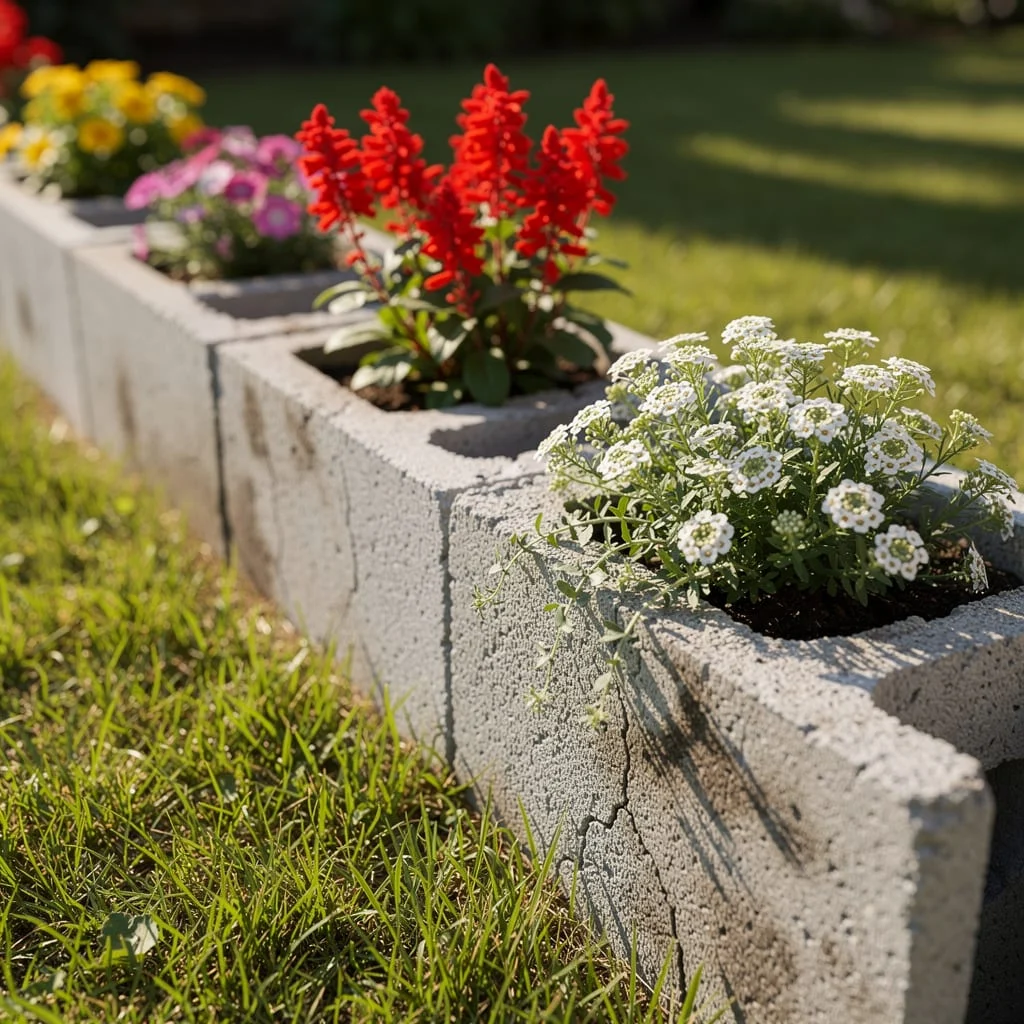
Place standard cinder blocks on their sides in a single continuous row along the bed edge, hollow cavities facing upward. The cavities become individual planters. Fill each cavity with a mix of potting compost and garden soil and plant compact annuals — sweet alyssum, red salvia, alpine strawberries, or trailing lobelia work well at this small scale. The blocks themselves are near-free or salvaged. The planting in the cavities is what makes them interesting. Use the same flower variety throughout for a consistent look, or alternate two varieties in a repeating sequence. Against a warm cedar fence, the grey block contrasts cleanly and the planted cavities tie the edging to the garden behind it.
Broken Terracotta Shard Row
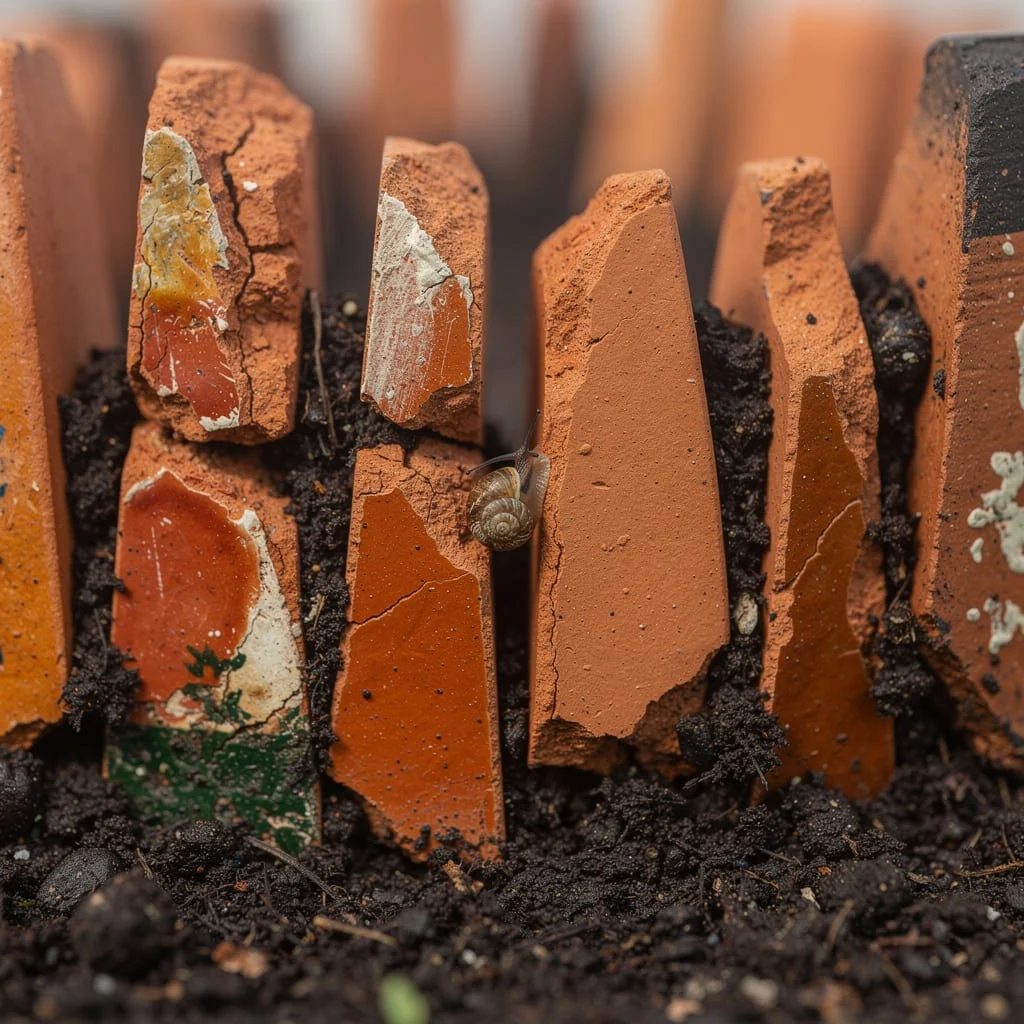
Save broken terracotta pots rather than discarding them. Break larger pieces to produce irregular shards of roughly consistent height — four to six inches. Push each shard vertically into the soil along the bed edge, jagged edge upward, pressed tightly against the next piece. The irregular tops create a primitive, handmade line that suits Mediterranean and drought-tolerant plantings particularly well — lavender, rosemary, sage, and lamb’s ear planted behind terracotta shards looks genuinely intentional rather than improvised. This edge costs nothing if you already have broken pots, and it gives broken pieces a use rather than sending them to landfill. Do not use this near high-traffic areas where barefoot contact is possible.
Log Round Border
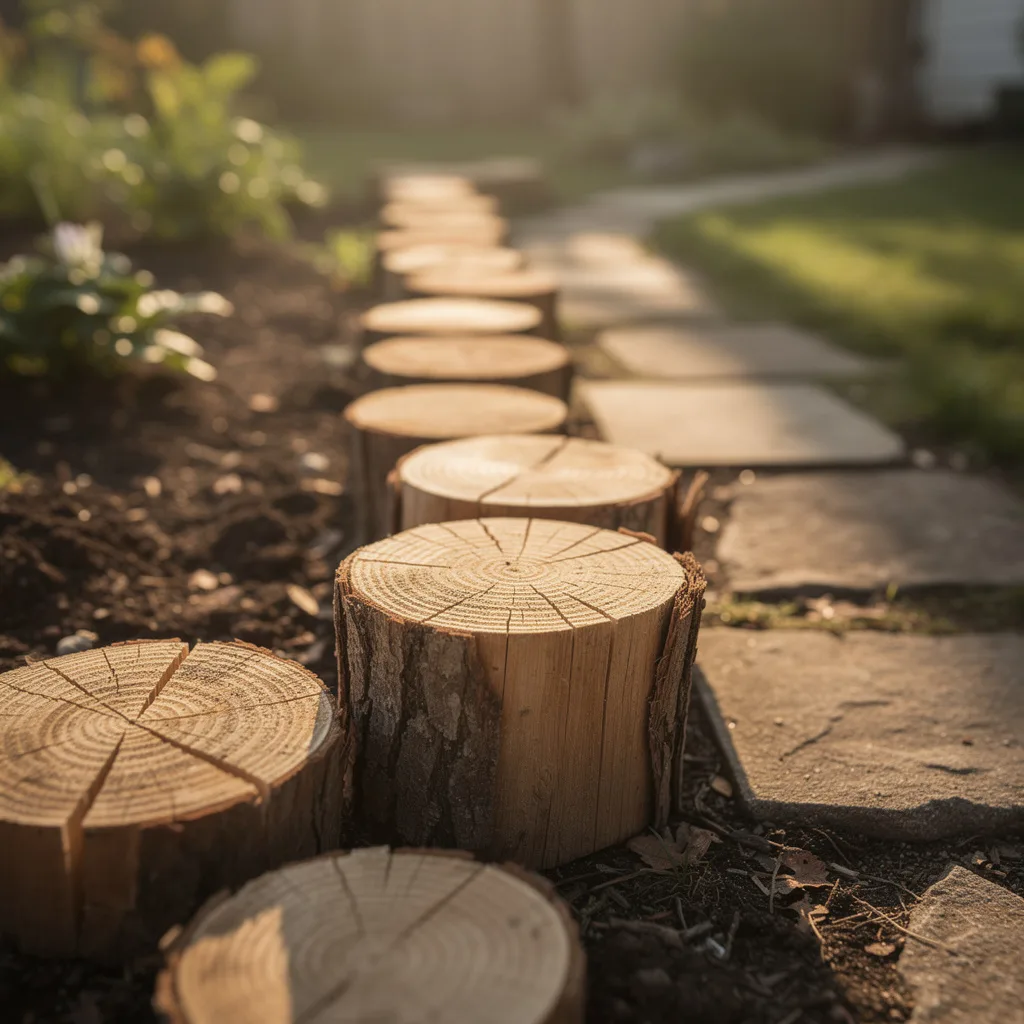
When a tree comes down, cut the trunk into uniform rounds of six to eight inches in thickness. Set each round upright in the soil, compacted tightly against the next, to create a continuous low fence along a bed edge. Sand or treat the cut faces with an outdoor wood sealant to slow decay. The concentric grain rings visible on each round face are genuinely beautiful in morning or late afternoon light. This edging suits naturalistic woodland gardens and cottage-style beds. It is not appropriate for formal or contemporary spaces. It will begin to decay within three to five years depending on the wood species, which means it’s best treated as a medium-term solution rather than a permanent installation.
River Stone Flat-Laid Transition
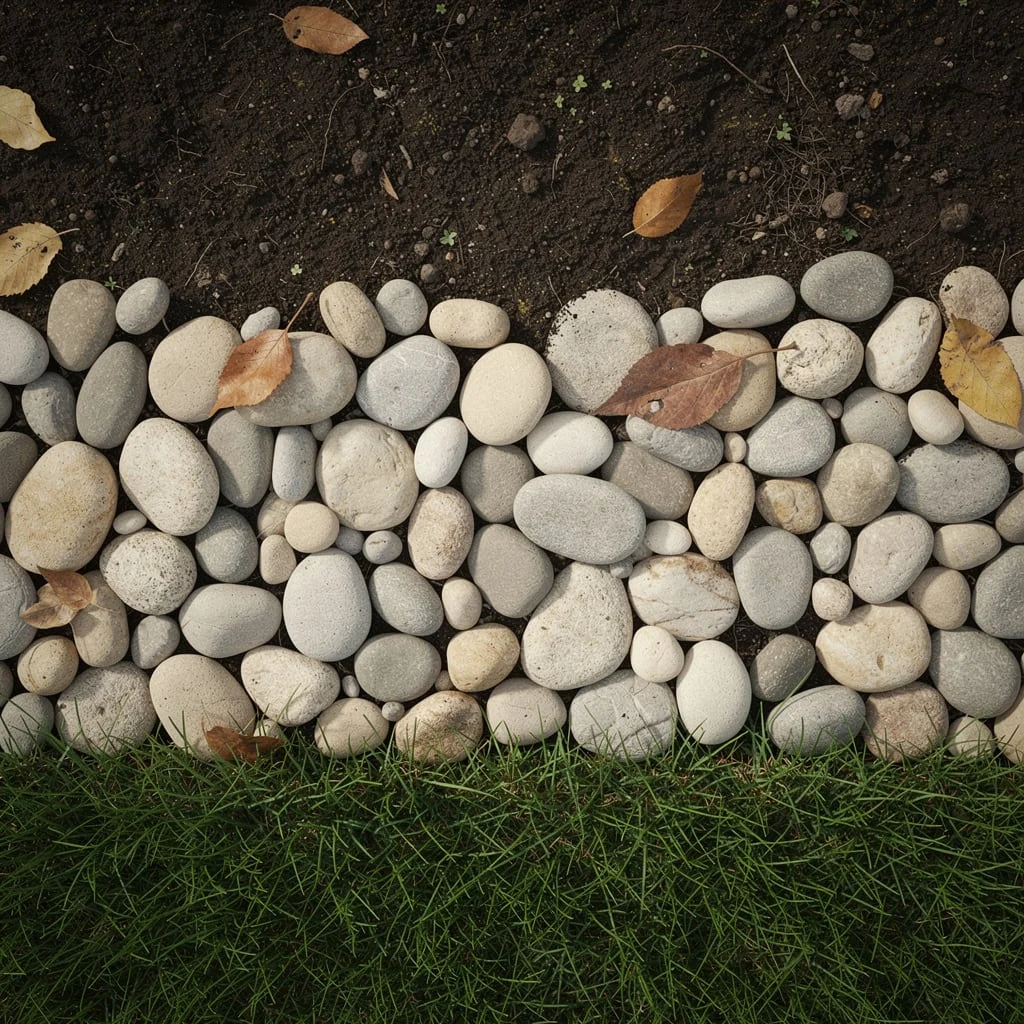
Source smooth, flat river pebbles or paddock stones in a consistent grey-white tone. Lay them densely as a flat two-to-three-inch-deep mulch strip along the bed edge rather than installing them upright or stacked. The flat-laid approach is more subtle than stacked stone — it creates a textural transition zone between the lawn edge and the planted bed rather than a hard boundary line. This works well when the garden itself has a naturalistic character and you want the edge to feel continuous with the planting rather than imposed on it. Use a steel or brick strip underneath the stone at the lawn-facing edge to prevent the pebbles migrating into the grass.
White Painted Plastic Bottle Edge
Collect identical plastic bottles — two-liter soda bottles work best for their uniform shape. Fill each bottle with sand or water for stability and push the cap end into the soil so the rounded base is exposed above ground. The filled bottle resists soil pressure better than an empty one. Paint every bottle with outdoor masonry primer and then a flat exterior white — not gloss, which reflects too harshly. The result is a clean white scalloped line that reads from a distance as intentional rather than recycled. This is a vegetable garden solution rather than a front yard solution. It will require repainting every one to two seasons as UV exposure chalks the surface.
Ornamental Grass and White Gravel Strip
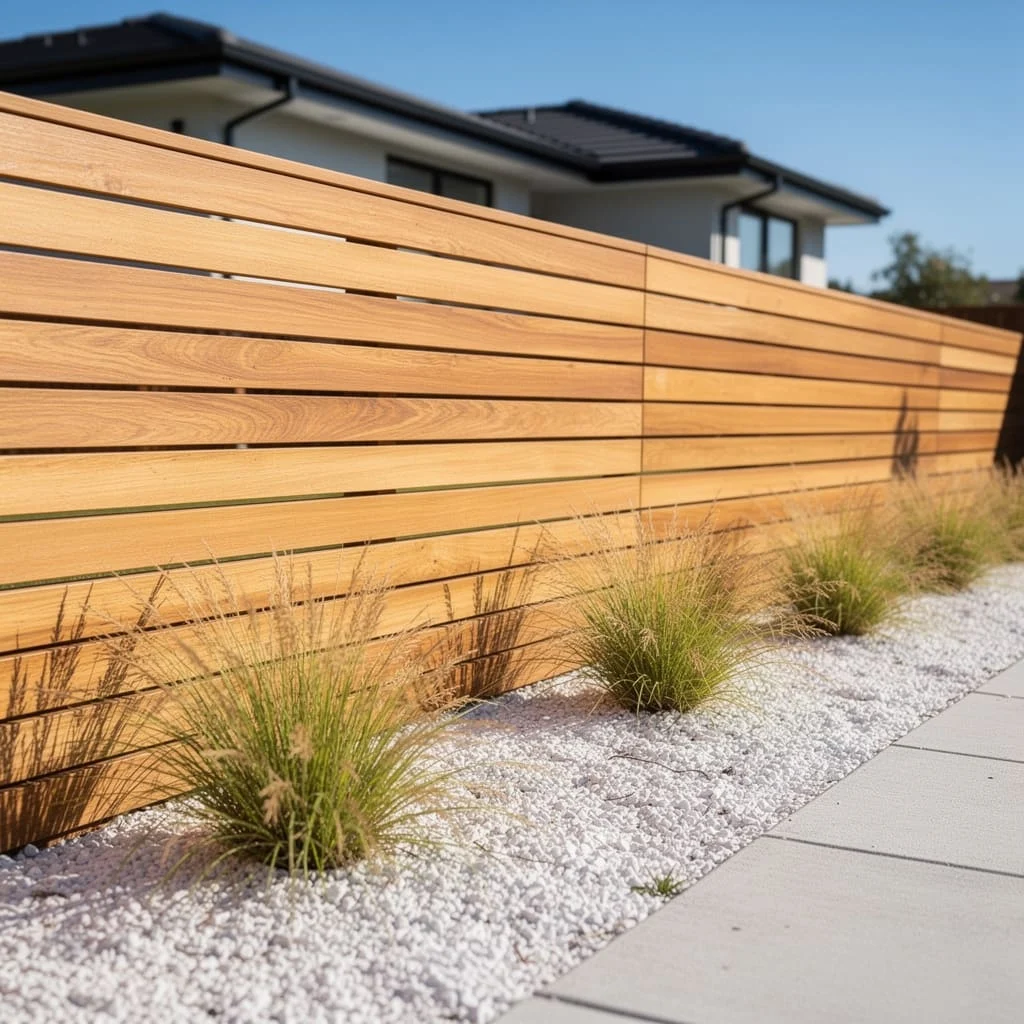
Along a horizontal-slatted timber fence, lay a two-to-three-foot-wide gravel strip using white or cream-toned crushed aggregate. Plant tufting ornamental grasses at regular spacing directly in the gravel over landscape fabric — Blue Fescue, Mexican Feather Grass, or any compact ornamental species works well. Install a flat-set concrete paver as the edging at the lawn face of the gravel strip. No upright edging material is needed here because the gravel strip itself is the designed element. The horizontal timber fence, the white gravel, and the soft-textured grasses create a palette that reads as confidently modern without requiring any expensive materials.
Cinder Block Fence-Line Bed
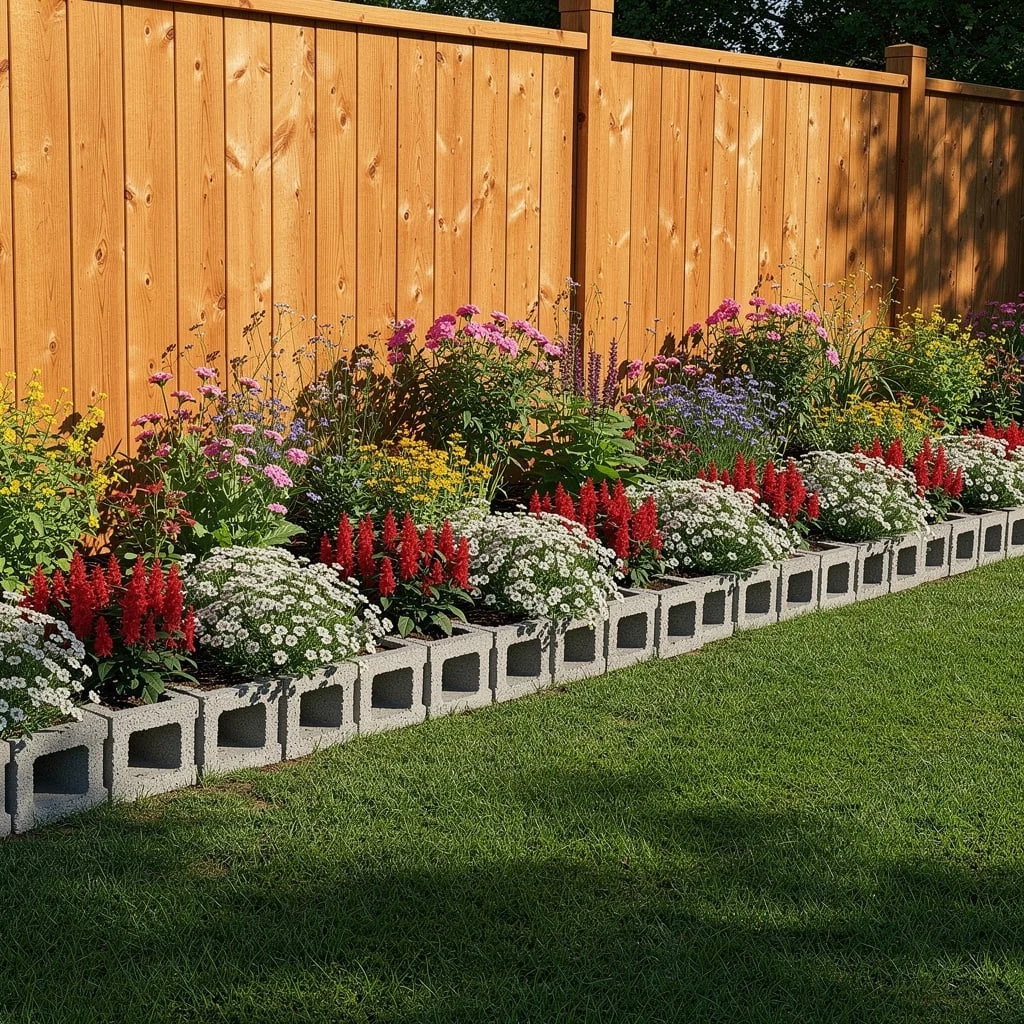
Along a cedar fence, lay cinder blocks end-to-end in a single row flat on the ground, hollow cavities facing upward. Plant each cavity with a compact annual or perennial. Behind the cinder block row, fill the bed generously with a mix of taller perennials — coneflower, salvia, rudbeckia — that grow above the block height and create a layered effect. The blocks define the bed edge without requiring any separate edging material. The planted cavities integrate the border into the planting rather than letting it read as a separate element bolted onto the garden. This setup handles the transition between lawn and a fence-line planting bed better than most edging materials at this price point.
Flagstone Stepping Path Edge
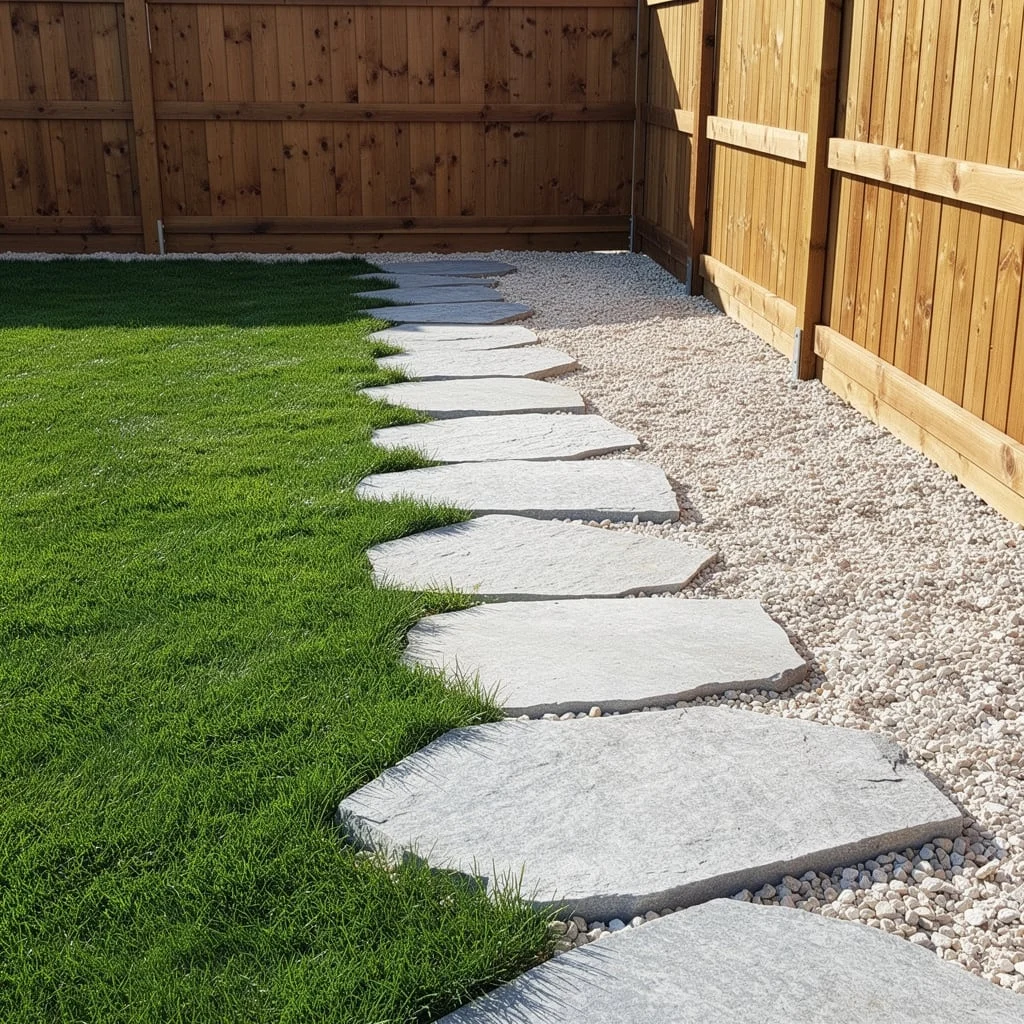
In a yard corner where a fence meets the house or where two fence lines intersect, lay large irregular flagstones in a diagonal stepping path that also defines the planting bed edge. Each stone sits partially in the gravel and partially on the grass, creating an implied boundary without a hard upright element. Fill the non-paved half of this corner with white gravel as a low-maintenance ground surface. The flagstones do double duty — they provide a functional walking surface along the fence and serve as the edge definition simultaneously. No separate edging material is required. The interplay between the large grey stone flags, the white gravel, and the warm cedar fence creates a coherent palette from three inexpensive materials.
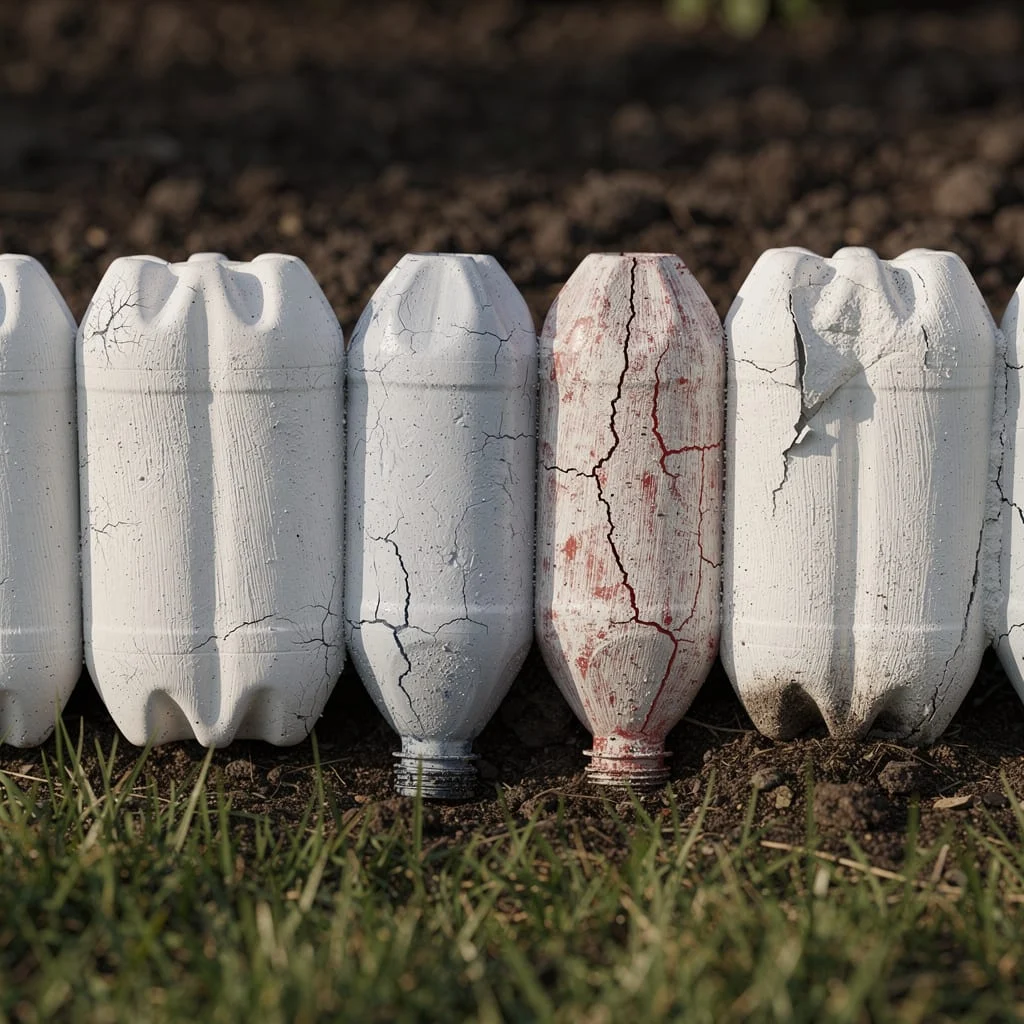
Painted Milk Bottle Vegetable Border
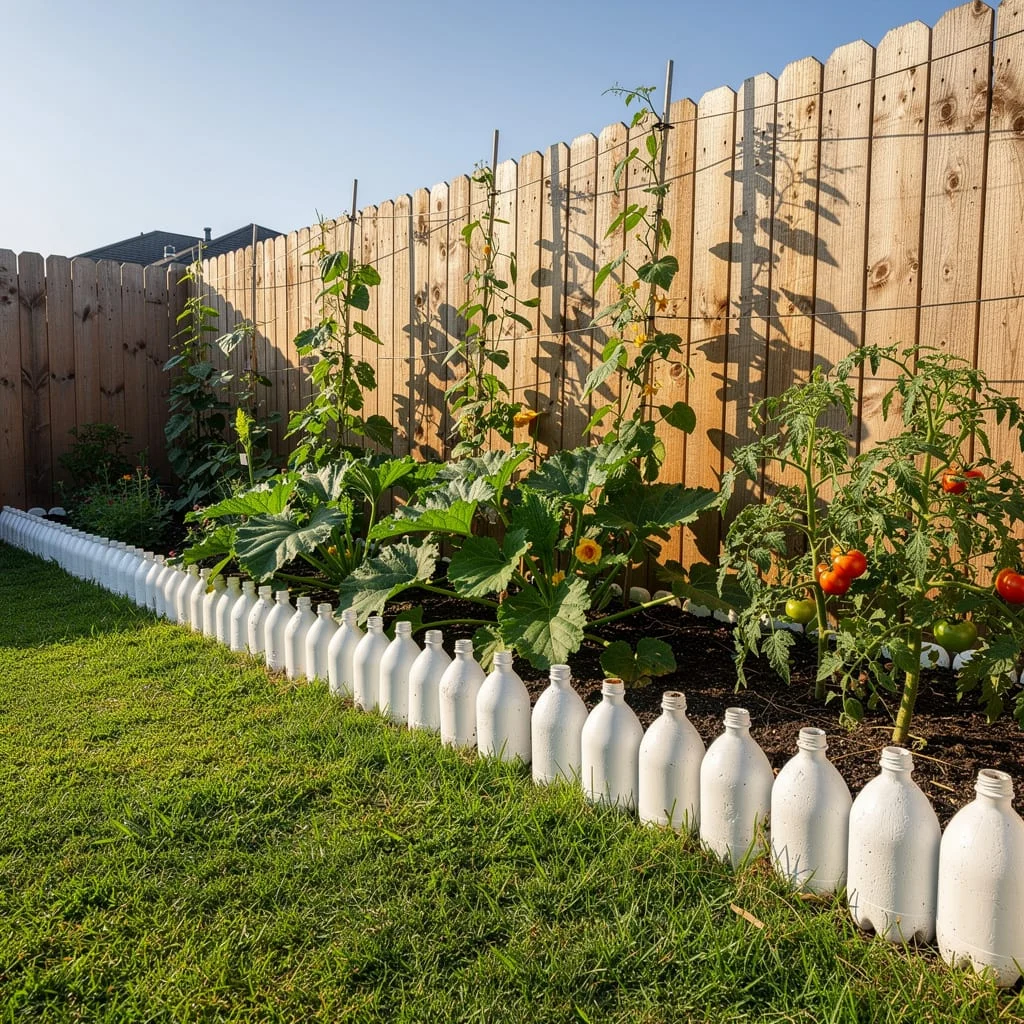
Along the edge of a vegetable garden adjacent to a fence, collect plastic one-liter or two-liter milk jugs. Paint them uniformly in exterior flat white paint after priming. Push the base of each bottle into the soil, neck up, so they stand upright in a continuous row. The white vertical forms create a clean, crisp line against dark mulch and the warm tones of a cedar fence. This is one of the higher-contrast edging options in this collection and works specifically because of the dark mulch on the bed side — without dark mulch, the white bottles disappear against pale soil. The combination of white bottle edging, dark mulch, and bold vegetable plants above creates a clean three-value composition that photographs well and reads clearly from a distance.
Terracotta Half-Round Tile Row
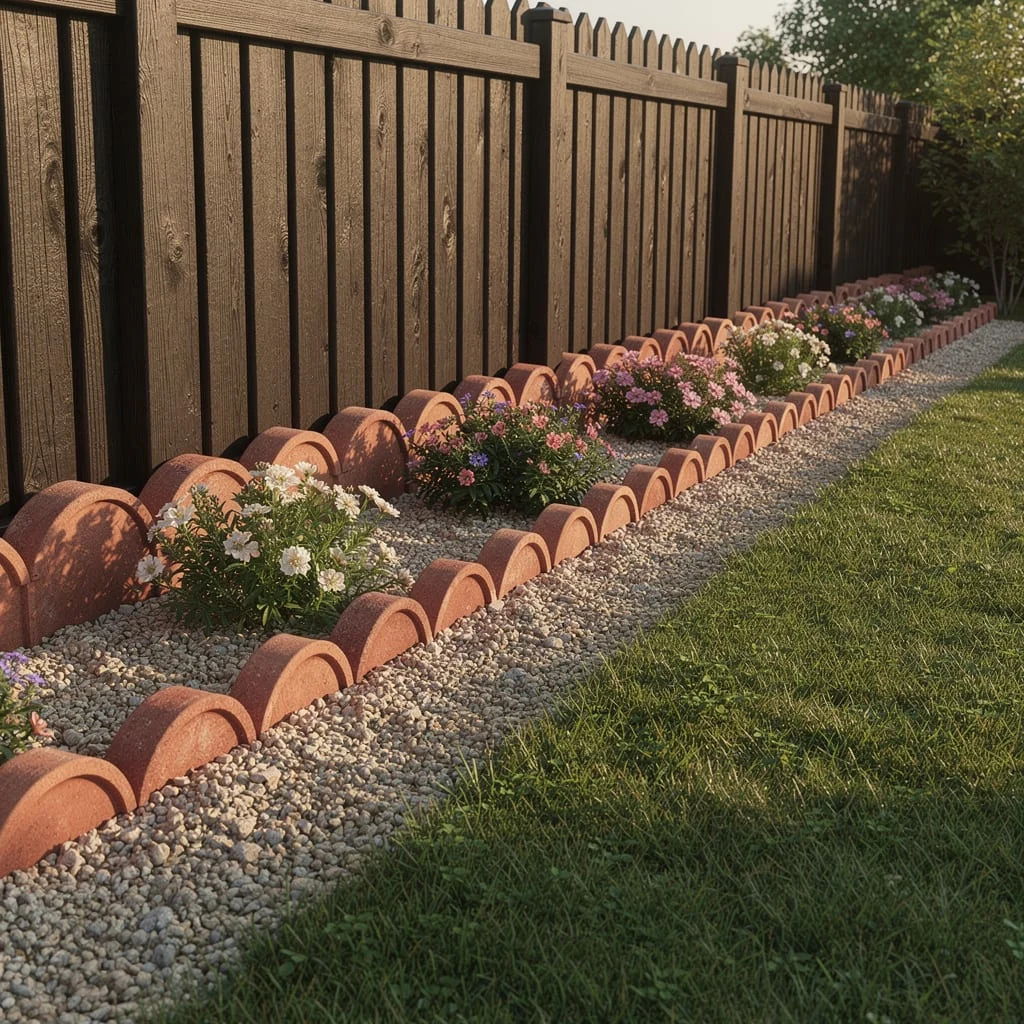
Source terracotta half-round roof tiles or border tiles from a salvage yard or masonry supplier. Press them into the soil along the bed edge, curved face upward, so the repeating half-round profiles create a scalloped pattern. Pair them with a gravel strip between the tile edge and the lawn as a secondary transition zone. Behind the tile edge, plant a mix of low mounding flowers that will billow gently over the top of the tile without burying it — asters, dianthus, alyssum. Against a dark weathered fence, the warm terracotta reads as a strongly Mediterranean or Provençal detail. This is an edging style with real character, and the salvaged material cost is minimal.
Bamboo Stake Fence Edge
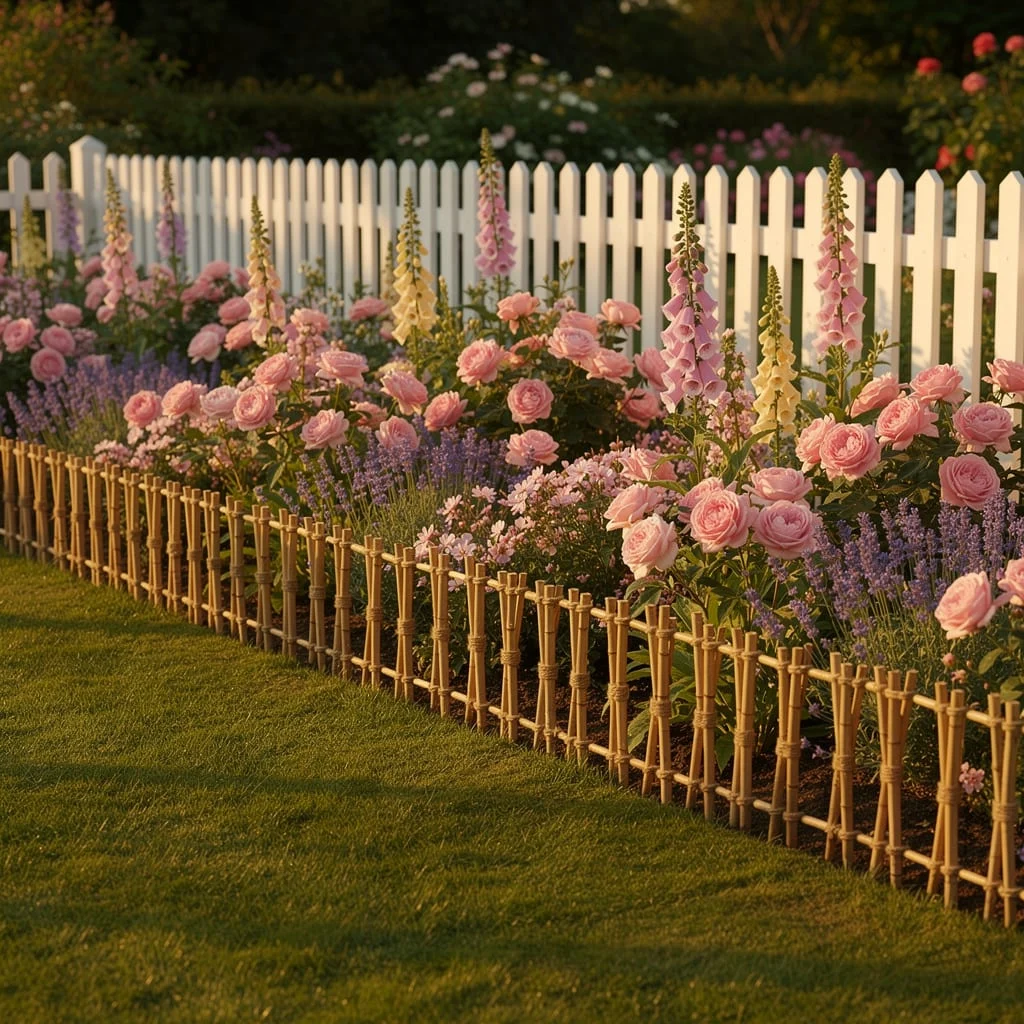
Source bamboo canes or harvest bamboo from your own garden. Cut them to a consistent six-to-eight-inch length and sharpen one end on each. Push them into the ground along the bed edge at an angle, alternating the lean direction slightly to create a woven or picket effect. Bind pairs or groups together with jute twine at the top for a more finished look. This rustic low fence suits English cottage gardens with loose, romantic plantings — climbing roses, foxgloves, lavender, and salvia look exactly right behind a bamboo cane edge. It does not suit formal or contemporary yards. Bamboo will weather grey over a season or two, which suits the cottage aesthetic. Replace any broken canes annually.
Sandstone Slab Herb Garden Edge
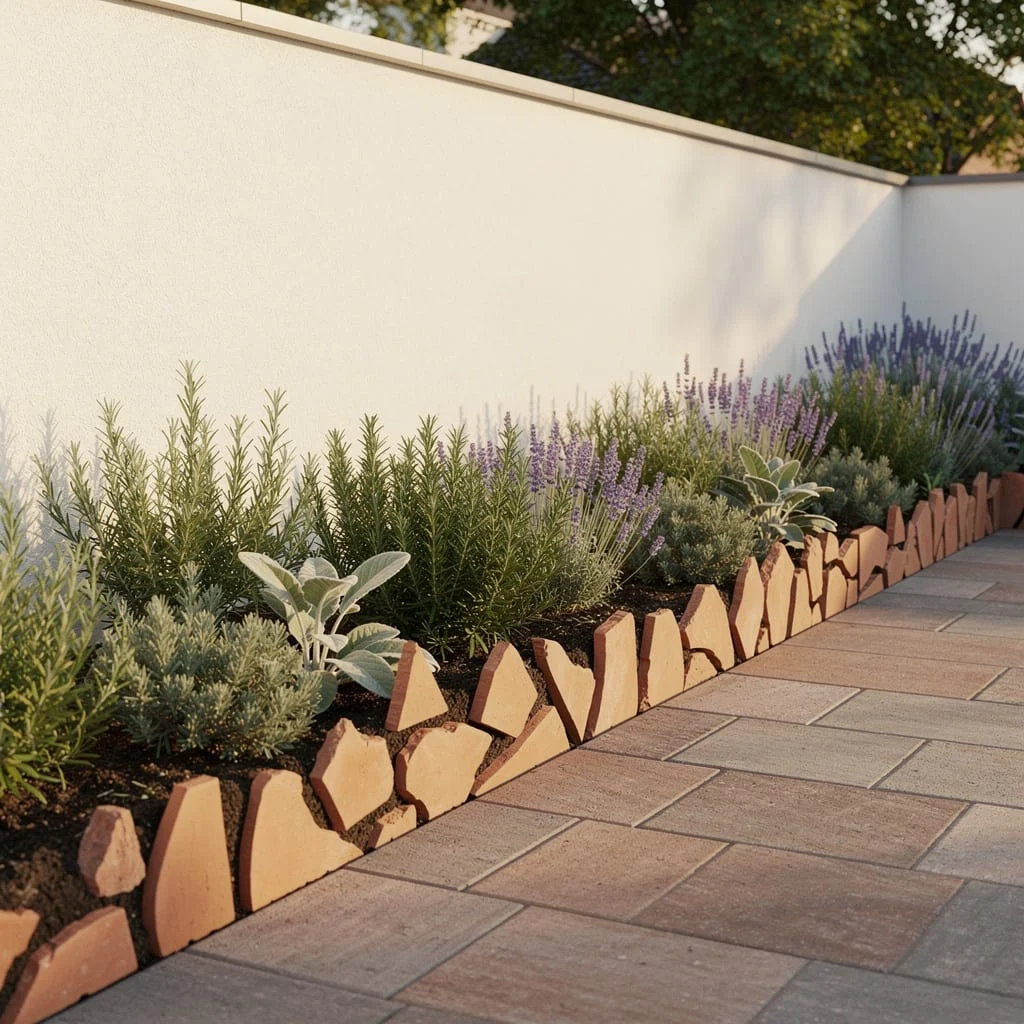
Along a patio or path, set irregular sandstone slabs on edge in a continuous row to define a narrow herb border planted against a white wall. The warm honey tones of sandstone suit the silvery, drought-tolerant palette of herbs — rosemary, lavender, sage, and lamb’s ear. The stone edge is low, typically four to six inches above soil level, which keeps the herbs the dominant element rather than the edging. This works best in a paved garden context where the sandstone slab edge bridges the planting bed to the surrounding paved surface. It reads as architectural while remaining inexpensive because the stone is irregularly cut salvaged material rather than dressed stone.
Hardwood Sleeper Driveway Edge
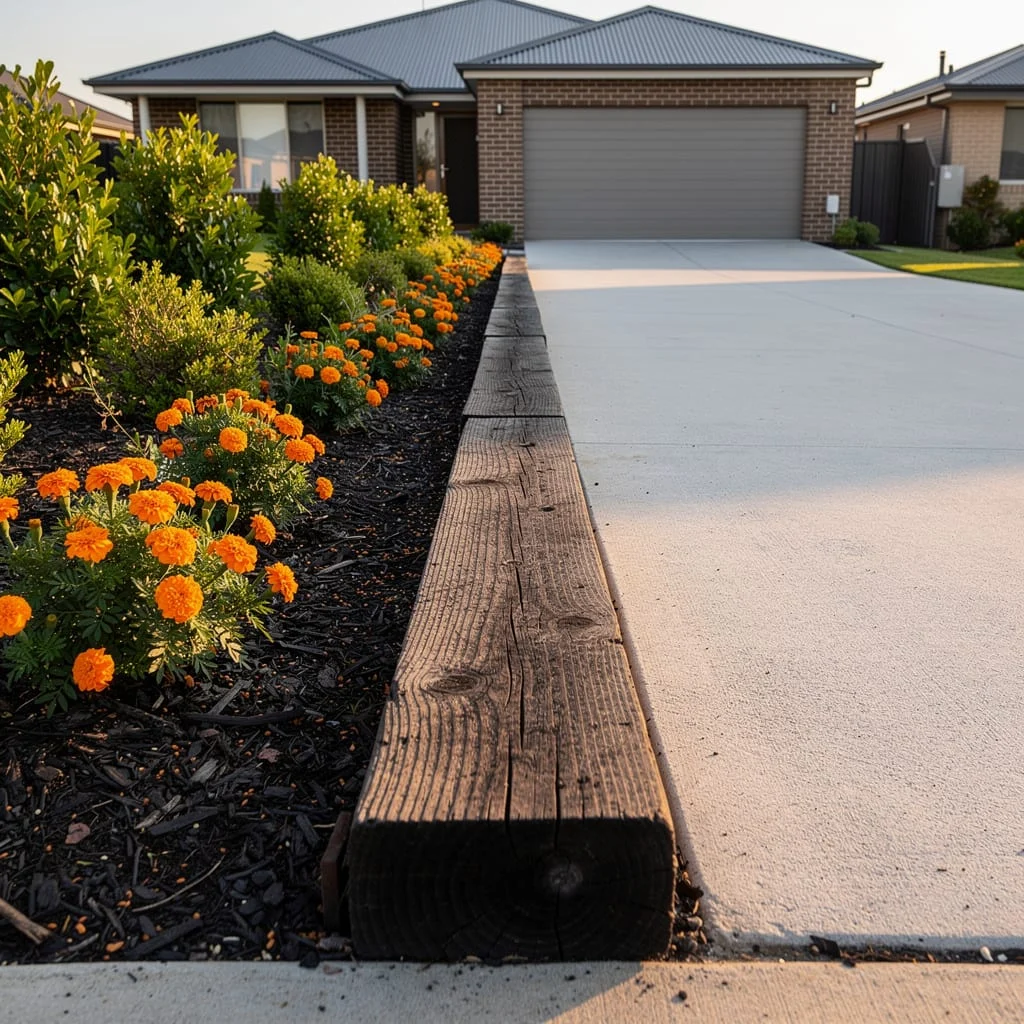
Along the edge of a concrete driveway, set a single hardwood railway sleeper flat on the ground running parallel to the drive, its long edge flush with the concrete. It serves as a generous, sturdy boundary between the driveway surface and the planting bed. Behind the sleeper, fill the bed with dark bark mulch and plant orange marigolds and compact evergreen shrubs. The dark sleeper against the pale concrete creates a clean two-tone boundary. The orange marigolds against the dark mulch and warm wood provide the color. This combination is extremely simple but highly effective because every element has been chosen to contrast with the one next to it — pale concrete, dark wood, dark mulch, bright orange bloom.
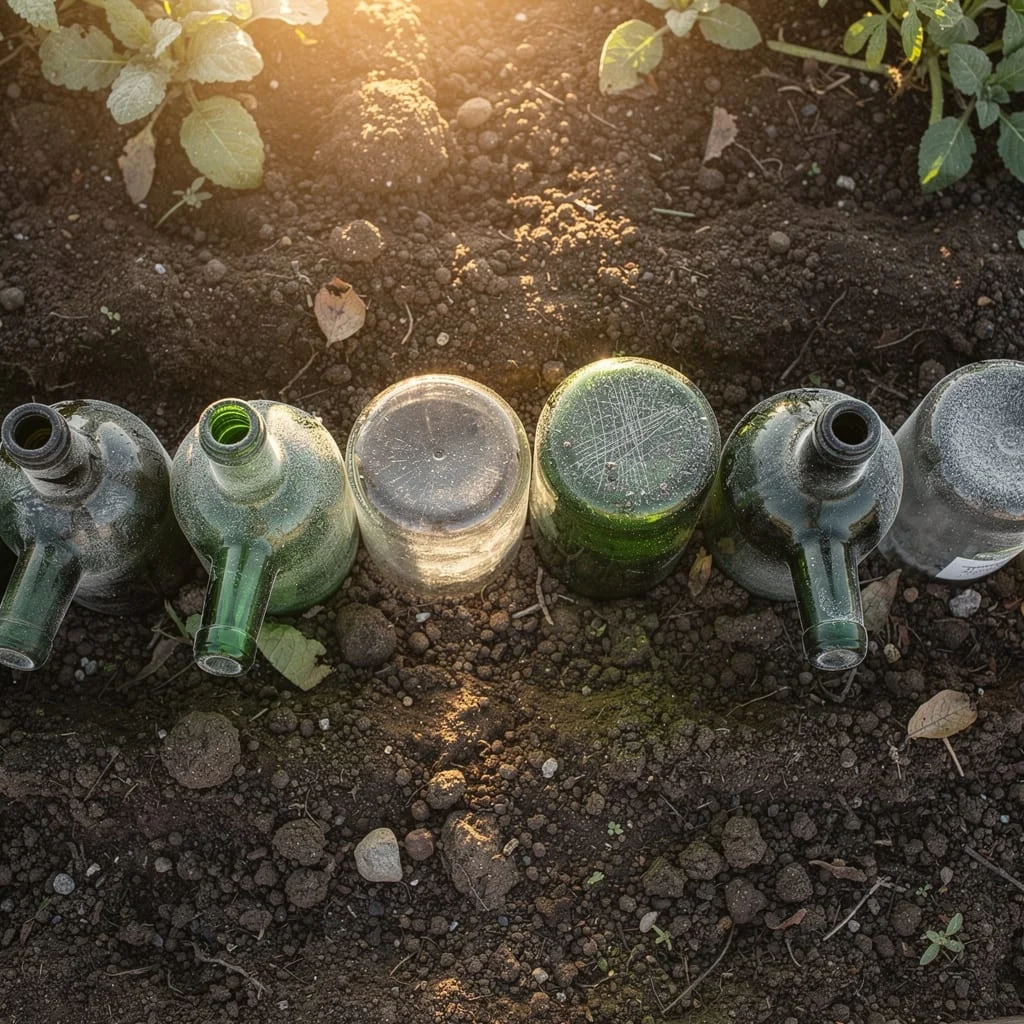
Wine Bottle Vegetable Garden Edge

Collect dark green wine or beer bottles in a consistent shape. Push each bottle neck-down into the soil along the vegetable bed edge so only the rounded base of each bottle is visible above ground. The dark green glass catches light and creates small lens-like reflections along the edge line, particularly effective in morning and late afternoon sun. Install them tightly so the bases are touching and the edge reads as continuous rather than a row of individual elements. This edging is genuinely beautiful in a kitchen garden context where tomatoes, cabbages, and lettuces are the planting behind it. The dark glass against dark mulch reads as a subtle, sophisticated border that costs nothing beyond the time to install it.
The Edge Is Never Really About the Edge
Every garden in this collection has one thing in common. The edging isn’t what you actually look at.
What you look at is the planting behind it, framed and contained by the edge. The edge is the punctuation mark at the end of a well-constructed sentence. You don’t admire punctuation. You just notice when it’s missing.
Get the line right. Keep it clean. Use whatever material makes sense for your budget and your aesthetic. That’s the whole job.