
There is a version of patriotic decorating that involves plastic tablecloths, paper plates with eagles on them, and a string of lights that dies by the second year. Nobody wants that version.
Then there’s the other kind. The kind where someone took an afternoon, gathered a few materials, and made something that actually looks considered. A flag painted on reclaimed wood. Hydrangeas in mason jars with small flags tucked between the stems. A door hanging that makes people stop on the porch and look.
The difference between them is not skill. It’s intention.
Every idea in this post can be made at home in an afternoon. Most of them cost very little. All of them look better than anything you’d find in the seasonal aisle.
The Three-Color Rule Is Your Best Friend
Red, white, and blue is a palette that works. But it only works when you treat it like a palette — with decisions about proportion, tone, and which shades you choose.
Not all reds are the same. A deep crimson reads as rich and considered. A fire-engine red reads as loud. Not all blues are the same. Navy is sophisticated. Royal blue can tip into juvenile. Choose your tones before you buy a single supply.
Proportion Matters
The most common mistake in patriotic decorating is using equal amounts of all three colors. Equal red, equal white, equal blue. Everything competing at the same volume.
Let one color dominate, one support, and one accent. Navy as the dominant tone with red as the accent reads as classic and restrained. White as the base with red and blue as accents reads as fresh and summery. Pick your hierarchy and stick to it.
Natural Materials Warm the Palette
Red, white, and blue against natural materials — raw wood, galvanized metal, seagrass, linen — reads as American farmhouse. The same palette against plastic or synthetic materials reads as a party supply catalogue.
Every project in this post is more effective with at least one natural material in it. A jute ribbon. A wooden slab. A clay pot. An unpainted tin can. The organic texture does the heavy lifting.
Small Details Make the Difference
The things that separate a good DIY from a cheap one are almost always small.
A bow tied with proper loops and tails rather than a limp knot. Paint that has been allowed to dry between coats rather than streaked. A flower arrangement where the stems are cut to different heights rather than all the same.
Don’t Overfill
The most common overfilling mistake happens with wreaths, centerpieces, and jars. More flowers, more ribbon, more everything until the piece reads as cluttered rather than abundant.
Leave breathing room. A wreath with some grapevine visible is more interesting than one packed solid. A jar with five stems has more presence than one with fifteen. Restraint reads as confidence.
Weather and Scale for Outdoor Pieces
Outdoor patriotic decor has two enemies: rain and scale.
For anything going outside, seal painted surfaces with an outdoor matte sealer. Use UV-resistant paint on items in full sun. Use wire or strong cord rather than ribbon for hanging pieces that will face wind.
For scale, outdoor pieces need to be larger than you think. A wreath that looks substantial indoors can disappear on the front of a house. A flag display that fills a wall on a porch reads correctly from the street. When in doubt, go bigger.
DIY Patriotic Decor Ideas Worth Making
Mason Jar Centerpiece on Wood Slice
Use three mason jars of the same size — quart Ball jars work well. Place them on a natural wood slice or cross-section slab that has had the bark left on the edges. The raw wood edge is the detail that makes this read as farmhouse rather than casual.
Fill the outer two jars with fairy lights — a single strand each, loosely coiled inside. Leave the centre jar for the flower arrangement. In the centre jar, place a mix of white garden roses, pink spray roses, white baby’s breath, and fresh greenery with American flags on wooden picks tucked throughout.
The fairy lights in the flanking jars provide a warm glow that makes the arrangement feel intentional even in daylight. In the evening they become the centrepiece’s main character. Set the whole display on a simple linen or burlap table runner and surround with simple clear wine glasses at each place setting.
Painted Flag Rocks for Garden Border
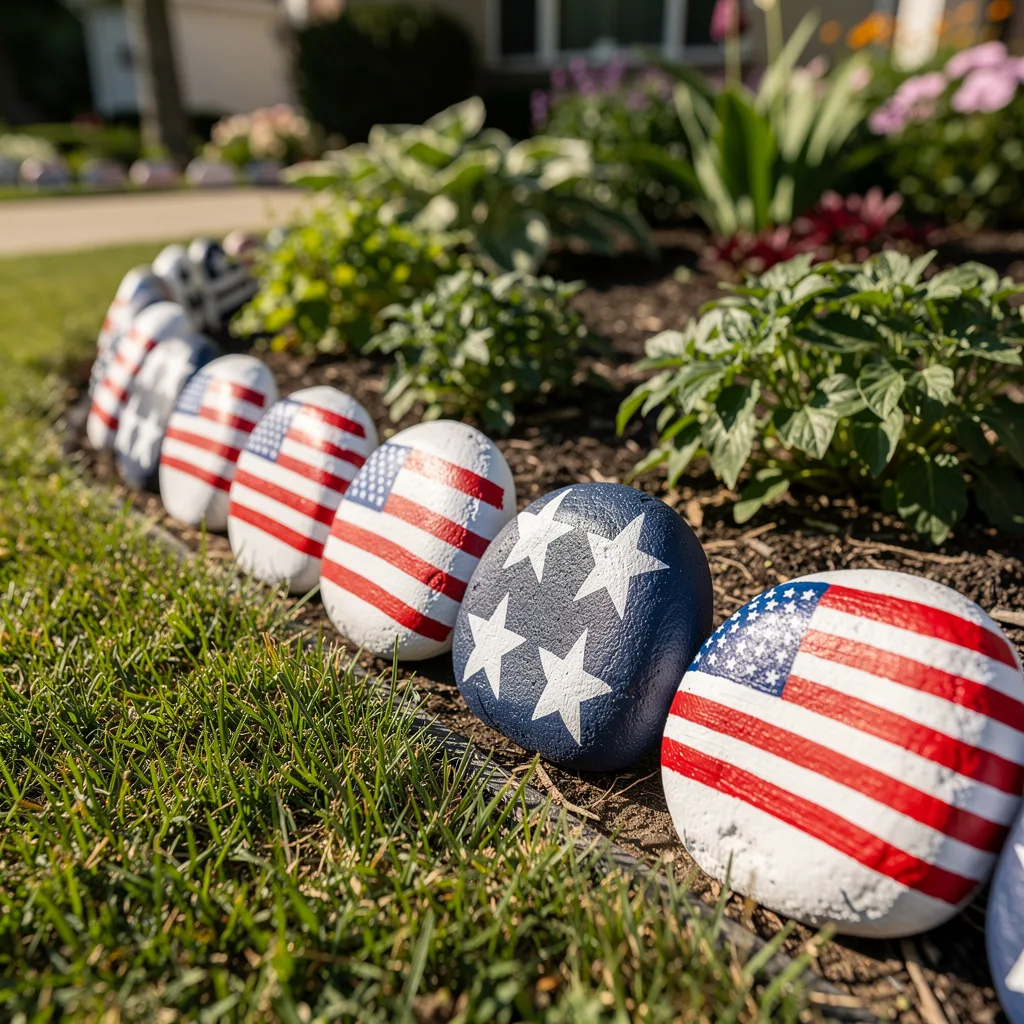
Collect smooth rounded rocks roughly the size of a large egg — collect them from a creek, purchase landscape stones, or use smooth river rocks from a garden centre. The rounder and smoother the surface, the easier they are to paint. Prime each rock with white paint first — two coats — to create a clean base. On some rocks, paint the American flag design: navy in the upper left corner with white stars, and alternating red and white horizontal stripes filling the rest of the surface. On others, paint the navy field with a cluster of white stars only.
Seal every rock with outdoor matte spray sealer — two coats. Arrange them in a row along a garden bed border, alternating the flag design with the star-field design, close enough that they sit touching. The row reads as a decorative border that is also a display.
Patriotic Holiday Tree
Use a full artificial Christmas tree — green is traditional but a white or frosted tree also works well for this palette. Fluff it fully before decorating.
Wind multiple ribbons through the branches from top to bottom using the looping method: cut ribbon into 18–24 inch lengths, fold in half, and tuck the fold deep into a branch so both tails hang forward. Use red-and-white striped wired ribbon, navy ribbon with white stars, and a thinner red polka-dot ribbon in a three-to-one ratio of wide to narrow. The ribbons should appear to cascade rather than wrap.
Add red and blue silk hydrangeas throughout, clustered in groups of three rather than evenly distributed. Hang star-shaped ornaments, small metal flag signs, and wooden holiday-themed picks throughout the tree. Top with a large starburst or star topper in red, white, and blue. The finished tree should feel abundant — this is not a place for restraint.
Striped Wine Glasses
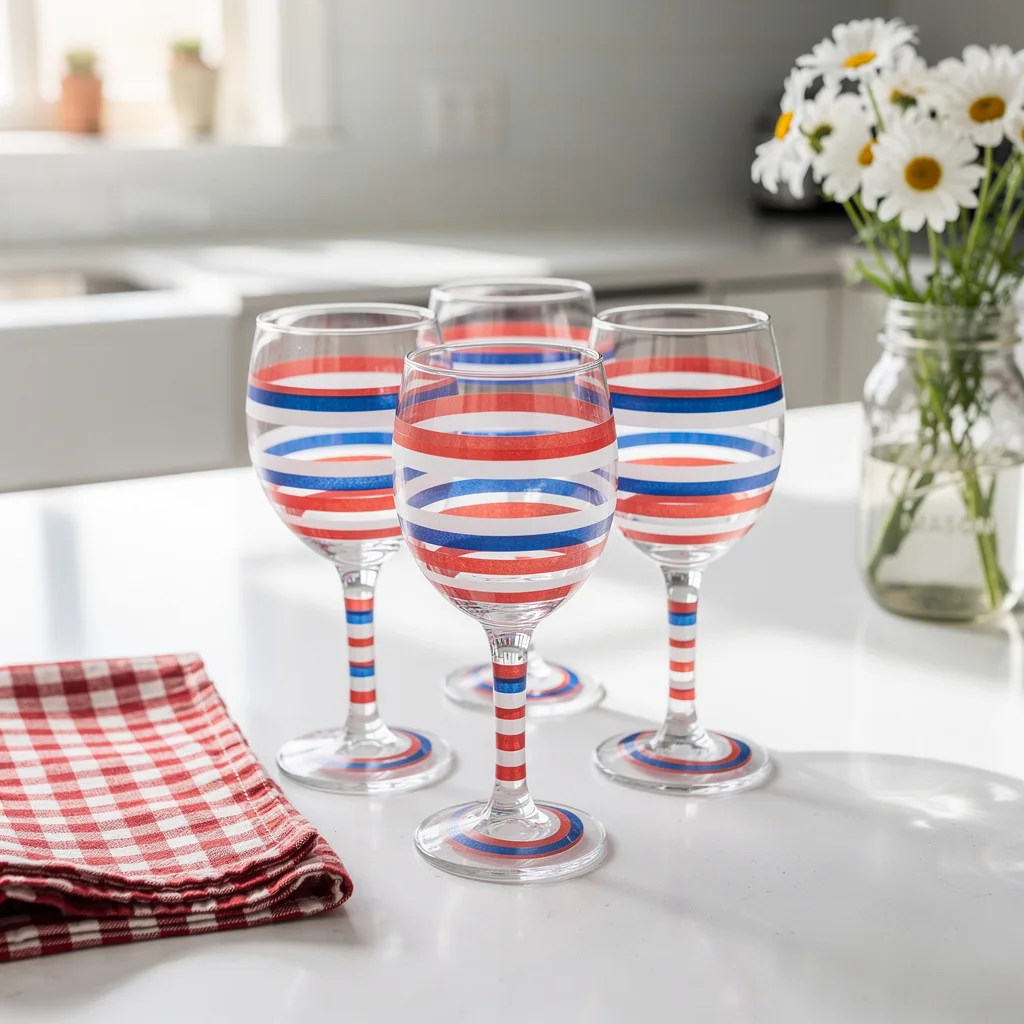
Use glass paint or enamel craft paint in red, white, and blue — make sure it is rated for glassware and is dishwasher-safe once cured. Working on clean, grease-free glasses, use a fine brush or paint pen to apply horizontal stripes around the bowl of each glass. Vary the stripe width — some stripes one centimeter wide, some two — and alternate red, white, and blue in no fixed pattern. Continue the striping down the stem and across the foot of the glass.
Allow the paint to dry completely, then bake the glasses in the oven according to the paint manufacturer’s instructions — typically 350°F for 30 minutes — to set the paint permanently. The curing step is essential; skip it and the paint peels on the first wash. Pair with red gingham or checked napkins and a mason jar of white daisies for a complete table setting.
Painted Terracotta Bell Door Hanging
Take two terracotta pots of different sizes — one standard and one slightly smaller — and invert them so they hang mouth-down like bells. Paint the lower section of each pot with horizontal red stripes on a natural clay background. Paint the rim area navy blue and add small white star shapes using a star stamp or a thin brush.
Wire the two pots together through their drainage holes with a length of sturdy wire, leaving the smaller pot just above and in front of the larger one. Surround both pots with a bundle of artificial or fresh greenery — small-leafed filler stems in bright green work well — wired to the same cord so the greens frame the bells on both sides and trail downward.
At the top, tie a multi-layered bow using three ribbons: navy blue with white stars, red and white ticking stripe, and a narrower red grosgrain. The layered bow creates a full, textured topper that finishes the piece. Hang from a nail or wreath hook on a barn-style or painted wooden door.
Cupcake Liner Pom-Pom Wreath
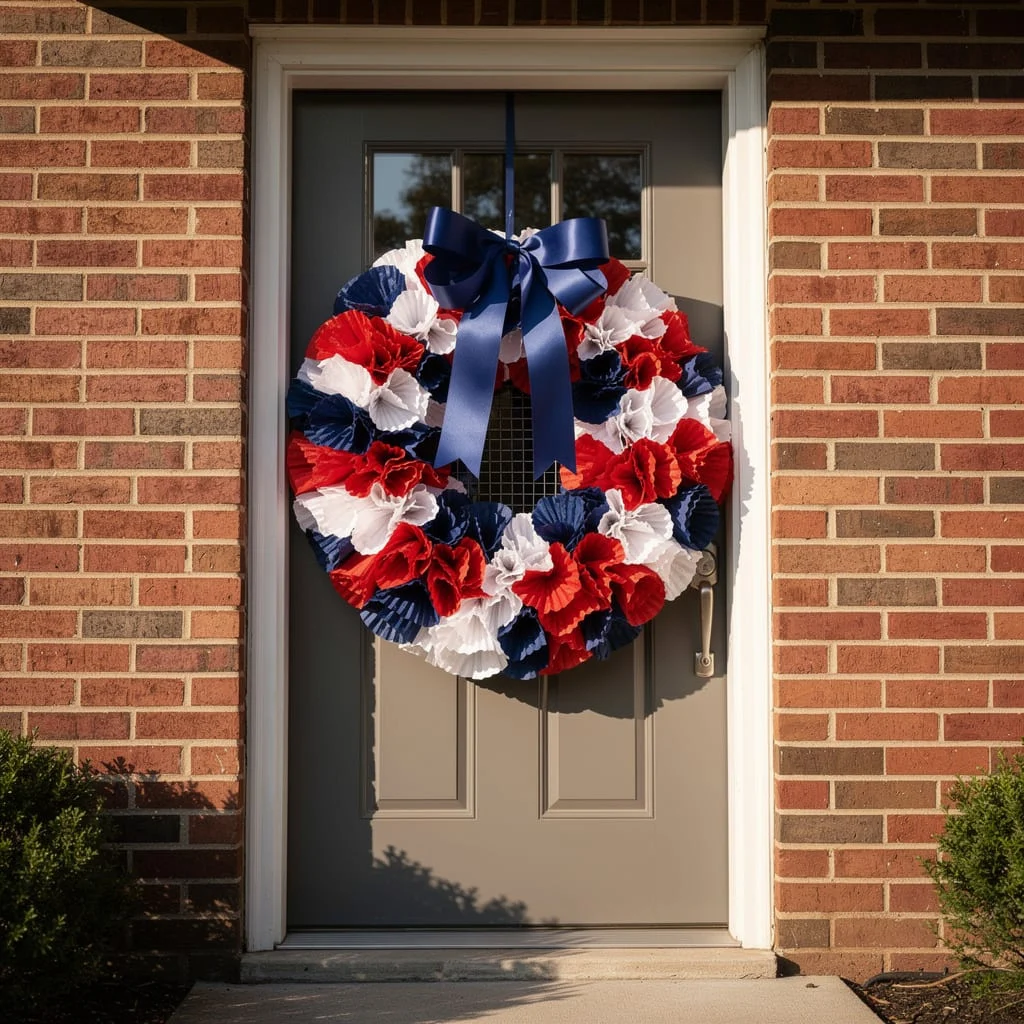
Use a wire wreath frame — 18 inches in diameter. Gather paper cupcake liners in red, white, and navy blue — you will need approximately 100 to 120 liners total. For each pom-pom, stack four liners in the same colour, fold the stack in half, then in half again, and twist a short piece of wire through the centre point. Fan out the layers to create a full, ruffled flower shape. Attach each pom-pom to the wire frame by twisting the wire tails around the frame.
Fill the entire frame, packing the pom-poms tightly so no wire shows. Arrange the colours in a roughly even distribution rather than in stripes or sections — the mixed distribution reads more floral than flag. Finish with a wide navy satin ribbon tied in a full bow at the top. The finished wreath is lightweight, weather-resistant, and holds its shape well.
Grapevine Wreath with Stars and Ribbon
Start with a grapevine wreath — 18 to 22 inches in diameter. Leave a significant portion of the right side of the wreath bare; this open area is where the metal star ornaments will hang.
Wire two large flat metal stars to the open section of the wreath — one at the top of the open area and one below it, slightly overlapping. Paint one star navy with white painted stars across it, and the second in red and white horizontal stripes. Let them overlap slightly so they read as a pair.
On the left side, build a full bow using three ribbons wired together: a wide navy ribbon with white stars, a narrower red ribbon with white polka dots, and a medium red grosgrain. The bow should have six to eight loops and long tails. Wire silk red geraniums, blue hydrangea clusters, white button flowers, and fern or filler greenery into the wreath around and below the bow, letting some greenery trail downward well below the wreath base.
Painted Pinecone Galvanized Bucket
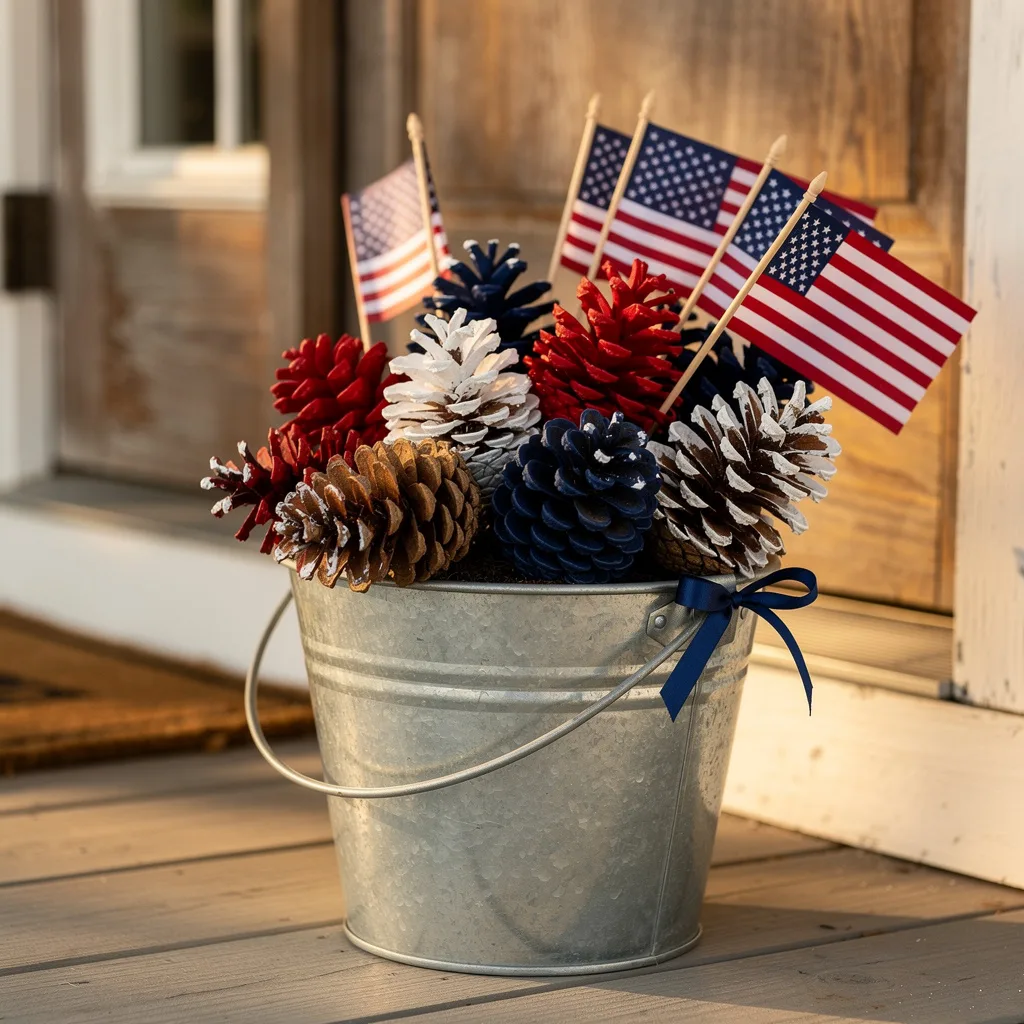
Collect pinecones — large ones, ideally five to seven inches long. Working outside, paint them in groups: some in deep red, some in white, some in navy blue. Apply two coats of craft paint, allowing it to dry between coats. Leave a few unpainted in their natural brown tone — the natural ones ground the palette and prevent it from reading as too artificial.
Fill a medium galvanised metal bucket with floral foam or crumpled newspaper to within two inches of the rim. Arrange the pinecones standing upright in the bucket, mixing colours and sizes as you go. Insert five small American flags on wooden picks at varying heights throughout the pinecones — aim for different angles rather than all vertical. Tie a navy grosgrain ribbon bow to the bucket handle. Place the finished bucket on a front porch step or beside a doorway. It handles outdoor conditions well and looks effective day and evening.
Fabric Bunting Porch Garland
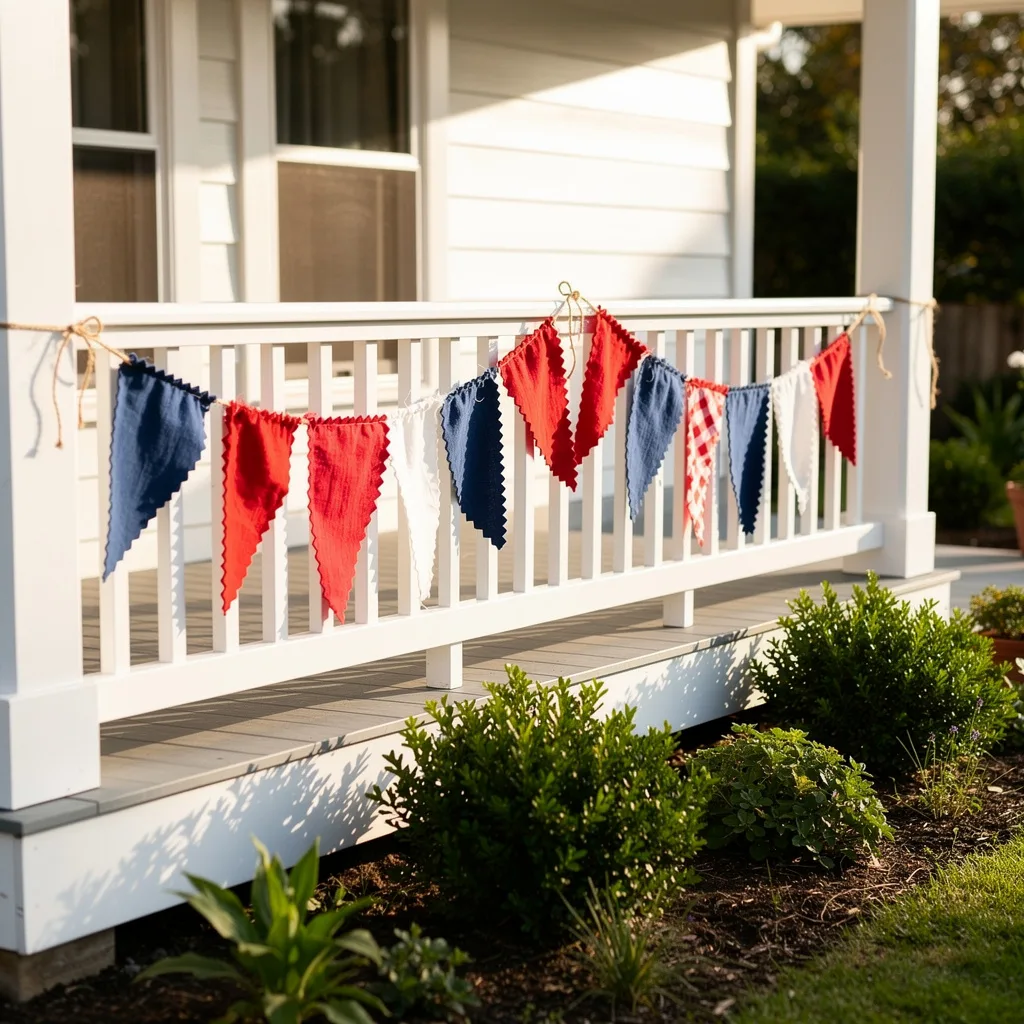
Cut fabric triangles in red, white, and navy — use muslin, linen, or cotton fabric in those colours. Cut each triangle approximately 8 inches wide at the top and 12 inches tall. Use pinking shears for the two angled sides to create a decorative zigzag edge that also prevents fraying without hemming. Fold the flat top of each triangle over a length of natural jute twine and hot glue the fold closed, spacing each pennant approximately one inch apart. Mix the colours in a repeating pattern — navy, red, white, or vary it with the occasional red gingham or check print pennant as a contrast detail.
Tie the ends of the jute to porch posts, railings, or hooks so the garland hangs in a relaxed curve rather than pulled taut. The natural drape is what makes fabric bunting look handmade in the best sense. Use one or two decorative clothes pegs or bows at the tie points to conceal the knots.
Chalkboard Memorial Day Door Sign
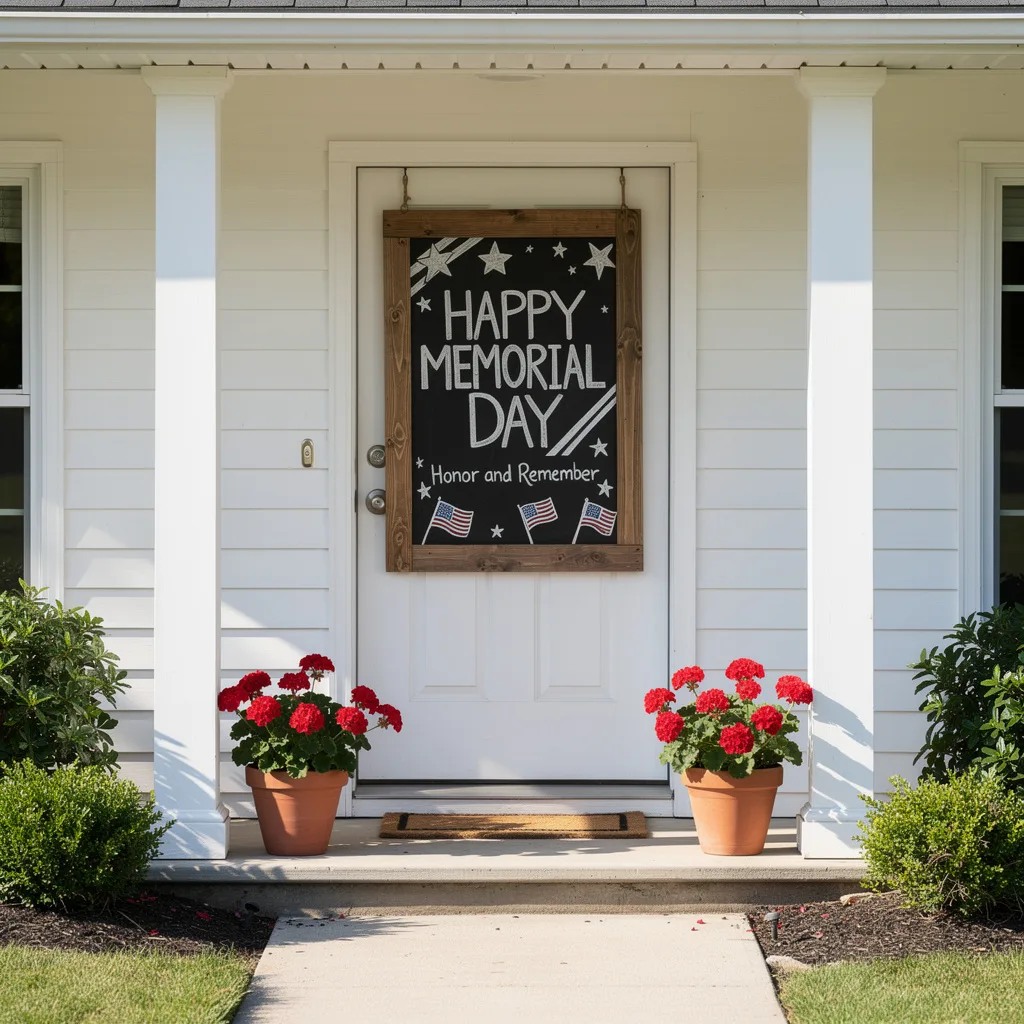
Build or source a simple rectangular chalkboard in a natural wood frame — pine or cedar works well. The board should be large enough to fill most of a standard front door: approximately 20 by 28 inches. Using chalk or a chalk pen, letter “Happy Memorial Day” in large, informal block lettering across the upper two-thirds of the board. Below it, in a smaller script or print, add “Honor and Remember.” Draw small stars in the corners and diagonal stripe accents in the upper area.
Draw three small American flags along the bottom edge of the lettered section. Sand the frame lightly so it has a slightly rough, unpainted quality. Hang from two lengths of jute cord tied through holes drilled at the top of the frame. Flank the doorway with terracotta pots of deep red geraniums at ground level — the red flowers against the white siding and chalkboard complete the entry display.
Painted Flag Lanterns
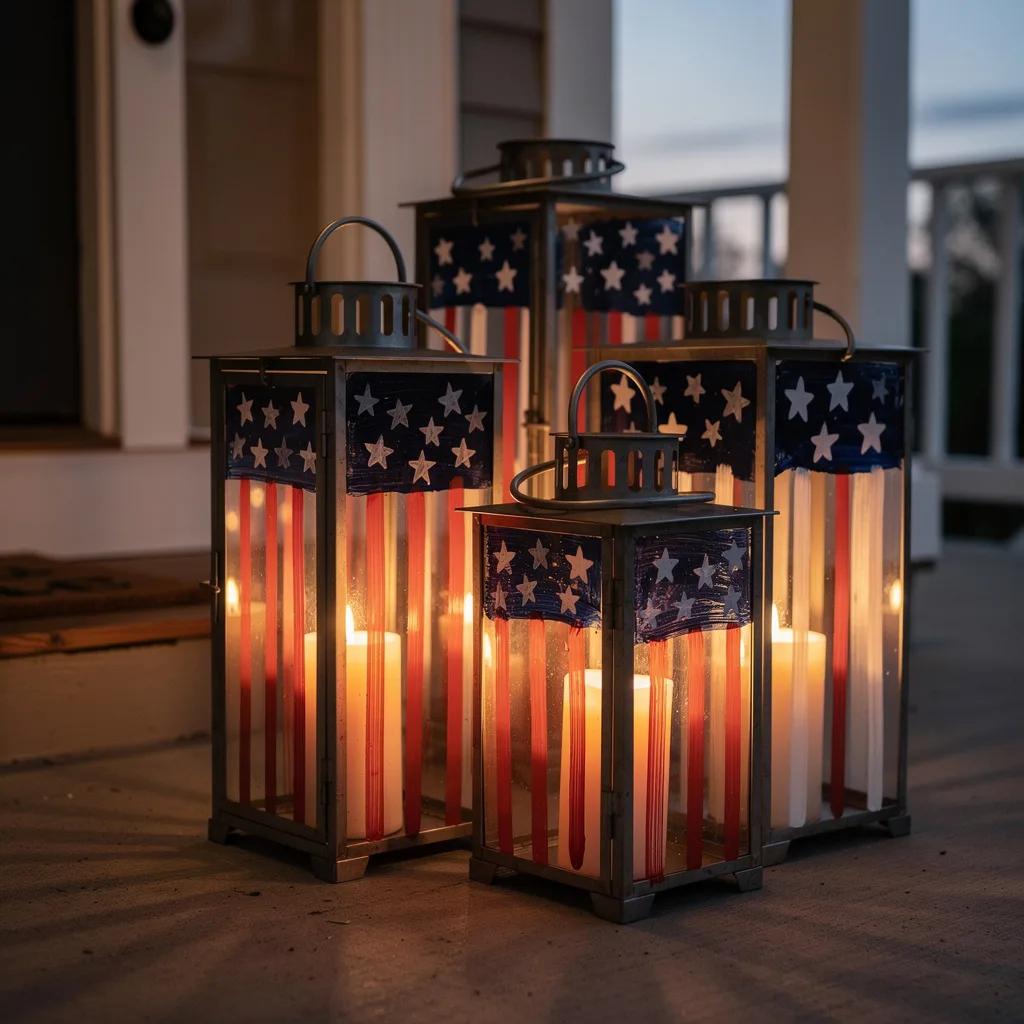
Source three metal lanterns in graduated sizes — the kind with glass panels in a metal frame. Clean the glass panels with alcohol to remove all grease. Using red, white, and navy craft paint, paint an American flag design directly on the glass of each lantern. Work the navy field with white stars across the upper portion of one panel, and alternating red and white vertical stripes down the remaining panels. The paint application should be visible and slightly rough — this is a folk-art interpretation, not a precise rendering.
Allow to dry, then seal with a clear glass-compatible sealer. Place a pillar candle or large LED candle inside each lantern. Arrange the three lanterns in a group on a porch — tallest at the back, shortest at the front. When lit at dusk, the painted flag pattern glows warmly through the glass. The effect is most dramatic when the surrounding light is low.
Red, Rose, and Daisy Door Wreath
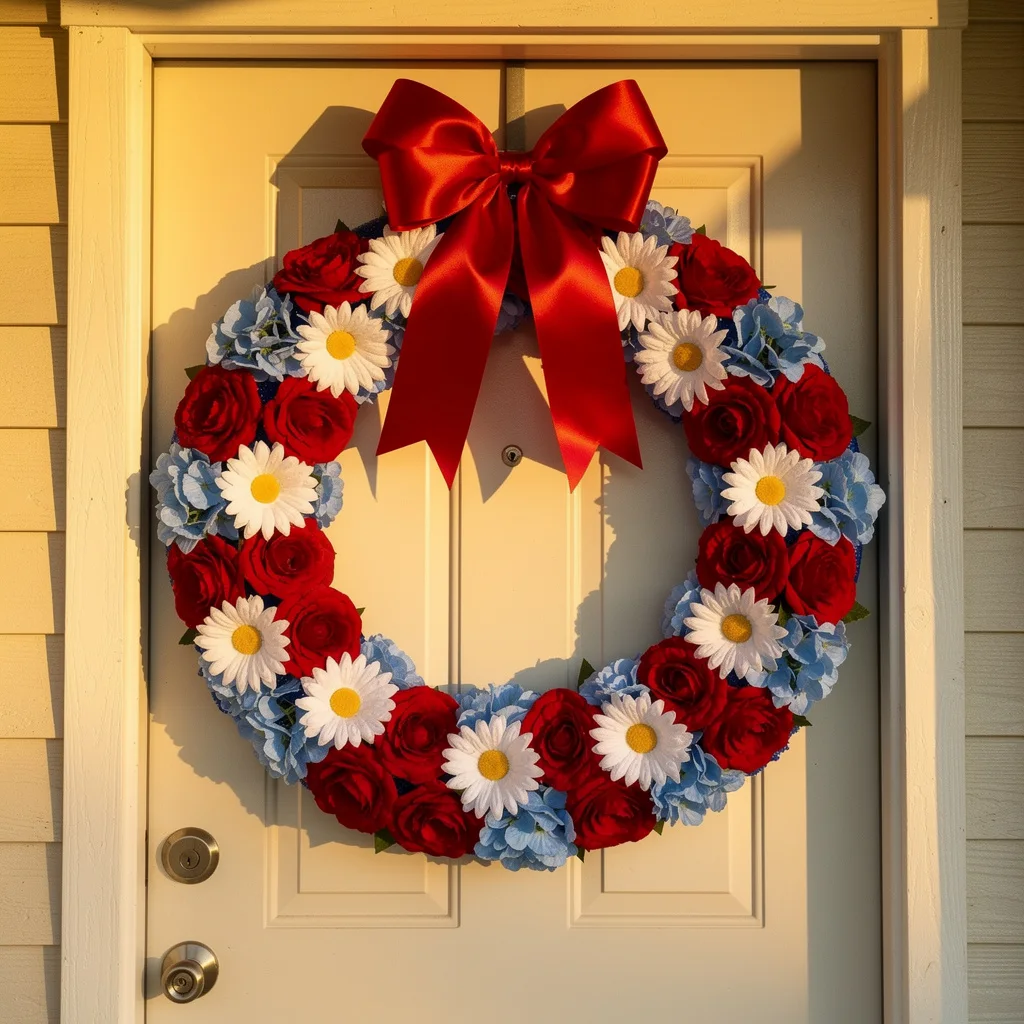
Use a wire wreath frame and a hot glue gun. Source silk or high-quality faux flowers in deep red roses, white daisies with yellow centres, and blue hydrangea clusters. Begin by hotgluing the hydrangea clusters around the full circumference of the frame to create the blue layer. Then add red roses evenly spaced, gluing them between and slightly on top of the hydrangea clusters. Finally, add white daisies in the remaining gaps — the daisy centres provide a yellow accent that warms the overall palette.
The wreath should be packed full enough that no frame is visible. Attach a wide red satin ribbon bow at the top — six to eight loops, with long tails that drape down either side of the wreath. The bow should be as wide as the wreath itself at its widest point. Hang on a cream or pale door where the red bow reads with maximum contrast.
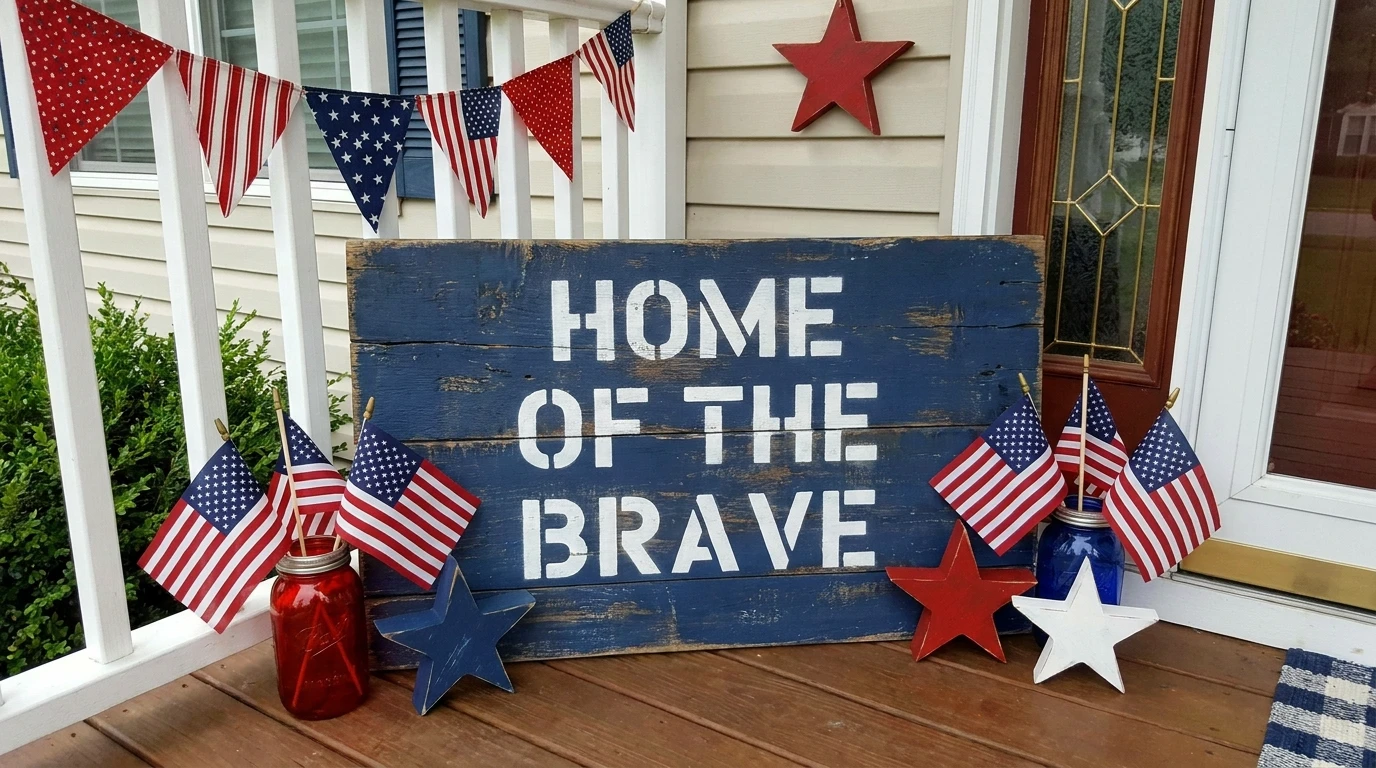
Reclaimed Wood Flag Panel
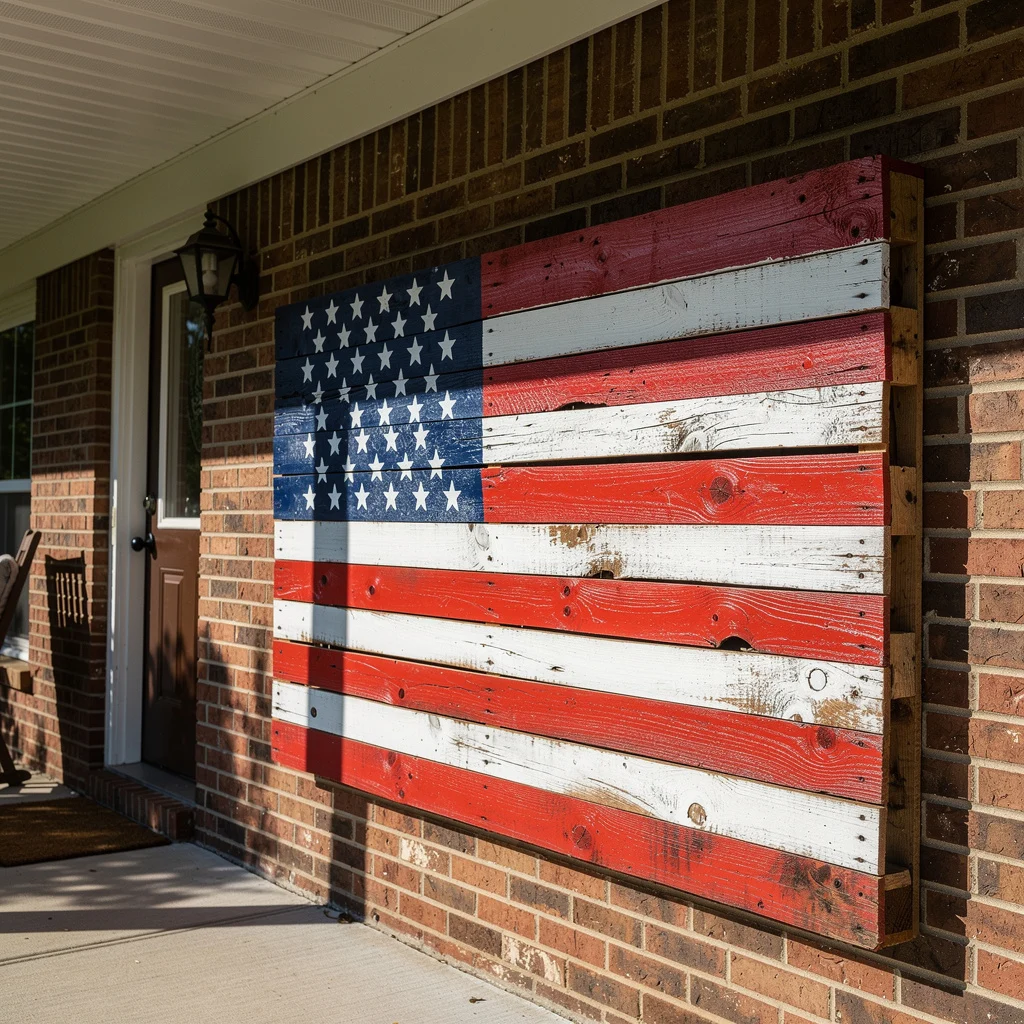
Source six to eight rough-sawn or reclaimed timber boards in the same width — fence boards, pallet boards, or scaffold planks all work. Cut them to the same length and join them side by side using two horizontal cleats screwed across the back. Paint the assembled panel as an American flag. Start with the navy field in the upper left — roughly one third of the width and one third of the height. Paint alternating red and white stripes across the remaining width. Use a star stamp or cut star stencil to add white stars to the navy field.
The paint should not be perfectly smooth or uniform. Allow brushstrokes to show. Allow the natural wood grain to break through the white stripes slightly. The aged, imperfect quality is the look you are after. Lean the finished panel against an exterior wall or fence rather than mounting it flush — the lean reads as intentional and adds shadow depth.
Patriotic Kitchen Towels
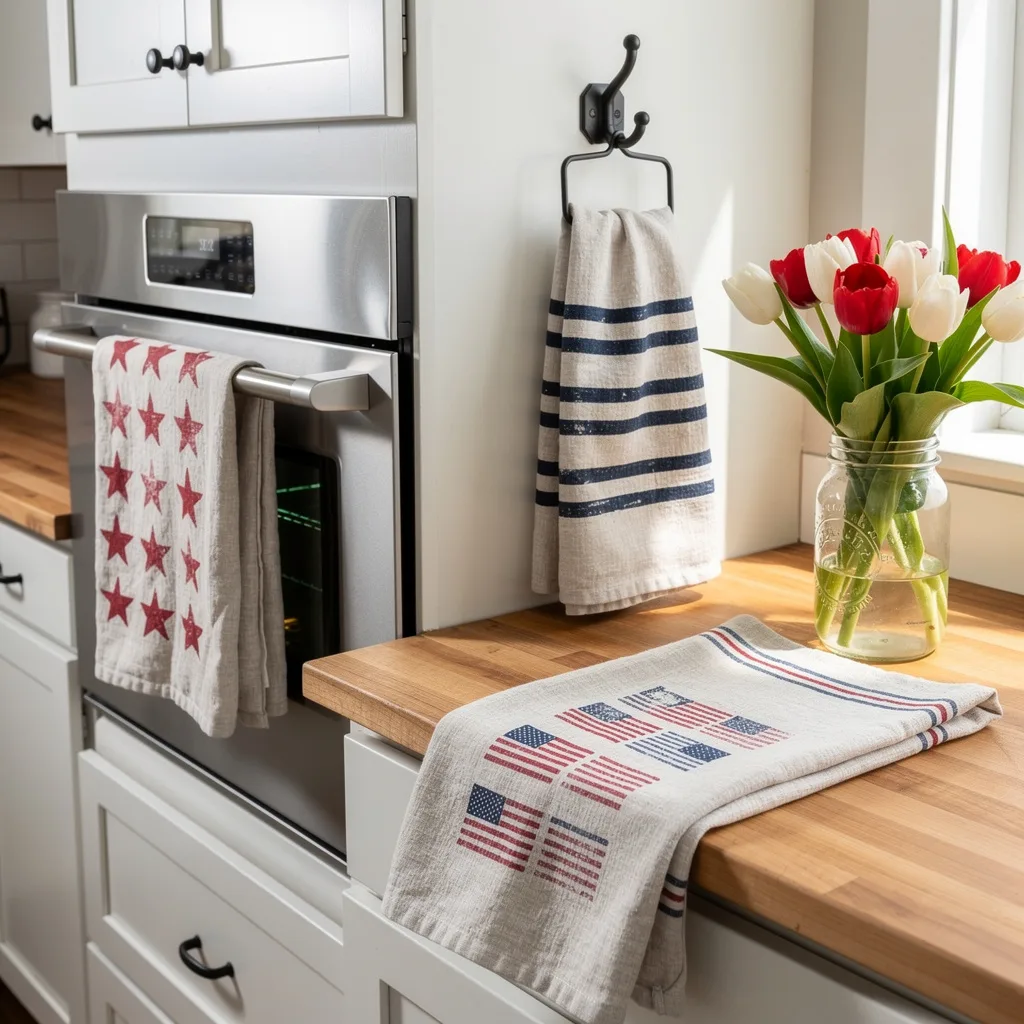
Use natural linen or cotton flour sack towels in a natural undyed tone as the base. Wash them before painting so the fabric is pre-shrunk and accepts paint well. Using red and navy fabric paint and a flat brush, paint a grid of small American flags across the lower portion of one towel — four or five flags in a row with thin red and navy stripe borders above. On a second towel, paint a large red star in each corner and a row of three smaller stars across the centre. On a third, paint a series of bold horizontal navy stripes across the lower third.
Heat-set all painted towels with a hot iron once the paint is dry — press firmly over the painted areas for 30 to 45 seconds. This step is essential for wash-fastness. Hang them layered on an oven handle and draped over a hook, and place a mason jar of red tulips and white flowers on the counter nearby.
Star and Felt Pennant Fireplace Mantel
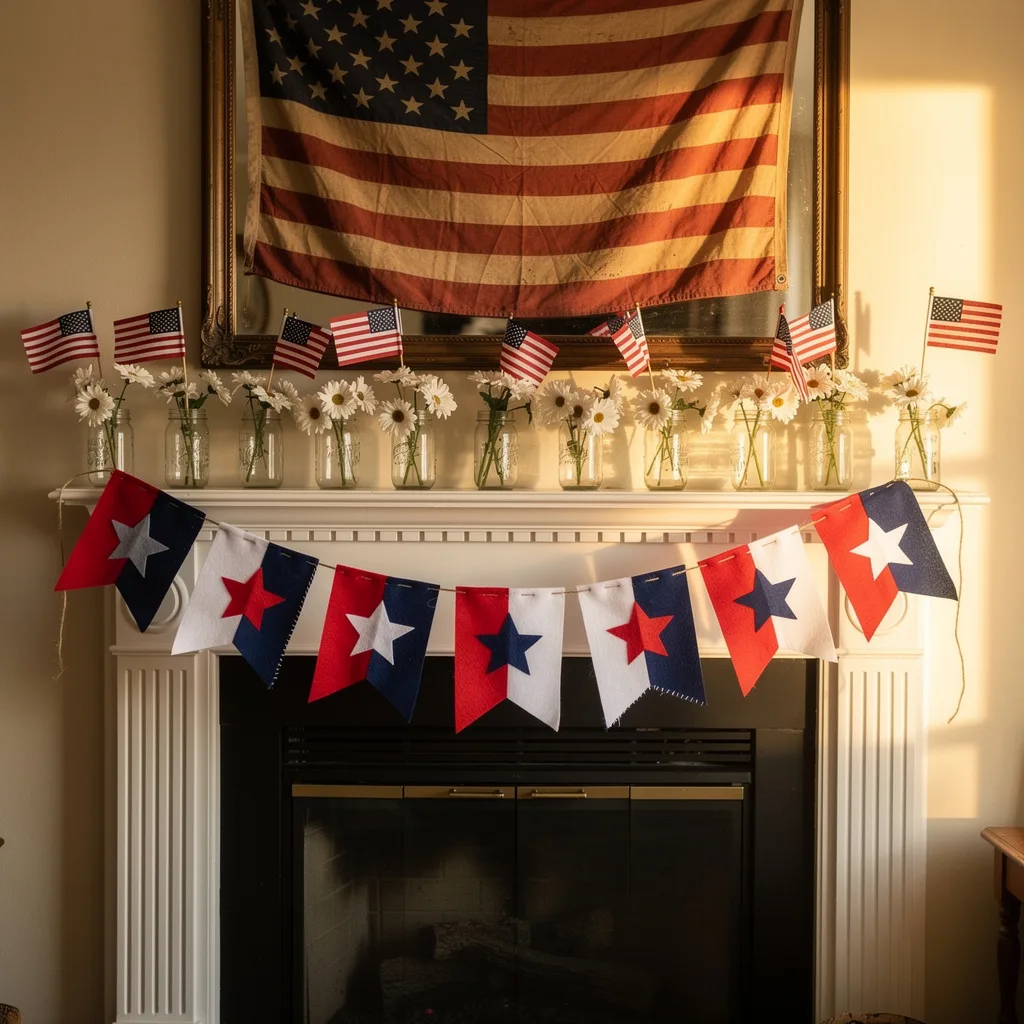
Cut pennant shapes from red, white, and navy felt — approximately 7 inches wide and 10 inches tall. Make at least twelve pennants. On each pennant, cut or glue a star shape in a contrasting colour to the centre: white star on navy, navy star on red, red star on white. Stitch the top edge of each pennant over a length of jute cord using a simple whip stitch or hot glue. Drape the pennant garland across the front of a white painted mantel, allowing it to dip in a generous curve.
On the mantel surface, line up eight to ten small mason jars in a row, each holding two or three white daisy stems and one small American flag on a wooden pick. The uniformity of the jars and the natural variation in the flower placement create a clean, deliberate arrangement. Behind the mantel display, hang or prop a large vintage-style American flag — aged, slightly faded, with visible fabric texture. This becomes the backdrop to the entire composition and transforms the mantel into a full patriotic vignette.
Reclaimed Wood Star Cluster
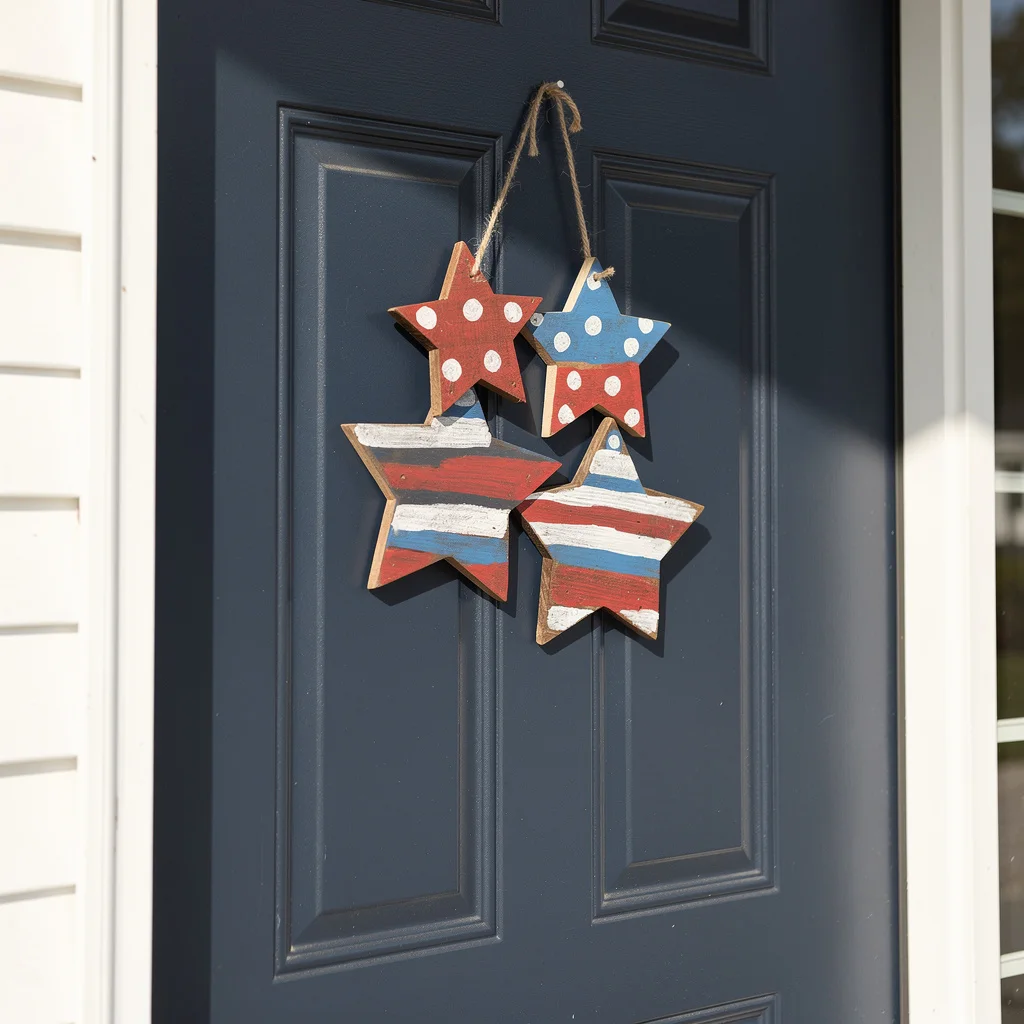
Cut four star shapes from reclaimed timber or rough-sawn pine board in two sizes — two small (approximately 8 inches point to point) and two larger (approximately 12 inches). Sand the edges smooth but leave the face surfaces rough. Paint each star differently: one in solid red with white polka dots, one in navy with white polka dots, one in red and white horizontal stripes, and one in blue and white horizontal stripes. Allow the paint to look slightly worn — apply one coat, let dry, then lightly sand the raised grain so the wood shows through in places.
Drill a small hole at the top of the largest star and thread a length of natural jute cord through all four stars so they hang as a cluster, the two smaller ones at the top and the two larger ones below, slightly overlapping. Hang from a single nail on a navy front door. The dark door makes the painted wood stars pop at maximum contrast.
Flag-Painted Tin Can Planters
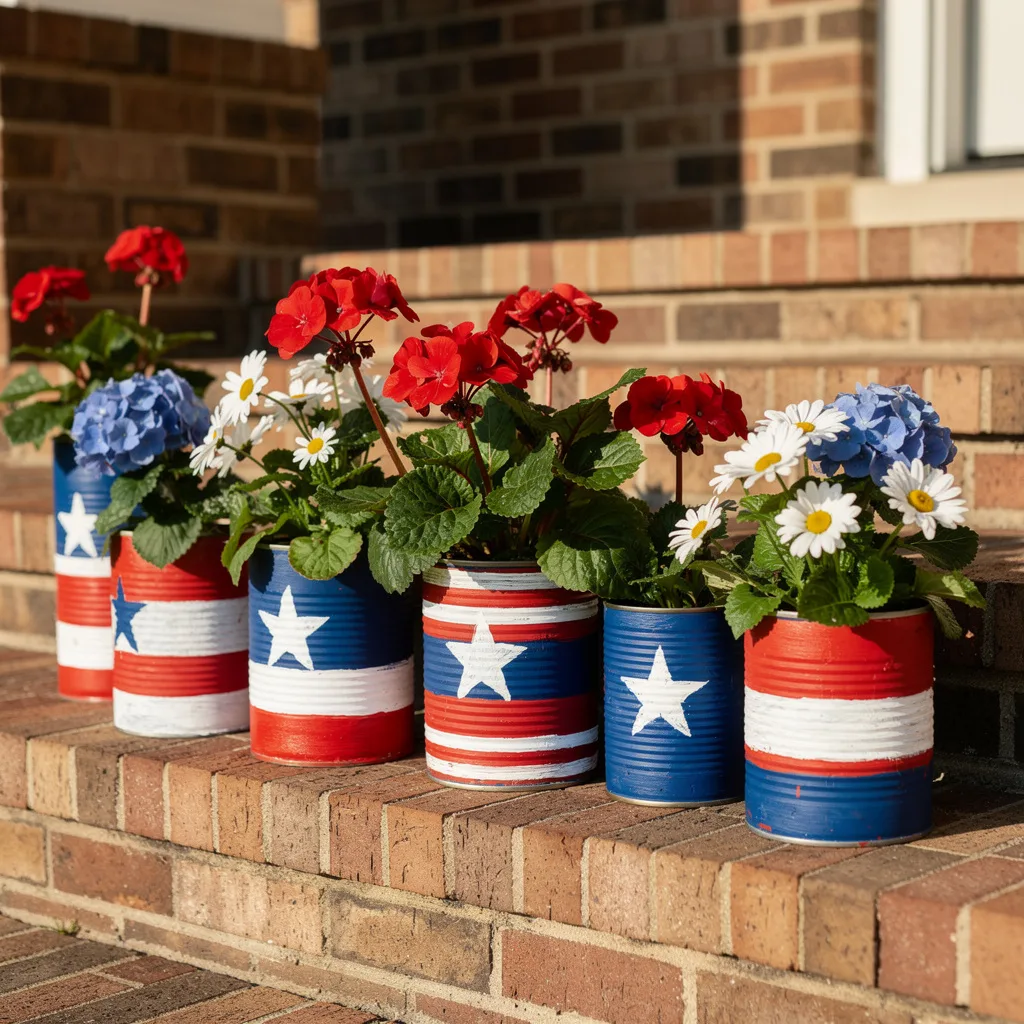
Wash and remove the labels from five or six large tin cans — standard 28-ounce cans work well, as do larger catering-size tins for more impact. Use a hammer and nail to punch drainage holes in the bottom of each can. Prime the outside of each can with a spray primer, then paint the full exterior. Alternate the designs: some cans with a navy blue upper band and white star, red and white horizontal stripes below; others with the stripes reversed. Paint the stars freehand or use a star stencil — the slight irregularity of a freehand star reads as charming rather than sloppy at this scale.
Seal with outdoor sealer if the planters will be outside. Plant each can with a single type of flower in a patriotic colour: red geraniums, white daisies, or blue hydrangeas. Line the cans in a row on a brick step or low wall, alternating the flower colours across the row so the overall display reads red, white, blue, red, white across the top.
The Easiest Upgrade of All
Before buying supplies for any of these projects, look at what you already have.
A plain white vase becomes patriotic with a red bow and a handful of flags tucked into whatever is already in it. A plain wooden tray becomes a seasonal display surface with three candles and some stars scattered across it. A wreath frame you already own becomes a new wreath with thirty minutes and a bag of faux flowers.
The goal of DIY decor is not to spend the least money or make the most things. It’s to make something that feels like you put thought into it.
That thought is what people actually notice. Not the cost. Not the material. The thought.
So take the afternoon. Tie the bow properly. Paint the second coat. Cut the stems at different heights.
The difference between something that looks good and something that looks great is almost always just that.