
Your backyard is not a storage unit for outdoor furniture you bought and then left out to season. It is not a patch of lawn you maintain out of obligation. It is not the place you look at through the kitchen window while telling yourself you’ll sort it out next summer.
Next summer is now. You’ve run out of excuses.
The problem with most backyard projects isn’t execution. It’s that people start with the wrong question. They ask “what can I add?” instead of “what do I actually want this space to do?” Add enough things to an outdoor space without a unifying purpose and you end up with a gravel patch next to a dead succulent next to a pizza oven nobody uses next to three different kinds of chairs that don’t speak to each other. Character is not the same as clutter.
From Lawn to Living Space
The Zone Problem Nobody Names
Most backyards fail because they’re treated as one undivided space. You put things in it — a table here, a chair there — and then wonder why it never feels like a place rather than a collection of objects.
Rooms work because they have boundaries. Your backyard needs the same logic applied outdoors. A gravel pad edged in steel. A circular fire pit area separated from the lawn by a stone border. A pergola that frames one corner. Boundaries create zones, and zones create the feeling that something was intentionally designed.
The Lawn Is a Floor, Not a Feature
Grass is a surface. It connects zones. It softens transitions. Used as the entire backyard, it’s just a mowing obligation.
The moment you treat the lawn as the floor between destination points — a seating area, a kitchen zone, a pond, a garden bed — the space acquires structure. You don’t need to rip it all out. You need to give the grass something to be in contrast with.
When Budget Meets Ambition
The best backyard projects are not the most expensive ones. A pallet bench with lavender pots either side can be more considered than a ten-thousand-dollar paving job done without a plan.
The question to ask before every project is: what does this space need to do, and what is the simplest construction that achieves it? A round gravel pad and a fire pit ring solves “we want somewhere to sit outside at night” as elegantly as anything more elaborate. Solve the function first. The aesthetics follow.
The Materials That Do the Most Work
Gravel as a Design Tool
Gravel gets dismissed as a low-effort filler. It’s actually one of the most flexible materials in an outdoor space. It drains. It defines. It provides a neutral base that makes any furniture or plant placed on it read clearly. And it costs a fraction of poured concrete or paving.
The key is containment. Gravel without a proper steel, timber, or stone edge just migrates. It ends up on the lawn, on the path, on your feet inside the house. Get the edging right — clean, level, fully contained — and gravel becomes a proper surface rather than an intermediate state before you decide what to do.
Timber’s Two Lives
Timber in a backyard context works in two very different registers. Fresh-cut, oiled hardwood reads as clean and modern. Weathered, rough-sawn reclaimed timber reads as relaxed and organic. Both are correct. Neither is wrong. What doesn’t work is putting them in the same project without a deliberate reason.
If you build a cedar pergola, the furniture under it should be clean and simple. If you build something from reclaimed pallet wood, the plants around it should be loose and unmanicured. Let the material set the register, then respect it everywhere else.
Metal That Ages With You
Corten steel, black powder-coated steel, galvanised metal — these are the backyard materials that improve over time rather than deteriorating. The corrugated steel raised bed looks better after two years of weathering than it did when it was installed. The black powder-coated planter develops a depth of tone that new metal doesn’t have.
Specify metal fittings, edging, and structures wherever possible. They require no maintenance, they age gracefully, and they introduce a crispness that timber alone rarely achieves.
Before You Spend Anything, Decide These Three Things
Shade or Sun?
Where your backyard gets sun determines everything else. A pergola needs to be positioned for afternoon shade, not morning light. A seating area in full west-facing sun in summer will be unusable by 3pm. A pond needs protection from full sun to control algae.
Spend a weekend noting where the sun falls at 9am, 1pm, and 5pm before you commit to anything. That data will save you from every expensive mistake.
Levels and Drainage
Before any hard landscaping, understand where water goes. Build a gravel pad in a slight depression and it becomes a puddle after rain. Set a pond in the wrong place and it floods into the garden. Install a pizza oven on a slab without drainage slope and the concrete stains permanently.
Water moves downhill. Work with that before you build against it.
Connection to the House
Every great backyard has a clear relationship between the house and the outdoor space. There should be an obvious path from the back door to the main outdoor zone — whether that’s a stepping stone path, a paved connection, or a pergola structure attached to the building.
Backyards that feel disconnected from the house feel like they belong to a different property. The link between interior and exterior is not decorative. It’s structural.
Backyard Projects Worth Your Weekend
The Cedar Gazebo
Build or purchase a hexagonal cedar gazebo frame — six sides, a pyramidal cedar-shingled or tongue-and-groove timber roof, with a rooftop cupola or vent cap as the apex detail. Stain or oil the exterior in a warm red-brown tone. Build a U-shaped bench seat around the interior perimeter using the same timber, set on a raised cedar deck floor. Fit the bench with thick outdoor seat cushions and add scatter cushions in warm accent colours — rust, orange, gold. Hang a rattan or woven pendant light from the central apex point. String warm festoon lights along the interior roofline. Hang two or three small planted baskets from the structural corner posts. The gazebo is not a decoration added to the garden. It is a destination within the garden. Treat it as a room.
The Gravel Fire Circle
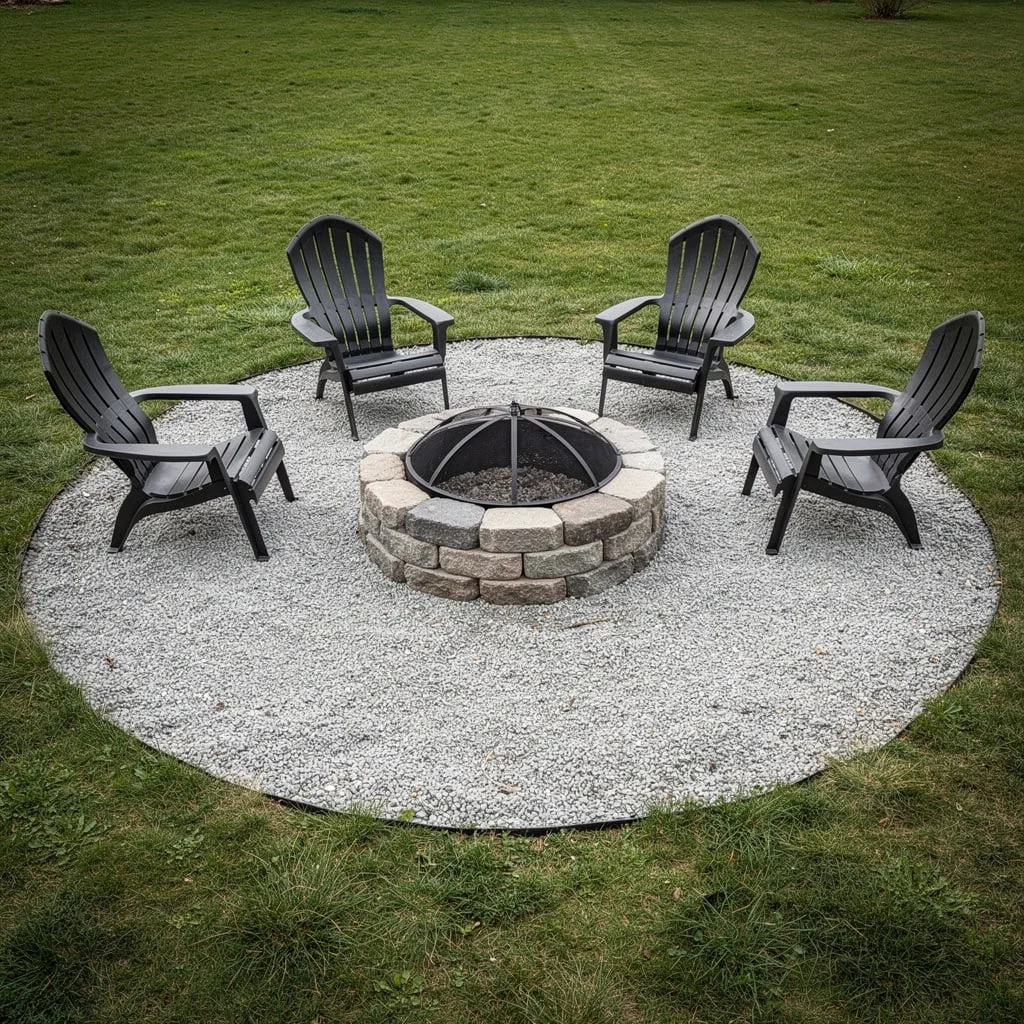
Mark a circle approximately four metres in diameter. Edge the entire circumference with a single row of reclaimed stone or bullnose brick set flush with the surrounding lawn. Fill the interior with white or pale grey angular gravel to a depth of 100mm. Build a simple mortared stone fire pit ring at the exact centre — stack natural stone blocks two to three courses high in a circle approximately 600mm in diameter, fill the base with sand, and set a standard steel fire bowl ring on top. Place five or six matching Adirondack chairs around the ring at even intervals. The chairs should all be the same — colour, style, material. Variation in seating around a fire pit looks like an accident rather than a choice.
The Hanging Basket Garden
In a shaded corner with a mature tree or pergola overhead, this is about density. Install a custom S-hook bar across the underside of the pergola or across a horizontal branch support, and hang basket hooks at 400mm intervals. Fill each basket with a different trailing or mounding flower variety — petunias, impatiens, bacopa, ivy geraniums — in a single coordinated palette of pinks and purples. Add raised timber garden boxes on the ground perimeter, planted with the same palette extended into full-size shrubs and perennials. Place two simple timber bench seats facing each other in the centre, a low table between them, and cushion them in a neutral linen or cotton. The hanging baskets above the seating create a canopy effect that encloses the space without any structure.
The Backyard Cinema
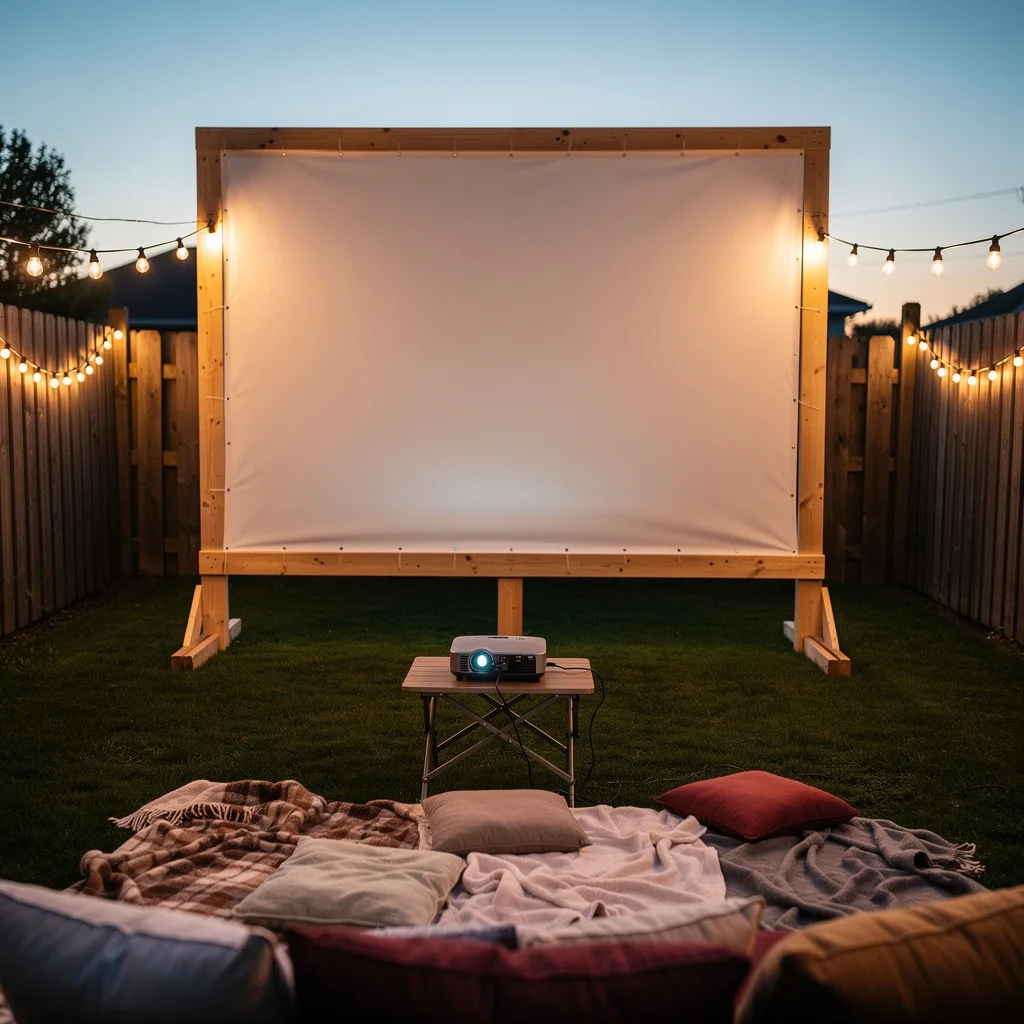
Build a simple free-standing frame from 90x45mm structural pine: two A-frame legs at the base, a top horizontal beam, and two corner uprights forming a rectangle. This does not need to be permanent — the feet can simply rest on the lawn. Stretch a blackout fabric screen tightly across the frame and secure with staples and a timber capping strip. Position a compact projector on a folding table at the correct throw distance — check the projector manual, but typically 2 to 3 metres for a 2-metre screen. Run festoon lights along both side fences. Lay blankets and cushions on the lawn in front of the screen. The seating arrangement should feel like someone made a real nest, not just dropped a mat.
The screen itself will be mostly invisible in the garden during the day. At dusk it becomes the entire room.
The Black Pergola Corner Lounge
Paint a standard timber pergola — posts, beams, rafters — entirely in charcoal grey or near-black exterior paint. A single dark colour removes all the “build quality” from the visual equation; what you see is the form, not the material. Set the pergola over a curved-edge gravel pad bordered with a single row of stone cobbles. Install a low dark grey modular outdoor sectional inside — the L-shape configuration works for a corner pergola. Add one large-leaf potted plant in a black square planter at each exposed post. Back the pergola against a horizontal-slat timber panel fence in a warm natural cedar tone. The black structure against the warm timber backdrop and the grey gravel base creates a palette of three neutrals that reads as expensive without any costly materials involved.
The Grid Wall Planter
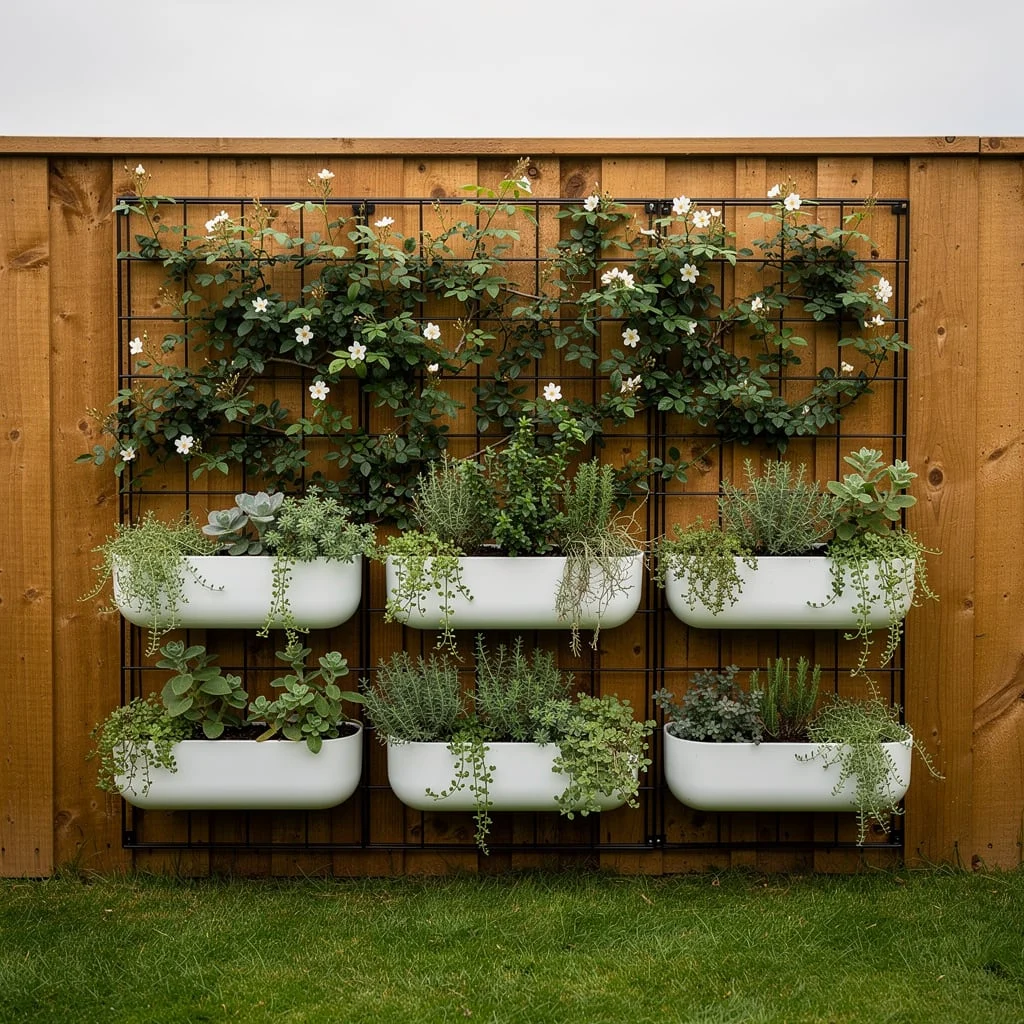
Mount a black powder-coated steel grid panel — the flat mesh variety, not chicken wire — directly onto your timber fence using standoff brackets that hold it 40 to 50mm off the surface. Attach white oval-shaped wall planters to the grid at two horizontal levels — six planters total works well for a standard fence panel. Fill the lower planters with trailing succulents, herbs, and small-leafed creepers that spill forward over the rim. Plant a climbing rose or small-flowered jasmine at the top of the grid and train it through the squares as it grows. The white planters against the cedar fence and black grid is a high-contrast combination that reads as intentional from twenty metres away. Leave the fence above the grid completely bare — let the climbing plant do the work of filling that space over time.
The Koi Pond With Waterfall
Excavate a freeform pond approximately 1.5 metres by 2 metres, with a depth of at least 900mm at the deepest point. Koi require deeper water than garden fish — shallower ponds overheat in summer. Line with EPDM rubber liner and conceal the edge with dry-stacked natural fieldstone. Build a waterfall feature at one end: stack large fieldstone and flat-topped slate pieces to create a low cascade two or three tiers high — aim for natural irregularity, not a symmetrical pyramid. Conceal a submersible pump behind the stone stack with the outflow directed over the top flat stone. Introduce koi — start with three or four fish and allow the population to self-regulate. Plant water lily and iris, and surround the outside of the pond with cottage-style planting: marigolds, rudbeckia, ornamental grasses. The waterfall sound is the thing. It changes the acoustic character of the entire backyard.
Gravel Dining Island
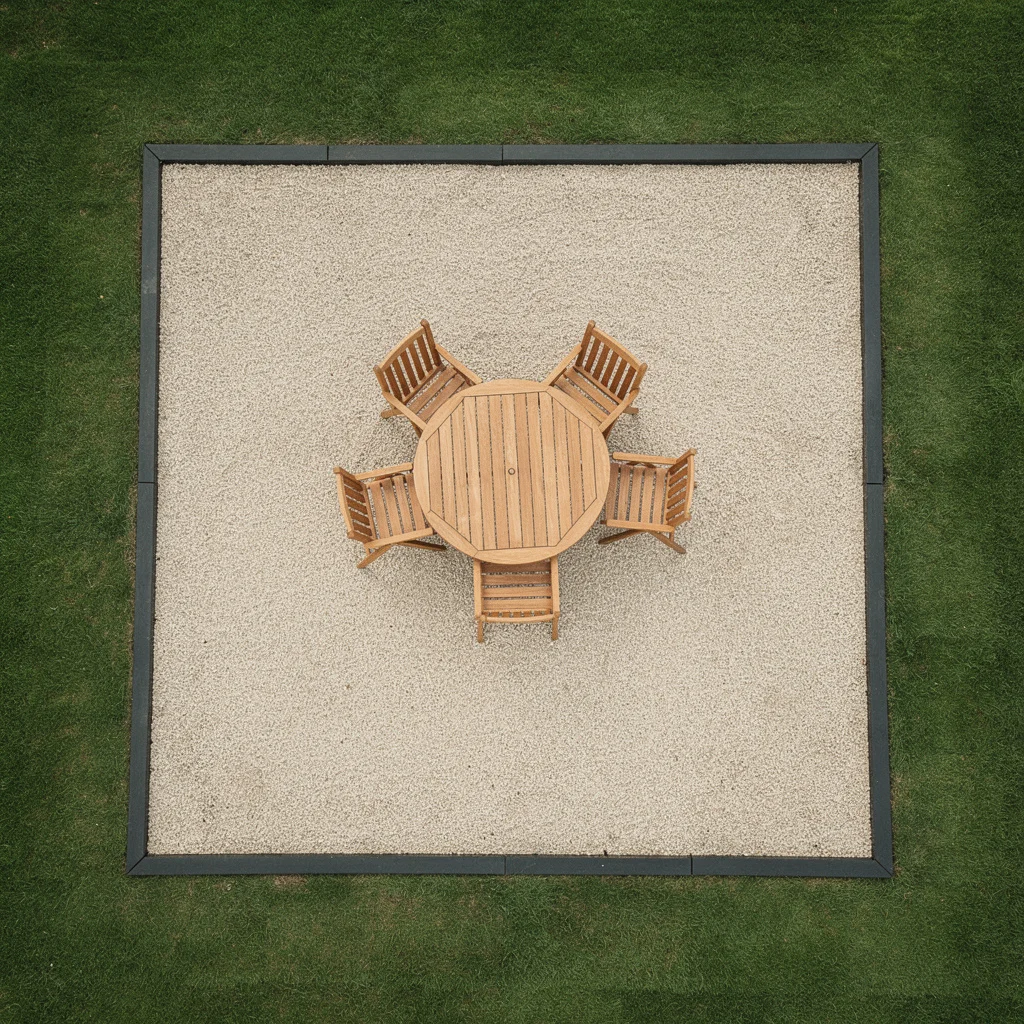
Mark out a square — approximately four metres by four metres — in the lawn with spray paint. Excavate to 150mm depth and lay weed matting over the base. Fill with compacted fine gravel to just below lawn level. Frame the entire perimeter with a single run of 100mm deep black steel edging, mitre-cut at the corners so the join is invisible. Place a round teak dining table in the centre with four or six matching chairs. The table sits in the lawn like an island. The gravel base means chair legs don’t sink, and the contrast between the pale gravel square and the surrounding green lawn creates a clear visual zone that reads as intentional outdoor dining space. No pergola required.
The Pergola Swing Bed
Build a square pergola frame — four posts, double top beams on all four sides, and a lattice of cross members at the top — from large-section rough-sawn structural timber. Leave it raw or apply a single coat of exterior oil. Hang a round pallet-construction swing bed from four heavy-duty chain links attached to the four inner beam intersections. The swing bed is built from pallet boards laid radially on a circular frame and padded with a thick round tufted outdoor mattress. Surround the base of the pergola with a circular raised bed edged in black steel, planted with lavender, salvia, and ornamental grasses. The swing is not a toy. It is a seat designed for an adult who wants to sit in the garden without the rigidity of a chair.
The Granite-Edged Garden Pond
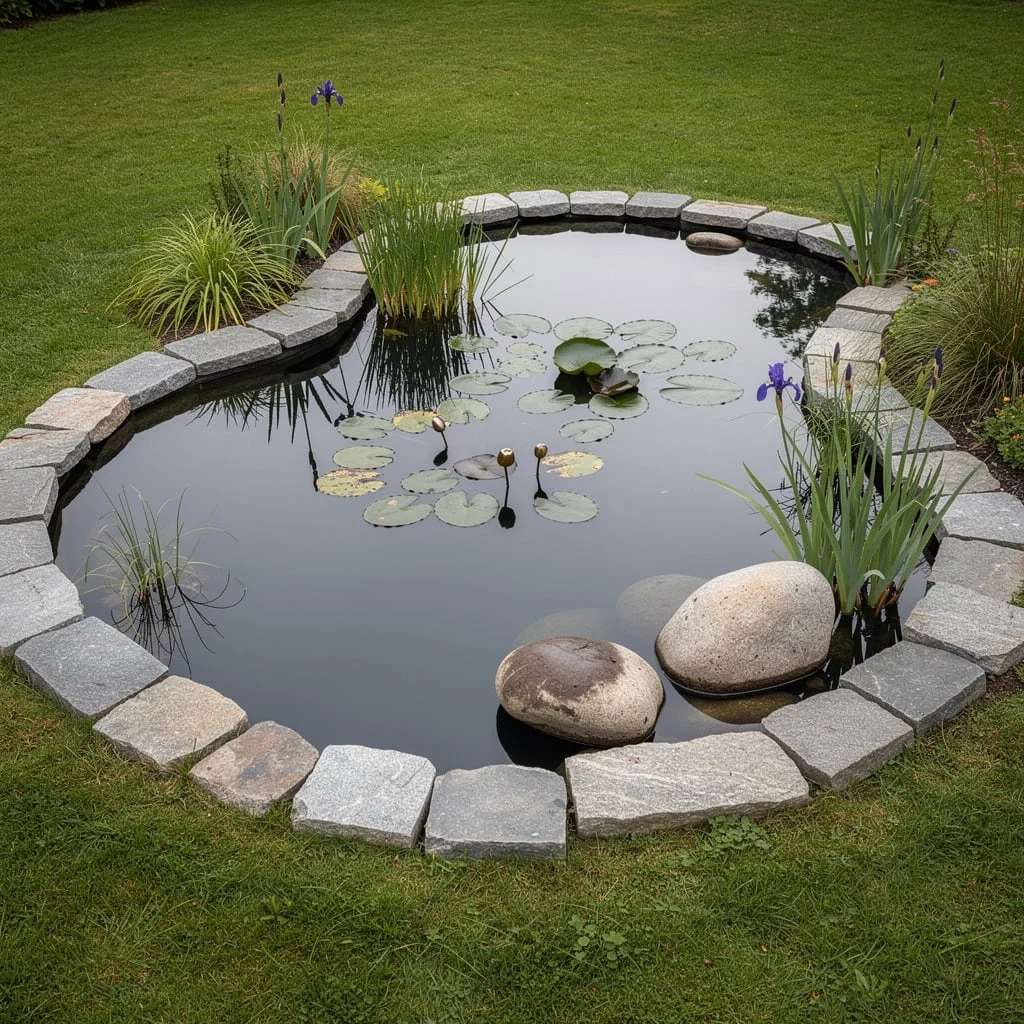
Dig an organic kidney or oval shape to a depth of 600mm at the deepest point, with shallower shelf areas at 200mm and 400mm around the perimeter for marginal plants. Line with a quality EPDM rubber pond liner, not PVC, which cracks in UV. Lay split-face granite cobbles around the entire rim, overhanging the water edge by 50mm so the liner is completely hidden. Set two or three large rounded boulders — not the same size — inside the shallow shelf area at one end to create visual variation and a perch point for birds. Plant iris, water rush, or similar upright marginals in the shallow shelf, and float one or two water lily varieties in the deeper zone.
Do not overplant. The water surface needs to remain visible for the pond to read as a reflective feature rather than a planted trough.
The Festoon Dining Room
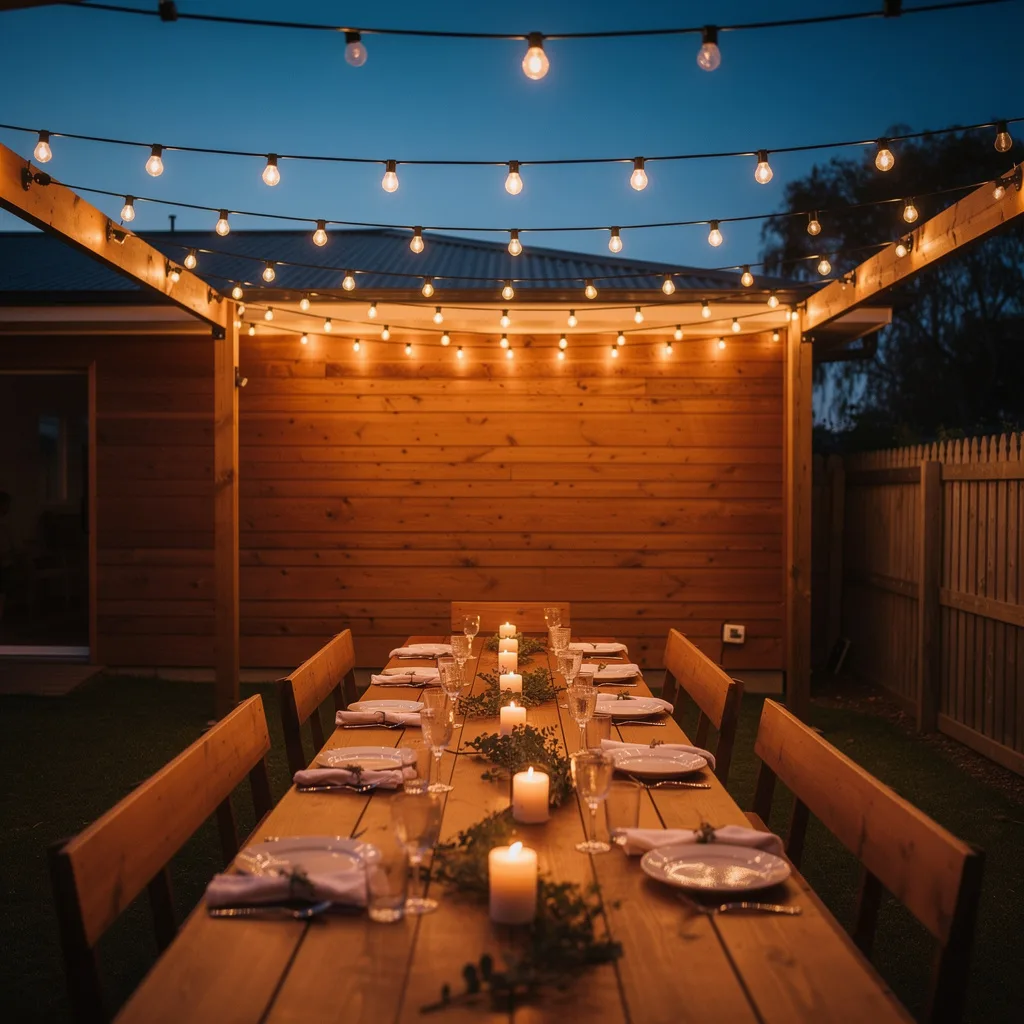
Build or commission a simple three-sided timber frame — two side walls and a back wall, open to the sky — using rough-sawn cedar or redwood planks. The back wall should be solid-clad timber, the sides open or partially open. Span festoon lights across the interior in parallel runs at a consistent height, approximately 2.5 metres from ground level, terminating at a timber bracket on each side wall. Run a second layer of lights across the open front in a catenary curve. Place a long farmhouse-style dining table on a concrete or compacted gravel base inside the frame. Set the table with candles in pillar holders spaced along the centre. At dusk the warm light reflecting off the cedar walls and the candle glow off the table creates an atmosphere that no amount of outdoor furniture spend achieves without it. Light is the actual design element here.
The Rendered Pizza Oven

Build a concrete block plinth approximately 900mm high and 1000mm square — standard hollow concrete masonry units laid in running bond, rendered smooth on all external faces in white cement render. Leave a framed opening at the base for firewood storage: a simple timber-framed recess about 600mm wide and 400mm high, with a cedar lining. Mount the oven dome on top of the plinth — either a purchased refractory kit dome or a hand-built sand-cast dome using refractory cement and aggregate. Render the dome in white to match the plinth. Install a stainless steel flue vertically from the dome exit. Lean a long-handled pizza peel against the side.
The oven is a sculptural object as much as it is a cooking appliance. Position it where it can be seen from the dining area and from the house, not hidden behind the shed.
The Modern Flat-Roof Pergola
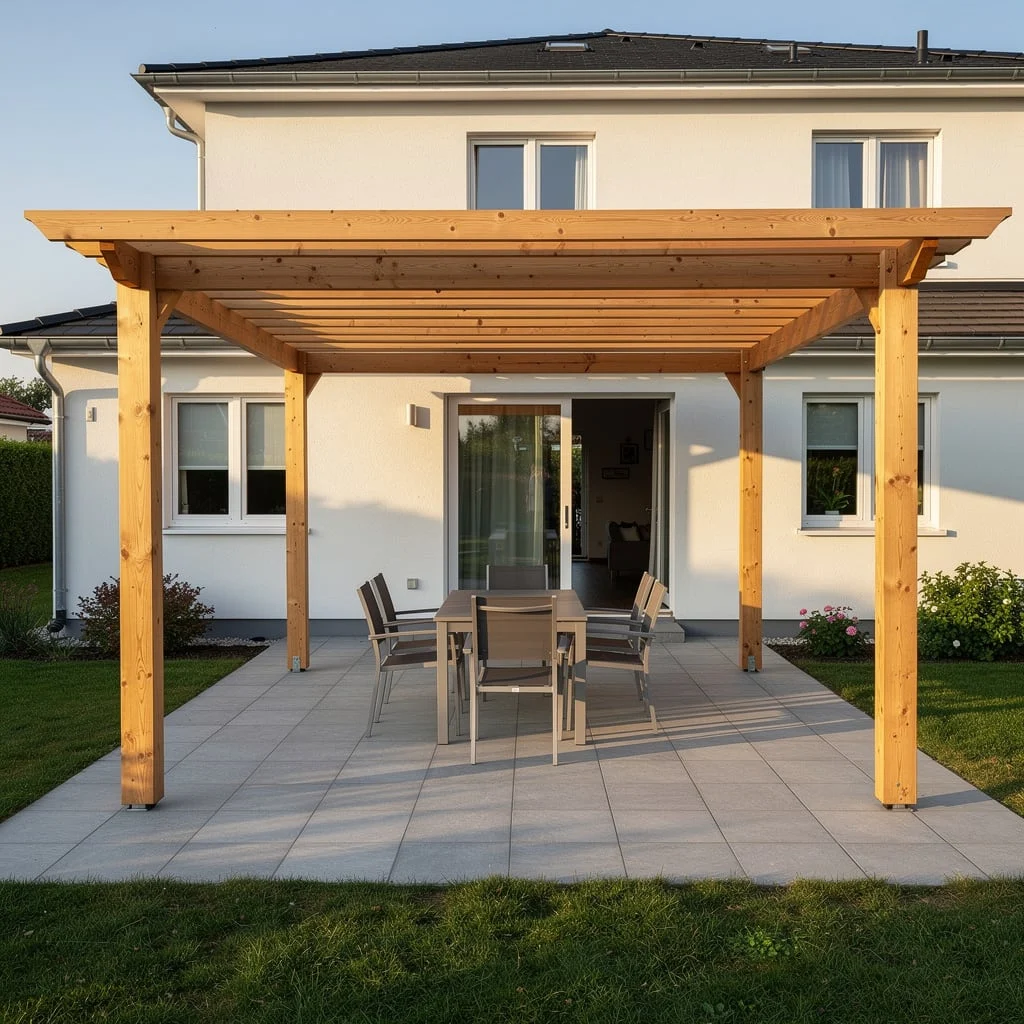
Set four or six posts in a rectangular grid pattern using 140x140mm structural timber or engineered pine. Use post anchors rather than in-ground posts if you want the option of relocating later. Frame the top with double beams and then lay evenly-spaced rafters at 400mm centres, running front to back. Keep the rafter profile consistent and the overhang equal on all sides — this is what separates a considered pergola from a DIY kit. Oil the timber in a natural or warm honey tone immediately, and re-oil annually. Place a simple rectangular dining set underneath in a dark tone — the warmth of the oiled timber reads best against dark or neutral furniture rather than competing colours.
The Round Stepping Stone Path
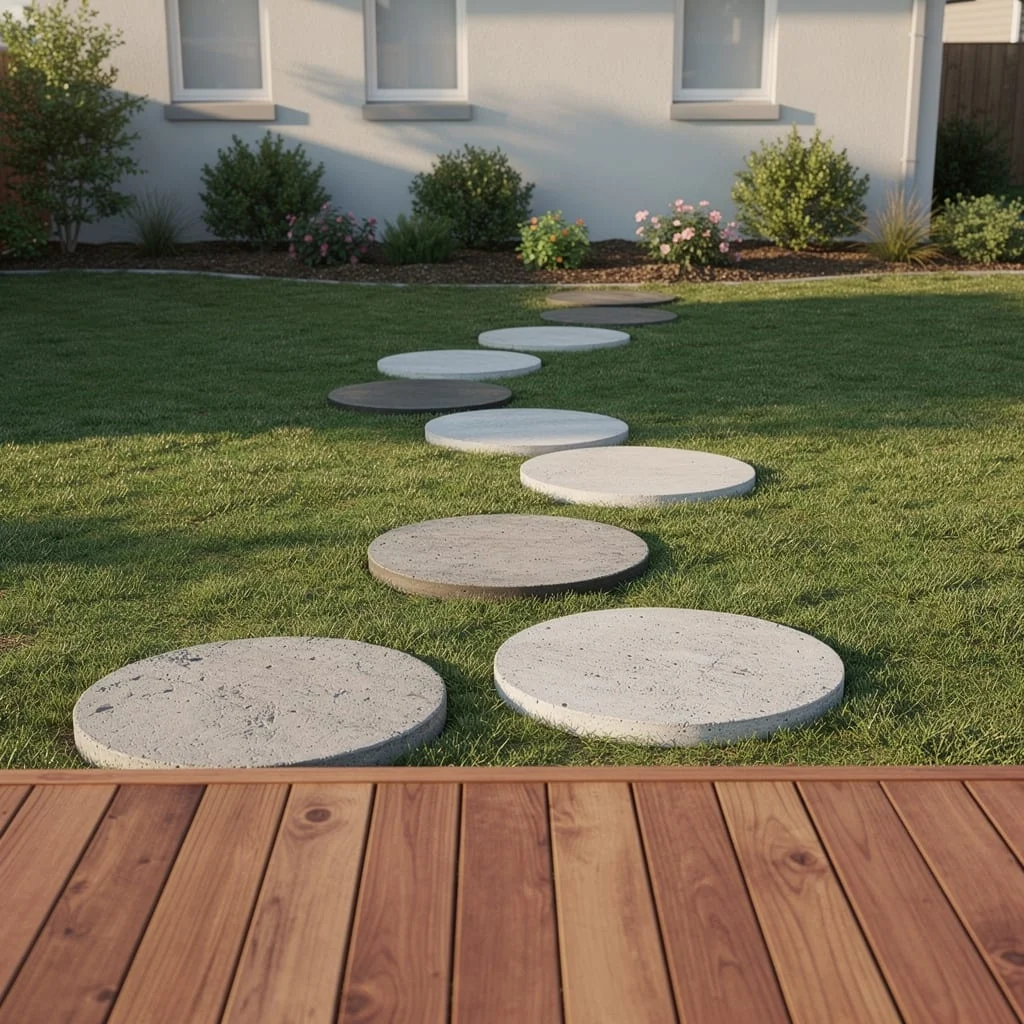
Source circular concrete stepping pads in two or three slightly different diameters — 400mm, 500mm, and 600mm work well together. Do not use uniform sizes; the variation is what gives the path its organic quality. Lay them in a slightly curved line from the deck or back door across the lawn to a garden bed or seating area. Press each one down into the grass so the top surface sits flush with the lawn — no step up, no step down. Stagger the arrangement with occasional two-pad groupings rather than a perfectly spaced single file. The pads should feel like they were placed by someone who walks that path daily, not installed by a landscape contractor.
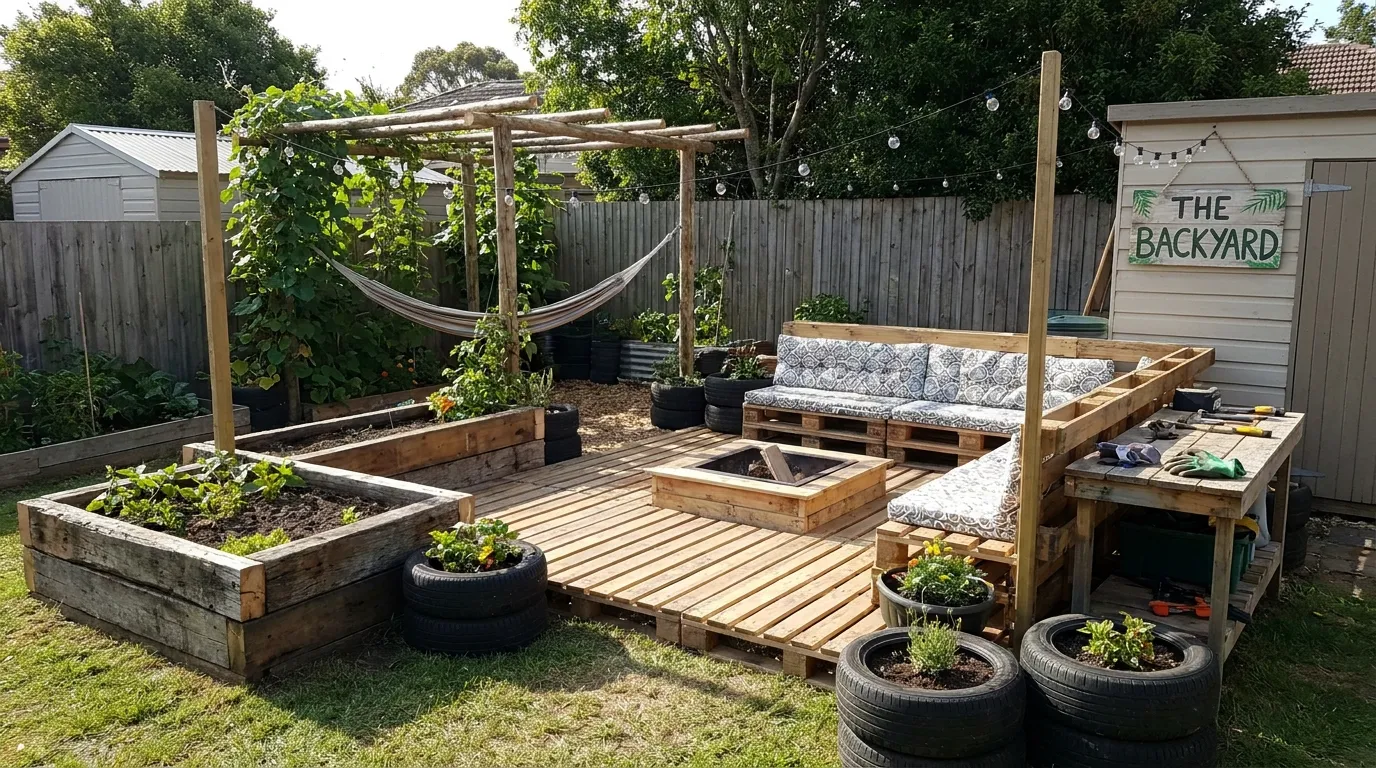
The Pallet Garden Bench
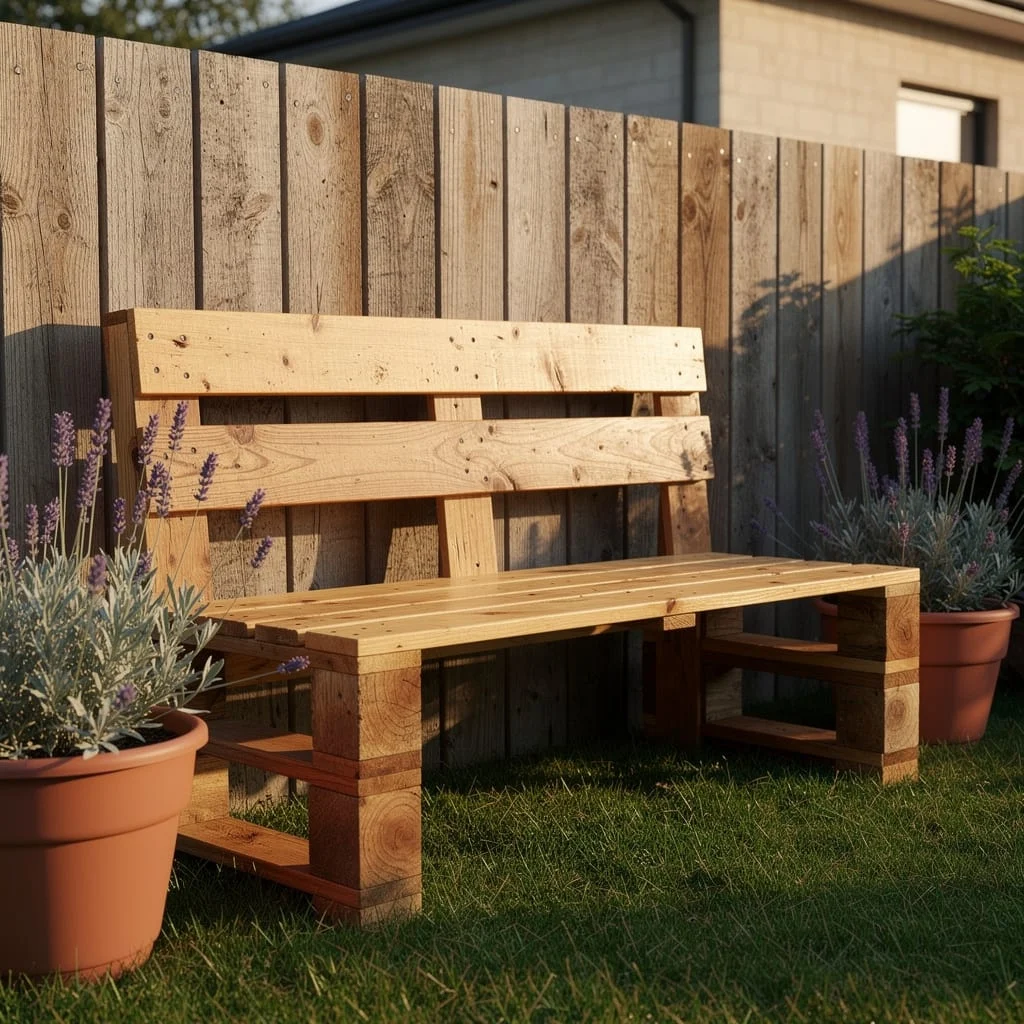
Source three standard timber pallets in good condition — no broken boards, no chemical staining. Stack two flat on top of each other as the seat base. Cut the back slats of the third to create a backrest panel and attach at a slight angle using carriage bolts. Sand all surfaces to 120-grit and apply a clear exterior oil or light stain — do not paint, the grain is the point. Set terracotta pots of lavender on either side, all the same size and same height. Position against the fence in a spot that gets afternoon light. The bench is used. The lavender scents the air when you brush it. This is all the garden seating you actually need.
The Dry River Bed
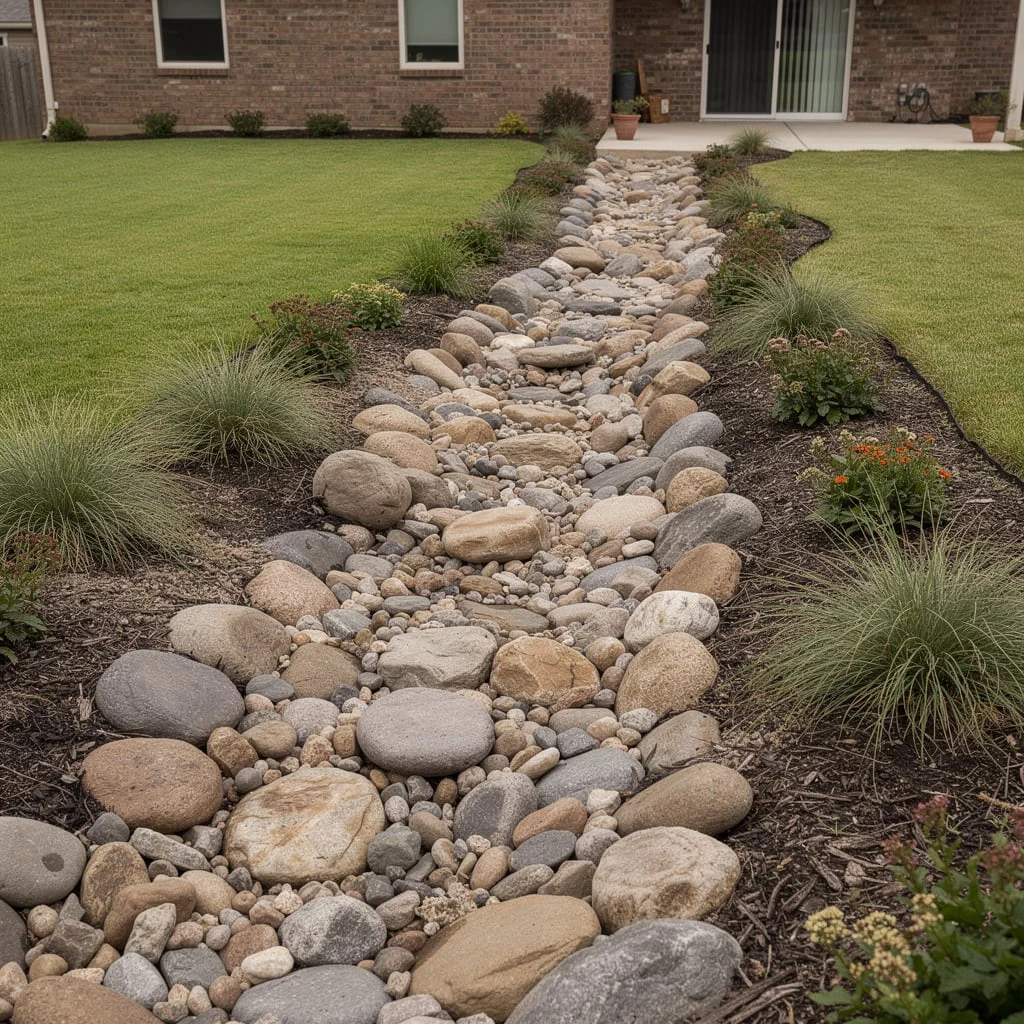
Mark a shallow trench approximately 400mm wide following a gently curved line through the garden border — it should connect two areas and appear to drain naturally from high ground to low. Excavate 200mm deep and lay weed matting. Fill the centre channel with fine pea gravel and then layer larger rounded river rocks — 100 to 300mm diameter, a mix of grey and warm beige — along both edges and partially into the centre channel in irregular clusters. Plant ornamental grasses in dark mulched soil on either side: blue fescue, pennisetum, or stipa.
The dry river bed solves a drainage issue if you have one, but more importantly it introduces a naturalistic linear element that gives the garden border a structure without the rigidity of edging or retaining.
The Cinder Block Outdoor Kitchen
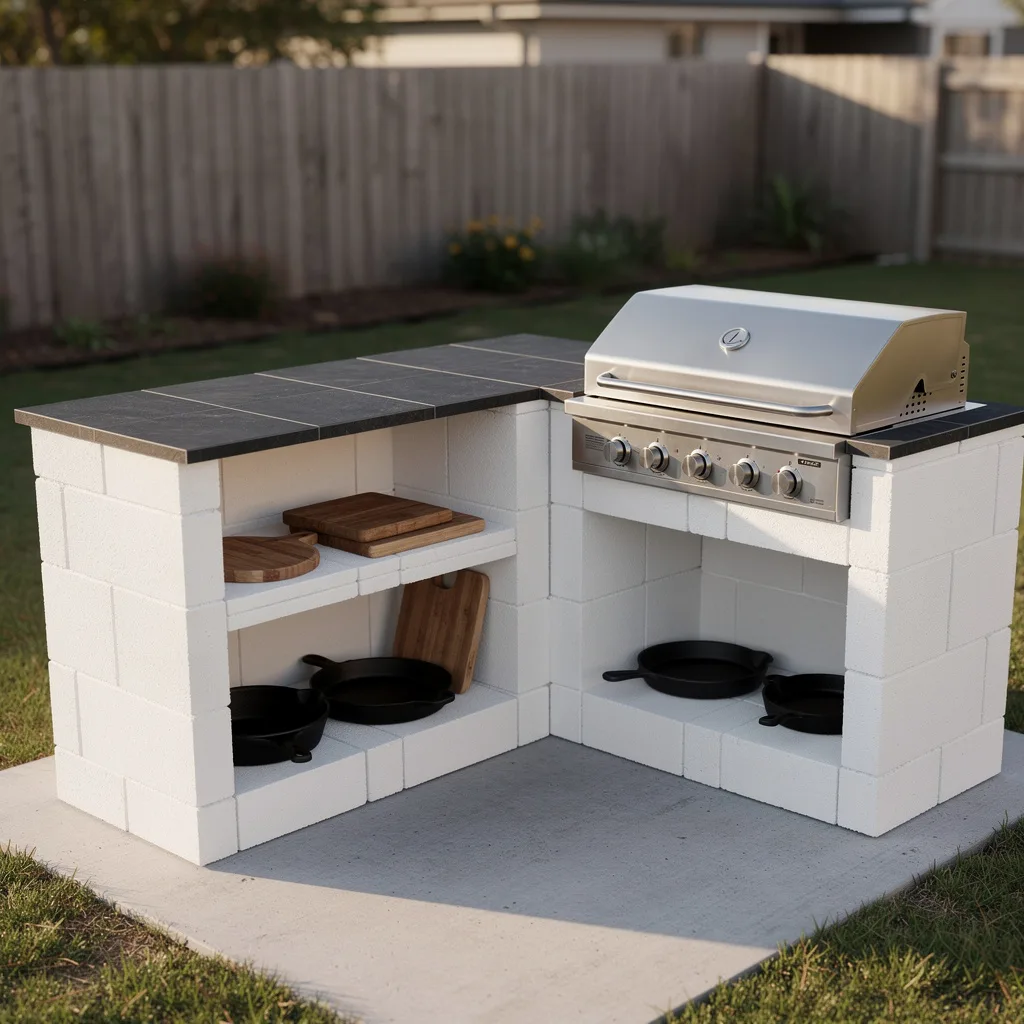
Lay a concrete slab base at least 100mm thick, approximately 2.5 metres by 1.5 metres. Build the kitchen frame from standard concrete masonry blocks — standard grey, unpainted, precisely laid in running bond. The L-shape configuration works best: one arm for the built-in grill insert, the other for prep counter. Cap both arms with large-format dark porcelain or slate tiles — the contrast between the white block and the dark tile cap is the entire colour scheme. Install open shelves within the block structure for cookware storage using a simple concrete lintel. Recess a drop-in stainless steel grill unit into the end of the grill arm.
Leave the block face raw and unpainted — the texture and the shadow of the block joints are the finish.
The Patterned Patio
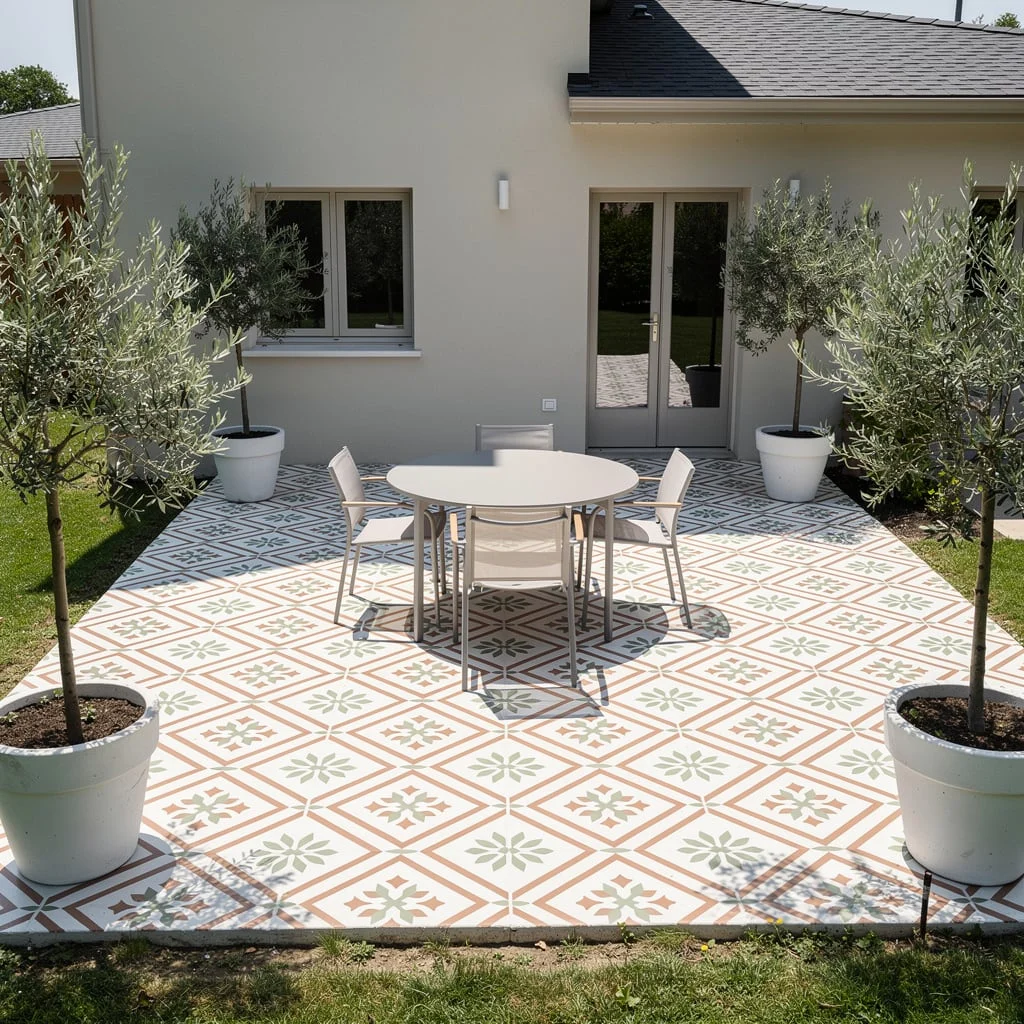
Lay a full-width patio in encaustic-style porcelain tiles — the kind with a repeating geometric or floral motif in terracotta, sage, and off-white. These are available as standard 200x200mm outdoor-rated porcelain from most tile suppliers. The pattern does the design work; everything else should be quiet. Use a white or very pale round table in the centre with simple white frame chairs. Place four large round planters in white — one at each corner of the patio, each containing a standard olive tree clipped to a clear stem with a round canopy.
The bilateral symmetry of the olive trees, the round table, and the patterned tile creates a composition that feels Mediterranean and considered without anything complicated or expensive.
The Jasmine Trellis Screen
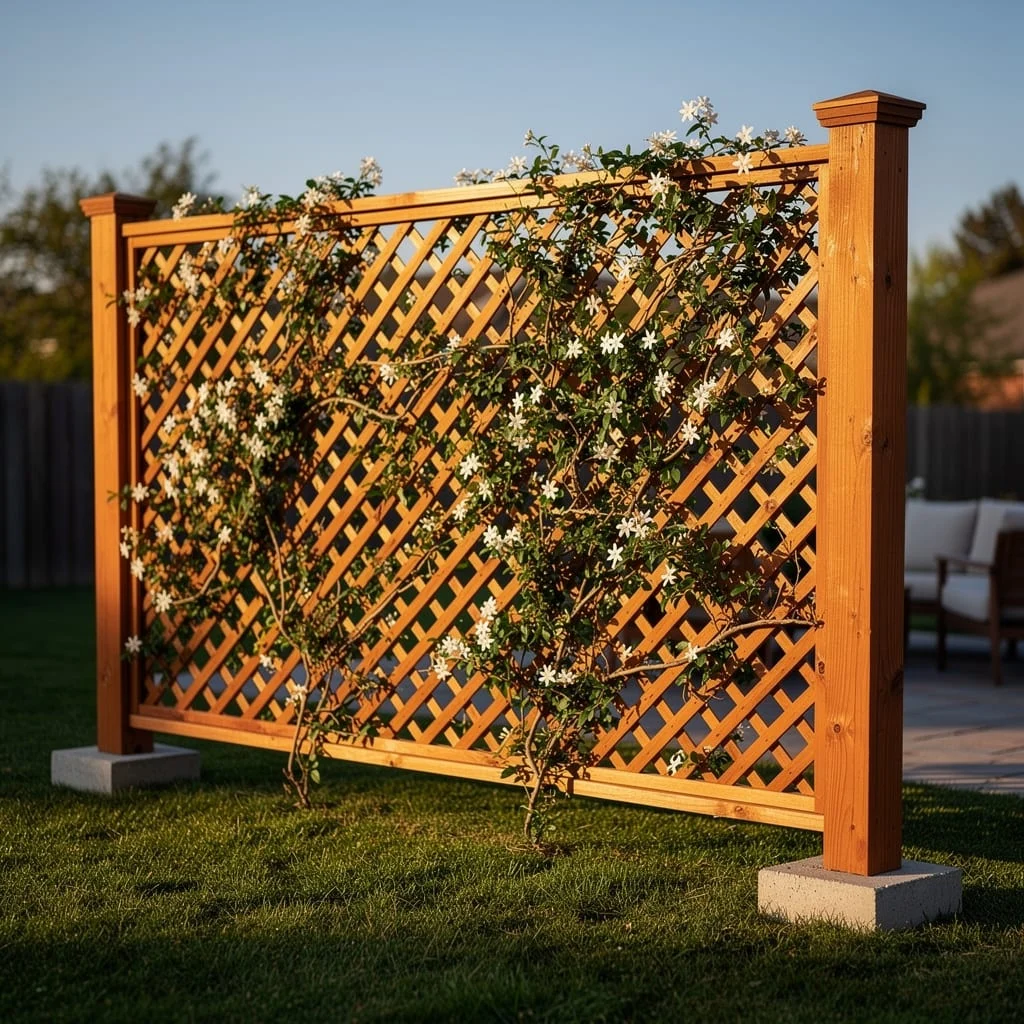
Set two 100x100mm timber posts in concrete footings approximately 2.5 metres apart and 2 metres out of the ground. Frame a rectangle between them using 70x45mm timber rails — one at the top, one at the base, and one at mid-height. Fill the rectangle with diagonal cedar lattice panels stained to a warm honey tone. Plant one star jasmine at the base of each post and guide the first shoots onto the lattice with soft ties. Within two growing seasons the lattice fills. The scent at night in spring and summer is the return on the investment.
Position the screen to create a division between a seating area and the rest of the garden — a room within a room effect that no fence or wall achieves with the same lightness.
Corrugated Steel Raised Beds
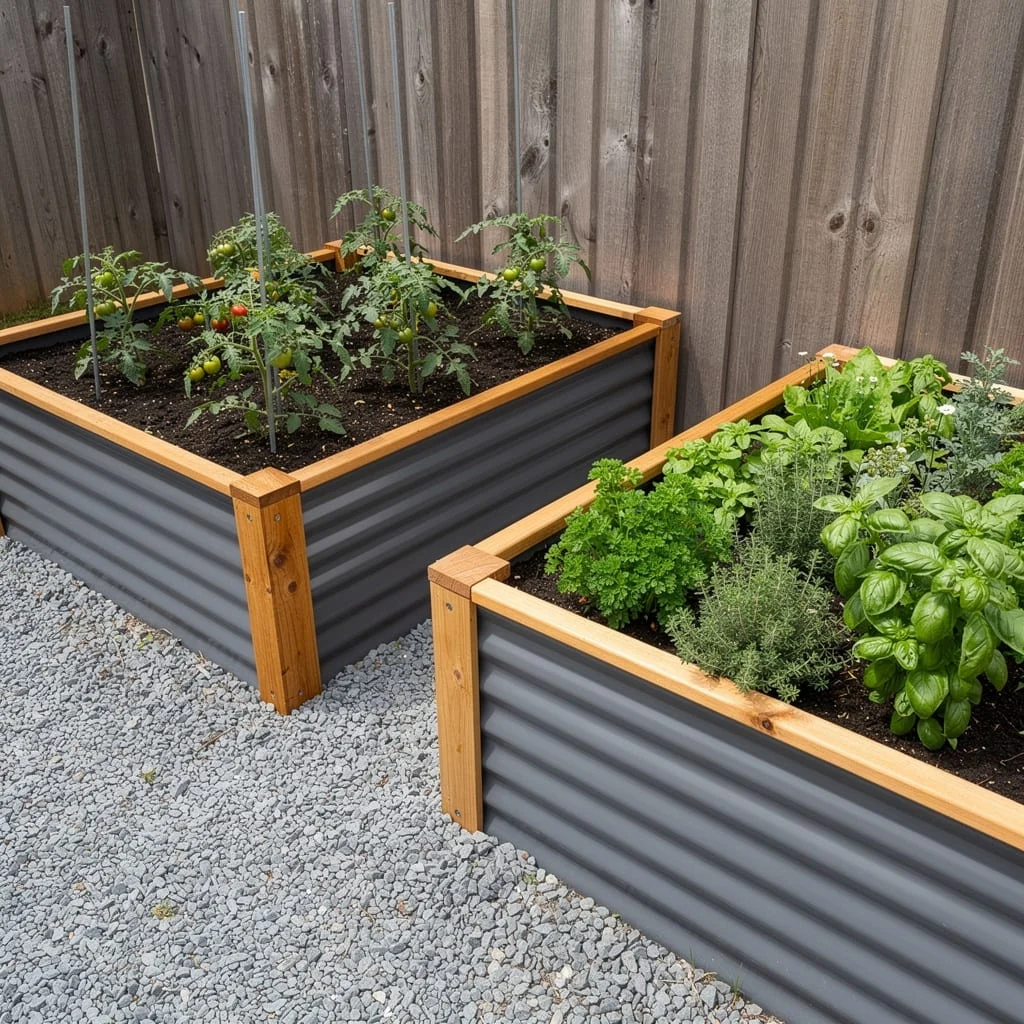
Source pre-made corrugated steel raised garden beds with timber corner posts — the grey or charcoal steel variety, not galvanised. Install two beds side by side in an L-configuration or parallel, with a 600mm gravel path between them. Use angular light grey gravel for the path base, edged in steel to keep it contained. Fill the beds with a premium vegetable mix to 300mm depth. Plant one bed with tomatoes, the other with a dense mix of culinary herbs — basil, rosemary, parsley, thyme.
The visual interest comes from the contrast between the industrial corrugated steel, the warm timber corner posts, and the lush organic growth of the plants. Allow the plants to grow above the top of the bed frame — the overflow is part of the look.
What Every Good Backyard Project Has in Common
Every backyard in this list committed to something.
Not a little of everything. Not three different styles hedging against each other in case one didn’t work out. One idea, followed through consistently from the ground surface to the overhead structure to the planting at the edges.
That commitment is the difference between an outdoor space that guests comment on and one they simply use. Both are valid. But only one of them required you to make a decision and trust it.
Your backyard is not a showroom. It doesn’t need to impress anyone who isn’t you. Figure out how you actually want to spend time outside. Then build that, and build it well.