
The side of your house is not a hallway. It’s not a place to lay concrete and call it done. It’s not a utility corridor dressed up with a pot plant and some gravel because you ran out of ideas before you ran out of property.
It’s the longest uninterrupted outdoor space most homes have. And almost everyone wastes it.
The problem isn’t budget. It’s that people treat the side passage as an afterthought — a gap between walls that needs covering rather than a space that needs designing. The moment you shift that thinking, everything changes.
The Narrow Space Trap
Treating Width as a Limitation
The first mistake people make in a side passage is fighting the narrowness. They try to make it feel wider by keeping everything minimal, pale, and featureless. The result is a space that feels empty rather than intentional.
Narrowness is not a problem. It’s a design parameter. Some of the most striking side passages work because they lean into the corridor quality — they create depth, draw the eye forward, and make the journey through the space feel deliberate.
Work with the proportions. Choose materials and plants that have vertical interest. Think about what you see when you stand at one end and look down the length.
The Single-Material Mistake
One concrete slab from fence to wall, end to end. It solves the problem of mud and drainage. It solves nothing else.
Material contrast is what gives a side passage its personality. The interplay between a hard surface and a planted border, or between two paving materials used in the same path, creates visual rhythm. A path that has only one texture to look at is a path that becomes invisible.
Ignoring the Fence Line
Most people landscape the house side — put some plants near the wall, maybe a border. The fence sits bare and vertical and completely unaddressed.
The fence line is half your design. Whether you paint it, clad it, train something up it, or use it as a backdrop for a planting bed, it needs a role. Leaving it raw makes the most prominent surface in the space a non-decision.
What Makes a Side Passage Actually Work
The Path Is Not the Point
The path is infrastructure. What makes a side passage work is everything that flanks it. The paving material only matters insofar as it complements what’s growing alongside it or how it reads against the wall colours.
Good side passages have a visual hierarchy. There’s a surface to walk on, a planted layer at low or mid height, and ideally something at eye level or above — a climbing plant, a tall grass, an architectural shrub. Three layers. That’s the formula.
Repetition Builds Rhythm
A single agapanthus looks like a plant that wandered in from somewhere else. A row of agapanthus at even intervals, all the way down the fence line, looks like a decision. Repetition in a narrow space creates the sense that something was designed rather than accumulated.
The same applies to paving. Stepping stones placed at a consistent interval feel purposeful. Stepping stones dropped in at random feel like a leftover project.
Light Changes Everything
Most side passages get limited direct sun for most of the day. This is not a problem — it’s an opportunity to use shade-tolerant plants that have real texture and interest. Ferns, mondo grass, liriope, hellebores. These plants bring density and lushness that sun-scorched grasses never achieve.
At night, a side passage with no lighting disappears. String lights along the roofline, low path lighting, or a single wall-mounted fixture can turn an unremarkable corridor into something you actually want to walk through after dark.
Side House Walkway Ideas
Tropical Raised Planter Bed
Build a rendered and capped masonry retaining wall — 400mm high, painted or rendered in a warm limestone tone — along the fence side of the passage to create a raised garden bed. Fill it with tropical planting: banana, bird of paradise, and low-level bromeliads as understorey. Lay travertine-look tiles on the path. Mount a single brass wall light on the house wall at mid-height for evening use. The raised bed brings the planting to a height where it reads in your peripheral vision as you walk — it’s present in a way that ground-level planting never quite manages.
The Arched Timber Gate
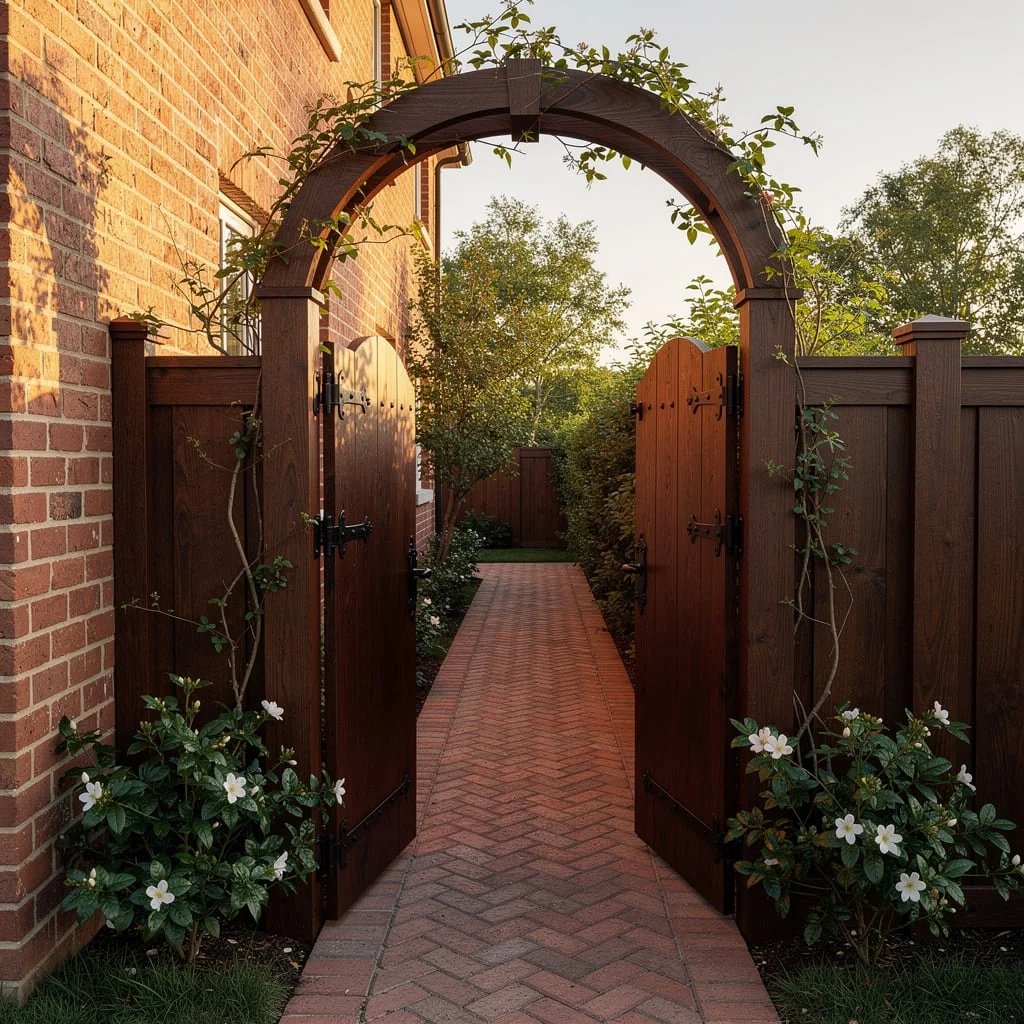
Before you even think about the path behind it, spend your money on the gate. A full-height arched timber gate in a rich dark mahogany stain, set between matching fence panels and topped with a timber arch framing — not a plastic arch kit, a proper timber arch with substance and weight — does more for a side passage than any paving choice you’ll make. Train a climbing plant up the arch posts. Use black iron hardware: hinges, latch, bolt. Lay a herringbone brick path behind it so the warm red brick complements the stained wood. Keep the planting at the base simple — a gardenia or white jasmine on each side — so the gate itself remains the moment.
People will walk through that gate and feel something. That’s the only measure that matters.
Corten Raised Beds, Slate Path
Use corten steel planters — the pre-made rectangular variety — along one side of the passage to create raised kitchen garden beds. Fill with vegetables, herbs, and a few nasturtiums for colour. On the path side, use slate stepping stones set in fine grey gravel. Against a dark fence with horizontal slat fencing at eye level and a few hanging baskets on the fence posts, this becomes a productive, beautiful side passage that earns its square footage in a way that purely decorative schemes never quite do.
Use the weathered surface of the corten as a colour note — it’s the one warm element in an otherwise cool palette, and it does that job perfectly.
Cedar Pergola With Jasmine
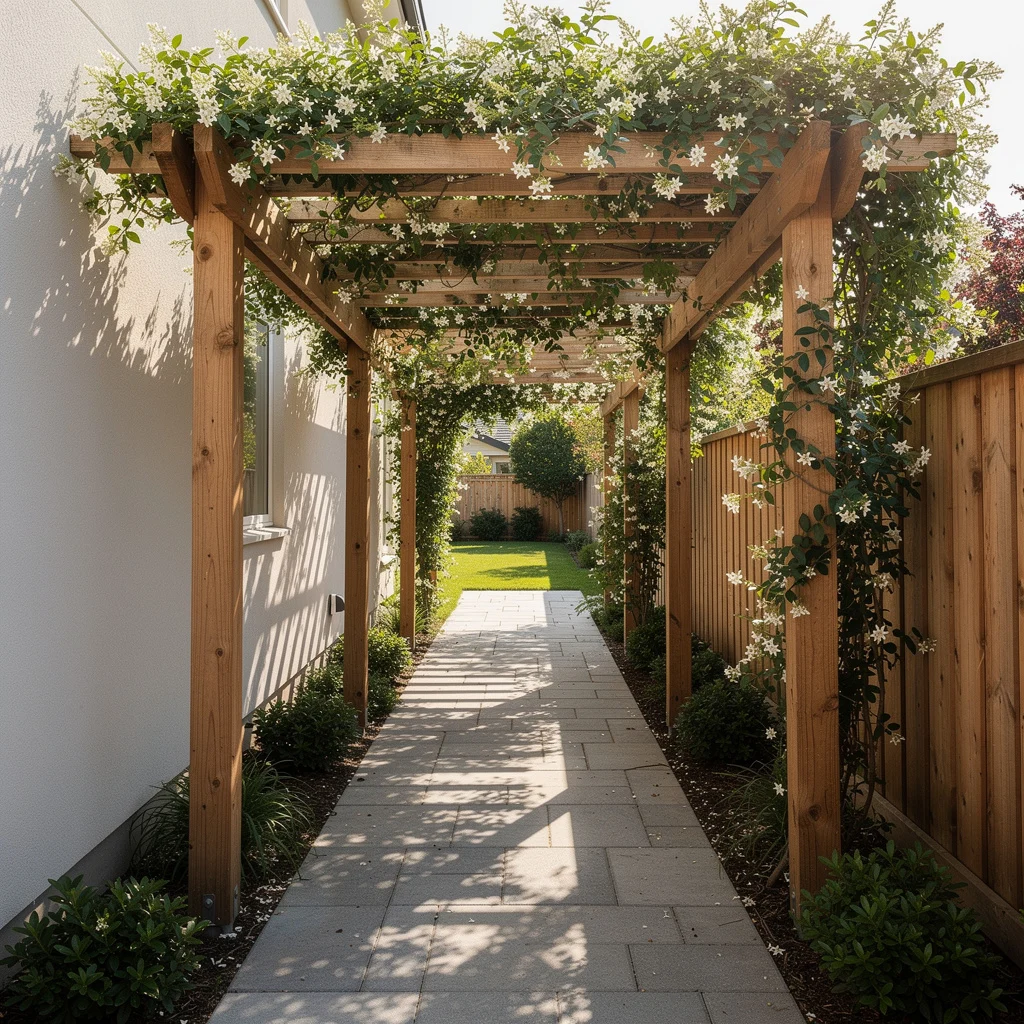
Build a pergola structure — cedar posts and beams, no roofing material, open lattice — that runs the full length of the side passage at pergola height. Space the posts evenly and use the same beam spacing throughout so the overhead grid casts regular shadow lines on the path below. Train star jasmine up every post. Within two growing seasons the overhead beams will disappear under white flowers and the passage below will smell extraordinary in spring. Lay large-format concrete pavers on the path. Keep the underplanting simple — a box hedge either side at 300mm height is enough.
The pergola changes what the passage is. It becomes a room you walk through rather than a gap you pass between.
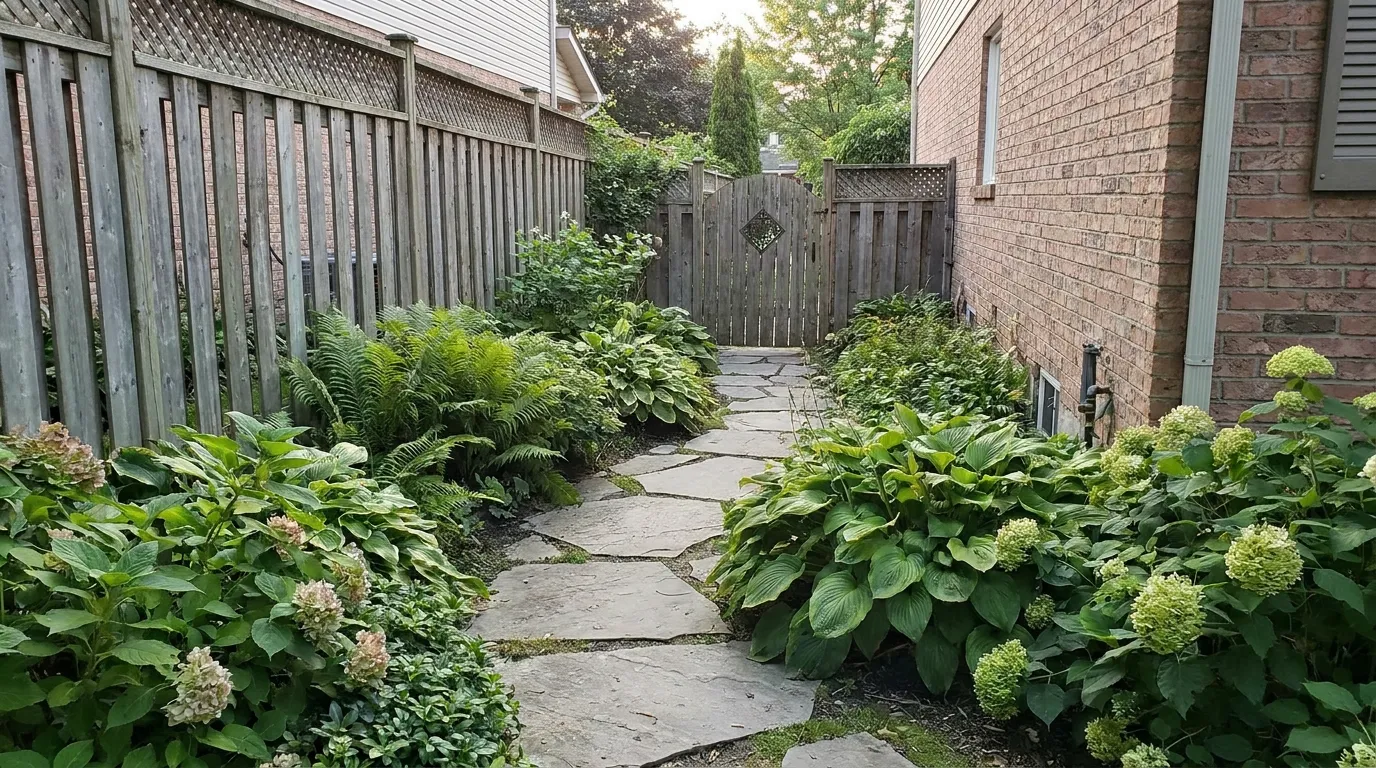
Lush Shaded Garden Passage
If your side passage gets almost no direct sun, commit to that condition entirely. Source a mix of shade lovers — hostas, ferns, hellebores, ajuga — and plant them thickly on both sides of a simple stepping stone path. Let them overlap the path edges. Let them mix heights. The key is density: a lush shaded passage needs to feel like you’re walking through a garden, not past two thin borders. Keep the stepping stones simple — plain concrete or bluestone — so the planting is the thing. Add a copper downpipe on the house wall as a warm metallic detail against the green.
This is the only passage on this list where the less you control, the better it gets.
Exposed Aggregate, White Daisies
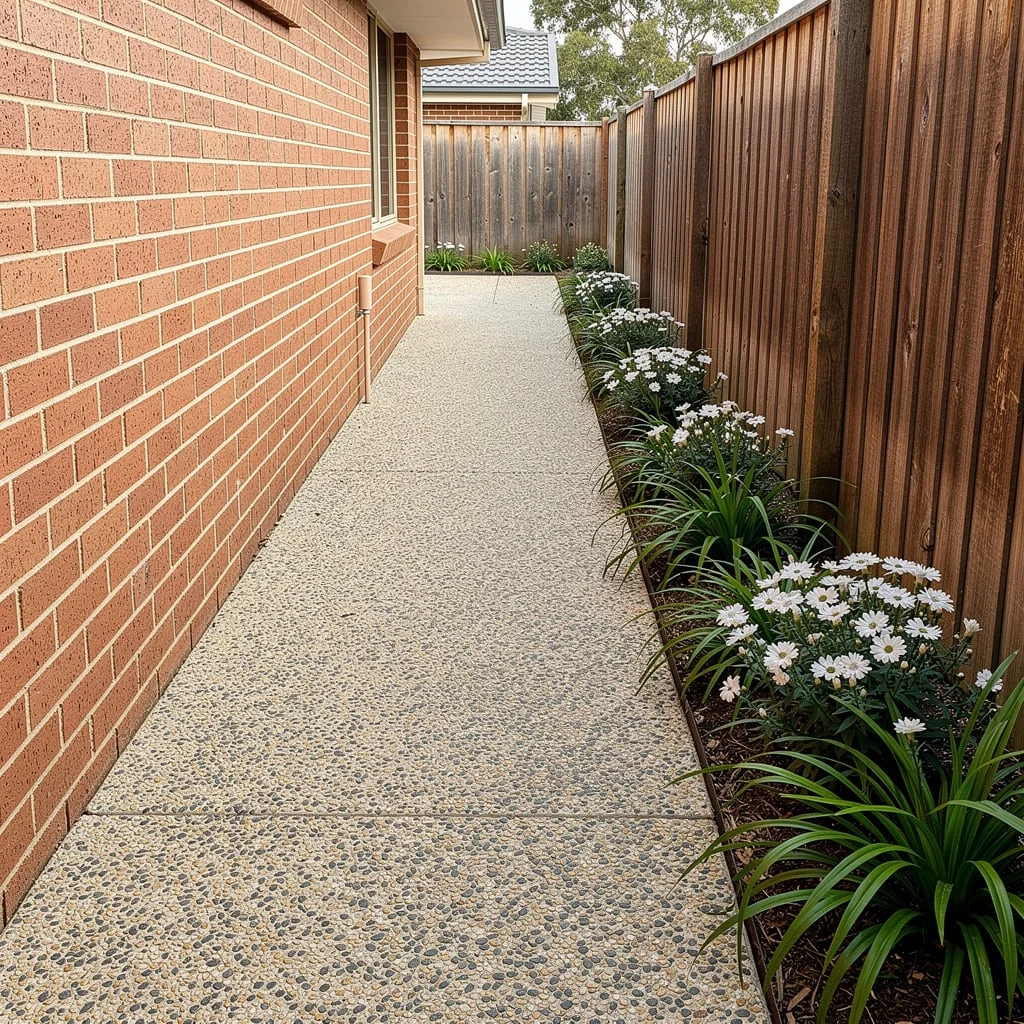
Lay exposed aggregate concrete panels — the kind with visible small river pebbles in a pale buff and grey mix — as your full-width path. Butt the panels together with a tight joint so the surface reads as continuous rather than segmented. Along the fence line, install a narrow garden bed edged with a low steel border and plant it alternating with lomandra and white African daisies. The daisies flower in flushes and self-renew; the lomandra stays green and structural in between. The pebble texture in the concrete picks up the rounded quality of the lomandra leaves and ties the two materials together without any effort on your part.
Keep the fence stained in a warm cedar tone so it reads as a warm third element alongside the pale aggregate and the white flowers. No other planting needed.
Round Steppers On Artificial Lawn
Lay artificial turf across the full width of the passage — the good stuff, with a natural blade shape and a slight colour variation to avoid that synthetic flatness. Set circular concrete stepping pads flush into the surface at a consistent stride interval. Along the fence line, plant a dense row of banana palms and fill the base with white pea gravel as a contrasting ground layer, divided from the turf by a crisp steel edge. The diagonal cut between turf and white gravel adds a graphic quality that makes even a very simple planting scheme feel designed.
Concrete and Hardwood Inlay
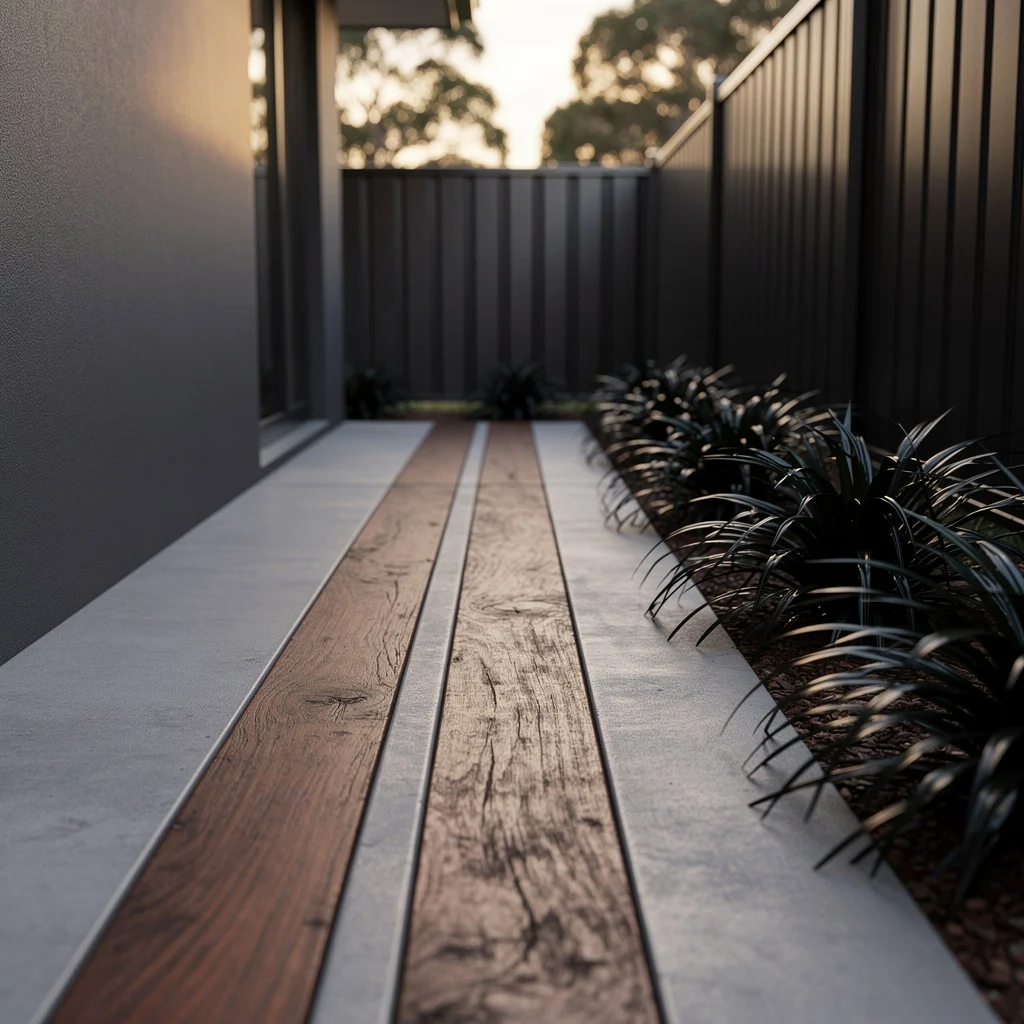
Pour a standard concrete path but before it sets, lay two parallel runs of hardwood decking board — seasoned hardwood or a timber-look composite works equally well — flush into the surface, running the length of the passage. The timber bands break the grey expanse and add warmth that raw concrete never achieves on its own. Along the fence, plant a continuous row of black mondo grass in a dark mulch bed. The black mondo against the dark fence and the timber inlay creates a monochromatic scheme that feels considered rather than cold.
This works best when the house wall is a charcoal or dark grey render — the warm timber inlay becomes the only warm note in an otherwise cool palette, and that contrast is precisely what makes it interesting.
Stepping Stones Through Dark Pebbles
Fill the entire passage floor with dark grey river pebbles — smooth, rounded, 20 to 40mm diameter — to a depth of 80mm. Set cream-toned limestone or travertine stepping stones at comfortable intervals through the centre. Plant either side with red-leafed photinia, nandina, or similar shrubs that have burgundy-red foliage. The red planting against the dark grey pebbles against the cream stone is one of those combinations that photographs as if it was styled, despite being entirely achievable without any professional intervention.
Edge the pebble field with steel edging on both sides so it stays contained and crisp.
Stepping Stones in Honey Gravel
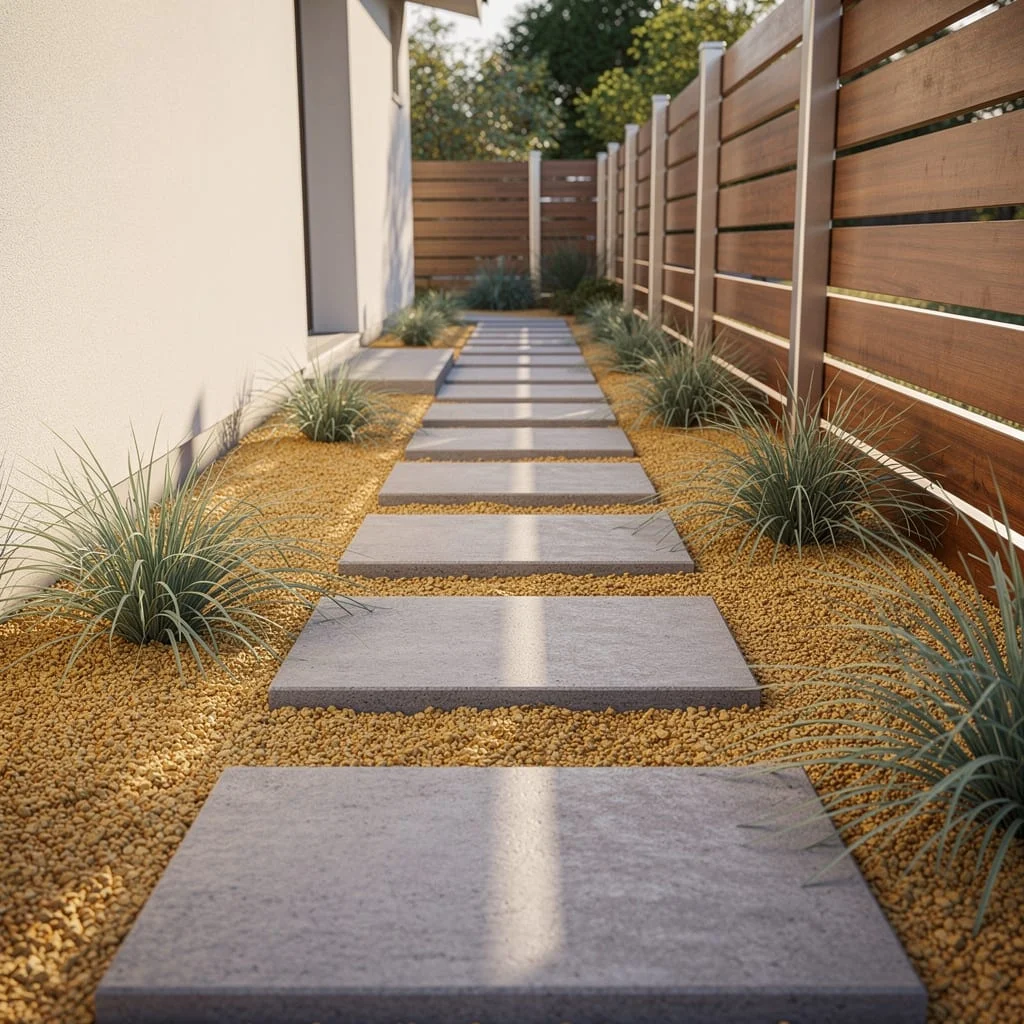
Lay large-format concrete pavers — 600x600mm or bigger — at even spacing down the centre of the passage. Set them into a deep bed of honey-coloured pea gravel so the gravel comes to just below the paver surface, allowing it to drain freely and shift slightly with foot traffic. Along both sides, plant blue fescue or similar blue-grey ornamental grass in clusters, with enough spacing between clusters to let the gravel read as a ground layer rather than being completely hidden. The blue grass against the warm honey gravel against a warm timber slatted fence is one of those combinations that looks effortless and took someone a good deal of thinking to arrive at.
The key is the gravel depth — at least 80mm — so it doesn’t compact or kick off the pavers with normal use.
Bluestone Tiles, Copper Edging, Agapanthus
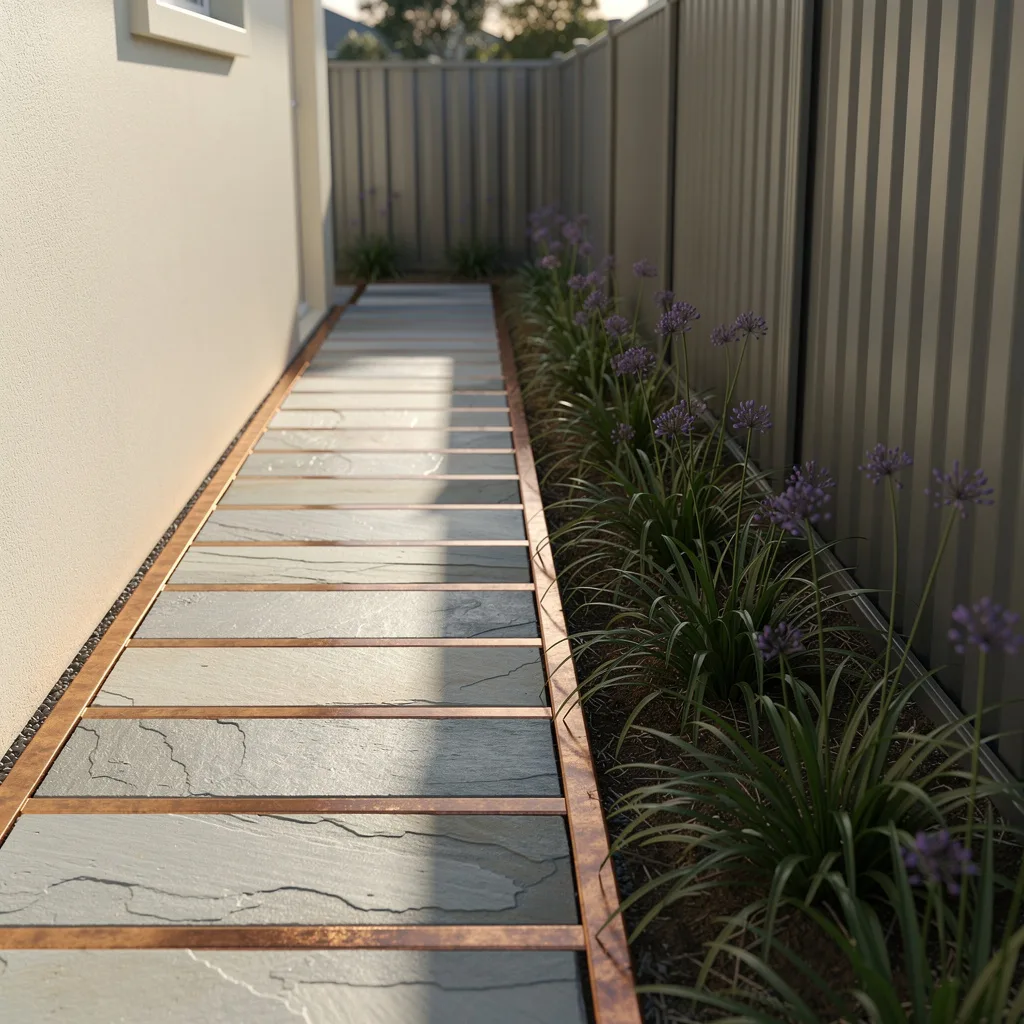
Lay full-width bluestone tiles across the path with a thin copper strip inserted as the joint between each tile. As the copper oxidises over months, it shifts from bright metal to a warm brown-orange that picks up the terracotta and bronze tones in agapanthus flowers beautifully. Plant the border with agapanthus — the tall variety, not the compact dwarf — in a single row against a pale colorbond fence. The purple-blue flower heads sit above the tile level and sway just enough to animate a space that would otherwise be static.
The copper joints are the detail that separates this from a standard tiled path. They’re not expensive — copper strip edging is available from most paving suppliers — but they signal that someone thought about this carefully.
String Lights, Climbing Roses, Pea Gravel
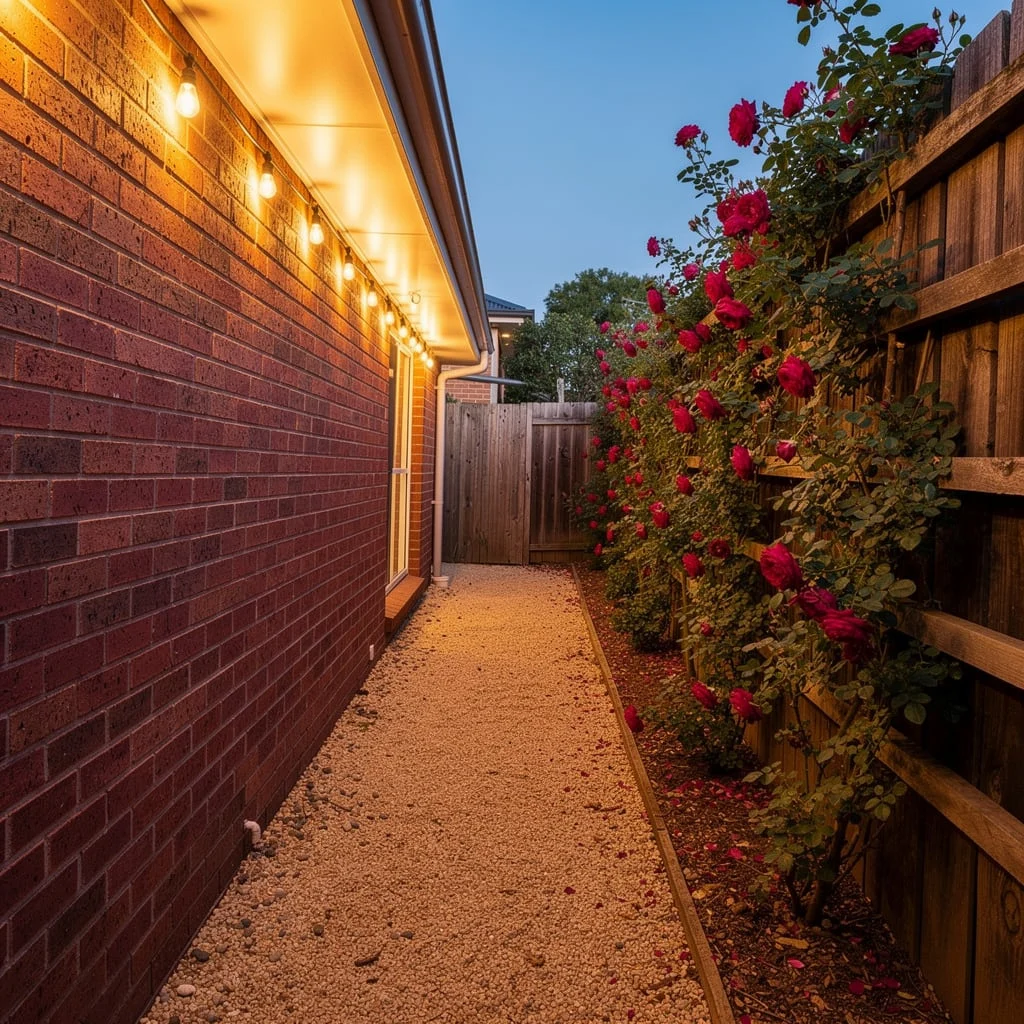
Run exterior-grade festoon string lights along the full length of the roofline bracket to the fence, evenly spaced and at a consistent height. The bulbs should be warm white — not daylight, not Edison-yellow, warm white. Fill the path with compacted pea gravel, deep enough to walk on without sinking. Against the fence, train a climbing rose on a simple timber trellis — a dense, repeat-flowering variety like a red climber that produces through multiple seasons. At dusk, the string lights reflect in the gravel surface and the climbing roses glow against the warm brick wall in a way that has nothing to do with design and everything to do with atmosphere.
This is the easiest of all these ideas to execute and consistently one of the most effective.
Paved Path, Grass Strip, Agapanthus Border
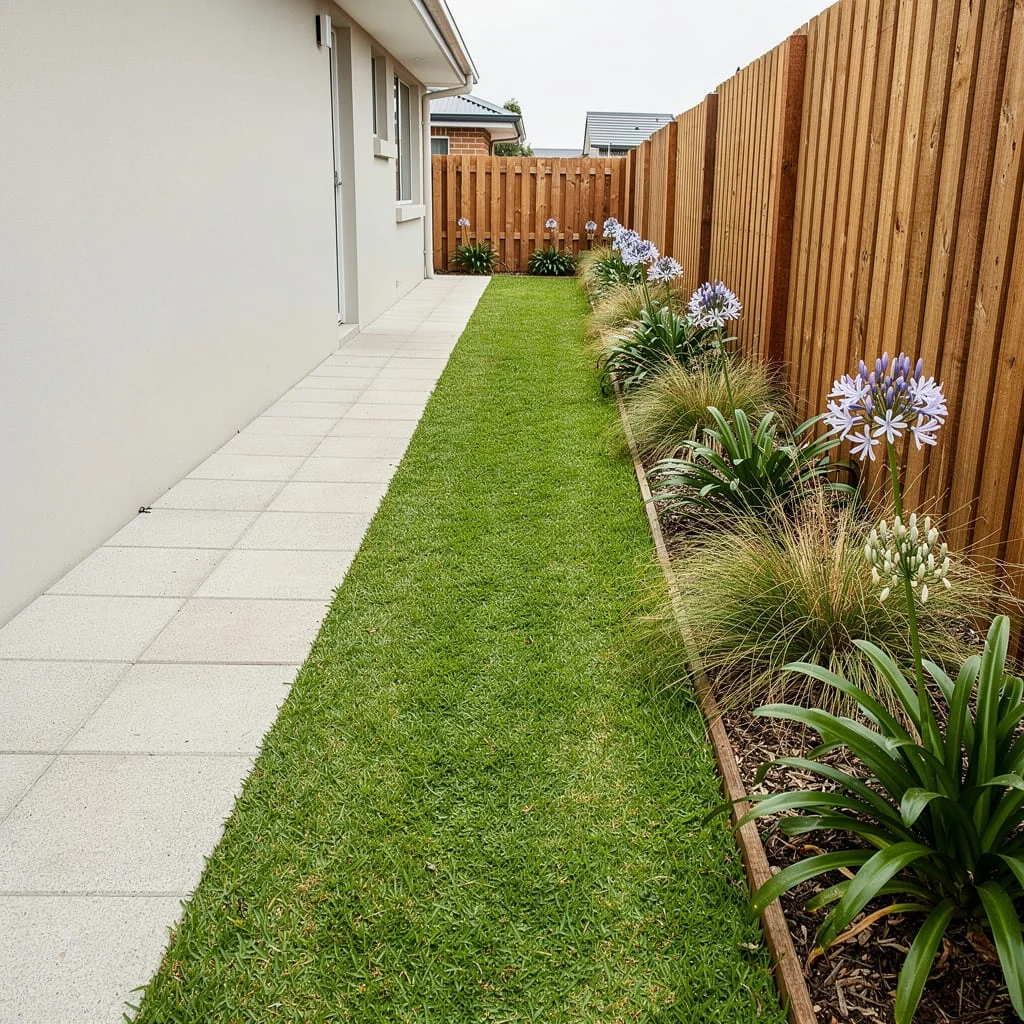
Lay cream granite pavers along the house wall as a clean walking surface, 600mm wide. Leave a strip of turf — real turf, not artificial — between the pavers and the garden bed. Then plant the bed with alternating agapanthus, ornamental grasses, and dark mulch against a vertical-board cedar fence. Three layers, three textures, three tones of green against warm timber. The grass strip is what makes this work: it softens the transition between the hard path and the planted bed and gives the whole composition an easiness that direct-butt-to-garden never achieves.
Keep the lawn strip narrow — no wider than 400mm — so it reads as a design element rather than an accidental leftover.
Timber Sleeper Steps in Grass
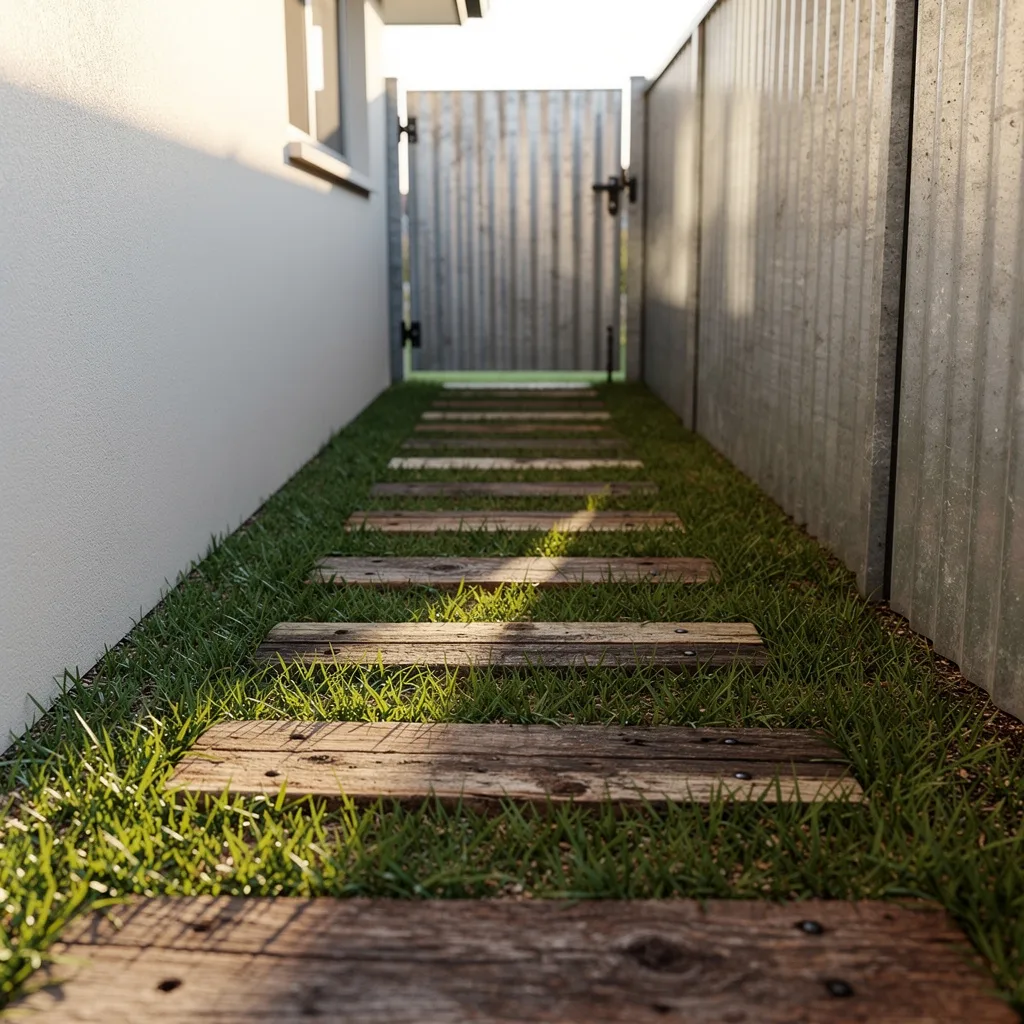
Set treated hardwood railway sleepers — the real thing, full-depth, with visible grain and nail holes if they’re recycled — as stepping stones laid flat into a grass base. Space them at a comfortable walking stride. Let the grass grow between and around the sleepers so the timber reads as emerging from the lawn rather than sitting on top of it. The beauty of this approach is its honesty. There’s no gravel, no edging, no fuss. Just old wood and living grass and a gate at the far end.
This works in the narrowest of passages because it takes up no visual space — the grass is the ground, the sleepers are just guides for your feet.
Herringbone Brick, White Daisies Both Sides
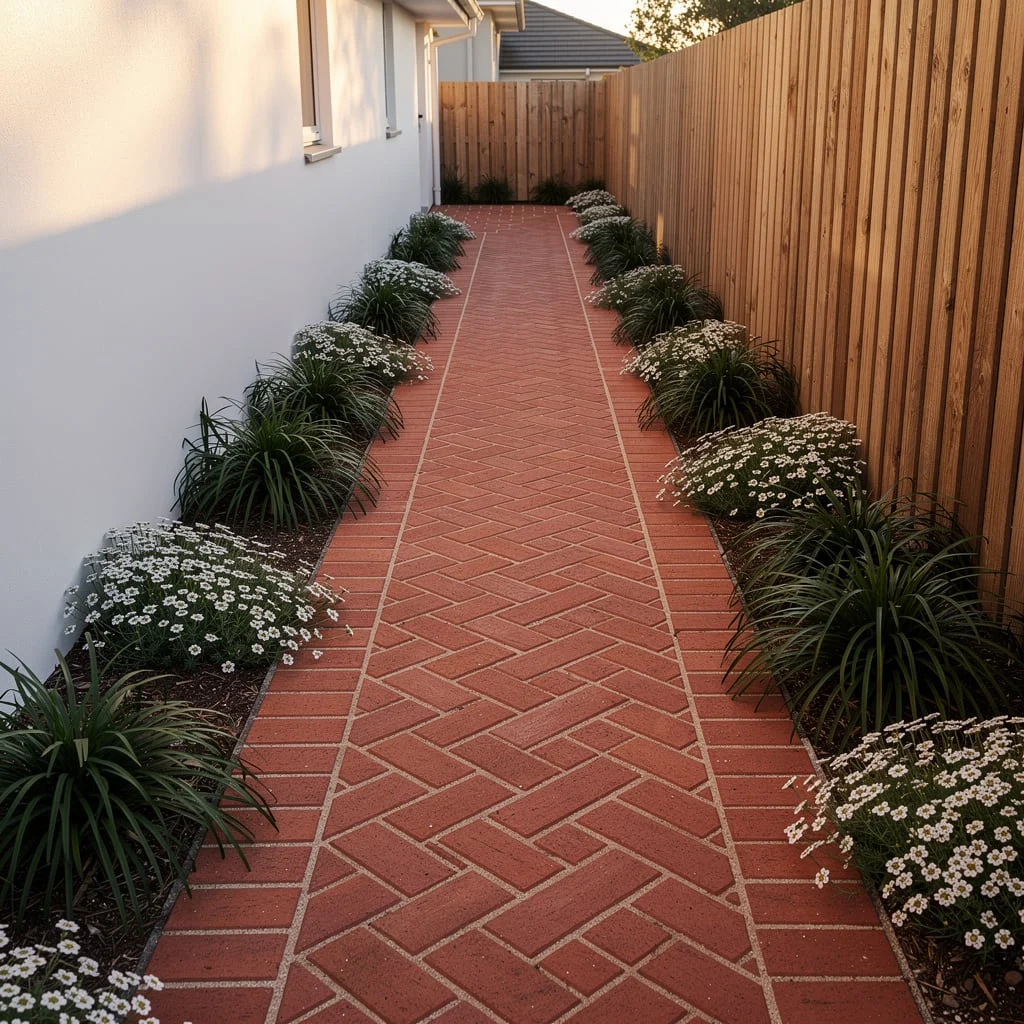
Lay clay pavers in a herringbone pattern across the full width of the passage. Use a terracotta red brick — not a concrete look-alike — and grout with white sand so the diamond pattern is crisp and readable. Then plant identical borders on both sides: alternating liriope and white daisies, all the same species, all the same height, perfectly mirrored. The bilateral symmetry gives a narrow passage a formality that makes it feel like a design feature rather than a gap between things. The warm brick and the white flowers are timeless. The cedar fence behind becomes a warm backdrop for a composition that would be at home in a Victorian terrace or a new build.
Don’t mix species in the border. Restraint is what makes the symmetry land.
Flagstone in Creeping Thyme
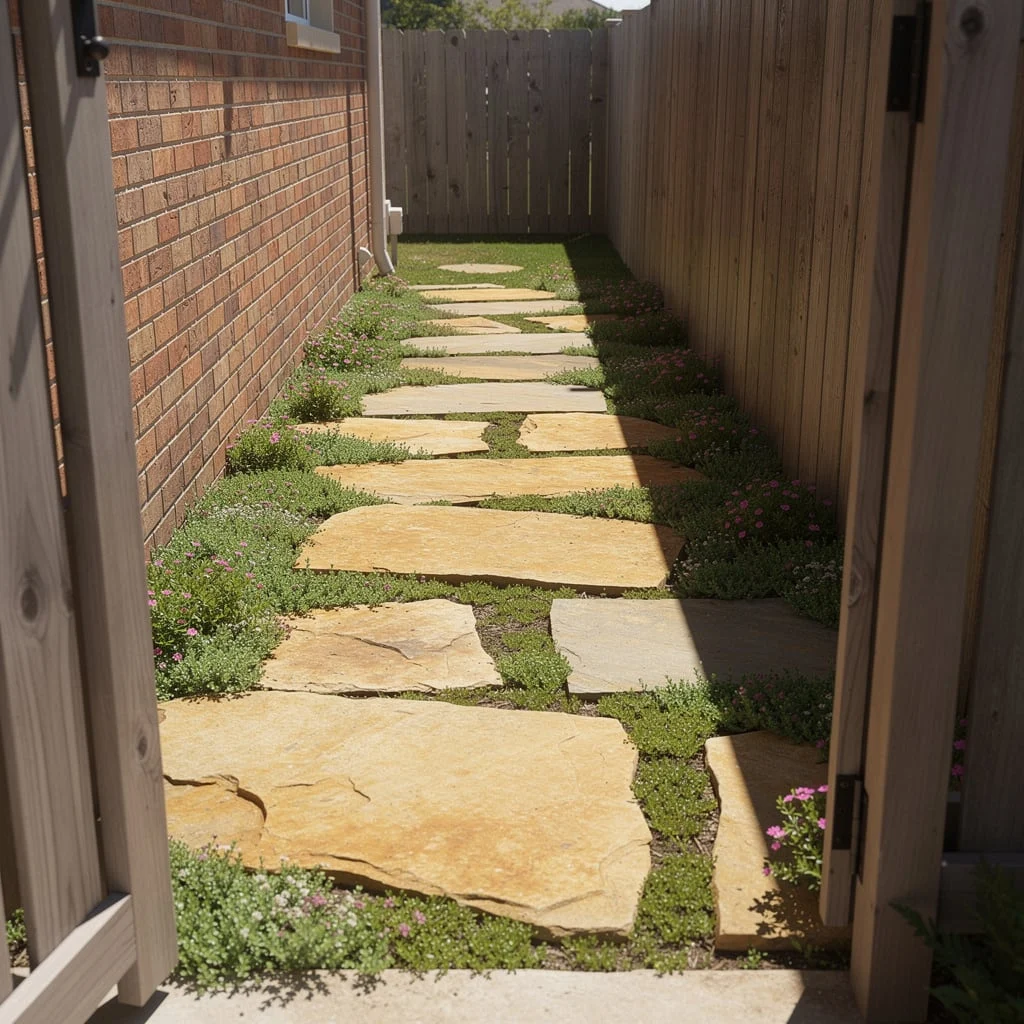
Source irregular sandstone or limestone flags — not cut square, not uniform size — and lay them in a random mosaic across the width of the passage. Leave generous gaps between each stone — at least 30 to 40mm — and plant those gaps with creeping thyme. As the thyme establishes and spreads, it fills the joints and releases fragrance when stepped on. Use a low-growing flowering variety — Thymus serpyllum works well — that stays below the stone surface so it doesn’t become a trip hazard. This is the one path treatment that actually improves the more it’s walked on. The worn-in quality it develops after two seasons is something no manufactured paving product ever achieves.
The Living Fence Wall
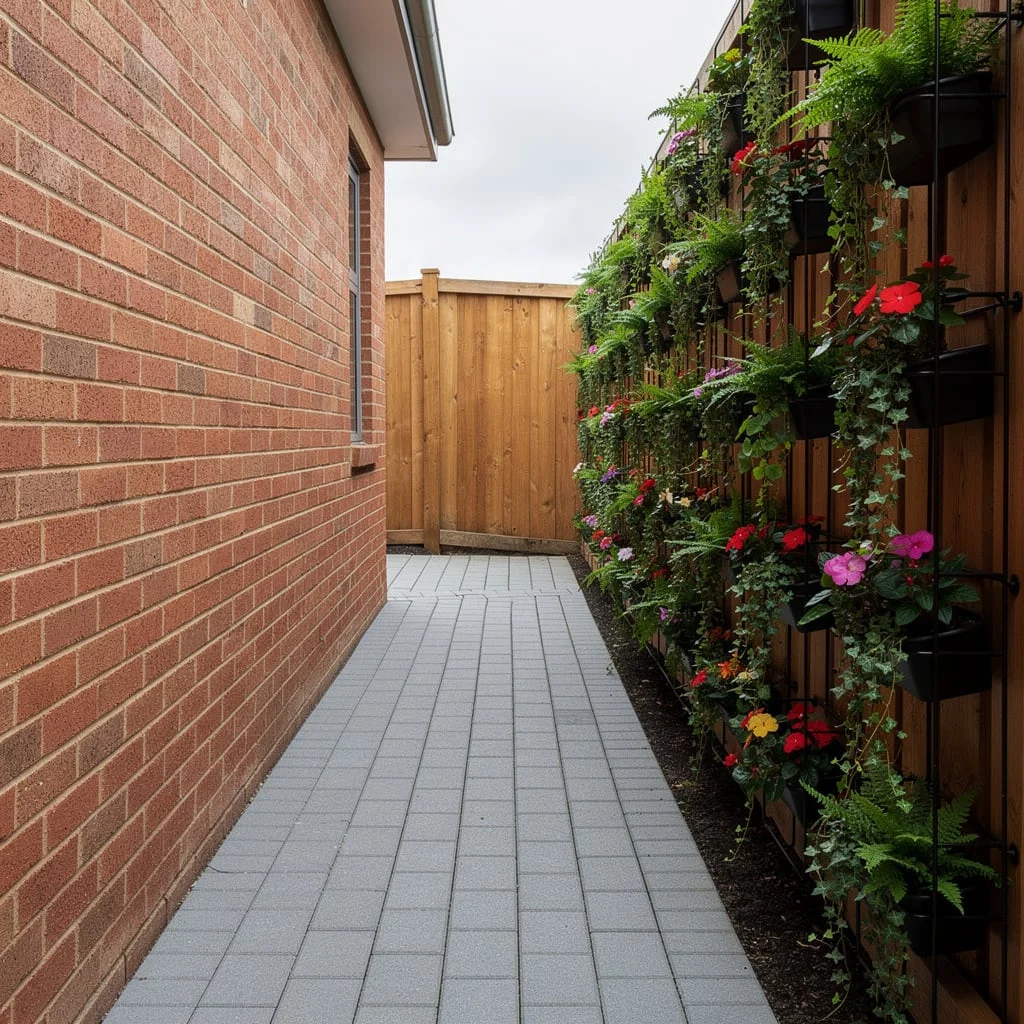
Mount a modular vertical garden system to the fence using black powder-coated steel brackets set at regular intervals — these are available as flat-pack systems from most garden retailers. Fill the pots with a mix of ferns, ivy, and impatiens for colour. Allow the ivy to trail and climb between pots so over time the fence disappears behind a continuous planted surface. Lay cobblestone-format grey pavers on the path side so the floor is hard and clean against the lush vertical green. The contrast between the controlled hard surface and the exuberant planted wall is what makes this work.
Water the vertical system on a drip timer — hand watering a wall of pots is unsustainable within three weeks of installation.
Pebble Mosaic With Curved Border

Have a stonemason lay a river pebble mosaic as the path body — grey and white pebbles set into mortar, random pattern — with a border of alternating black and white diamond-cut tiles on each side. Then curve the entire path rather than running it straight. Even a gentle S-curve through a side passage transforms a utility corridor into a garden walk. Surround the path with a loose cottage planting — lavender, salvia, erigeron, anything with a soft informal habit — so the curved path reads as meandering through a garden rather than pointing down a gap between walls.
This is the most labour-intensive option on this list. It is also the one that will be photographed every time someone visits.
Full-Width Grey Tiles, Restrained Planting
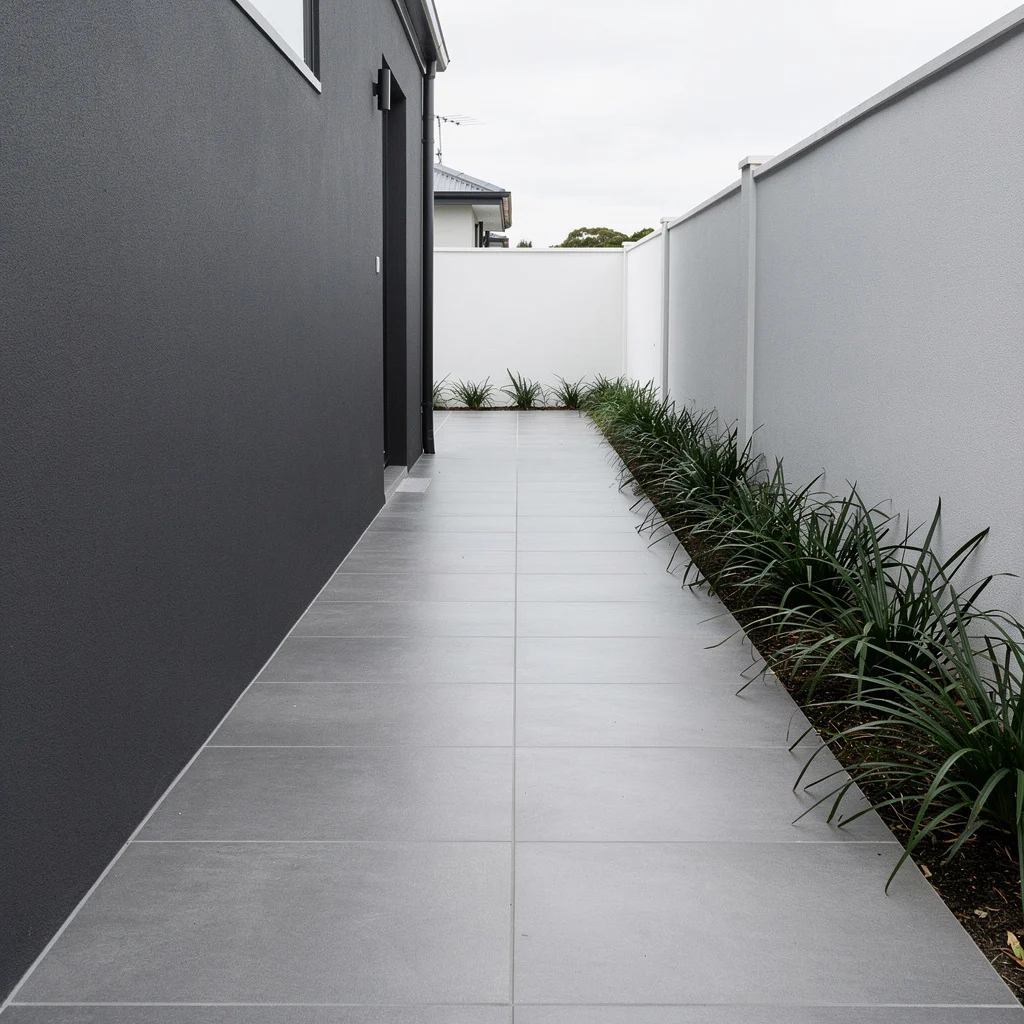
Lay 600x600mm light grey porcelain tiles full-width with minimal grout joints. Keep the border narrow — 150mm of black mondo grass in dark mulch against a mid-grey fence. Nothing else. No pots, no feature plants, no colour. Let the clean geometry do the work. This is for the house where everything else is already speaking loudly and the side passage needs to be quiet.
It takes confidence to make a space this restrained. Most people fill in the silence. Leave it.
Slate and Japanese Maple
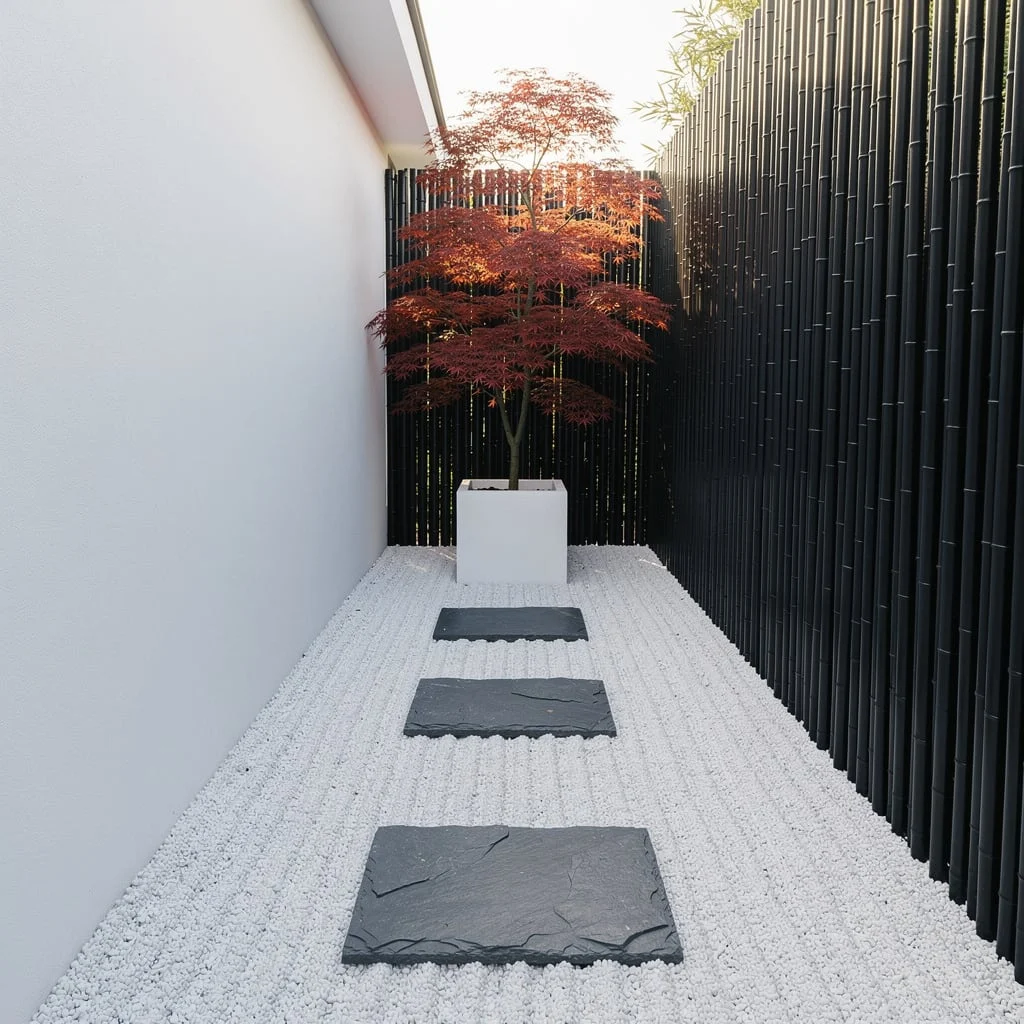
Fill the passage floor entirely with raked white pea gravel — rake it in parallel lines from wall to fence. Set three dark slate pavers as stepping stones. At the far end, place a single large white cube planter containing a Japanese maple — the burgundy-leafed variety, not green — with a screen of black bamboo stakes behind it as a privacy fence. Two colours: white and near-black. One point of drama: the maple. This is landscape design distilled to its most essential ingredients. It doesn’t need anything added to it.
The Longer View
Side passages are patient spaces. The ones that look best have been growing into their design for two or three seasons at minimum. The planting has filled in. The paving has settled. The gate has weathered to the right tone.
The biggest mistake isn’t choosing the wrong paver or the wrong plant. It’s expecting the space to look finished on day one.
Give it time. Make considered decisions about the elements that take years to change — the path surface, the fence treatment, the structural planting — and let the seasonal layers build themselves. A side passage that’s been properly considered and then left alone to mature will outlast every interior renovation you’ve done and look better for it.
The side of your house has been waiting. Decide what it’s for.