
Nobody is neutral about a decorated golf cart. Either you drove past a neighborhood parade and thought someone had too much time on their hands, or you were the one with the time. This guide is for the second person.
Golf cart parades are the July Fourth tradition that neighborhoods keep accidentally inventing because they’re genuinely fun, surprisingly competitive, and require just enough effort to feel like an achievement without requiring a flatbed truck and a permit. The carts in this collection range from a twenty-minute seat cover swap to a full professional flower installation that could anchor a wedding.
Here’s how to build each one.
Why Most Golf Cart Decorations Miss the Moment
The cart pulls out of the driveway. It looks patriotic. It does not look like anything in particular. This is the failure state.
No Visual Theme
A cart with a few flags, some ribbon, and a balloon tied to the back is a cart that tried. A cart with a single unifying idea — all flowers, all balloons, all typography, all Western — is a cart that decided. The deciding is the difference. Every cart in this collection has one dominant concept and everything else supports it. Pick your concept before you buy the first roll of ribbon.
Wrong Scale for a Moving Vehicle
Decorations that look great in a photo on a porch look small on a moving cart. The cart is three-dimensional, seen from multiple angles, and competes visually with everything around it at a parade. Scale everything up from your first instinct. The flower roof installations in this collection use hundreds of stems. The balloon clouds extend four to five feet above the roofline. The ribbon fringe covers every surface edge. Restraint is not a parade virtue.
Decorations That Don’t Survive Motion
Anything attached with tape will be gone by the second turn. Loose balloons will make a break for it at the first intersection. Ribbon that isn’t secured at multiple points becomes a kite. Build for a moving vehicle, not for a parked display. Use cable ties, bungee cords, and floral wire for structural elements. Test everything at parade speed — which is four miles an hour, but still — before the actual event.
The Design Approach That Separates the Winners
The carts that stop people mid-route have made a series of specific decisions. Not one inspired decision. A series of them.
Know Your Register Before You Build
There is a vast difference between the register of the flower-roofed white cart and the register of the mint cart with long-balloon spikes. One is a formal garden party on wheels. One is a beach town Saturday. Neither is wrong. Both are committed. Decide whether you’re going for whimsical, sophisticated, maximum noise, or quiet charm, and then build only in that direction.
The Roof Is the Hero
On a golf cart, the roof is the largest flat visible surface. It is seen from a distance. It is what reads first. Every successful cart in this collection treats the roof as the primary display surface and builds everything else — posts, sides, front, back — as supporting elements that lead the eye upward and outward to the roof.
If your roof is boring, your cart is boring. Start there.
Give the Posts Something to Do
The four roof support posts are the second most visible structural element and almost nobody uses them intentionally. Wrapping them in ribbon creates a barber-pole effect that carries the eye from ground to roof. Hanging bows from them creates visual rhythm as the cart moves. Trailing ribbon from them creates movement. The posts are four free decoration opportunities that most carts leave bare.
What to Decide Before You Go Shopping
Permanent or Seasonal
Custom paint, vinyl wraps, and permanent seat covers are different commitments than wire-and-floral-foam installations designed for one parade. Know which category you’re building. A full flag vinyl wrap on a custom-upgraded cart is a multi-season investment. A balloon cloud is a Tuesday afternoon and about forty dollars in supplies.
Budget by Zone
Divide the cart into four decoration zones: roof, posts, front/sides, and interior/seats. Allocate your budget and effort by which zone will be most visible in your specific parade route. If the route is mostly curbside viewing, the sides and front carry the most weight. If it includes a staging area where carts are seen from above, the roof matters most.
Weather
Silk flowers hold up in humidity. Fresh flowers are glorious for approximately three hours and then less so. Paper fans work in dry heat and fail immediately in rain. Balloons in direct summer sun will pop by mid-afternoon. Know your conditions and choose your materials accordingly.
Patriotic Golf Cart Ideas
The Patriotic Seat Cover Swap
The seat cover approach is the most accessible entry point in this entire collection. Source a cotton or canvas seat cover in a flag-print patchwork or flag-motif fabric and fit it over the existing seat cushion. Most standard golf cart bench seats take a cover cut to approximately forty-eight by twenty inches.
The key to making this look intentional rather than accidental is fabric quality and fit. A tight-fitting cover in a medium-weight cotton canvas looks purposeful. A loose cover in thin polyester looks like a picnic blanket was left on the seat. Choose fabric with a scale of print that’s large enough to read from ten feet away — the patchwork flag format shown here works well because each square is visible as a distinct motif.
This is the correct approach for a cart that needs to function as a golf cart the other 364 days of the year and doesn’t benefit from structural decorations that take an hour to remove.
The Long Balloon Spike Crown
Every beach community has seen exactly one cart that stopped everyone in their tracks. This is that cart.
Purchase 160q twisting balloons — these are the long, thin balloons used for balloon animals, not standard round balloons. You will need approximately sixty to eighty. Inflate each to about three-quarters of its full length so it retains some flexibility without becoming rigid. Attach them to the roof frame perimeter and roof surface using cable ties threaded through small holes at the knotted end of each balloon.
Work around the entire perimeter of the roof first, angling the balloons outward and upward at approximately forty-five degrees. Then fill the interior of the roof surface with additional balloons pointed straight up. Mix red, white, and navy blue throughout rather than grouping colors — the mixed color effect reads as a fireworks burst from any angle.
For the front of the cart, construct a separate twisted balloon pinwheel in three colors and attach to the front grill with a cable tie. Thread a short strand of small American flag bunting along the interior cross bar between the two front roof support posts.
The Flower Roof Installation on a White Six-Passenger
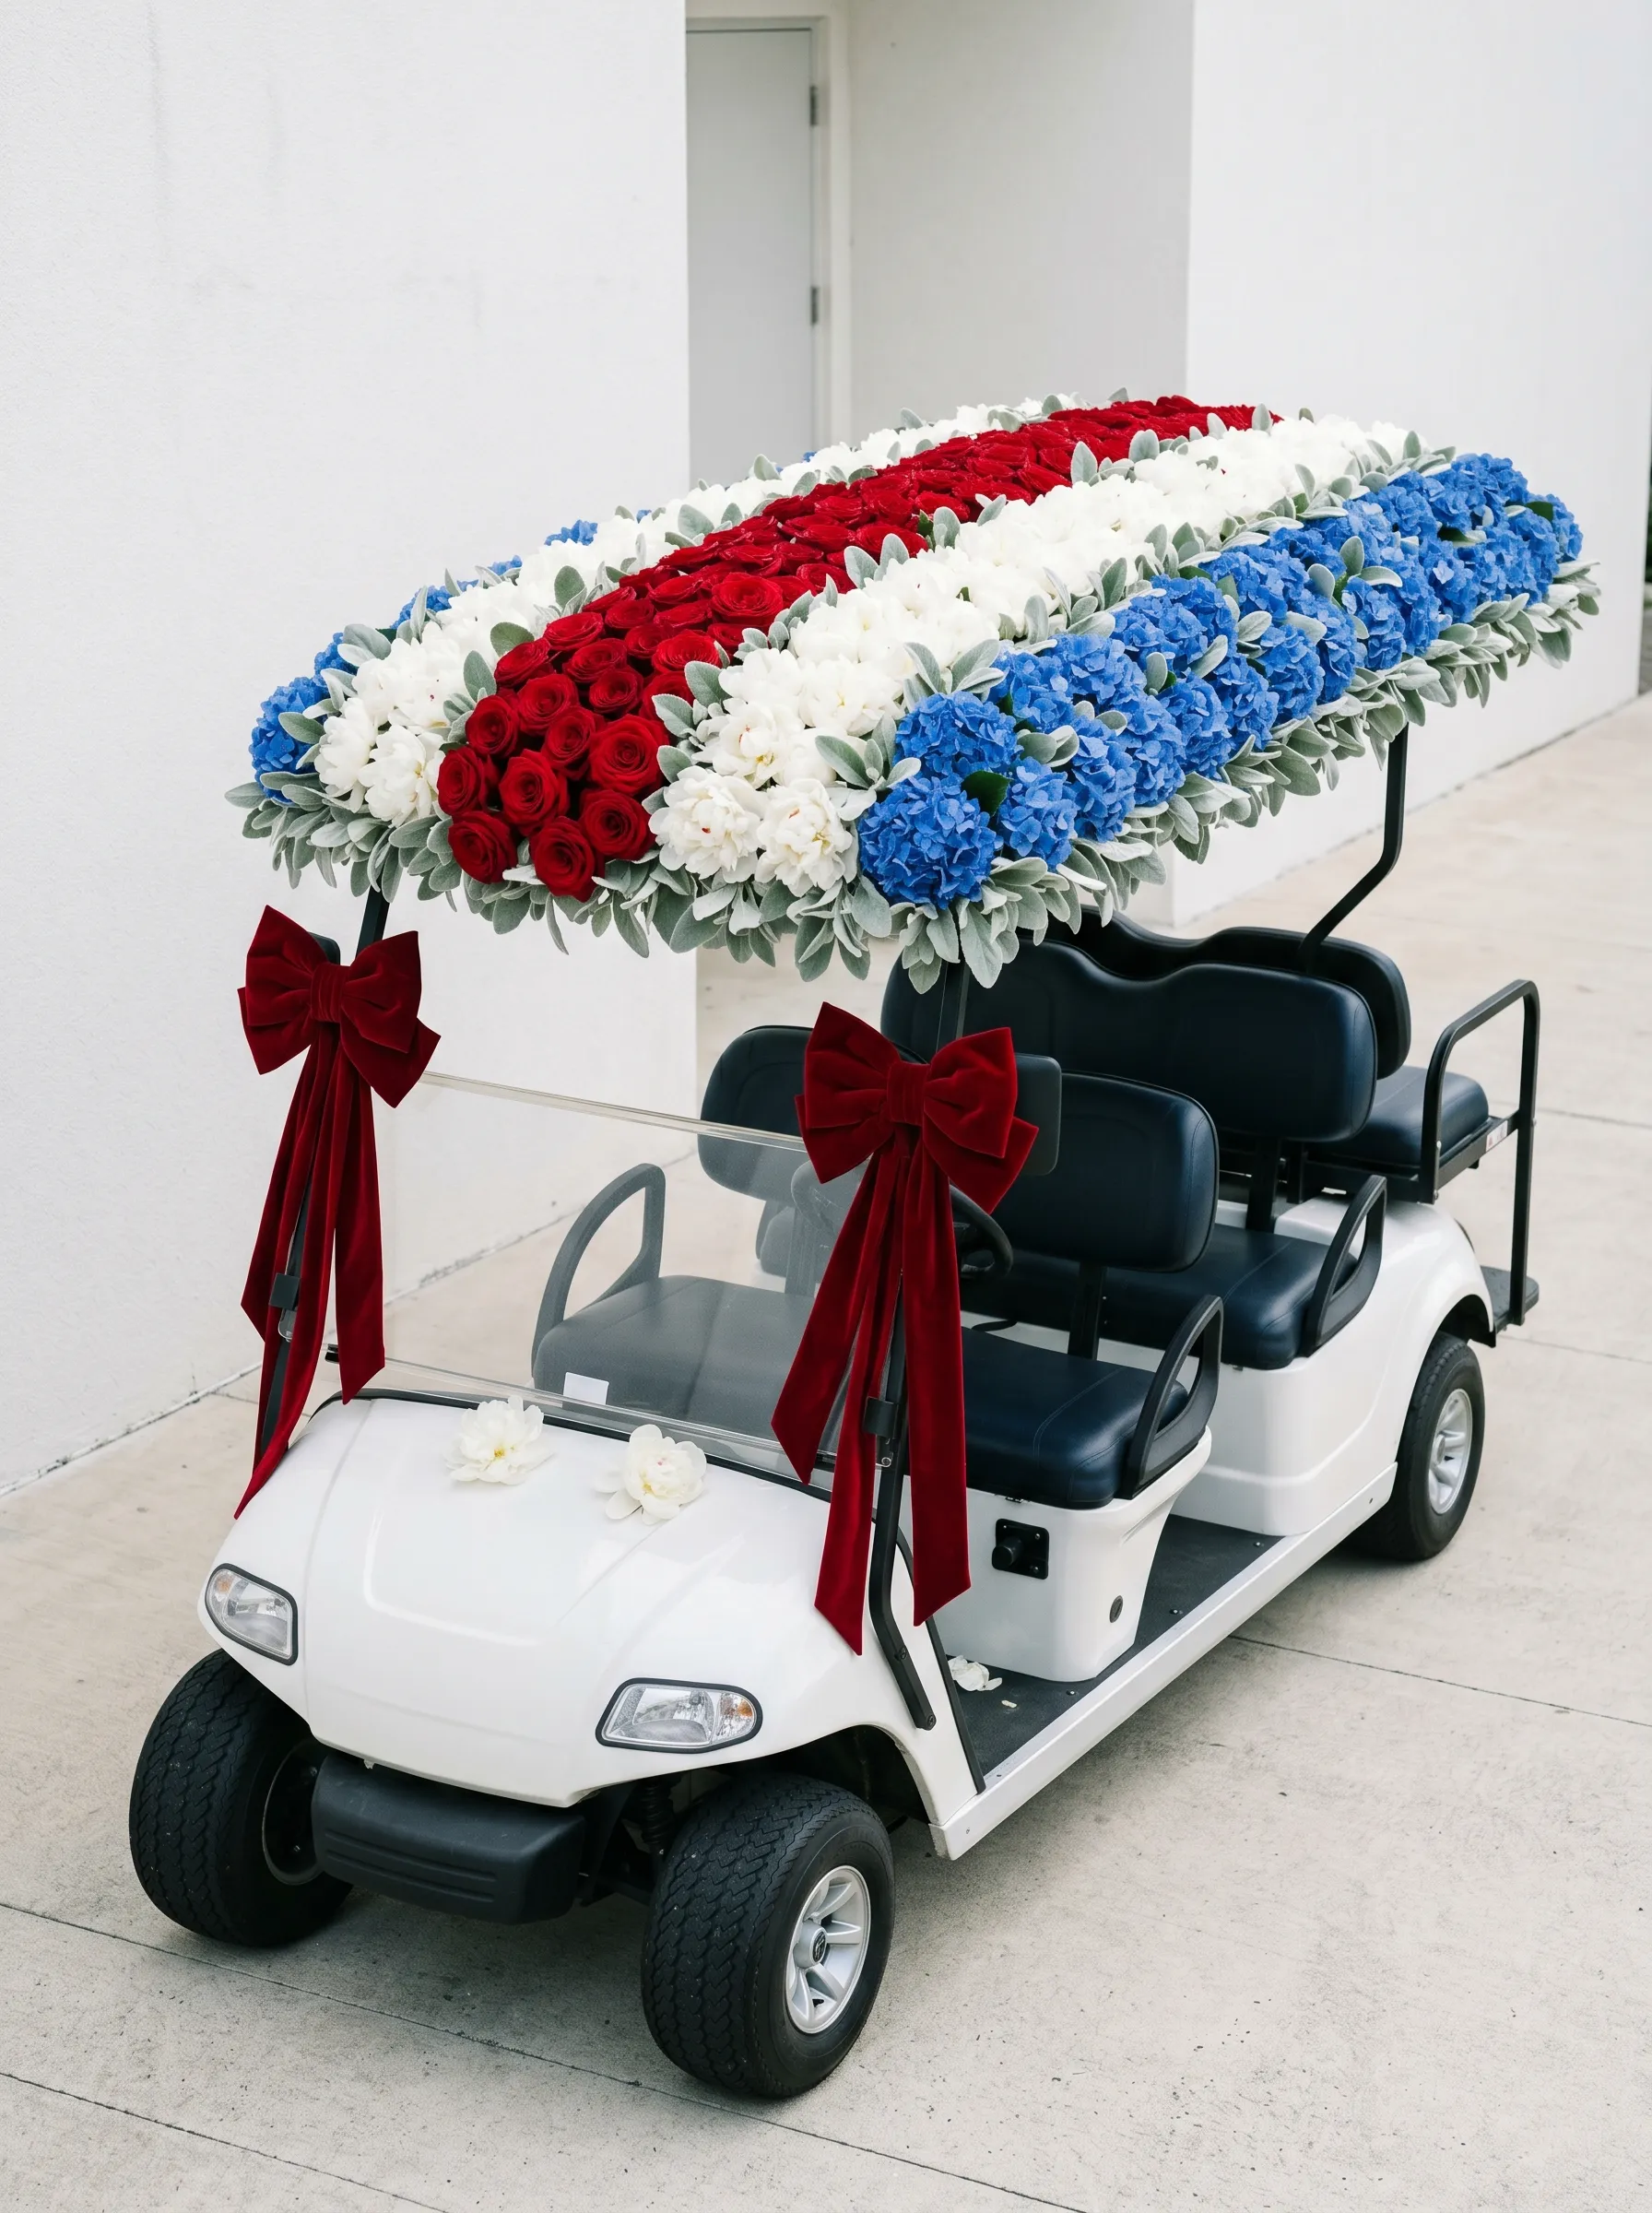
The most elegant cart in this collection. The principle is straightforward: build a continuous bed of flowers across the entire top surface of the cart, edge to edge, using a rigid frame base that rests on the existing roof.
Cut a piece of chicken wire or hardware cloth to the exact dimensions of the roof. Bend the edges down by two inches to create a lip that rests on the roof edge. Secure to the roof with cable ties through the existing roof drainage holes. Over this frame, lay and secure floral foam blocks in rows, soaking them thoroughly before installation.
Build the flower installation in three color bands: a red garden rose band across one third of the roof, a white peony or white hydrangea band through the center third, and a blue hydrangea band across the final third. Edge the entire installation with silver dusty miller or eucalyptus leaves to create a clean perimeter. The grey-green foliage edge separates the flower colors from the cart body and gives the installation a finished, intentional border.
On the roof support posts at the front, attach deep burgundy velvet ribbon bows — tied with long tails hanging to the seat level. One per front post, one per rear post. Nothing else. The flowers are the decoration. Let them work.
The Western Patriotic Barn Cart
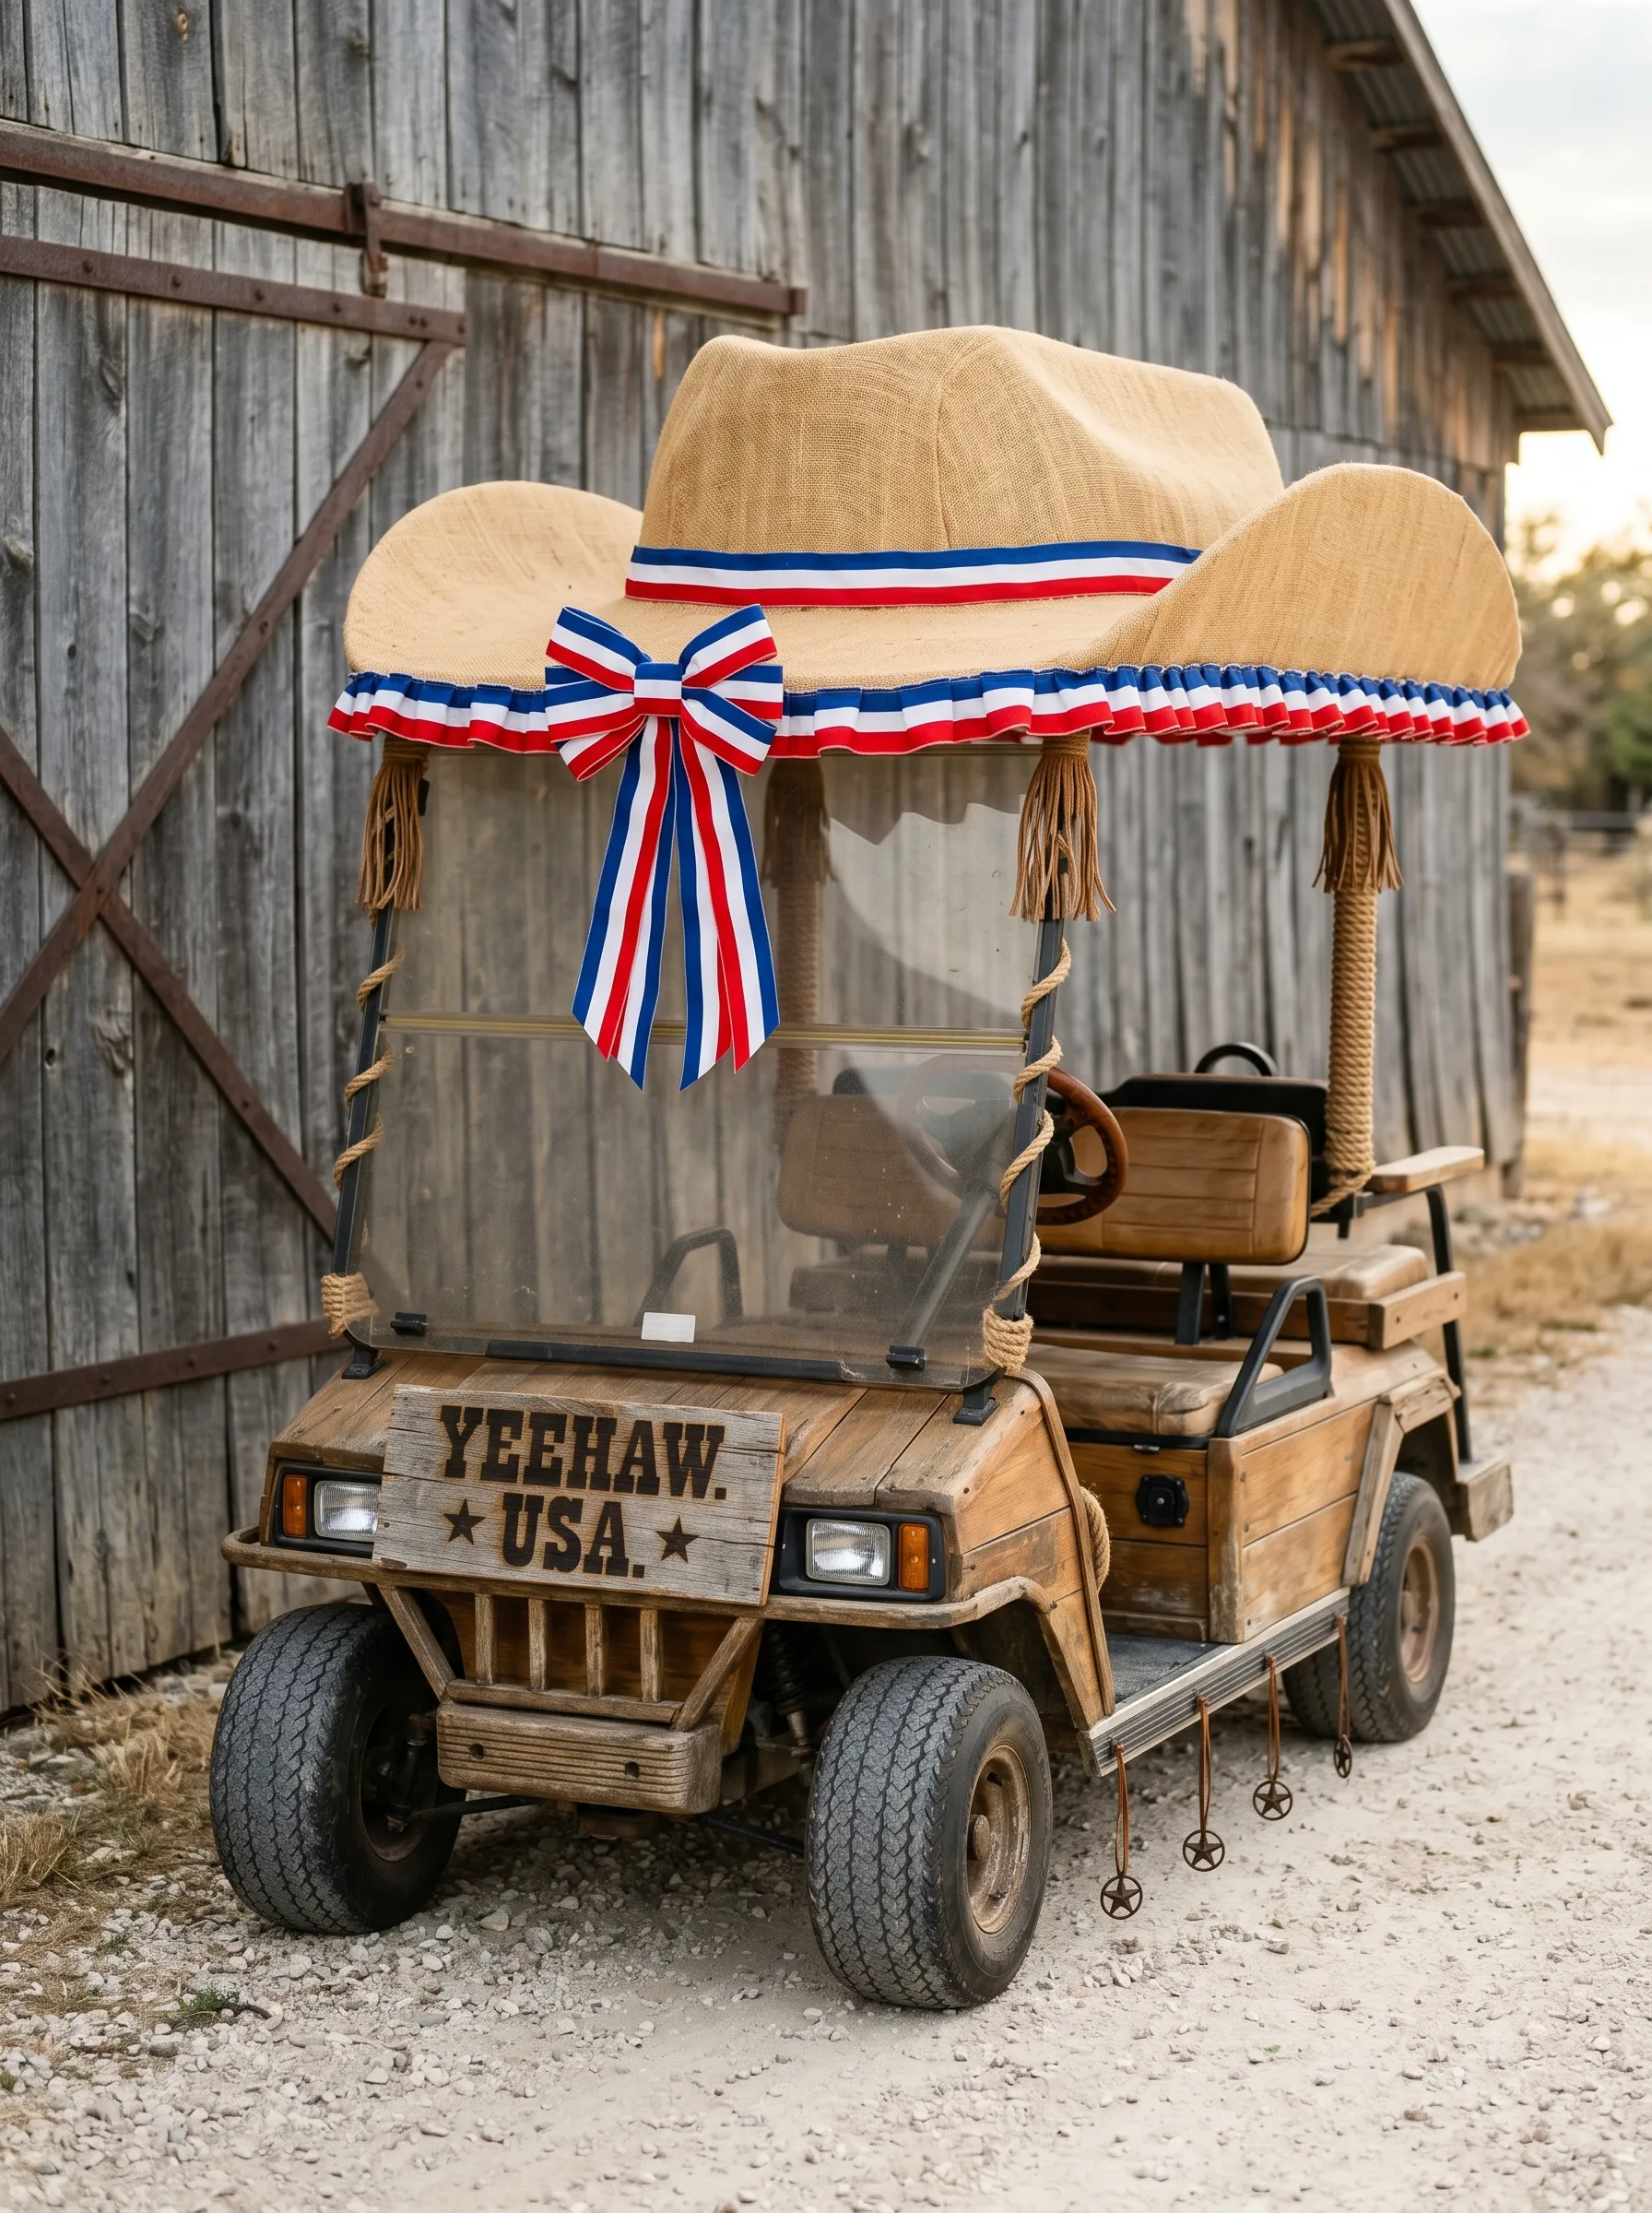
The concept is specific and the execution follows from it completely: a cart dressed as a Western ranch vehicle. Start with the body cladding — attach panels of rough-cut or weathered barnwood to the front hood and side panels using strong double-sided automotive tape and cabinet screws, or source a wood-paneled cart body if the investment makes sense. Burn or route a short phrase in large block letters into the front panel.
For the roof, construct a large straw cowboy hat shape from burlap-covered foam or purchase an oversized novelty cowboy hat large enough to sit on the roof — at minimum twenty-four inches across the brim. Secure to the roof with cable ties through the hat structure and around the roof frame edge.
Add a ruffle of red-white-blue stripe ribbon to the underside perimeter of the hat brim where it meets the roof edge. Wrap a wide stripe ribbon around the hat band area, overlapping it in a precise pleated ruffle. Tie a large multi-loop bow in matching stripe ribbon at the front center.
Wrap each roof post in jute or manila rope in a spiral from base to roof connection. Hang small wrought iron star pendants on lengths of jute from the back bumper. The combination of rope, barn wood, and oversized hat brim creates a visual identity that reads clearly from fifty feet.
The Full Competition Cart With Flower Roof, Bows, Balloons, and Signage
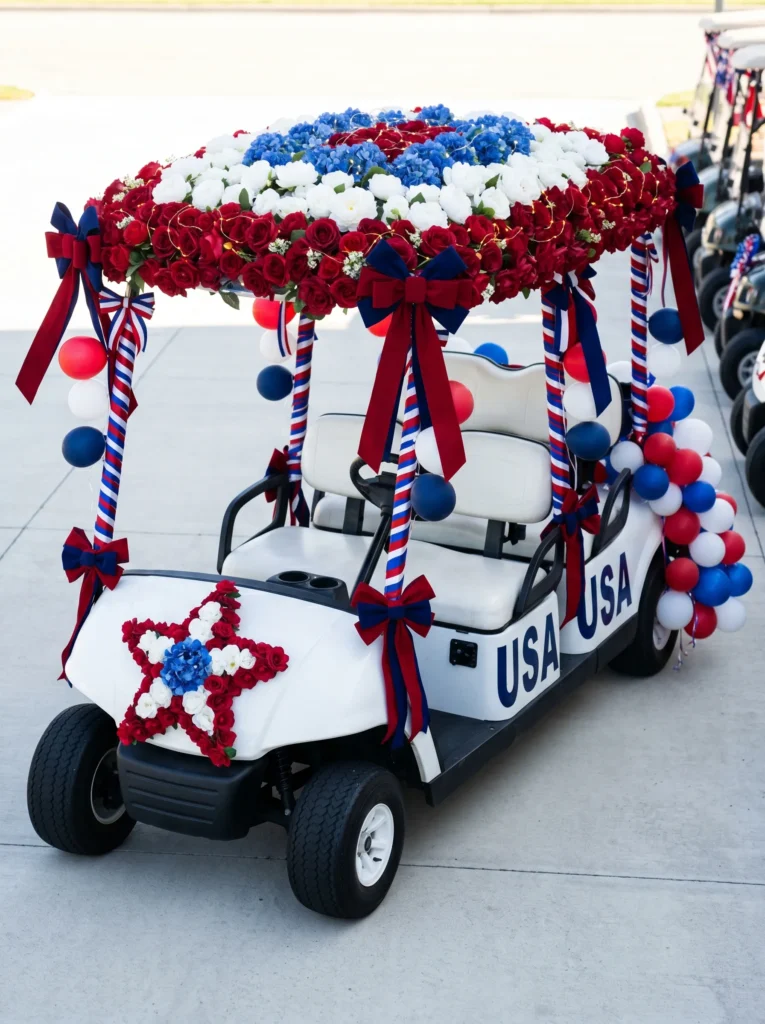
This cart enters to win. Everything is working simultaneously and somehow avoiding chaos because each element has a defined zone.
The roof gets the full flower installation: red roses, white silk flowers, and blue hydrangeas in a continuous massed coverage edge to edge. Nestle a strand of warm-white fairy lights throughout the flower layer so they twinkle through the petals. Add three to five tall agapanthus or allium stems at intervals rising above the flower layer for height variation.
The posts get two treatments: large deep red velvet bows at the top where the post meets the roof, and lengths of red-white-blue striped ribbon wrapped diagonally down each post in a barber-pole spiral, with the ends left free to trail. On the front hood, construct a star shape from silk flower heads in the palette — red roses for the star outline, white flowers filling the upper half of the star interior, blue flowers for the lower half.
On the side panels, letter “USA” in large vinyl or painted block letters repeated on both sides. At rear corners, attach small mixed balloon clusters — four to six balloons each — in navy, red, and white.
The Typography and Vinyl Wrap Statement Cart
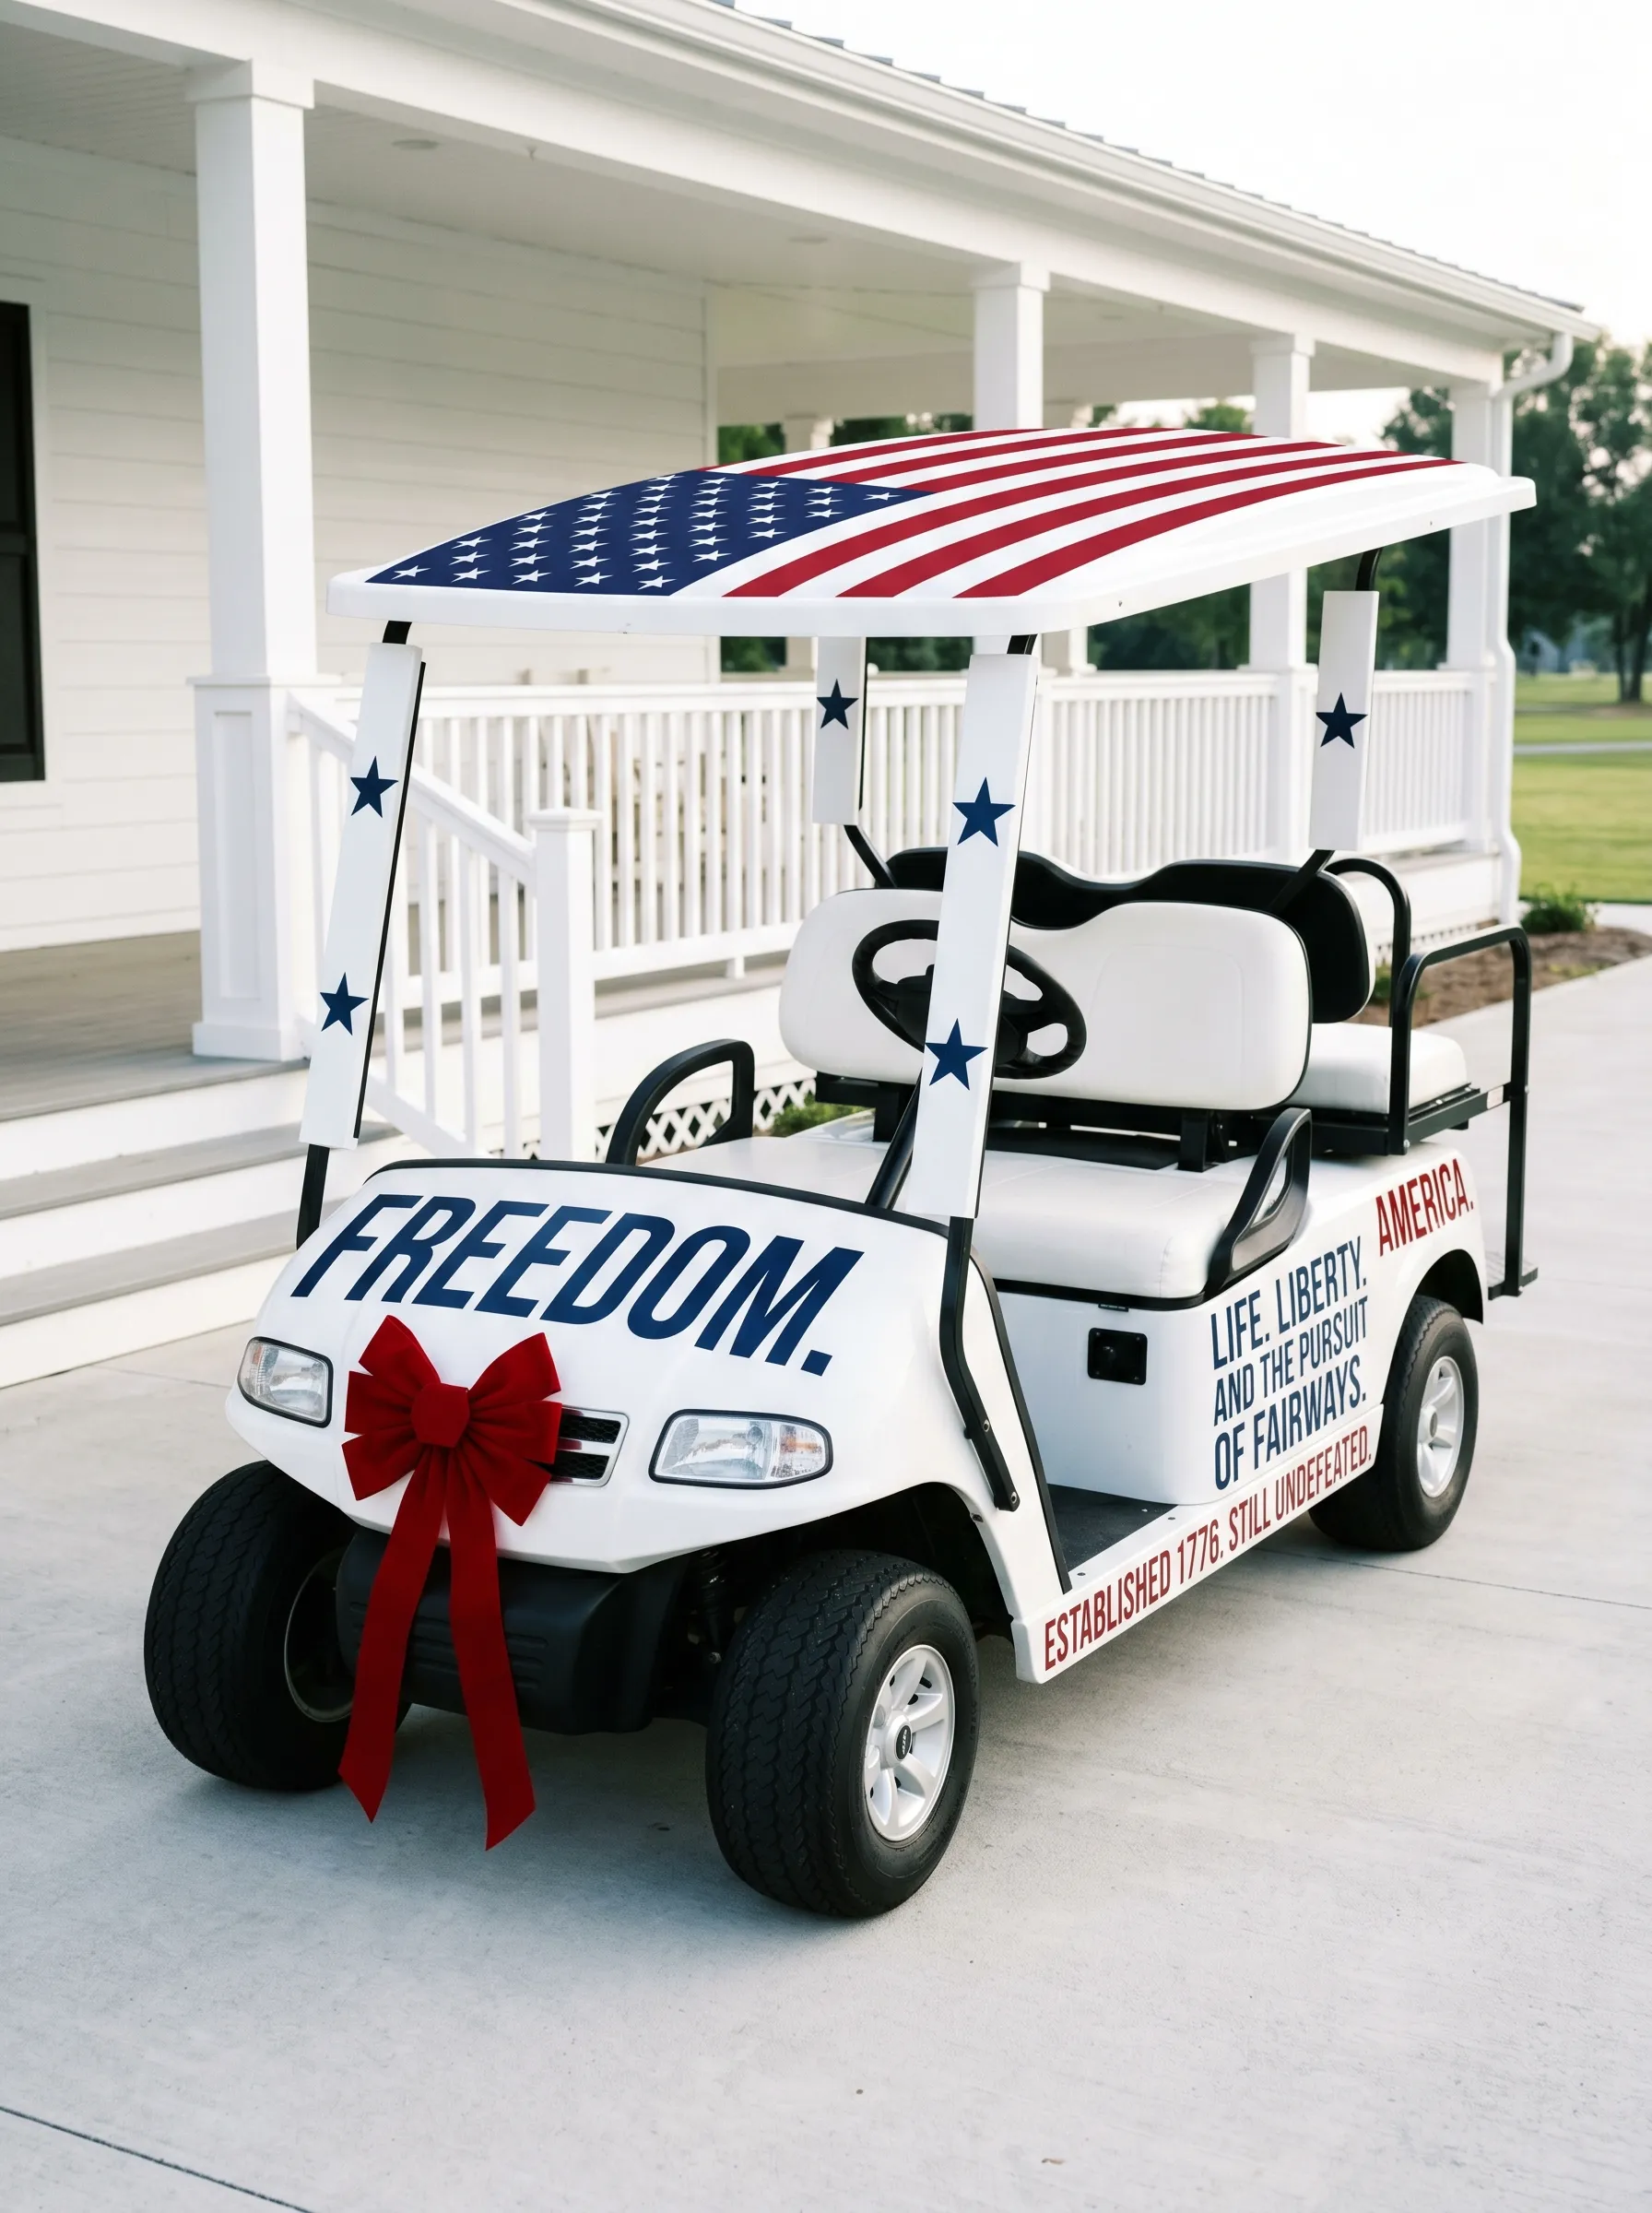
Words are underused in golf cart decoration. This cart is entirely built around type and it is completely confident about it.
Apply a full flag vinyl wrap to the roof — this is available as a pre-cut roof decal for common golf cart models from several online retailers and applies like a large sticker. The flag image should orient with the canton (star field) in the front upper left corner as if the cart were driving into the wind.
On the front hood, apply large vinyl lettering in a bold block font in navy: a single word, maximum nine characters, in capitals. On the passenger side panel, apply a smaller secondary text block in a combination of red and navy — a short phrase in two typographic treatments, mixed caps and sentence case.
On the front roof support posts, apply small individual star decals spaced approximately six inches apart up the full post height. On the front bumper, attach a single large velvet bow in deep red with long tails. Leave everything else white. The contrast between the white cart body, the minimal typography, and the single bow is the look.
The Flower Garland and Pennant Parade Cart
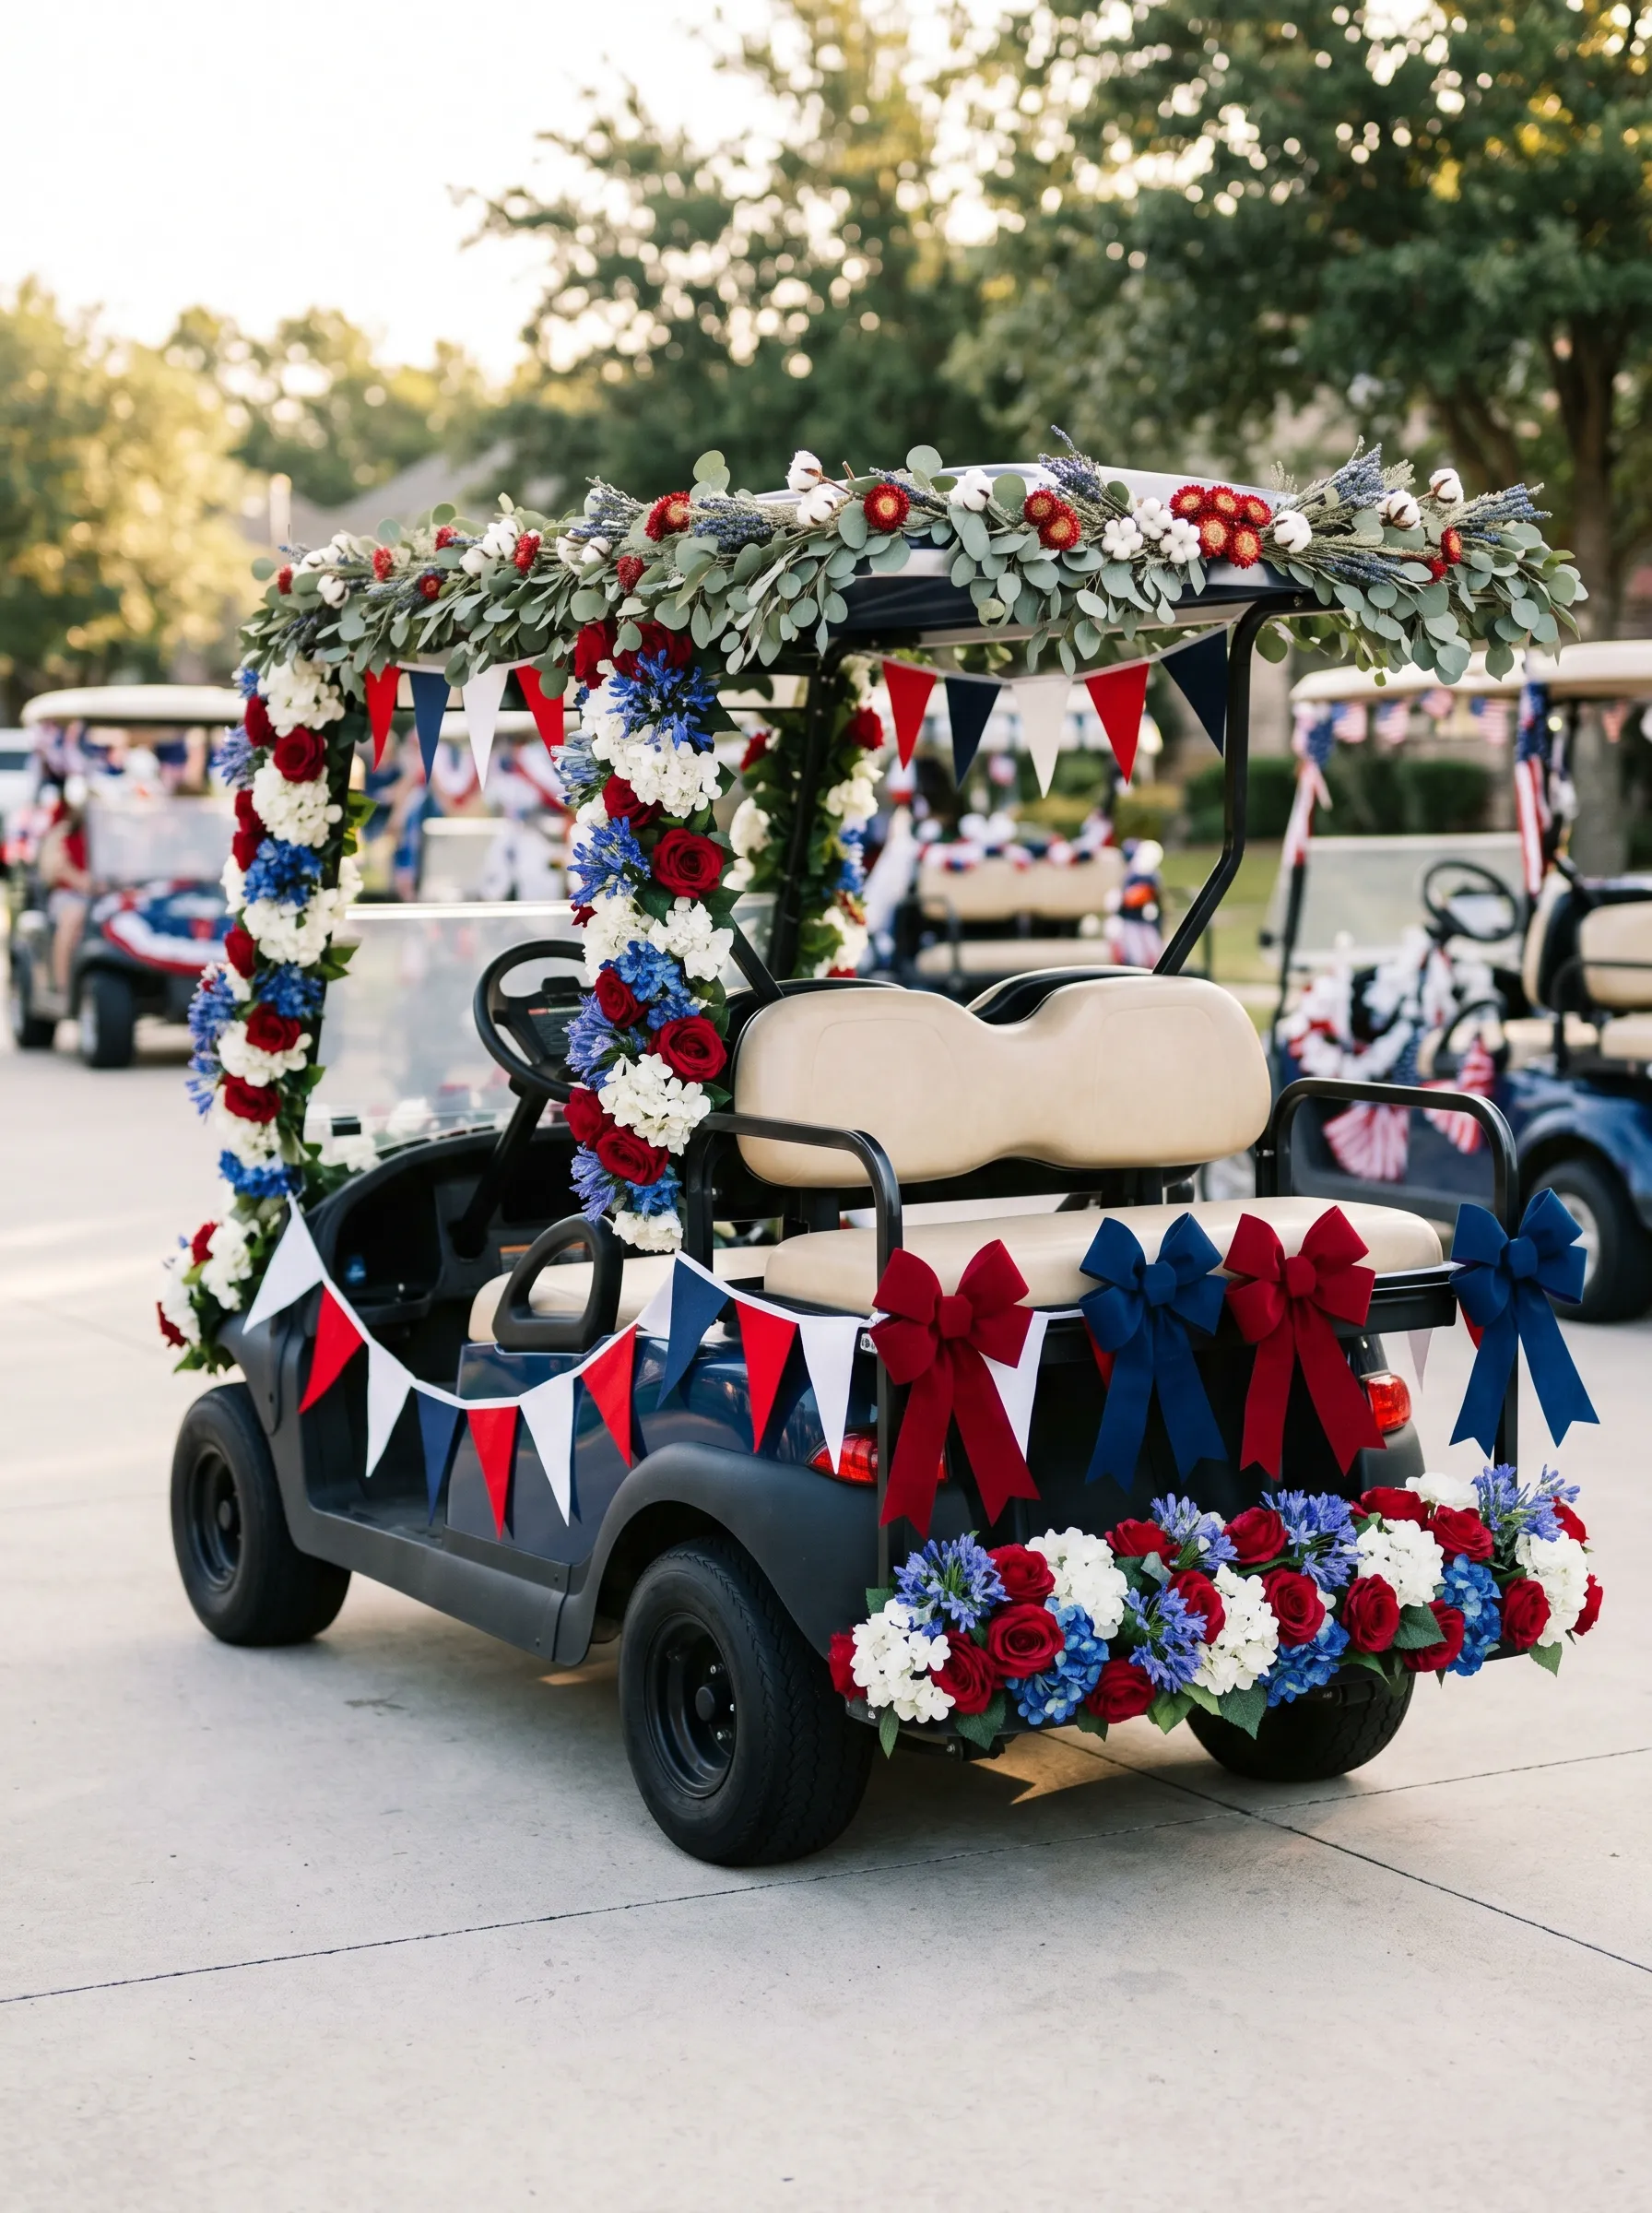
This cart is built for a parade route — it has decoration on all four sides and reads clearly from any approach angle.
Build the hero element: a continuous flower garland that wraps around each roof post from ground level to roof height, then travels across the underside of the roof perimeter at eave height. Wire silk rose heads, white hydrangea clusters, and blue agapanthus stems to a base of flexible wire or thick jute rope at alternating intervals. Work in sets of three: one red, one white, one blue, repeat. The garland should be dense enough that the rope base is not visible.
For the pennant garland, cut triangles of fabric in red, white, and navy approximately eight by six inches and string on baker’s twine. Run one strand along each roof edge from front to back and one across the front face of the roof. At the rear of the cart, build a swag of mixed flowers in a flat arrangement mounted on the rear bumper or attached to the back panel.
On the rear uprights, attach large bows — one deep red, one deep navy — at mid-height.
The Ribbon Explosion Cart
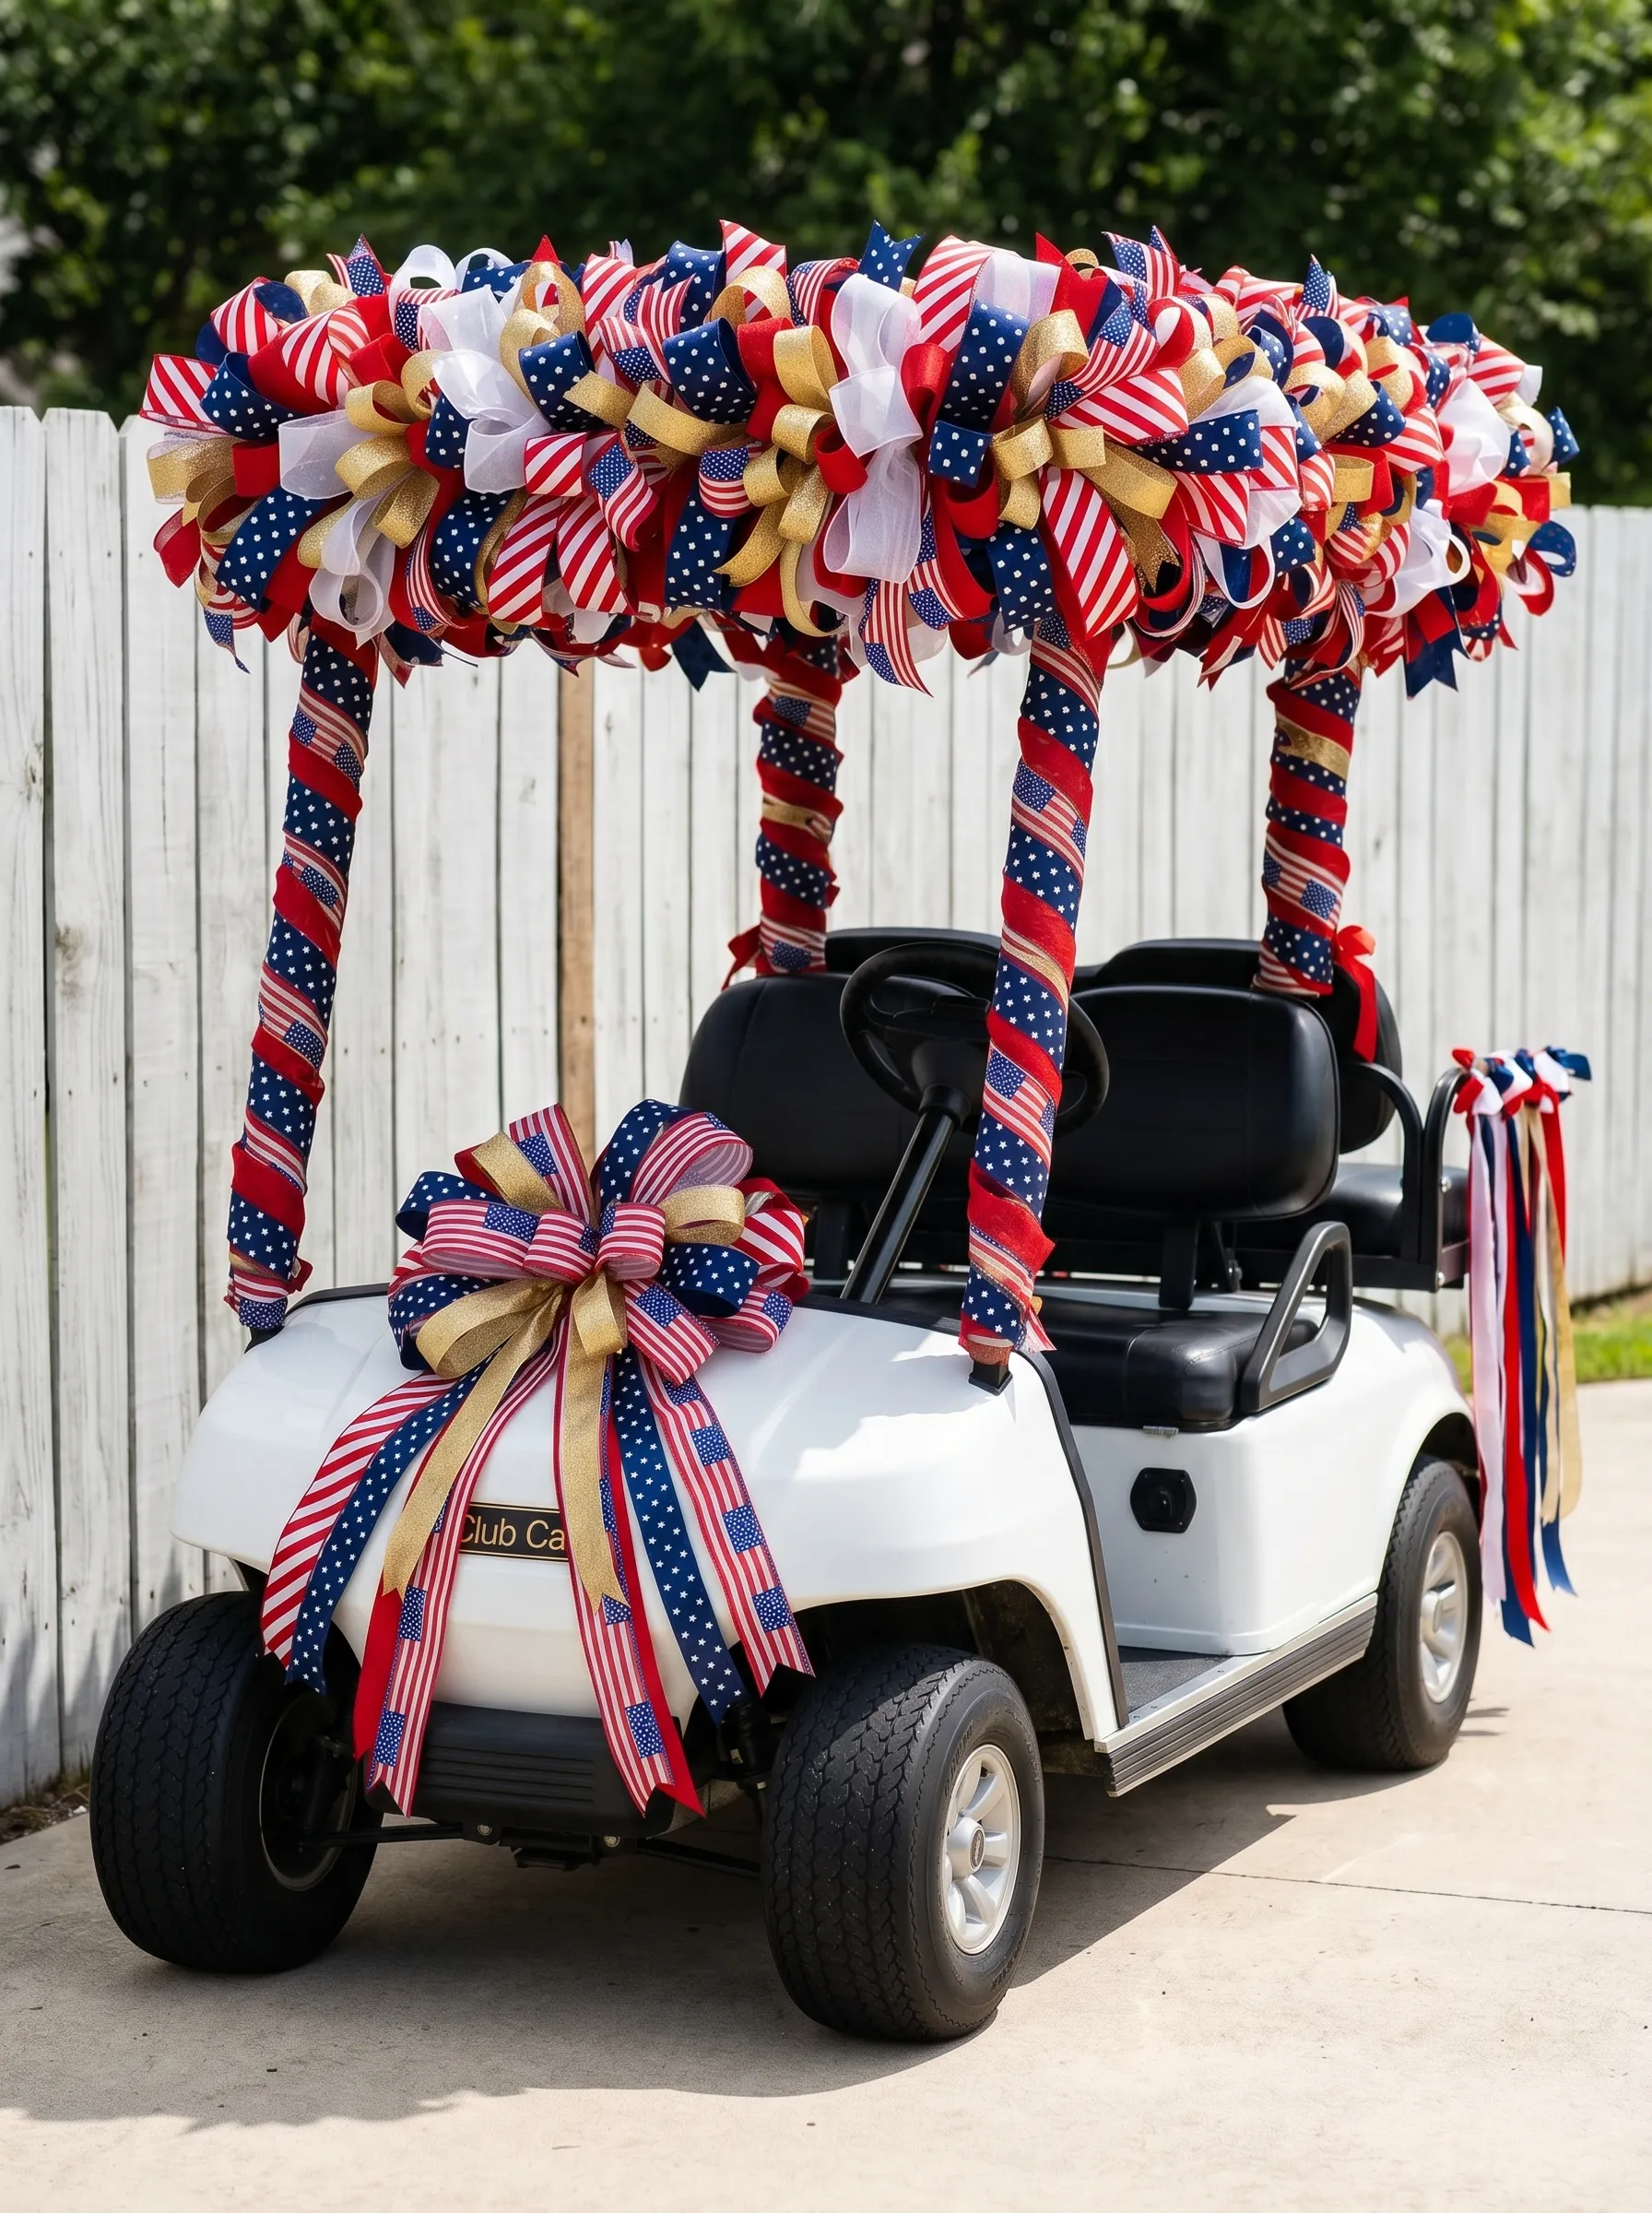
This cart chose a single material and went all the way with it. The material is ribbon and there is a lot of it.
Source ribbon in eight to ten different patterns within the palette: red-and-white stripe, navy polka dot, flag print, gold metallic, white grosgrain, sheer white organza, red satin, navy satin, red-white-blue stripe. Cut lengths of approximately sixteen inches from each roll, then group them in bundles of six to eight mixed ribbons and tie each bundle in a lark’s head knot through a piece of chicken wire stretched across the roof frame. Work from the outer edges inward, packing the bundles tightly together until the entire roof surface is covered in loops and tails of mixed ribbon.
On each post, wrap alternating spirals of two different ribbons — one stripe and one solid — taping at top and bottom and securing the spiral with additional tape at mid-point. At the front, build a large combination bow from five to seven of the same ribbon types, tie it as a multi-loop bow, and attach to the front center grill. Leave two long tails in the most graphic ribbon of the collection.
At the rear of the cart, attach additional ribbon tails of twelve to eighteen inches in length so they trail behind the moving cart.
The Flag Canopy Cover With Flags and Bow
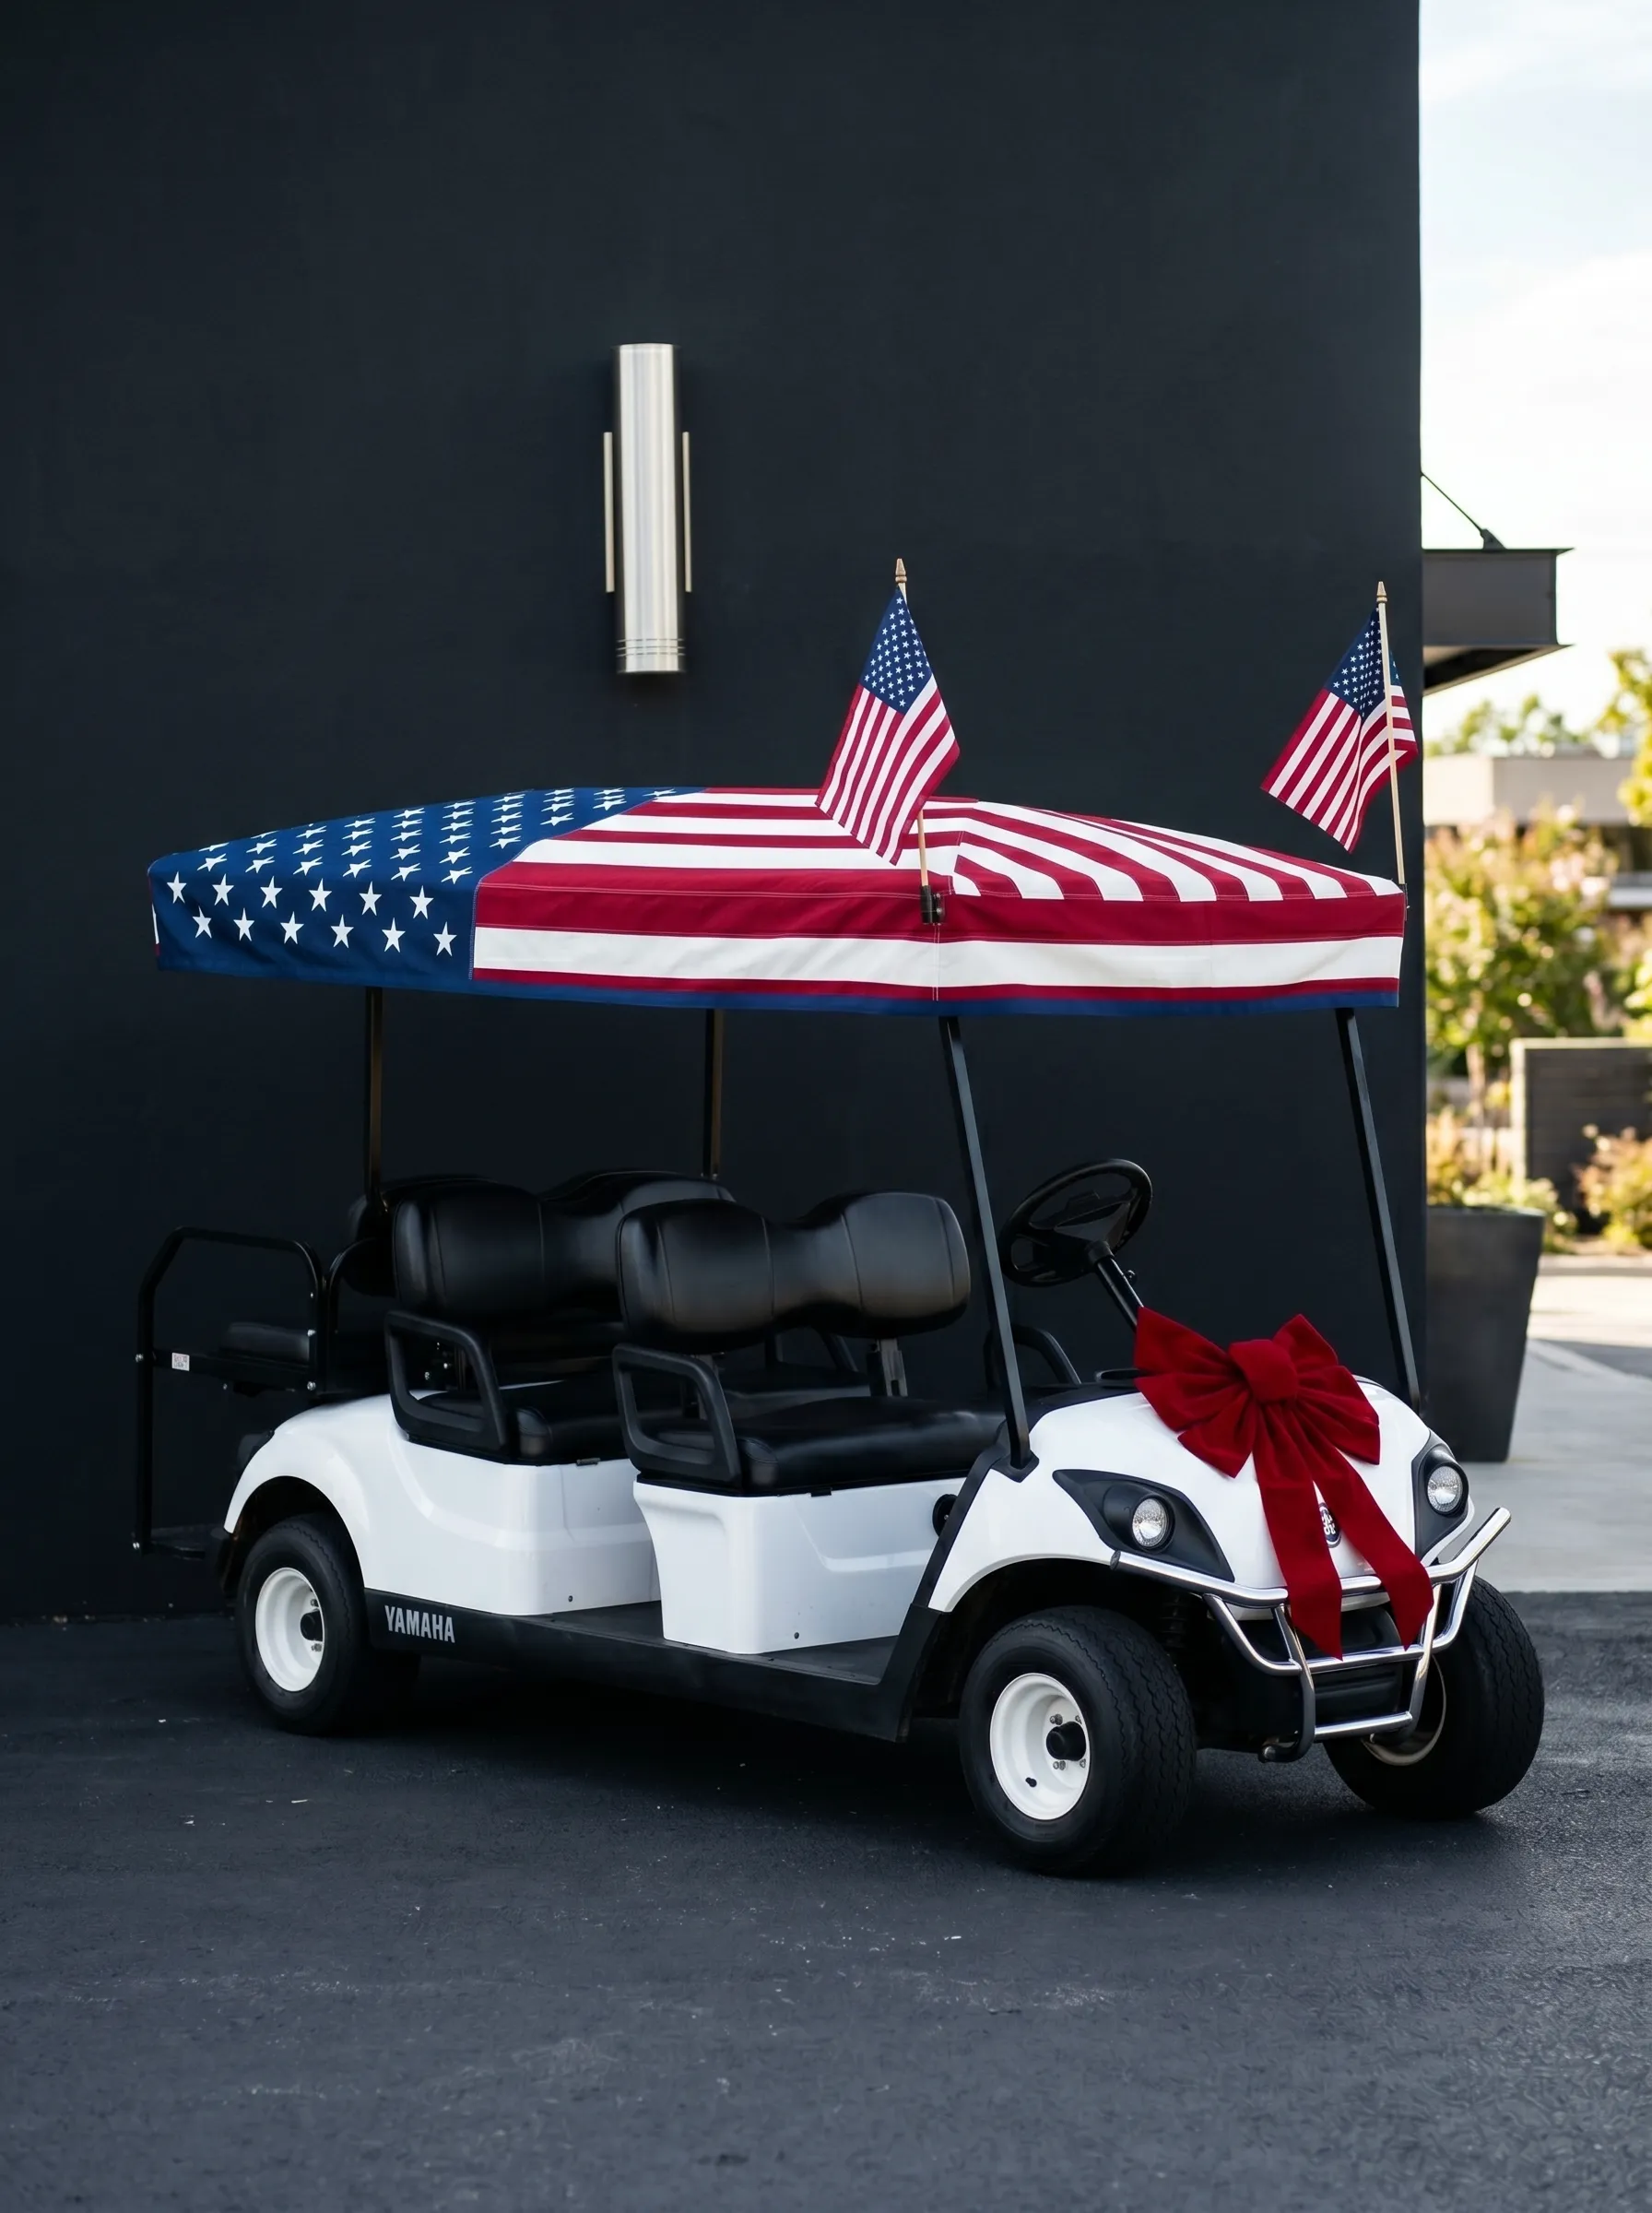
The restraint of this cart is its sophistication. Two elements. That’s all.
Source a custom-fit golf cart canopy cover in a flag print — the full flag rendered across the entire top, canton in the upper left, stripes filling the rest. These are available for most standard cart models and fit over the existing top. Smooth the cover flat and tuck the edges under the roof lip for a neat finish.
On the front right and front left roof support posts, attach two medium-sized American flags on gold-tipped staffs, inserted at a forward angle of approximately thirty degrees. Position them symmetrically, the same height on each post, angled so they face forward when the cart is in motion.
On the front center grill, attach one velvet bow in deep red — not burgundy, not pink, but a genuine saturated red. Medium size, multi-loop, with tails reaching the ground level. Nothing else. The flag canopy is doing the work. The flags on the posts reinforce the theme. The bow gives it festivity without noise.
The Balloon Cloud Cart That Wins Altitude
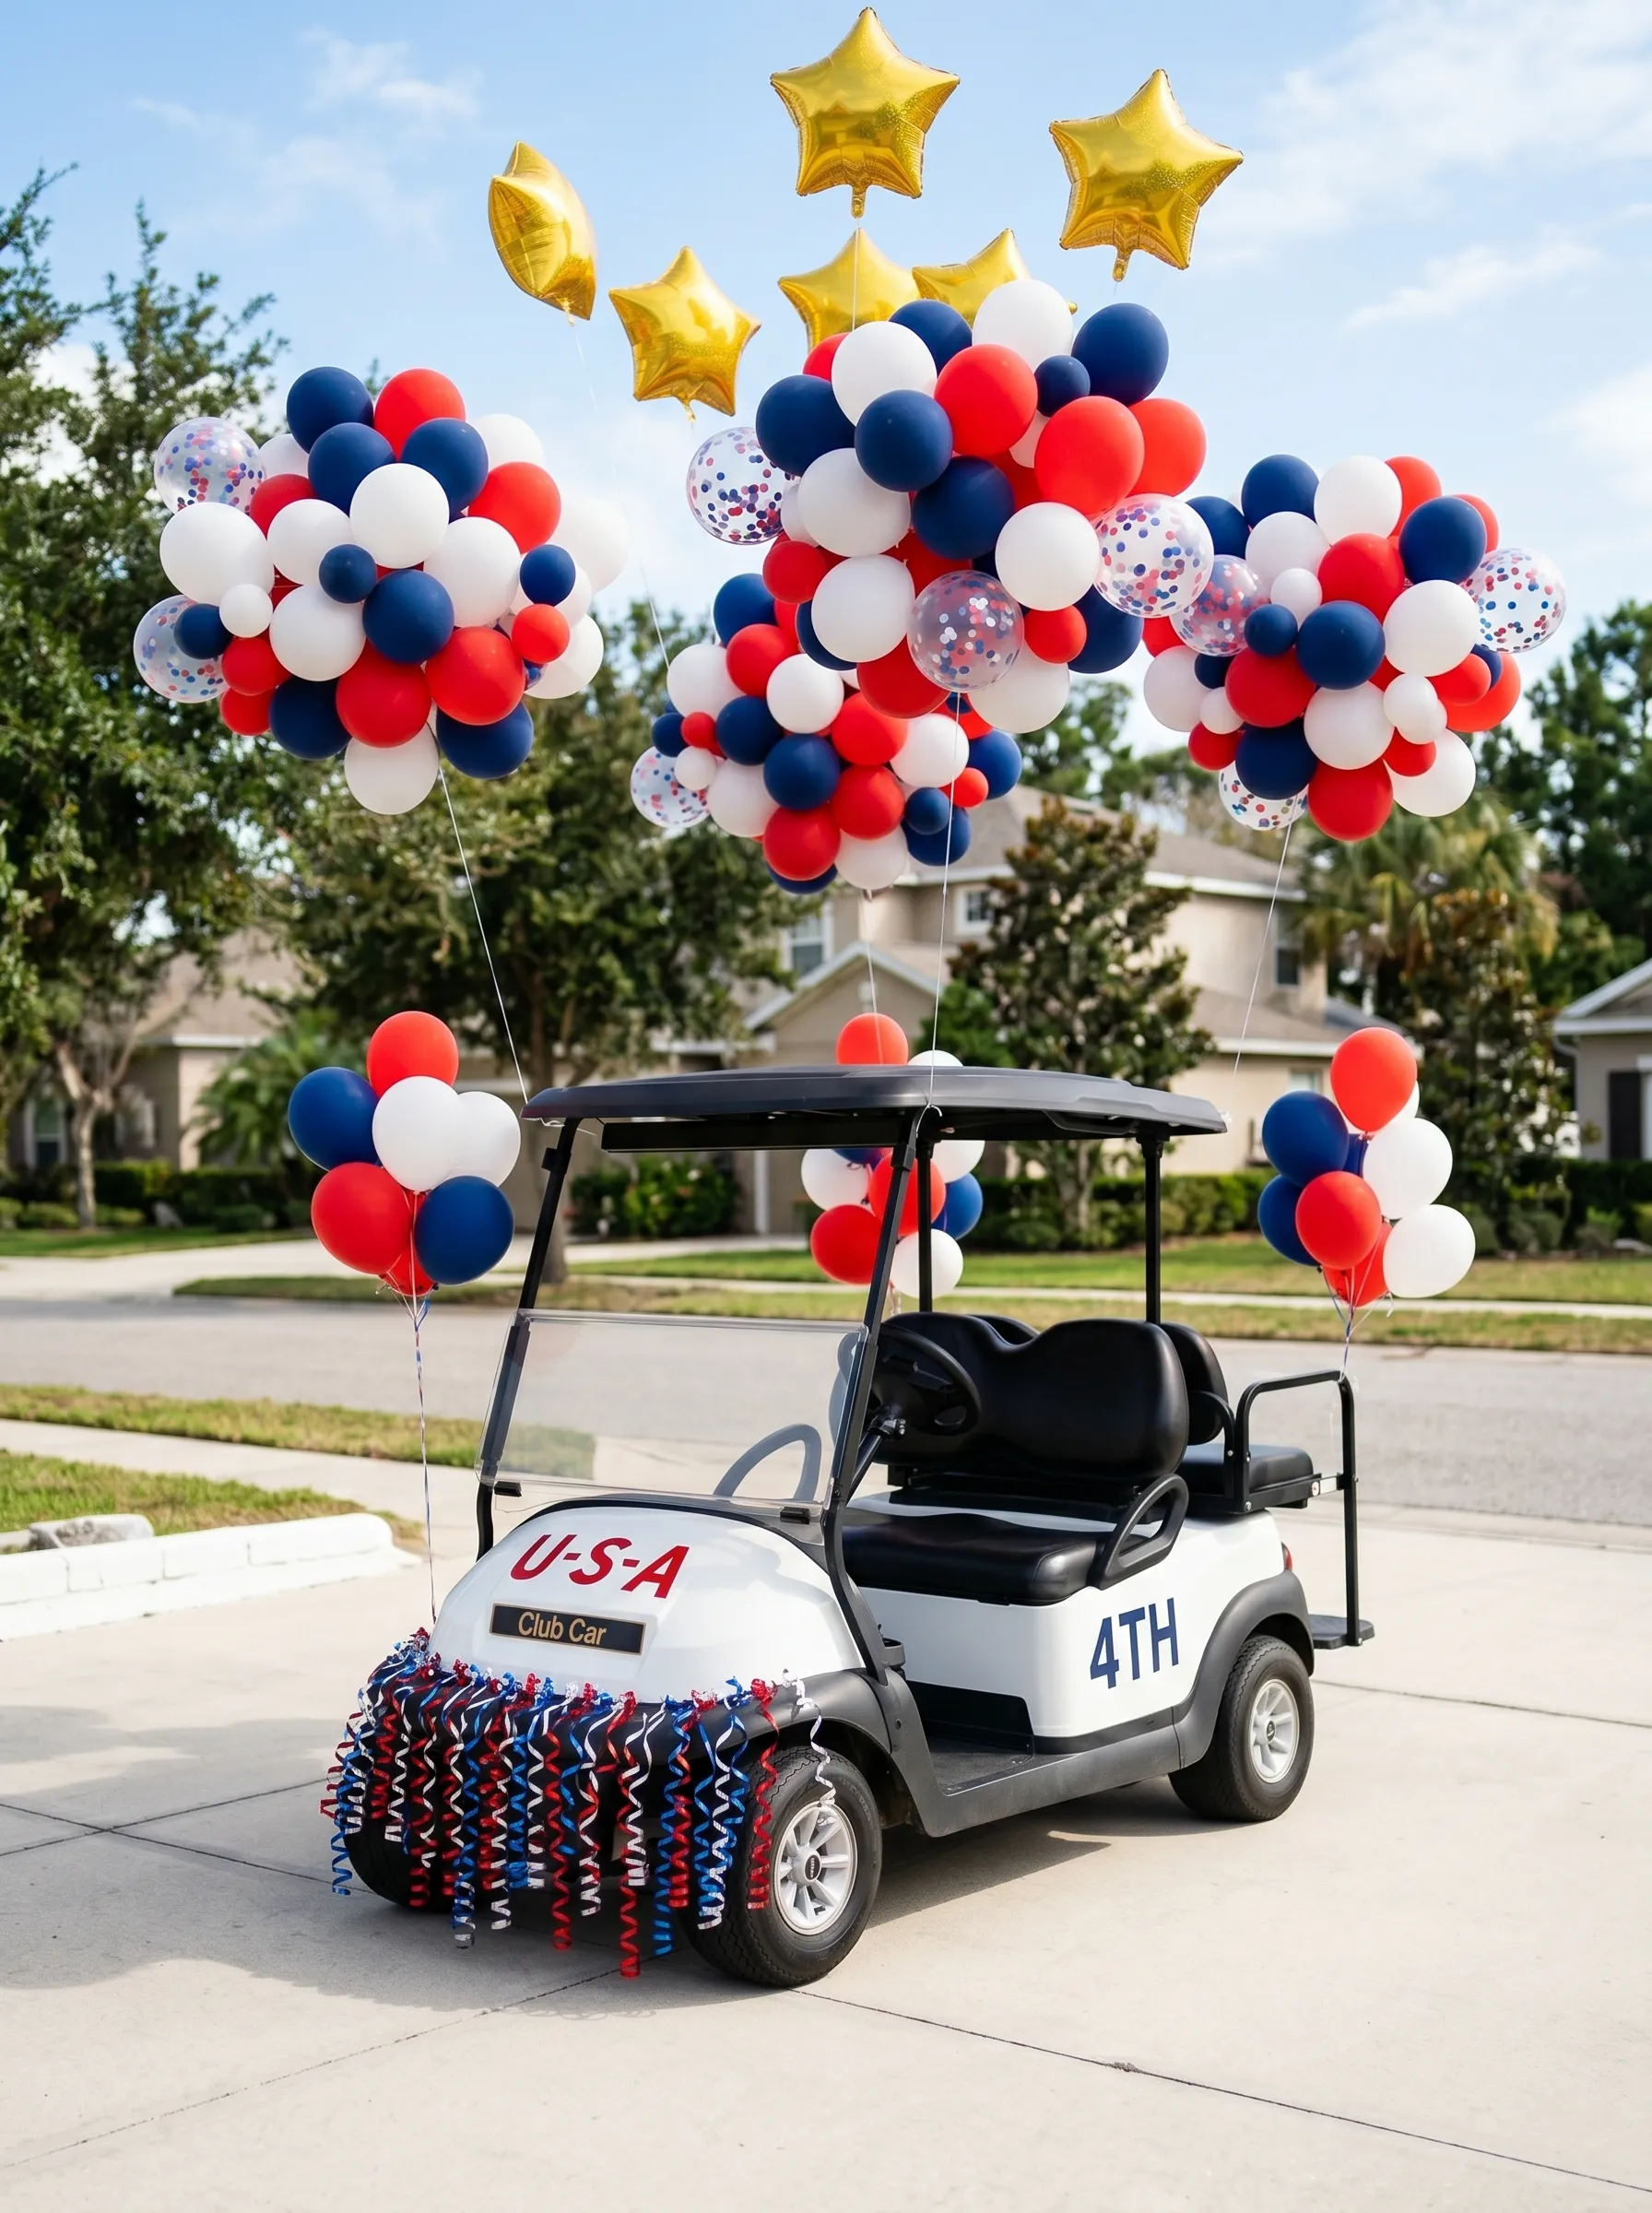
The balloons are off the cart. That is the entire strategy.
Inflate matte navy, matte red, and white latex balloons in eleven-inch and five-inch sizes, plus clear confetti-filled balloons in the same palette. Group them into separate mixed clusters of ten to fifteen balloons each by tying the knot ends together. You will need four clusters: one large center cluster and three smaller flanking clusters.
Tie each cluster to a separate length of clear fishing line or clear balloon ribbon cut to different lengths — center cluster longest, flanking clusters progressively shorter. Attach all lines to a central anchor point on the cart frame, using a small sandbag or weight inside the cart as ballast. The clusters should float at heights ranging from two to four feet above the roof line, creating an asymmetric cloud that moves with the wind as the cart travels.
Thread gold foil star mylar balloons — three to five — into the tallest parts of the center cloud. On the cart body, apply simple vinyl lettering: initials, a date, or a two-word phrase. On the front lower bumper area, attach a row of metallic fringe in red, white, and navy so it moves as the cart drives. The effect from forty feet is a cart with a floating galaxy above it.
The Illuminated Night Parade Cart
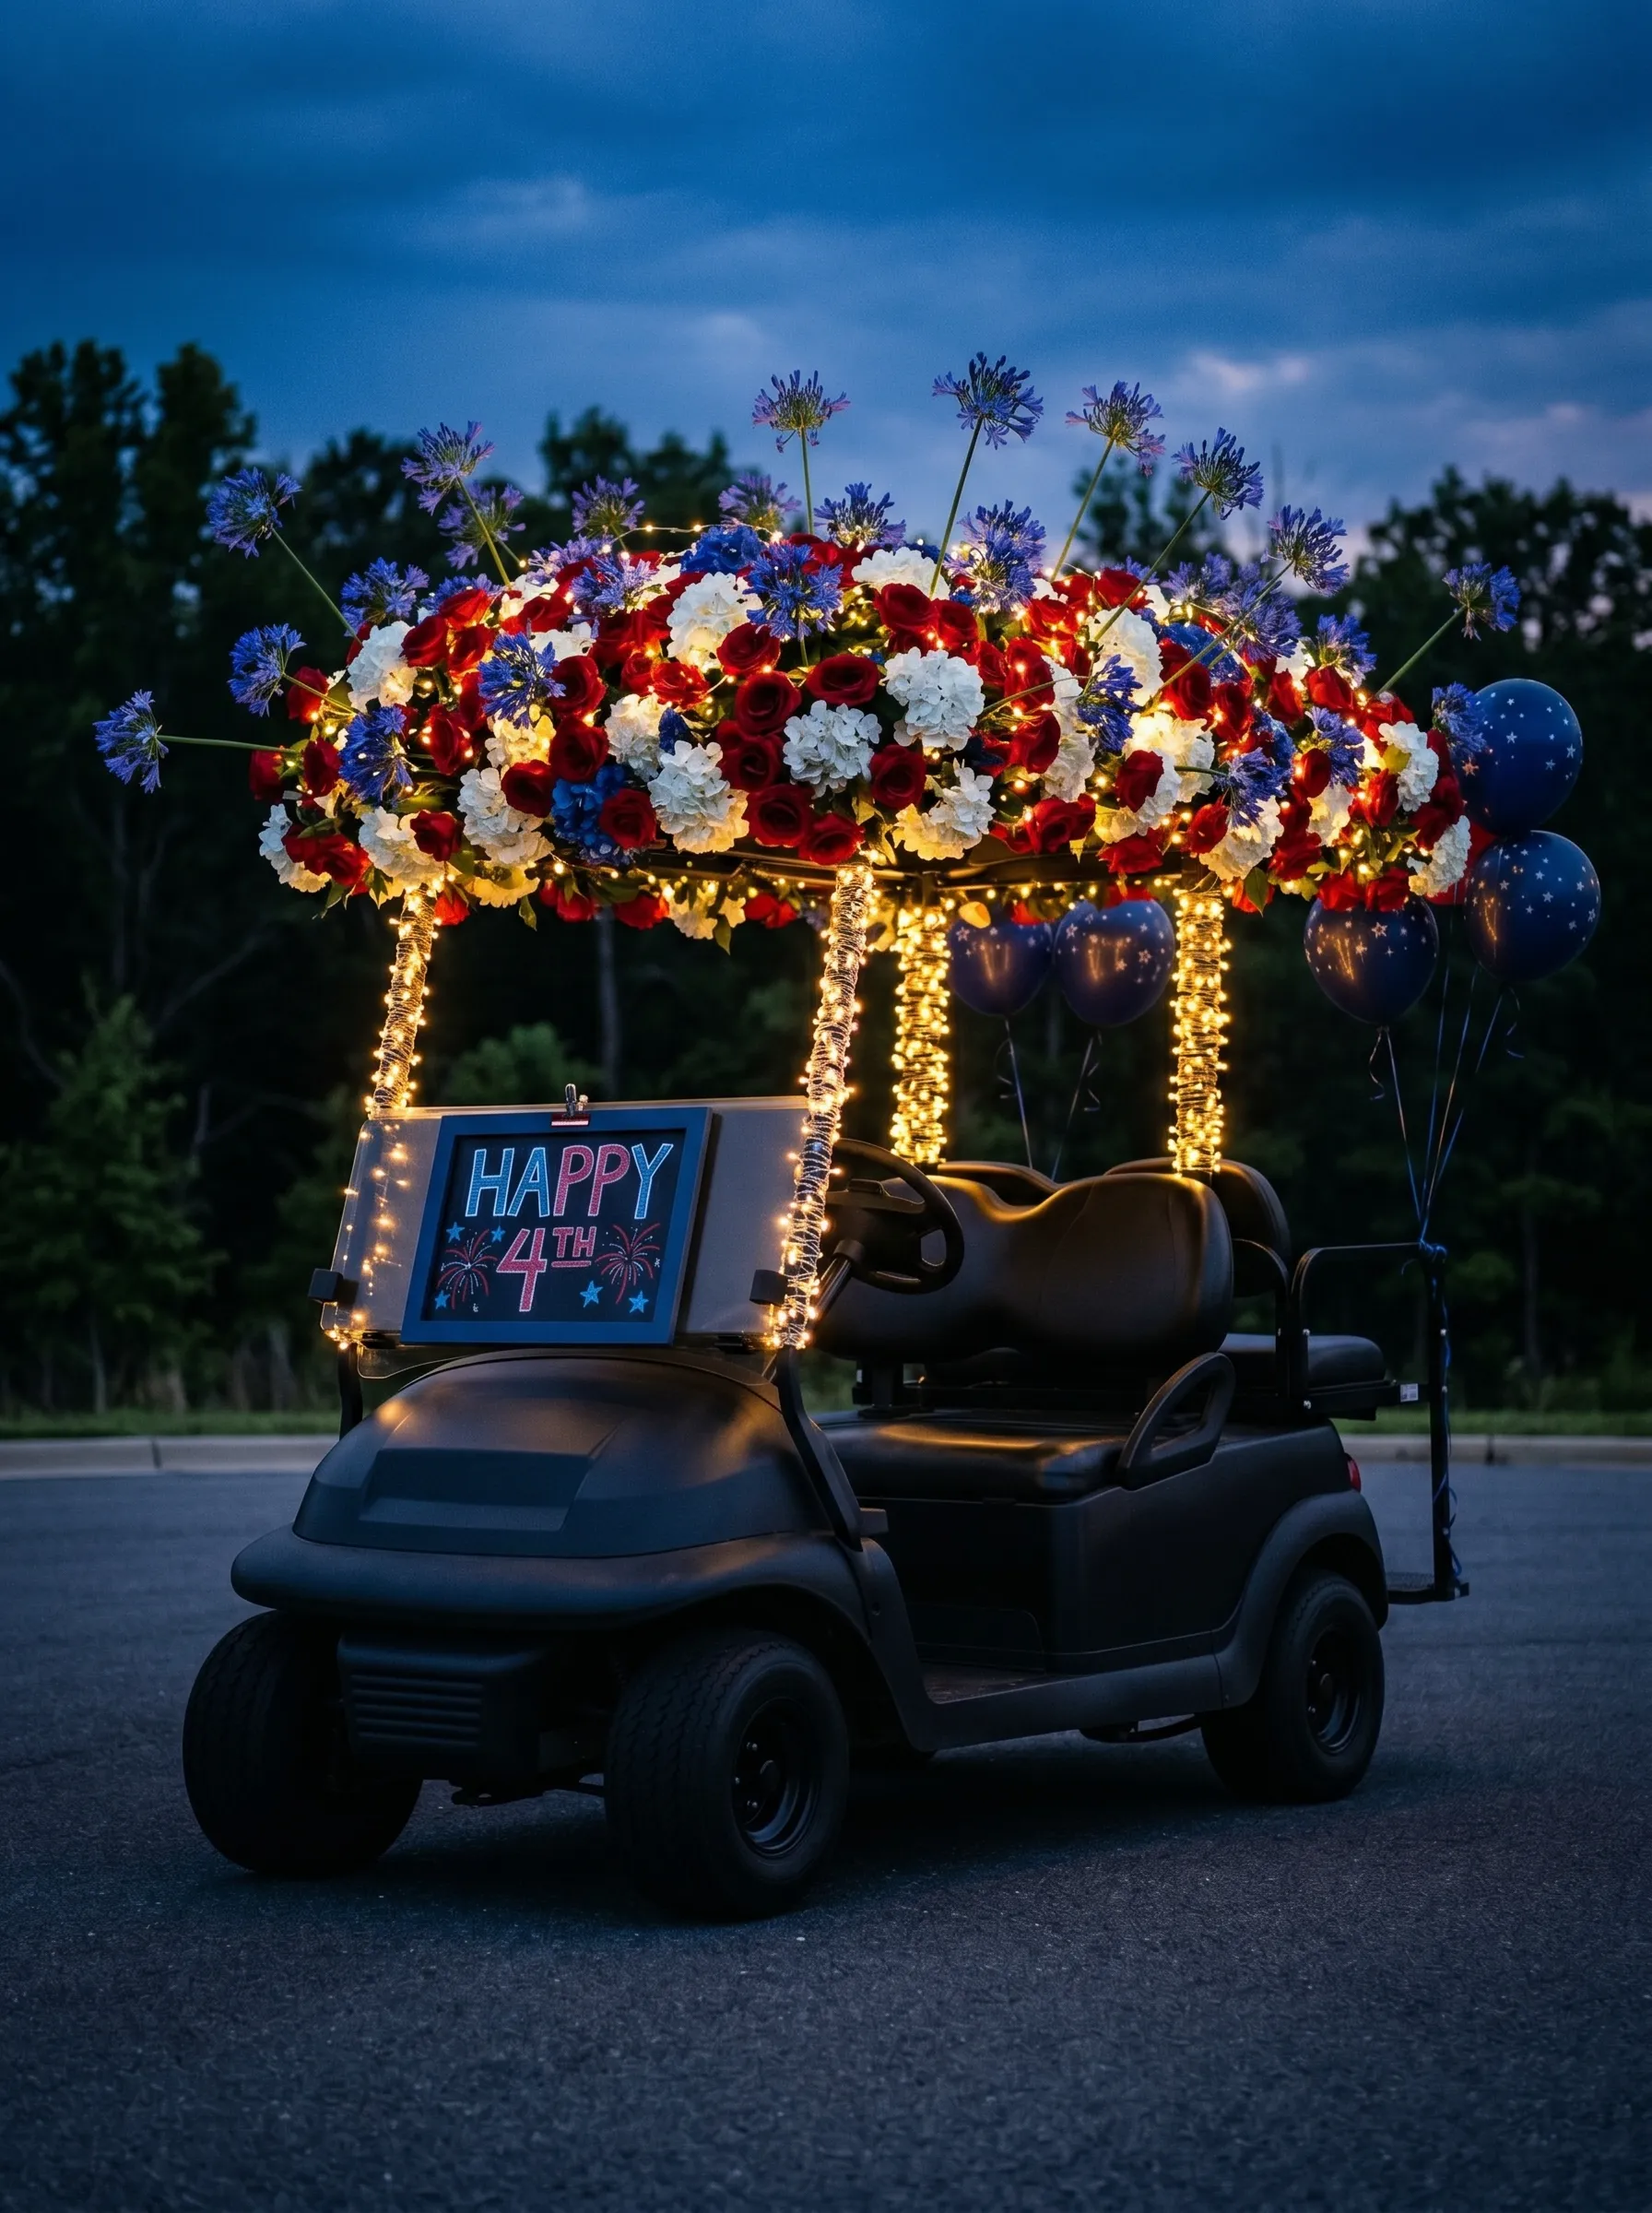
The parade you entered starts at dusk. This is the cart you bring to that parade.
Build the flower roof installation as previously described — red roses, white hydrangeas, blue agapanthus and cornflowers in a dense massed arrangement across the entire roof surface. Before you add the flowers, lay two to three full strands of warm white battery-operated fairy lights across the chicken wire base, letting the lights run in loops and curves rather than straight lines. When the flower installation is complete, the lights will show through the gaps between blooms.
Wrap each roof support post with additional fairy light strands wound in a spiral from base to top. On the rear panel of the cart, mount a chalkboard sign in a simple frame — this becomes the visible message on the road as the cart passes. Letter the date, a greeting, or a short patriotic phrase in chalk markers in red, white, and blue on the black background.
Attach a cluster of three to four navy or dark blue balloons to the right rear corner. The key is battery choice: use fresh lithium batteries rated for at least eight hours, and test the full light installation running for two hours before the parade night to confirm no heat buildup in the flower material.
The Farmhouse Country Garden Cart
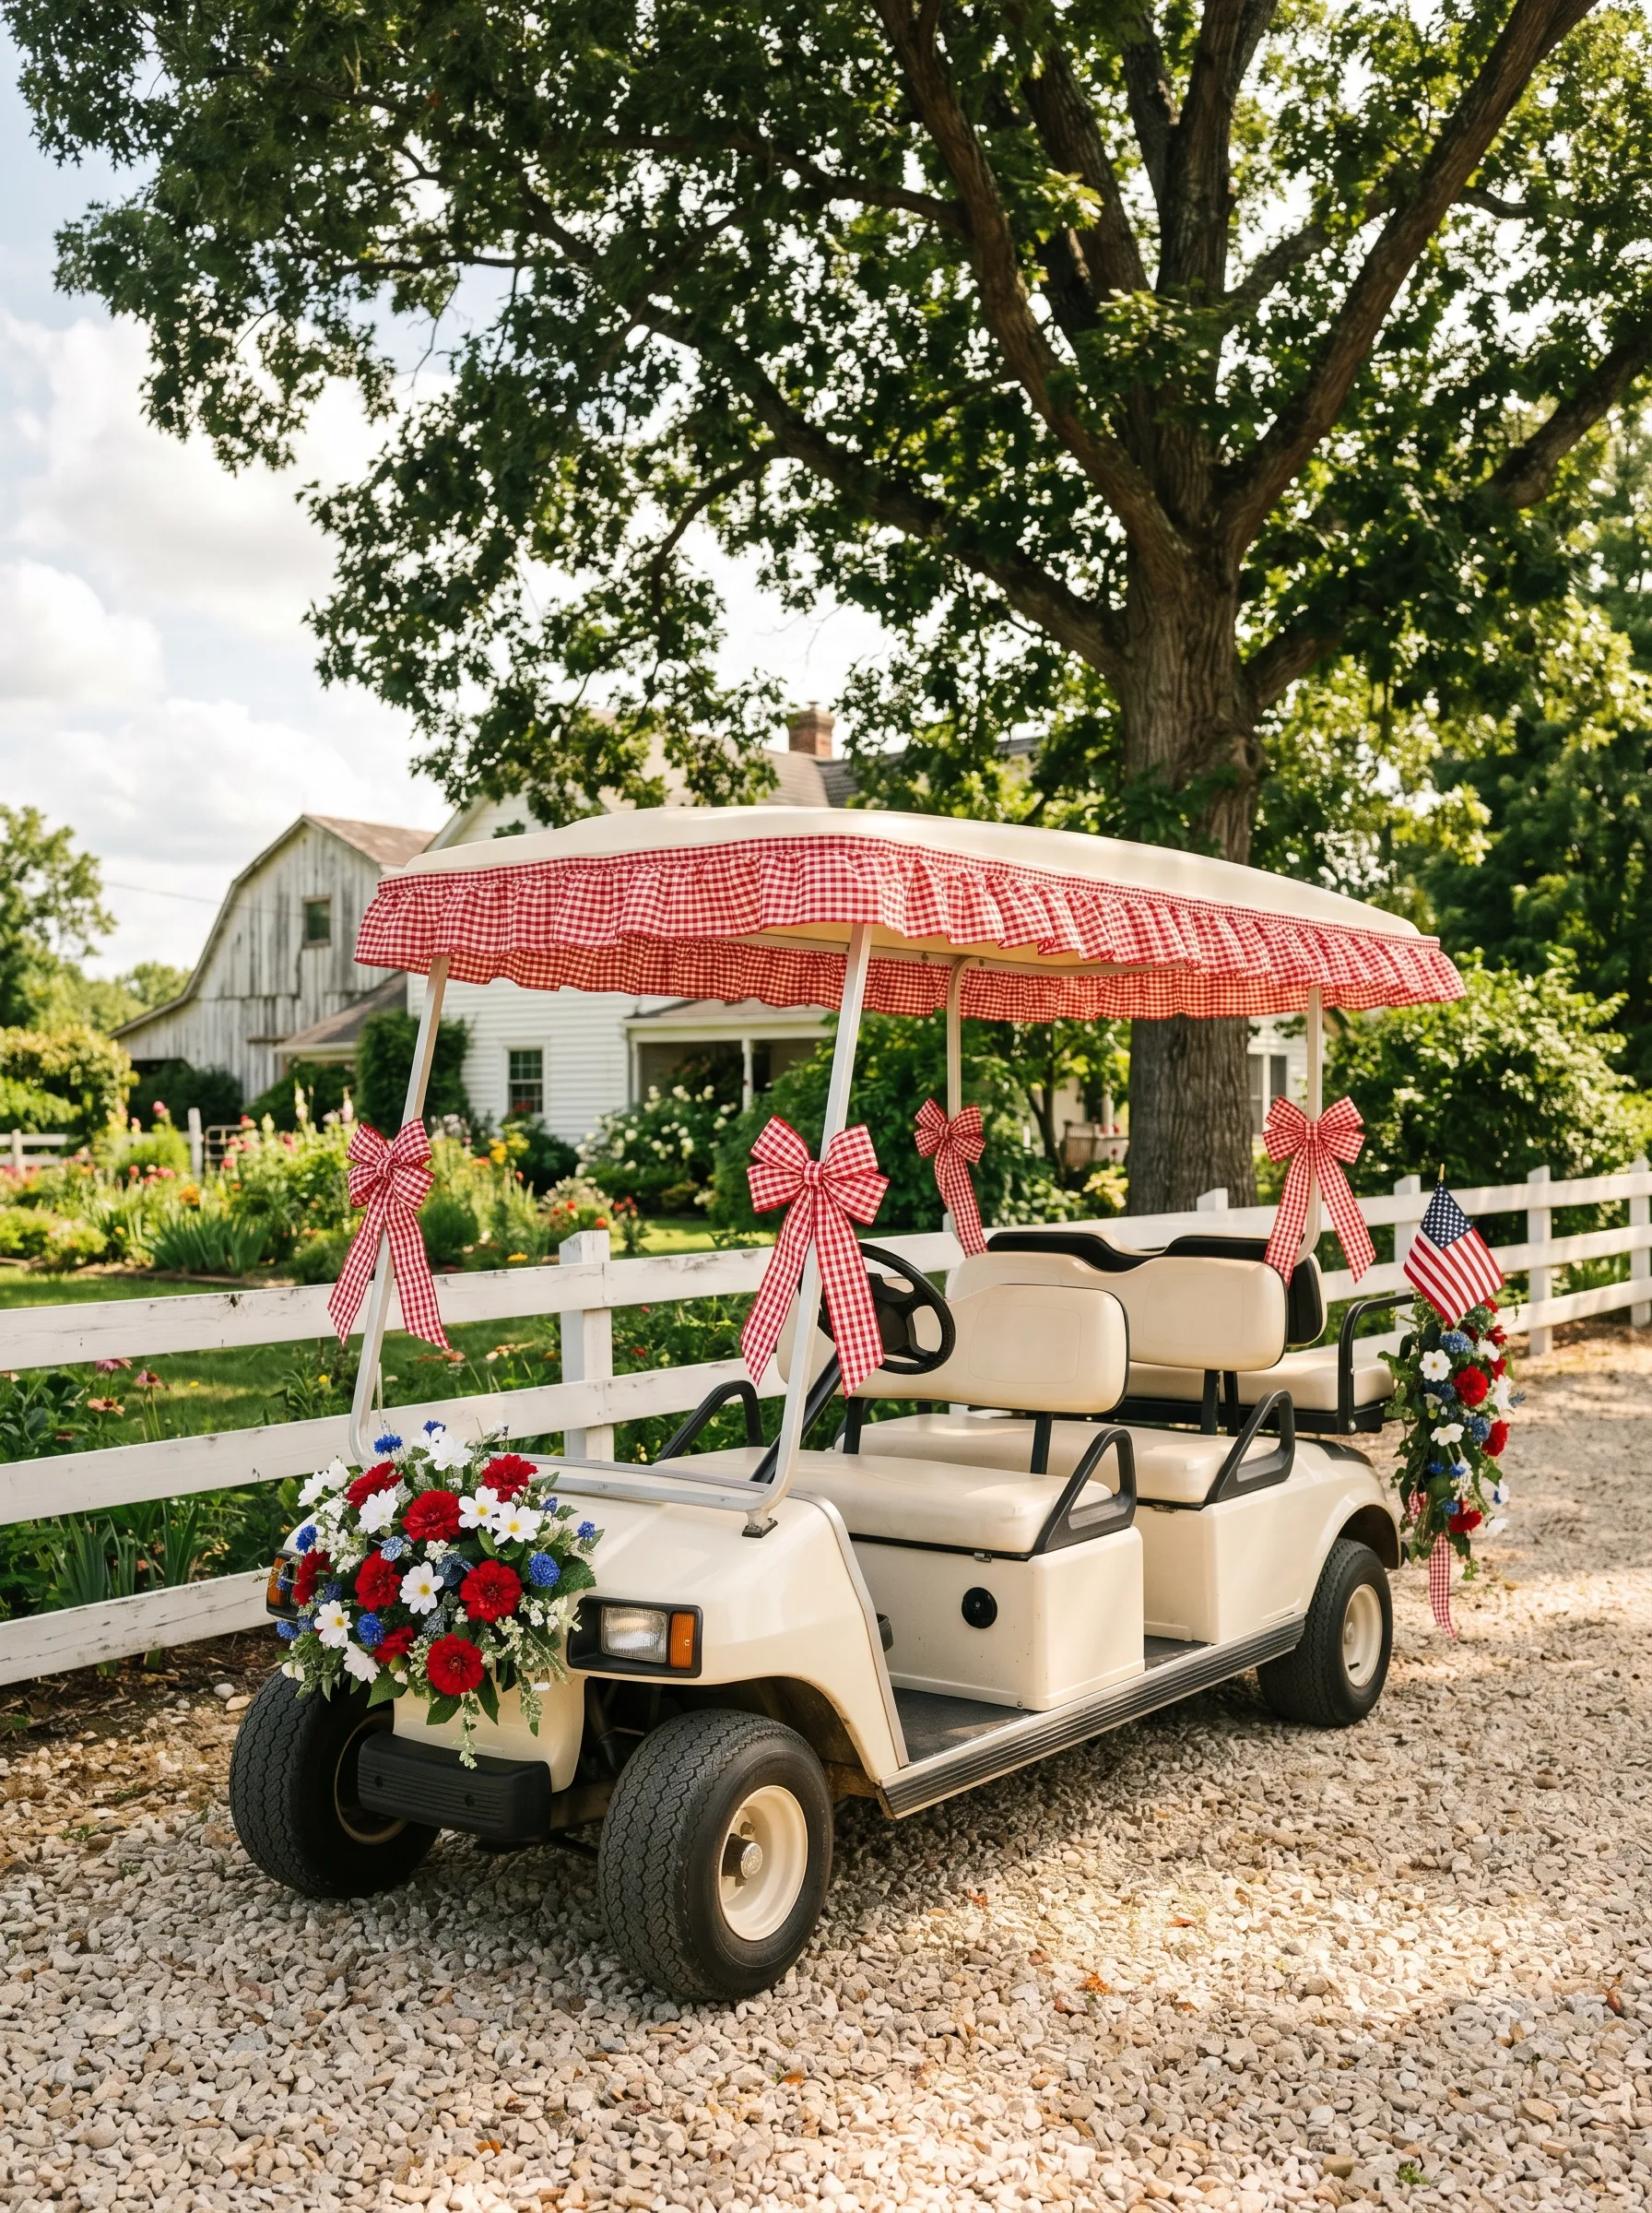
The gingham ruffle canopy is the idea. Everything else exists to support it.
Source enough red-and-white gingham fabric to cut a ruffle approximately six inches wide and long enough to encircle the entire roof perimeter. Press under a half-inch hem on both long edges, then gather the ruffle to approximately two-thirds of its original length using a long gathering stitch or a gathering foot if you have one. Attach the ruffle to the underside edge of the roof perimeter using hot glue, fabric adhesive, or small binder clips hidden by the ruffle itself.
On each roof support post, tie a simple double-loop gingham bow with tails to mid-point. For the front of the cart, build or source a low horizontal flower arrangement in a container that mounts to the front bumper — an elongated window box or floral foam brick wrapped in burlap works. Fill with a garden-style mix: red gerberas or zinnias, white daisies, blue cornflowers, loose greenery. Keep the arrangement no more than eight inches tall so it doesn’t obstruct the driver’s view.
On the right rear corner or rear cargo area, attach a single small American flag and a secondary mixed flower swag in the same garden palette, tied with a long gingham ribbon tail. The whole cart should read like someone’s farmhouse garden picked itself up and went for a drive.
The Red Cart With Deco Mesh Frame
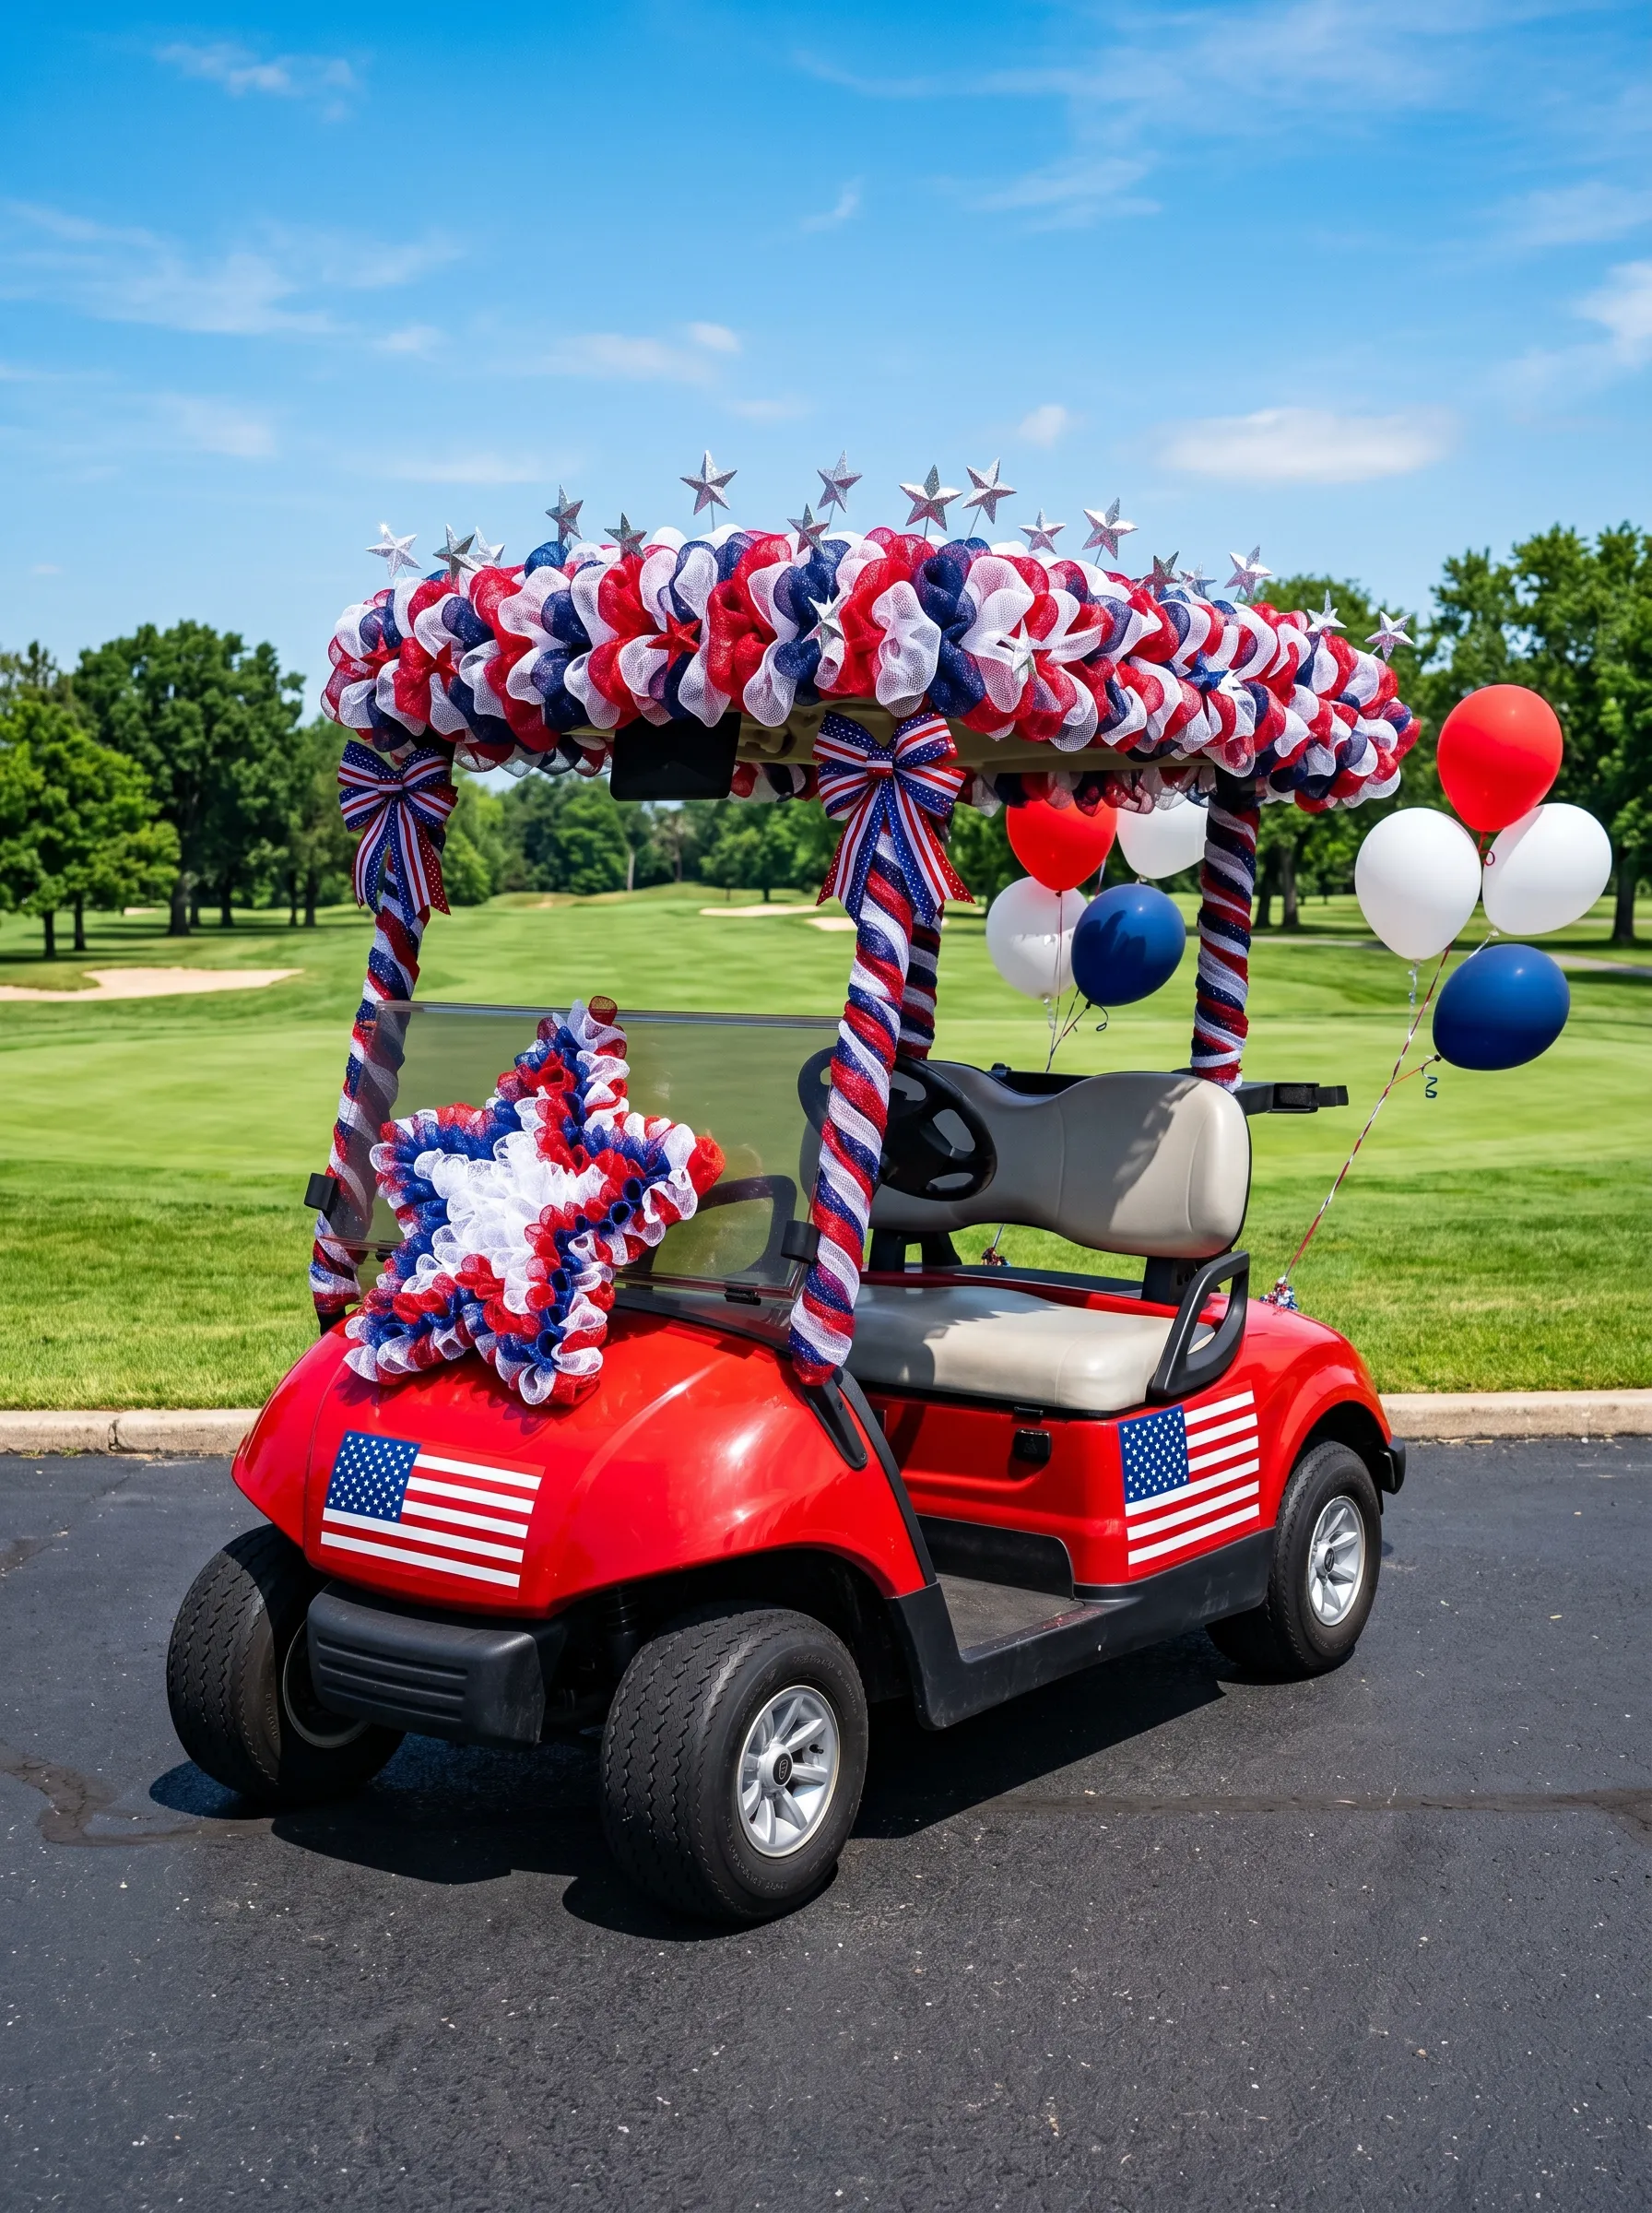
The cart body is red. This is not incidental. It is the starting point of the palette.
Work a continuous frame of deco mesh around the entire roof perimeter: thread loops of red, white, and navy blue deco mesh tubing through a wire or zip-tie grid attached to the roof frame edge, packing them together so no gap shows between loops. Extend this treatment down each post by wrapping the posts with alternating spiral bands of two or three mesh colors and securing at top and bottom with cable ties.
On the roof surface above the packed perimeter, insert silver metallic star picks — the kind sold for floral arrangements — evenly spaced across the top. On the dashboard or front panel, build a single large deco mesh wreath or star shape from the same mesh colors and attach with zip ties or bungee cord through the grill.
On the cart body panels, apply two American flag decals — one on each front corner panel — in a scale that fills at least one-third of the panel surface. Finish with a cluster of three balloons in red, white, and navy tied to a rear corner and one matching deco mesh bow on the front grill facing forward.
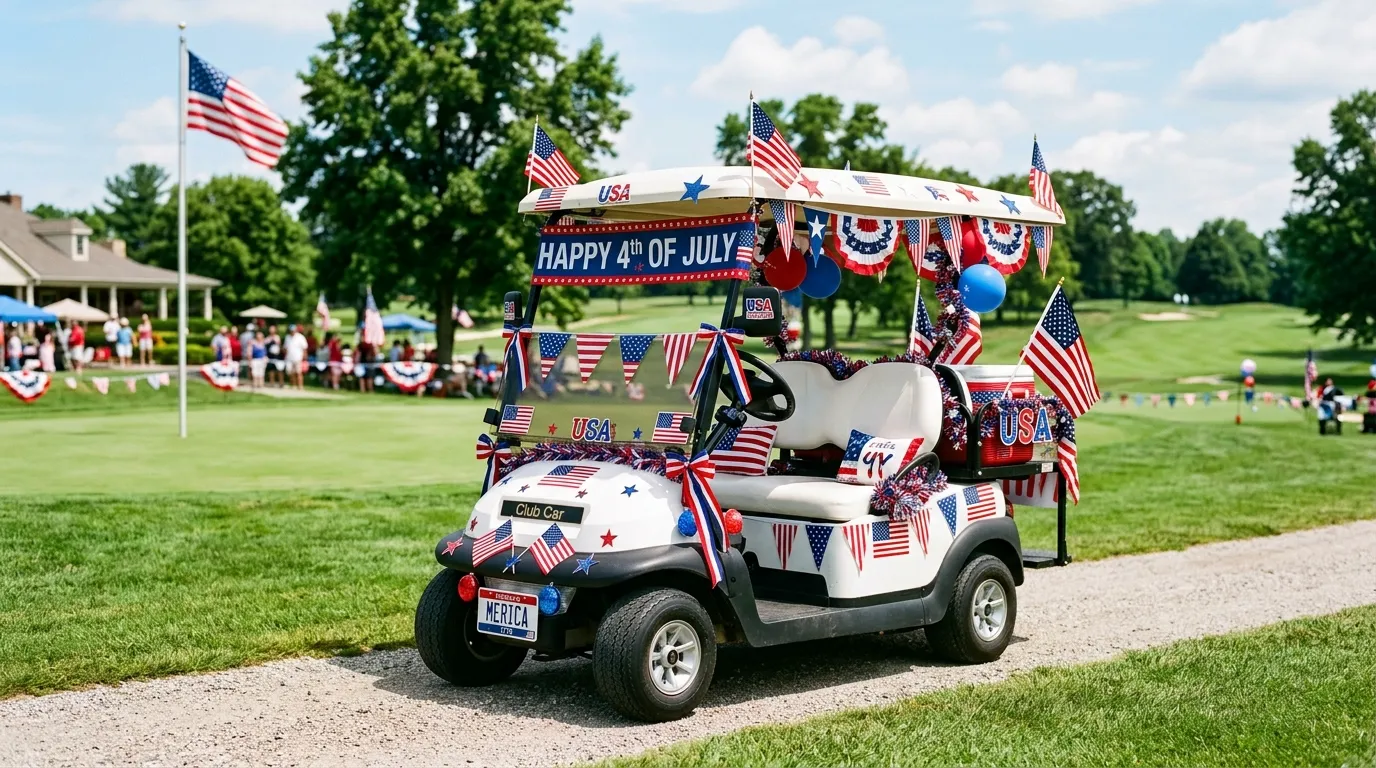
The Simple Club Car With Pennant and Wreath
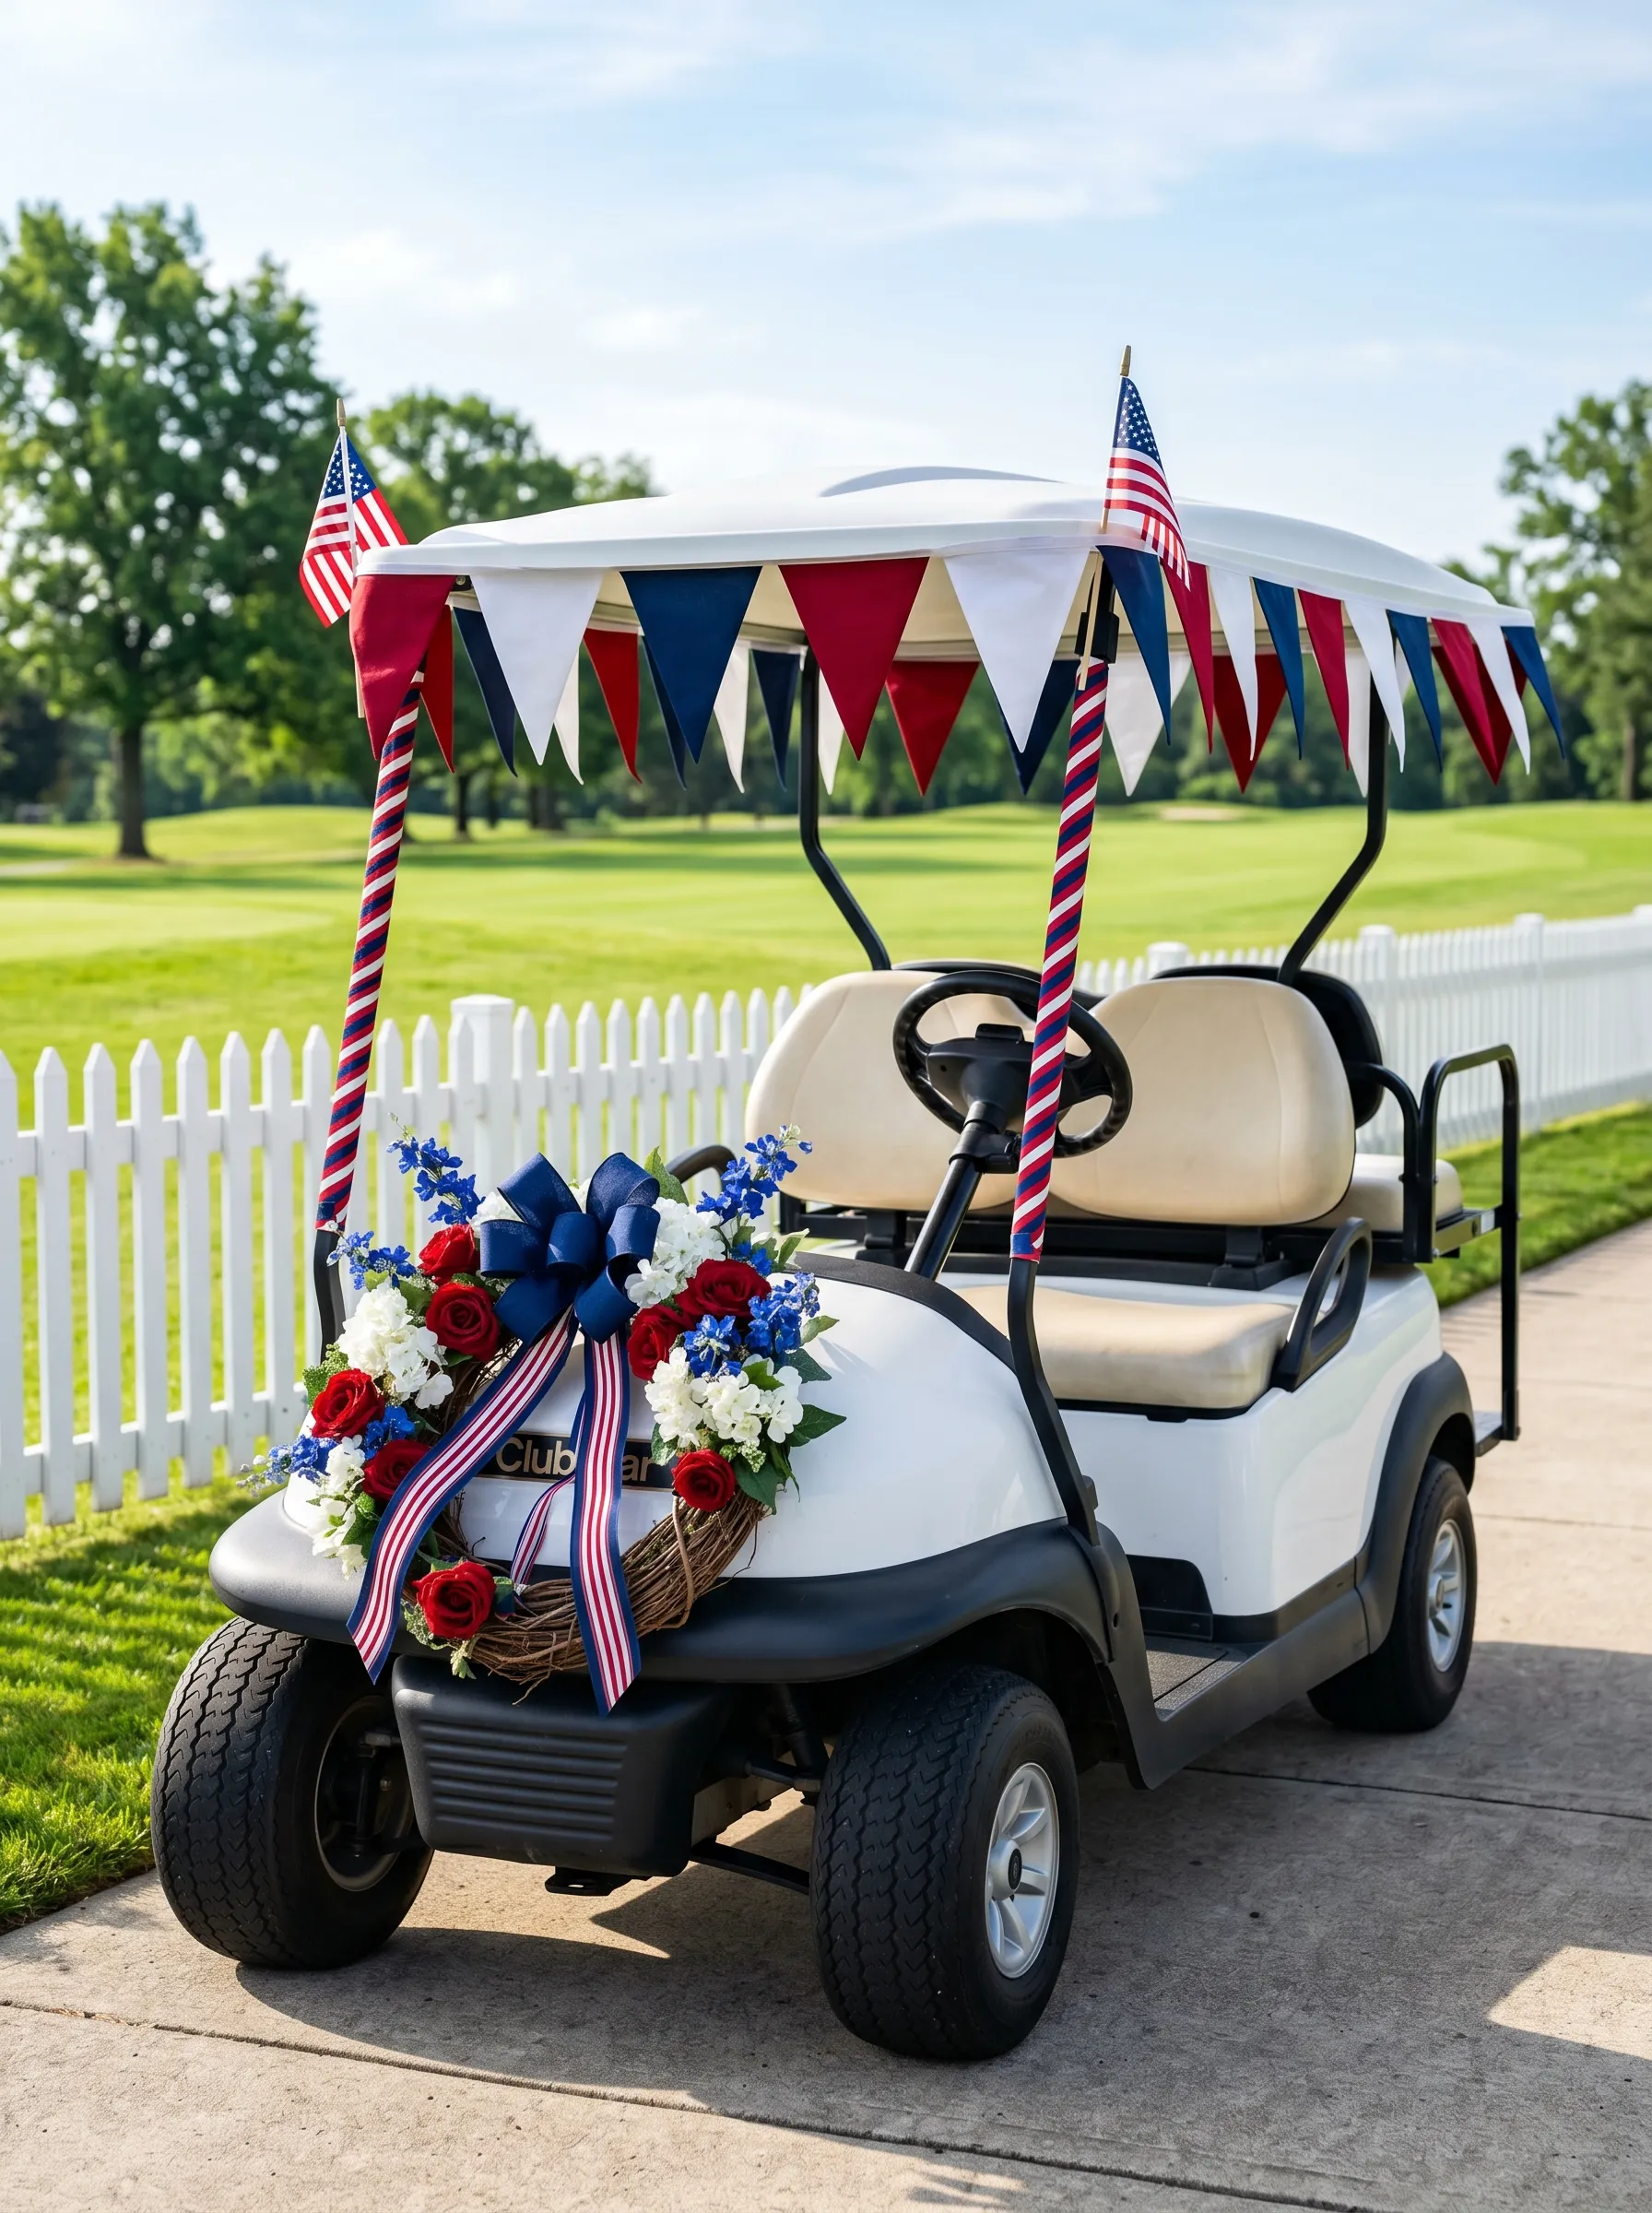
Not every parade requires a flower installation that took twelve hours. This cart is thirty minutes of work and looks completely finished.
Source three lengths of baker’s twine and cut triangles from red, white, and navy fabric or felt — eight triangles per twine length, evenly spaced and attached by folding the top edge over the twine and gluing. Run these three strands in parallel from the front left post, across the front roof edge, to the front right post, attached at each end with a simple zip tie through the roof edge.
Wrap each roof support post with red-white-blue striped ribbon in a tight spiral from base to top, taping the start and finish and adding a single piece of tape at mid-height to prevent slipping. At the front of the cart on the front bumper area, attach a grapevine wreath of approximately twelve inches diameter. Fill the wreath with red roses, white hydrangeas, and blue delphinium tucked into the vine base. Tie a navy wired ribbon bow with long flag-print tails to the top of the wreath.
At the two front roof posts, attach small American flag picks pointing forward at approximately a forty-five degree upward angle. This is the correct cart for a golf community parade where the carts will be parked and walked past rather than driven in a moving procession. It reads neat, intentional, and finished without requiring tools or structural modification.
The One Thing Every Cart in This Collection Got Right
Each of these carts made a decision and then refused to second-guess it.
The flower roof cart didn’t add balloons. The balloon cloud cart didn’t add flowers. The typography cart didn’t add garlands. They each found their concept and built it completely rather than hedging with a little of everything.
That is the instruction. Pick your concept. Build it all the way. Drive it slowly enough that people can actually see it.
The neighborhood is watching. Make it worth the glance.