
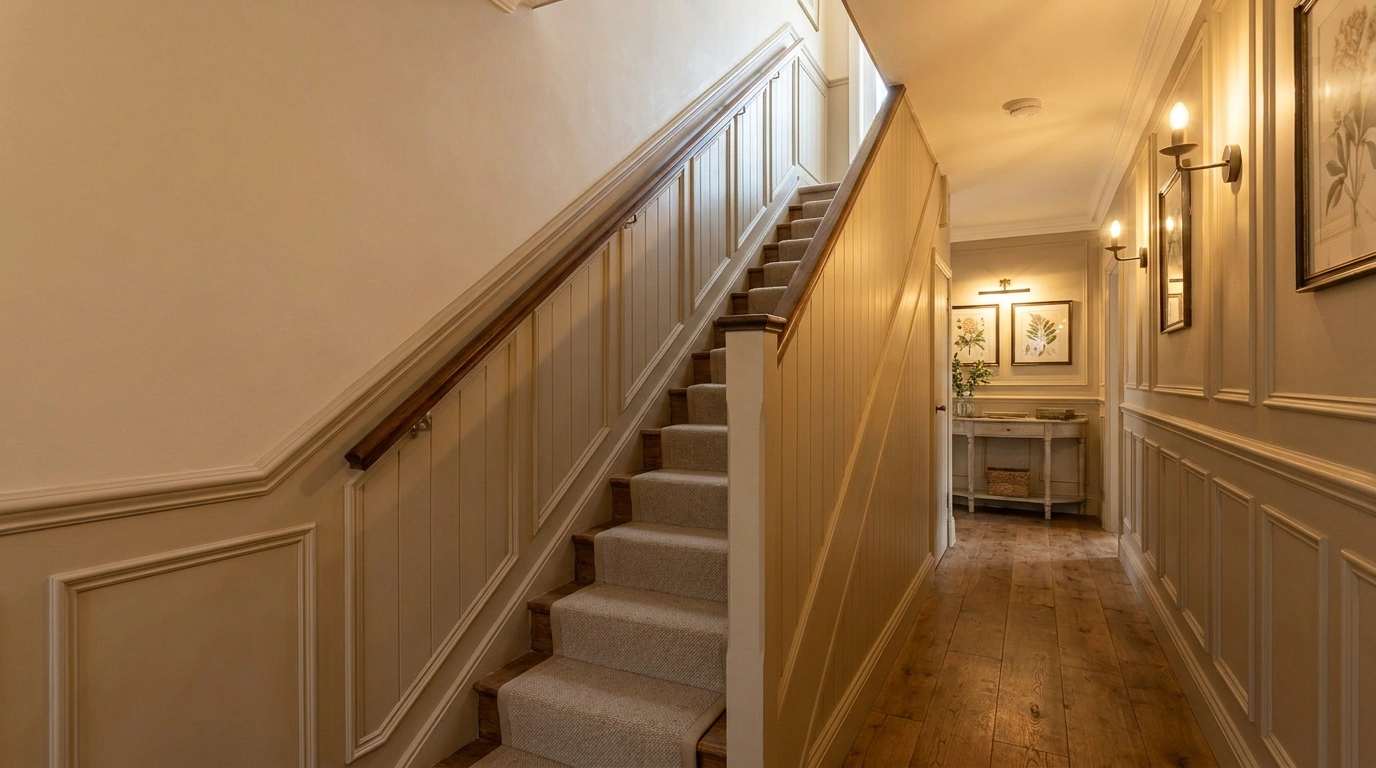
Staircase walls have a difficult shape and an unusually public job. You see them from the entrance, from the landing, and while walking past with a laundry basket large enough to obstruct your remaining judgment.
A little architectural structure can help.
Paneling gives that long, sloping wall a deliberate rhythm. It can connect the entrance to the upper floor, make plain walls more interesting, or bring an older staircase into a more coherent relationship with the rest of the house.
The layout matters before the color. Attractive molding will not rescue panels that collide awkwardly with the handrail, squeeze around switches, or finish beside a door in a narrow strip that looks like an apology.
Draw the Entire Stair Wall Before Choosing the Molding
Include the stair angle, landings, doors, skirting, handrail brackets, switches, and changes in ceiling height. Use temporary markings or a scaled drawing to inspect the composition from above and below.
Wall paneling is a decorative finish. It must not compromise the staircase, guards, handrail use, required clearances, or existing protective construction. Have the installer check the actual site and applicable requirements rather than copying dimensions from an unrelated project.
For work affecting stair components, the Stairbuilders and Manufacturers Association emphasizes reviewing installation instructions and confirming site dimensions before proceeding. Stairbuilders and Manufacturers Association
Paneling Arrangements for Different Staircases
Soft Green Tongue-and-Groove
A muted sage green tongue-and-groove brings a calming, tactile quality to the stair wall. The vertical lines add subtle height and structure without overwhelming a compact entryway.
Pair the painted timber lower section with a crisp cream runner and checkered marble flooring for a grounded, classic look. Keep the upper walls in a matching soft hue to maintain a cohesive flow.
Anchor the space with natural wood tones on the handrail to introduce warmth against the cooler green shades. This combination feels fresh, traditional, and entirely welcoming from the moment you step inside.
Classic Box Panels Following the Stair Angle
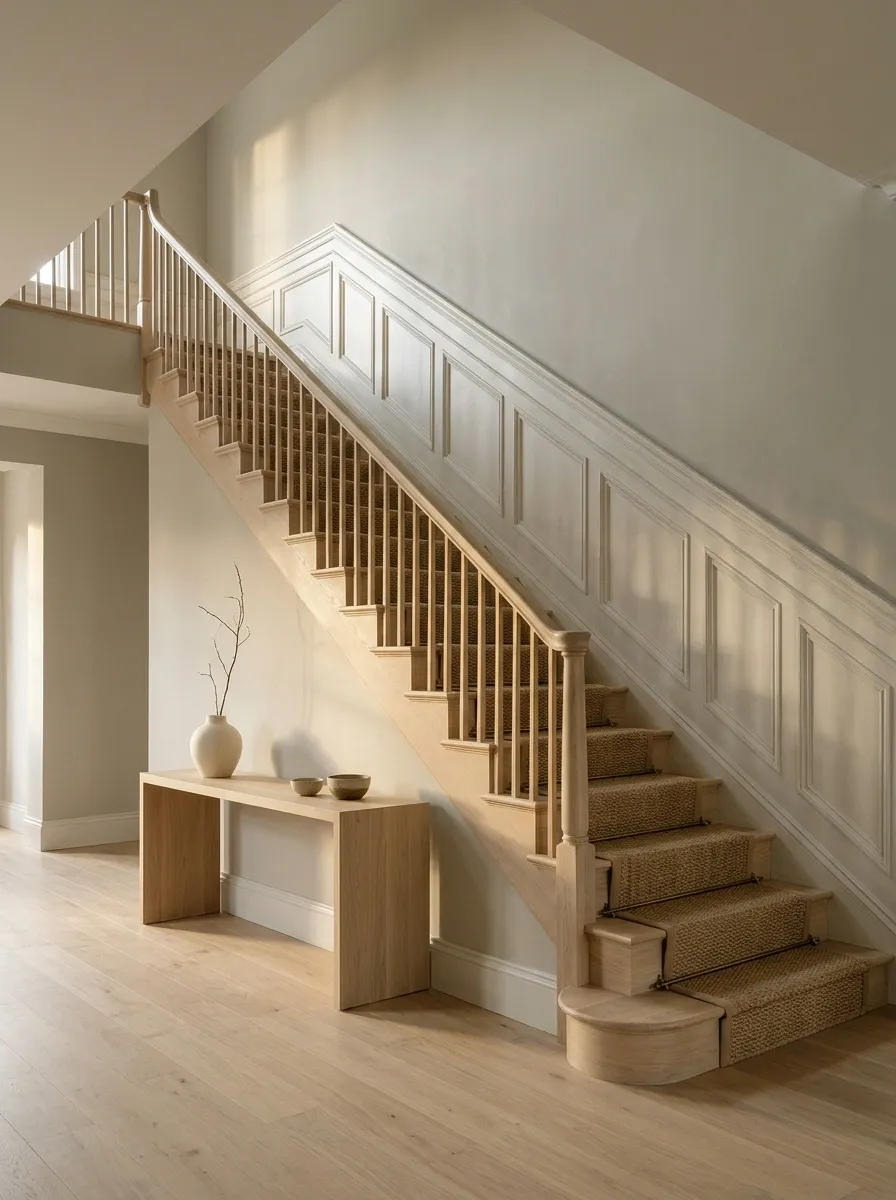
Rectangular-style wall frames can become raked panels along the flight, with their upper and lower lines following the staircase’s direction.
Keep the vertical divisions deliberate and distribute the panels across the complete wall. The spacing between them should feel related, even when the first and last sections need adjustment.
A restrained paint color lets the geometry provide the detail. You do not need ornate molding to make the wall interesting when the staircase already supplies a strong diagonal.
Traditional Sage Raised Panels
Traditional raised box paneling painted in a soft sage green creates an instant heritage feel along a grand staircase. The rhythmic framing adds architectural depth that makes even a simple hallway feel curated and complete.
Complement the rich wall treatment with a neutral runner on the stairs and a striking black-and-white marble checkerboard floor below. A traditional chandelier overhead ties the composition together with classic elegance.
Introduce fresh floral arrangements on a slender side table to soften the structured lines of the wood paneling. The overall effect balances historic charm with a refined, livable palette.
Dark Olive Under-Stair Storage
A deep olive tone on vertical tongue-and-groove paneling turns functional under-stair storage into a striking design feature. The dark shade creates a sophisticated anchor while keeping the vertical lines clean and unobtrusive.
Incorporate seamless cabinet doors into the paneling design so the storage remains hidden when closed. Brass hardware adds a subtle gleam against the dark paint, elevating the utility of the space.
Keep the surrounding elements light, such as white timber flooring and a neutral runner, to balance the saturated tones of the paneling. This approach maximizes both style and practicality in a hardworking hallway.
Full-Height Rectangular Panels on a Tall Stair Wall
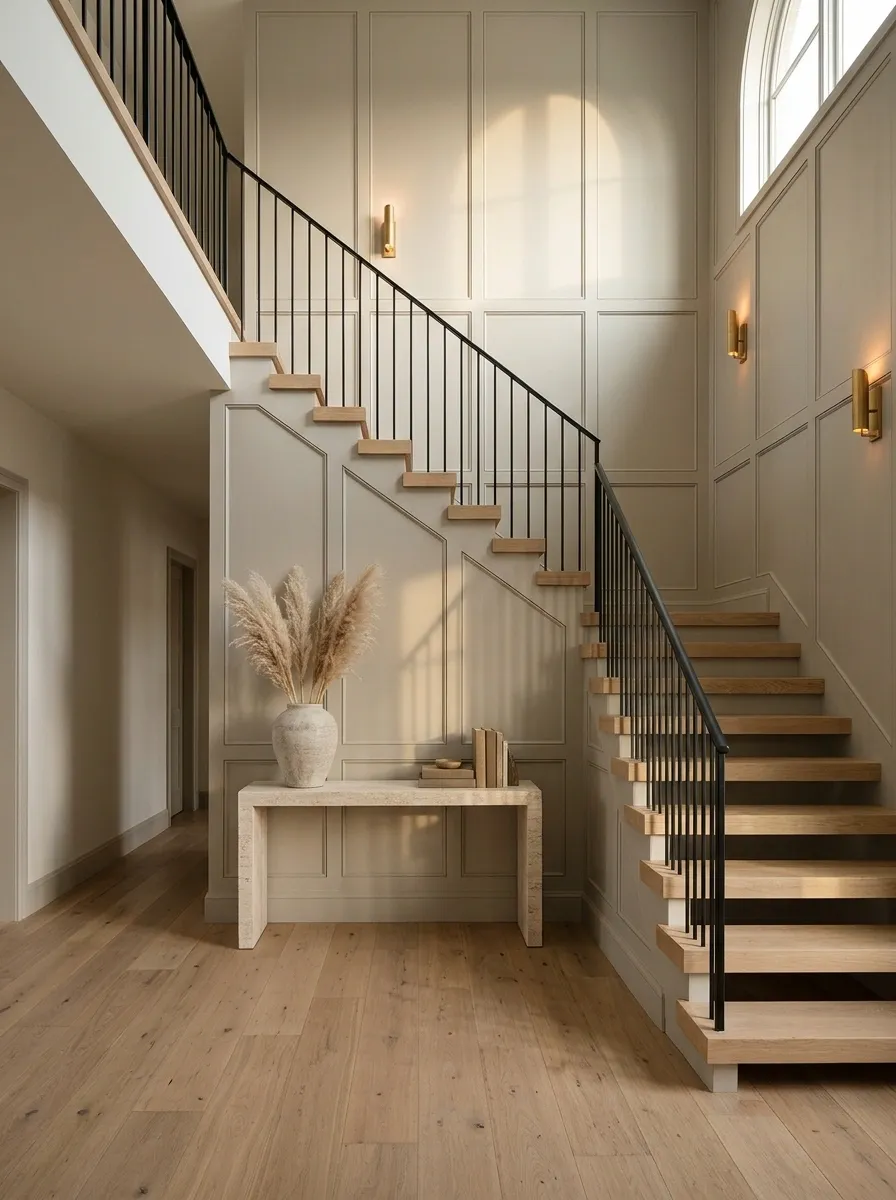
A tall stair wall can accommodate larger vertical panels that use its height. This can feel more settled than filling the surface with several rows of small boxes.
Choose a molding scale that remains visible from below without becoming heavy close up. Keep the panel arrangement related to landings and major architectural breaks.
The wall should look proportionate to the house. A modest entrance does not need to acquire the ceremonial paneling schedule of a municipal staircase.
USE THE HEIGHT DELIBERATELY
Fewer, larger fields can give a tall wall a clearer structure than many small boxes.
Botanical Wallpaper and Crisp Molding
Pairing traditional white wainscoting with a delicate botanical wallpaper creates a charming contrast along a staircase. The crisp white lower frames provide a solid foundation for the whimsical pattern above.
Choose a wallpaper with a neutral background and fine line-work to keep the upper wall from feeling too busy alongside the stair geometry. Let the molding follow the precise angle of the ascent for a tailored finish.
Combine the wall treatments with dark wooden doors and simple brass hardware to ground the space. This pairing delivers a sophisticated take on country-house style that feels both timeless and personal.
A Square Grid Across the Landing
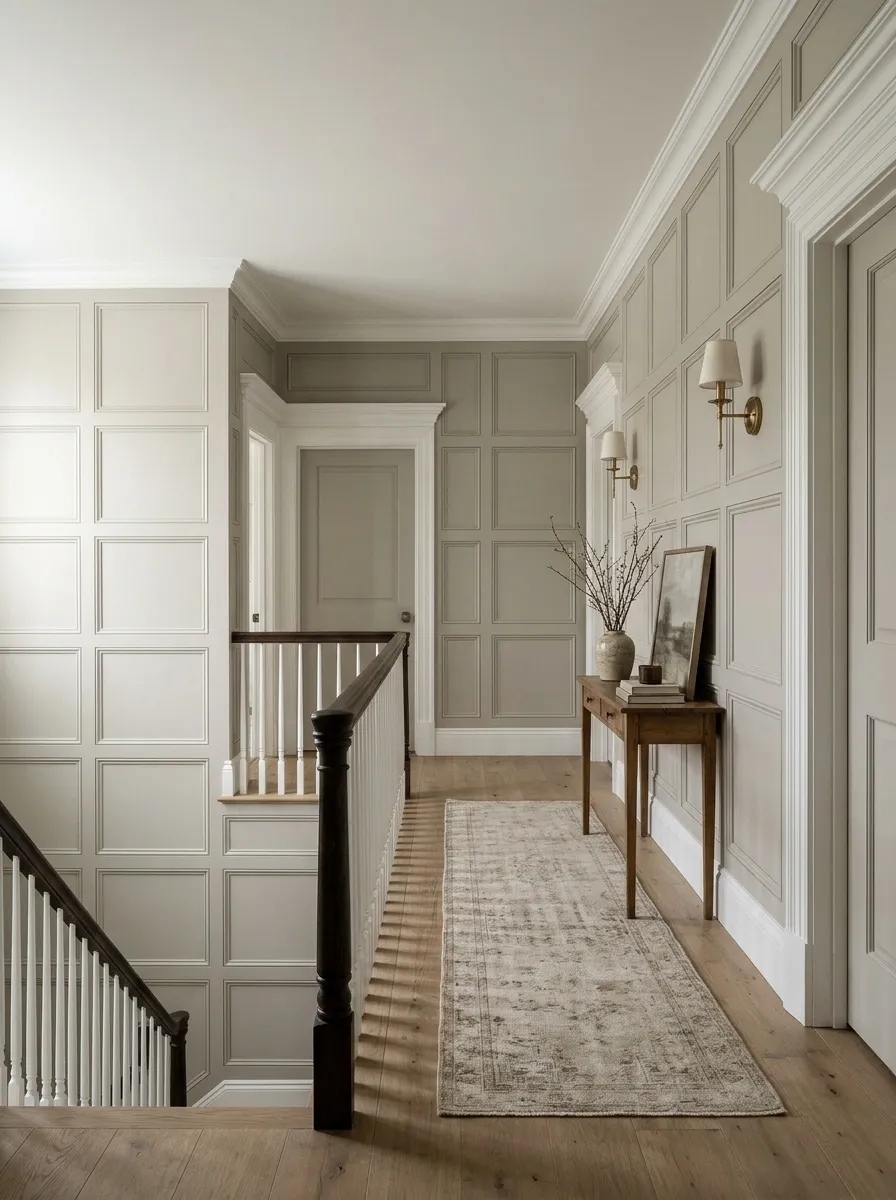
A square or near-square grid can work on a landing wall where the architecture becomes level. Let the stair-flight treatment transition deliberately into this different geometry.
Choose the grid around door positions, ceiling height, and the length of the landing. Avoid tiny leftover sections beside frames.
This is useful when the landing feels visually disconnected from the staircase below. The repeated material or paint color can connect the two areas without requiring every panel to have the same shape.
| Stair flight | Landing |
|---|---|
| Geometry responds to the slope | Geometry responds to the level wall |
| Repeated molding profile | The same profile continues |
| Clear transition at the turn | Deliberate grid around doors |
Rich Walnut Wood Paneling
Dark walnut wood paneling brings an unmatched sense of luxury and warmth to a staircase and landing. The rich grain and deep tones create a dramatic backdrop that feels deeply established and architectural.
Pair the dark wood walls with slender black metal balusters and a warm timber handrail for a refined, modern-traditional aesthetic. Light oak flooring helps balance the richness of the vertical panels.
Keep surrounding decor minimal to let the natural beauty of the wood grain take center stage. This sophisticated approach elevates the hallway into a genuinely striking architectural statement.
Beadboard for a Softer Cottage Staircase
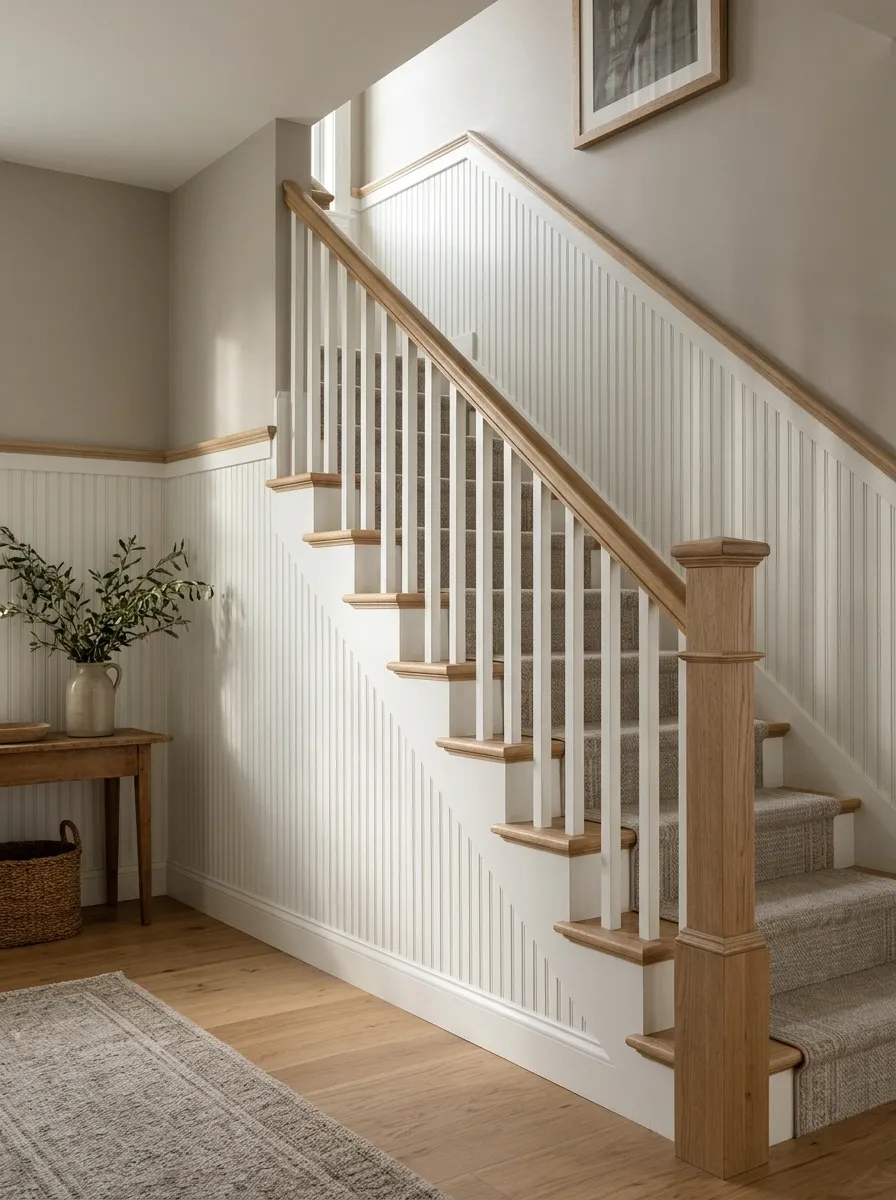
Beadboard brings a finer vertical texture that suits relaxed traditional interiors. Pair it with a simple cap, plain upper walls, and restrained stair-runner patterns.
Choose a system appropriate to the wall and conditions, with a carefully planned finish around the handrail and electrical fittings.
Keep the surrounding details relatively quiet. Beadboard already provides repeated lines; adding busy wallpaper, a strong runner, and ornate brackets can make the staircase feel as though every material has arrived with its own presentation.
FINE TEXTURE, SIMPLE FINISH
Repeated vertical texture.
Calmer paint and textiles.
Fluted Lower Paneling With Plain Walls Above
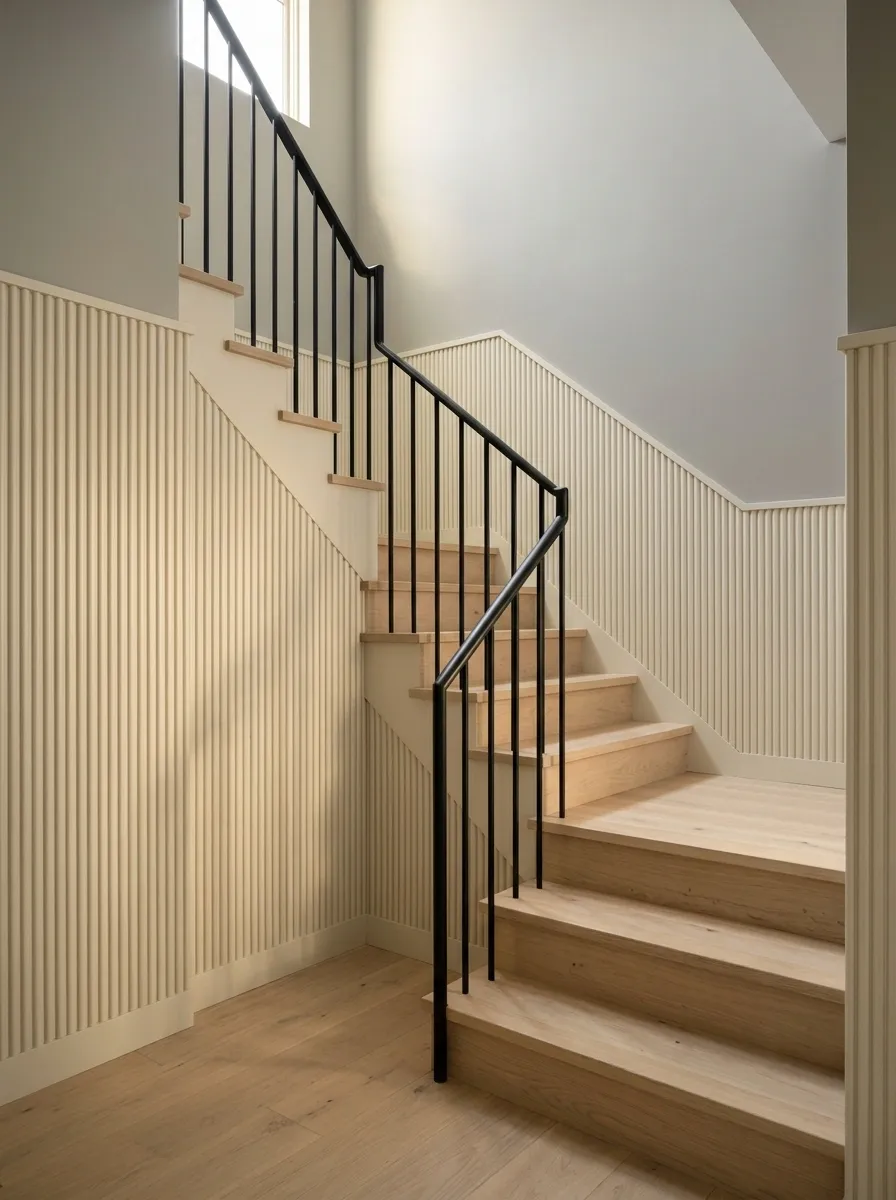
Fluted paneling introduces a denser texture that can work particularly well in a contemporary staircase. Restricting it to a lower area can keep the wall from becoming visually relentless.
Choose the depth and profile with the available space in mind. Keep handrail clearance and projecting details part of the practical assessment.
A simple upper wall lets the fluting remain legible. The staircase does not need every surface to have a texture simply because the first one looked convincing.
A concentrated textured area works better when the adjacent surfaces have less to say.
Wide Natural-Oak Panels Beside Pale Walls
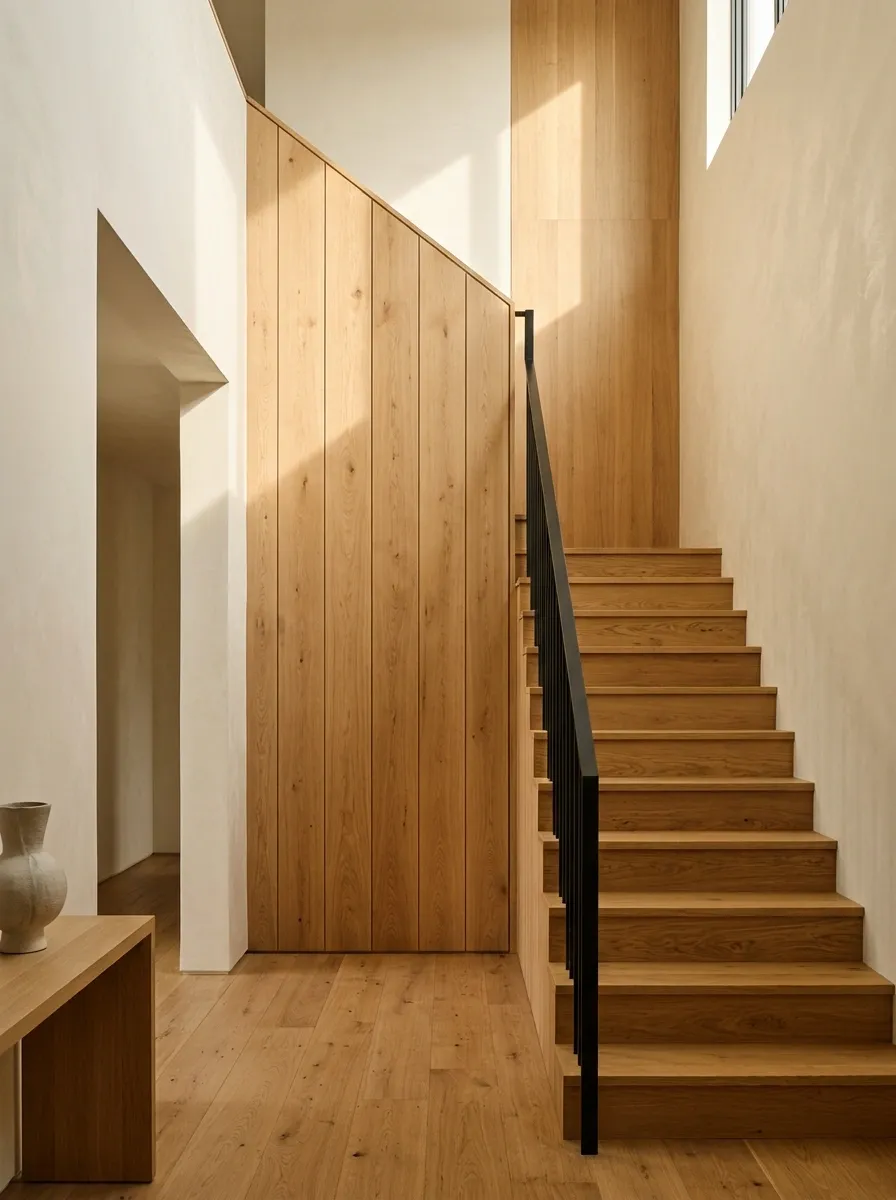
Wide oak panels can provide warmth without the repeated detail of narrow slats. Pale adjoining walls and a simple handrail help the timber remain the feature.
Choose the wood tone beside the actual treads and flooring. Related tones can work together without matching exactly.
Check the proposed joints and finish samples in the stairwell’s light. Oak that looks gentle in a bright showroom may become much more orange or dark in a shaded entrance.
| Compare together | Why |
|---|---|
| Panel sample | Main timber color |
| Stair treads | Immediate neighboring finish |
| Hall flooring | Connection at the bottom |
| Wall paint | Supporting undertone |
Deep Green Lower Panels With a Dark Handrail
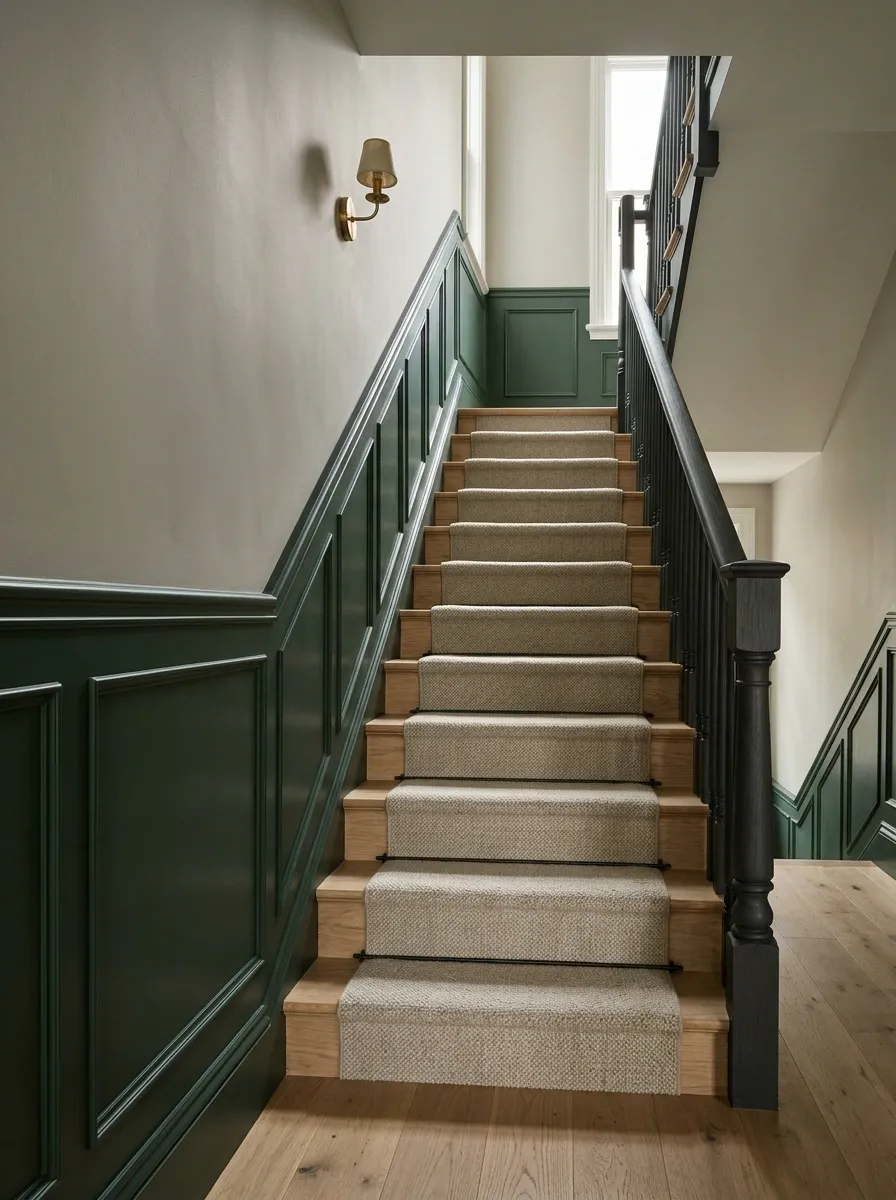
Deep green paneling can give a pale stairwell a substantial base. A dark existing handrail can remain distinct without needing an exact paint match.
Keep the upper wall warm and quiet if you want the lower color to lead. Check the green at both ends of the staircase, especially where daylight changes.
The combination can feel rich without elaborate molding. Strong color and a clear panel rhythm already provide enough character to survive without another row of decorative objects on the landing.
Dark rail, green base, pale wall. Give each element a clear role.
White-on-White Paneling for Subtle Relief
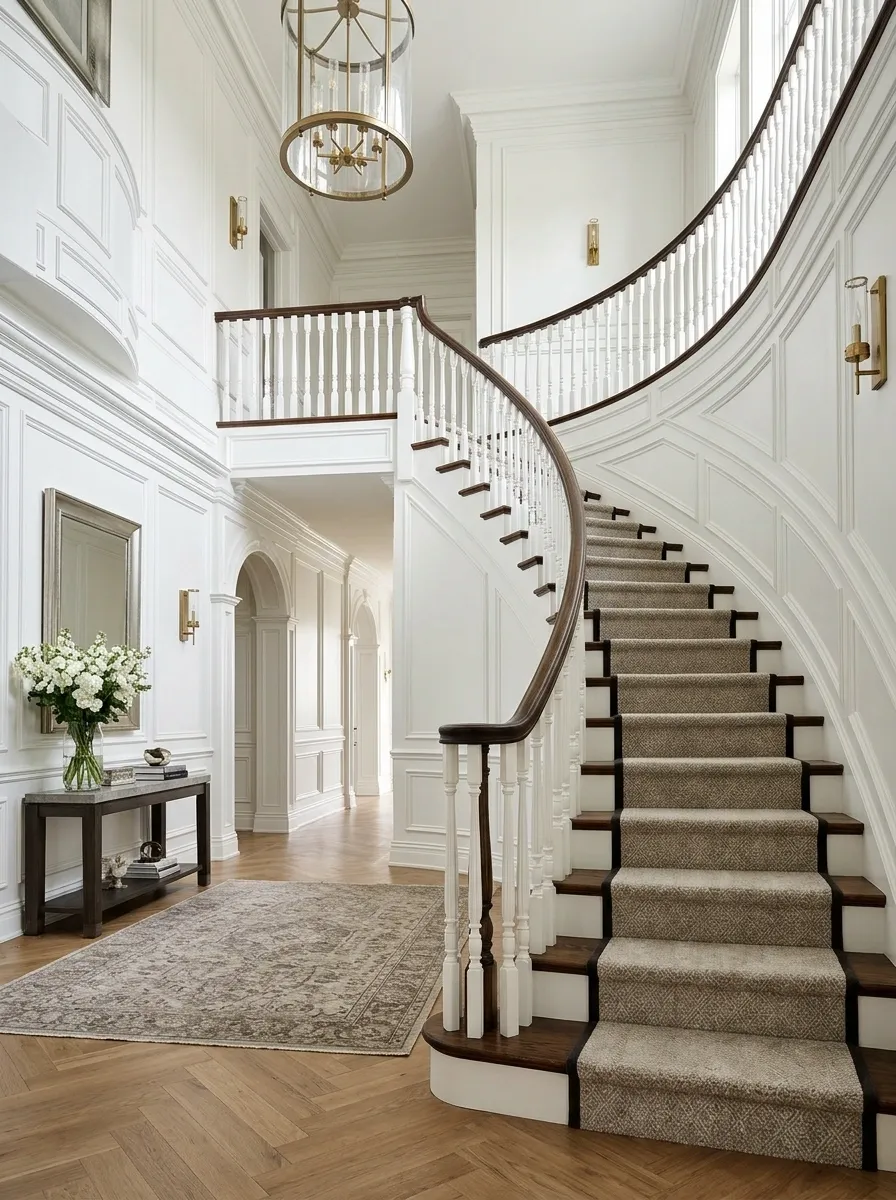
Painting panels and surrounding walls in the same white can make the texture more important than the color contrast. Light and shadow reveal the molding.
Choose the white beside existing trim and flooring. A cooler white and a warm cream can look unexpectedly separate when they touch.
Keep the profile proportionate to the wall. Subtle does not mean the smallest possible molding; the detail still needs enough presence to look intentional from the hall below.
Look after dark: Side lighting can reveal molding differently from daylight, so inspect a sample profile under the stairwell’s evening lights.
Black Lower Panels With Cream Above
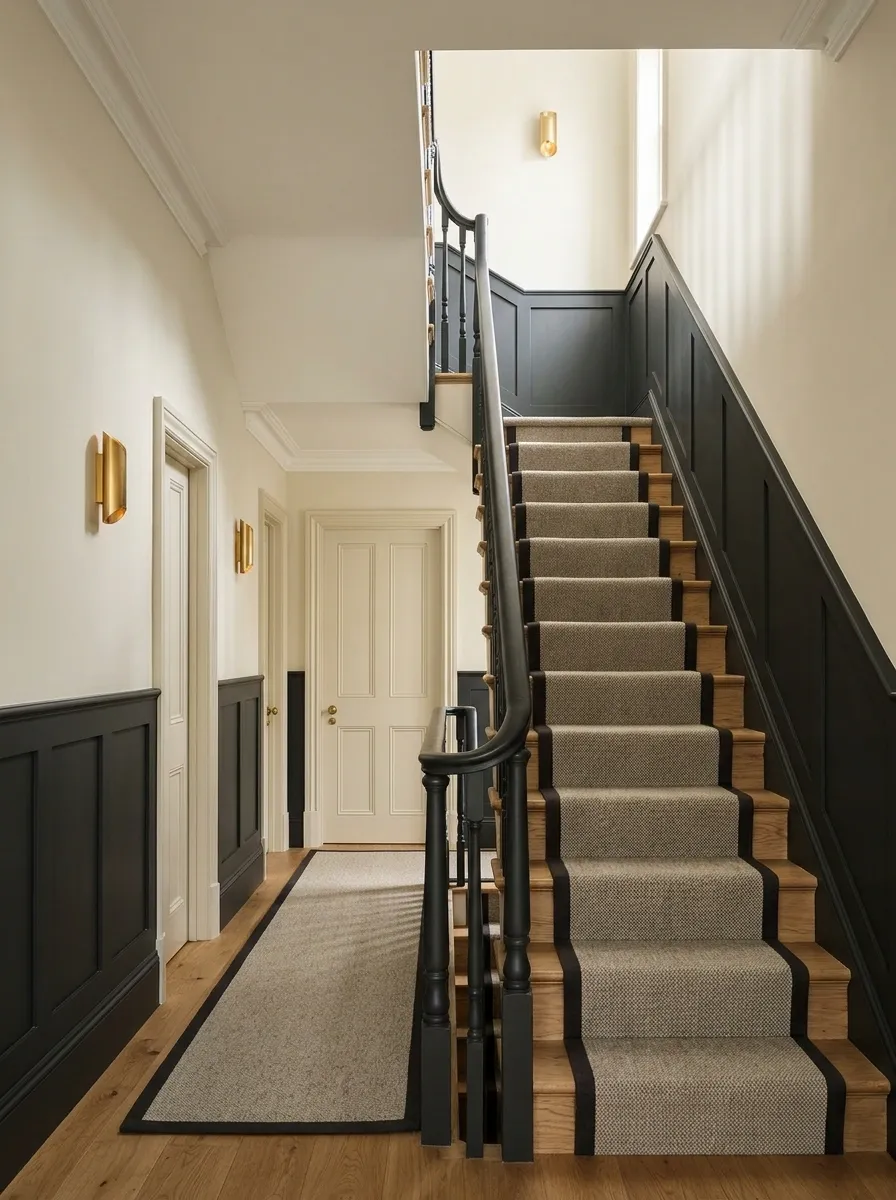
Black lower paneling and cream upper walls create a stronger graphic arrangement. It works best when the stair treads, runner, and handrail remain visually coherent.
Choose the black with the room’s light in mind. A softened shade may sit more comfortably beside timber than a very cool, hard black.
Keep the cream connected to nearby doors and ceilings. The contrast should organize the wall, rather than make every existing white surface look like it was selected during a separate project.
Repeat the dark tone selectively through the rail or another existing architectural detail.
Wallpaper Above a Simpler Paneled Base
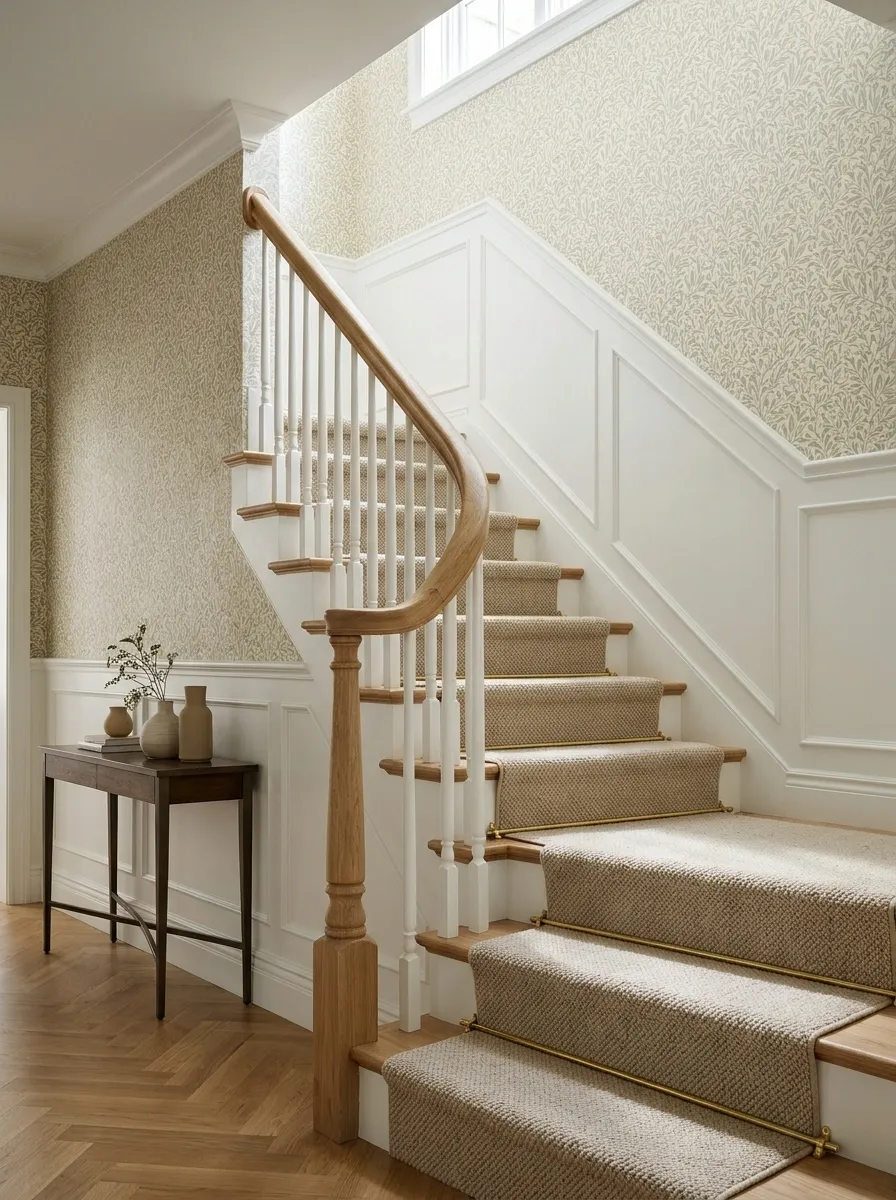
A paneled lower wall can provide a quieter foundation for wallpaper above. Choose the paint from the paper’s background or one of its restrained tones.
Check the wallpaper’s pattern scale across the full stair wall. A print interrupted by a slope, several doors, and a landing needs planning.
Keep the molding relatively simple. The wallpaper supplies decorative complexity, so the panels do not also need to arrive wearing their most elaborate formal outfit.
| Layer | Main contribution |
|---|---|
| Wallpaper | Pattern and color |
| Paneling | Structure and a clear lower boundary |
| Handrail | Usable architectural line |
| Runner | A supporting textile |
Double-Line Molding for a More Formal Hall
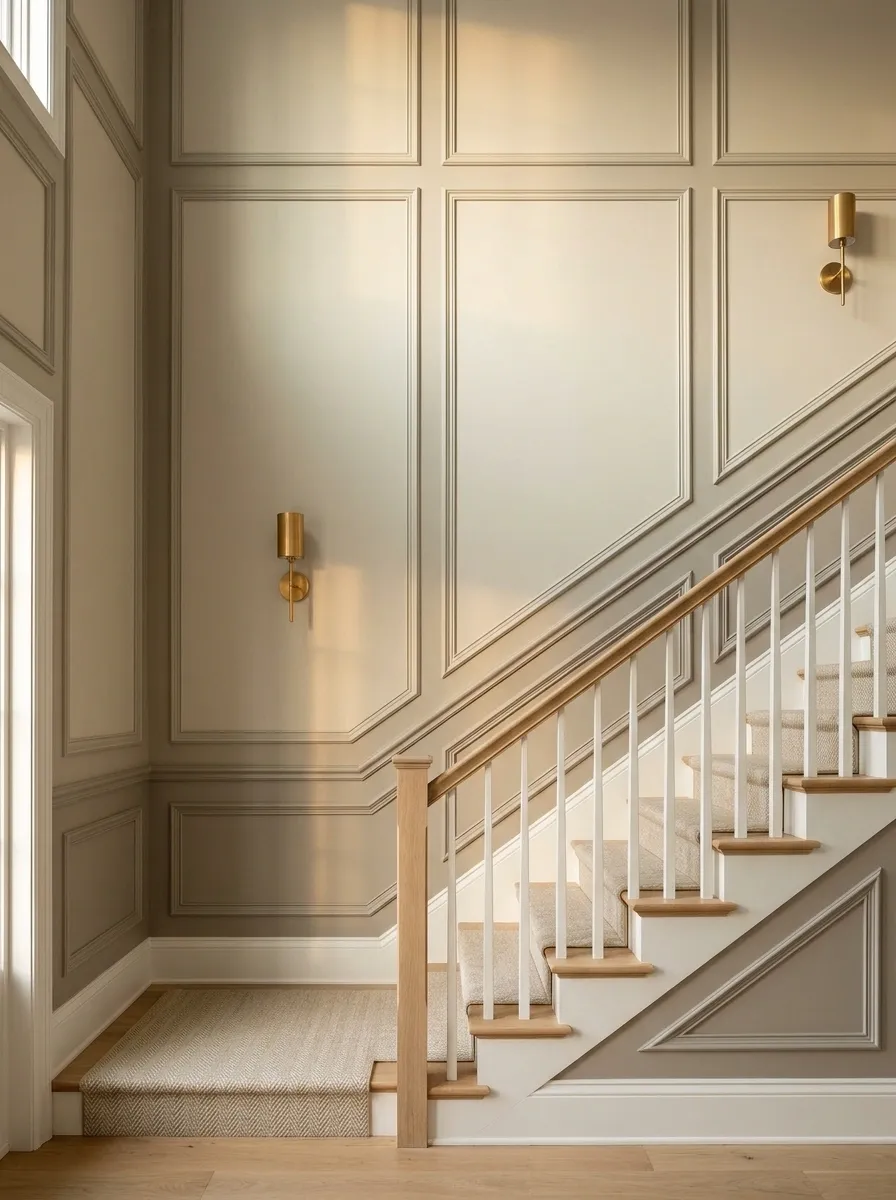
A second inner molding can give larger panels a more formal appearance. The detail needs enough wall area to remain clear rather than cramped.
Plan the distance between the two profiles consistently. Around narrow sections, it may be better to simplify than force the complete detail into every gap.
Use a restrained color if the molding is prominent. The extra line should create depth, rather than turn the wall into an increasingly elaborate exercise in parallel parking.
FORMAL DETAIL NEEDS ROOM
Inner line adds a quieter layer.
Simplify cramped sections instead of shrinking every detail.
Broad, Shallow Panels in a Narrow Stairwell
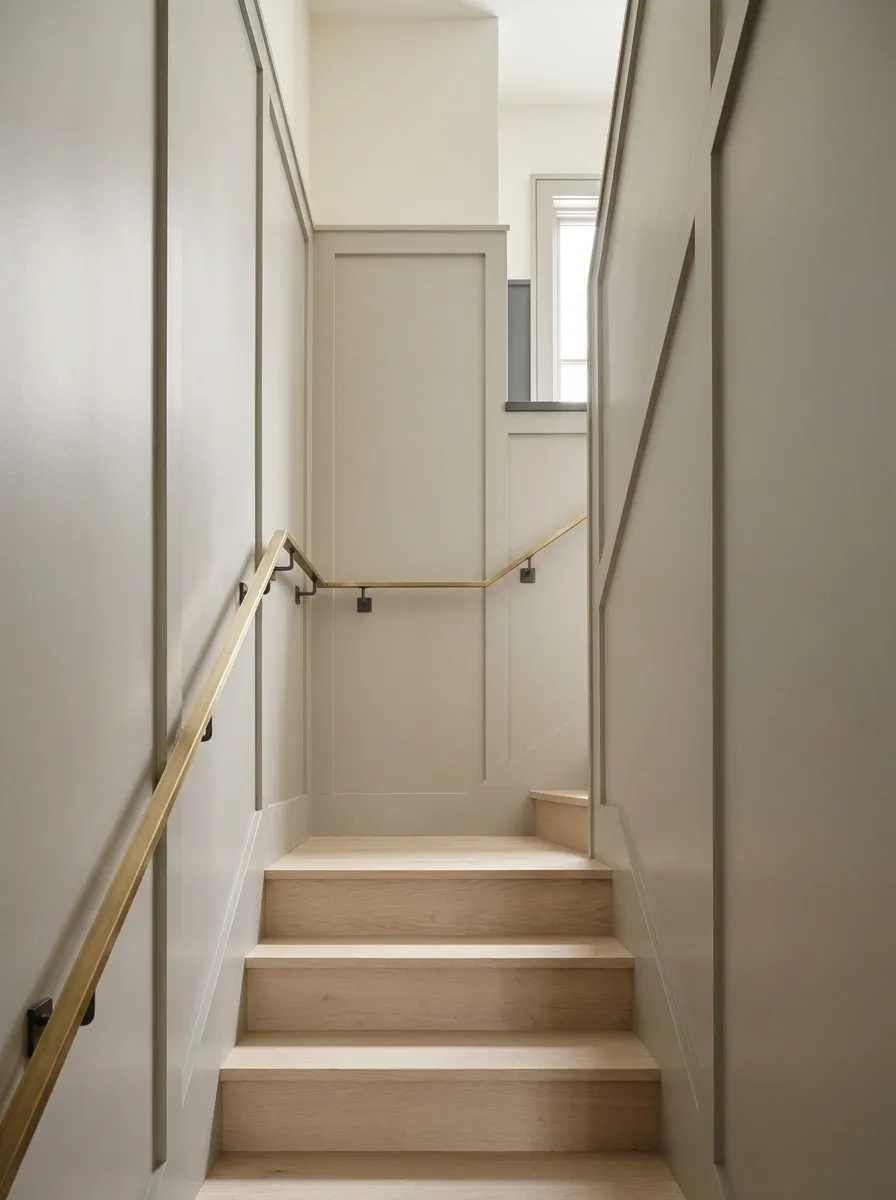
A narrow stairwell can benefit from a simpler pattern with broad fields and restrained projection. Keep the practical width and handrail use central to the design.
Avoid choosing a deep profile purely because it looks substantial in a larger house.
The wall can gain structure without feeling crowded. A few well-proportioned sections often look more convincing than numerous small panels occupying every available strip of plaster.
Judge projection as well as pattern: The physical depth of the finish matters in a constrained stairwell.
A Stepped Top Line Where the Architecture Supports It
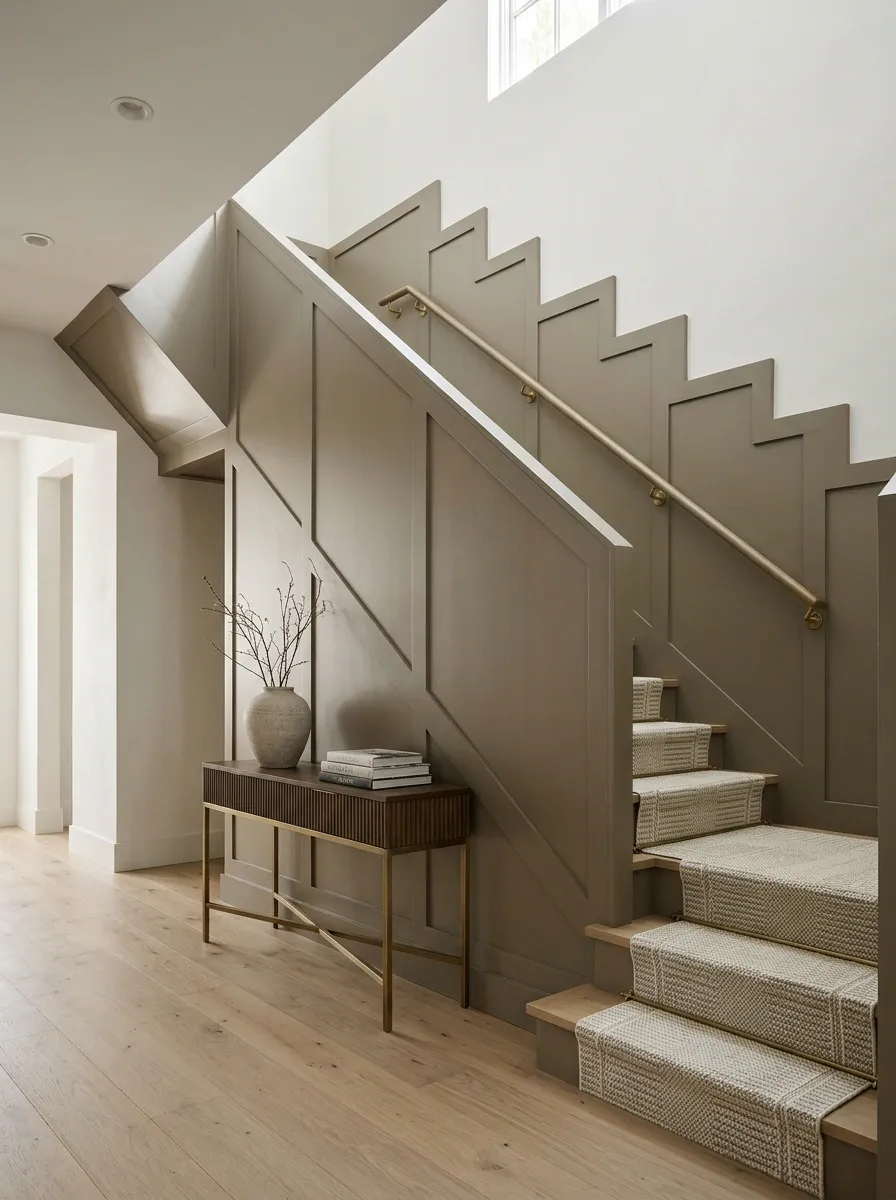
A stepped upper boundary can create a more graphic panel arrangement than a continuous raked line. It needs careful design so each change looks deliberate.
Use the wall’s architecture and overall rhythm to determine the steps rather than automatically copying every riser.
This can suit a contemporary interior with simple details. Keep the remaining trim quiet so the stepped outline remains readable rather than becoming one more competing shape beside the stairs.
A DELIBERATE CHANGE OF LEVEL
Concept study: set the steps as one composition, with consistent panel language.
Tapered Panels Around a Turning Staircase
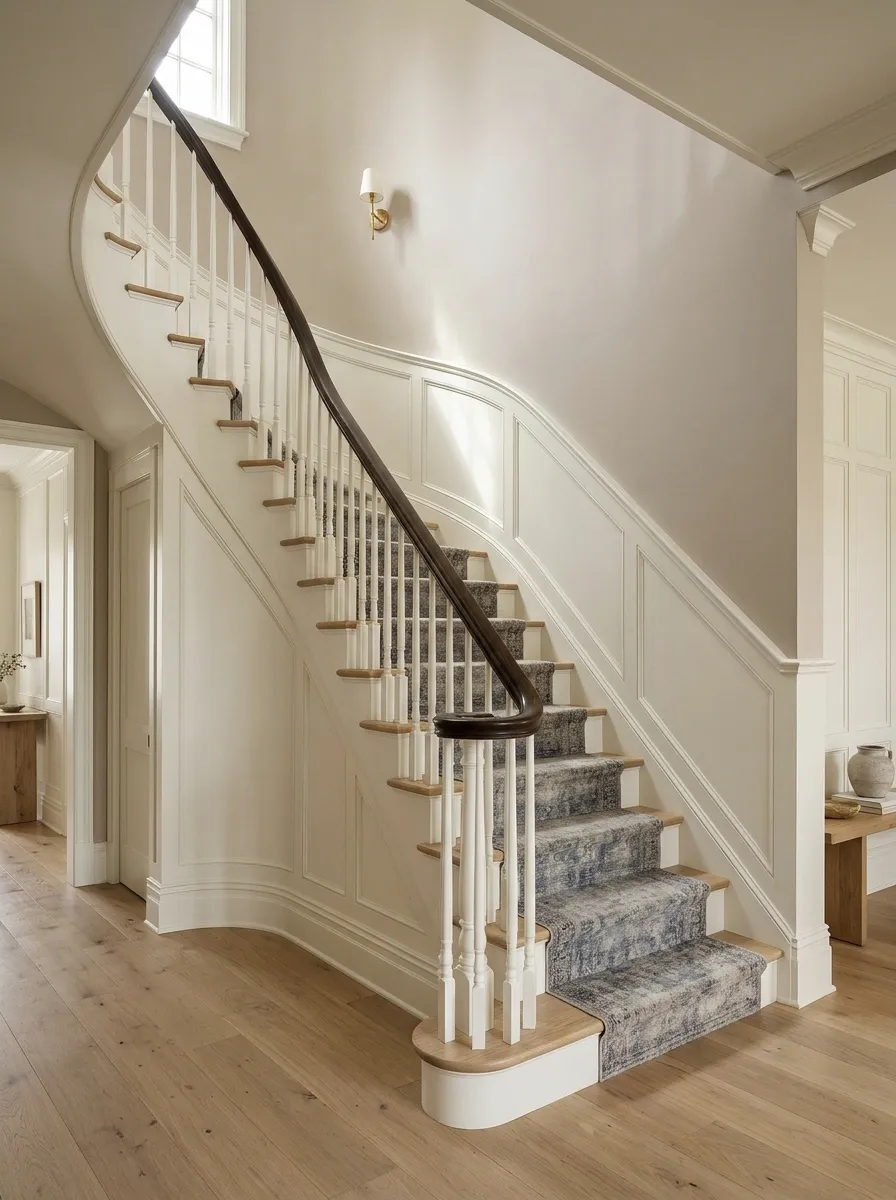
A turning staircase may need panels that change shape as the wall geometry changes. Treat the turn as part of the complete elevation.
Let a joiner or designer resolve awkward tapered areas rather than forcing identical panels onto every wall segment.
The important relationship is the overall spacing and profile. A small difference in panel width can look intentional; a collection of tiny triangles often looks like the remaining geometry was left to fend for itself.
| Keep consistent | Allow to respond to the wall |
|---|---|
| Molding profile | Panel width |
| Visual spacing | Tapered ends |
| Finish | Transition geometry |
| Overall hierarchy | Individual field shape |
Use Shadow-Gap Panels for a Contemporary Stair
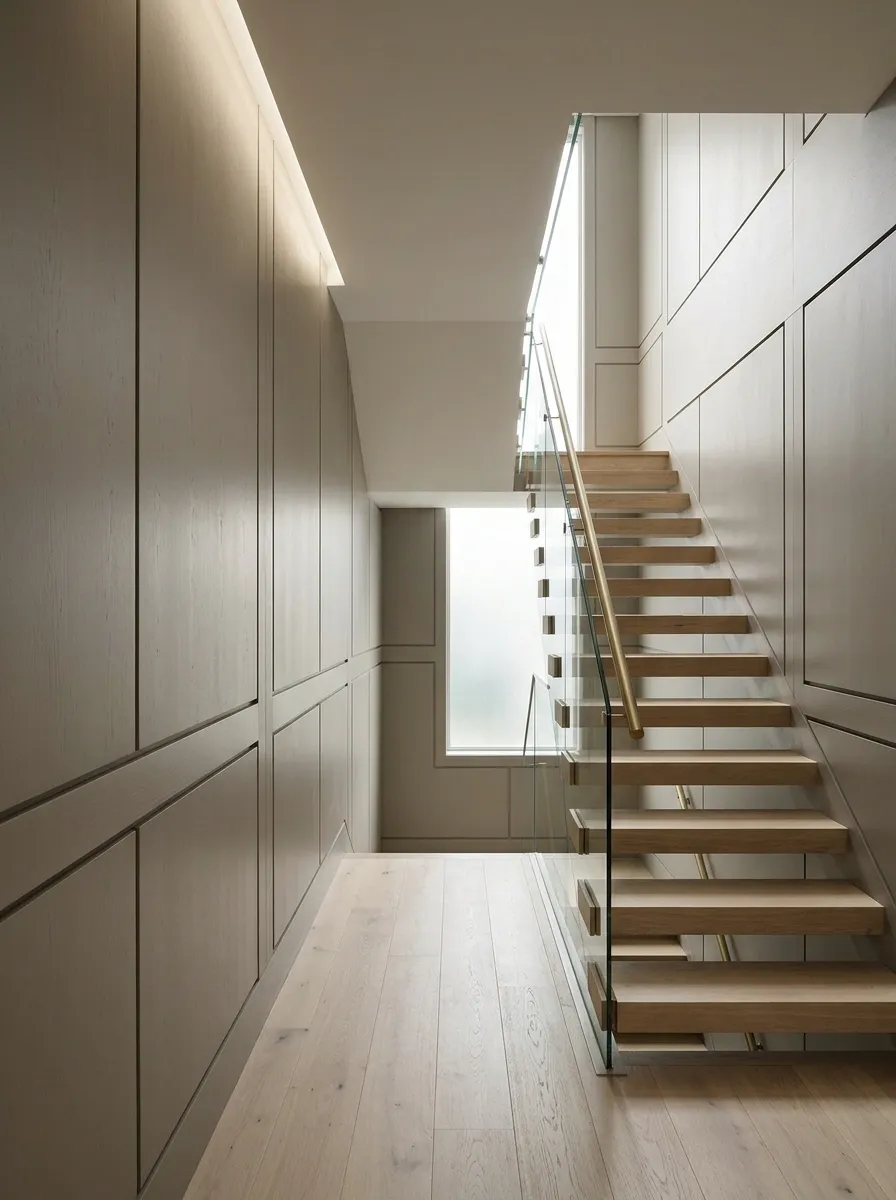
A shadow-gap system can create clean divisions without traditional applied molding. The joints provide the visual rhythm.
Plan the module, material movement, corners, and transitions with the installer. A minimal appearance depends on careful execution, particularly around doors and landings.
Choose a finish that suits the house rather than making the staircase feel unrelated to the entrance. Modern detail can be subtle; it does not need to announce that the rest of the trim has been dismissed.
Minimal detail is still detail: Ask how the gaps finish at corners, skirting, doors, and the top of the paneling.
Conceal an Existing Under-Stair Door Within the Panel Rhythm
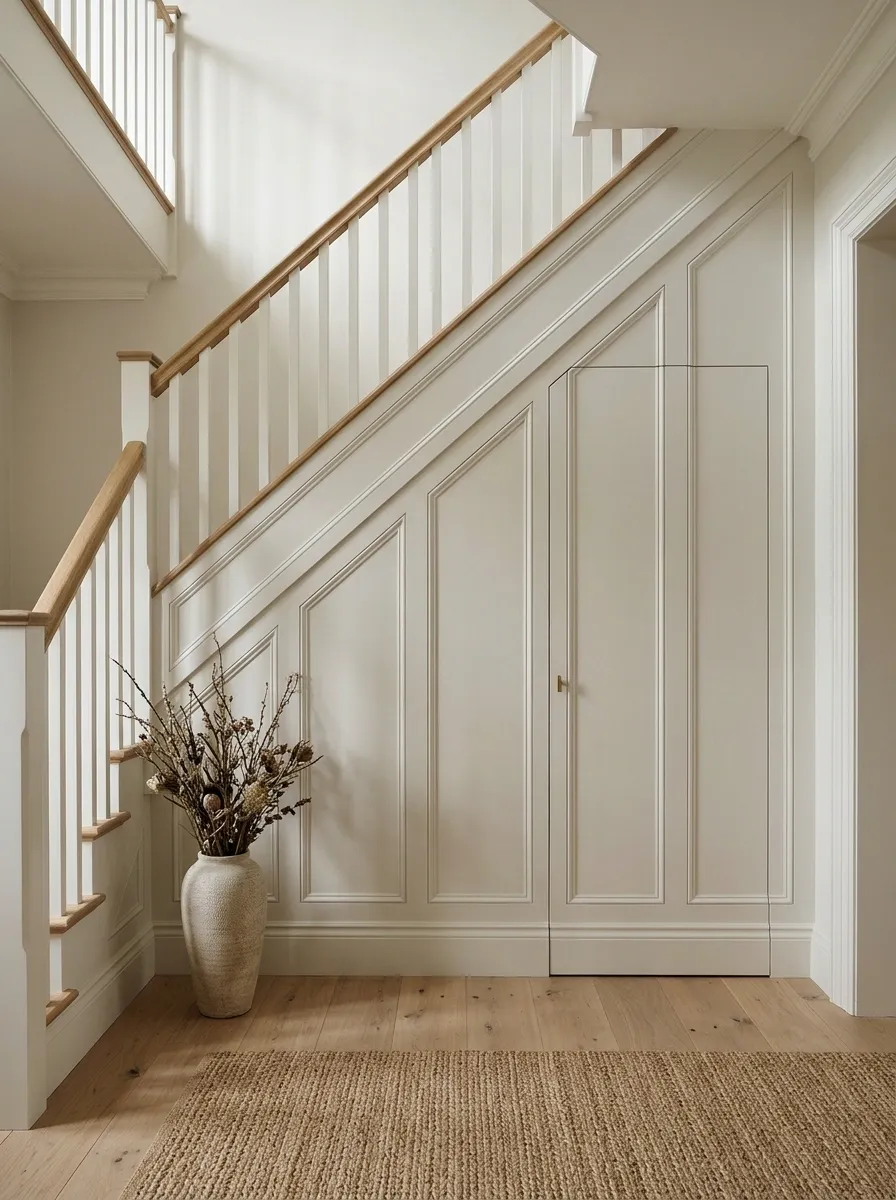
An existing suitable under-stair door can be incorporated into the wall’s panel layout while retaining required access, hardware, and protective performance.
Plan the door outline and opening movement before dividing the wall. Avoid covering necessary ventilation or access features.
The goal is a quieter elevation. You should still be able to find and use the door without searching for a mysterious seam whenever the vacuum cleaner is needed.
CONTINUOUS LOOK, USABLE ACCESS
A concealed appearance must preserve the door’s required function.
Continue Paneling Behind a Landing Bench
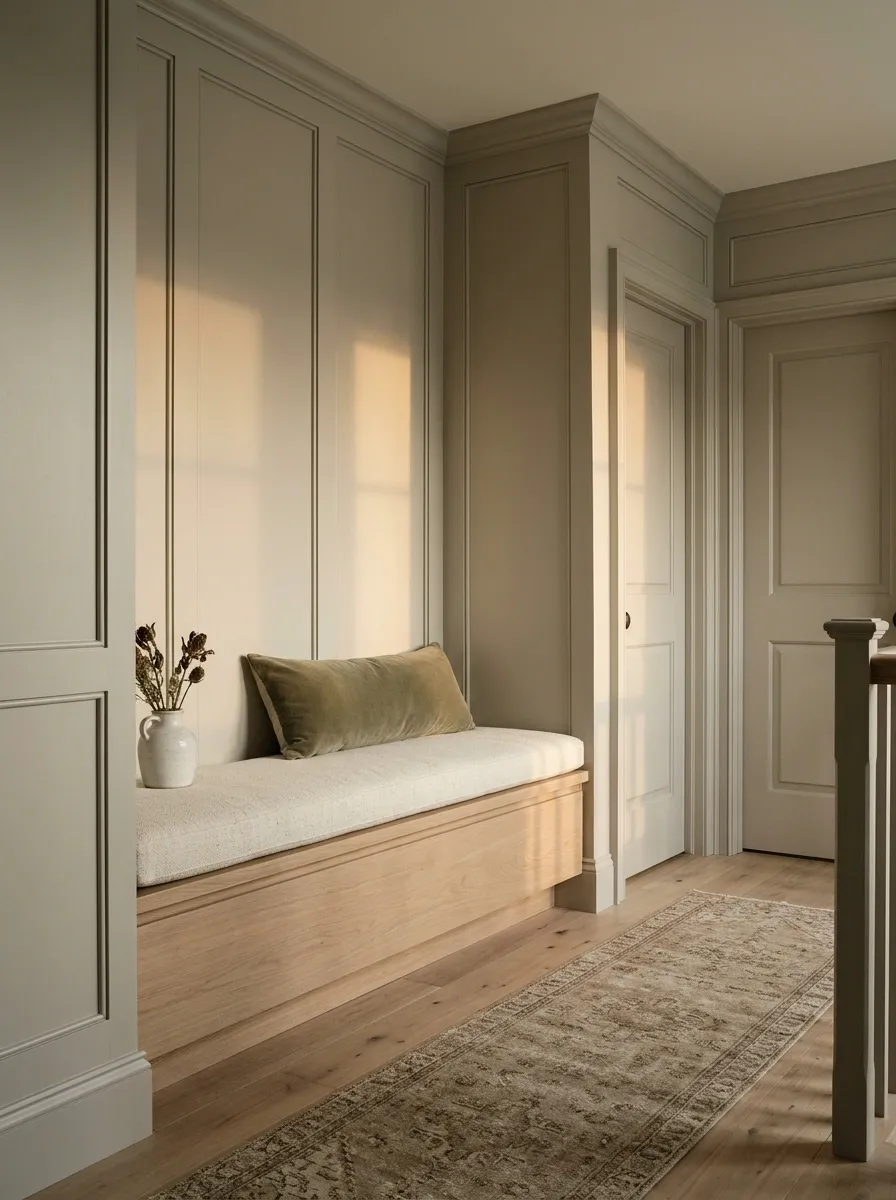
Where a landing genuinely has enough space, paneling can provide a backdrop to a small seat. Relate the panel divisions to the complete bench arrangement.
Keep the route, doors, and usable landing area clear. A bench is not automatically appropriate simply because the wall looks empty.
Choose a simple seat if the paneling is detailed. The arrangement should provide somewhere useful to sit, rather than a furniture obstacle dressed in particularly coordinated upholstery.
| Before adding seating | Check |
|---|---|
| Landing space | Comfortable circulation |
| Nearby doors | Full movement |
| Bench position | Space to sit and rise |
| Panel layout | A coherent backdrop |
Use Tall Narrow Panels to Connect Two Levels
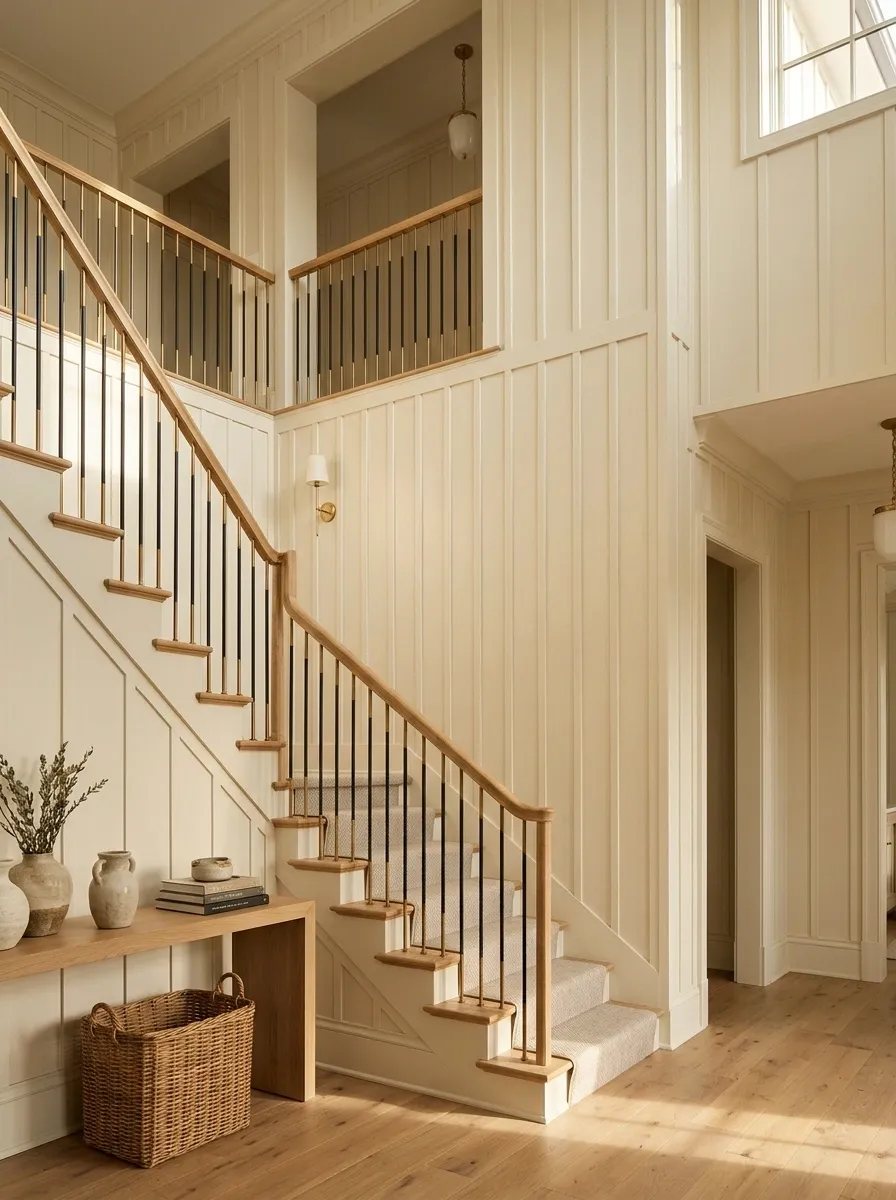
A tall wall visible from both floors can take elongated panels that visually connect the entrance and landing.
Plan them around the major wall height and openings rather than creating a separate decorative scheme at every level. Keep the spacing deliberate across the full view.
This can make a stairwell feel more unified. The paneling should connect the architecture, not divide it into several small areas that appear to have been completed by unrelated decorating committees.
Warm Gray Panels Beside Natural-Oak Treads
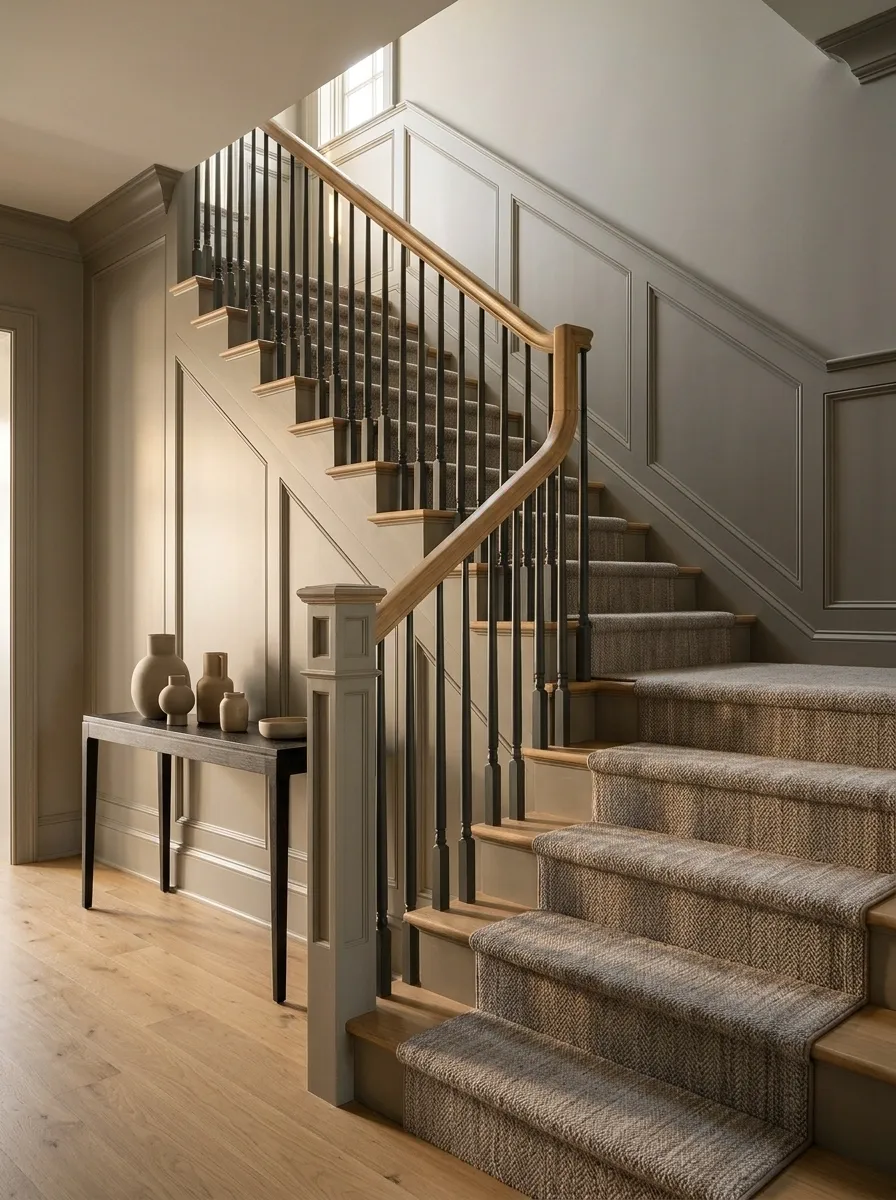
Warm gray paneling can provide a quieter backdrop to oak stairs, especially where a very cool gray would make the timber look excessively orange.
Test the paint beside the actual treads and in the stairwell’s darker areas. Keep the upper wall and trim related.
A simple profile lets the material relationship lead. You do not need another strong pattern if the oak grain, runner, and balustrade already give the staircase plenty of detail.
Sample in place: The relationship between gray paint and oak is easier to judge beside the real timber than in a paint-shop aisle.
Align Panel Divisions With Nearby Door Architecture
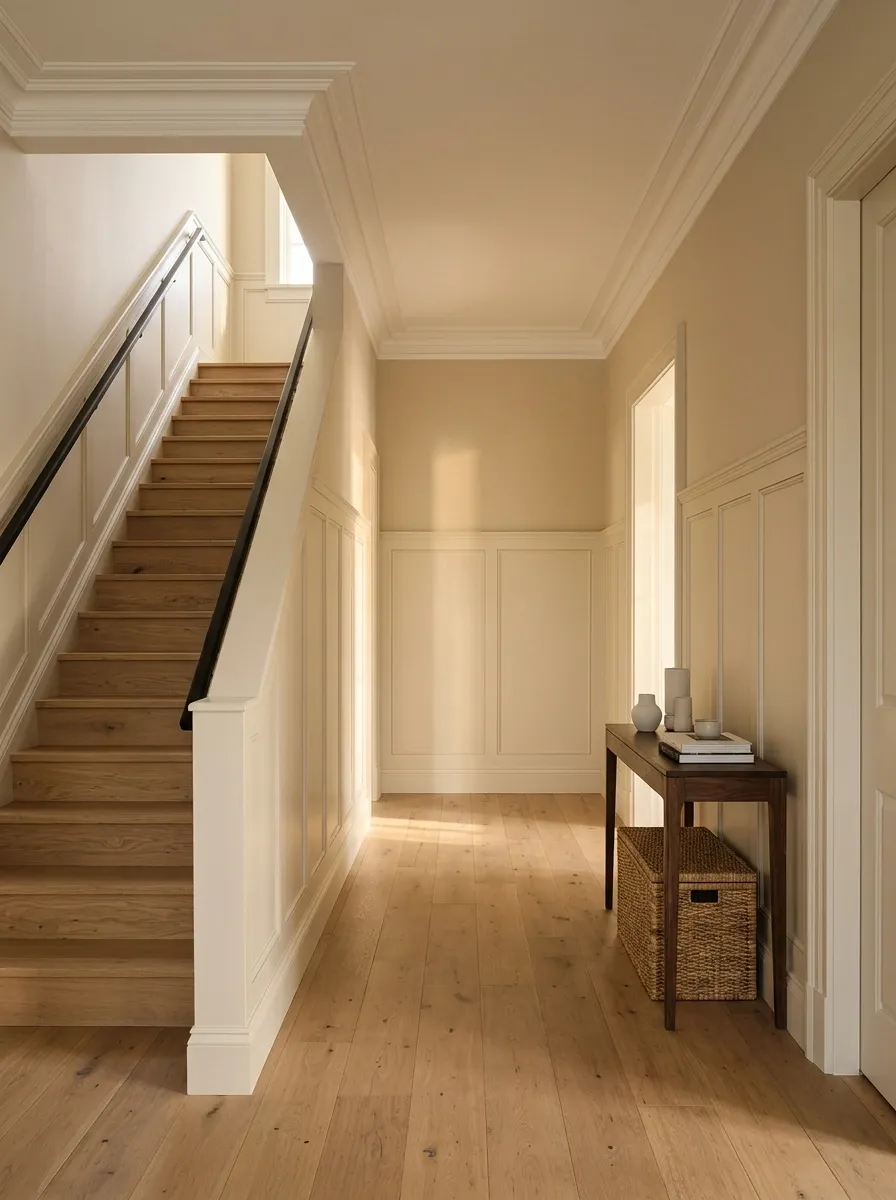
Paneling looks more settled when its major lines acknowledge doorframes and other strong architectural boundaries.
You do not need every line to align exactly. You do need to avoid awkward near-alignments and tiny leftover sections.
Draw the whole wall before deciding the panel count. Treating each gap between doors separately can produce several perfectly neat panels that collectively appear to have never met one another.
Plan the gaps together. Avoid narrow leftover strips beside the frame.
Repair and Refinish Existing Original Paneling
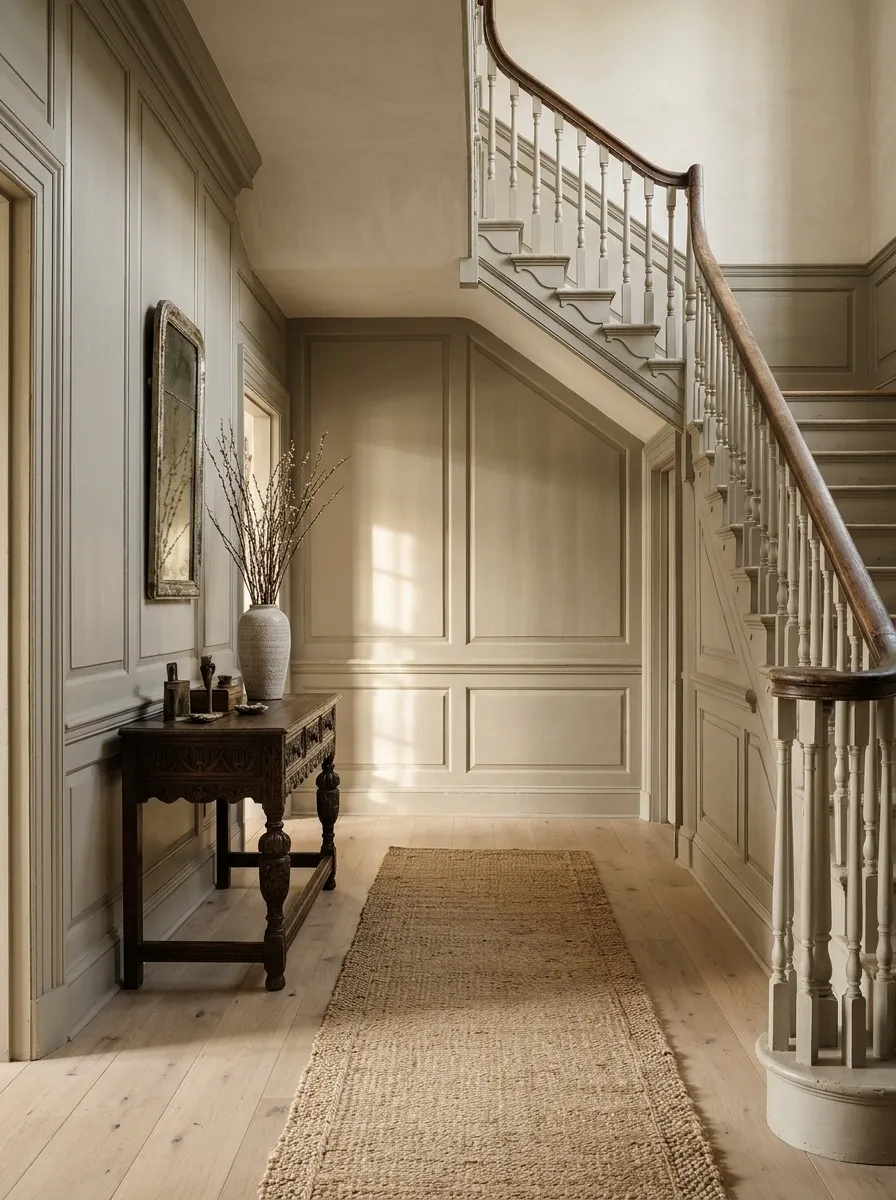
If original paneling remains, inspect its condition before replacing it. Sound material may need repair, appropriate cleaning, and a compatible finish rather than a new system installed over it.
Assess unknown coatings before sanding or stripping. Older painted surfaces can require specialist attention; EPA guidance identifies disturbance of older lead-based paint as a source of hazardous dust. US EPA
Keep useful original details where they suit the house. Age is not automatically a fault, and fresh material is not automatically an improvement.
| Keep if sound | Assess before changing |
|---|---|
| Original proportions | Unknown coatings |
| Good joinery | Damp or damaged areas |
| Appropriate profiles | Loose or failing components |
| Architectural character | Previous unsuitable repairs |
Panel One Main Wall and Let the Others Stay Quiet
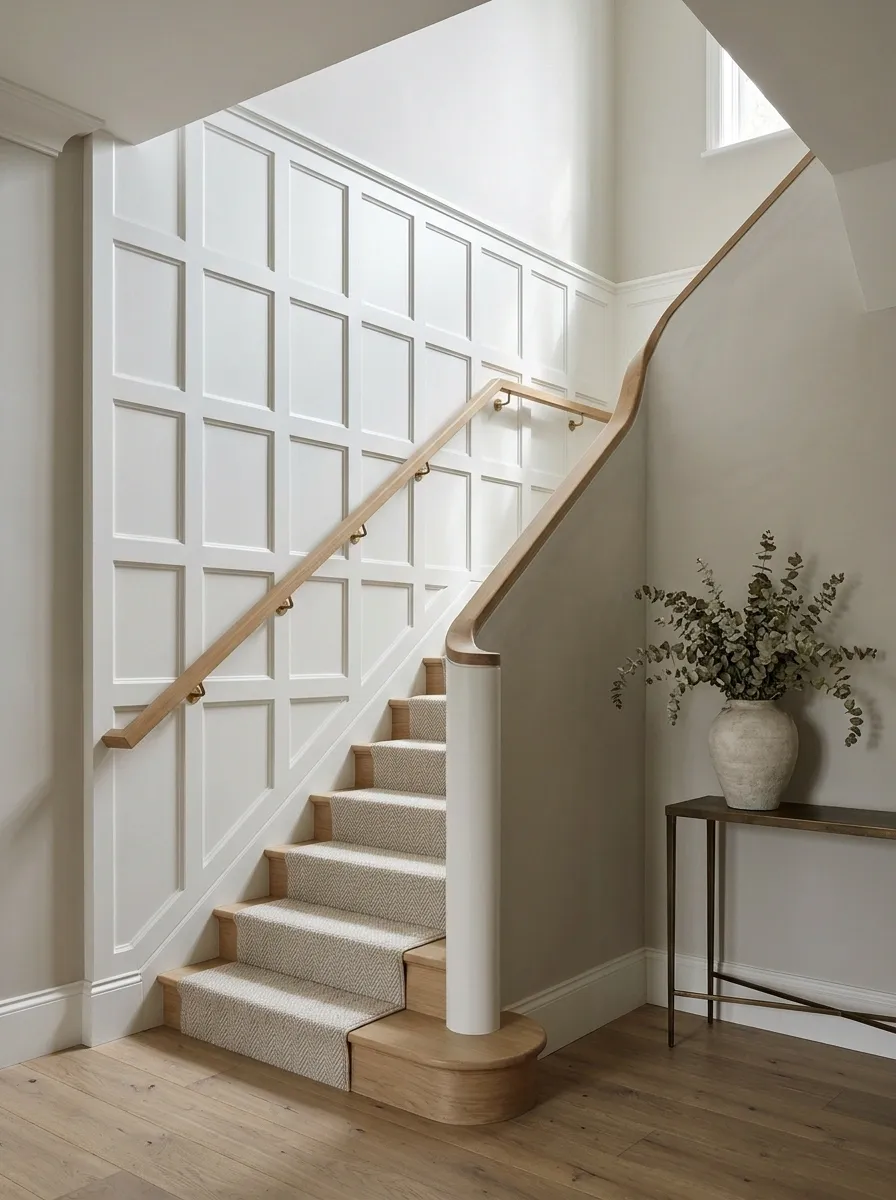
One principal paneled wall can be enough, particularly in a smaller entrance with several doors and a visible staircase.
Choose the wall that carries the strongest view and keep adjoining surfaces simpler. Repeat a paint color or profile elsewhere only where it helps.
The whole hall does not need identical treatment. A clear feature wall can look more intentional than paneling every available surface until the stairs feel wrapped in a particularly enthusiastic joinery sample book.
Main wall
Lets the feature register.
Approve the Awkward Corners Before the Easy Panels
Look closely at the first panel, the last panel, the landing turn, and the areas around doors and brackets. Those are the places that decide whether the finished staircase feels considered.
Large uninterrupted sections are usually easier to make attractive. The junctions reveal the planning.
Choose a layout that belongs to your staircase, then let the installer resolve it properly. The wall should still look convincing when you are halfway up the stairs, close enough to notice everything.