
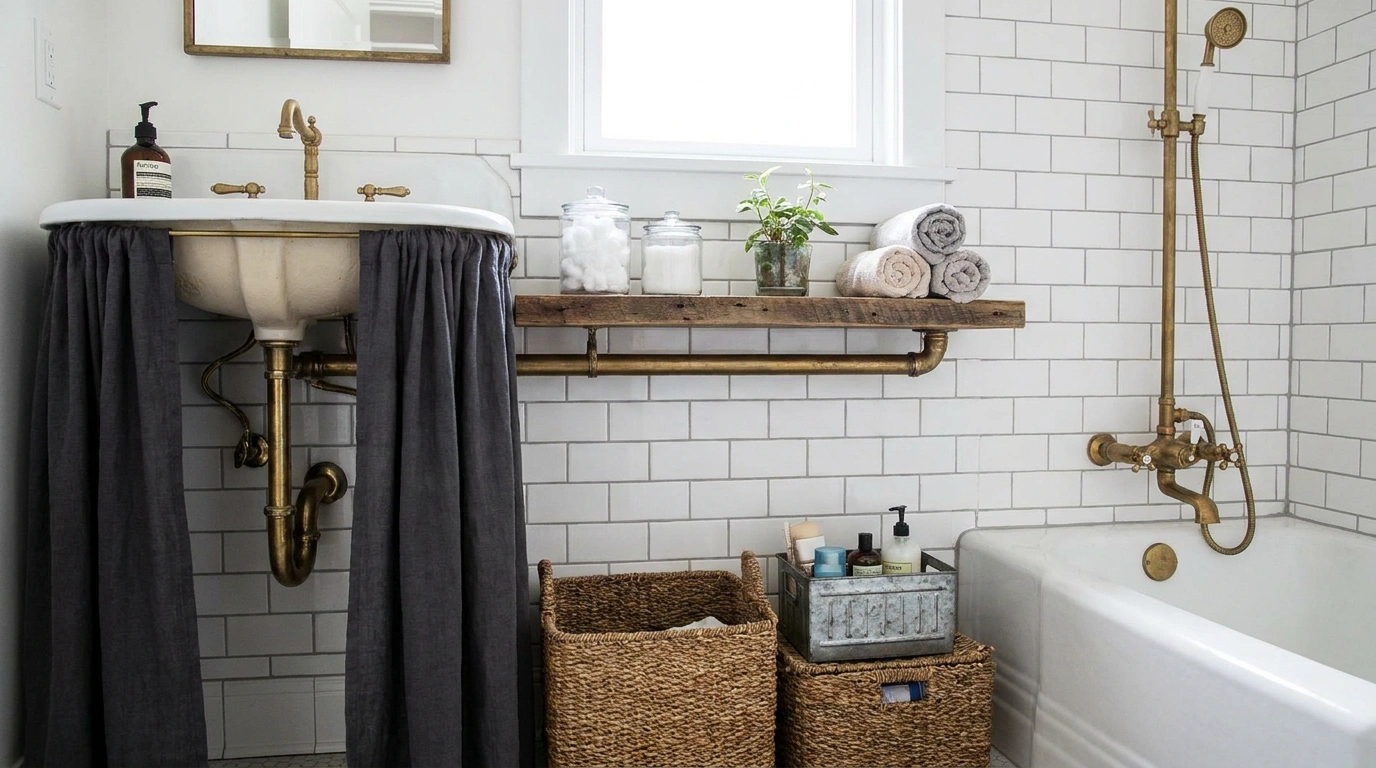
A floating basin can look wonderfully light. Then you look underneath and meet the entire plumbing department.
Exposed bathroom pipes are easier to live with when their surroundings look finished and the fittings remain accessible. That can mean emphasizing attractive pipework, adding a movable element nearby, or planning a proper removable enclosure. The appropriate answer depends on what the pipes do, their condition, and how much working space they need.
Have leaks, corrosion, condensation, or loose fittings assessed before decorating. Do not wrap pipes in rope or fabric, hang storage from them, or paint unidentified components. In older homes, leave suspect insulation alone; HSE identifies pipe lagging as a possible asbestos-containing material.
Bathroom Decorating Ideas That Leave the Plumbing Usable
Embrace Metallic Copper Statements
Make your plumbing work twice as hard by turning complex pipe runs into striking visual art. Polished copper fittings against dark brickwork create an industrial masterpiece that demands attention.
Keep surrounding patterns intentional when introducing bold metallic textures. A dramatic wallpaper choice pairs wonderfully with exposed hardware if you maintain clean lines and proper lighting throughout the space.
Coordinate your fixtures by matching mirror frames and faucets to the primary pipe material. This ties the entire room together into a cohesive, design-forward environment without feeling cluttered.
Give the Pipes a Plain, Finished Wall Behind Them
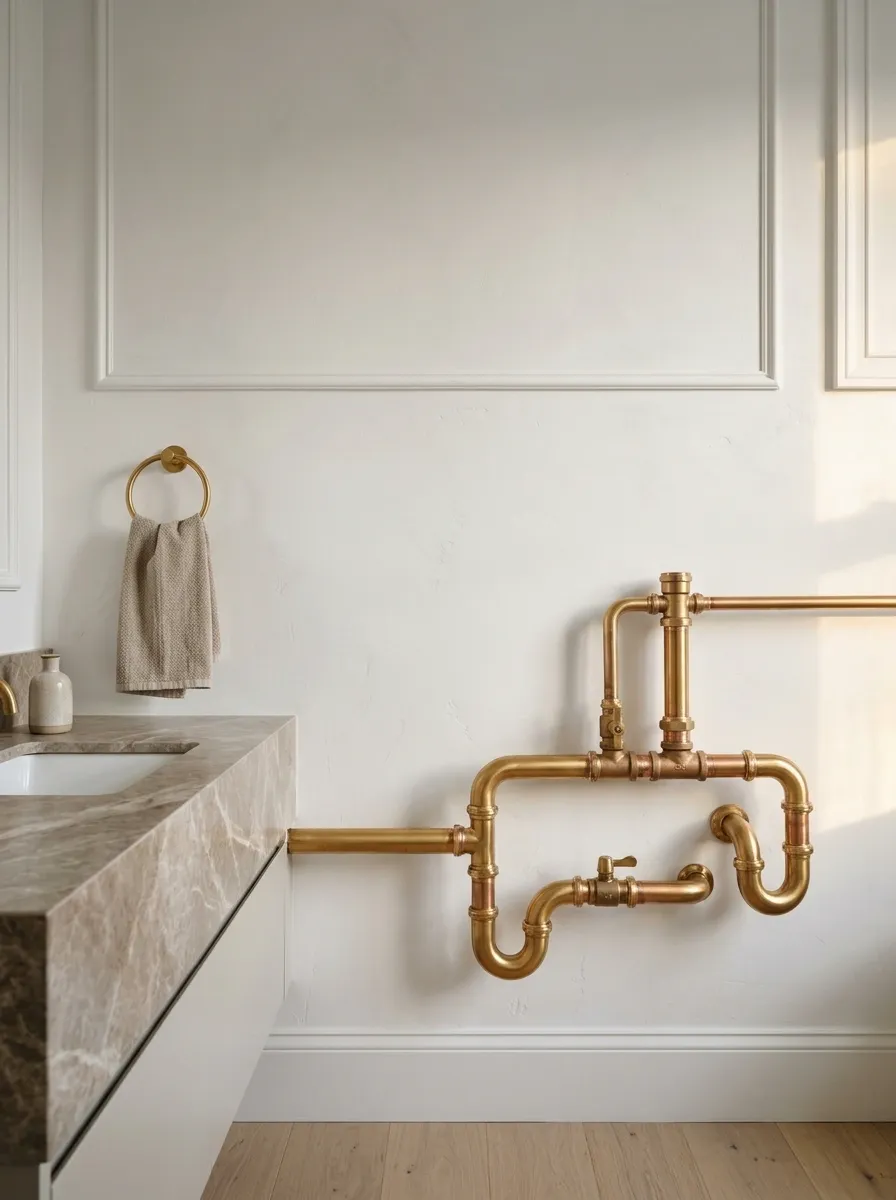
Start behind the fittings.
Repair damaged wall finishes around the plumbing penetrations using a method suitable for the location. A clean background makes even ordinary fittings look less accidental.
Address the cause of crumbling paint or staining first. Repainting active damp is a temporary publicity campaign, not a repair.
Choose a plain finish near complicated pipework so every bend does not compete with patterned wallpaper or tile. You can place the decorative interest higher on the wall, where it will be easier to enjoy and much less annoying to clean.
Start with the background
Plain finished wall
Repair moisture problems before making the surrounding surface decorative. Conceptual relationship only; confirm service-specific clearances, suitable materials, and maintenance access.
Expose Industrial Towel Warmers
Transform a simple necessity into a focal point by utilizing exposed copper piping for wall-mounted towel rails. The raw metallic finish adds warmth and texture against neutral plaster walls.
Position your towel storage to integrate seamlessly with existing wall valves and fittings. This keeps the functional elements of the room accessible while maintaining an uncluttered aesthetic.
Choose plush, dark textiles to contrast sharply with bright metal pipes. The combination creates a tactile, spa-like experience that highlights the beauty of exposed functional hardware.
Repeat Chrome in the Mirror Frame
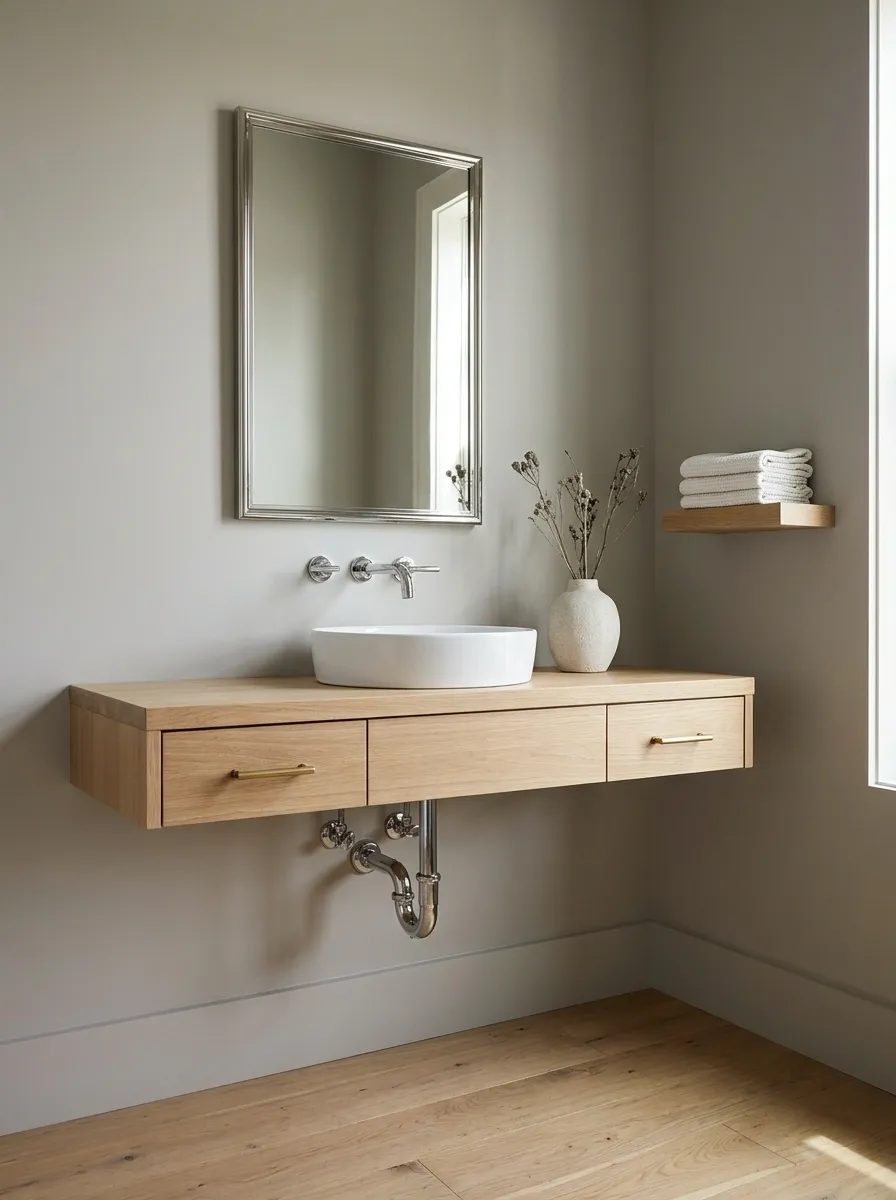
If the basin waste and supply fittings are already chrome, a restrained chrome or silver-toned mirror frame can connect them to the rest of the bathroom.
Compare finishes in the room. Bright chrome and brushed nickel are related but visibly different; decide whether the difference looks deliberate.
Keep the mirror proportionate to the basin and place it for actual users. The pipe finish can inform the choice without taking over every detail. You do not need a matching metallic bin, soap dispenser, shelf, and toilet-brush monument to establish a relationship.
Small repeat, useful effect: One metal detail at eye level gives exposed metal below the basin visual company.
Highlight High Tank Plumbing
Elevate a traditional bathroom design by showcasing a classic high-tank toilet with dramatic vertical piping. The elongated pipe creates a wonderful sense of height and architectural interest.
Paint your walls in a rich olive tone to anchor the vintage aesthetic and provide a sophisticated backdrop for traditional white ceramics and dark hardware.
Pair the elevated plumbing with a contrasting checkerboard floor to ground the space. Simple accessories ensure the vintage fixtures remain the undisputed star of the room.
Use a Dark Wall to Frame Bright Metal
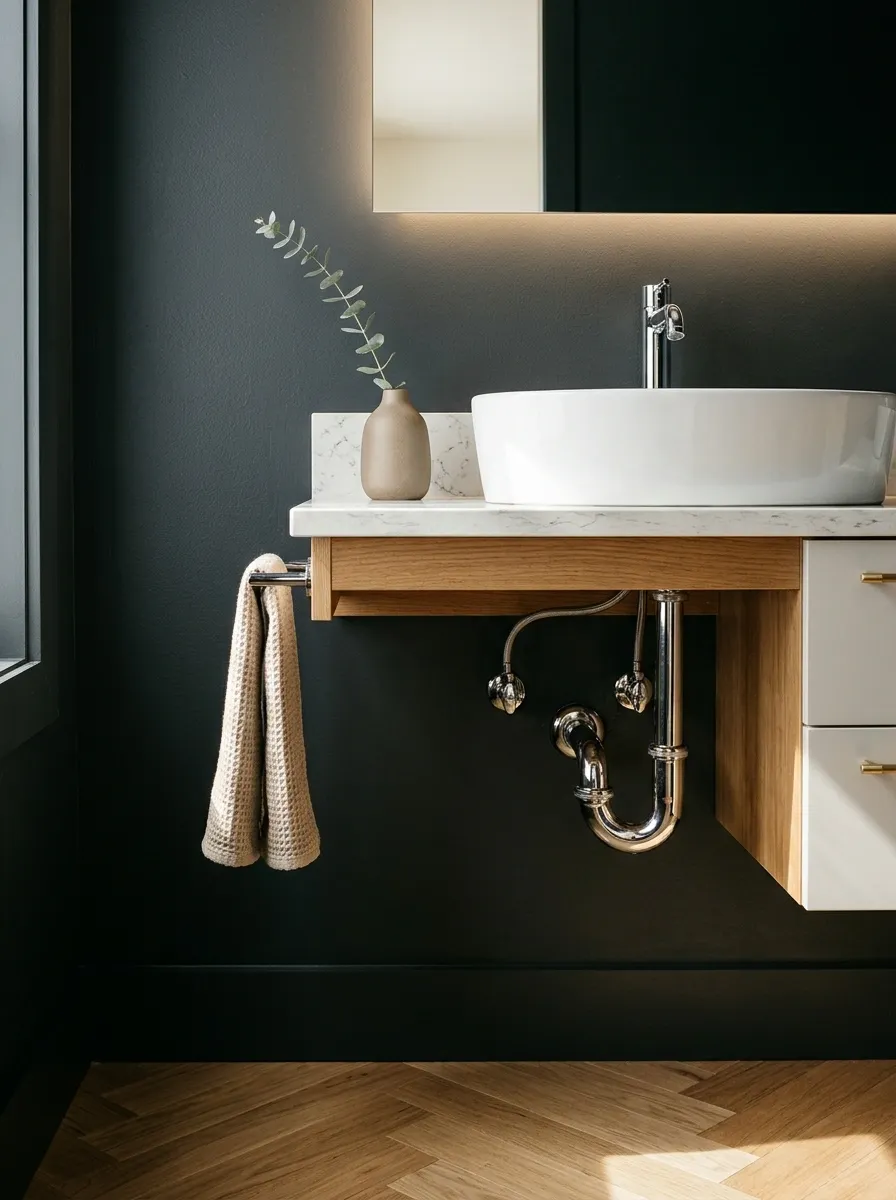
Chrome or polished metal can look crisp against a deep blue, charcoal, or green wall. The contrast makes the plumbing a visible part of the composition.
Keep the wall finish suitable for the bathroom conditions and retain good lighting around the basin. Dark paint does not excuse a mirror in which nobody can see.
Use a quiet floor and restrained accessories if the contrast is strong. Let the basin and pipework form one clear arrangement instead of adding several unrelated features around the same small patch of wall.
Combine Green Tile and Pink
Play with unexpected color combinations by pairing rich green vertical tiles with vibrant pink accents and warm gold hardware. The juxtaposition creates a playful yet deeply sophisticated atmosphere.
Utilize recessed wall niches to echo accent colors and display curated decor items. Good lighting inside these pockets ensures the space feels intentional and bright.
Keep metallic finishes consistent between the basin faucet and mirror frame to unify the vibrant palette. A restrained approach to accessories lets the gorgeous tilework and bold colors shine.
Balance a Wall-Hung Basin With an Independent Stool
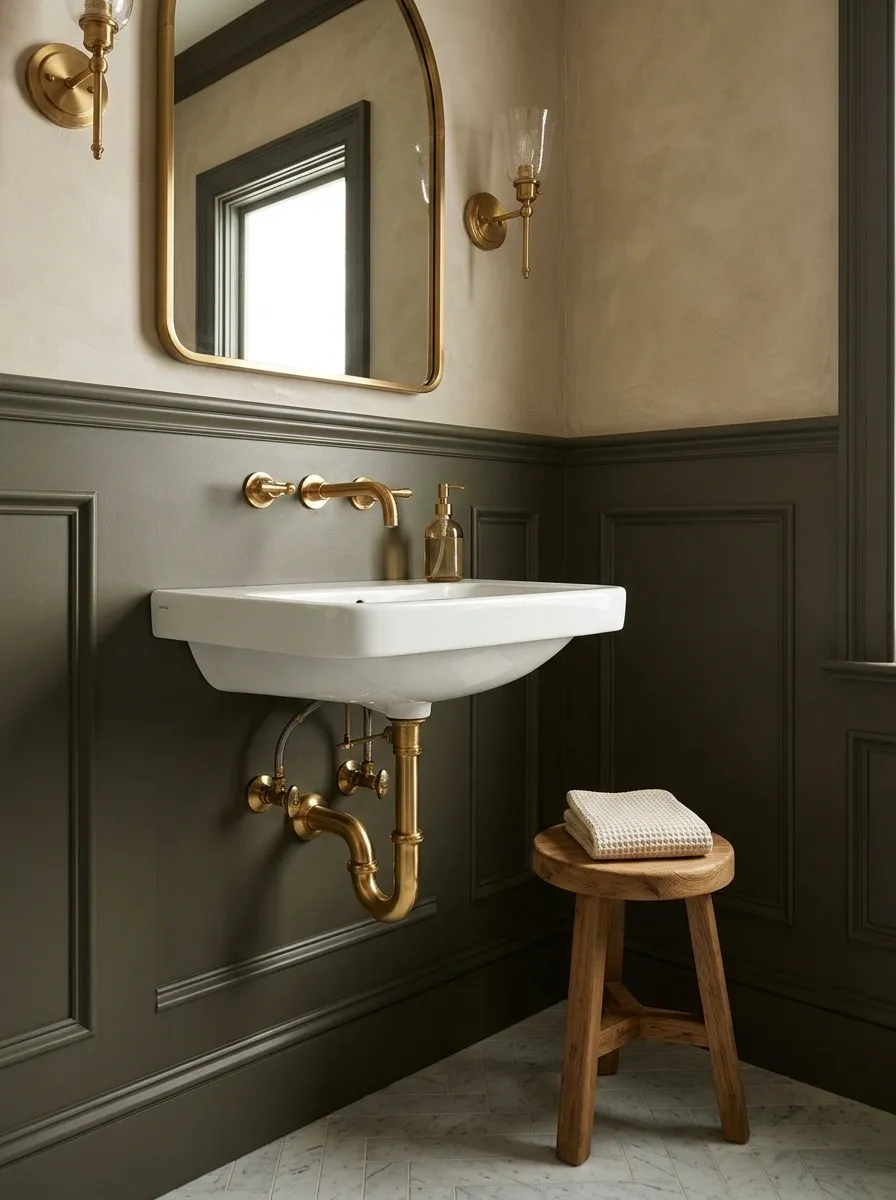
A small stool beside the basin can add warmth and somewhere for a dry towel, provided it does not obstruct the pipes or walking route.
Choose a material and finish suitable for the room’s humidity. Keep the stool separate from the plumbing and easy to move for cleaning.
Place it to the side rather than wedging it directly under the trap. The visual effect comes from balancing an open basin with a solid nearby shape, not from seeing how much furniture can fit around a drainage assembly.
| Position | Check |
|---|---|
| Beside the basin | Standing and cleaning space |
| Outside pipe access | Fittings can still be reached |
| Away from splash concentration | Material remains appropriate |
Add a Shelf Below Only Where Access Allows
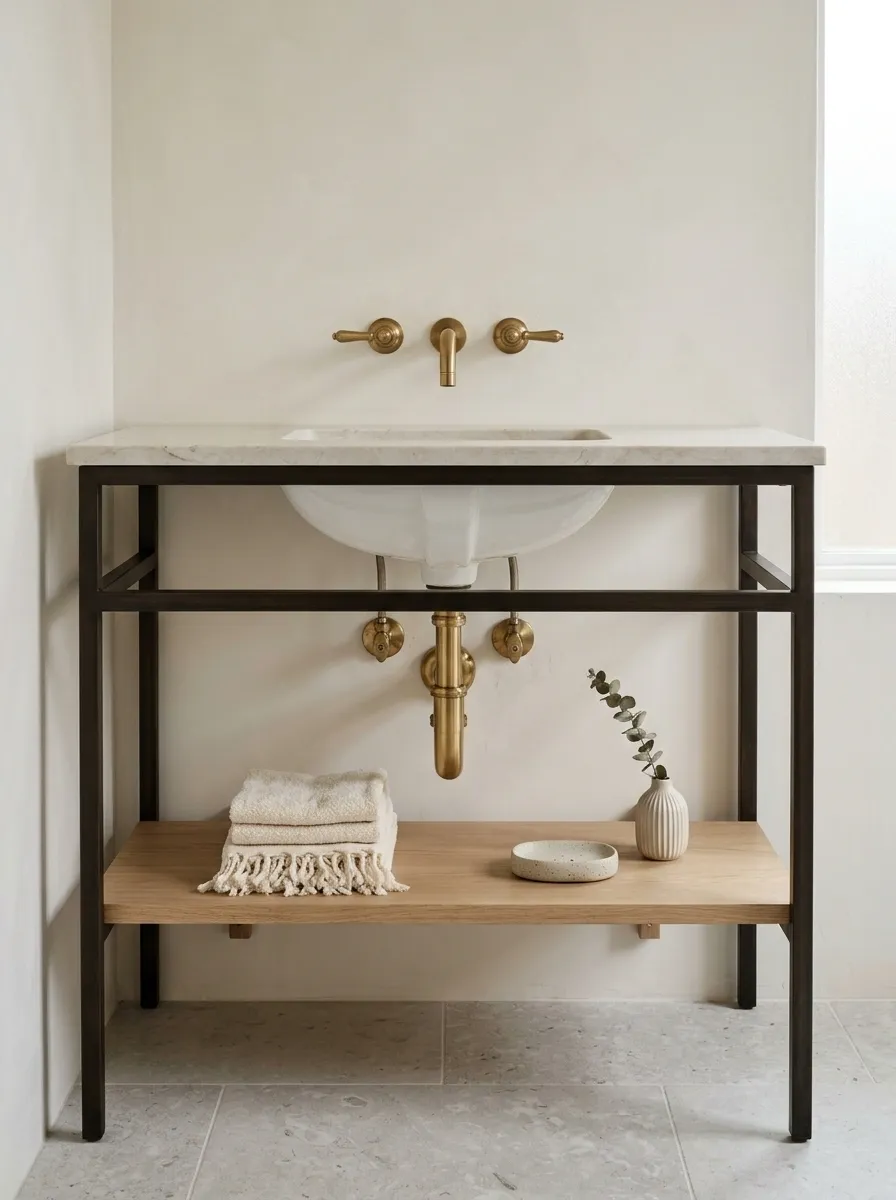
An independently supported lower shelf can make an open basin area feel more complete. Its position needs to preserve access to the trap, valves, and wall fittings, including room for maintenance.
Use a moisture-appropriate material and confirm the placement with a plumber if you are unsure. Seeing a valve through a narrow slot does not mean someone can work on it.
Keep the shelf lightly loaded with movable items. A small stack of spare towels can work better than several baskets that must be emptied before anything can move.
An open shelf with working space
Independent shelf where approved
Shelf height and access depend on the actual plumbing; this is a concept, not a build plan. Conceptual relationship only; confirm service-specific clearances, suitable materials, and maintenance access.
Choose a Coordinated Trap During a Planned Plumbing Update
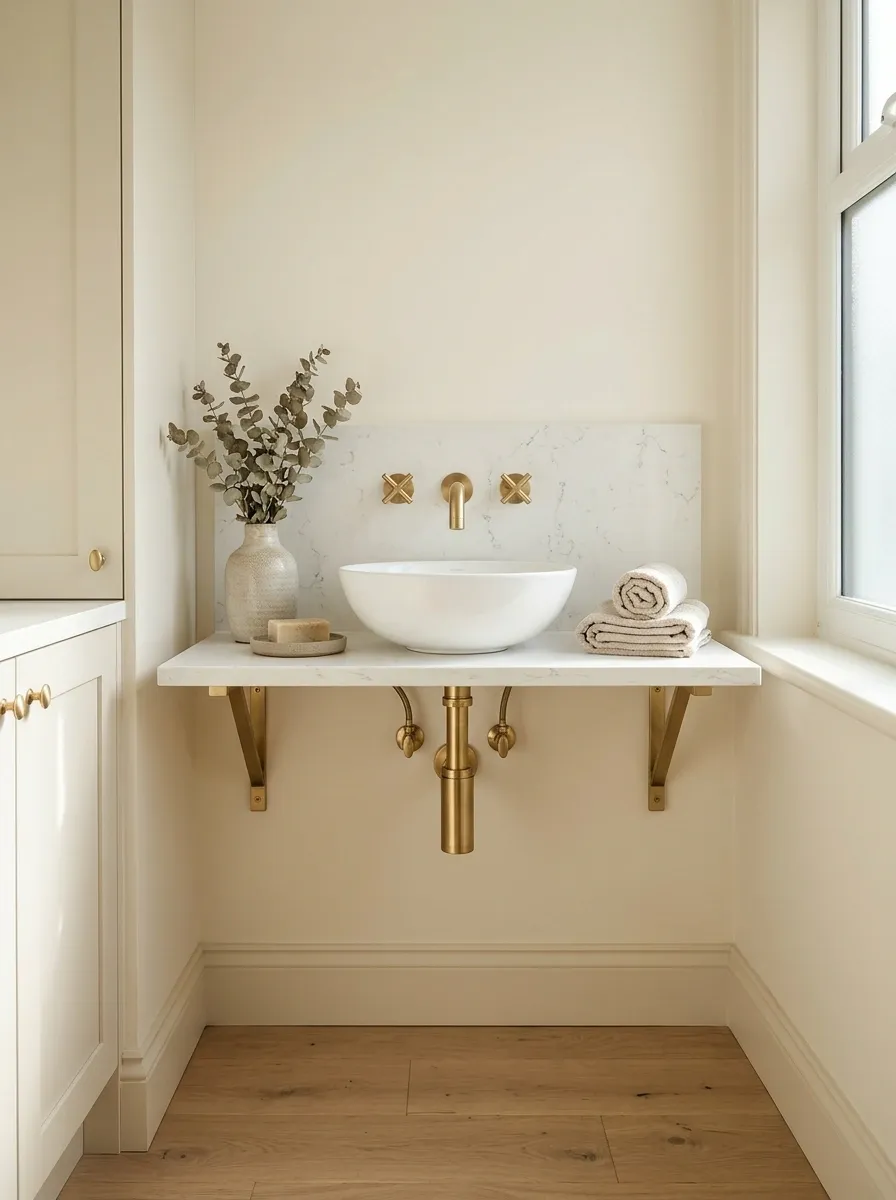
If a plumber is already replacing the basin waste, ask about a suitable exposed trap with a finish and form that fit the room. This is a functional plumbing choice as well as a visual one.
Compatibility, correct drainage, maintenance, and local requirements come first. A bottle trap that photographs well is not automatically suitable for every installation.
Coordinate with the taps or basin supports rather than collecting different metal finishes by accident. The work makes most sense as part of a necessary update, not as a casual decorative swap under a working sink.
Ask the plumber: Which exposed trap suits this basin, connection, maintenance access, and local requirements?
Use a Compatible Pedestal or Shroud
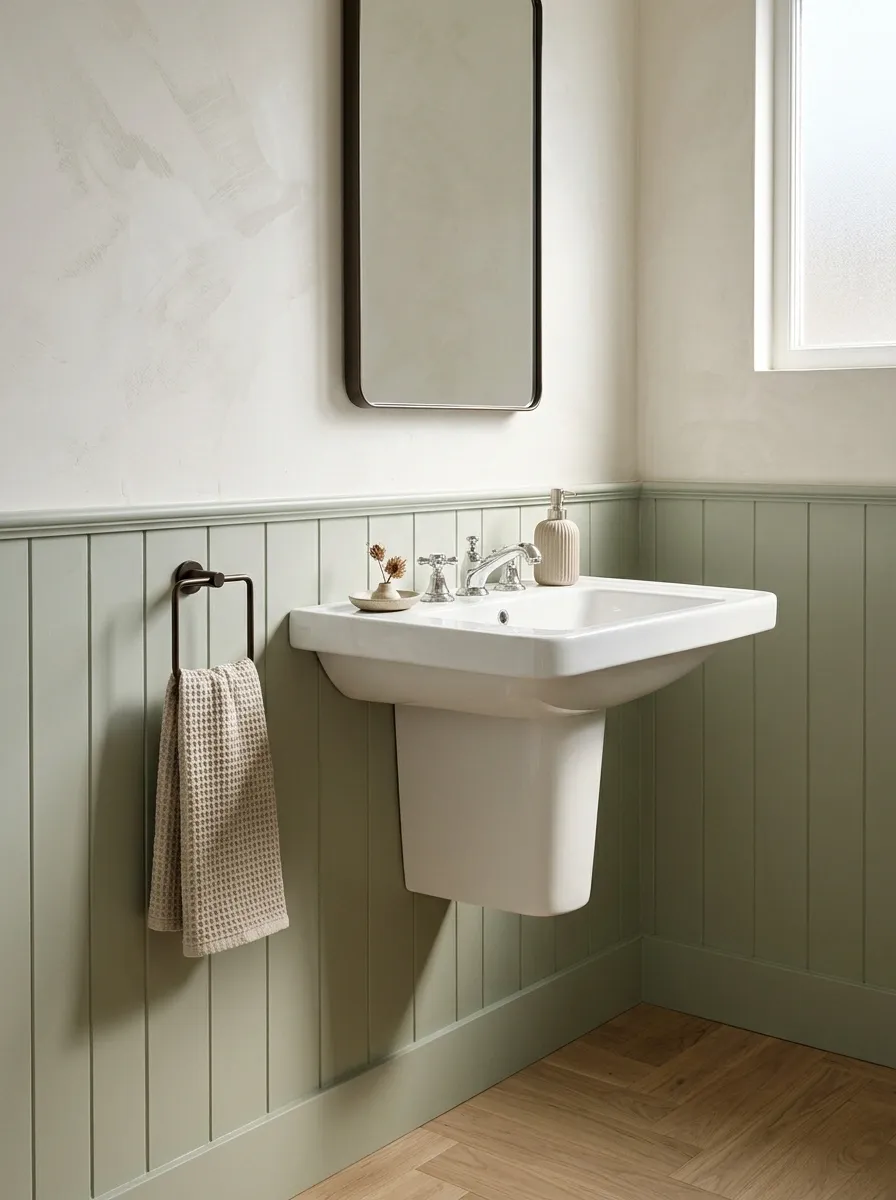
Some basins have a manufacturer-compatible pedestal or semi-pedestal that can conceal part of the plumbing. Confirm compatibility and the installation method before buying one.
A shroud should not be improvised into structural support for a basin that requires a different mounting arrangement. It also needs to preserve the intended maintenance access.
Choose the basin’s own system where available so the proportions look integrated. A generic cover that nearly fits can draw more attention than the pipes did, while making the floor behind it impressively difficult to reach.
Install a Removable Front on a Planned Vanity
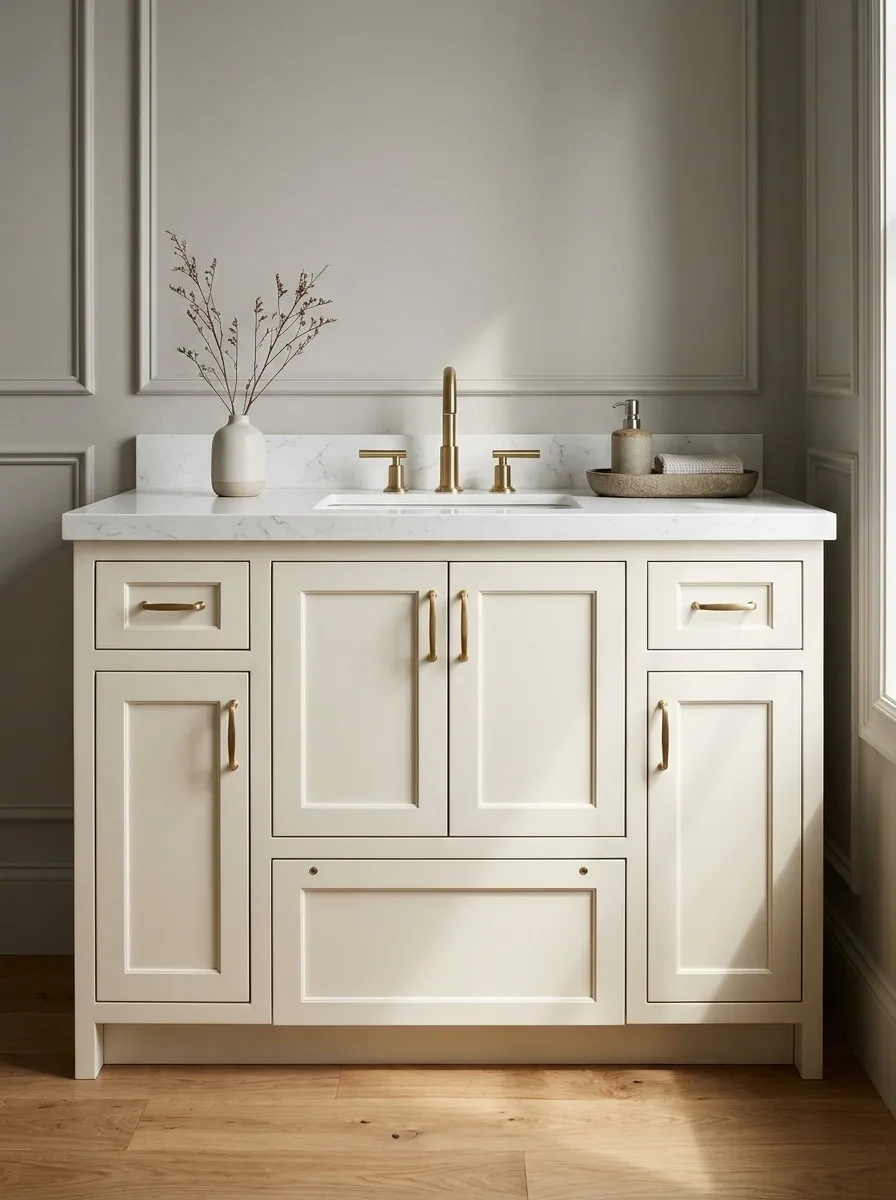
A vanity with an appropriately designed removable panel can hide the view without sealing the plumbing inside a decorative fortress.
Plan the opening with whoever will maintain the fittings. Access needs to include operating valves and servicing connections, not merely looking at them with concern.
Use finishes suitable for bathroom conditions and avoid making everyday storage dependent on a complicated panel removal. The cabinet should improve how the room works as well as how it looks. A neat seam is valuable; a repairable installation is considerably more valuable.
| Plan before finishing | Why |
|---|---|
| Panel removal method | Access without destructive work |
| Valve reach | Shutoff remains usable |
| Trap maintenance | Tools and hands need room |
Let a Console Basin Frame the Pipework
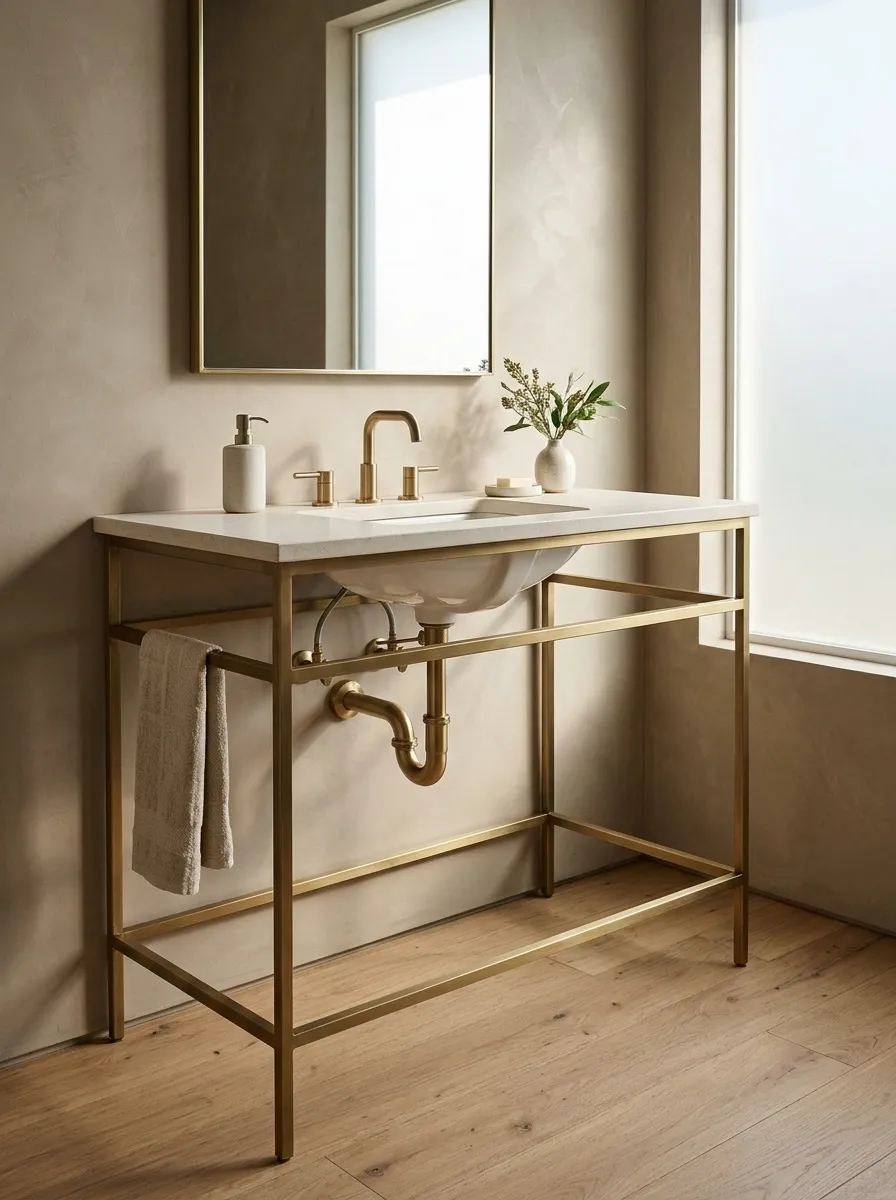
A purpose-designed console basin can make visible plumbing feel contained within a clear furniture-like outline. Metal legs or a timber-look frame provide structure around the open space.
Choose a system suited to the basin and installation rather than assembling a load-bearing arrangement from decorative furniture. Support and fixing details belong to the manufacturer and installer.
Keep the lower area simple.
The frame, basin, and trap already make a strong composition. Add a basket only if it has a useful job, a suitable position, and no effect on access. Empty space is doing useful work here.
A deliberate open-basin arrangement
Purpose-designed basin support
The support system must suit the basin and preserve plumbing access. Conceptual relationship only; confirm service-specific clearances, suitable materials, and maintenance access.
Echo Black Fittings in One Clear Outline
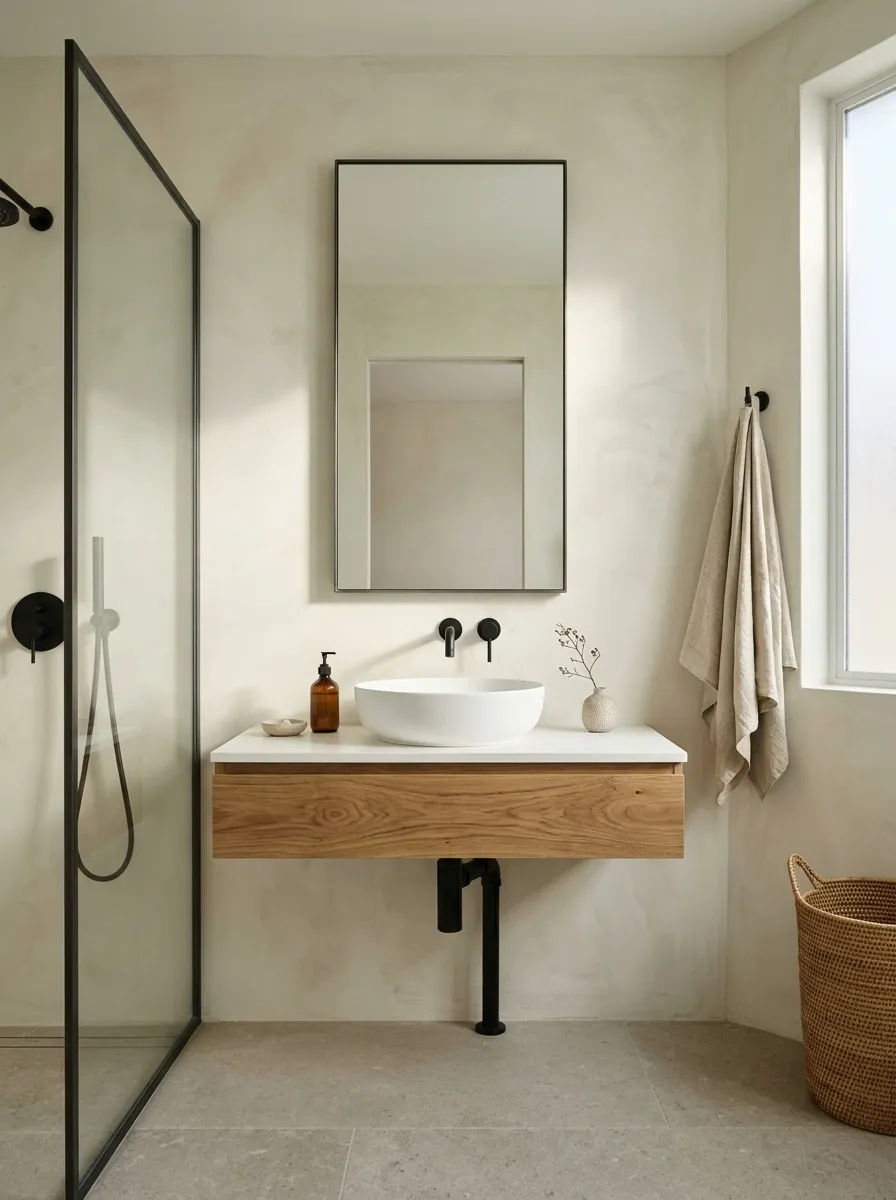
If exposed pipework is already black, a thin dark mirror frame or a black-edged shower screen can give it a visual partner.
Choose the repeat at a different height so the eye links the room vertically. Concentrating every dark element below the basin can make the lower half feel heavy.
Avoid painting valves or pipework merely to manufacture the scheme. Work with existing approved finishes. The room can still feel coordinated when the metals vary slightly, provided the larger outlines are deliberate and the supporting palette is restrained.
Hang the Main Artwork Above the Plumbing Zone
A well-placed print or decorative wall piece can make the upper wall the focal point while the pipes remain visible below. Choose artwork appropriate to the room’s humidity and keep it away from direct spray.
Align it with the basin or another main element rather than trying to center it on the pipe junction.
Check for concealed services before fixing. A strong focal point does not require drilling directly above known plumbing. Suitable mounting and an appropriate position matter more than achieving an imaginary perfectly symmetrical line.
| Artwork choice | Useful consideration |
|---|---|
| Replaceable print | Less concern about valuable originals |
| Moisture-appropriate material | Suits the location |
| Simple subject | Does not compete with busy fittings |
Tile a Clear Backdrop Behind an Open Basin
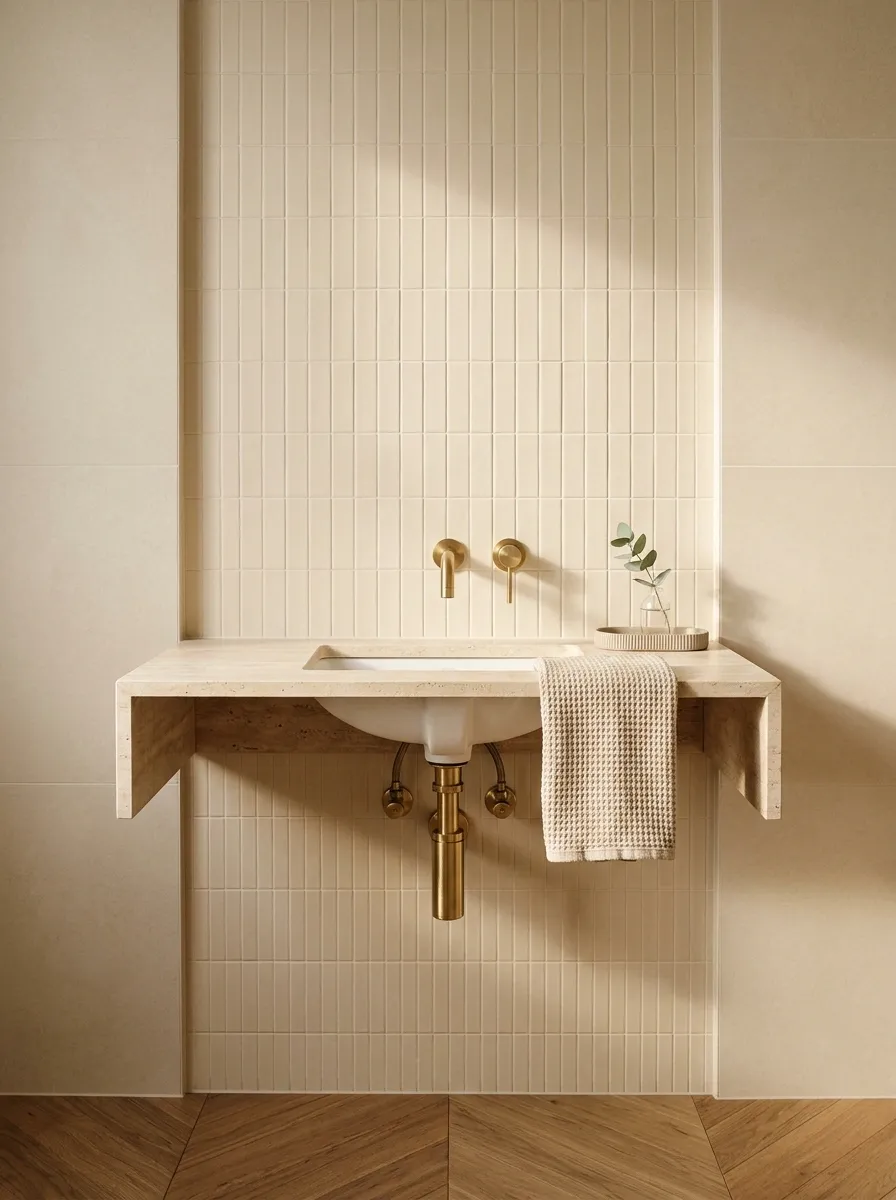
A defined tile panel can make the basin and exposed fittings look like one planned zone. Use a simple format where the pipework is complicated, and resolve edges neatly.
Have waterproofing, fixing, and wall penetrations handled appropriately for the location. Decorative tile alone does not establish a waterproof system.
Choose grout that supports the intended effect. Strongly contrasting joints add another network of lines, which may be more geometry than the area needs. A calmer grout relationship lets the basin shape remain the main feature.
Use a clear basin backdrop
Tile panel relates to the basin width
Waterproofing, penetrations, and access need appropriate installation. Conceptual relationship only; confirm service-specific clearances, suitable materials, and maintenance access.
Give a Low Horizontal Run a Related Wall Band
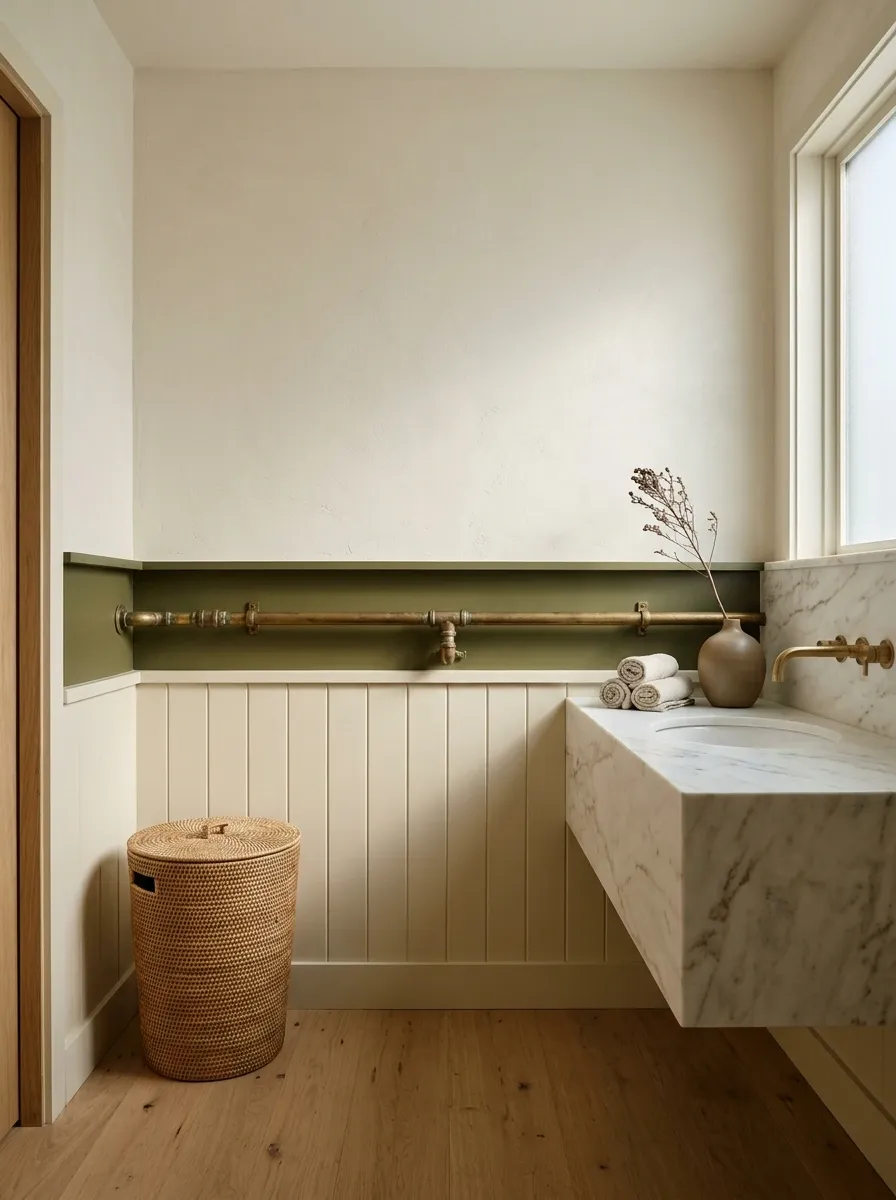
A horizontal painted band on the wall can acknowledge a low pipe run without enclosing it. Keep the band broad enough to feel like a wall treatment rather than a thin line tracing every fitting.
Paint the wall surface only. Let the service retain its suitable existing finish and access.
Carry the band to a natural endpoint such as a corner or doorway. An isolated patch ending beside the elbow can look like unfinished preparation. A clear architectural stop makes the color feel intentional.
Good endpoint: A room corner, door casing, or full wall width usually reads more clearly than the end of a pipe.
Use an Adjacent Tall Cabinet to Add Order
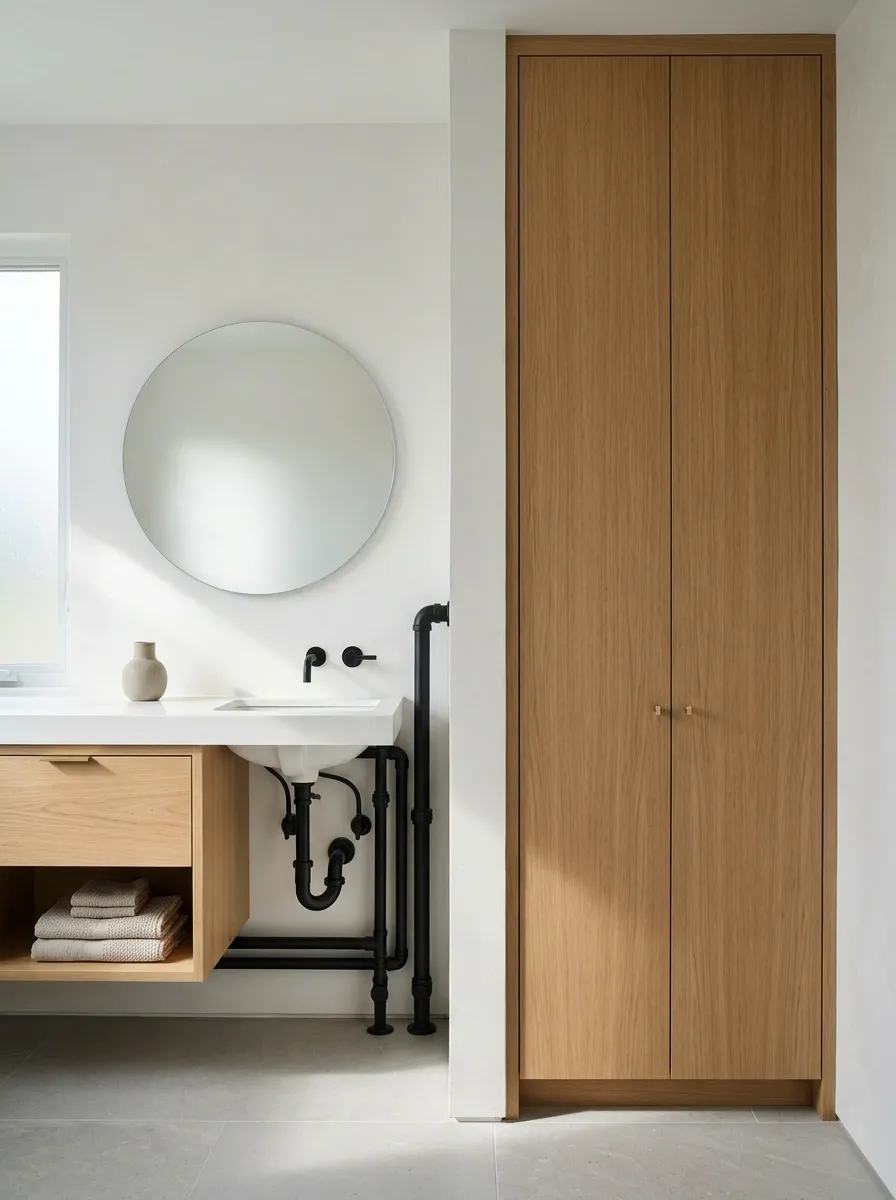
A narrow cabinet beside the plumbing wall can create a clean vertical shape and useful storage. Keep it outside the service access area and the basin’s standing space.
Secure tall furniture appropriately, checking concealed routes before drilling. Choose moisture-suitable materials and allow doors to open fully.
Use the cabinet to reduce clutter elsewhere, not to add another display surface requiring styling. Clearer surrounding surfaces often do more for exposed pipes than a clever disguise, because the room stops looking visually overloaded in general.
Place a Towel Rail on the Clear Adjacent Wall
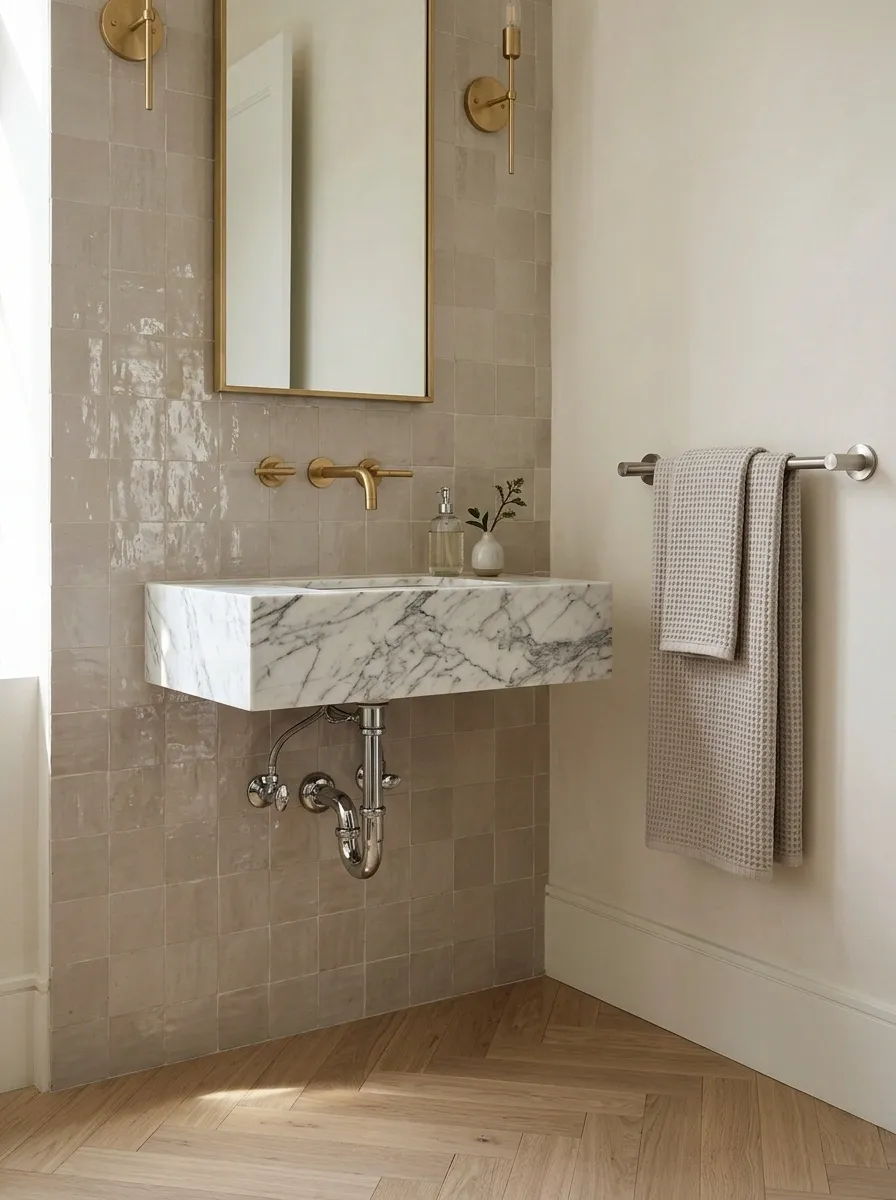
A proper towel rail can establish an orderly bathroom function close to the basin. It also gives wet towels somewhere sensible to go, rather than leaving exposed pipes to receive an unofficial promotion.
Mount the rail appropriately and keep its towels away from fittings, hot surfaces, and maintenance access. Check wall services before fixing.
Choose its finish in relation to the visible metal. It can repeat chrome or black without matching every component perfectly. The useful relationship comes from a clear location and enough room for towels to hang open.
| Proper rail | Working pipe |
|---|---|
| Designed to hold towels | Designed to carry a service |
| Mounted with suitable fixings | Should not take decorative loads |
| Planned drying position | Kept accessible |
Add a Movable Basket in a Separate Dry Area
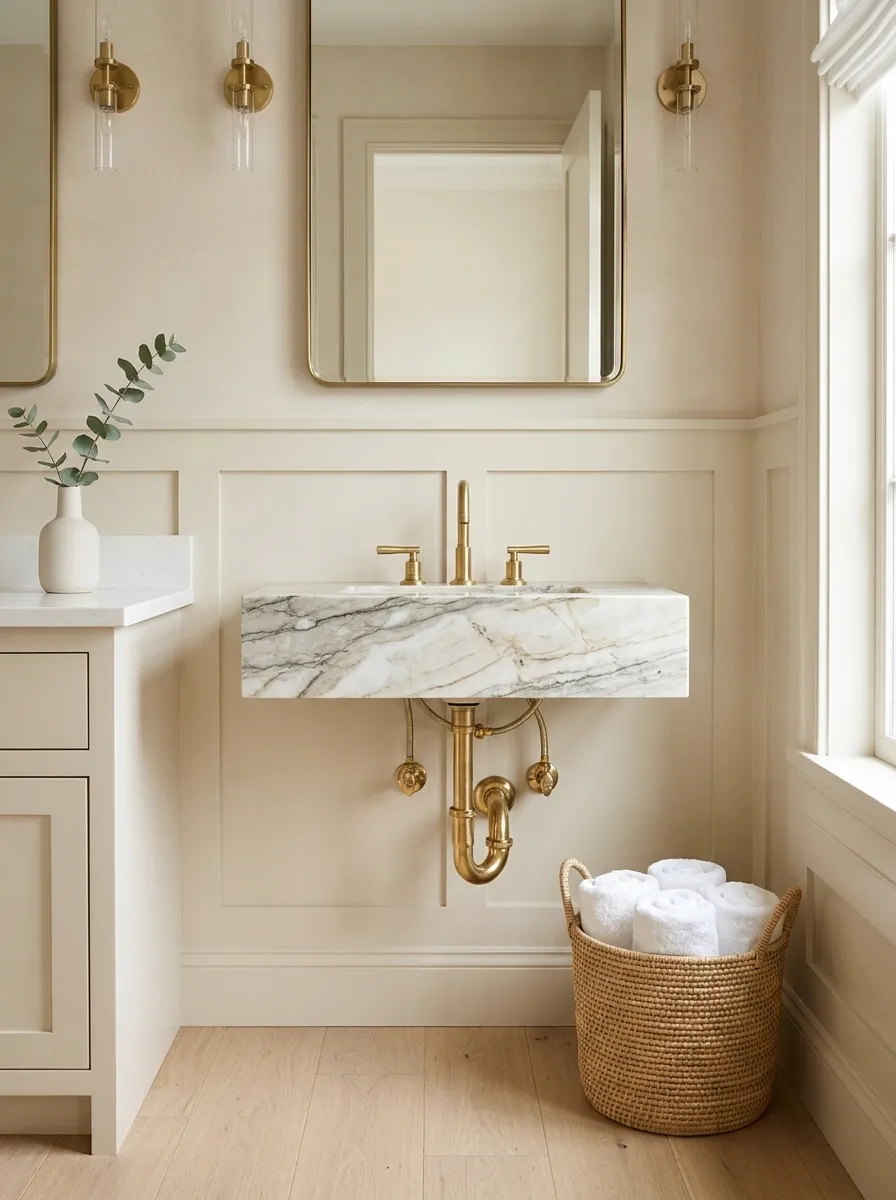
A basket of clean spare towels can soften an open basin arrangement when placed to one side, away from splashes and the plumbing work area.
Choose a washable or otherwise suitable container if the room gets humid. Keep it clear of pipes that heat up or collect condensation.
Use a size you can move easily for cleaning. A giant basket crammed around the trap looks like concealment by laundry, which is neither elegant nor especially hygienic. A modest, separate basket gives the room texture without becoming part of the plumbing installation.
Match the Surrounding Wall to White Plastic Pipes
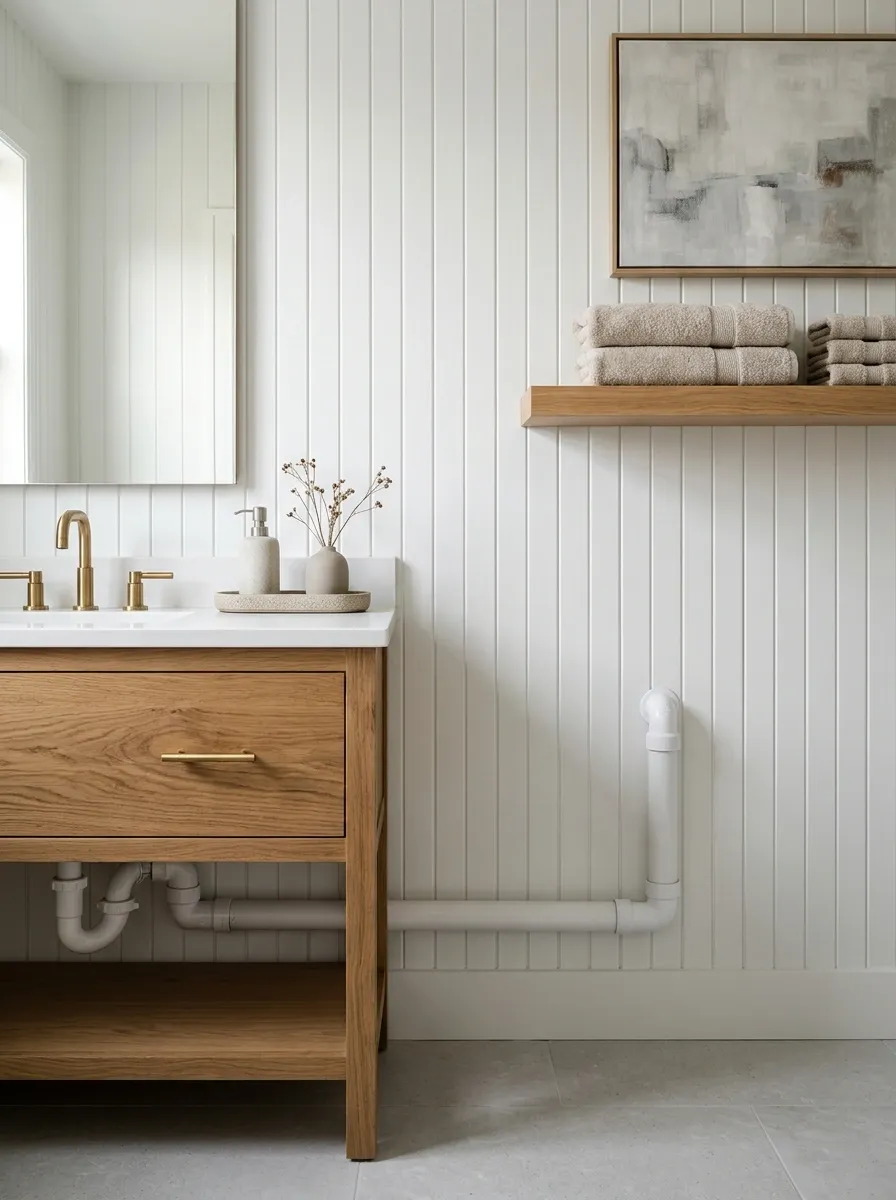
White plastic drainage can look less conspicuous against a related wall color. Compare the actual pipe with several white samples rather than choosing a dramatic cream by accident.
Keep other details simple and concentrate decorative color higher in the room through art or towels. The lower plumbing area becomes a quieter background.
Do not assume plastic pipe should be painted. If you want to alter its finish, get advice on the material and approved treatment. Changing the wall may deliver enough improvement with much less complication.
Try it without work: Hold a large white sample board behind the pipe and view it from the doorway.
Use a Dark Floor to Ground an Open Basin
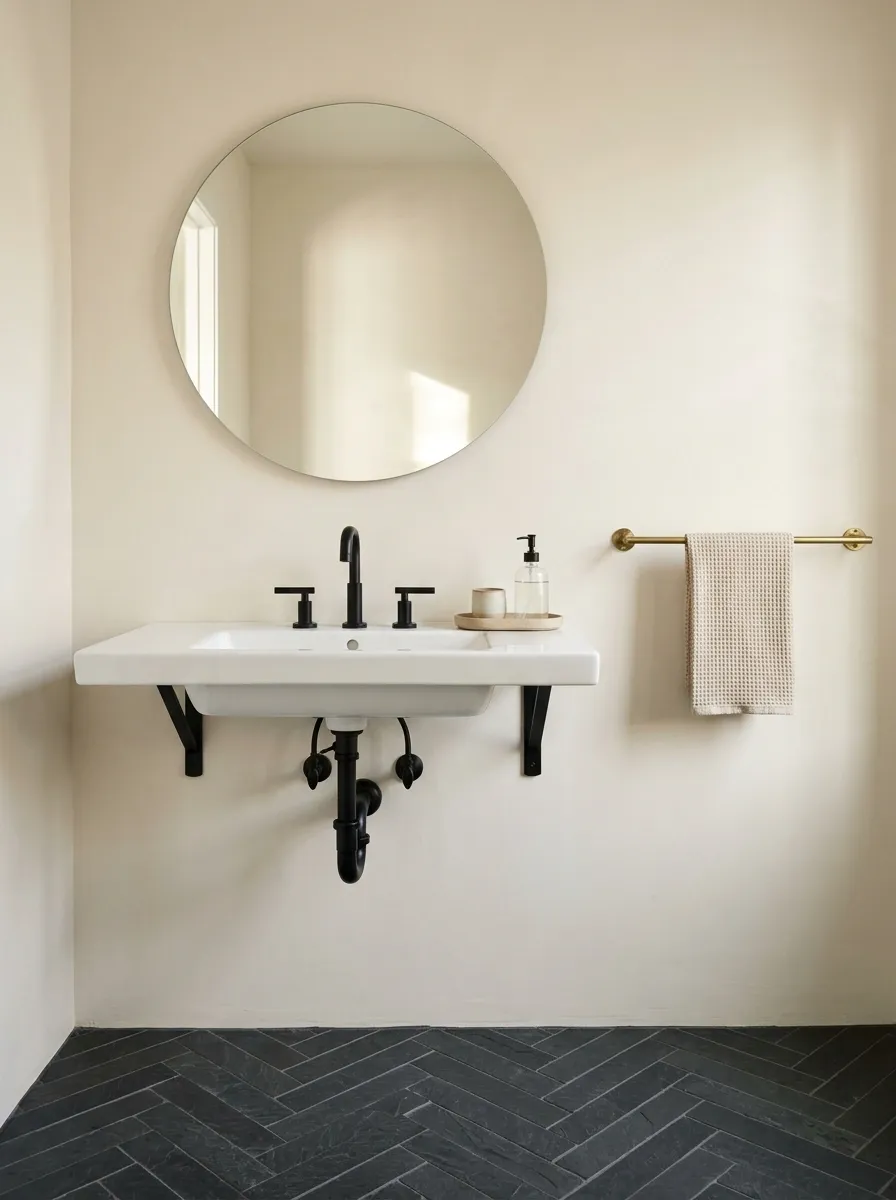
A darker floor can make a lightweight basin arrangement feel more settled. This is most relevant when flooring is already being replaced or the existing tile happens to provide the contrast.
Do not choose a new floor solely to distract from a short pipe. Consider slip suitability, cleaning, transitions, and the rest of the bathroom.
Keep the wall above the floor comparatively quiet so the basin reads clearly. A bright patterned floor and busy wall can make exposed fittings feel like another competing layer rather than an intentional detail.
Finish Wall Penetrations With Appropriate Trim
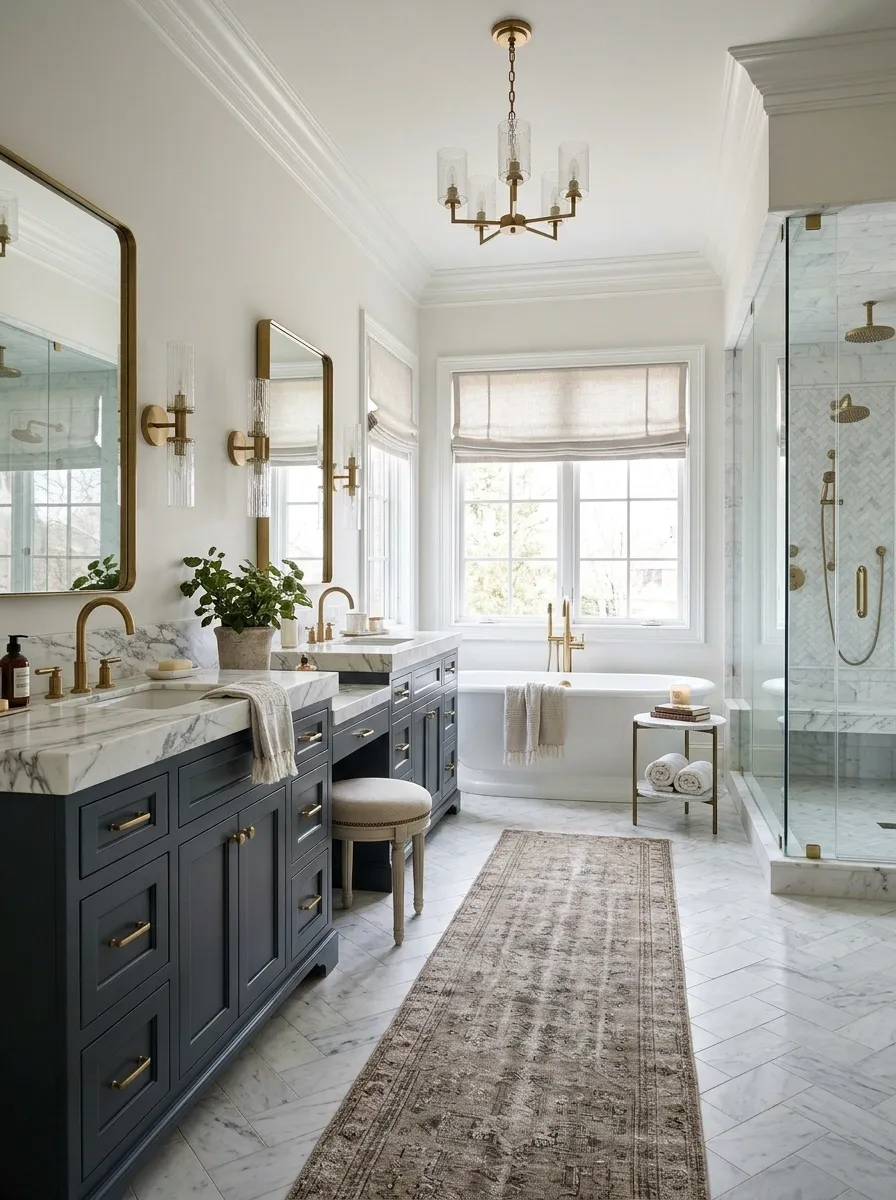
Neat wall-entry details can make visible plumbing look more complete. Ask a plumber whether suitable escutcheons or trim pieces can be used around the existing connections.
The trim needs to leave the installation workable:
- Connections remain inspectable.
- Moisture can still be noticed.
- Necessary movement and access remain available.
A decorative ring is not a repair for a damaged connection.
Coordinate the finish with the fittings where practical. This is a small detail, but it can remove the unfinished appearance of a rough opening more effectively than adding another accessory to the countertop.
| Ask about | Keep clear |
|---|---|
| Compatible trim size | Connection access |
| Appropriate finish | Signs of moisture |
| Correct installation | Valves and moving parts |
Use a Wall-Mounted Storage Piece Away From the Trap
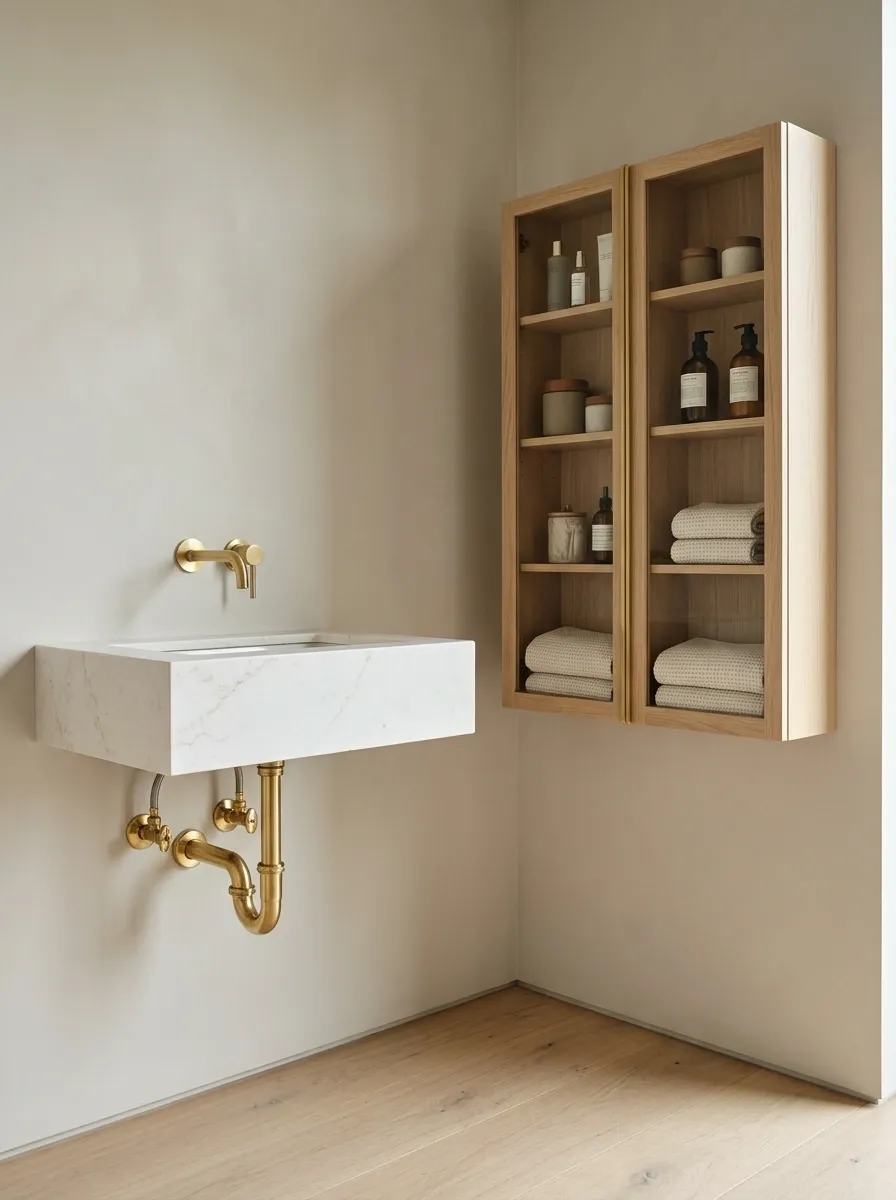
A cabinet or shelf on an adjacent clear wall can move everyday toiletries out of the basin area. That leaves the open underside easier to see and clean.
Check service routes before fixing and use a product suited to bathroom conditions. Keep the depth sensible so it does not interfere with standing or moving around the basin.
Store the items you actually reach for, not a staged collection of identical jars. Reducing clutter is the decorative benefit here; the pipes look more intentional when they are not surrounded by six unrelated storage emergencies.
Let the Mirror Carry an Interesting Shape
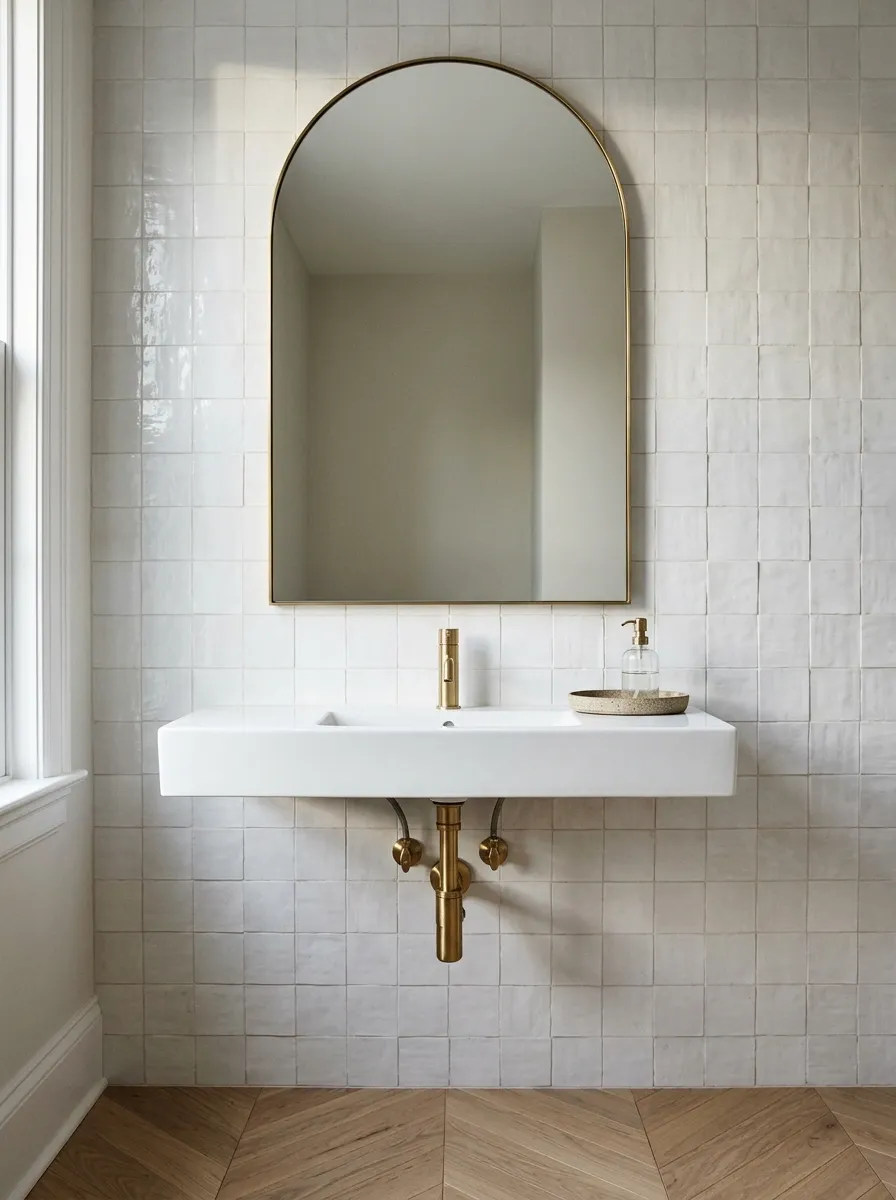
An arched, oval, or softly rounded mirror can give the eye a strong shape above a plain basin. The curves can also balance the angular fittings below.
Choose a size and mounting height that suit the people using it. Decorative shape should not turn shaving or makeup into a crouching exercise.
Keep nearby accessories restrained so the mirror remains the focus. A sculptural mirror, patterned wall, elaborate sconces, and exposed fittings can all be attractive separately while producing quite a committee when assembled in one narrow space.
Useful balance: Interesting upper shape, quieter wall, accessible lower fittings.
Give a Freestanding Bath’s Exposed Pipes Visual Breathing Room
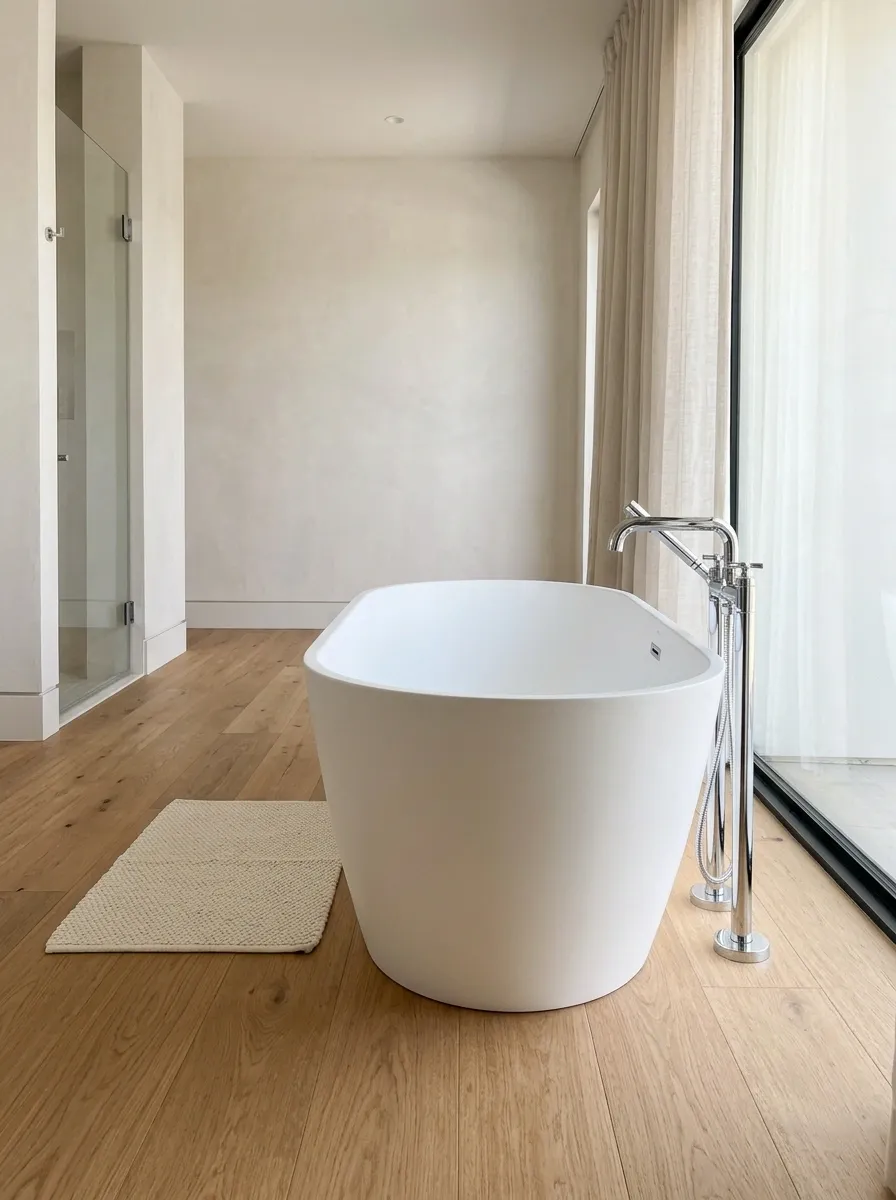
Where bath supply or waste fittings are designed to be visible, keep the surrounding floor uncluttered. Position storage and towel stands in separate suitable locations.
Use a restrained bath mat and let the tub’s outline remain clear. Do not wedge decorative objects between pipework and the bath, where cleaning and inspection become difficult.
If the fittings look unfinished or are not intended for exposure, ask the installer about the appropriate completion. A basket of eucalyptus will not improve an incorrect connection, no matter how photogenic the eucalyptus considers itself.
Keep the bath outline clear
Clear floor around the installation
Use independent storage elsewhere and preserve cleaning and maintenance access. Conceptual relationship only; confirm service-specific clearances, suitable materials, and maintenance access.
Plan a Serviceable Cover for an Awkward Corner Run
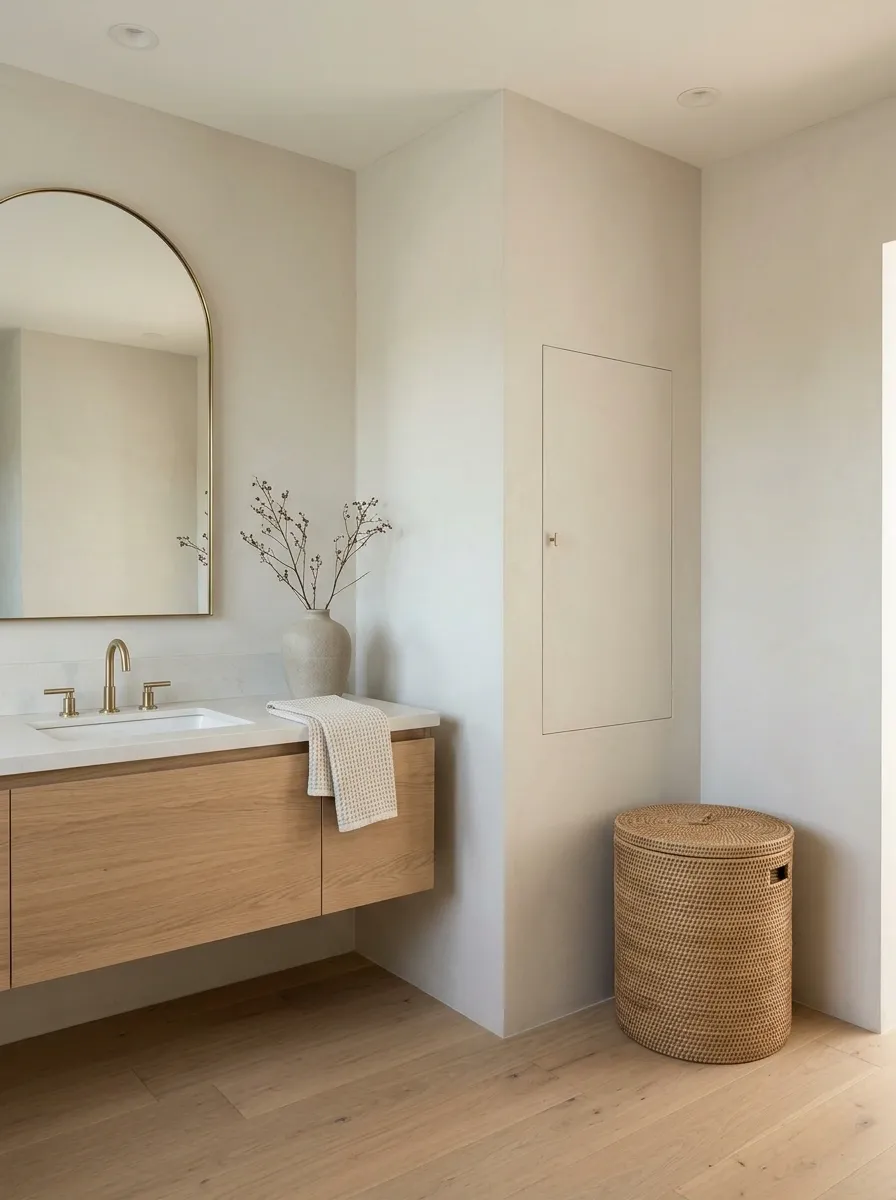
An irregular corner run may benefit from professionally planned removable boxing. Keep the shape as simple as the service allows and finish it to relate to the wall or nearby joinery.
Confirm ventilation, access, material suitability, and any service-specific requirements before construction. The cover must accommodate actual maintenance, not just the smallest visible fitting.
Use a clear removable section rather than burying everything beneath decorative layers. The room will still look finished when the panel closes, and future repairs will require fewer dramatic conversations about the tile.
| Before building | Decide |
|---|---|
| Service identification | Whether enclosure is appropriate |
| Maintenance requirements | Opening size and location |
| Bathroom conditions | Suitable materials and finish |
Leave Attractive Fittings Exposed and Simplify Everything Else
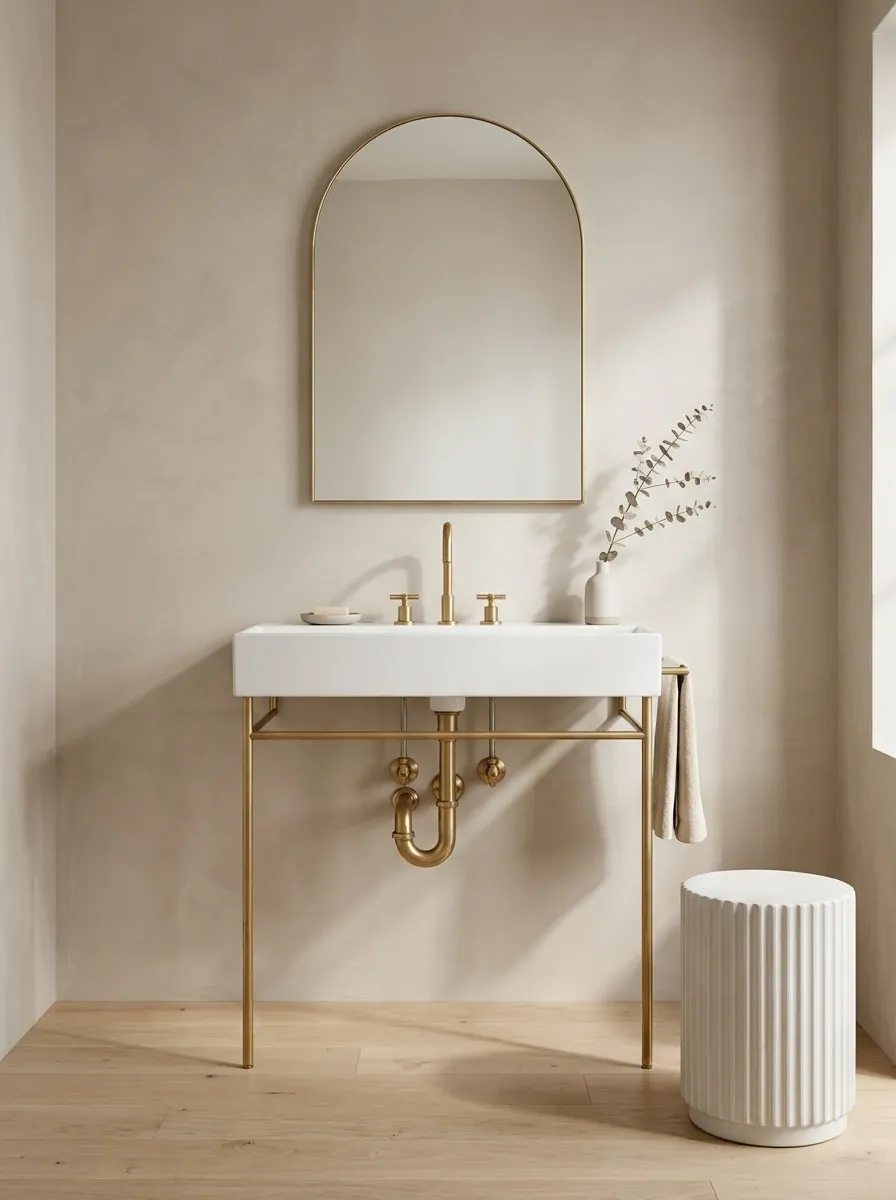
If the pipework is sound, suitable for exposure, and reasonably tidy, it may need no disguise. A coherent wall color, a well-sized mirror, and clear floor space can be enough.
Keep the fittings easy to inspect and clean around. Use independent storage for bathroom items rather than treating the pipes as supports.
This approach works particularly well with a purpose-designed open basin. The room feels deliberate because its useful parts have been considered, not because every practical component has disappeared behind an upholstered curtain of denial.
The bathroom should still be easy to clean on an ordinary weekday. If a decorative solution makes that harder—or makes a valve inaccessible—it is worth reconsidering before it becomes permanently attached.