
You know the feeling. You’re watching Something’s Gotta Give and Diane Keaton walks into that Hamptons kitchen and you stop paying attention to the plot entirely. The marble. The white cabinets. The enormous bouquet of something white and garden-grown. The way the whole room looks like it costs a fortune but also like someone actually lives there.
You’ve been chasing that kitchen ever since. You just haven’t admitted it out loud.
The Nancy Meyers kitchen is its own specific thing. It’s not farmhouse. It’s not Scandi. It’s not even really “white kitchen” — that category is too broad and too cold. It’s aspirational American comfort with a serious budget and impeccable taste and absolutely no interest in looking trendy. It’s the kitchen of a woman who has her life together and also happens to have a very good relationship with her kitchen supplier.
Getting it wrong is easy. Getting it right requires understanding what it actually is.
Nancy Meyers Kitchen Ideas
Copper Pot Rack Island
Mount a wrought iron or blackened steel rectangular pot rack directly above your kitchen island on chain, hung from ceiling hooks rated for the weight. The rack should be roughly the same length as your island — two-thirds at minimum — and hang at a height where the longest pots clear your tallest guest’s head by a comfortable margin.
Hang your copper and stainless pans mixed together, not organised by size. The visual interest comes from the variety of shapes and the contrast of aged copper against polished steel. Add an S-hook or two with a ladle or spider strainer. Position the island itself in butcher block, not marble, if you want the warm contrast to read properly — the warm honey of the wood plays against the cool metal overhead in a way marble doesn’t.
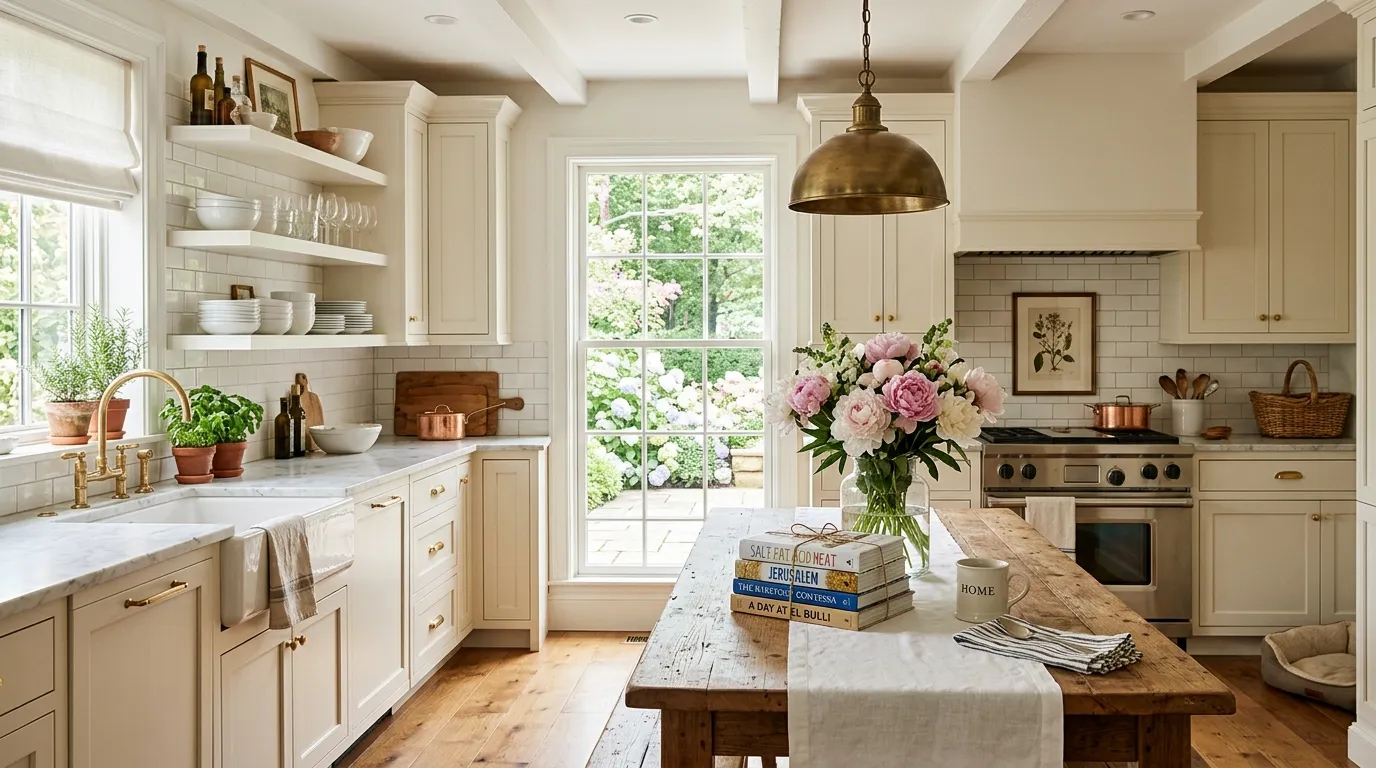
Cream Island Brass Blooms
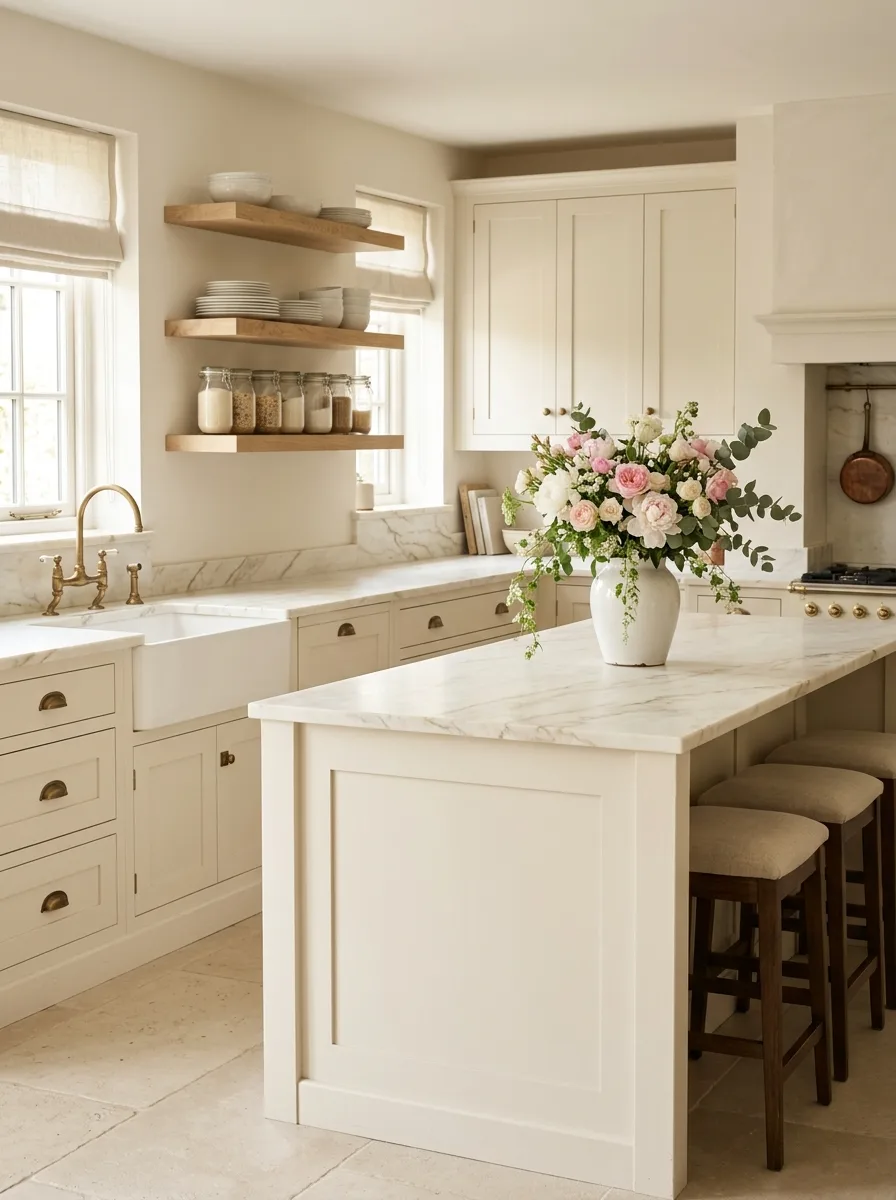
Paint your island and all base cabinetry in the same warm cream — Farrow & Ball’s Elephant’s Breath or Dead Salmon, or their Pointing if you want something closer to white. Use shaker cabinet doors with inset panels and cup pulls in an unlacquered or aged brass. The hardware should look like it has been there a long time and never been polished.
Top the island in marble with visible grey veining — Calacatta or Statuario, not the pure white Carrara that photographs as stark. Pair the floating oak shelves above the sink with simple linen Roman blinds, not curtains. And put one large, generous bunch of garden roses or peonies in a ceramic or stoneware vase on the island. Not a bud vase. A proper armful of flowers that looks like you just walked in from the garden.
Floor-to-Ceiling Cookbook Shelves
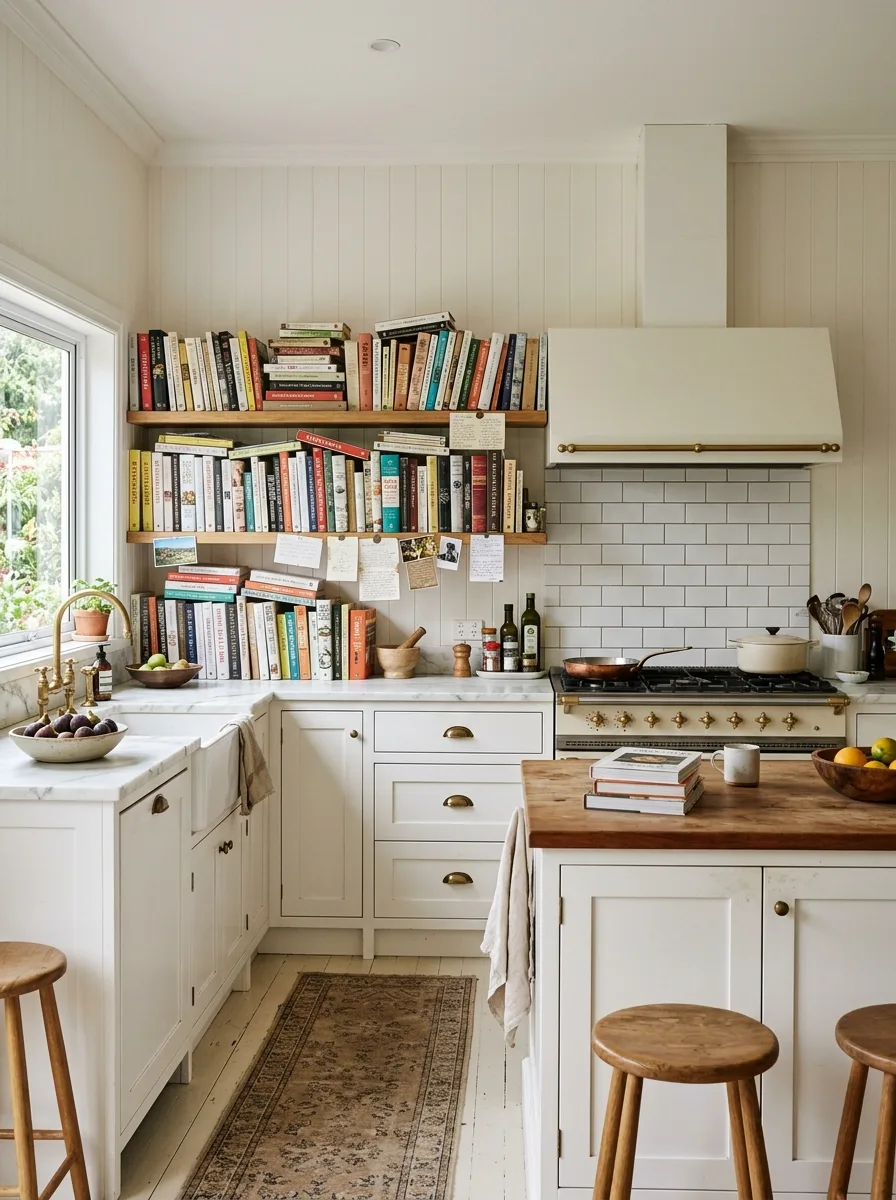
Install floating oak shelves from counter height up to within about thirty centimetres of the ceiling, running along one full wall. Use simple steel brackets in a dark finish — not decorative, just structural and visible. Fill these shelves exclusively with cookbooks, stood upright and slightly mixed — some horizontal stacks, mostly vertical. Pin recipe cards or postcards to the lower shelf face with small brass tacks.
The key is density. These shelves should look genuinely full, not styled. Use a cork notice board or a small section of painted blackboard between the lower shelf and the counter surface for notes, not as a feature wall. Below the shelves, keep the cabinetry white and the counters in marble or stone. The contrast between the calm below and the busy, colourful reading wall above is where the energy comes from.
Reclaimed Beam Vaulted Kitchen
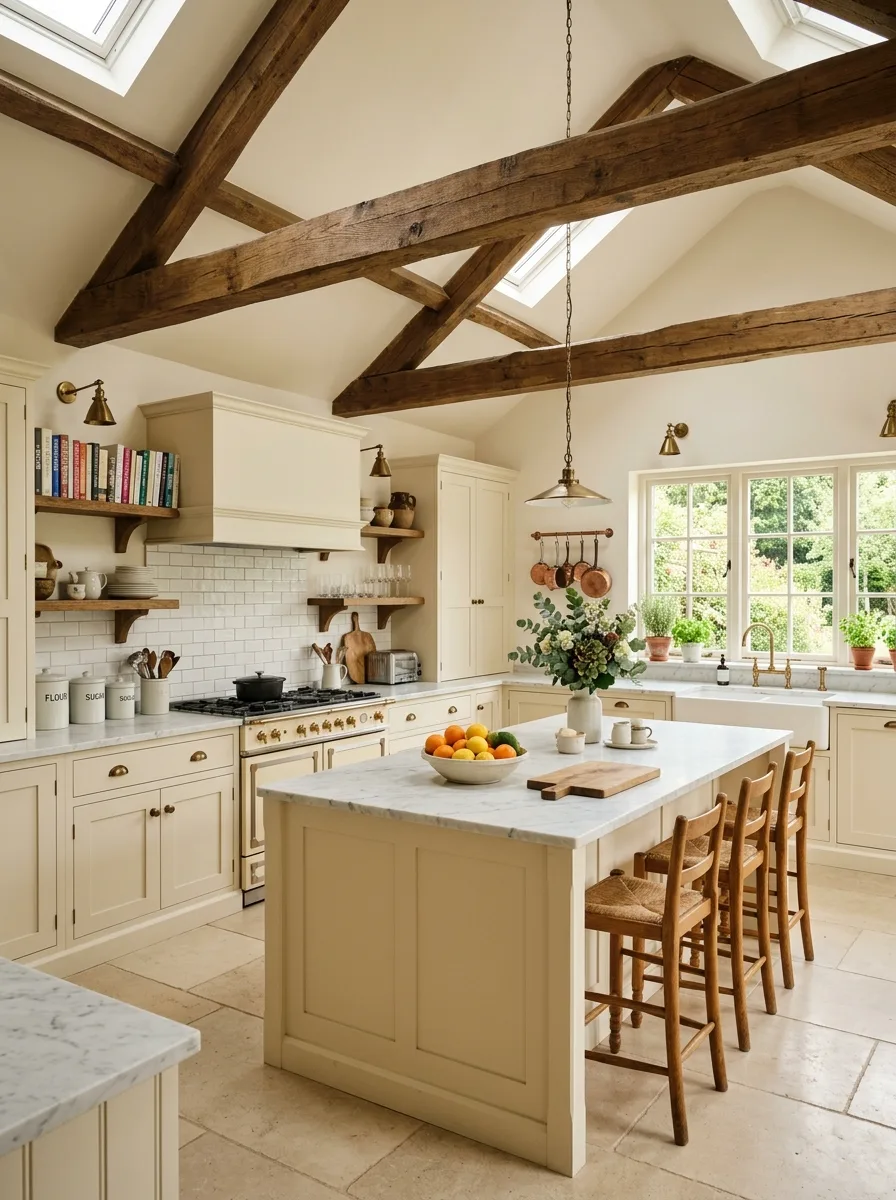
If you have or are building a vaulted ceiling, keep it as white plaster and let the beams do the work. Source reclaimed oak or pine beams rather than buying new — the difference in colour, texture, and irregular edge profile between reclaimed and new timber is immediately visible. Sand lightly and seal with a matte hardwax oil rather than varnishing, which would make them look too refined.
Install Velux skylights or a ridge light at the apex where possible. The combination of daylight dropping from above with natural light from large windows makes this type of kitchen almost impossible to make look bad. Paint the cabinetry in warm butter yellow — Benjamin Moore’s Pale Straw or Farrow & Ball’s Cream — rather than white, to echo the honey of the beams without matching them.
Sage Cabinet Butcher Block
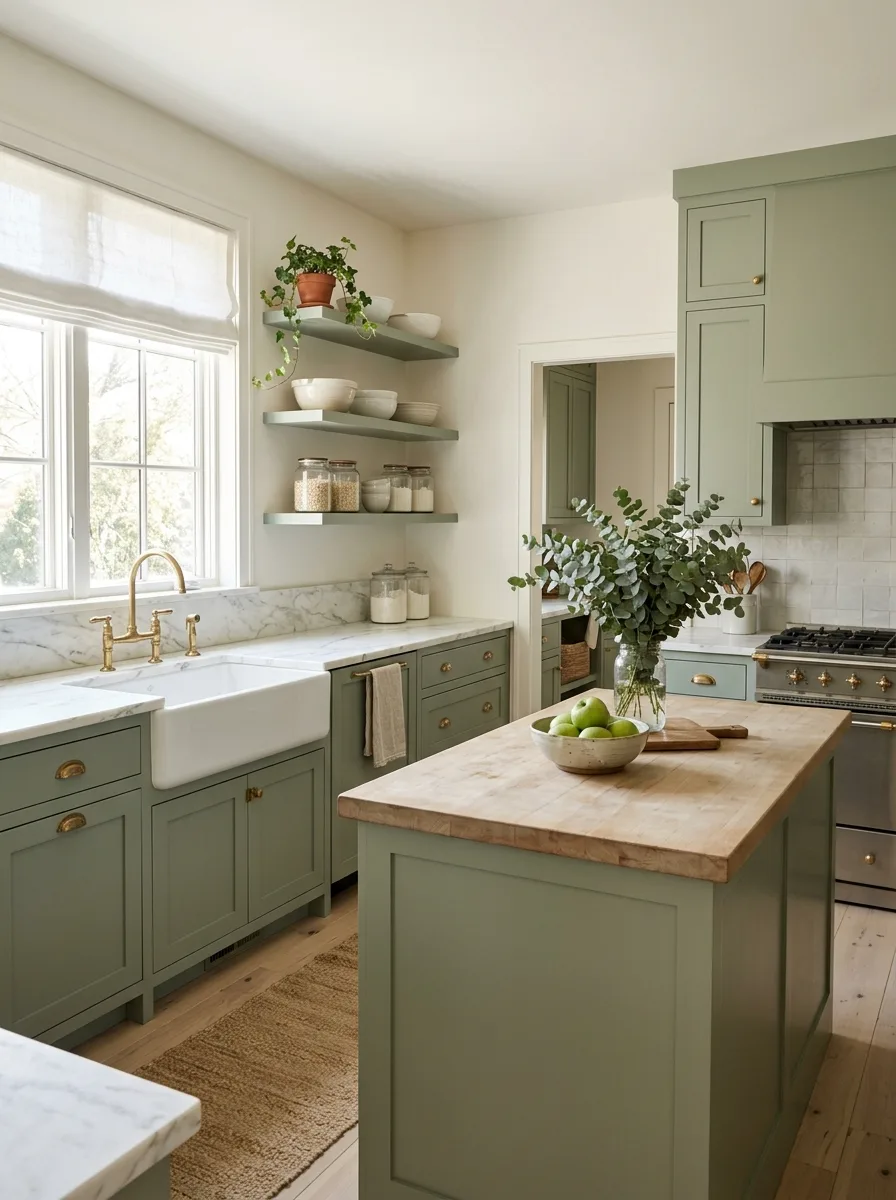
Paint all cabinetry — base units, uppers, island — in a single matte sage green. Not olive, not forest, not hunter. Sage: the grey-green that reads almost neutral in low light and quietly alive in daylight. Farrow & Ball’s Mizzle or Sulking Room Pink’s green-leaning cousin, French Grey, work well here. The colour should be consistent across everything — no mixing dark lower and light upper cabinets, which reads as a trend rather than a decision.
Pair with brass hardware throughout, unlacquered so it ages rather than staying polished. Top the island in raw butcher block sealed with food-safe mineral oil, and the perimeter counters in marble or a marble-look quartz. Float two or three sage-coloured shelves above the sink in the same paint as the cabinets — not wood, not white. Keep them sparse: a trailing plant, a few ceramic bowls, glass jars of grains.
Striped Banquette Garden Window
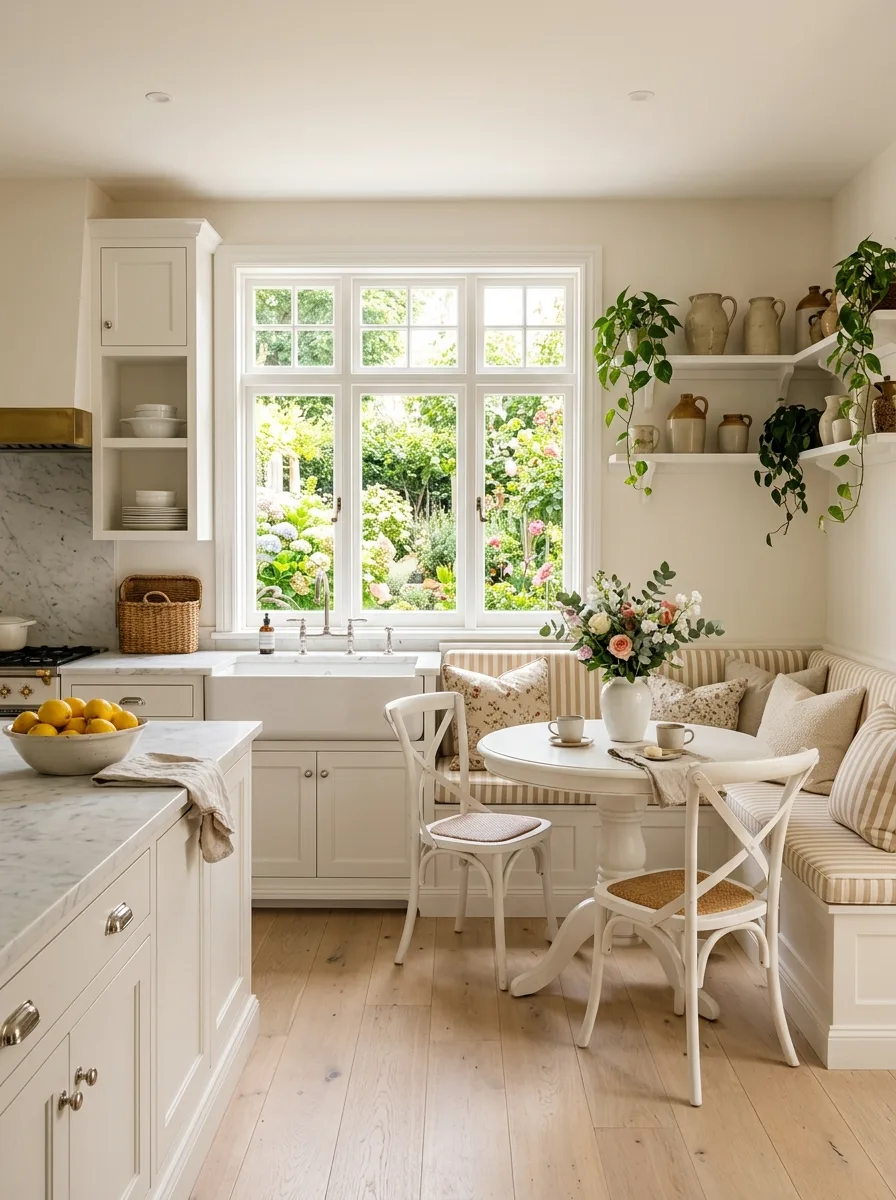
Build a fixed banquette in an L-shape or U-shape tucked into a corner of your kitchen, positioning it directly below or beside the largest window. Frame the window and seat structure as one built-in unit rather than two separate elements — the seat base should read as an extension of the window architecture, not furniture placed nearby.
Upholster the seat cushion and back cushion in a ticking stripe: a natural linen ground with a thin stripe in warm sand or faded terracotta. Add two or three loose cushions in complementary florals or linen solids. Use a small round pedestal table in white with a single pedestal leg — not a square table, which closes the space. Pair with Bentwood or X-back chairs in white. Fill the shelves above with stoneware jugs and trailing plants.
Scalloped Dresser Shelf
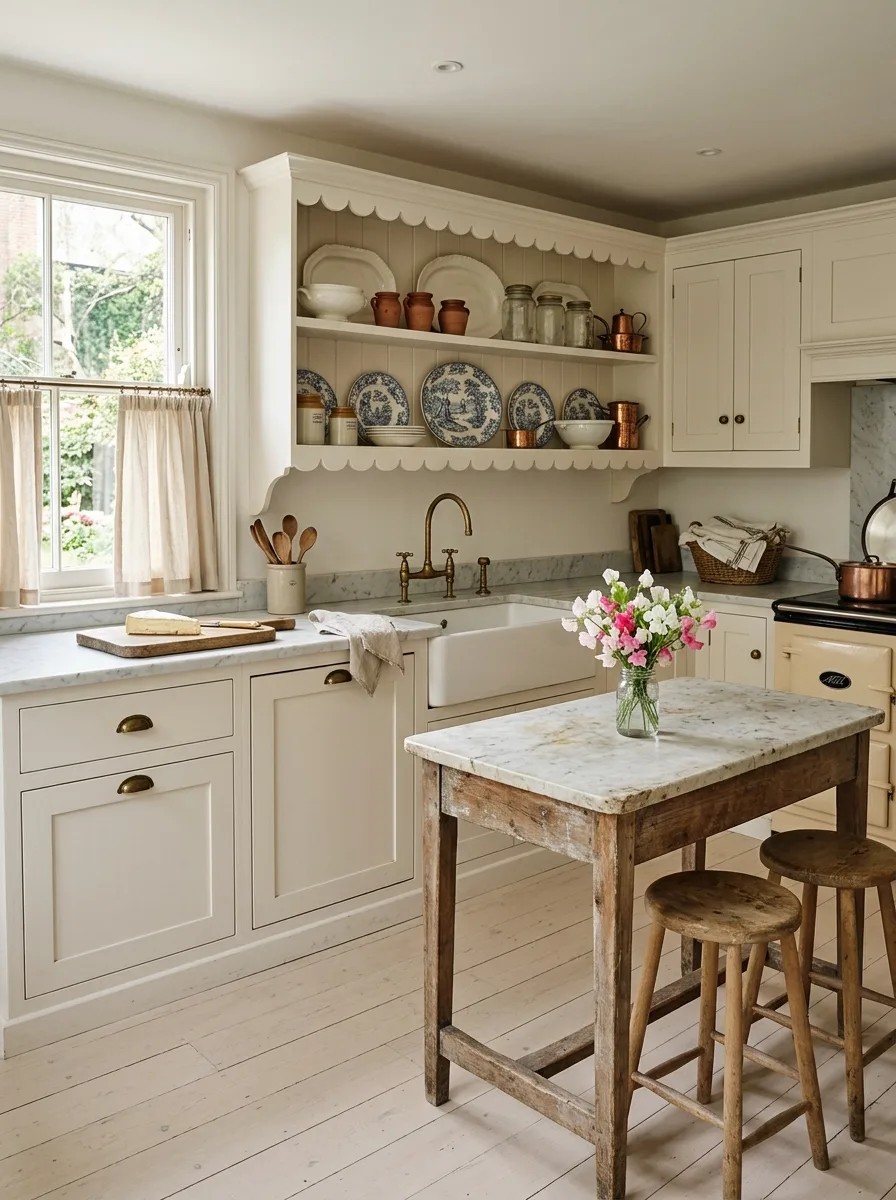
Build or source a large open dresser unit that spans one full wall of your kitchen. This is not a floating shelf — it’s a proper dresser with a full cornice top and a scalloped trim edge running along the underside of each shelf, cut in a deep wave with a jigsaw and painted to match the cabinetry. The scallop should extend down at least five centimetres and be generous in its curve — not a shallow ripple but a proper repeated half-circle.
Dress the shelves with a mix of transferware plates stood upright in plate grooves routed into the shelf, white ironstone stacked flat, and storage jars in amber and clear glass. Copper jugs and small terracotta pots in the back corners. Keep everything in a three-colour palette: white, blue, and warm copper-brown. The scallop is the feature — everything on the shelves is subordinate to it.
Coastal Blue-Grey Marble Island

Paint your cabinetry in a pale blue-grey — duck egg tipping toward silver, not navy tipping toward slate. Farrow & Ball’s Mizzle or Skylight, or Dulux’s Mineral Mist. Use nickel or brushed chrome hardware rather than brass — this is a coastal room, not a farmhouse room, and brass would tip it warm when it wants to stay cool and airy.
Top the island in white marble, but make the island proportionally long and narrow rather than boxy — this look favours a kitchen table format over a prep-station island. Use white-painted ladder-back or shaker-style bar stools to maintain the light palette. Keep your open shelving in white rather than oak. The only warmth in the room should come from the natural light through generous windows, and one copper kettle on the cooktop.
Kitchen Greenhouse Extension
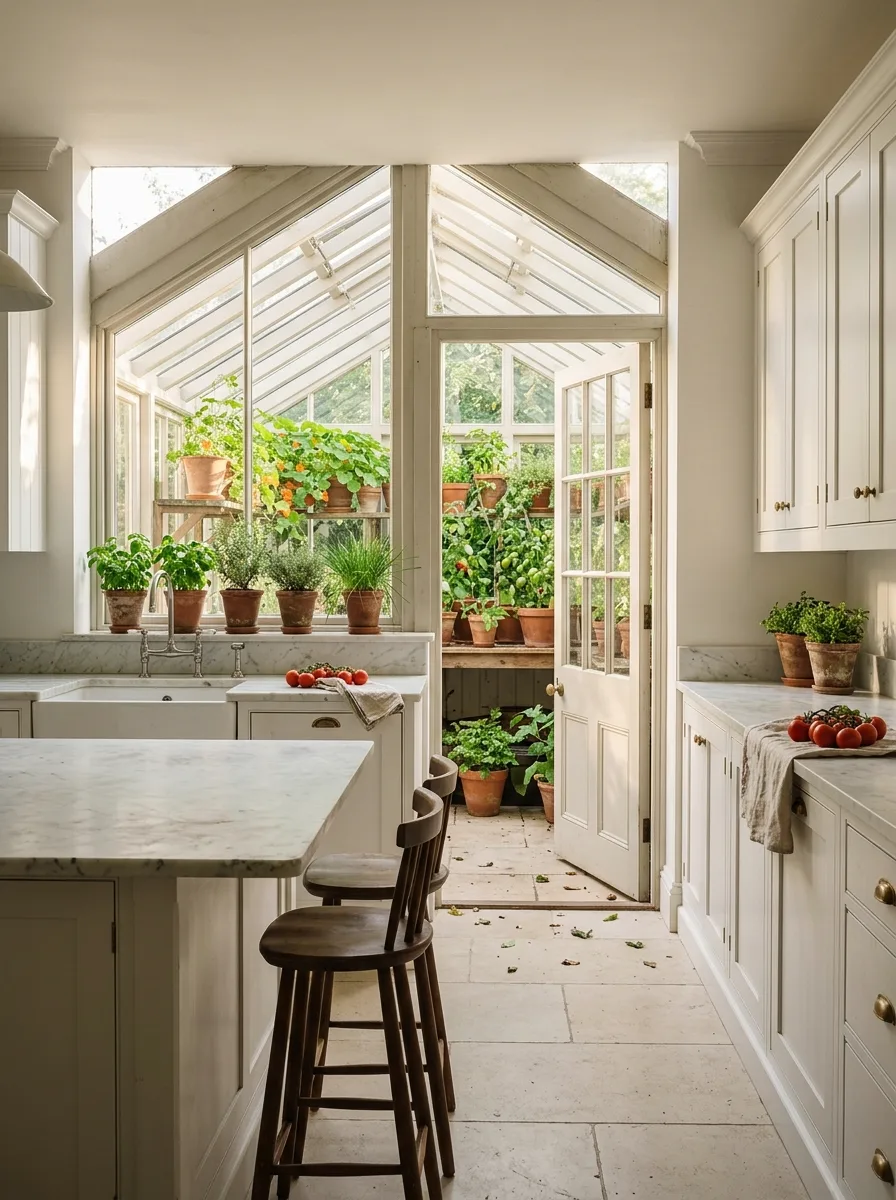
If you’re extending or renovating, design a lean-to greenhouse extension directly off the back of the kitchen with a glazed pitched roof and opening sash panels on the sides. Build it in the same cream or white paintwork as the kitchen, using slim painted steel or timber glazing bars rather than uPVC — the profile of the bar matters enormously to how the structure reads from inside.
Inside the extension, line the window ledges and side shelves with terracotta pots of herbs and climbing plants — basil, chives, thyme, nasturtium, small tomato varieties. The floor should continue whatever you’re using in the kitchen rather than switching to tile. The visual principle is that the kitchen grows outward into a growing space, not that a greenhouse was appended to a kitchen. The junction between the two should be a proper door, not a set of French doors, so the drama of opening it reads.
Aga Flagstone Farmhouse Table
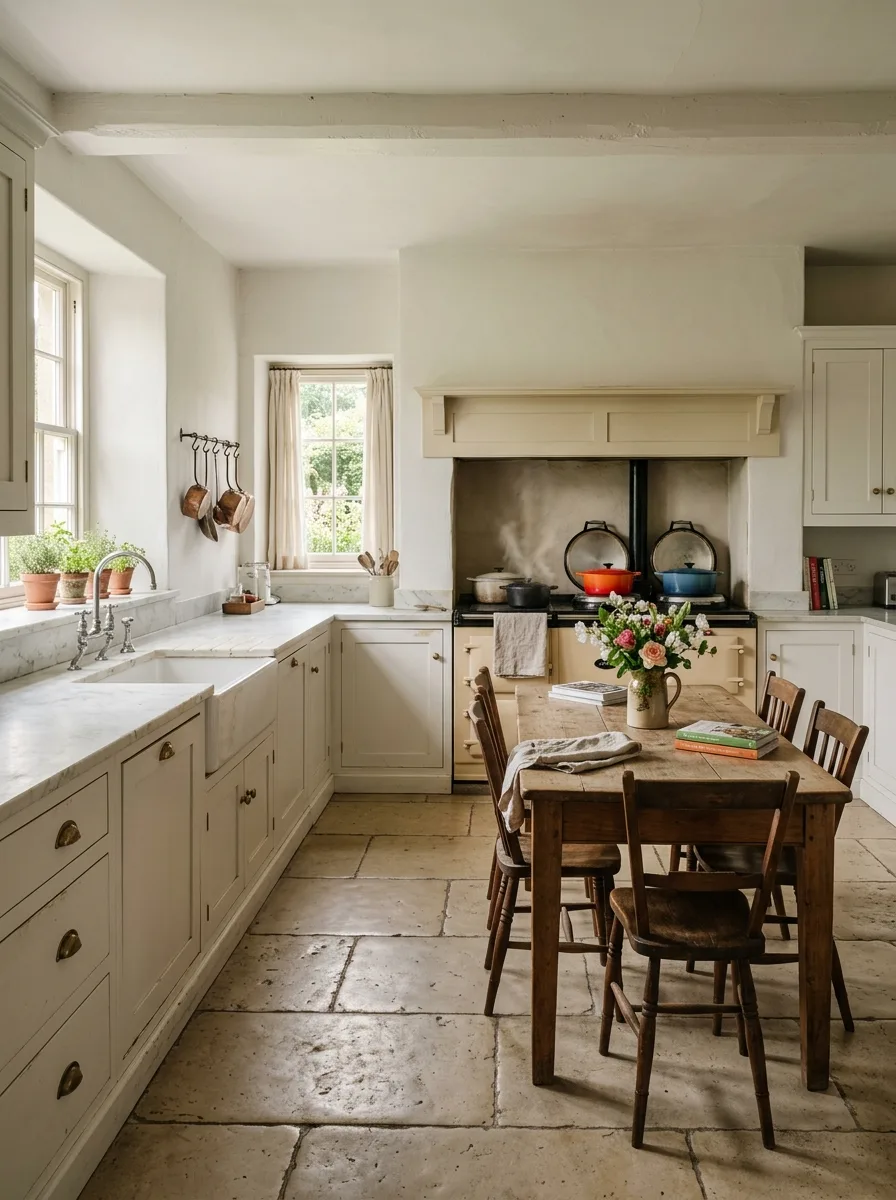
Anchor the room with an Aga or range cooker set into an alcove with a painted mantel hood rather than an extractor. The mantel should be finished in the same paint as the cabinetry, with a simple flat soffit rather than a decorative corbelled design — the simplicity is what makes it look architectural rather than ornamental.
Lay the floor in large-format reclaimed limestone or flagstone with uneven jointing — not rectified tiles set in perfect grids. Source the stone from a reclamation yard and ask for pieces with visible mineral variation and at least a century of use. In the centre of the room, place a genuine antique or antique-replica farmhouse table in scrubbed pine or oak with chairs that don’t match but belong to the same era. Set the table as if someone just cleared the plates and left.
Bay Window Kitchen Nook
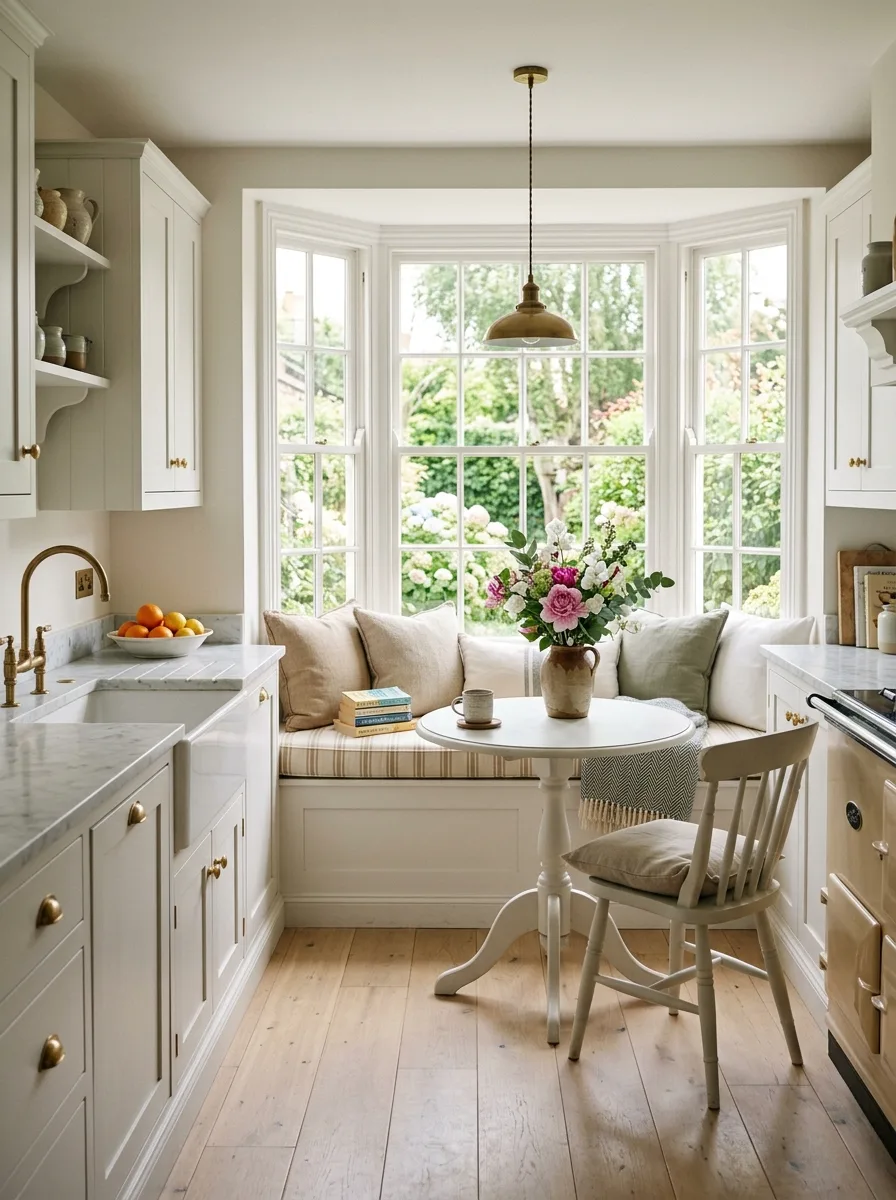
Build a padded window seat directly into a bay window recess, wrapping the seat around the full bay. The seat base should be a built-in unit in the same cabinetry as the rest of the kitchen, topped with a cushion in a ticking stripe or plain linen in a warm neutral. Keep the seat back open — no upholstered back panel — so the window itself remains the feature.
Hang a single dome pendant in aged brass or antique bronze from the ceiling above the table, at a height that relates to the table rather than the ceiling. Use a small round pedestal table rather than a rectangular one. The geometry of the round table in a bay window is the relationship that makes this work — a square table fights the curve.
Limewashed Stone Arch Provence
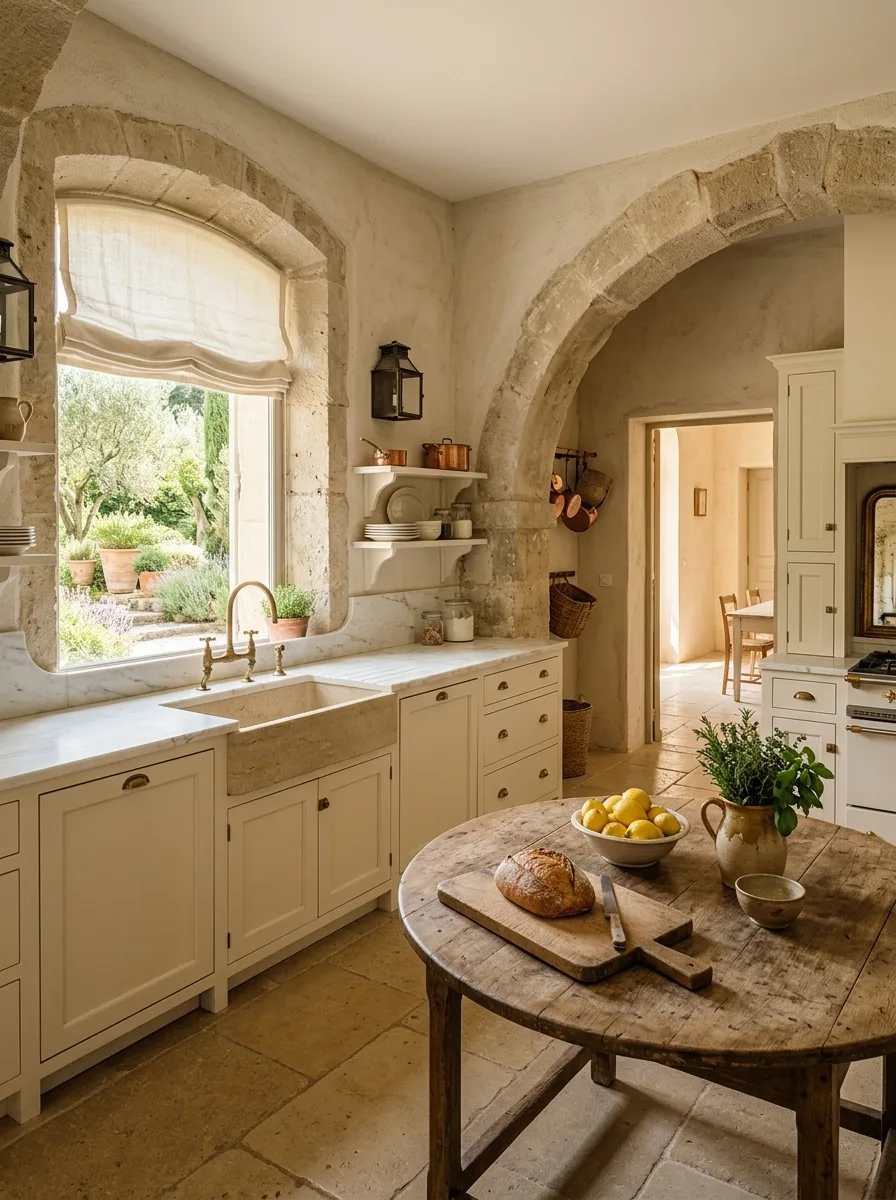
The defining element here is structural and cannot be faked well: a genuine stone arch framing either a window opening or a passage between rooms. If you’re renovating a house with existing stone walls, expose them and repoint with a lime-based mortar rather than cement. If you’re building new, source a reclaimed limestone arch and incorporate it into the wall structure — this is a significant building project but the result is permanent in a way no finish can replicate.
Against the raw limestone, keep the cabinetry in the simplest possible shaker style in warm cream. Use an antique wooden table with a rounded top as the central piece rather than a fitted island. Add copper pots on a wall rack, a linen Roman blind at the window, and a single rustic jug of lemons on the table. The stone does all the heavy lifting.
Dutch Door Garden Kitchen
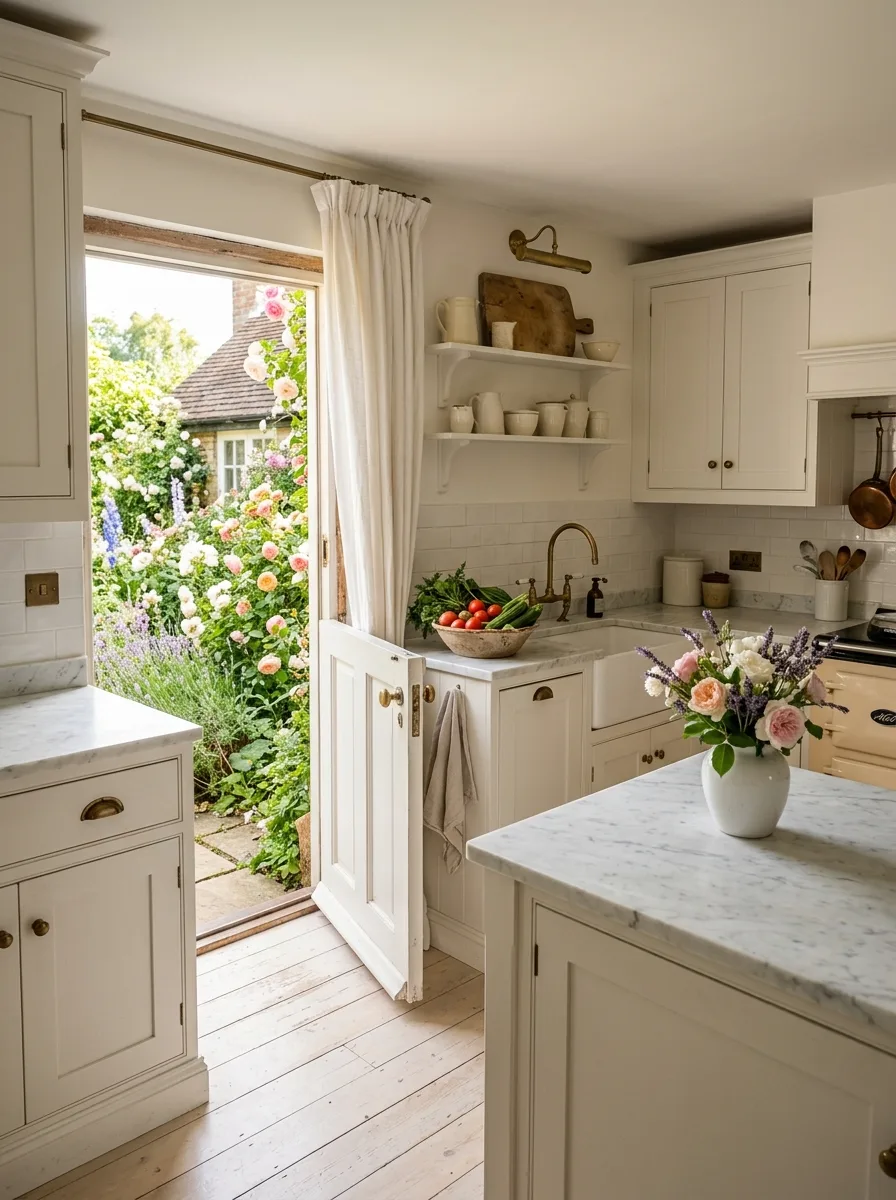
Install a traditional Dutch door — one that opens in two halves independently — on the wall that faces your garden. The door should open outward, be painted in the same colour as the kitchen cabinetry, and have a brass latch on the lower half. Leave the top half open during the day so the kitchen draws in garden air and the view of the garden becomes the room’s best feature.
Hang a single brass picture light on the wall above the open shelving opposite the door — not recessed lighting, not track lighting. A single directional picture light that illuminates the shelf and throws a warm pool. This is the detail that makes the kitchen look like a particular kind of person lives there. Dress the counters with fresh produce from the garden rather than decorative objects — tomatoes in a bowl, vegetables in a colander, a herb bundle by the sink.
Taupe Cabinetry Market Counter
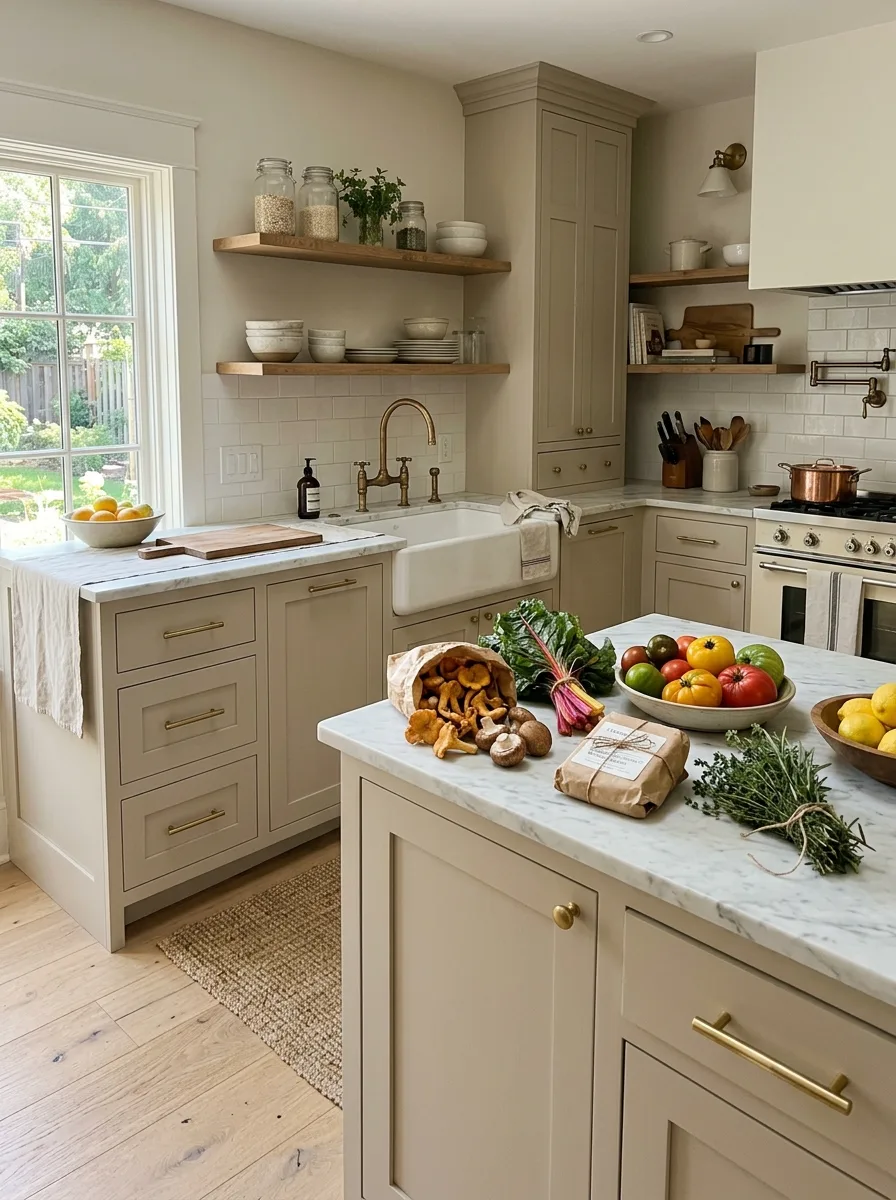
For a kitchen that wants to look like it’s just been stocked after a trip to the market, choose a warm taupe for the cabinetry — Benjamin Moore’s Bleeker Beige or Farrow & Ball’s Hardwick White — and use bar pulls in unlacquered brass throughout, long horizontal pulls rather than cup pulls, for a slightly more contemporary edge within the otherwise traditional room.
Top everything in marble, keep the backsplash in simple rectangular white ceramic tile, and dress the counter and island with fresh food rather than decorative objects. Chanterelles tumbled out of a paper bag. A colander of heirloom tomatoes. A bunch of chard. Lemons in a wooden bowl. Herbs loosely tied with kitchen twine. The kitchen looks best when it looks active, not staged.
Full-Wall Chalkboard Command
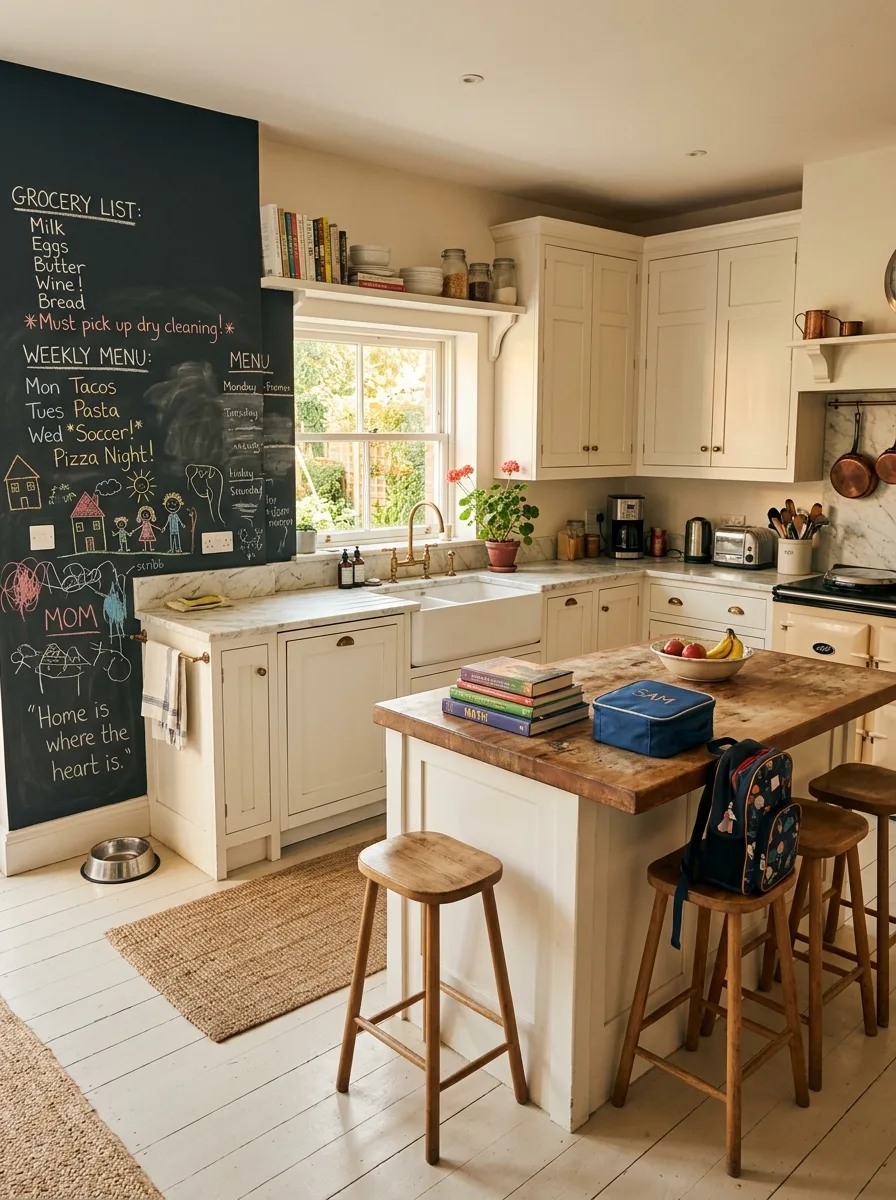
Paint one full wall in chalkboard paint — not a section, not a framed panel, but a floor-to-ceiling wall. Use a proper blackboard paint from Rust-Oleum or Little Greene rather than the chalkboard paint sold in craft shops, which takes chalk badly. Prime the wall, apply two coats, season the board by rubbing chalk across the entire surface and wiping off before use.
Write the week’s menu, the shopping list, children’s drawings, reminders, a favourite quote — let it accumulate rather than wiping it clean. The wall should look genuinely used. Opposite this wall, keep the kitchen entirely neutral and clean: cream cabinets, white tile, simple hardware. The contrast is the point.
Walk-In Pantry Mason Jars
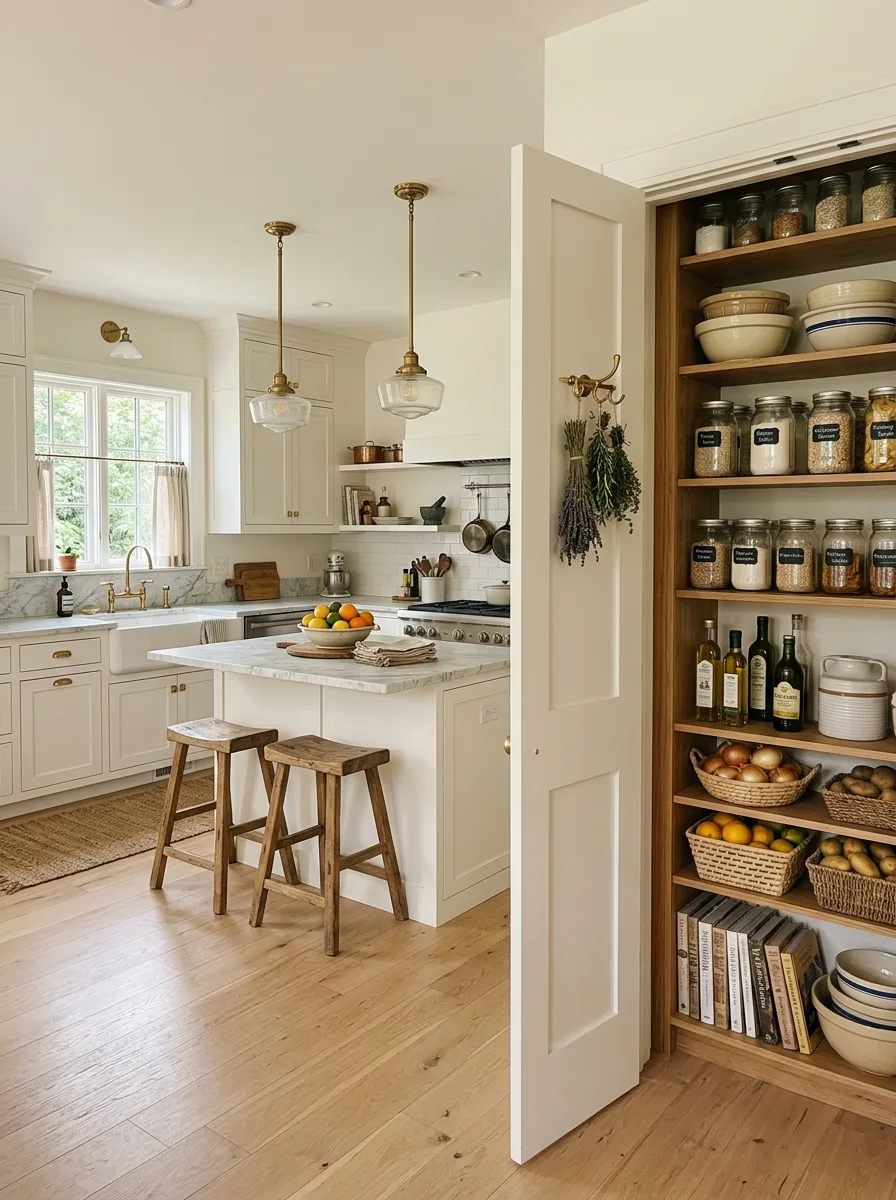
Build a walk-in or reach-in pantry with shelves in natural oak — not painted, not stained dark, just sanded and oiled. The shelves should be deep enough for large mason jars and shallow enough that you don’t lose things at the back — about 35cm is right for most pantry goods. Install adjustable shelving so you can reconfigure as your storage needs change.
Decant everything into mason jars or weck-style clip-top glass jars with chalkboard labels. Grains, flours, sugars, seeds, dried legumes, oils, vinegars. Woven baskets on the lower shelves for produce that doesn’t need refrigeration — onions, potatoes, citrus. The pantry should be a room you enjoy opening, not a space you close as quickly as possible. Hang a bunch of dried lavender from a wall hook for the scent.
Wicker Pendant Basket Storage
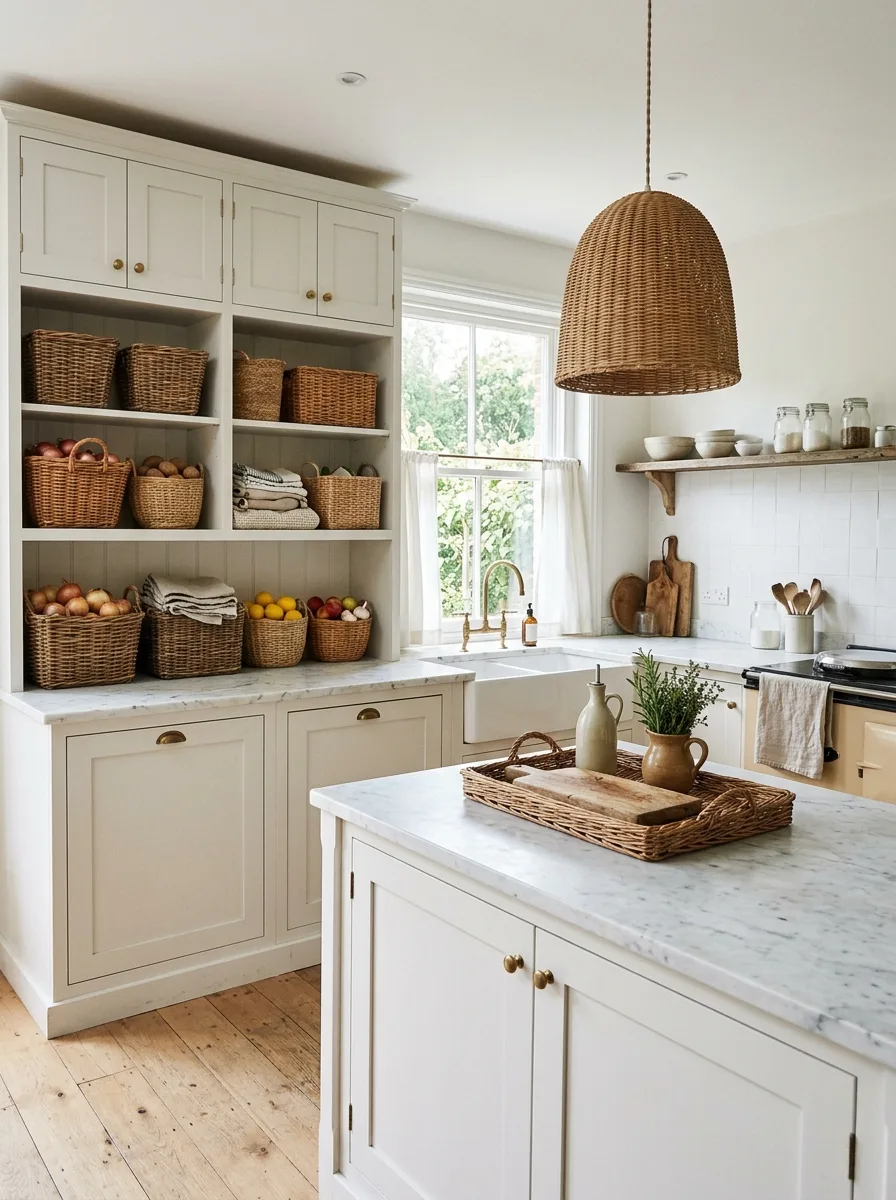
Hang a large wicker or rattan dome pendant — at least 50cm in diameter — over the kitchen island. Source this from a lighting supplier rather than a homeware shop; the quality of the weave and the scale of the pendant relative to the island matters. The pendant should feel generously proportioned rather than decorative.
In the open shelving built into your cabinetry, use wicker baskets of the same rattan family — rectangular for storing tea towels, round-handled for produce, smaller square ones for miscellaneous items. The repetition of the material across the pendant and the storage creates cohesion without matching. Keep the marble island surface clear of baskets. The baskets are for the shelves. The island is for cooking.
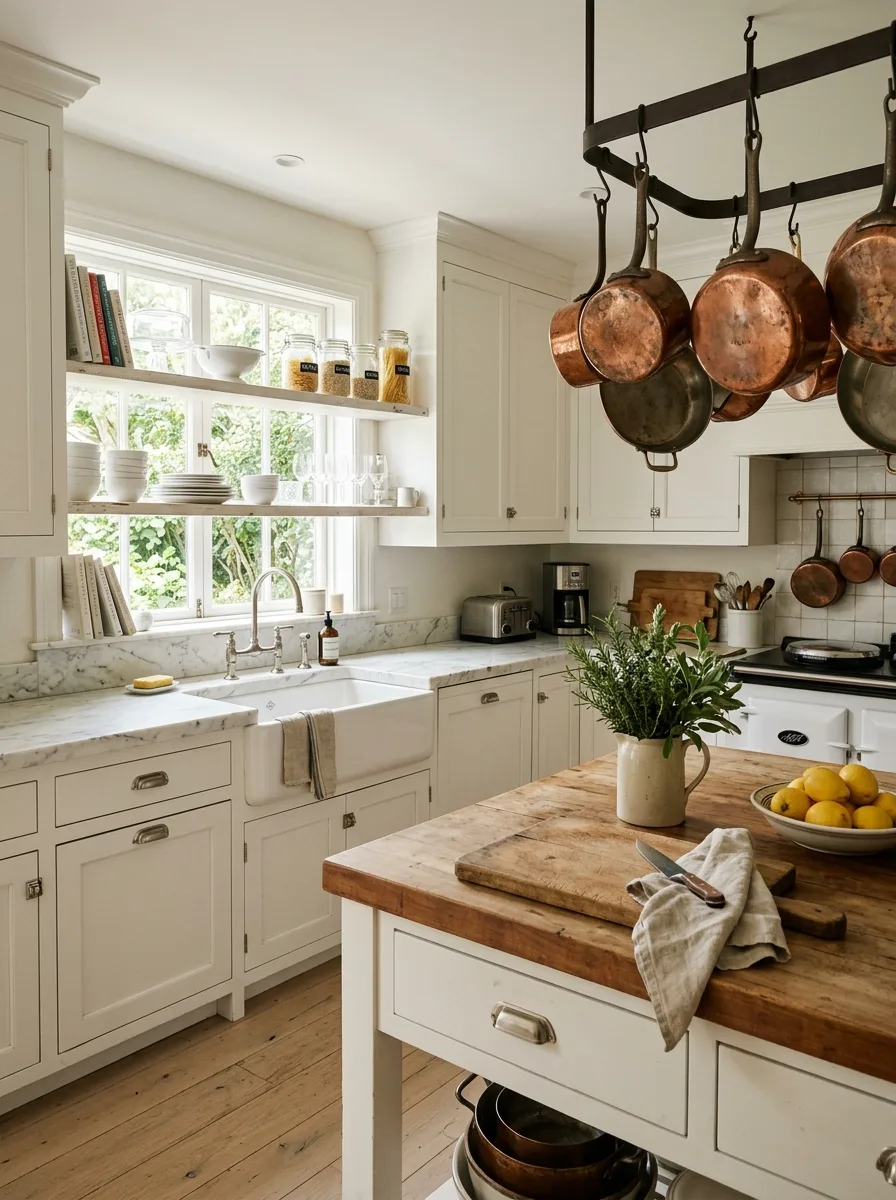
Brass Pot Rack Range Wall
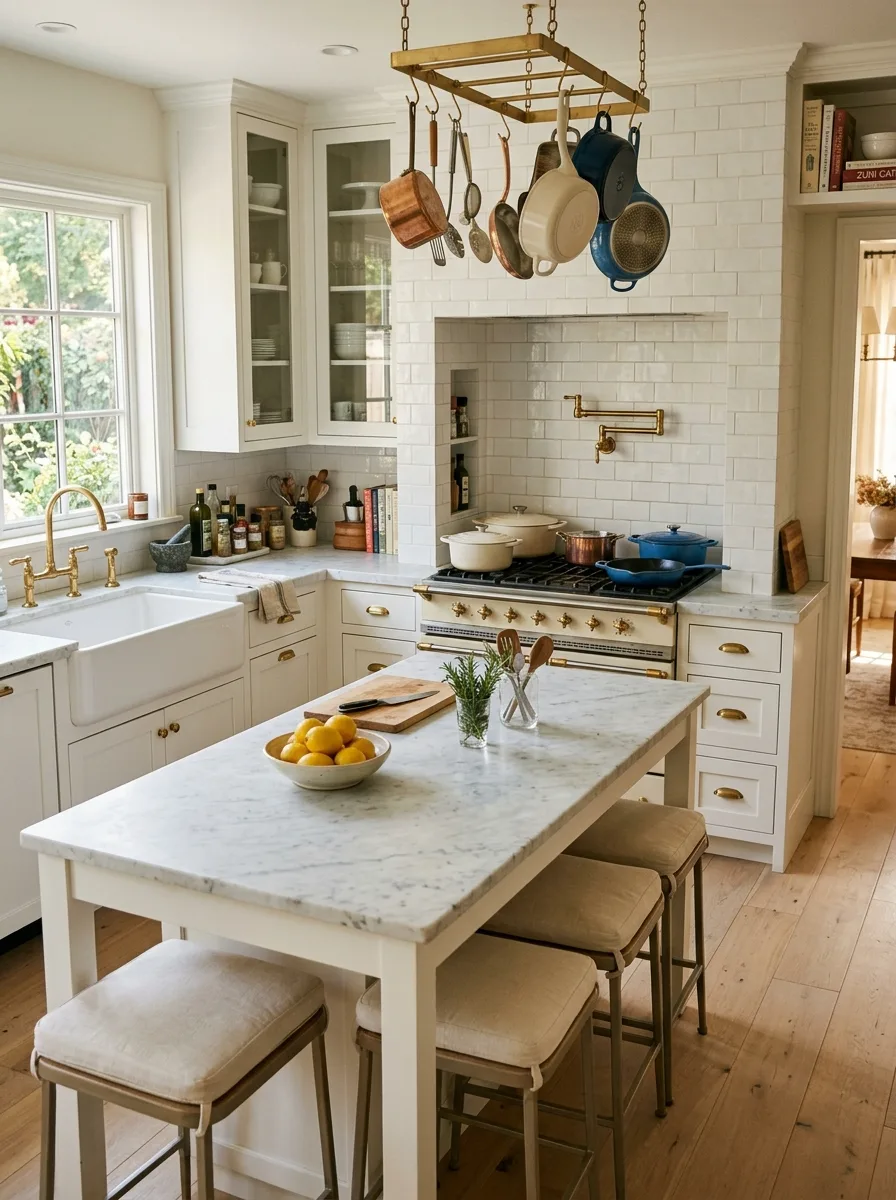
Install your range cooker in an alcove framed in subway tile — simple rectangular white ceramic, set in a running bond and grouted in a warm light grey rather than white. Above the cooker, run a pot rail in brass along the back wall of the alcove at a height that clears the tallest pot but sits below eye level when cooking.
Above the kitchen, hang a separate square brass pot rack from the ceiling on chains — also in brass, not black. The rack over the range holds your most-used pans. The hanging rack overhead holds the collection: copper in varying states of tarnish, enamel pieces in a limited palette of cream and blue, stainless stockpots. Let it look like a working cook’s kitchen, not a display.
French Door Garden Dining
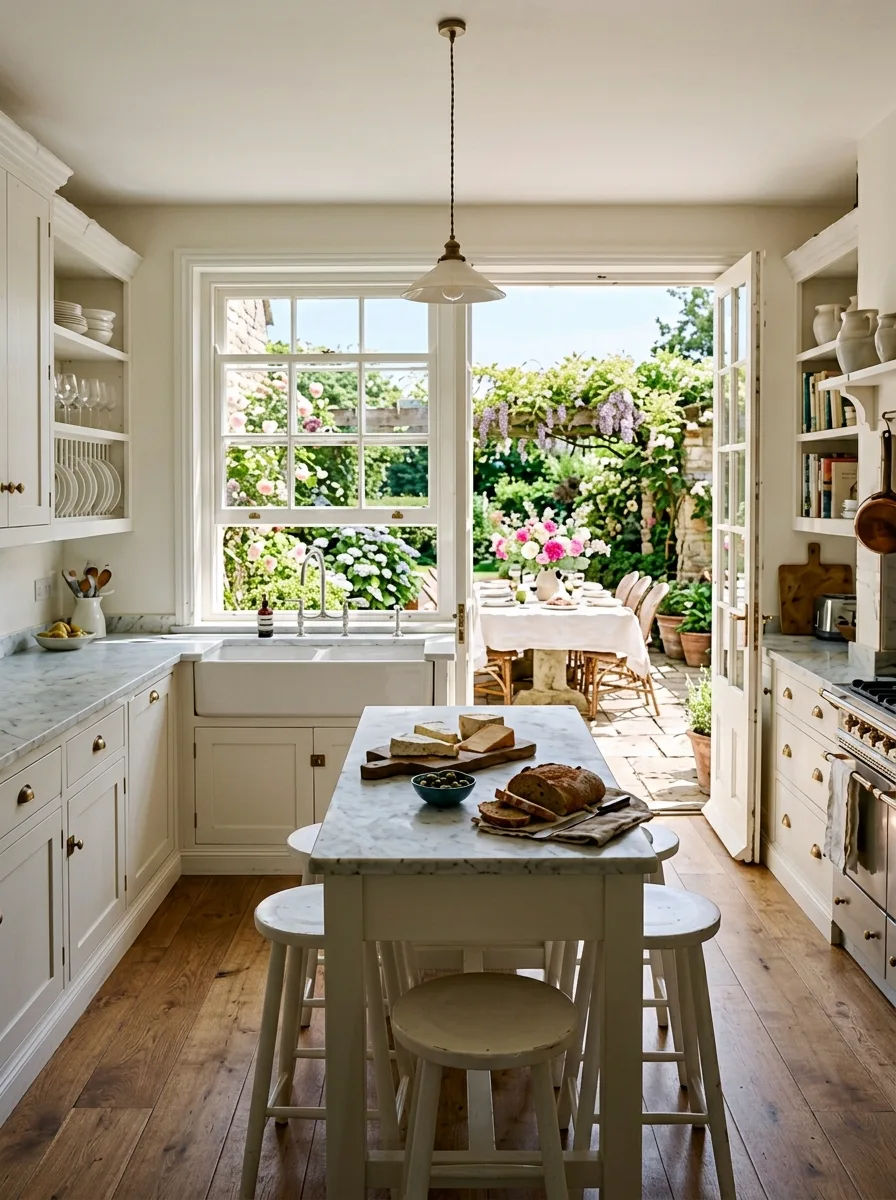
Design the kitchen so French doors open directly from the cooking space onto an outdoor dining table set in the garden. The doors should be in white or cream to match the cabinetry and open outward. The connection between the two spaces is the feature: food travels directly from the counter to the garden table without going through a corridor.
Keep the outdoor dining table in stone or teak and the chairs in a faded teak or rush-seated bistro style. Inside, the kitchen table that usually serves as the transitional surface should be a simple freestanding island in marble or stone — not built-in. The removable island means the indoor and outdoor spaces can work as one when the doors are open.
Stone Arch Cherry Blossom Window
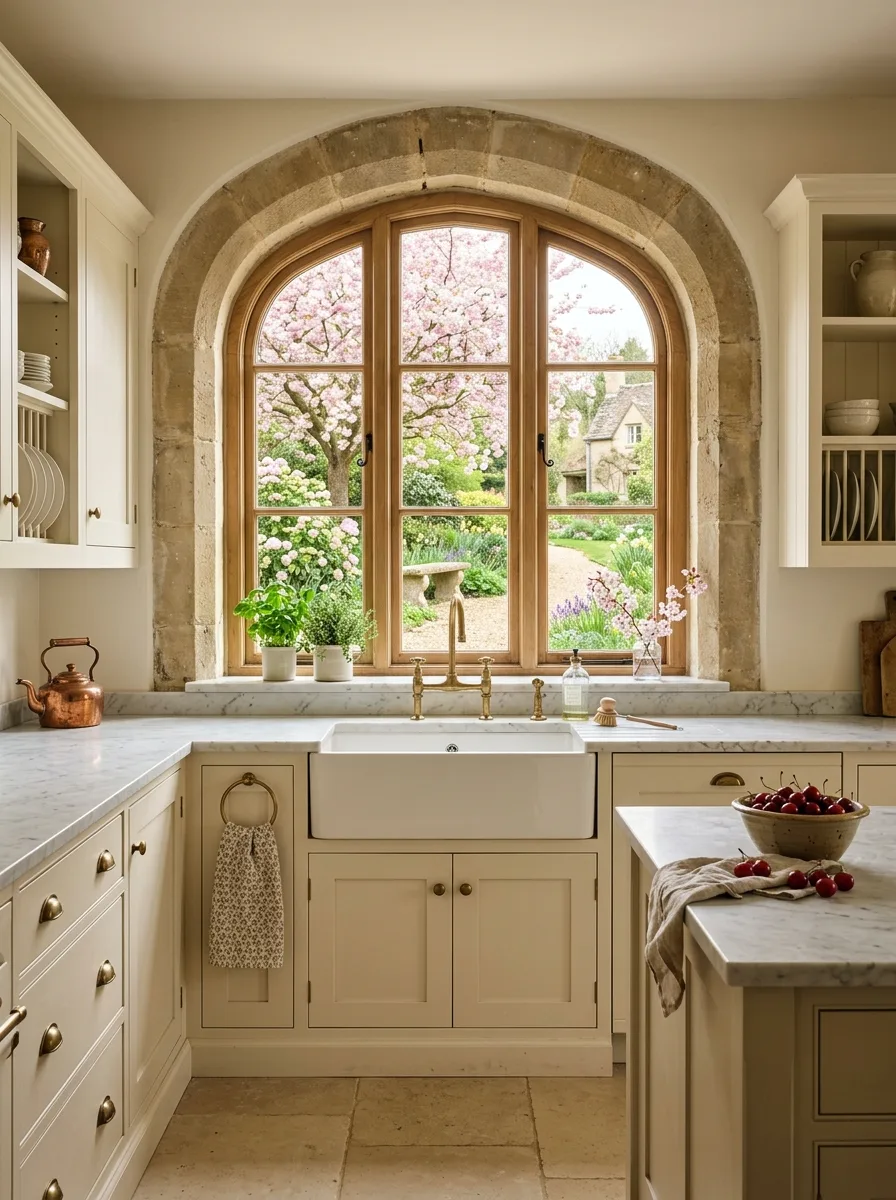
Frame the kitchen sink in a reclaimed stone arch — the arch itself is the feature. Nothing else in this composition needs to be dramatic. The arch should be genuine reclaimed limestone or sandstone, repointed with lime mortar, and the window set within it should be a simple casement in natural oak or warm wood rather than painted white.
Plant a flowering tree directly in view of this window. Cherry blossom in spring. A Japanese maple in autumn. Whatever gives you something living and seasonal to look at while standing at the sink. Set a farmhouse sink in the same warm cream as the surrounding cabinetry and use brass bridge taps. Keep the surrounding marble clean of objects except one small herb pot and a simple vase with a single flowering branch.
A Final Word on Kitchens That Work
Every kitchen in this collection is doing something specific. It’s not the farmhouse sink that makes them work — you can put a farmhouse sink in a terrible kitchen and it’ll look out of place. It’s not the open shelves, the copper pots, or the marble counters either.
What all of these rooms have in common is that they were designed from the outside in. Someone made the big structural decisions — ceiling, floor, window position, sink location — and then allowed everything else to follow. The copper pots hang where the ceiling permits. The flowers sit where the counter has room. The books live on the shelf that was built to hold them.
You cannot decorate your way out of a poorly structured kitchen. But you can build a simply structured kitchen and fill it with beautiful things and get there without a great deal of effort.
The best kitchens look like no one tried very hard. That’s because someone tried very hard, a long time ago, on the things that can’t be changed easily. Get those right first. Everything else is just shopping.