
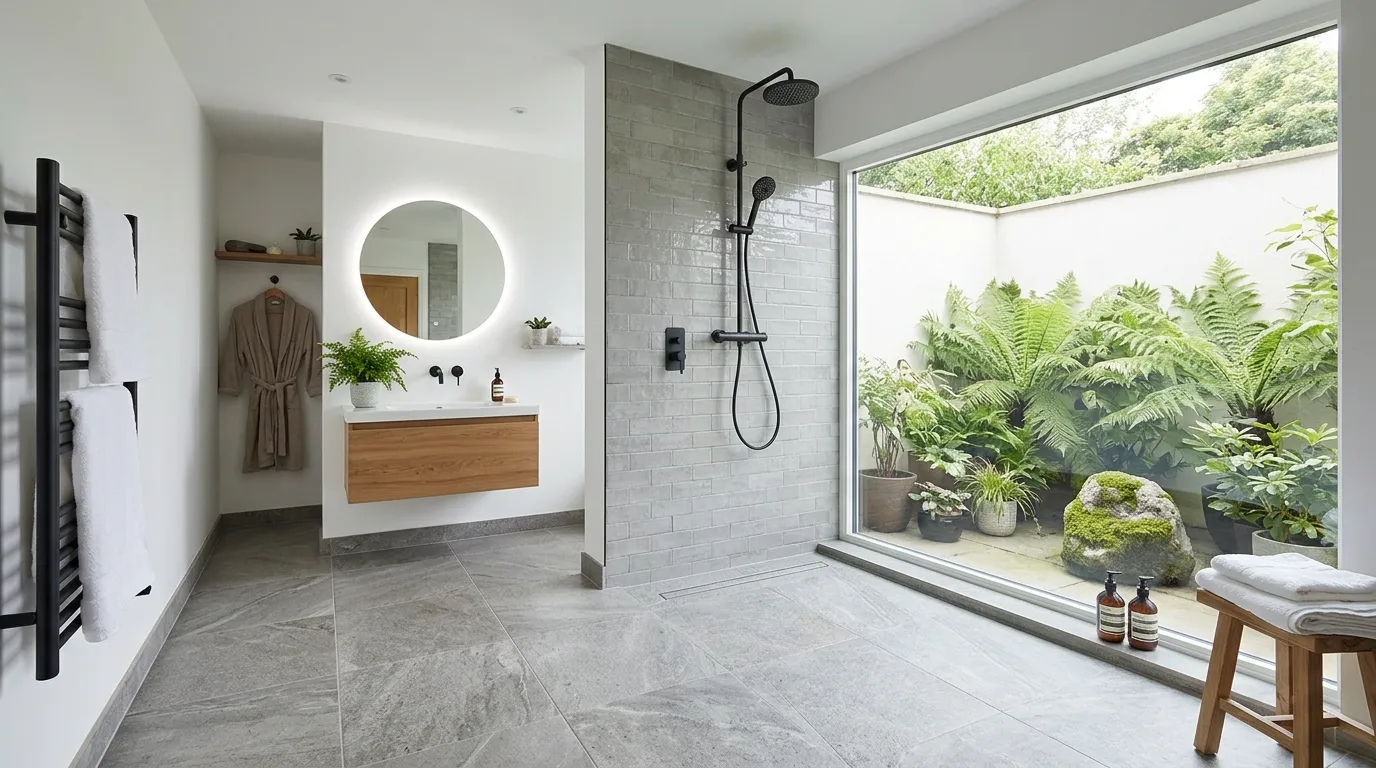
A walk-in shower with wall no door sounds simple until you actually have to design one. Remove the glass door, and suddenly the shower opening, water direction, wall height, floor slope, storage, lighting, and privacy all matter a lot more.
The biggest mistake is treating the missing door as the whole design. It isn’t. A good doorless shower works because the room controls water before water becomes a problem. The wall has to be placed correctly. The showerhead has to face the right direction. The floor needs a clear drain path. Even the towel location matters.
That’s why the best walk-in shower with wall no door designs don’t look like ordinary showers with one piece missing. They look intentional from the start.
Below are practical layouts, wall ideas, material combinations, storage tricks, and small design choices that make a doorless shower feel finished instead of unfinished.
Walk-In Shower Ideas
Luxury Lighting Overshadows Basics
Nothing screams expensive like turning your shower into a literal runway. By burying LED strips in every nook and cranny, you ensure your morning routine is fully illuminated, because clearly, nobody wants to wash their hair in anything less than interrogation-level brightness.
That marble-slab-on-everything look is the perfect way to spend a small fortune while praying you never drop a heavy shampoo bottle on the floor. It’s elegant, sure, but mostly it’s a commitment to a life of squeegeeing every square inch of stone until you die.
And let’s admire the stone pedestal basin tucked in the corner. Because if you’re going to have a shower large enough to host a small cocktail party, you might as well add furniture that has absolutely no business being in a wet room.
Build a long half wall beside the shower opening
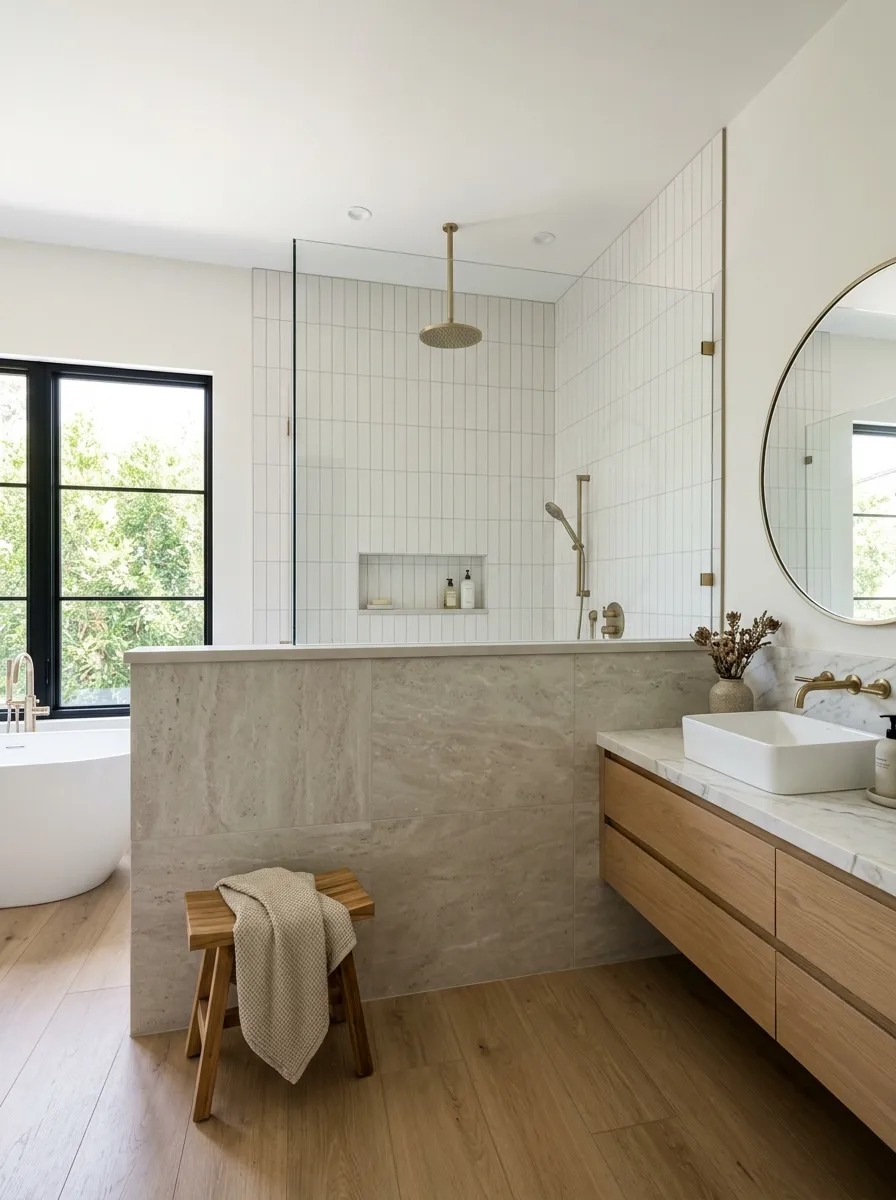
The simplest doorless layout is often the strongest.
Run a partial wall beside the shower so it blocks the direct spray while leaving a generous opening into the room. The wall doesn’t need to reach the ceiling. In fact, stopping it below the ceiling usually keeps the bathroom feeling larger.
Place the showerhead so it sprays toward the protected end rather than toward the opening. Keep the controls where you can reach them without standing directly under the water.
Best layout rule:
- Wall blocks the spray
- Showerhead points away from opening
- Drain sits inside the wet zone
- Entry stays completely open
The result feels architectural rather than improvised.
Maximalist Tiles Hide Regrets
If you’re terrified of a plain wall, just throw every patterned tile you can find into one giant mosaic. It’s the perfect way to distract from the fact that your actual plumbing is probably just standard-issue chrome that’s pretending to be something else.
Framing the focal wall with a mosaic border effectively creates a cage for your chaotic design choices. It tells the eye exactly where to look, mostly so it doesn’t wander off to the parts of the bathroom you forgot to renovate.
Recessed niches are great, provided you enjoy displaying your collection of half-empty soap bottles like museum artifacts. Just make sure those tiny tiles are sealed perfectly, or you’ll be enjoying a science experiment in your grout lines within the month.
Use a short return wall to create a tucked-away shower
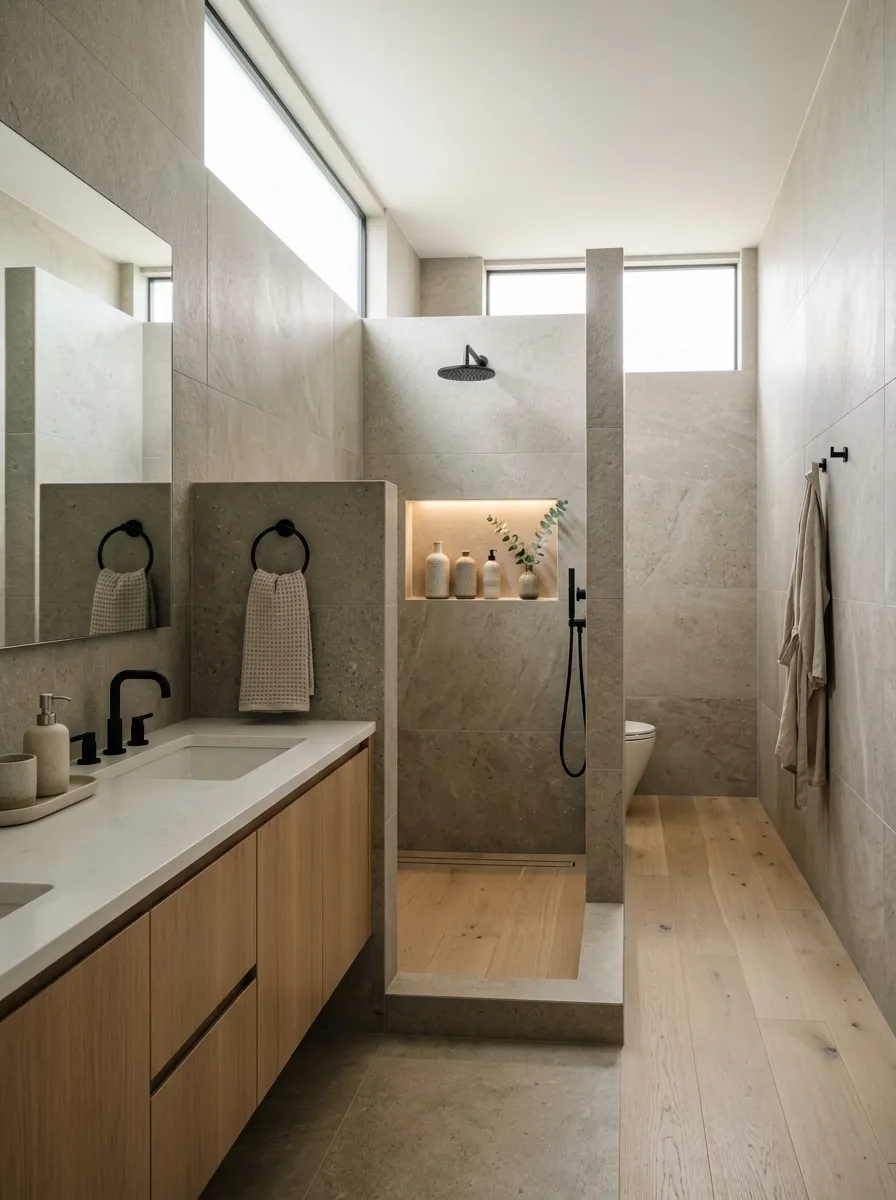
A short return wall changes the whole feel of the bathroom.
Instead of placing one straight wall beside the shower, turn the wall inward at the end. That small return creates a protected shower pocket and makes the entry feel less exposed.
This works especially well when the bathroom is narrow. The wall gives the shower a defined footprint without adding a bulky enclosure.
A return wall also gives you a useful place for a recessed niche or small ledge.
Design tip: Keep the return aligned with another architectural line in the bathroom, such as the vanity edge or a wall joint. That small alignment makes the layout feel deliberate.
Moody Drama Costs Extra
Nothing says high-end minimalism quite like choosing a color palette that makes your bathroom feel like a very expensive cave. It’s a bold look that demands you keep your floor white, lest you lose your sense of depth and accidentally walk into the wall.
That wall-mounted shelf is a triumph of form over function. It’s narrow enough to be nearly useless for anyone who owns more than one bottle of body wash, but at least it matches the dark, brooding aesthetic of your overpriced marble.
Running the shower wall all the way up creates a nice, clean line, provided your contractor actually understands how to cut stone. If you love scrubbing black surfaces to remove every single water spot, this is the low-maintenance fantasy you’ve been looking for.
Let the shower wall become the room’s main feature
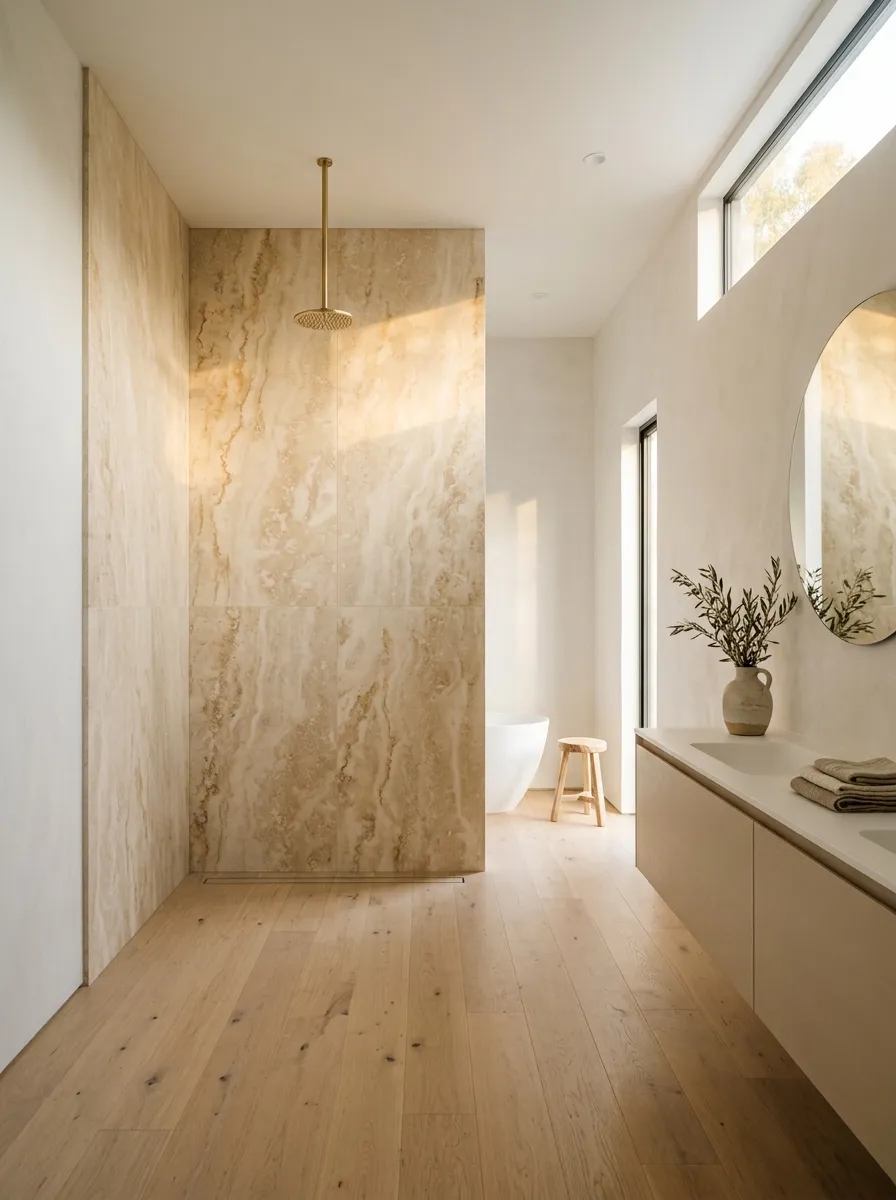
A doorless shower doesn’t need lots of decoration. It needs one strong architectural move.
Make the shower wall that move.
Use a warm stone-look tile, handmade-look ceramic, vertical fluted tile, or a calm large-format slab effect. Keep the surrounding walls quieter so the shower doesn’t compete with the vanity and flooring.
The wall becomes especially effective when it continues around the shower corner instead of stopping abruptly at the opening.
Don’t fill the wall with random niches, shelves, and contrasting strips. One strong surface reads far better.
Quick rule: If the shower wall is visually busy, keep everything else quiet.
Add a floating bench instead of a bulky built-in seat
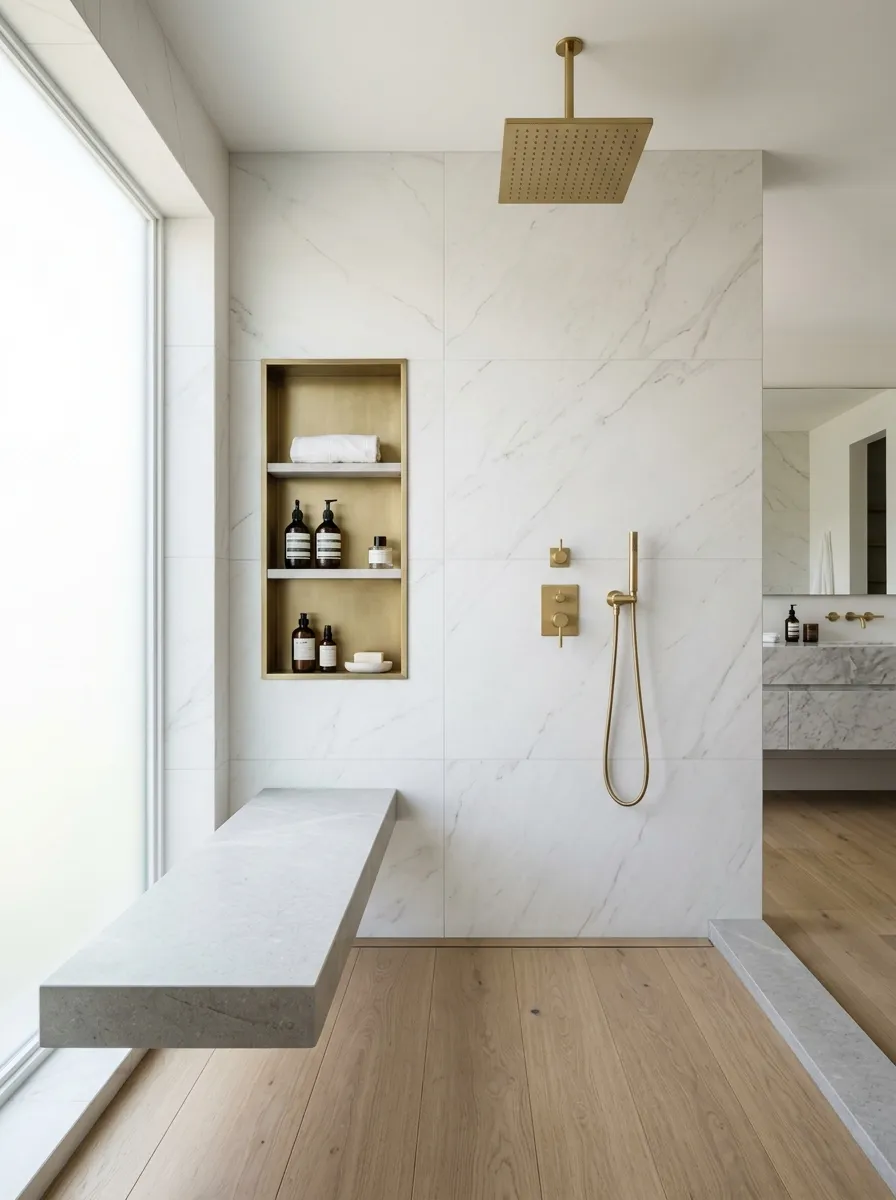
A heavy bench can make a doorless shower feel cramped.
A floating bench keeps the floor visible underneath, which makes the shower feel lighter. Use a solid stone-look surface or a tiled top with a clean edge.
Keep the bench deep enough to be useful, but don’t let it become a shelf for every bottle in the bathroom. Store daily products in a niche instead.
The space underneath can also help with cleaning.
Best combination: floating bench + recessed niche + open floor below.
Frame the opening with a contrasting tile border
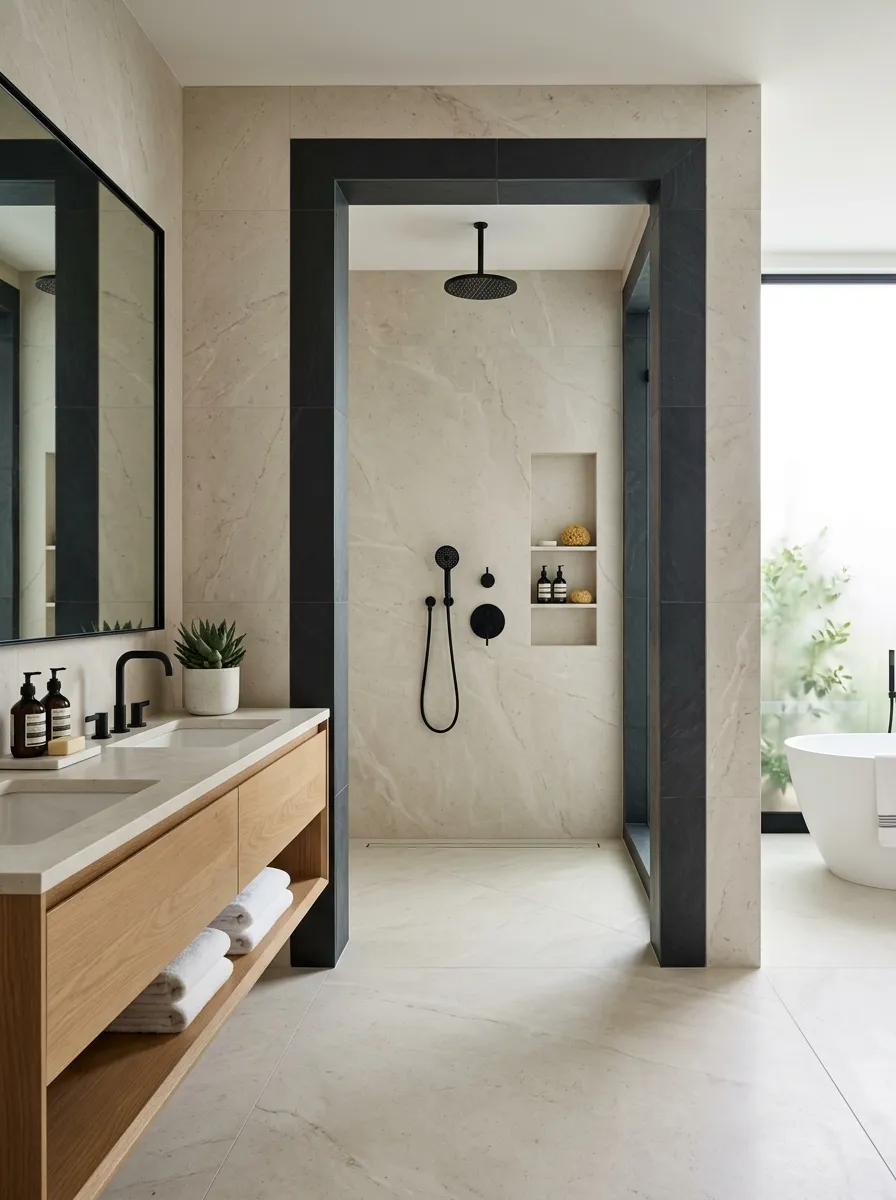
A doorless shower needs a visual edge.
Instead of adding glass, frame the opening with a narrow vertical strip of contrasting tile. The border gives the eye a stopping point and makes the shower feel designed.
Choose a material already used somewhere else in the room. A dark stone strip can connect to black fixtures. A warm beige border can connect to the vanity wood.
Don’t make the border too complicated. One clean line is enough.
This trick works especially well in bathrooms where the main tile is light and plain.
Use a warm stone palette to soften a modern shower
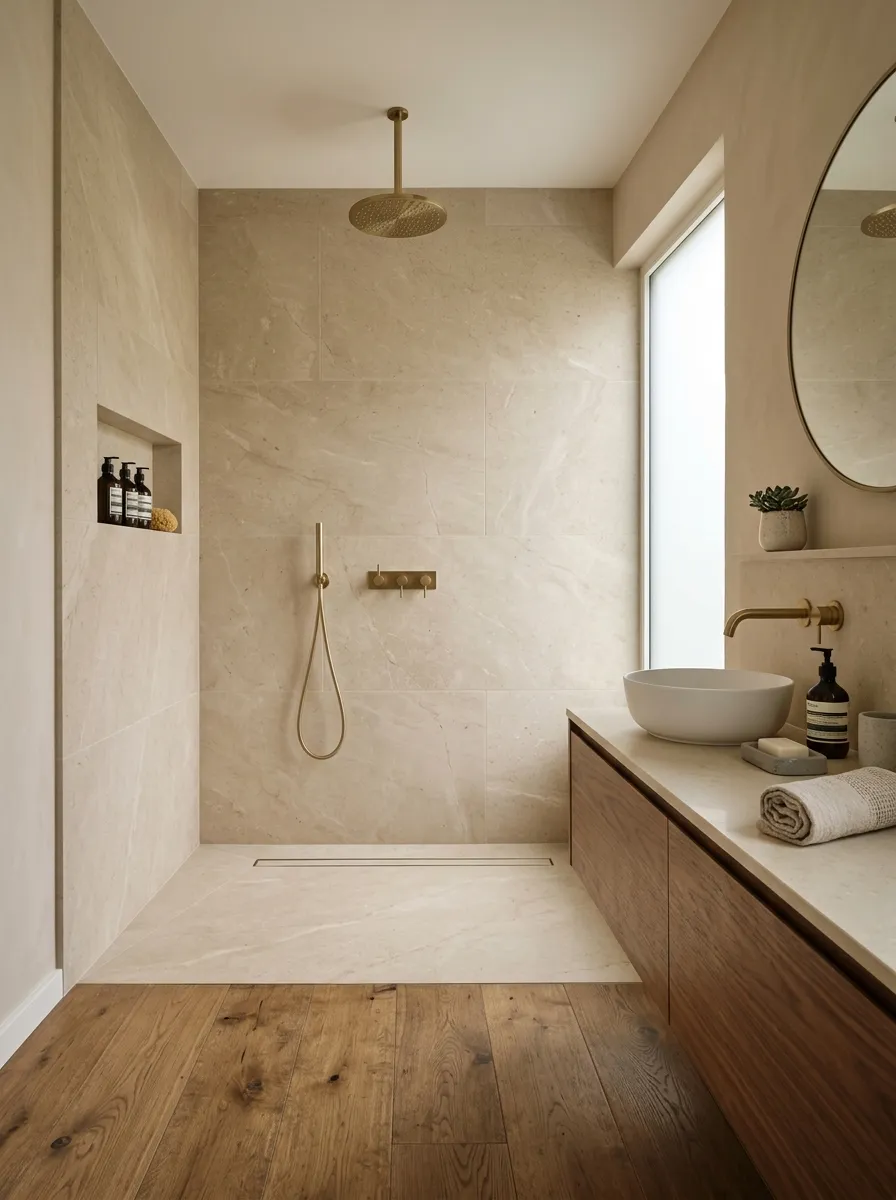
Doorless showers can become cold when every surface is white, gray, and glossy.
Warm stone tones fix that immediately. Think sand, taupe, limestone, warm beige, or soft mushroom.
Pair the tile with brushed brass or aged bronze fixtures if you want a softer look. Add warm wood outside the shower rather than filling the wet area with unnecessary accessories.
The key is restraint.
A warm palette needs texture more than decoration.
Create a tall tiled wall for a narrow bathroom
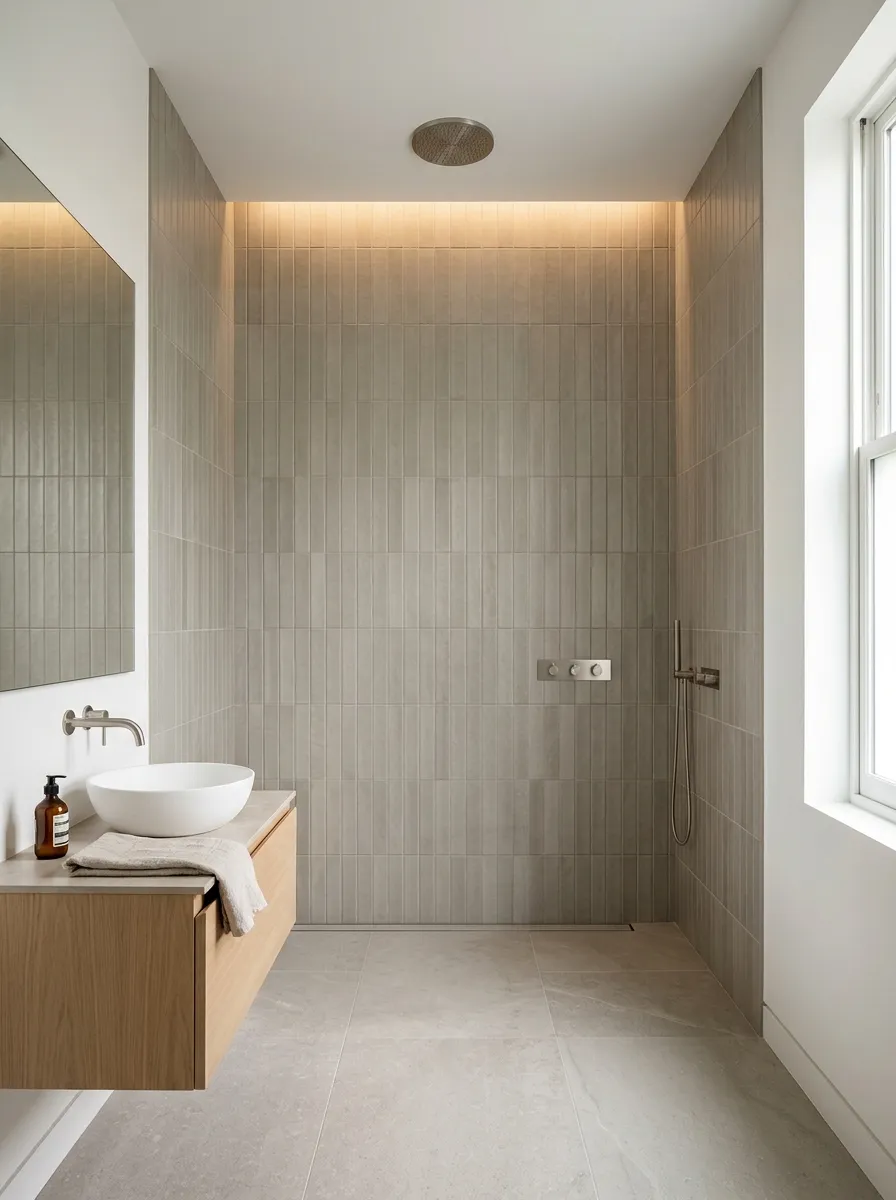
A tall wall can make a narrow bathroom feel more substantial.
Run the shower tile vertically from floor to near ceiling. The continuous lines pull the eye upward and give the shower more architectural weight.
This is especially effective when the room doesn’t have much width for decoration. Instead of filling the bathroom with accessories, make the wall itself do the work.
Keep the ceiling line clean. Don’t interrupt it with too many contrasting strips.
Vertical tile is the move when floor space is limited but wall space isn’t.
Put a recessed niche inside the wall instead of shelves
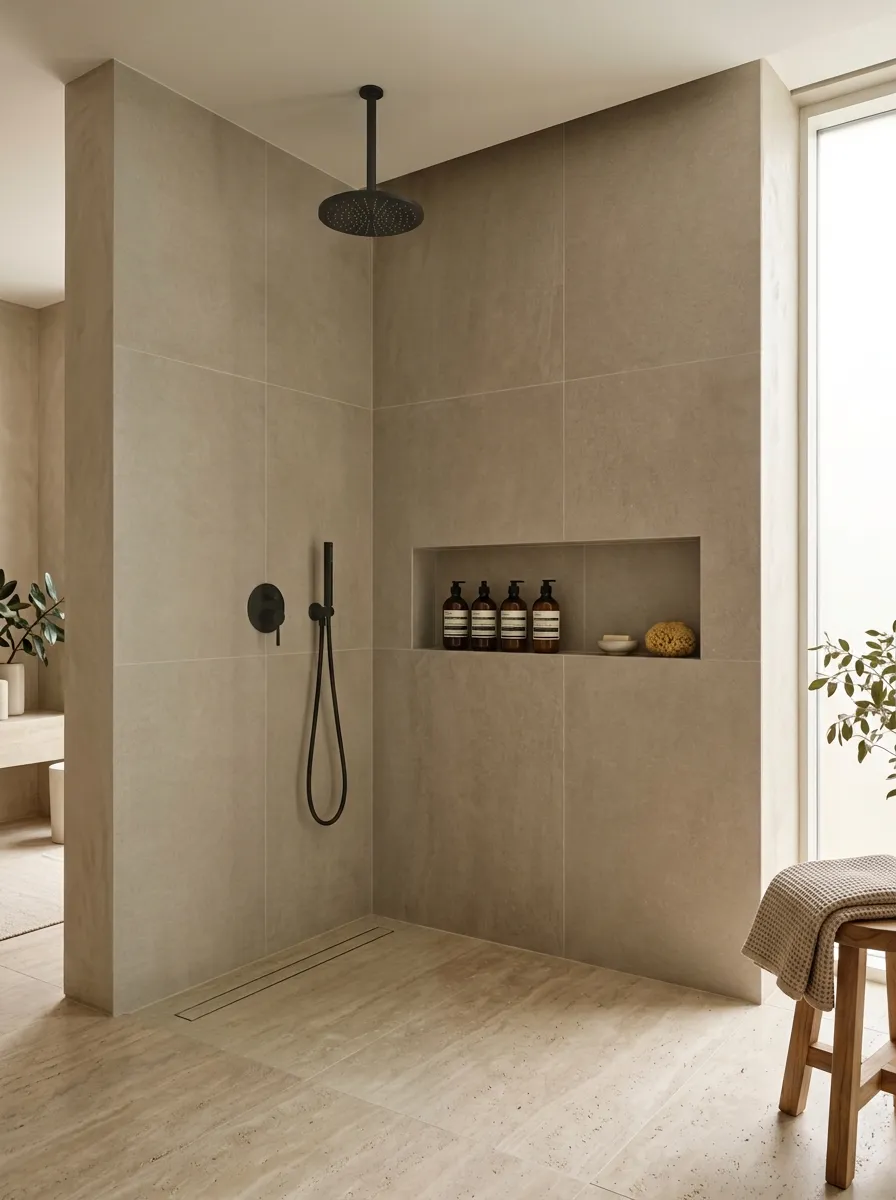
Open shelves collect bottles, water spots, and dust. A recessed niche keeps the shower cleaner.
Build it into the wall rather than attaching storage afterward. Match the niche trim to the main tile for a calm look, or use a contrasting stone for a deliberate accent.
Keep the niche away from the direct spray if possible. Products stay easier to reach, and the back wall stays cleaner.
A niche doesn’t need to be enormous. Store the products you actually use and stop there.
The best shower storage disappears into the architecture.
Pair the wall with a frameless glass side panel only where needed
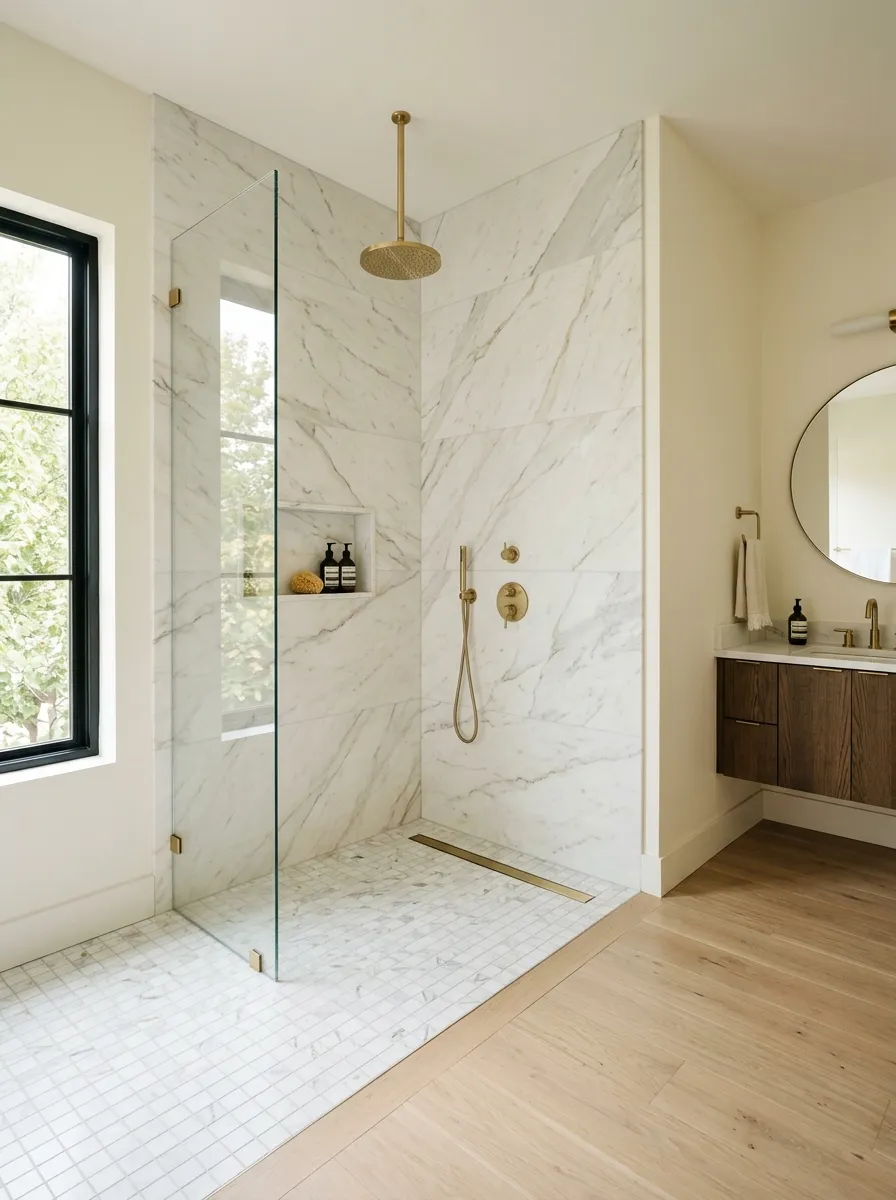
A doorless shower doesn’t always mean absolutely no glass.
A fixed glass side panel can control a troublesome splash zone while keeping the main entry completely open. This is useful when the room layout makes a wall alone too short to contain water.
The trick is to use glass as a supporting element, not as the main enclosure.
Keep the panel frameless and visually quiet. Let the tiled wall remain the dominant feature.
Think barrier, not box.
Use a dark shower wall against a light bathroom
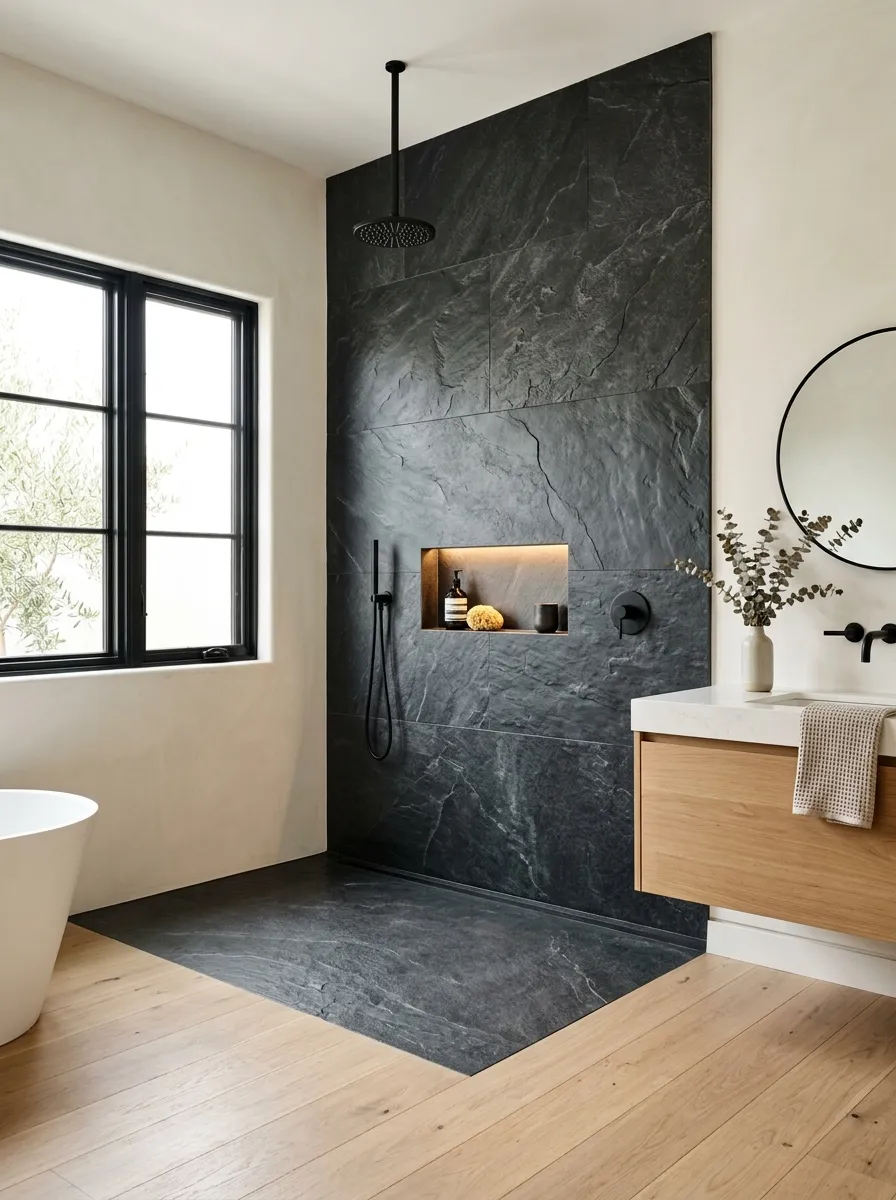
Contrast can define a doorless shower better than any decorative accessory.
A charcoal, deep brown, dark green, or black shower wall creates a visual destination. The rest of the bathroom can stay warm white or pale beige.
This works particularly well when the shower wall is behind a rain shower or built-in niche. The dark surface makes those details easier to see.
Don’t darken every wall. The contrast works because the rest of the room stays lighter.
One dark wall is stronger than a bathroom full of dark surfaces.
Add a linear drain for a cleaner floo
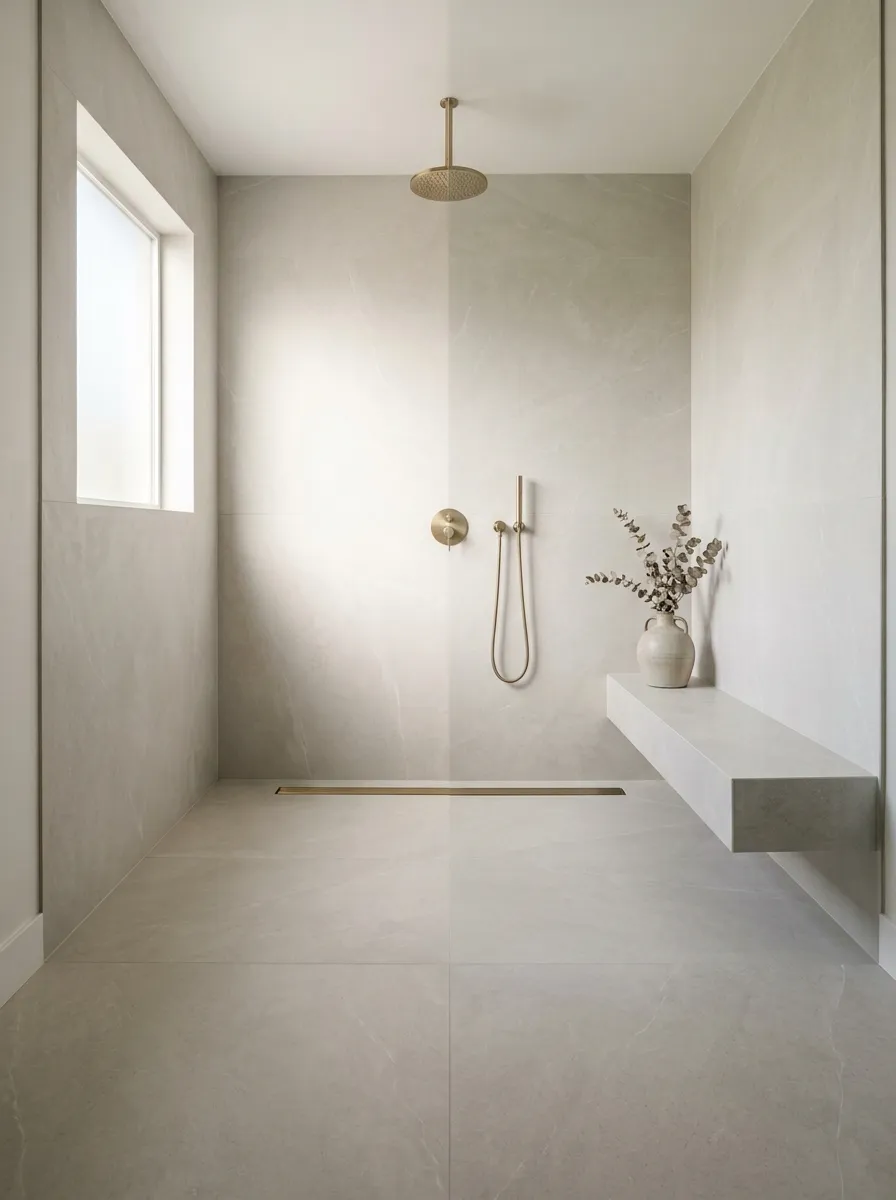
A linear drain gives a doorless shower floor a cleaner visual line.
Instead of a small central drain breaking up the tile pattern, the long drain can sit along an edge or wall, allowing the floor to read more continuously.
The drain still needs proper installation and slope. This isn’t a detail to improvise after choosing the tile.
Visually, though, the payoff is clear. Large-format flooring looks much calmer when the drain doesn’t sit in the middle of the composition.
Let the floor look intentional from the doorway.
Turn the half wall into a practical ledge
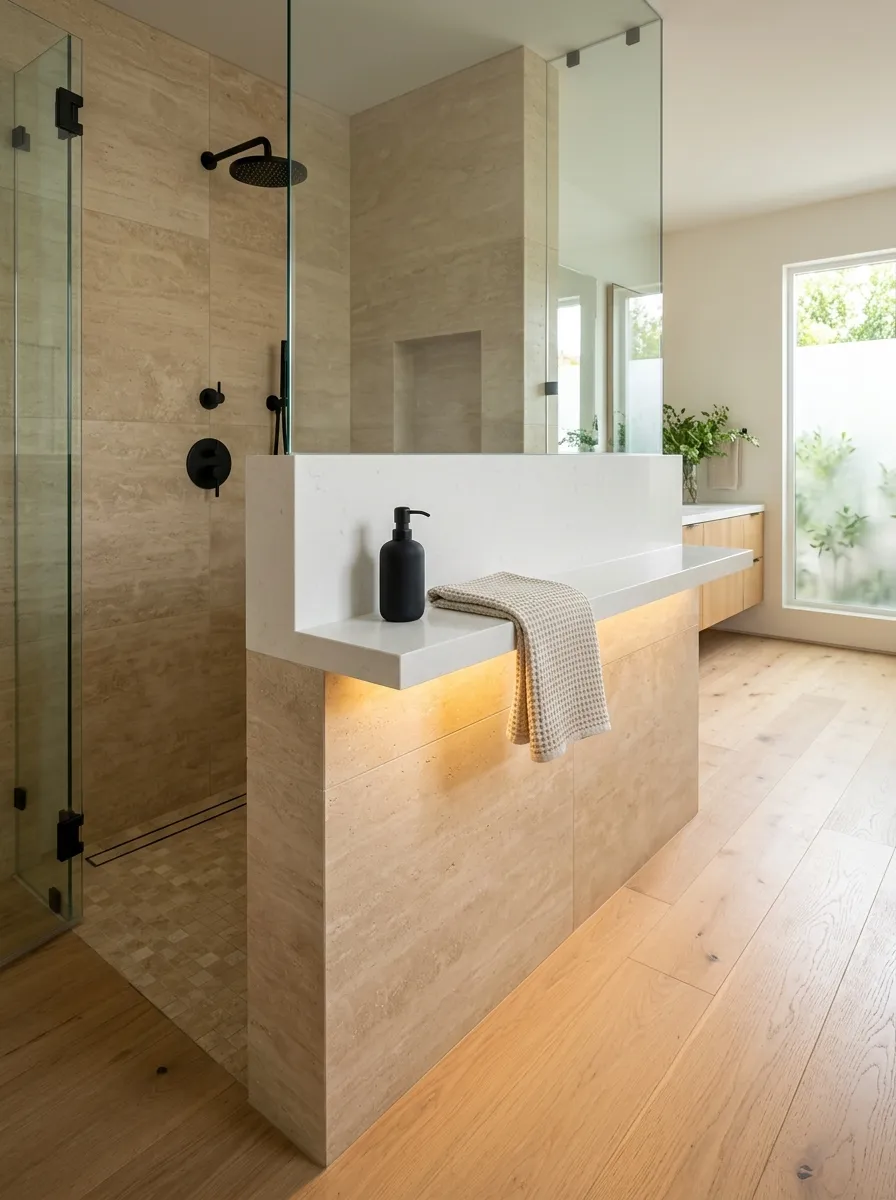
A shower wall can do more than block water.
Cap the wall with a durable, easy-clean surface and use it as a small ledge for carefully chosen items. A simple ledge can hold a soap dispenser, a small plant outside the wet zone, or a folded towel nearby.
Don’t turn it into a storage shelf packed with bottles. That makes the wall look cluttered.
The best ledges have breathing room.
Keep the top almost empty. That’s what makes it look expensive.
Mix vertical fluted tile with smooth stone
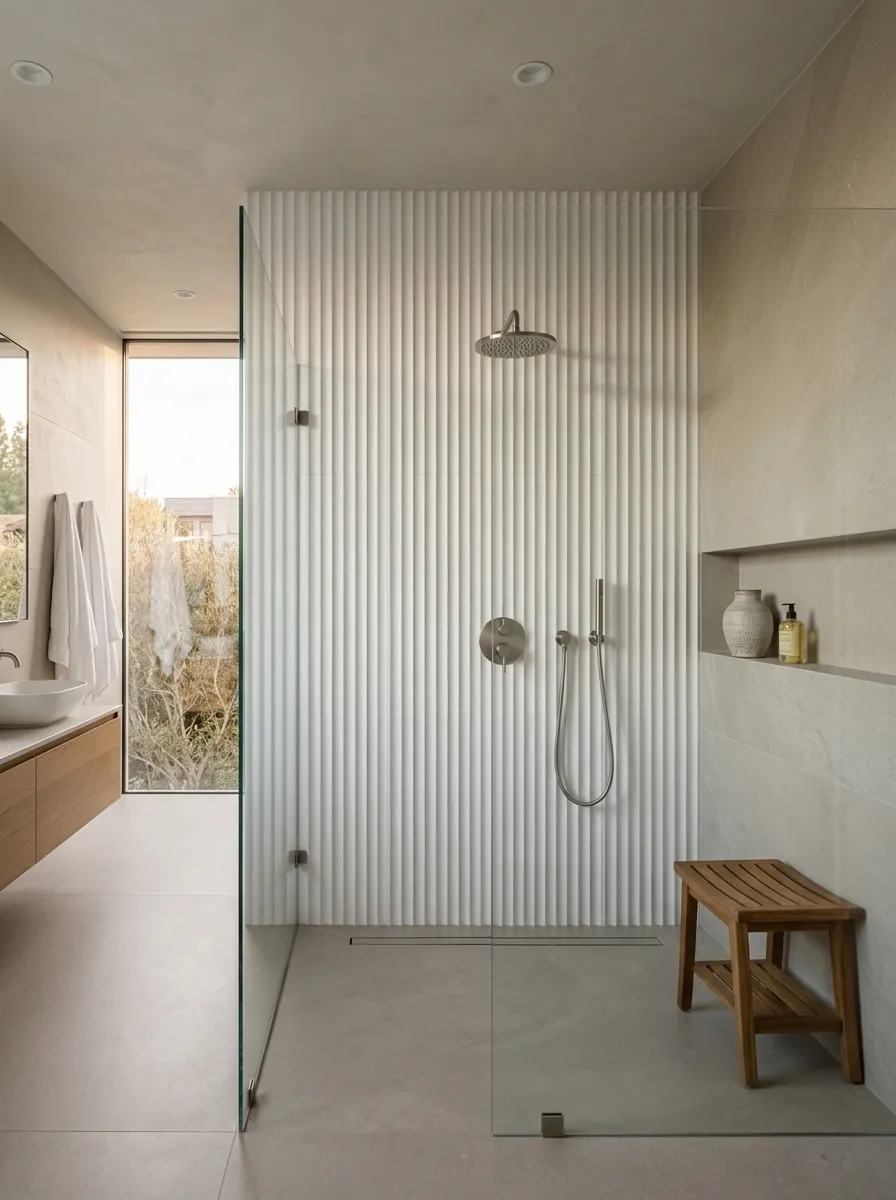
Texture gives a doorless shower depth without requiring more colors.
Use fluted or ribbed tile on the shower feature wall and keep the surrounding surfaces smooth. The light and shadow created by the texture can make the wall feel richer throughout the day.
Don’t use textured tile everywhere. It becomes noisy fast.
Pair the textured wall with simple fixtures and a clean shower floor.
Texture should be something you notice up close, not something shouting across the bathroom.
Use a corner shower layout to hide the openin
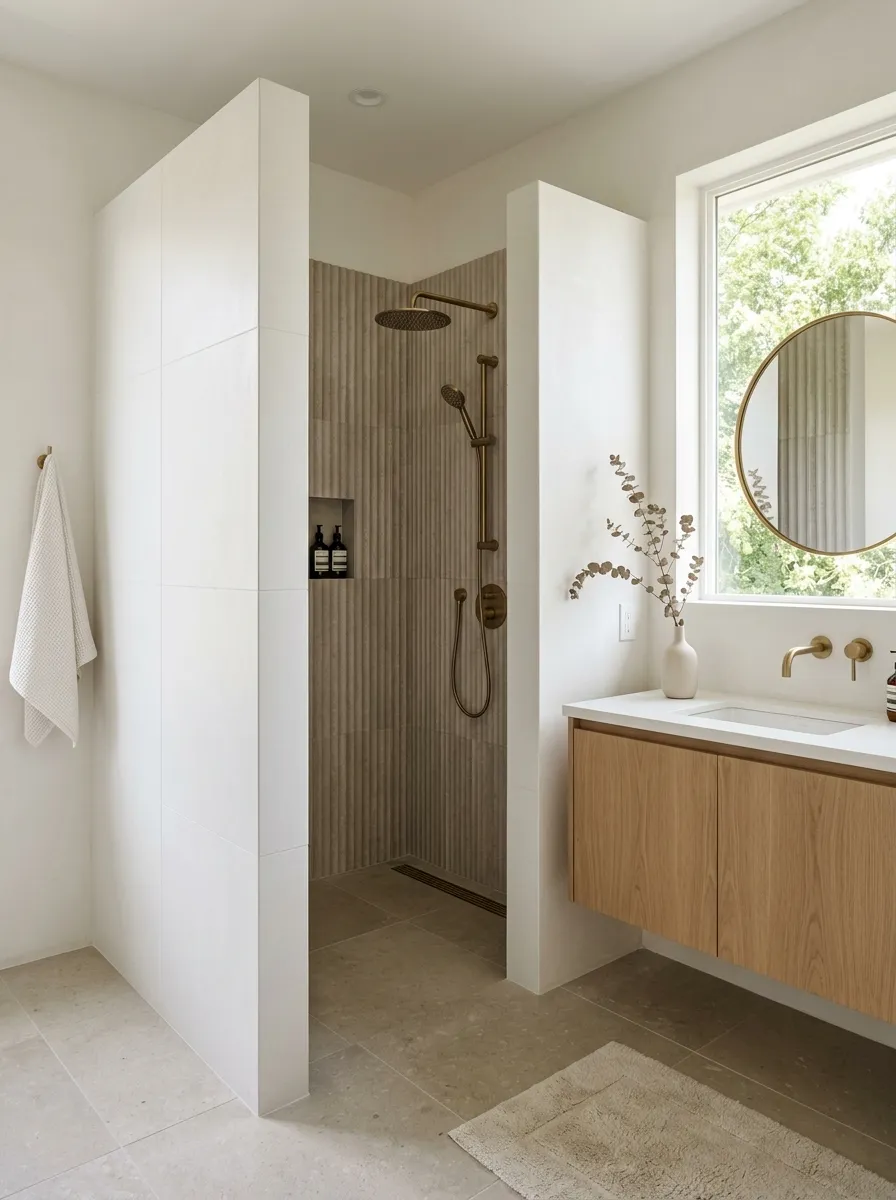
A corner location naturally helps a doorless shower feel more private.
Place the shower in the far corner and use a partial wall to shield the opening from the vanity or toilet. This creates a small visual buffer without needing a door.
It’s particularly useful in bathrooms where the shower is visible immediately from the entrance.
Keep the wall aligned with the room’s geometry. Crooked or awkward angles make the shower look squeezed into leftover space.
The farther the opening is from the bathroom entrance, the more comfortable the layout feels.
Add a ceiling-height tiled wall for a hotel-style look
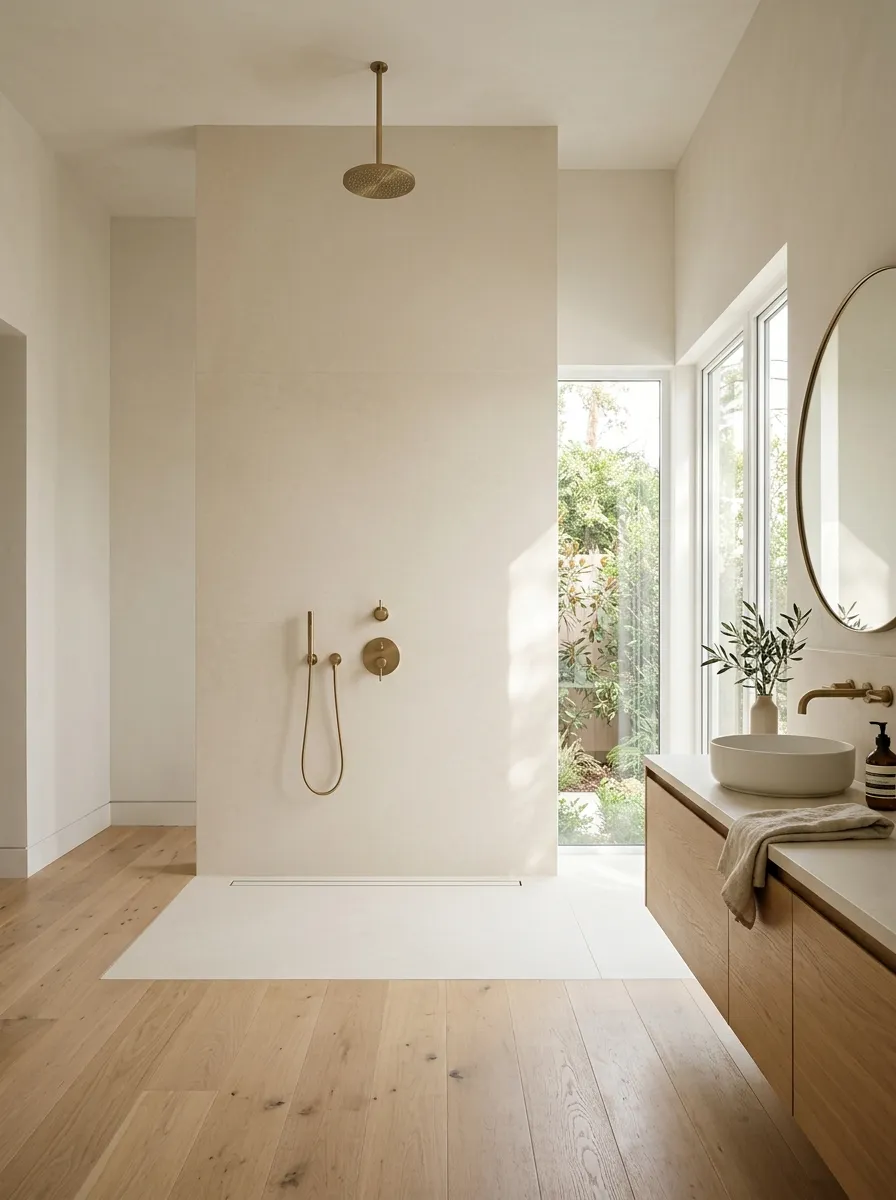
A wall that runs almost to the ceiling gives a doorless shower more presence.
Use one continuous tile field rather than stopping the tile at a random height. This creates a clean vertical plane behind the shower.
Pair it with a simple rain shower and understated fixtures. The room doesn’t need much else.
If the bathroom has a low ceiling, keep the tile light and the grout lines subtle so the wall doesn’t feel heavy.
The trick is continuity, not excess.
Use a slim wall with a built-in niche on the bathroom side
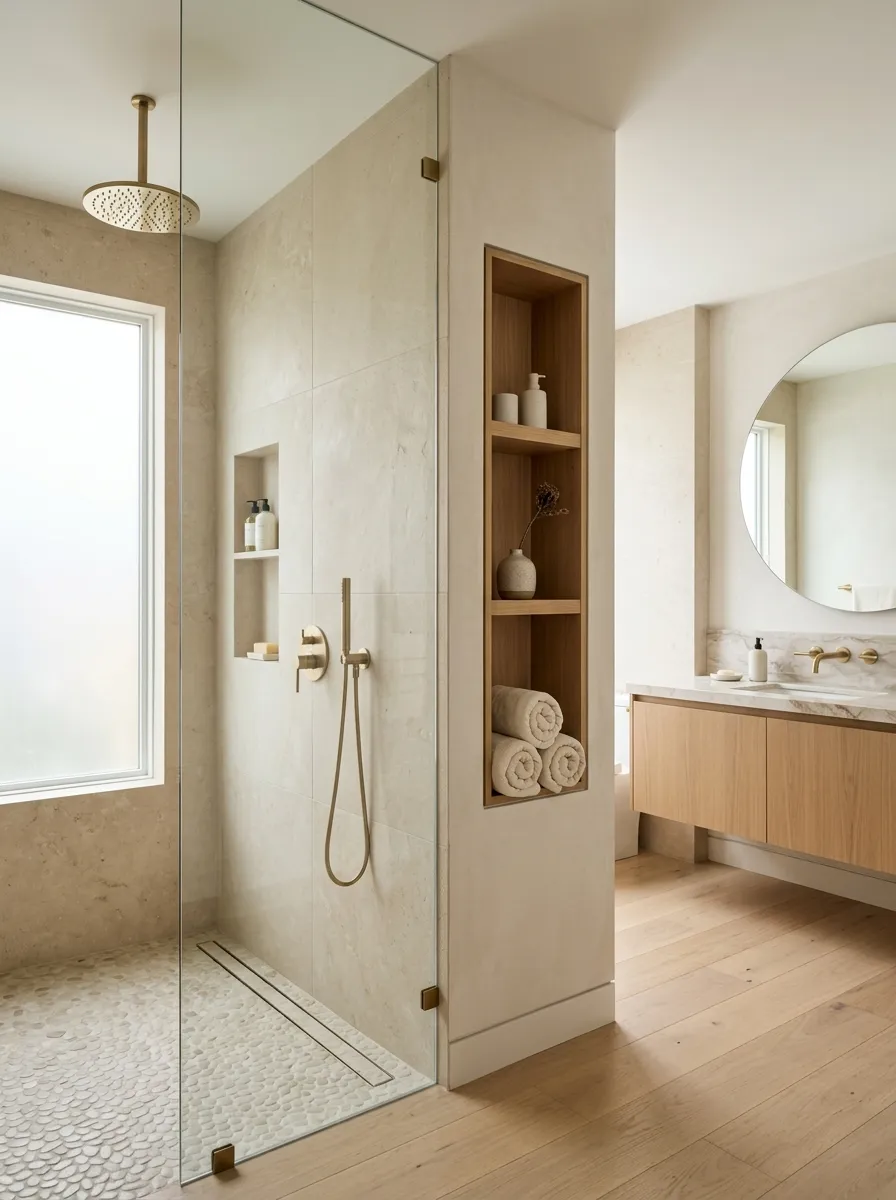
A slim partition can work twice.
The shower-facing side controls water, while the opposite side can hold useful storage. Depending on the bathroom layout, that outside face can become a niche for towels, baskets, or small decor.
This is especially clever in compact bathrooms where every inch has to earn its place.
Keep the partition visually light. A thick wall can make the room feel cramped.
One wall, two jobs. That’s good bathroom planning.
Use a soft green tile for a calm natural shower
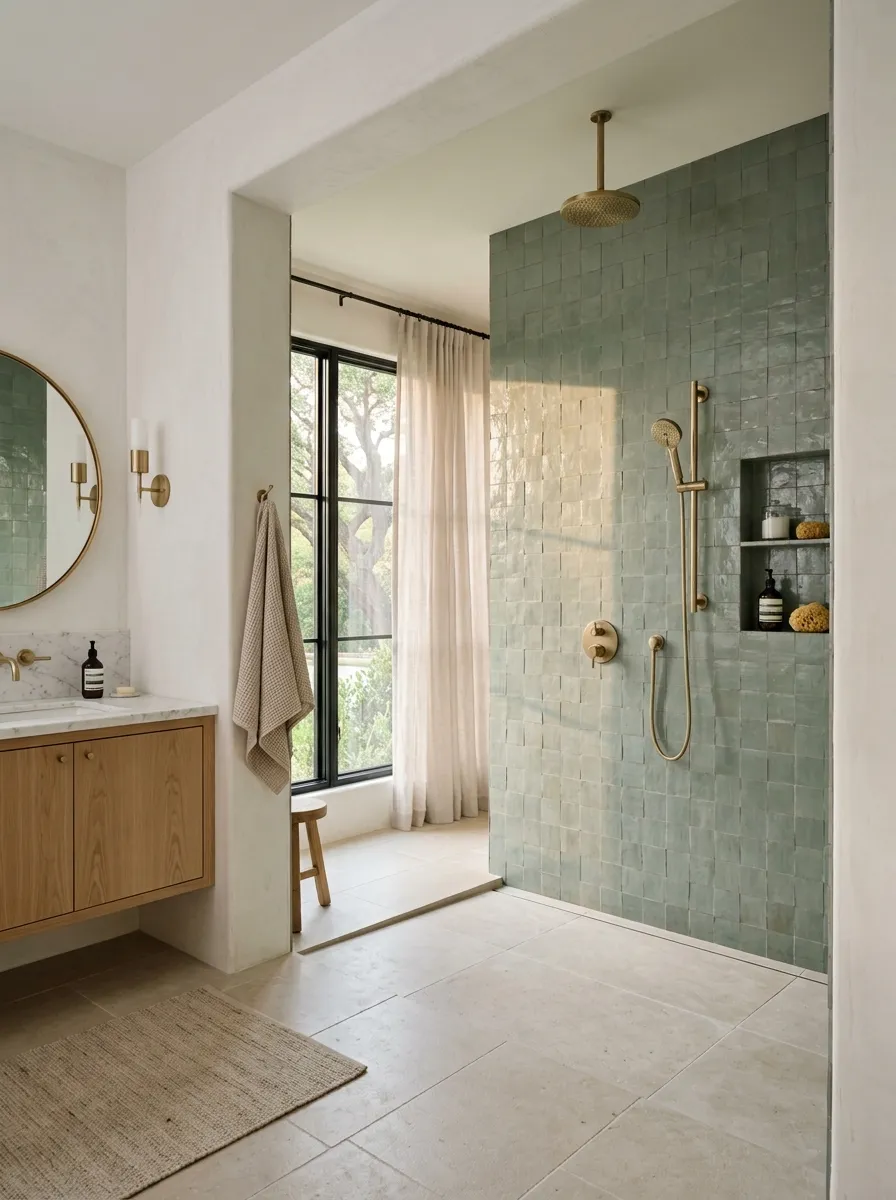
A muted green shower wall gives a doorless bathroom character without making it loud.
Choose dusty sage, olive, eucalyptus, or another softened green rather than a bright saturated shade. Pair it with warm white walls and natural wood outside the shower.
Brushed brass works well here because it adds warmth without making the room look overly decorative.
Keep the floor neutral. The green wall already has a job.
Let the color live on one plane.
Place a vertical niche beside the shower controls
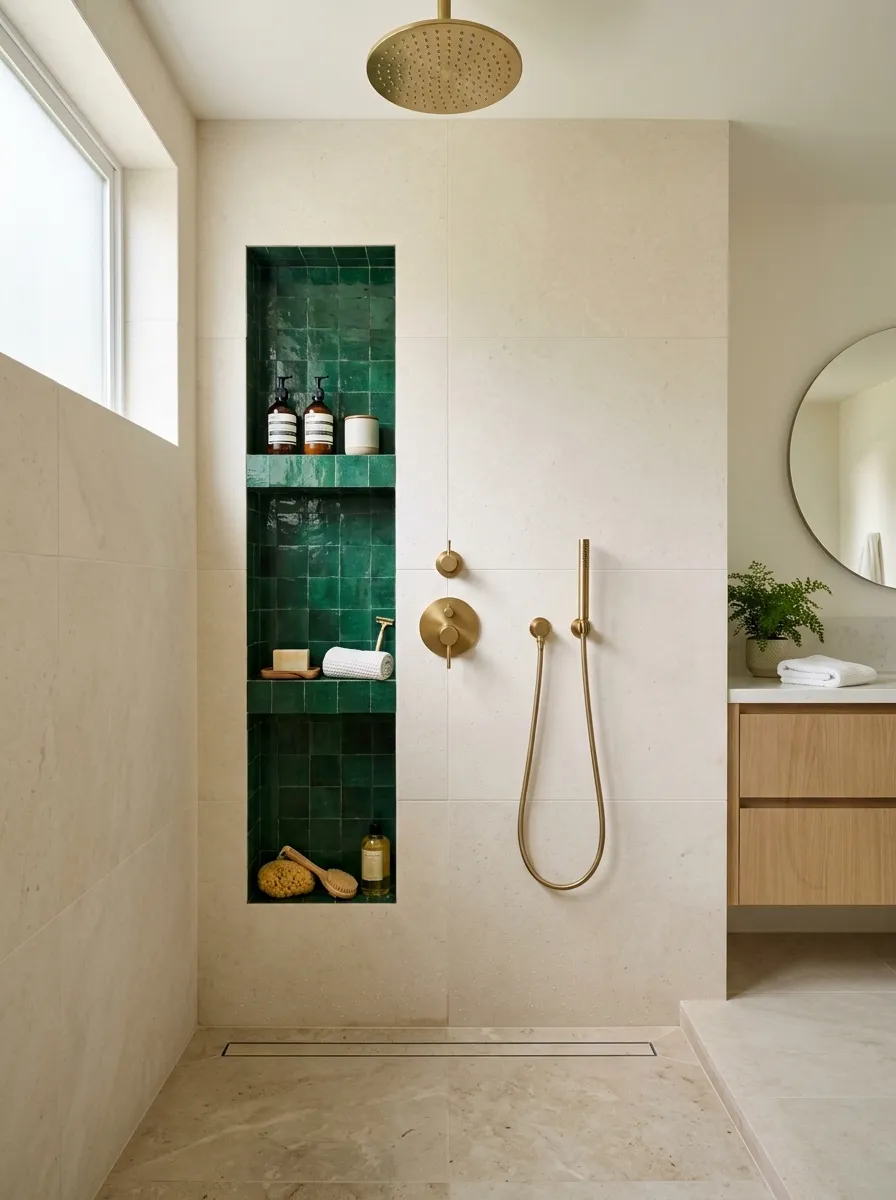
A narrow vertical niche can be more useful than one oversized horizontal opening.
Place it near the controls or another convenient location, depending on the layout, and divide it into two or three simple storage levels.
This gives shampoo, soap, and smaller products their own homes without covering the shower wall with shelves.
Use the niche as part of the wall design. A contrasting back tile can make it a small architectural detail.
Small storage should look built in, not attached later.
Make the wall thick enough to feel architectural
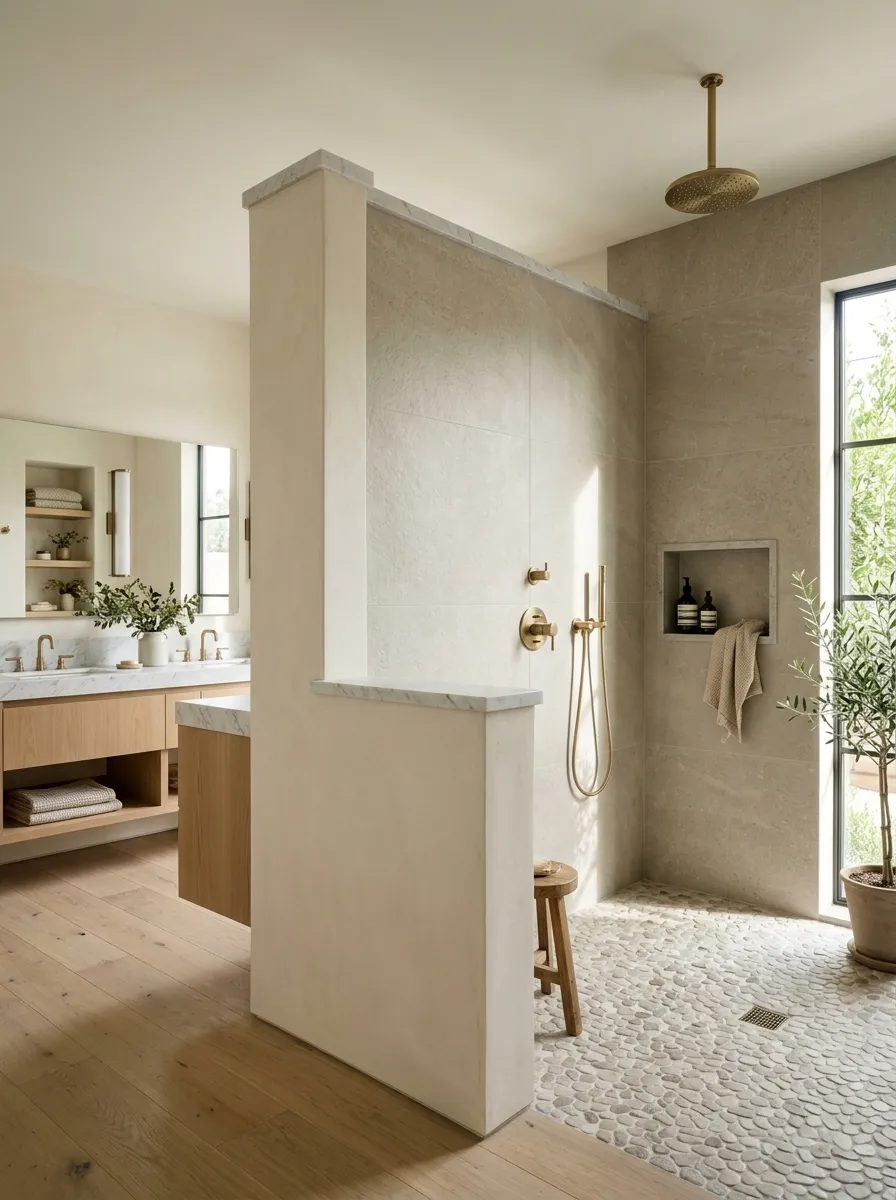
A flimsy-looking partition makes a doorless shower feel like a compromise.
A properly proportioned wall can make the bathroom feel custom-built. Give the wall a substantial visual presence, then cap it with a clean stone or tile surface.
The wall doesn’t have to be enormous. It just needs to look intentional.
This approach works especially well with traditional, Mediterranean, organic modern, and transitional bathrooms.
A wall with weight looks like architecture. A wall that’s too thin looks temporary.
Combine terrazzo-style flooring with a simple shower wall
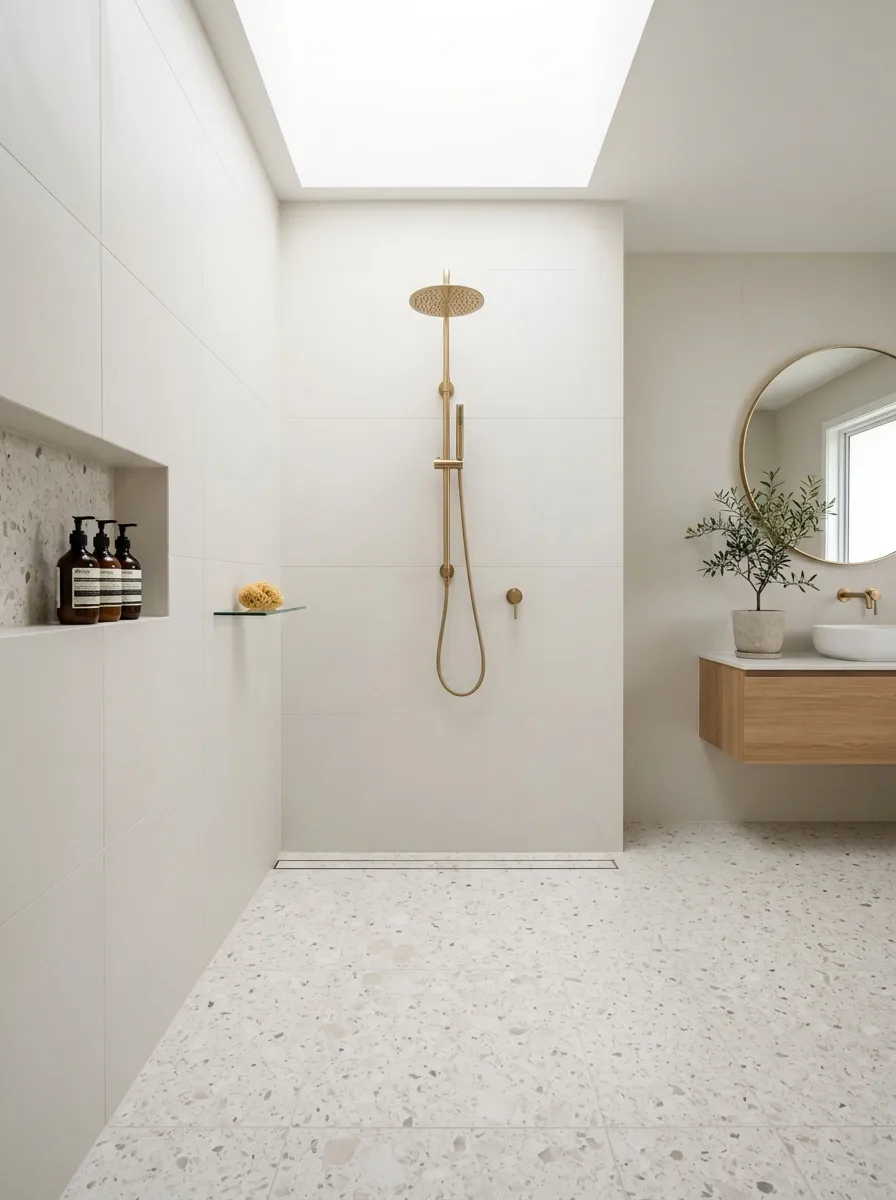
Terrazzo-inspired flooring can bring personality to a doorless shower without making the shower walls busy.
Keep the wall tile simple, preferably in one quiet color. Let the floor provide the pattern.
This works because the eye gets one detailed surface and several calm surfaces around it.
Use the same floor outside the shower if the material and installation are suitable. That creates continuity while letting the shower remain visually open.
Pattern belongs on one surface. That’s the rule.
Pattern or terrazzo look
Quiet, solid surface
Add a wall-mounted handheld shower beside the main fixture
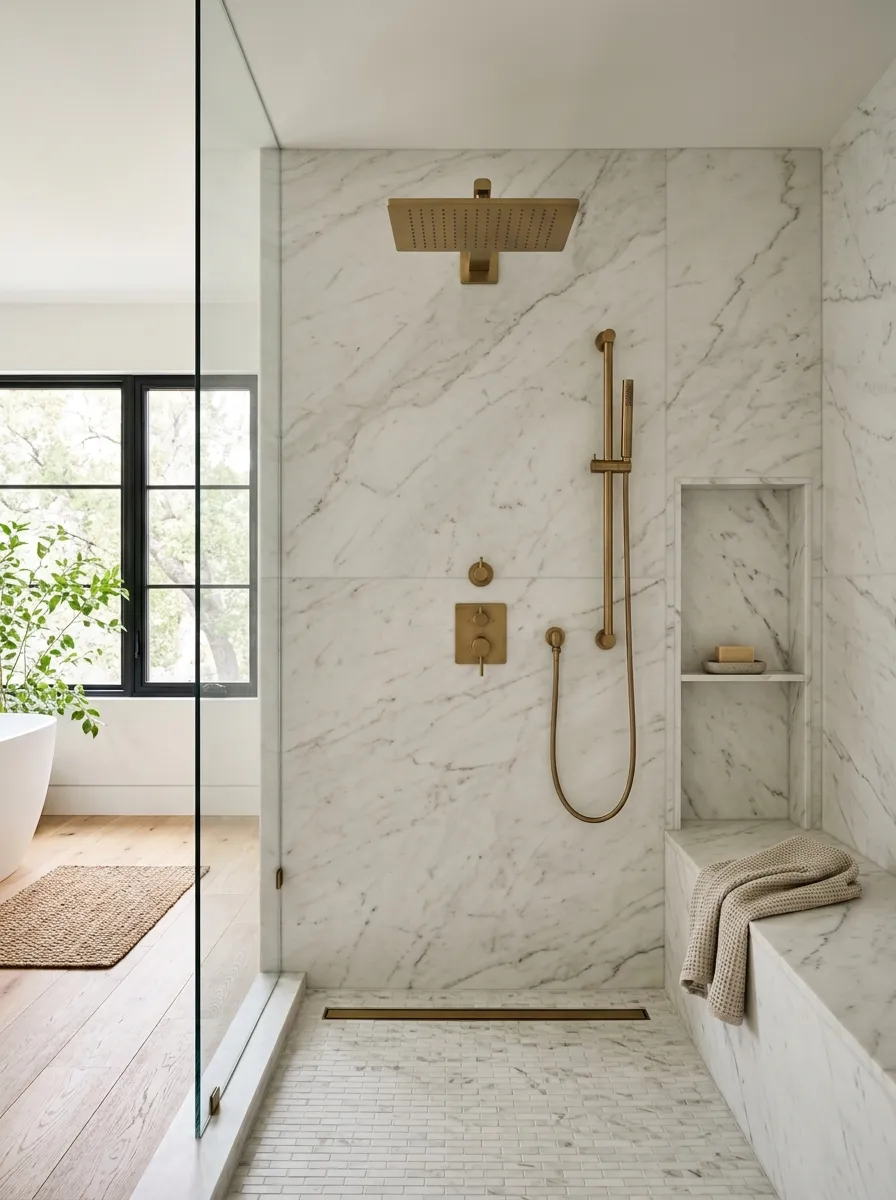
A handheld shower isn’t just a luxury detail. It’s a practical addition to a doorless shower, especially when the shower needs flexible cleaning or rinsing.
Mount it beside the main shower fixture and keep the controls within easy reach.
Choose fixtures that match the main finish. Mixing too many metals can make a simple bathroom look confused.
The wall-mounted setup also keeps hoses and accessories from cluttering the floor.
Two useful fixtures beat a wall full of decorative hardware.
Use a bench wall to create a natural privacy screen
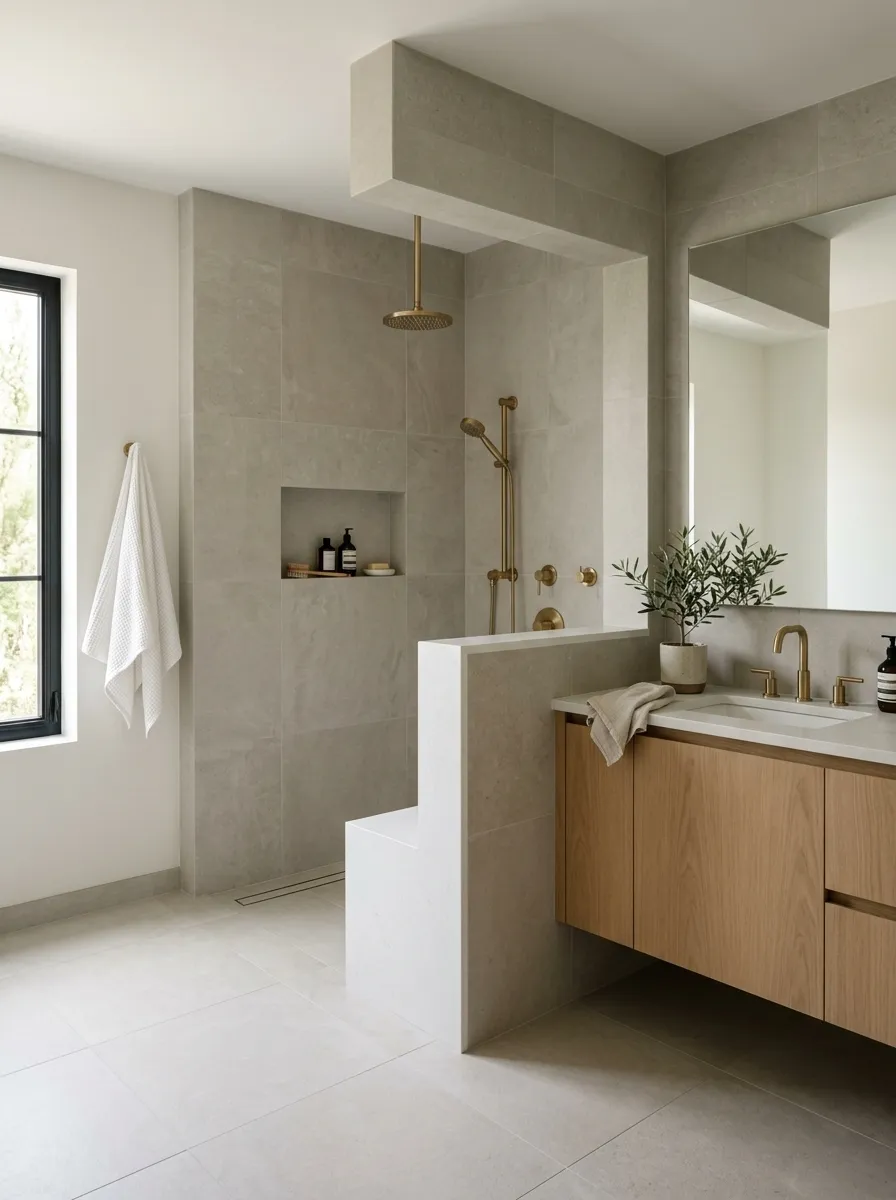
A partial wall doesn’t have to stop at shower height.
Extend it enough to create a comfortable visual screen between the shower and the rest of the bathroom. This is useful when the shower is positioned directly beside a vanity or toilet.
The wall should block the most exposed sightline without closing the shower completely.
Keep the top clean. A simple stone cap is enough.
Privacy comes from placement, not from filling the bathroom with glass.
Match the shower wall to the vanity for a connected look
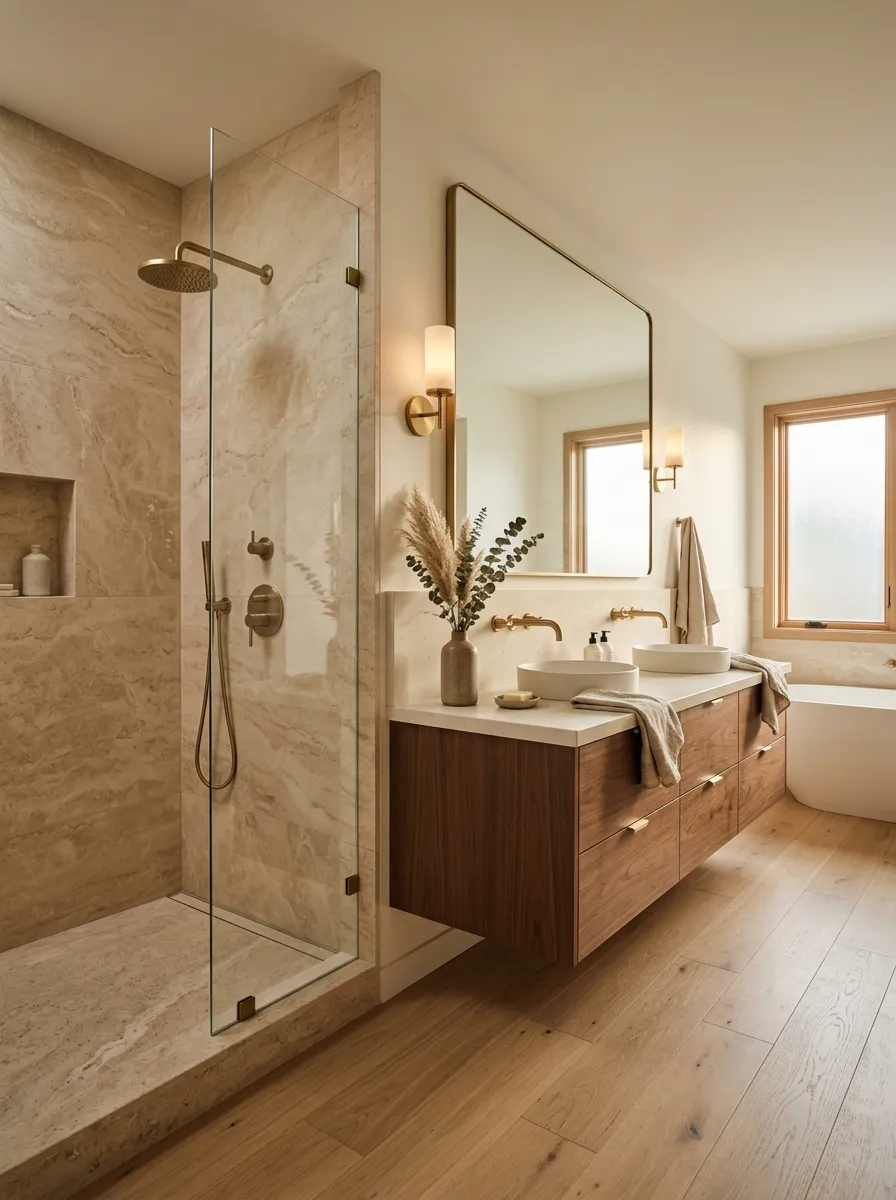
A bathroom looks more expensive when its materials repeat with purpose.
Use the shower wall tile in a softer or related version at the vanity. The materials don’t have to match exactly. They just need to belong to the same color family.
For example, warm beige shower tile can work with a walnut vanity and cream countertop. A gray stone shower can connect with a charcoal vanity.
This prevents the shower from looking like a separate room.
Repeat materials, not patterns.
Keep a narrow bathroom light with pale vertical tile
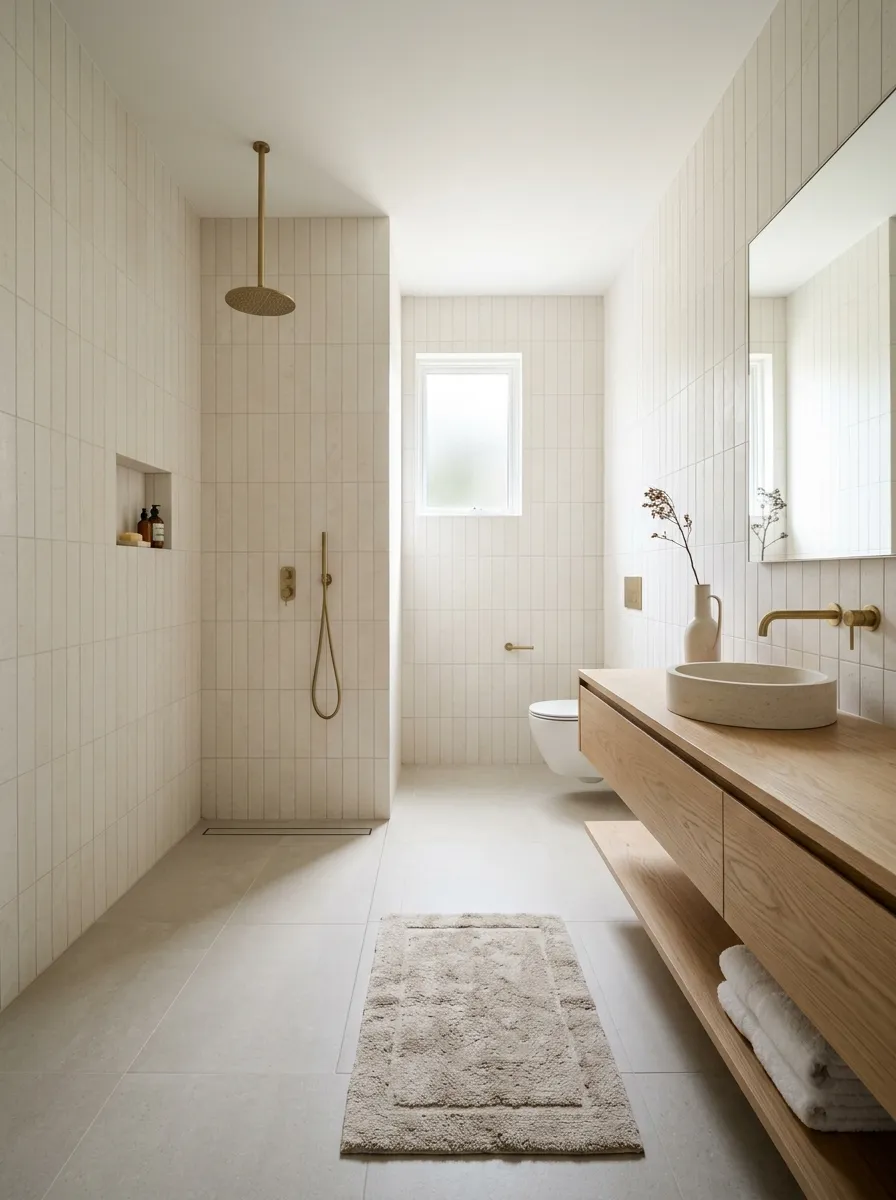
A dark doorless shower can look dramatic, but pale tile is the safer choice when the room is narrow or poorly lit.
Use creamy white, warm ivory, pale greige, or light limestone tones. Run the tile vertically to pull the eye upward.
Then introduce warmth through wood, brass, woven storage, or a soft bath mat outside the wet zone.
Don’t try to make the small bathroom interesting with five different materials. Light tile plus strong proportions already does the job.
Small rooms need clarity more than decoration.
Use a stone-look wall with matte black fixtures
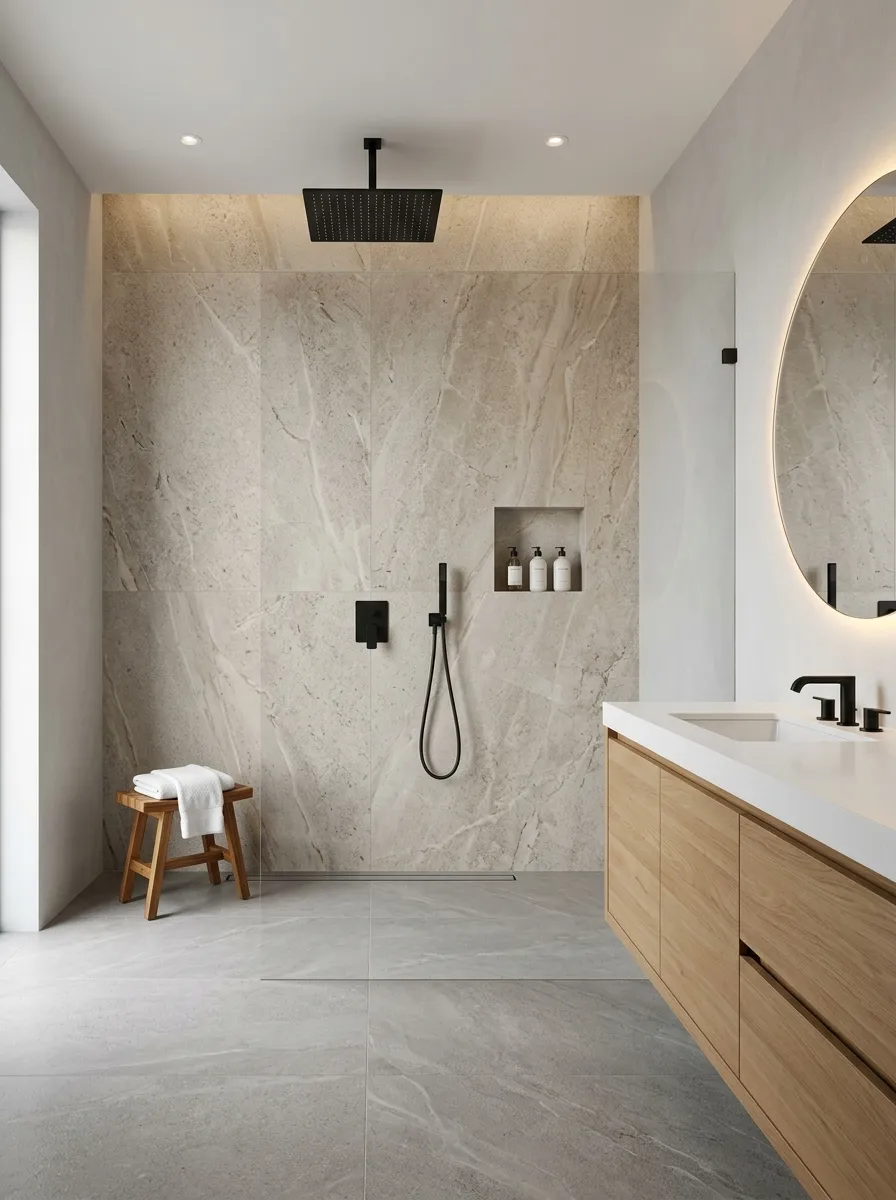
A stone-look shower wall and matte black fixtures create a strong modern combination.
Choose a warm stone with subtle movement rather than a heavily patterned surface. The black hardware then becomes a clean graphic detail against it.
Keep the vanity simple. Flat-front wood or warm white cabinetry works better than another dramatic finish.
This combination is especially effective when the shower wall extends above the normal eye line.
Stone supplies texture. Black supplies structure. Stop there.
Add a small skylight or high window for natural light
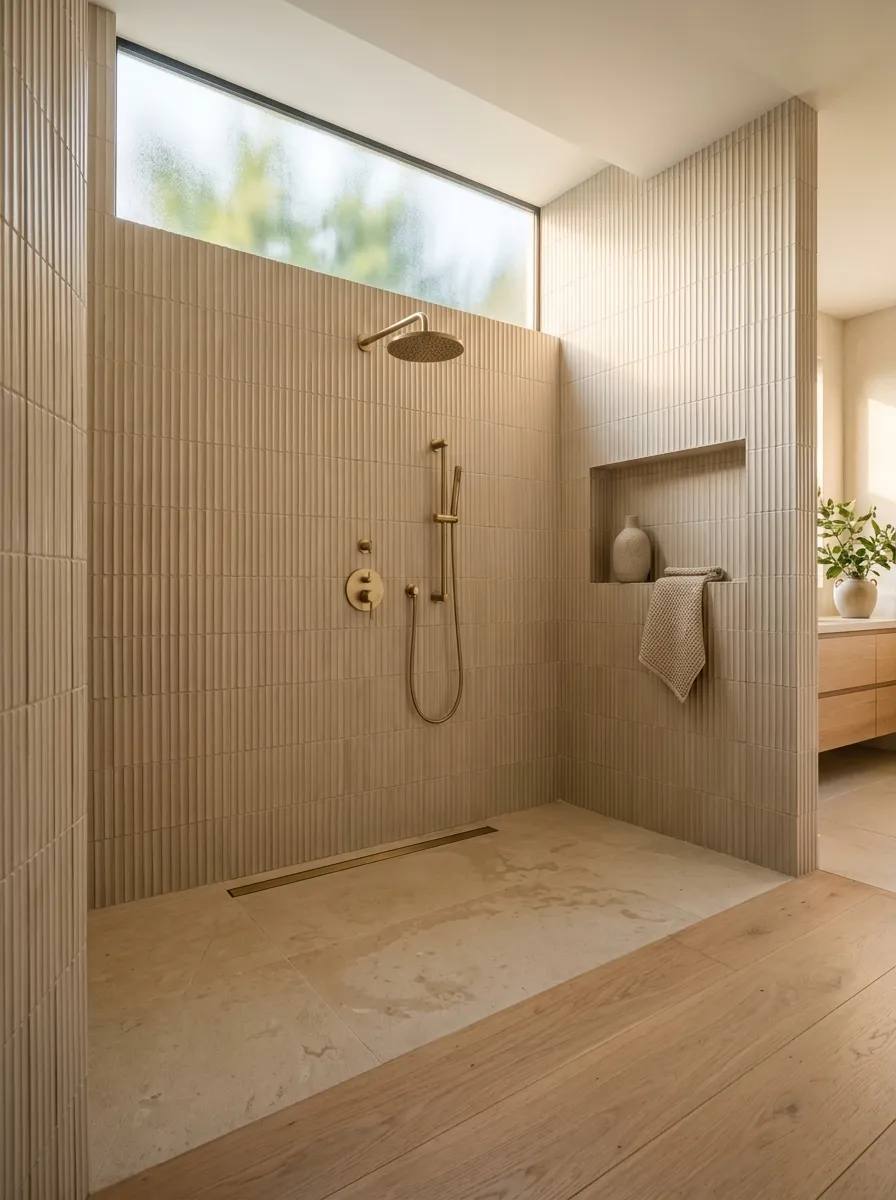
Natural light changes a doorless shower dramatically.
A high window or skylight can bring daylight into the wet zone without exposing the shower at eye level. Use privacy glass or another suitable glazing treatment where needed.
Keep the window placement high enough that the shower still feels private.
Natural light also makes tile texture easier to see. A fluted wall, handmade tile, or soft stone surface gets much more depth when daylight moves across it.
Light is a design material. Treat it that way.
Use a curved wall when the bathroom needs softer lines
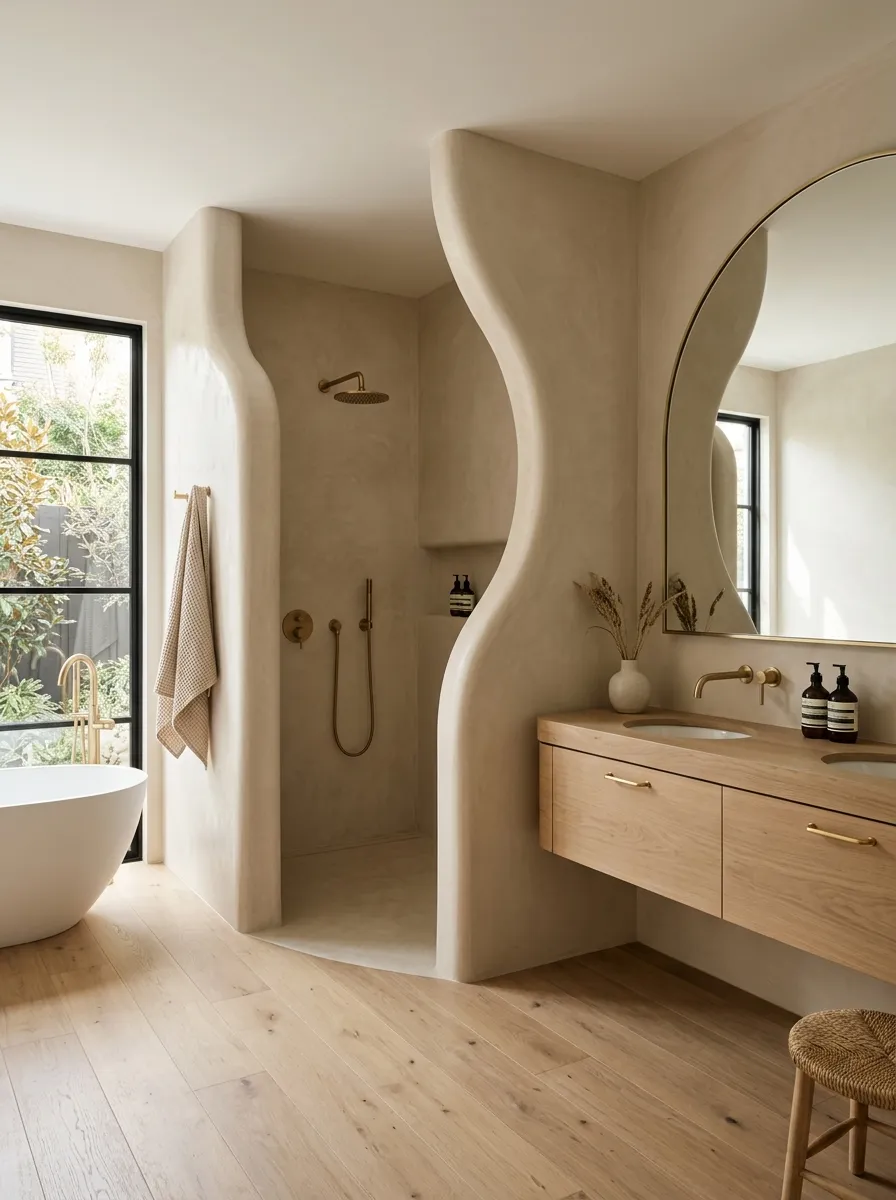
Straight walls aren’t the only option.
A curved or gently rounded shower partition can soften a modern bathroom and create a more natural transition into the shower. It also changes the sightline, which can help the shower feel more private.
Keep the rest of the room simple so the curve has room to stand out.
This works best when the curve repeats another rounded detail, such as an arched mirror or curved vanity.
Repeat the shape once. That’s enough to make it feel intentional.
Finish the shower with one oversized slab-look surface
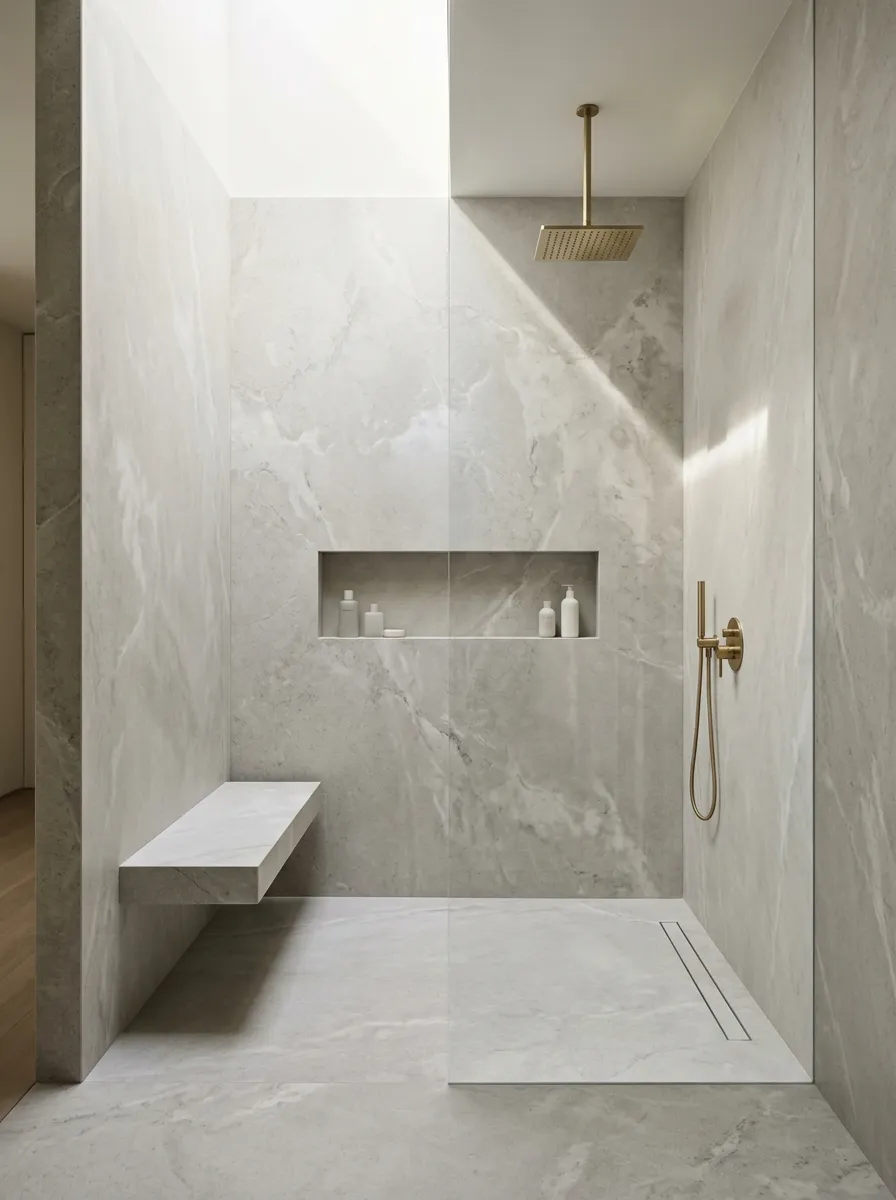
Large slab-look panels can give a doorless shower a quiet, high-end appearance.
The fewer visible joints, the calmer the wall feels. Choose a stone pattern with subtle movement instead of a loud print.
Use the same surface inside the niche or behind the bench to make the details feel integrated.
This approach is especially strong in modern bathrooms where the goal is clean architecture rather than decorative tile work.
Big surfaces need fewer accessories. Let the material breathe.
Finish the room with warm lighting instead of extra decor
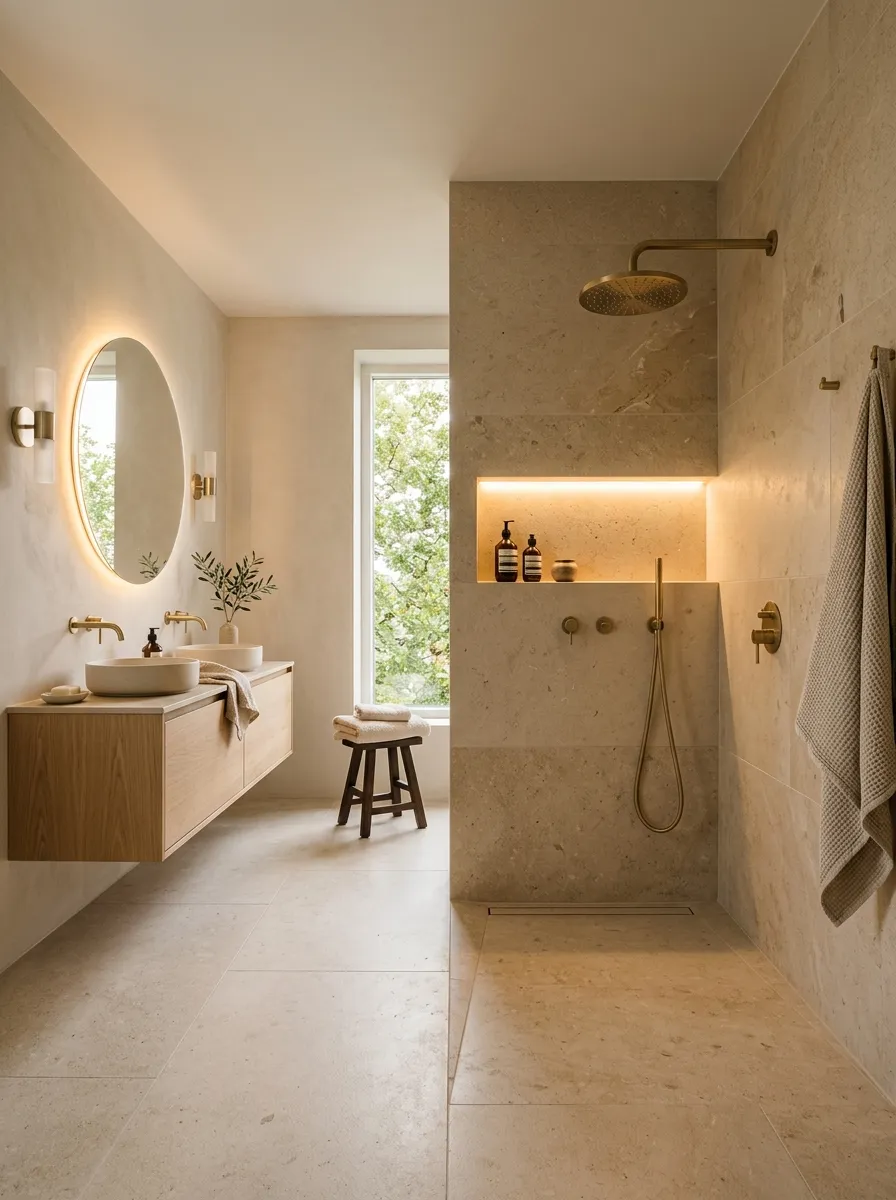
The last mistake is adding accessories because the shower still feels unfinished.
Fix the lighting instead.
Use layered bathroom lighting so the shower has useful task light and the rest of the room has softer ambient light. Warm lighting can make beige, stone, wood, and brass finishes look richer.
Keep fixtures simple. A clean wall, good tile, and well-placed lighting will always beat a shower packed with decorative objects.
If the shower still feels plain after the tile is installed, check the lighting before buying anything else.
How to Choose the Right Doorless Shower Design
The best layout isn’t the one with the most dramatic tile. It’s the one that fits the bathroom’s shape, controls water, and still looks good when nobody has cleaned the room in two days.
Start with the shower’s position and spray direction. Then decide how much privacy the room needs. After that, choose the wall material, floor, storage, and fixtures.
For a small bathroom, prioritize visual continuity. For a large bathroom, use the shower wall as an architectural feature.
Don’t force a trendy layout into a room that can’t support it. A simple half wall with excellent proportions will beat a complicated enclosure every time.
All in All
A walk-in shower with wall no door works best when the architecture does the work that glass normally would. The wall controls the spray, the floor guides water, the opening stays comfortable, and the materials give the shower a clear identity.
You don’t need ten different tile patterns or a bathroom full of accessories. One strong wall, smart fixture placement, built-in storage, and good lighting are enough to make the shower feel finished.
Choose the idea that fits your room first, then build the details around it. Save this list on Pinterest so you can come back to the layouts, tile combinations, and wall ideas when you’re ready to plan your bathroom.