
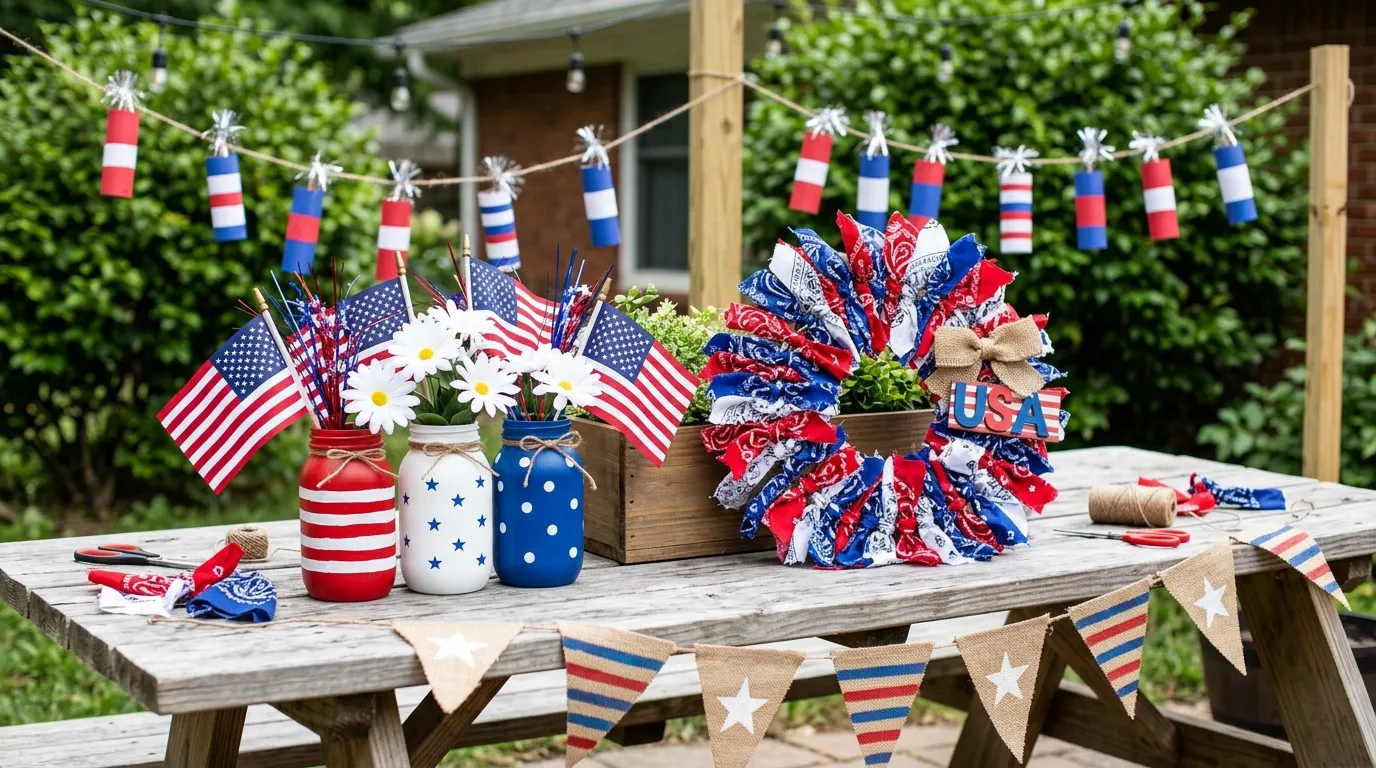
Everyone pins the gorgeous party photos. Nobody reads past the first step of the tutorial. Then July arrives and they’re standing in Party City at 11am wondering how it came to this.
The decorations in this post are different. Not because they’re simpler — some of them are genuinely involved — but because they use things you already have, materials that cost under ten dollars, and skills that stop well before “I need to take a class for this.” A hot glue gun, some paint, a mason jar. That’s most of the supply list.
The results look like you planned ahead. You didn’t have to.
Why DIY Patriotic Decor Works Better Than Store-Bought
There’s a version of this argument that’s pure craft propaganda, and that’s not what this is. Store-bought patriotic decor is often perfectly fine. There are exactly two reasons to make your own instead.
Scale and Fit
Store-bought decorations come in the sizes they come in. Your porch railing is your porch railing’s length. Your dining table is your dining table’s length. The flag runner that looks gorgeous in a stock photo may be eighteen inches shorter than your actual table.
When you make it, it fits. The pallet flag leans against your actual wall at your actual height. The rock border follows the actual curve of your actual flower bed. No measuring twice and hoping.
Character
There is a quality that purchased decor almost never has and homemade decor almost always does, when done with actual intent rather than rushed obligation. That quality is the visible evidence of decision-making. The slightly imperfect star stencil on the painted pot. The way the crepe paper petals don’t quite match because you chose different shades. The pallet wood grain showing through the red stripes.
Imperfection, when it’s the result of actual making, reads as character. It’s the difference between a decoration that looks like it came from a mold and one that looks like a person made it.
That said: none of this requires being a crafty person. It requires being a person with an afternoon.
The Materials That Appear Over and Over
Before any specific project, understanding the supply logic of patriotic DIY saves time and money.
Acrylic Craft Paint Is the Foundation
Every painted project in this collection uses standard acrylic craft paint. Not specialty paint, not chalk paint branded at triple the price, not oil paint. The small two-ounce bottles from any craft store in navy blue, red, and white. They cost about two dollars each, they’re waterproof when dry on most surfaces, and they work on wood, terra cotta, glass, metal, and coir.
Buy three bottles. One of each. That’s six dollars of supplies that covers half the projects in this post.
Crepe Paper Outperforms Every Other Paper for Flowers
Tissue paper flowers are the ones that look like tissue paper flowers. Crepe paper — the streamer roll kind, not the flat kind — has natural stretch in the grain direction that allows it to cup, curl, and shape the way real petals do. The difference in finished quality is significant and the price difference is about fifty cents per roll.
For red, white, and blue paper flower projects, buy one roll of each color. That’s it.
Jute Twine, Baker’s Twine, and Ribbon Are Interchangeable
Most of these projects call for something tied, wrapped, or looped. The specific material matters less than having one. Jute twine reads as rustic and farmhouse. Red-and-white baker’s twine reads as cheerful and vintage. Satin ribbon reads as formal. Burlap ribbon reads as farmhouse. Pick the aesthetic that fits your home and use that material consistently across multiple projects.
Consistency across projects makes a space feel designed rather than assembled from separate ideas.
What Every Good DIY Project Has in Common
The projects that photograph well and hold up through an actual party all share three qualities worth understanding before you start any of them.
A Clean Base
The most important step in any painting project is the prep. Wipe the pot down. Sand the pallet. Clean the bottle. Remove the label. A painted surface over a dirty or oily one peels, chips, and looks wrong in ways that are obvious to anyone who sees it.
Two minutes of prep changes the finished quality of every painted project on this list.
A Stencil for Stars
Stars are the element that separates the patriotic DIY projects that look intentional from the ones that look like a kid’s art project. Freehand stars almost always look bad. A star stencil — the kind with a grid of stars cut into a sheet of mylar or cardboard — costs three dollars and produces clean, consistent results on any surface.
Buy the stencil. Use a foam pouncer rather than a brush — it prevents paint from bleeding under the stencil edge. Use less paint than you think you need on the first pass. Add a second pass if needed.
Don’t Seal Until Dry
Every painted project that goes outside or gets handled needs a coat of clear sealer once the paint is completely dry. Not slightly dry. Completely dry. Clear matte or satin spray sealer works on wood, terra cotta, metal, and glass. It takes the craft paint from “looks homemade” to “looks finished.”
DIY 4th of July Decoration Ideas
The Hanging Porch Spinner Garland
This is the first thing guests see when they arrive and the last thing they remember. The motion of these spinners in any light breeze is constantly catching attention.
Buy or cut star-print paper plates in half to create saucer-cap shapes, or purchase pre-made star-print pinwheel caps from a party supply store. To each cap, attach a length of red-and-white or red/white/blue metallic spiral whirl — the kind sold at party stores as “whirls” or “swirls” — and a medium blue cardstock star cutout. The star and the spiral hang at different lengths from the same cap, so they catch air and spin independently.
Thread the caps at regular intervals onto a long strand of jute twine. Tie the twine to porch railings, pergola beams, or between fence posts. Six to eight units per ten-foot span is the right density — enough to read as a continuous installation, not so many that they tangle constantly.
Below the spinner garland, set a pot of red geraniums on the porch railing corner. The still flowers below and the moving spinners above play off each other.
The Grapevine Flag Wreath for the Front Door
A plain grapevine wreath becomes something worth noticing through two additions: a flag and a compound bow.
Take a medium or large grapevine wreath. Lay a small fabric American flag — the kind with a wooden flagpole, removed from the stick — across the upper left arc of the wreath so the star canton is visible. Wrap the flag fabric loosely around and through the grapevine as you go, letting the stripes hang down from the lower portion of the wreath rather than folding them behind it. The flag drape should be relaxed, not tight.
Thread artificial ivy vine through the grapevine at the lower arc and right side. Let it trail naturally over the stripes.
At the upper right, build a compound bow using multiple ribbon types layered together: a wide navy ribbon as the base layer, a narrower red-and-white stripe ribbon on top of it, then a very narrow red polka dot ribbon as the top element. The bow should have long tails that drape down alongside the flag stripes. Use a pipe cleaner or floral wire to hold the bow center together before attaching to the wreath.
This wreath works because the flag — the obvious element — is softened by the casual ivy and elevated by the layered bow into something that reads as designed rather than assembled.
The Painted Terracotta Pot With Geraniums
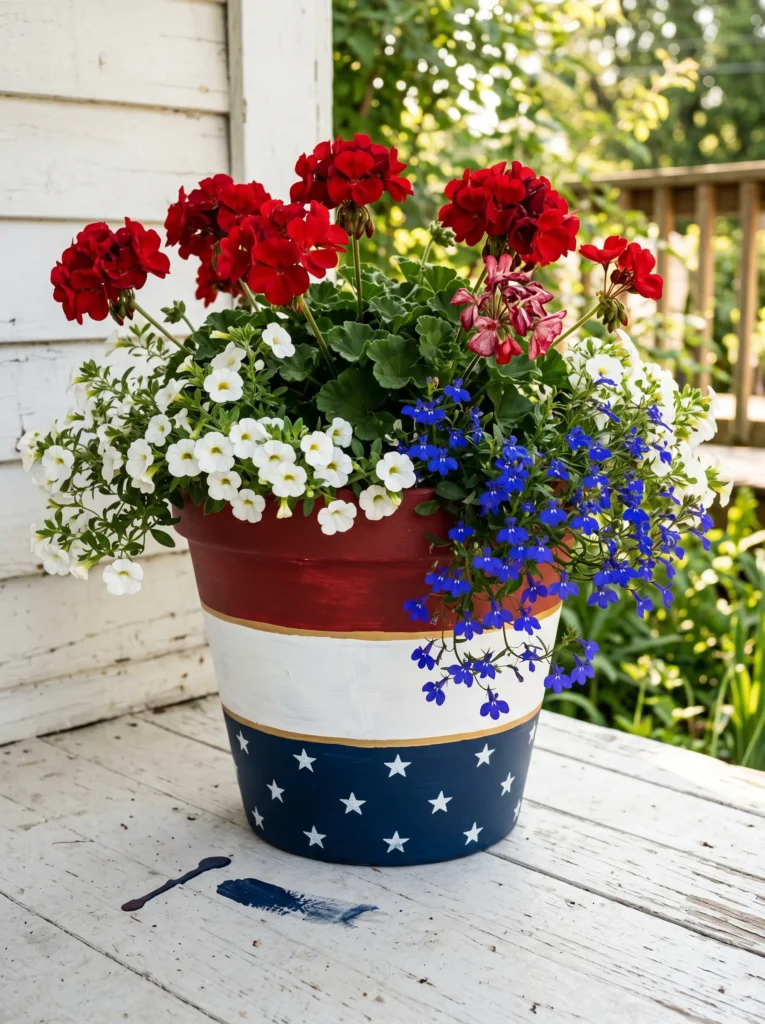
This is the project with the highest ratio of visual impact to time invested on this list. One terracotta pot, three paint colors, a star stencil, and two hours.
Paint the upper third of a standard terracotta pot in deep red. Allow to dry completely. Paint the middle third in white or cream. Allow to dry. Paint the lower third in navy blue. Allow to dry.
If you want a clean edge between sections, use blue painter’s tape as a guide and peel it while the paint is still slightly wet rather than fully dry — this prevents peeling. Once all three sections are dry, lay your star stencil on the navy bottom section and pounce white paint through it. A foam pouncer creates crisp edges; a brush will bleed.
Add a thin gold or cream stripe at each color transition using a fine brush or a paint pen — this detail elevates the project from competent to polished.
Plant the finished pot with red geraniums standing tall at the back, white petunias filling the middle zone, and blue lobelia trailing over the front edge. The flowers mirror the pot’s own three-color arrangement. Set it where sunlight hits it directly — the saturation of the painted colors in direct light is considerable.
The Burlap-Wrapped Galvanized Tub Planter
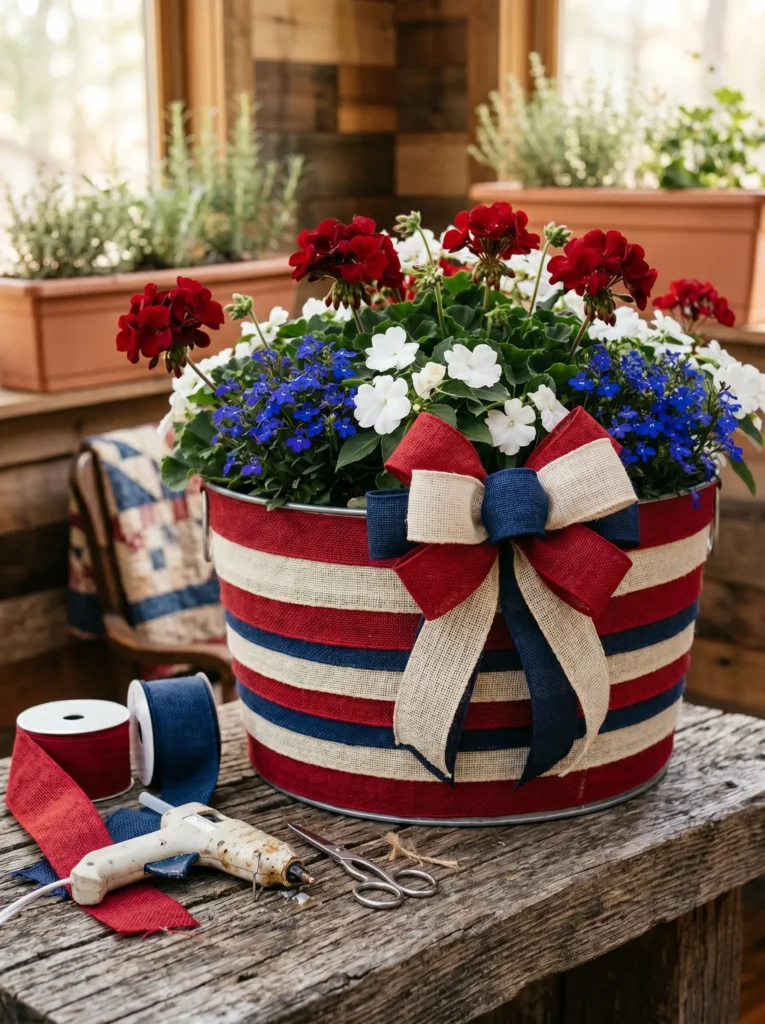
A galvanized wash tub is already a useful and good-looking container. Wrapping it takes it from useful to specific.
Cut lengths of burlap ribbon in three colors: natural/cream, red, and navy. Hot-glue them horizontally around the exterior of the tub in alternating wide stripes, starting from the bottom. Work upward, keeping the lines as parallel as possible. Trim any overlap at the seam where the ends meet in the back — this will be against the wall.
Make a large, full bow from the same three ribbons layered together: natural burlap as the base, red burlap on top, navy burlap as a narrow center accent. Attach the bow to the front of the tub at approximately the two-thirds height point.
Plant the interior with the standard patriotic combination: red geraniums taking the dominant volume at the back, white petunias filling the middle, blue lobelia trailing over the front edge.
The Wooden Popsicle Tiered Tray Ornaments
These are the small-scale details that make a tiered tray, a coffee table vignette, or a kitchen counter display feel complete rather than sparse.
Buy pre-cut wooden popsicle shapes from a craft store — they come in bulk and are inexpensive. Paint them in thirds: red top, white middle, blue bottom. No stencil needed; the hard horizontal division is what makes them read as deliberate. Use a small flat brush and keep the stripes relatively equal in height.
When dry, tie a small ribbon bow around each popsicle stick using thin patriotic ribbon — stars-and-stripes ribbon, red polka dot ribbon, or narrow navy ribbon. The ribbon bow goes at the stick-to-popsicle joint, like a little wrapper.
Set six to eight of them in a galvanized tray, a white bowl, or a small wooden crate as part of a tiered tray vignette. They also make charming package tie-ons or small party favors.
The Barnwood “America the Beautiful” Sign
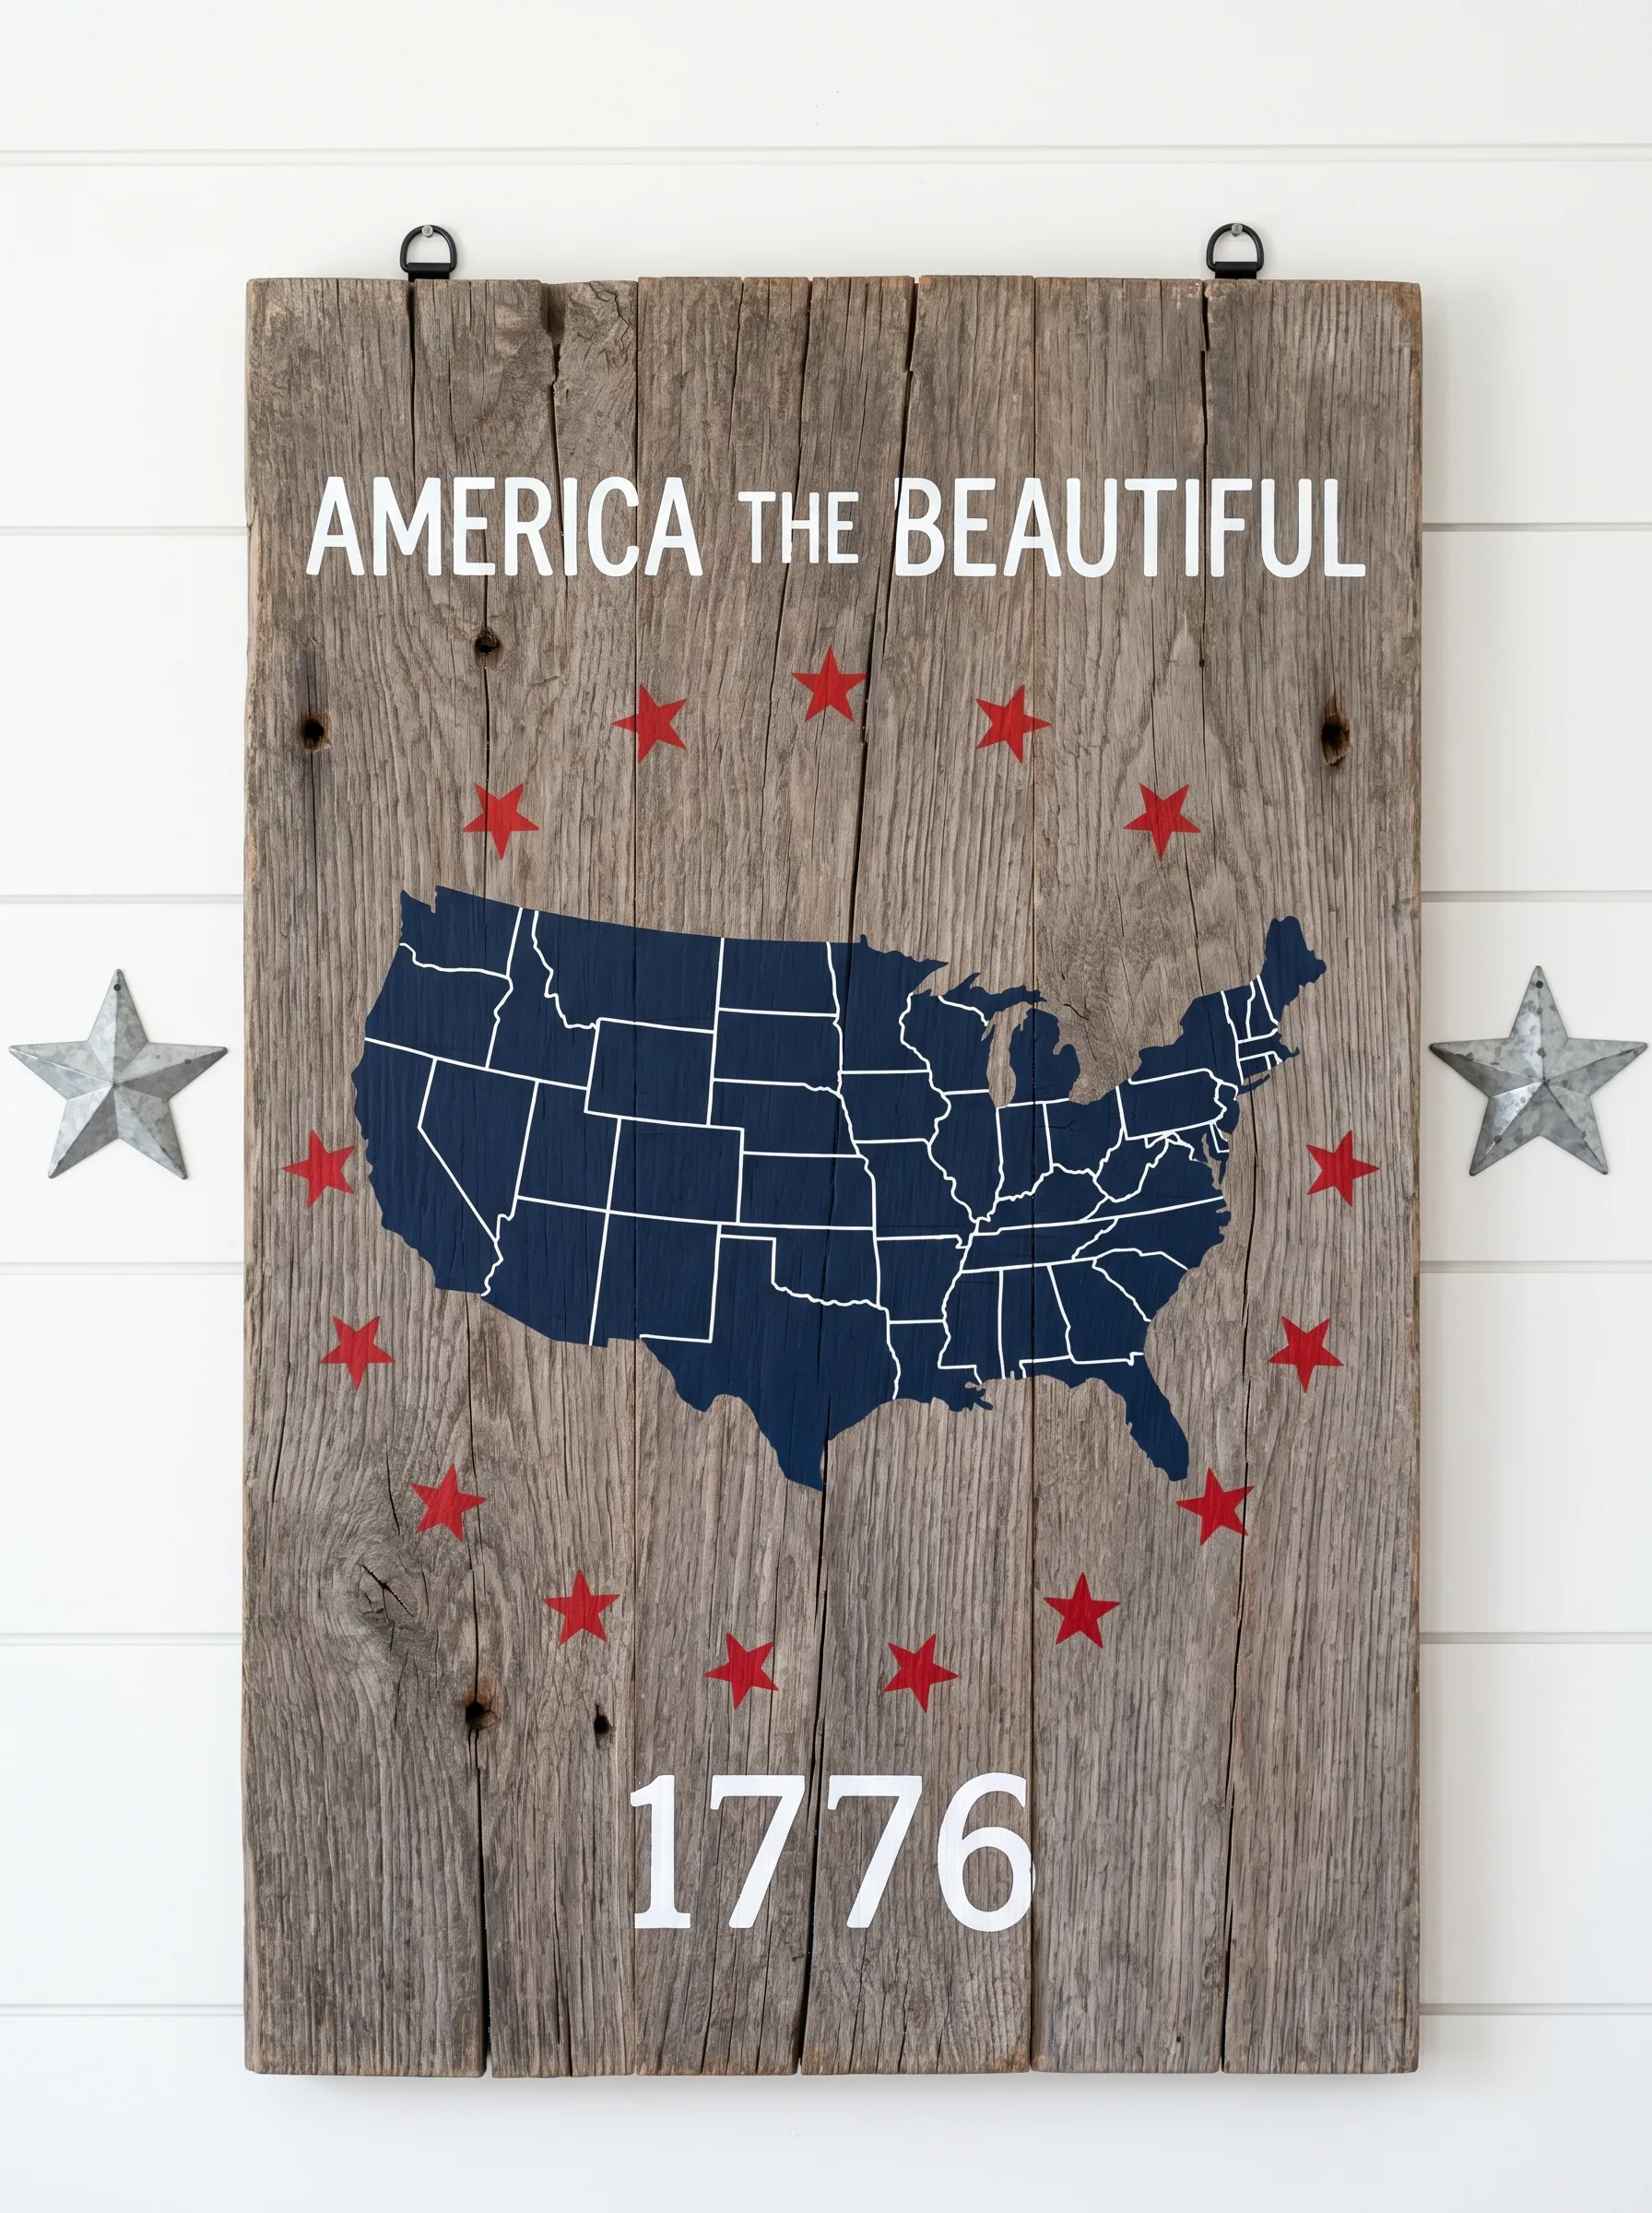
This is the project for someone with access to reclaimed wood and a willingness to commit to two hours of paint work.
Source several rough, weathered barn boards in varying widths and lay them together side by side to form a rectangle approximately 18 by 24 inches. Attach them from behind using two horizontal wooden cleats screwed across the back. Add two D-ring picture-hanging hardware pieces to the top cleats and run wire or rope between them.
Transfer your design to the wood surface using a chalk grid method or project from a laptop with a simple projector or image. The design: “AMERICA THE BEAUTIFUL” in white block letters at the top, a stenciled navy silhouette of the contiguous United States in the center, a ring of red five-pointed stars surrounding the map, and “1776” in large white numerals at the bottom.
Use acrylic craft paint and a fine brush for lettering or a purchased letter stencil. The map silhouette can be printed and traced, or purchased as a stencil. The stars should be stenciled using a star grid stencil.
Hang the finished sign on a shiplap or white painted wall. Flank it with two galvanized metal barn star wall decorations — one on each side, at a slightly lower height than the top of the sign.
The Flag-Print Table Runner With Hurricane Candles
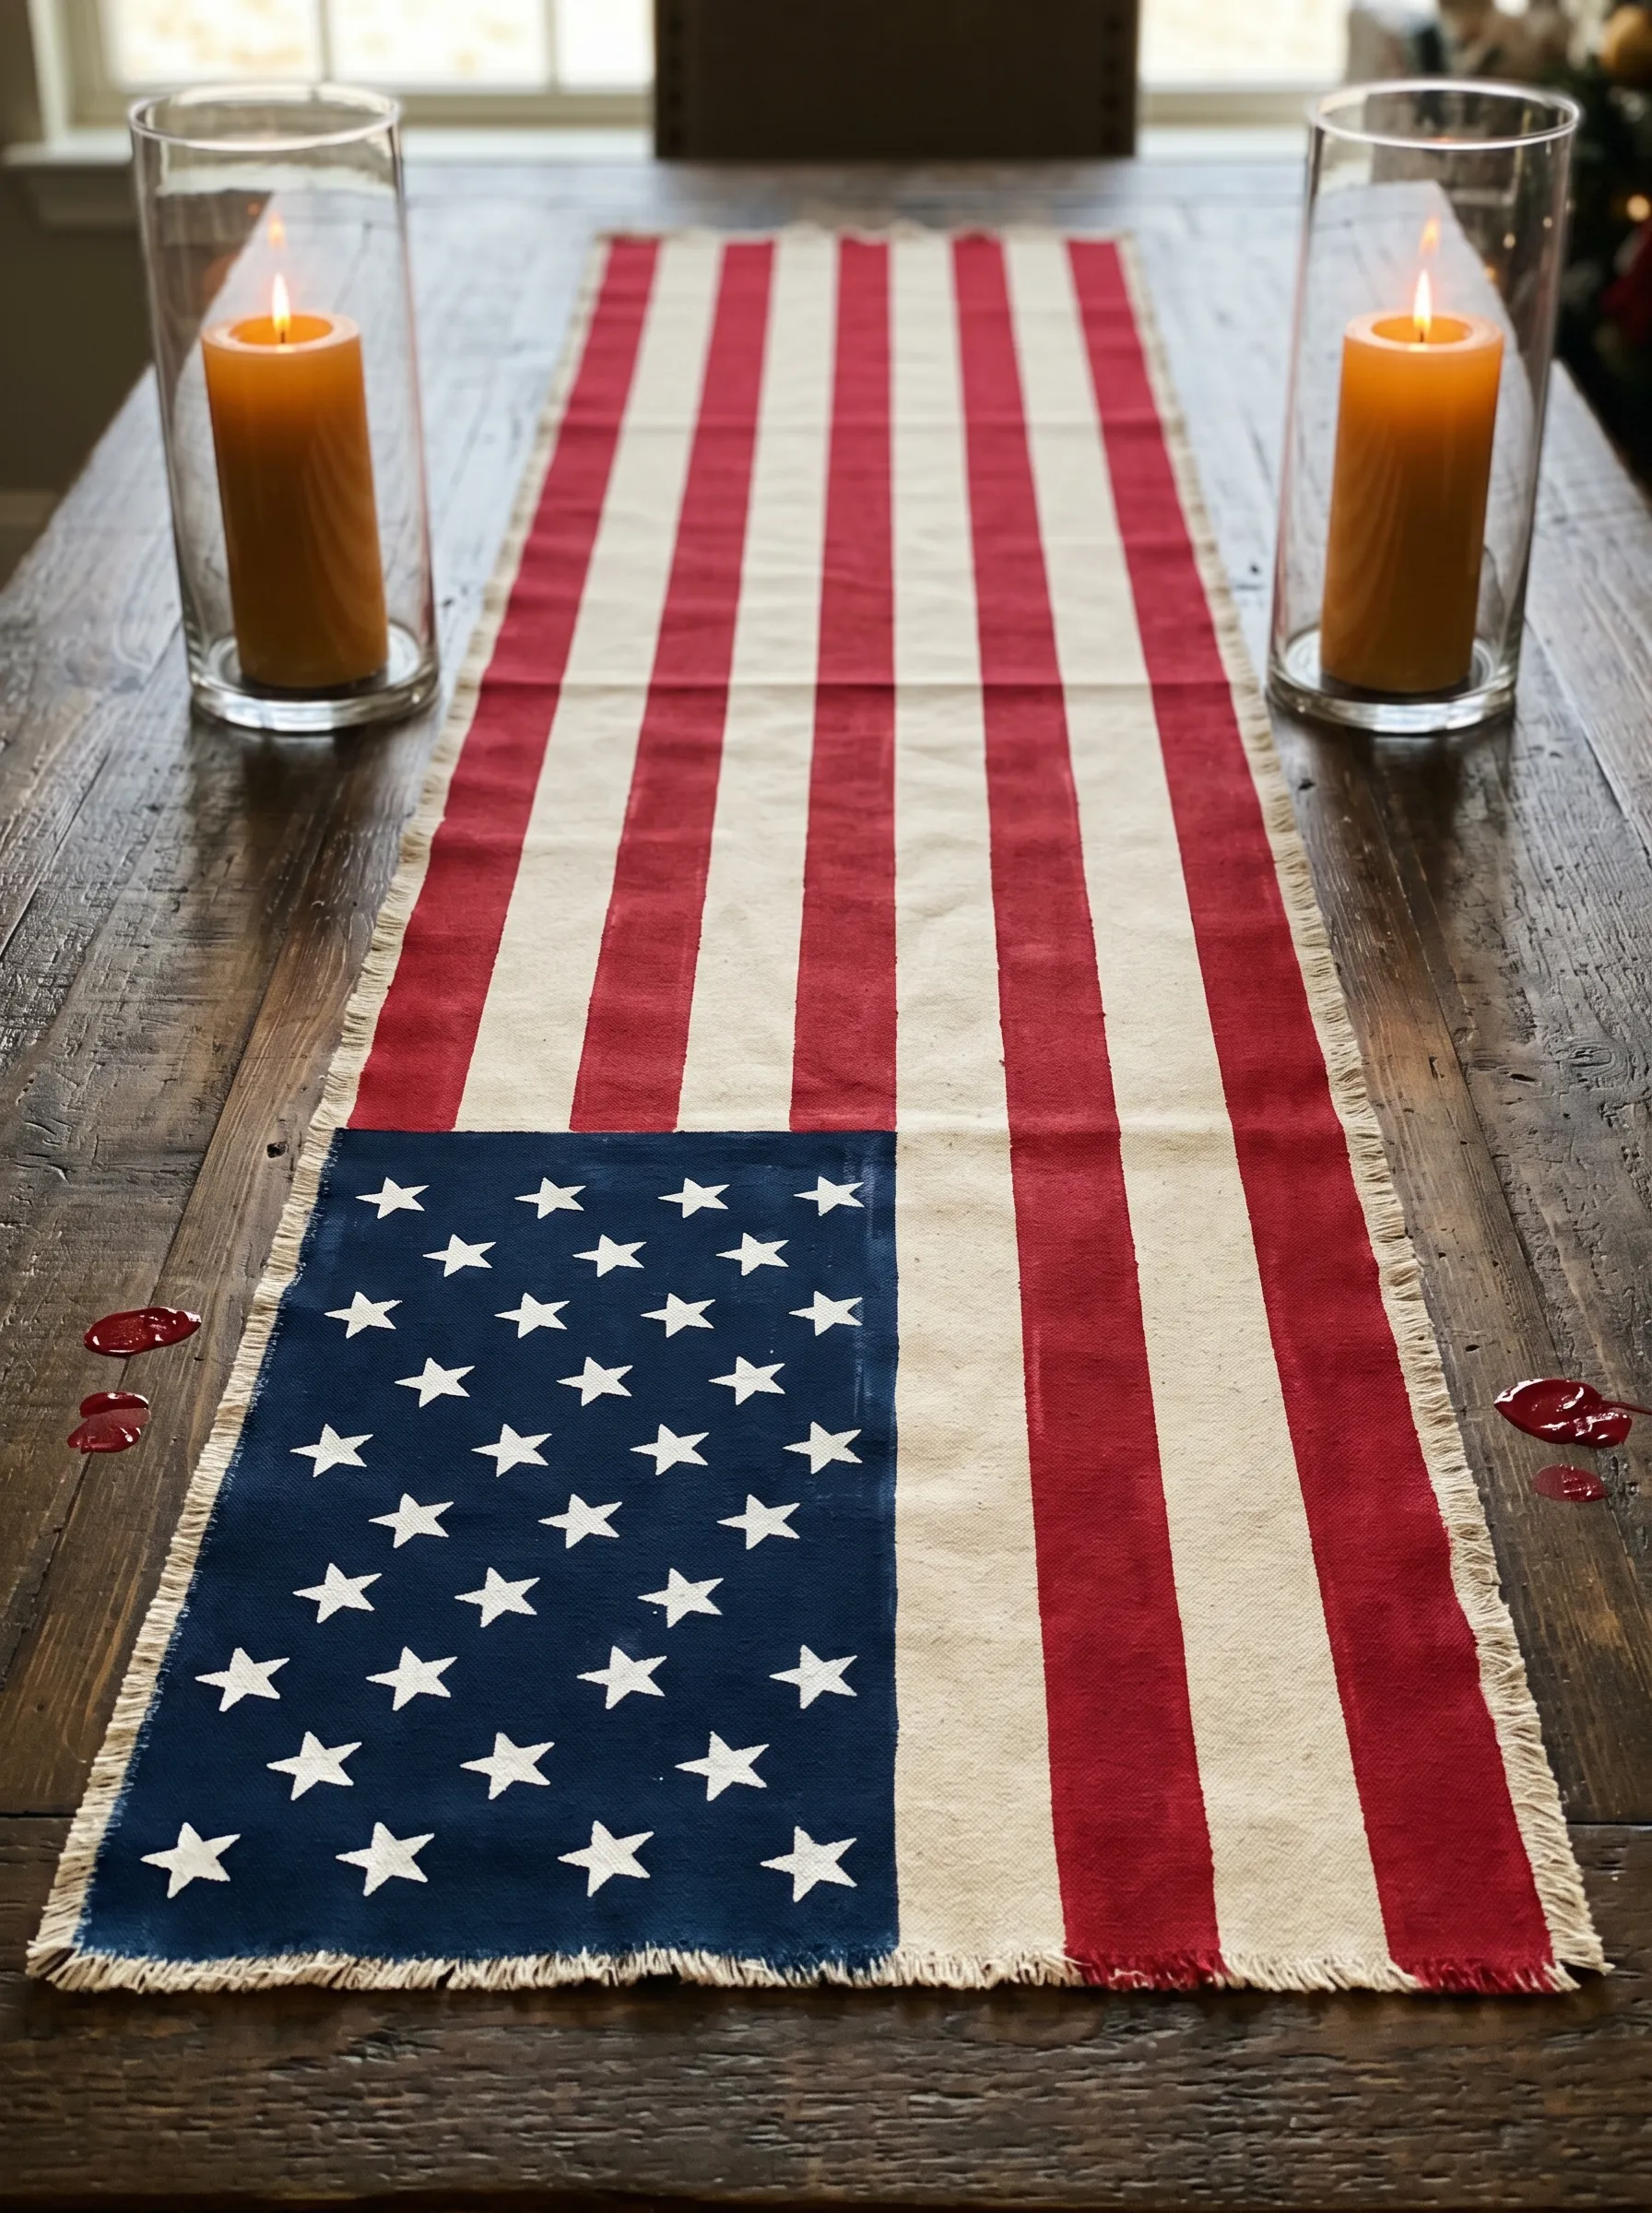
This is not a making project — it’s a sourcing project disguised as one. Find or purchase a cotton table runner printed in a full-flag pattern: navy canton with white stars at one end, transitioning to red-and-white stripes for the remaining length. The fringe edge is an important detail; it softens the otherwise graphic print and prevents it from reading as novelty rather than textile.
Lay it on a dark wood dining table without a tablecloth beneath it. The wood grain should show on the sides. Place one large beeswax or ivory pillar candle in a tall clear glass hurricane at each end, positioned approximately eight inches from the runner’s ends.
That’s the entire setup. The runner is doing all the work. The candles are doing the framing. Nothing else should be on this table.
The principle: a single strong textile is always more effective than multiple competing decorations. The flag runner is the decoration. Let it be.
The Painted Mason Jar Lantern Cluster
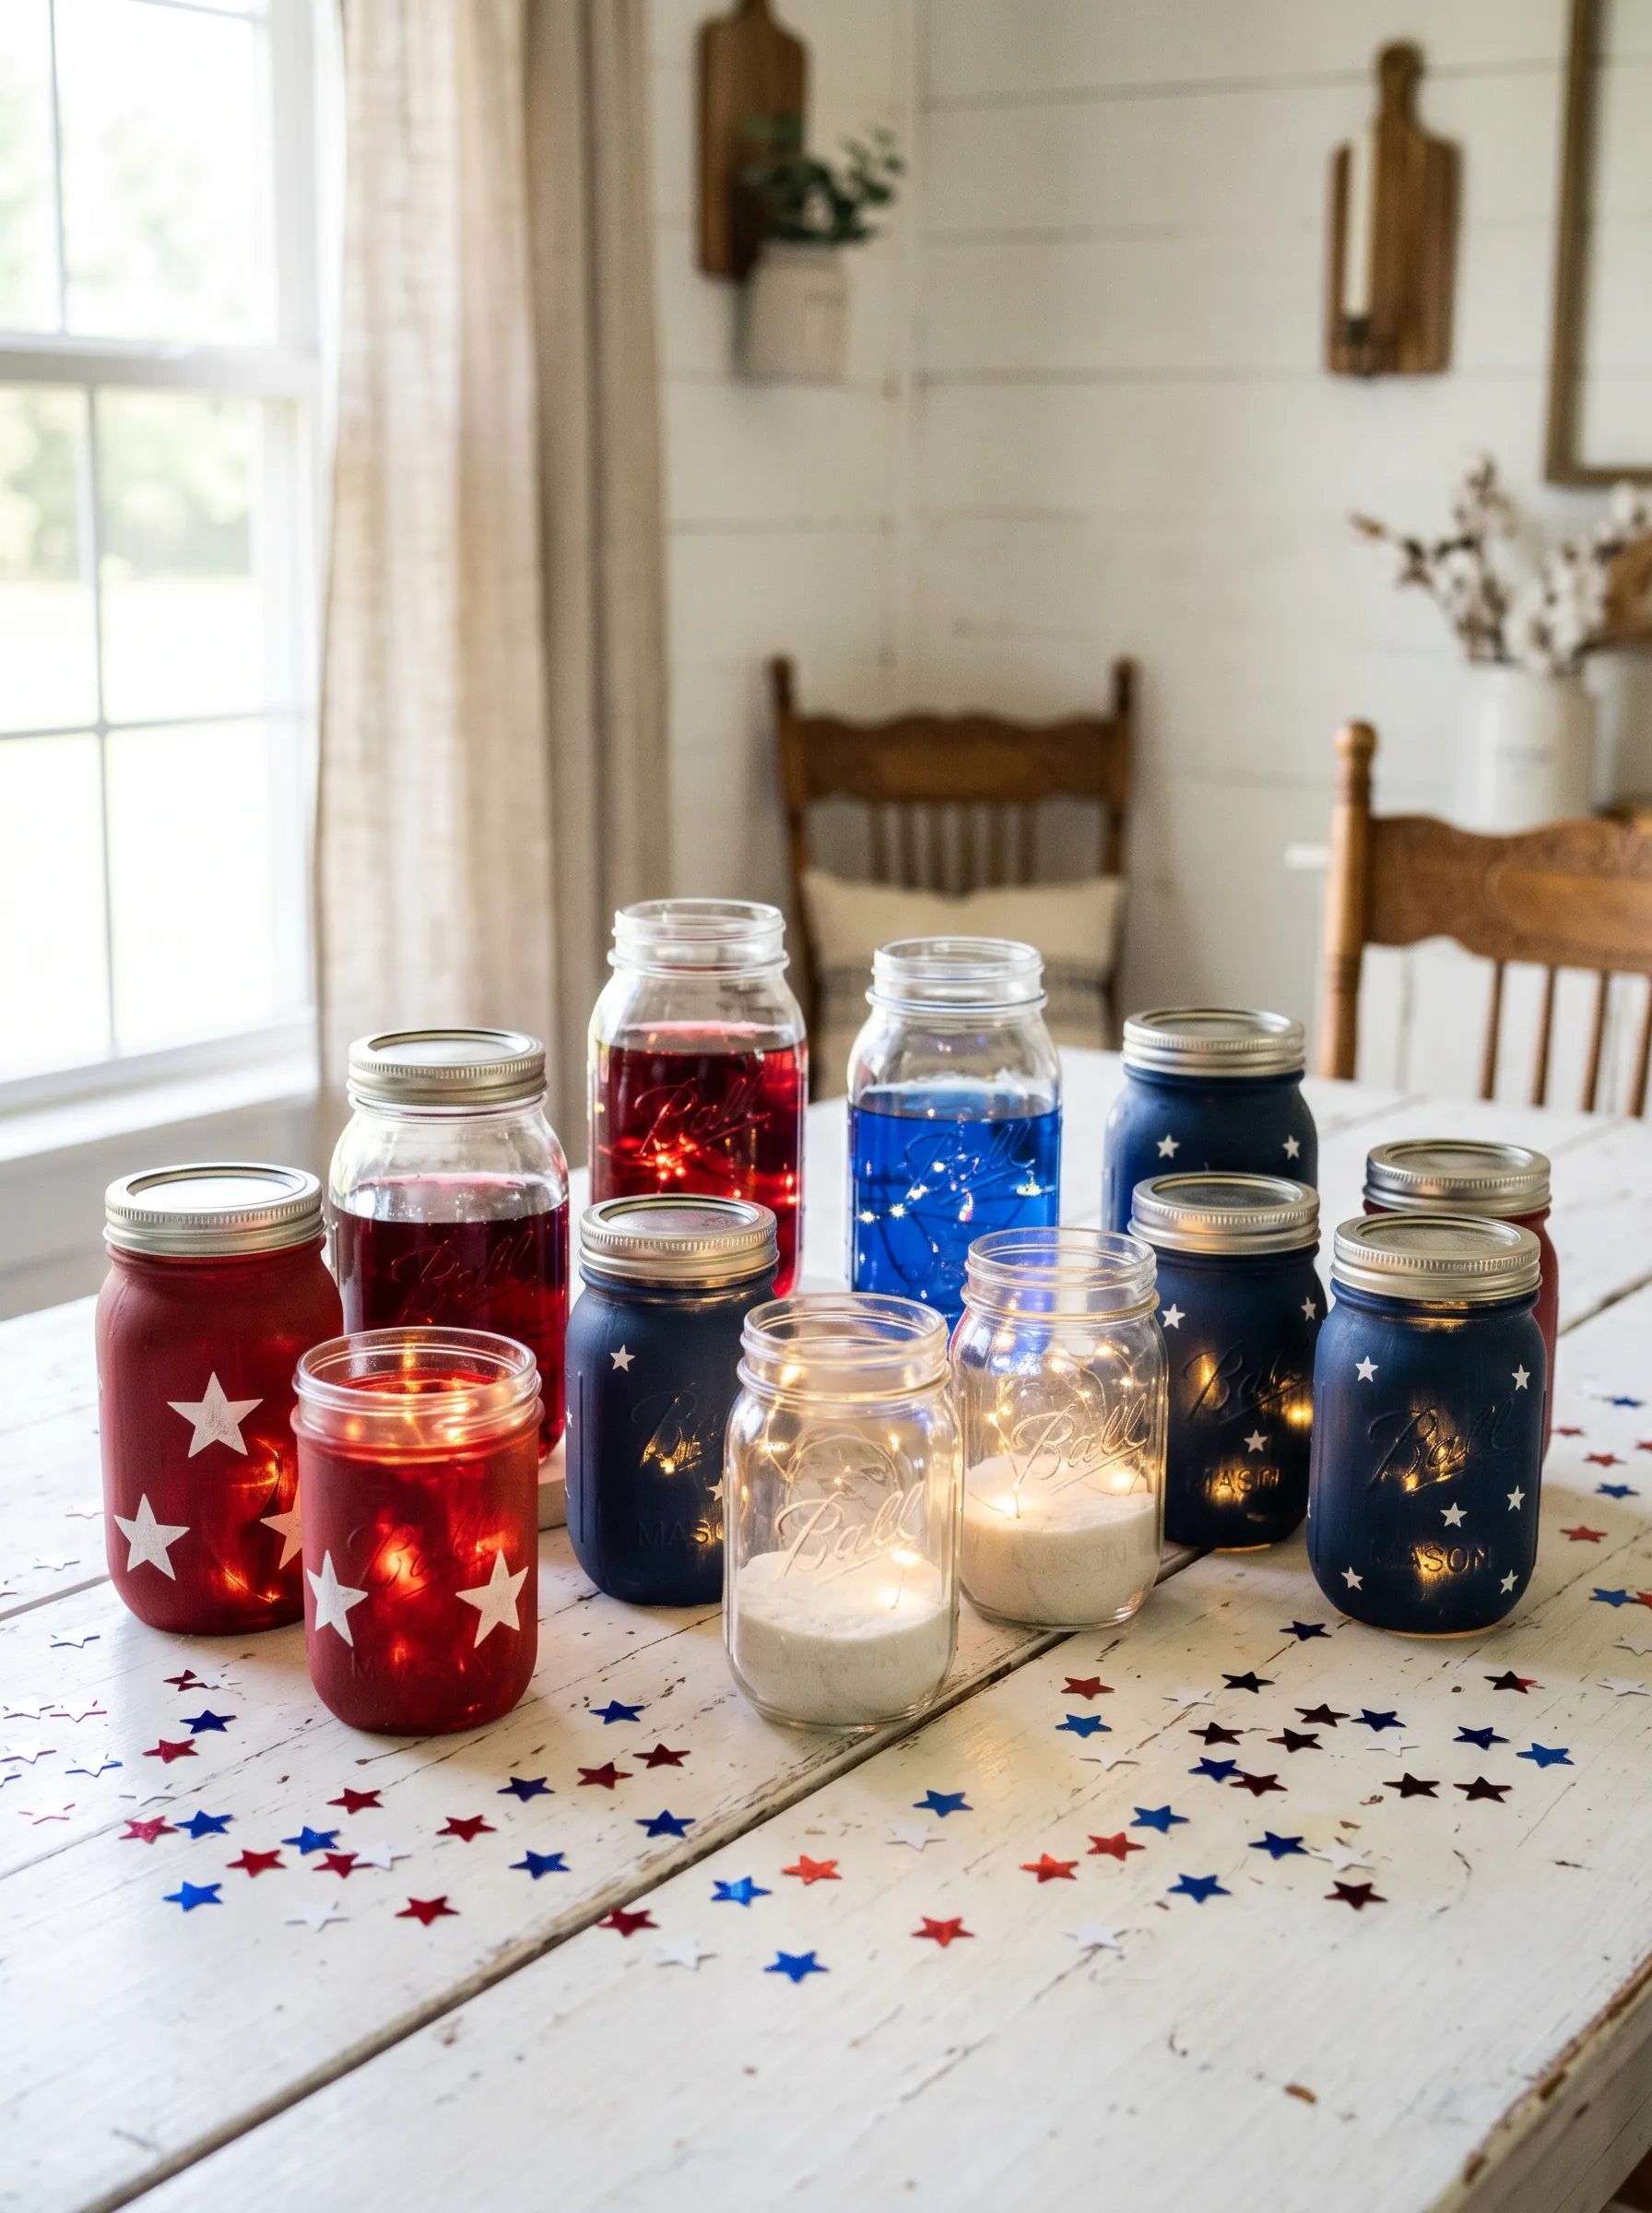
Buy a collection of Ball mason jars in various sizes. Quart, pint, half-pint — the variation in height is part of the composition.
For some jars: paint the exterior with two coats of navy acrylic paint. Once dry, lay a star stencil on the outside and pounce white stars through it. These are your solid painted lanterns.
For other jars: fill them with water tinted with red food coloring or blue food coloring. Drop a strand of battery-operated copper fairy lights through the jar opening. The tinted water glows the color of the water, not the color of the light — this is a surprisingly dramatic effect.
For a few plain clear jars: place a small white pillar or votive candle inside, perhaps with a layer of white sand at the bottom for stability.
Cluster all the jars together on a white chippy-paint surface or a wooden table. Vary the heights by using some smaller and some larger jars. Scatter red, white, and blue metallic star confetti across the surface between and around the jars.
At night, with the fairy lights going and the candles lit, this cluster is the most visually effective project on this entire list for approximately twelve dollars in supplies.
The DIY Crepe Paper Flower Table Runner
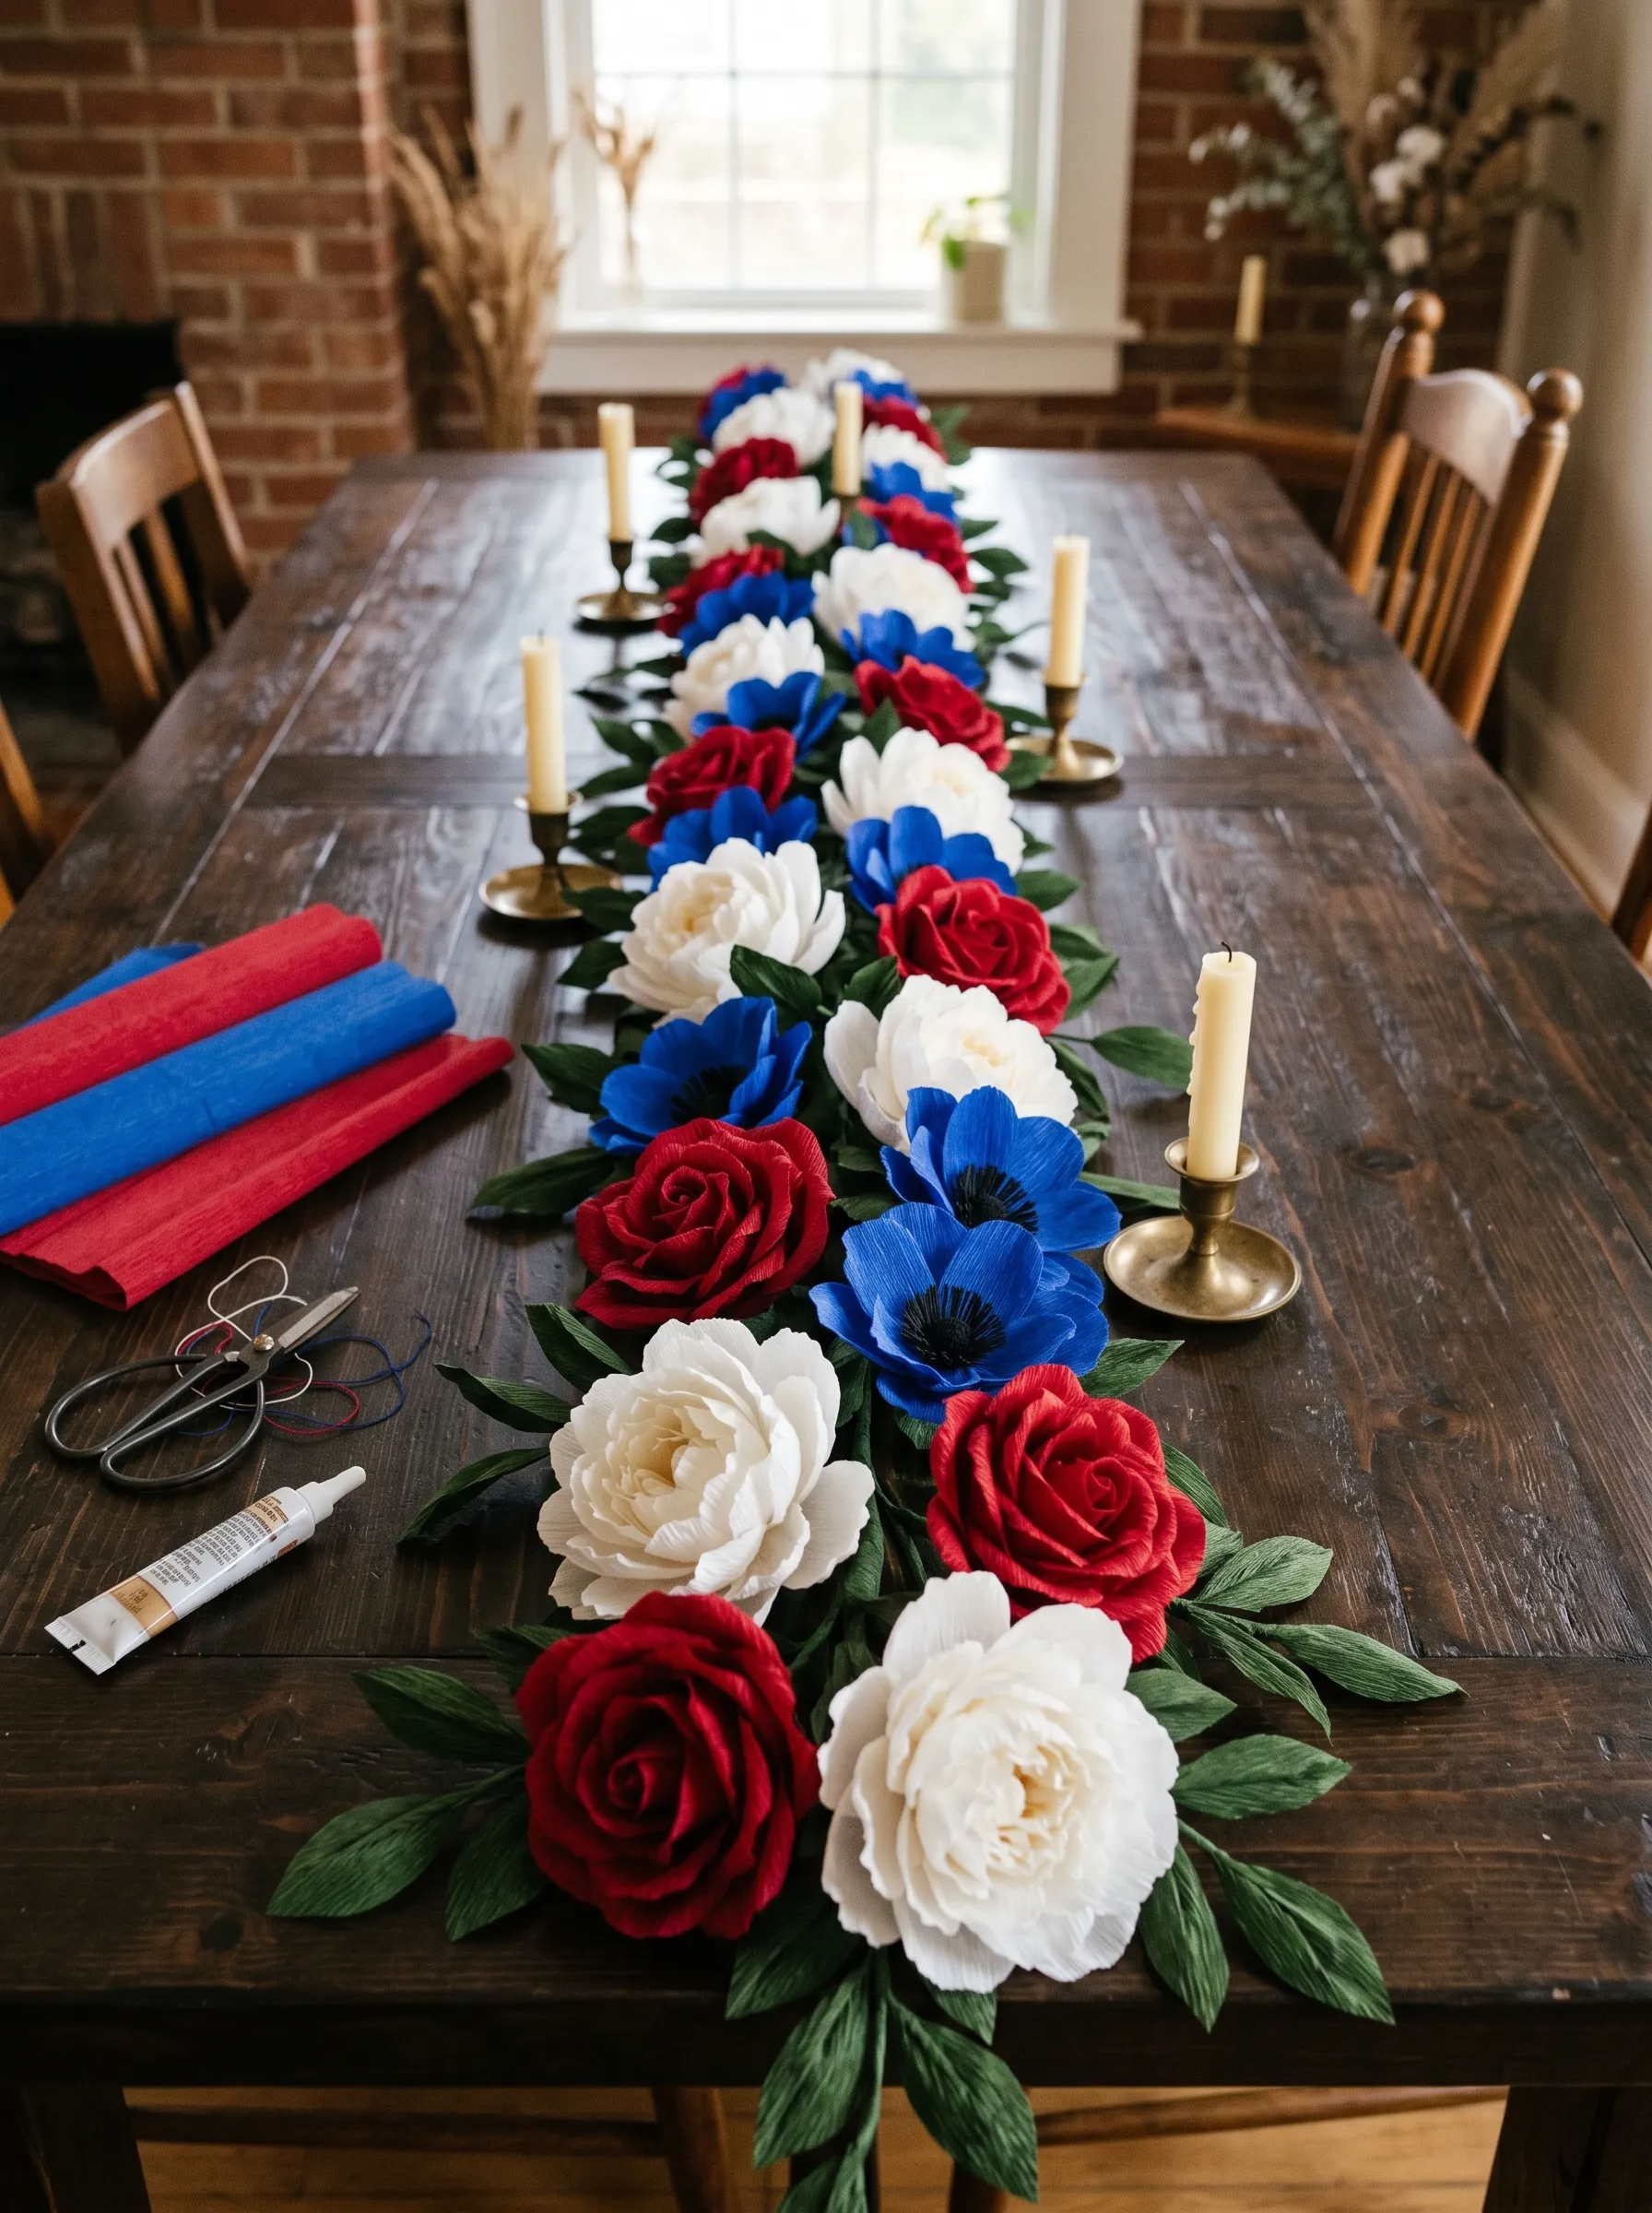
This is the most time-intensive project here. Give it an honest four to five hours, spread across two evenings if possible. The result is something nobody else will have and that looks genuinely beautiful on a dinner table.
Purchase rolls of crepe paper in red, cobalt blue, white, and dark green. The flowers in this runner are red roses, white peonies, and blue anemones — all achievable with the same basic technique, just with different petal shapes.
For red roses: cut large teardrop petals from red crepe paper, stretch the center of each petal gently to cup it, then layer and spiral them around a small rolled center, securing with a thin wire or floral tape stem. For white peonies: cut rounder, more open petals with slightly ruffled edges, layer them densely outward, and keep the bloom wide and flat rather than rolled tight. For blue anemones: cut rounded petals with a flat profile, layer five or six around a center pinched from very dark blue or black crepe paper.
Build the runner by threading wire stems through a long backbone of green leaf stems, laying it flat on the table surface. The brass taper candlesticks spaced along the runner serve as structural dividers between bloom clusters.
Leave the rolls of crepe paper and scissors at the table edge. The “in-progress” look is honest and actually adds to the charm — it signals that a person made this, not a vendor.
The Lawn Flag Made of Rocks, Petals, and Gravel
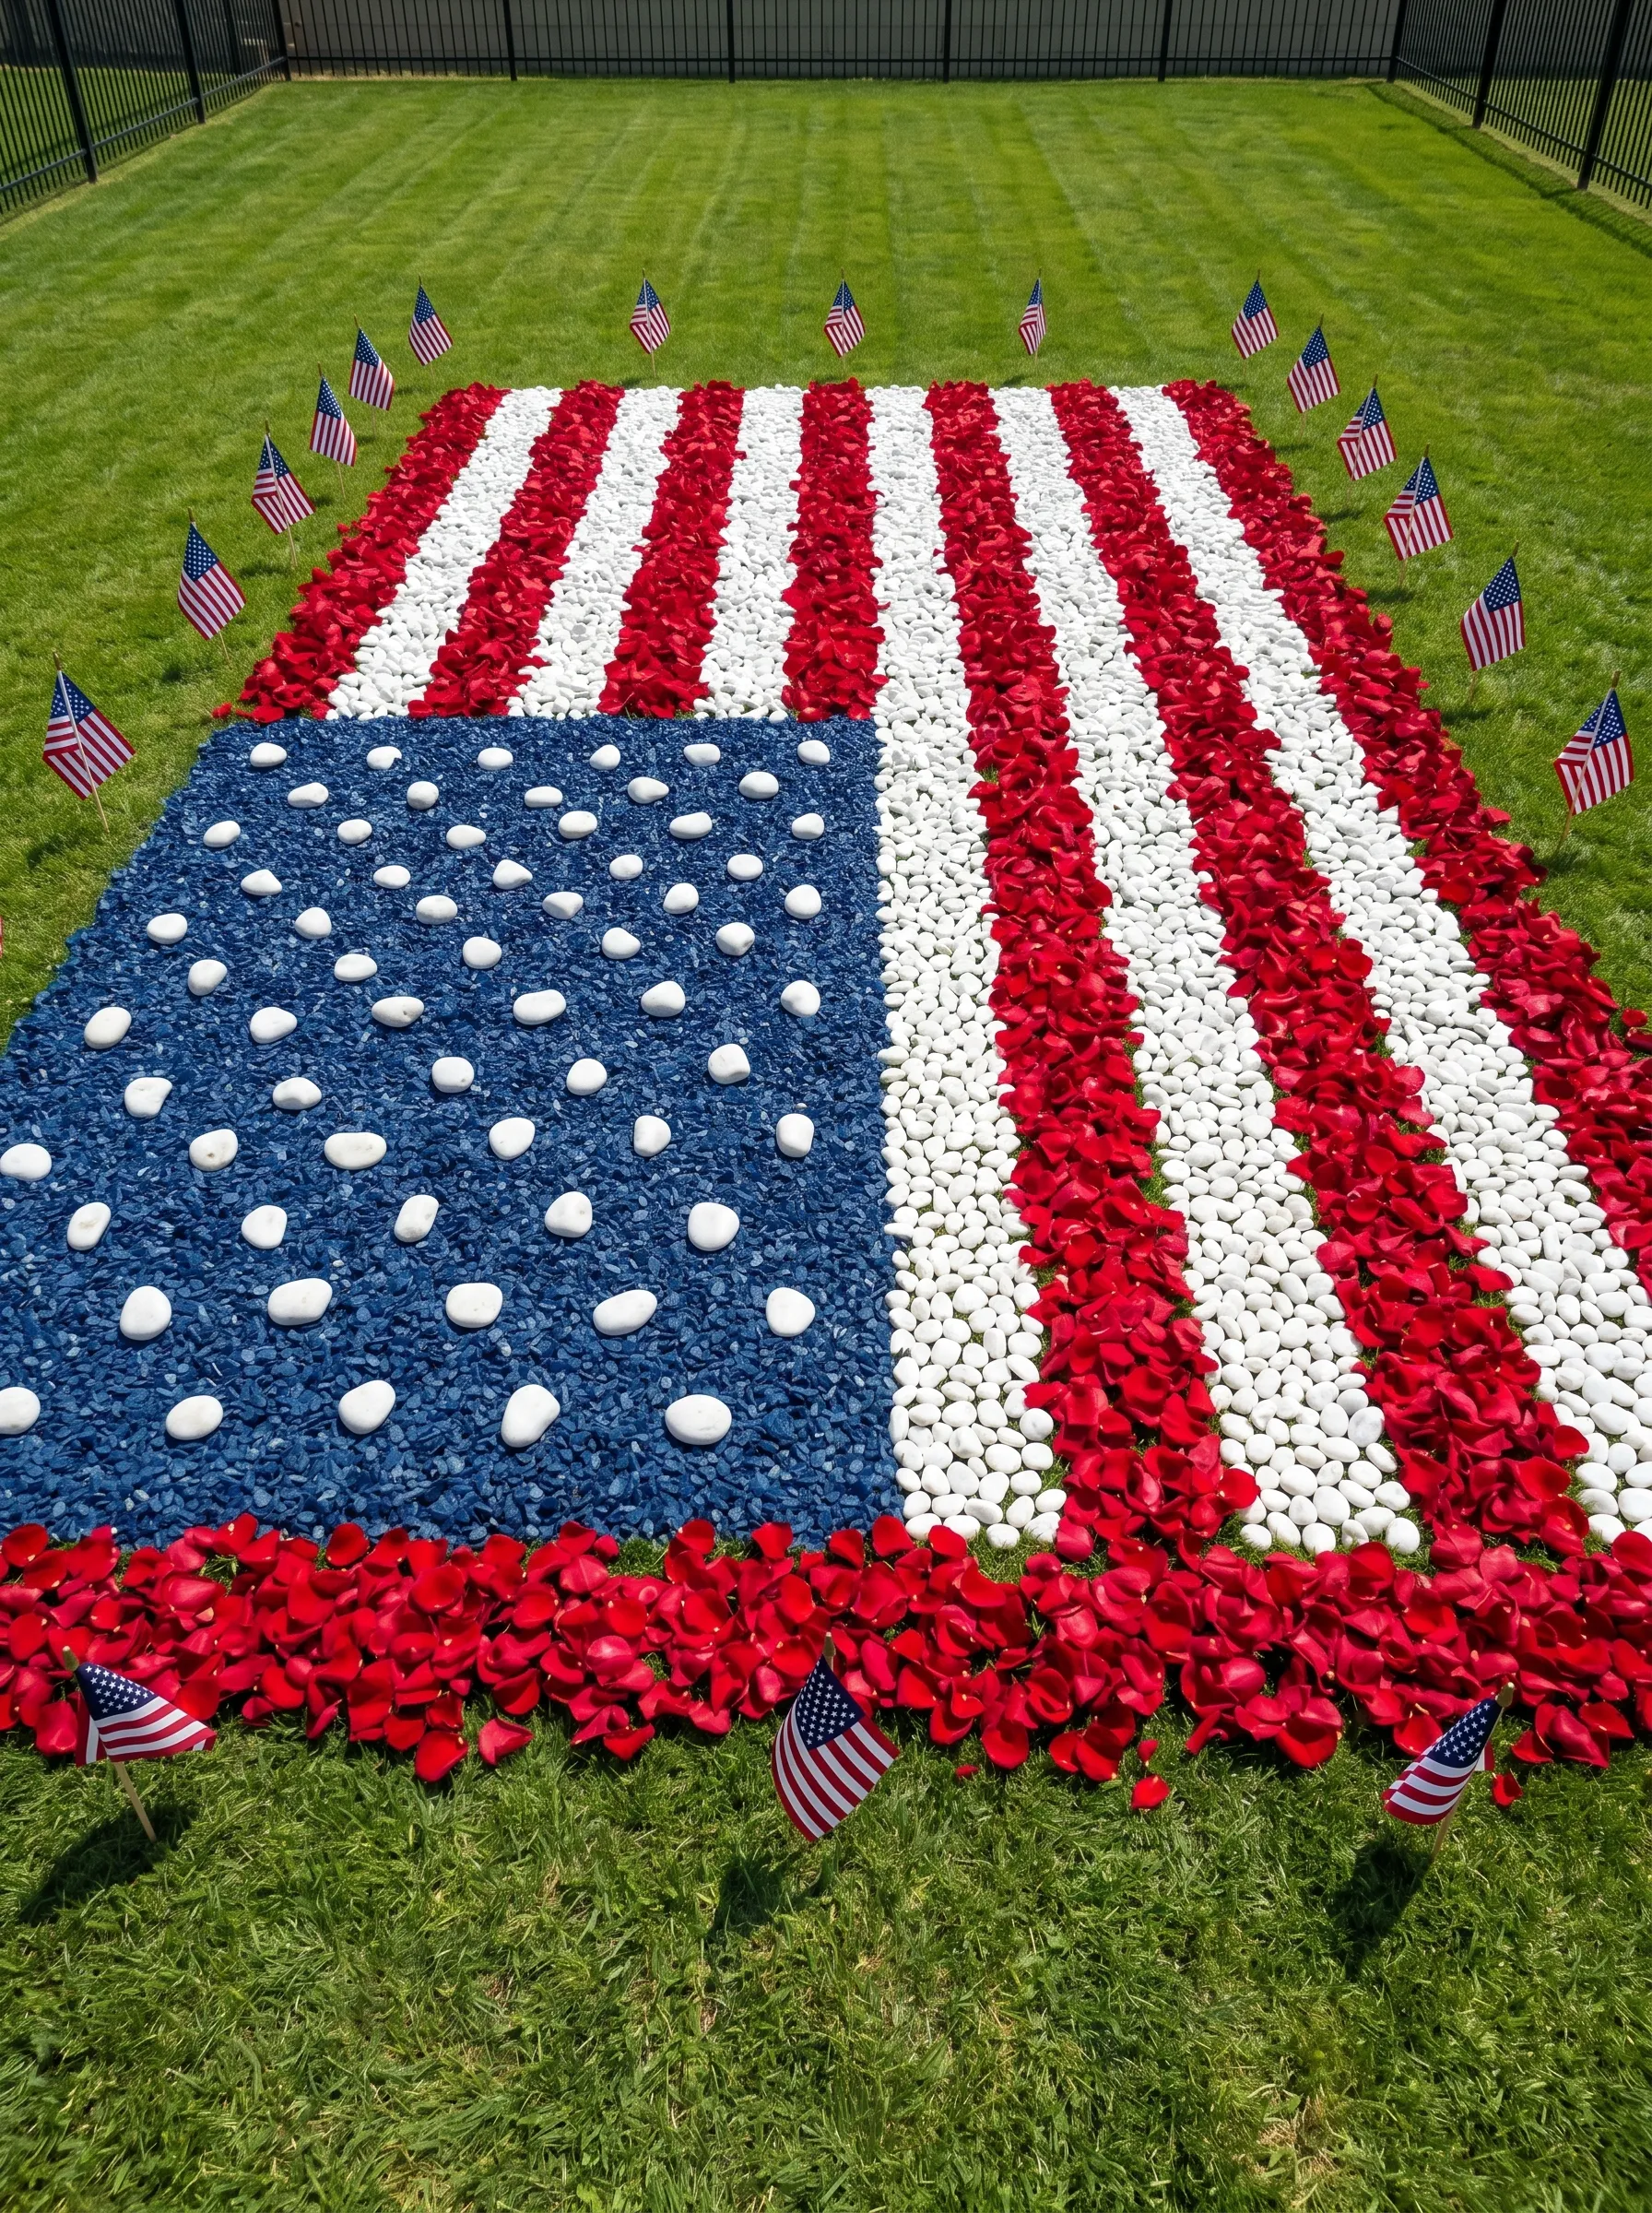
This is the project that stops people in their tracks. It’s visible from the street. It photographs from above with remarkable impact. And it requires no skill whatsoever — only time and willingness to spend an afternoon outdoors.
Mark out the proportions of an American flag on your lawn using stakes and string. The standard flag ratio is 19 by 10 — for a lawn installation, a 19-foot by 10-foot flag is dramatic but achievable.
For the canton (upper left blue rectangle): spread a deep layer of blue-dyed decorative gravel, available at garden centers. Into the blue gravel, press white river rocks in a grid pattern to represent stars. Keep them roughly evenly spaced.
For the red stripes: build parallel bands of red rose petals or red silk flower petals (available in bulk bags from craft stores). Red silk petals hold up in wind better than fresh ones. For the white stripes: build parallel bands of white river rocks, smooth and rounded, placed closely together.
Surround the entire installation with mini American flags on short sticks, pushed into the lawn every foot or so around the perimeter. This installation takes three to four hours to build. It lasts for the full day.
The Painted Patriotic Rock Garden Border
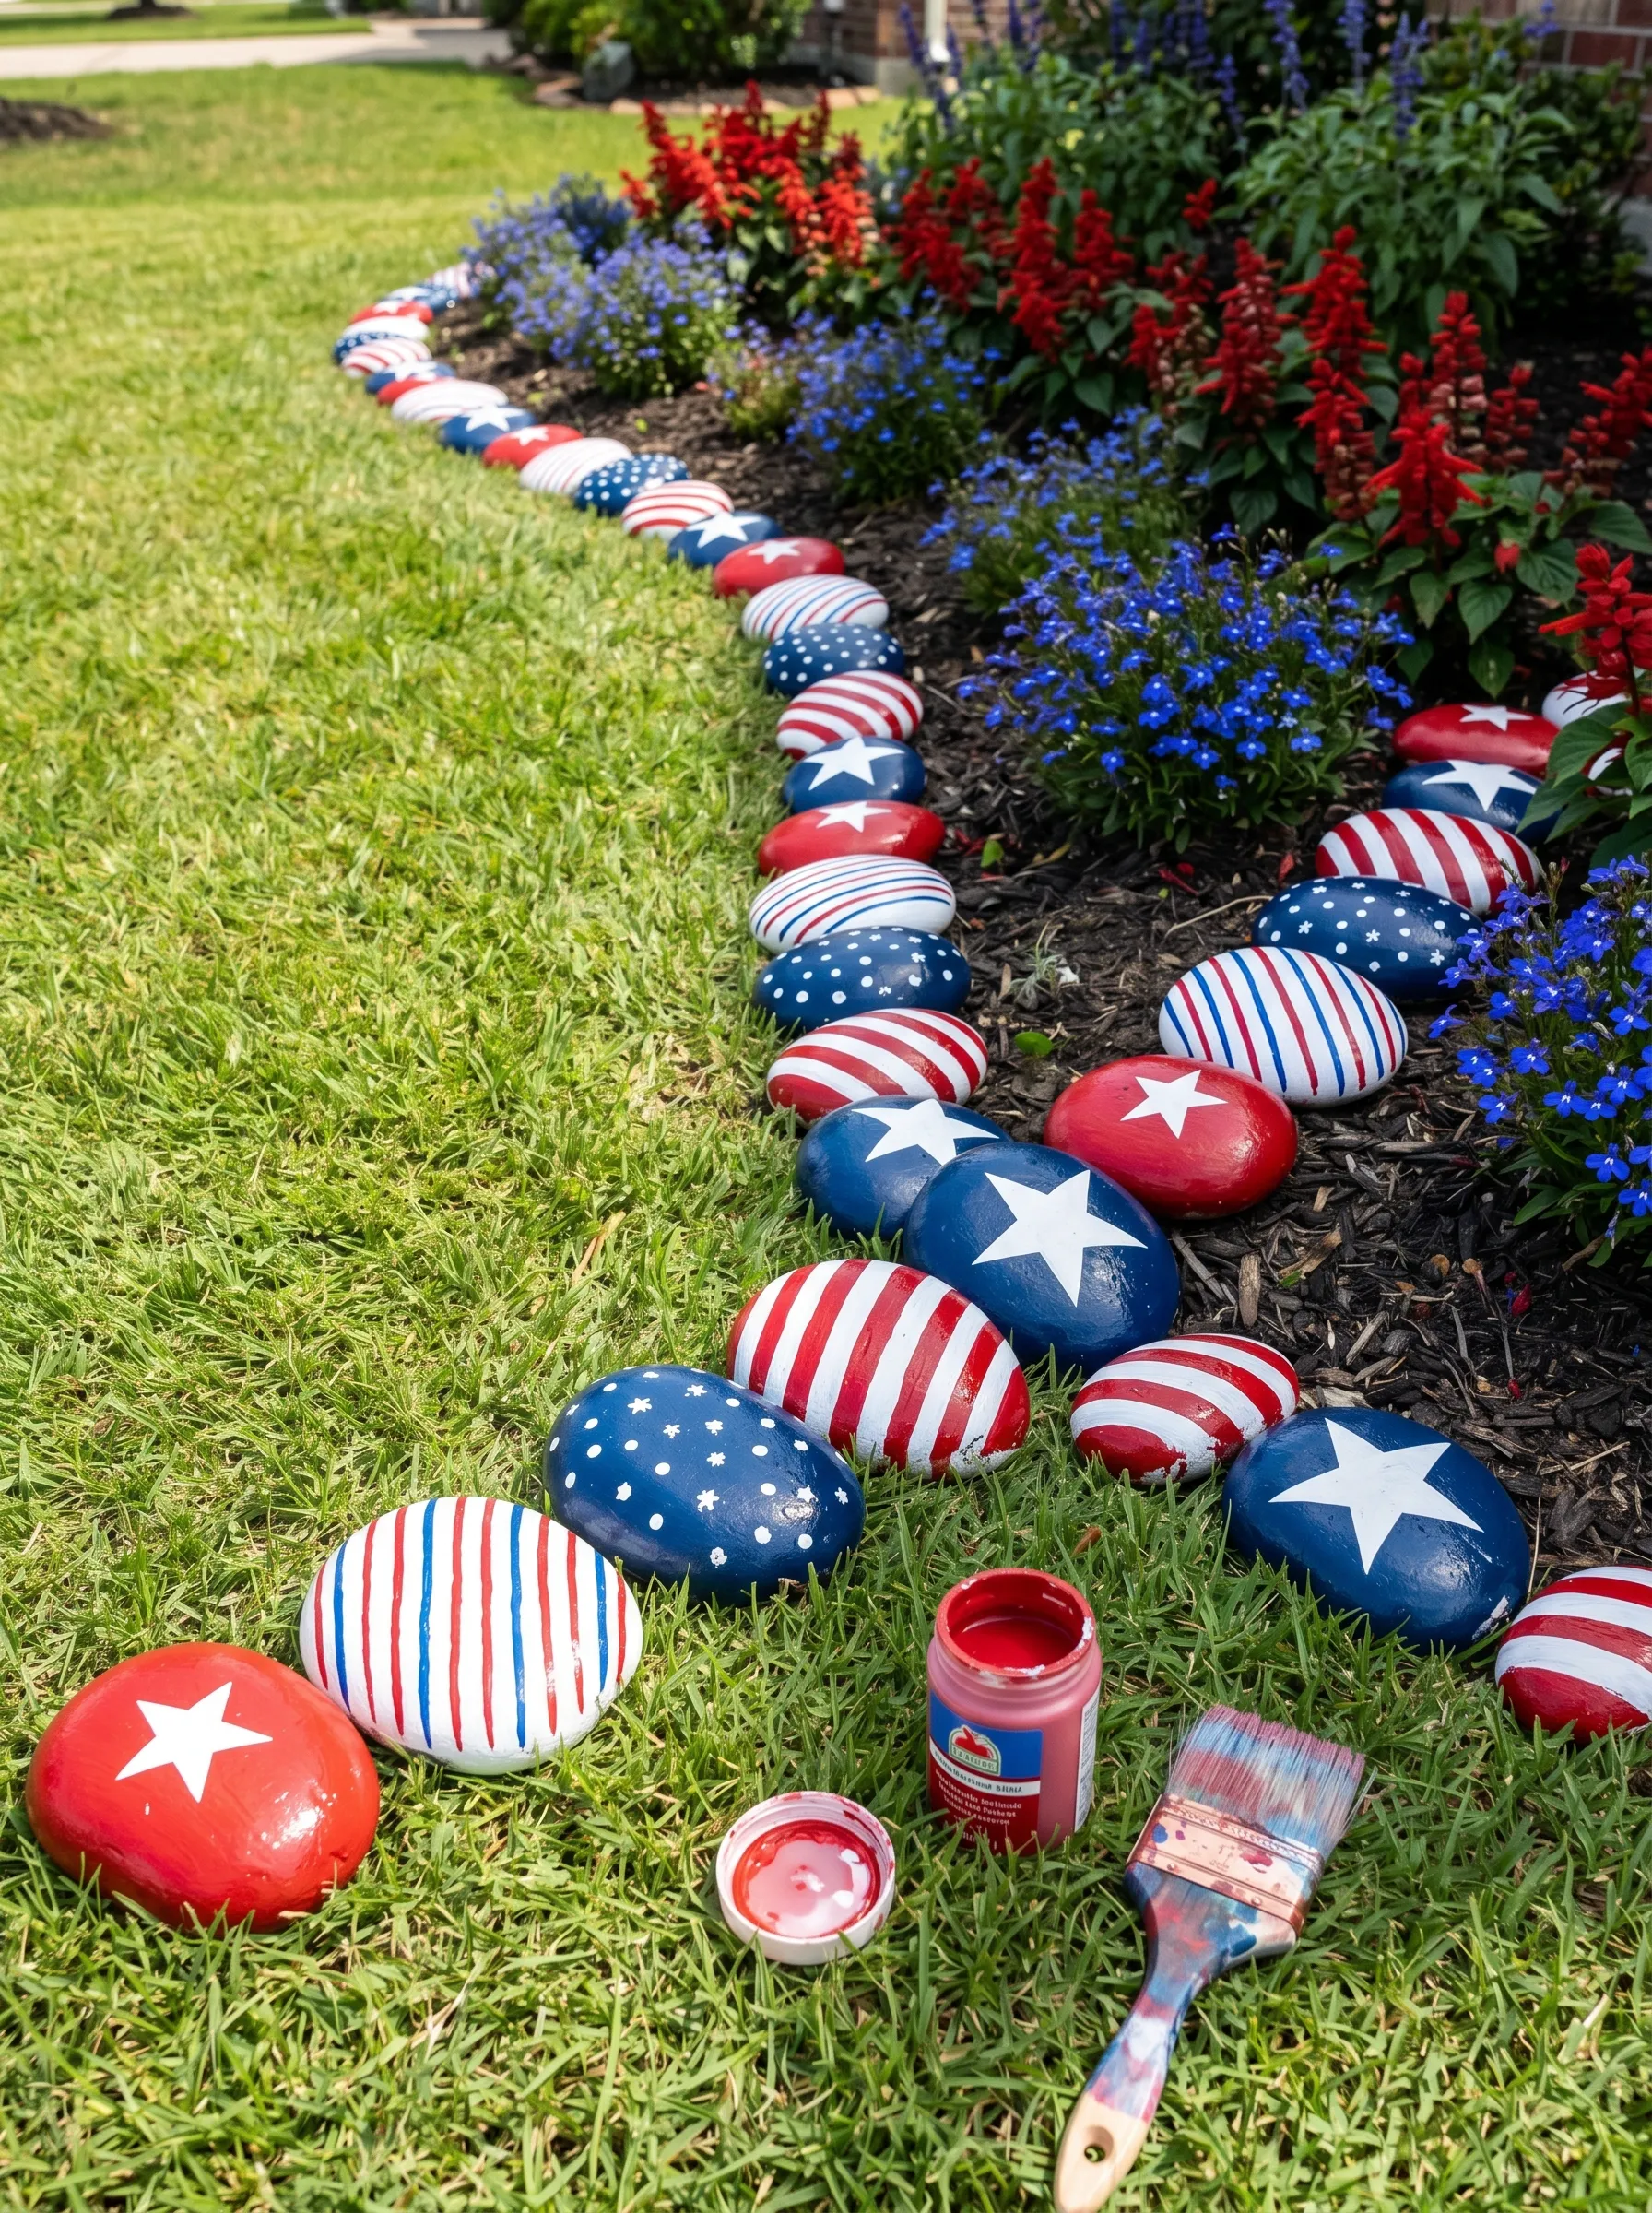
This project happens in two stages: painting and placing. Both are satisfying. Neither requires skill beyond patience.
Gather smooth river rocks in a consistent medium size — fist-sized to slightly larger. Two or three dozen is enough for a standard flower bed border. Clean them and allow to dry completely.
Paint each rock with one of three designs, using acrylic paint: red with white horizontal stripes; navy blue with white polka dots; navy blue with one large white star; red with a single white star; navy and red split horizontally with white stripes on one half. Vary the patterns so the border reads as a collection rather than a repeat.
Allow all rocks to dry fully, then spray with clear outdoor sealer. Place along the border between the lawn and a flower bed, setting them close enough together to touch or nearly touch, alternating patterns randomly.
The flower bed itself should ideally contain red, blue, and white annuals — red salvia, blue ageratum or lobelia, white alyssum or impatiens. The painted rocks become the frame for a living patriotic garden.
The Rustic Wood Crate Patriotic Planter
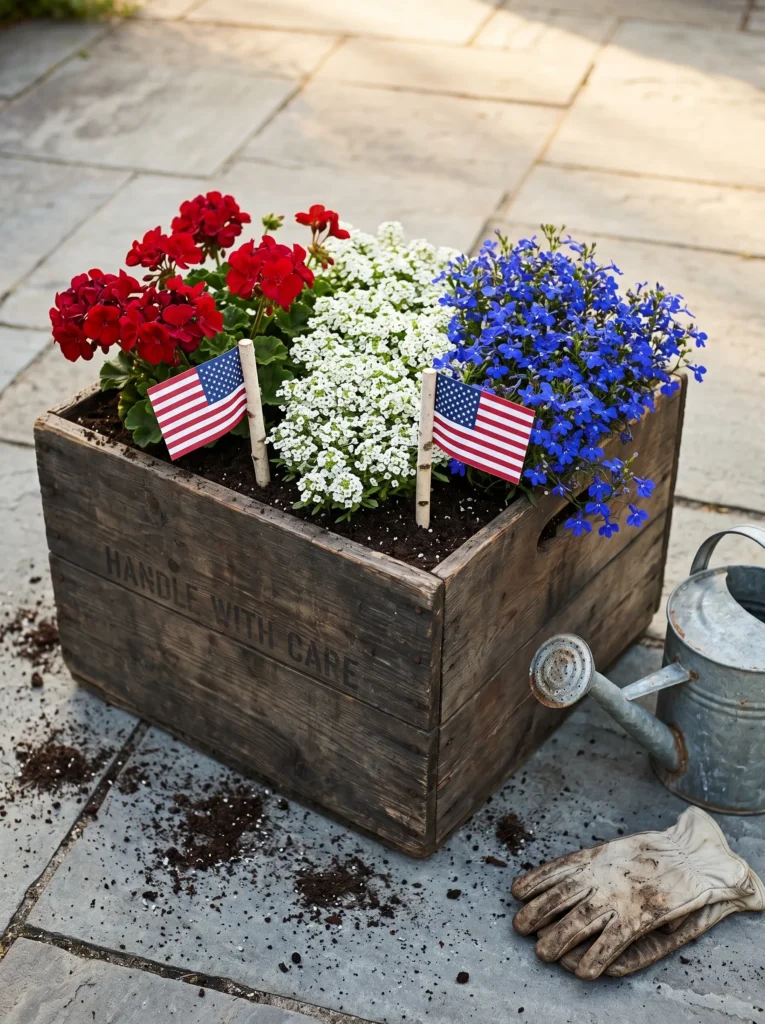
Find or purchase a wooden crate — the kind with stenciled text on the sides, like “HANDLE WITH CARE” or “FRAGILE” — in a natural or weathered brown tone. These are available inexpensively at craft stores. Line the interior with a plastic bag or landscape fabric to hold soil.
Fill with potting mix and plant in three distinct zones from left to right: red geraniums on the left, white alyssum cascading in the center, blue lobelia on the right. Keep the zones visible and separate rather than mixing — the horizontal tricolor reading is the entire point.
Push two mini American flags into the soil at the divisions between the color zones.
Set the crate on flagstone, a wooden deck, or a porch step with a galvanized watering can placed beside it. The watering can is not just functional decoration — it signals ongoing care and liveness in a way that a finished arrangement without tools doesn’t.
The Multi-Tier Mixed Fabric Pennant Bunting
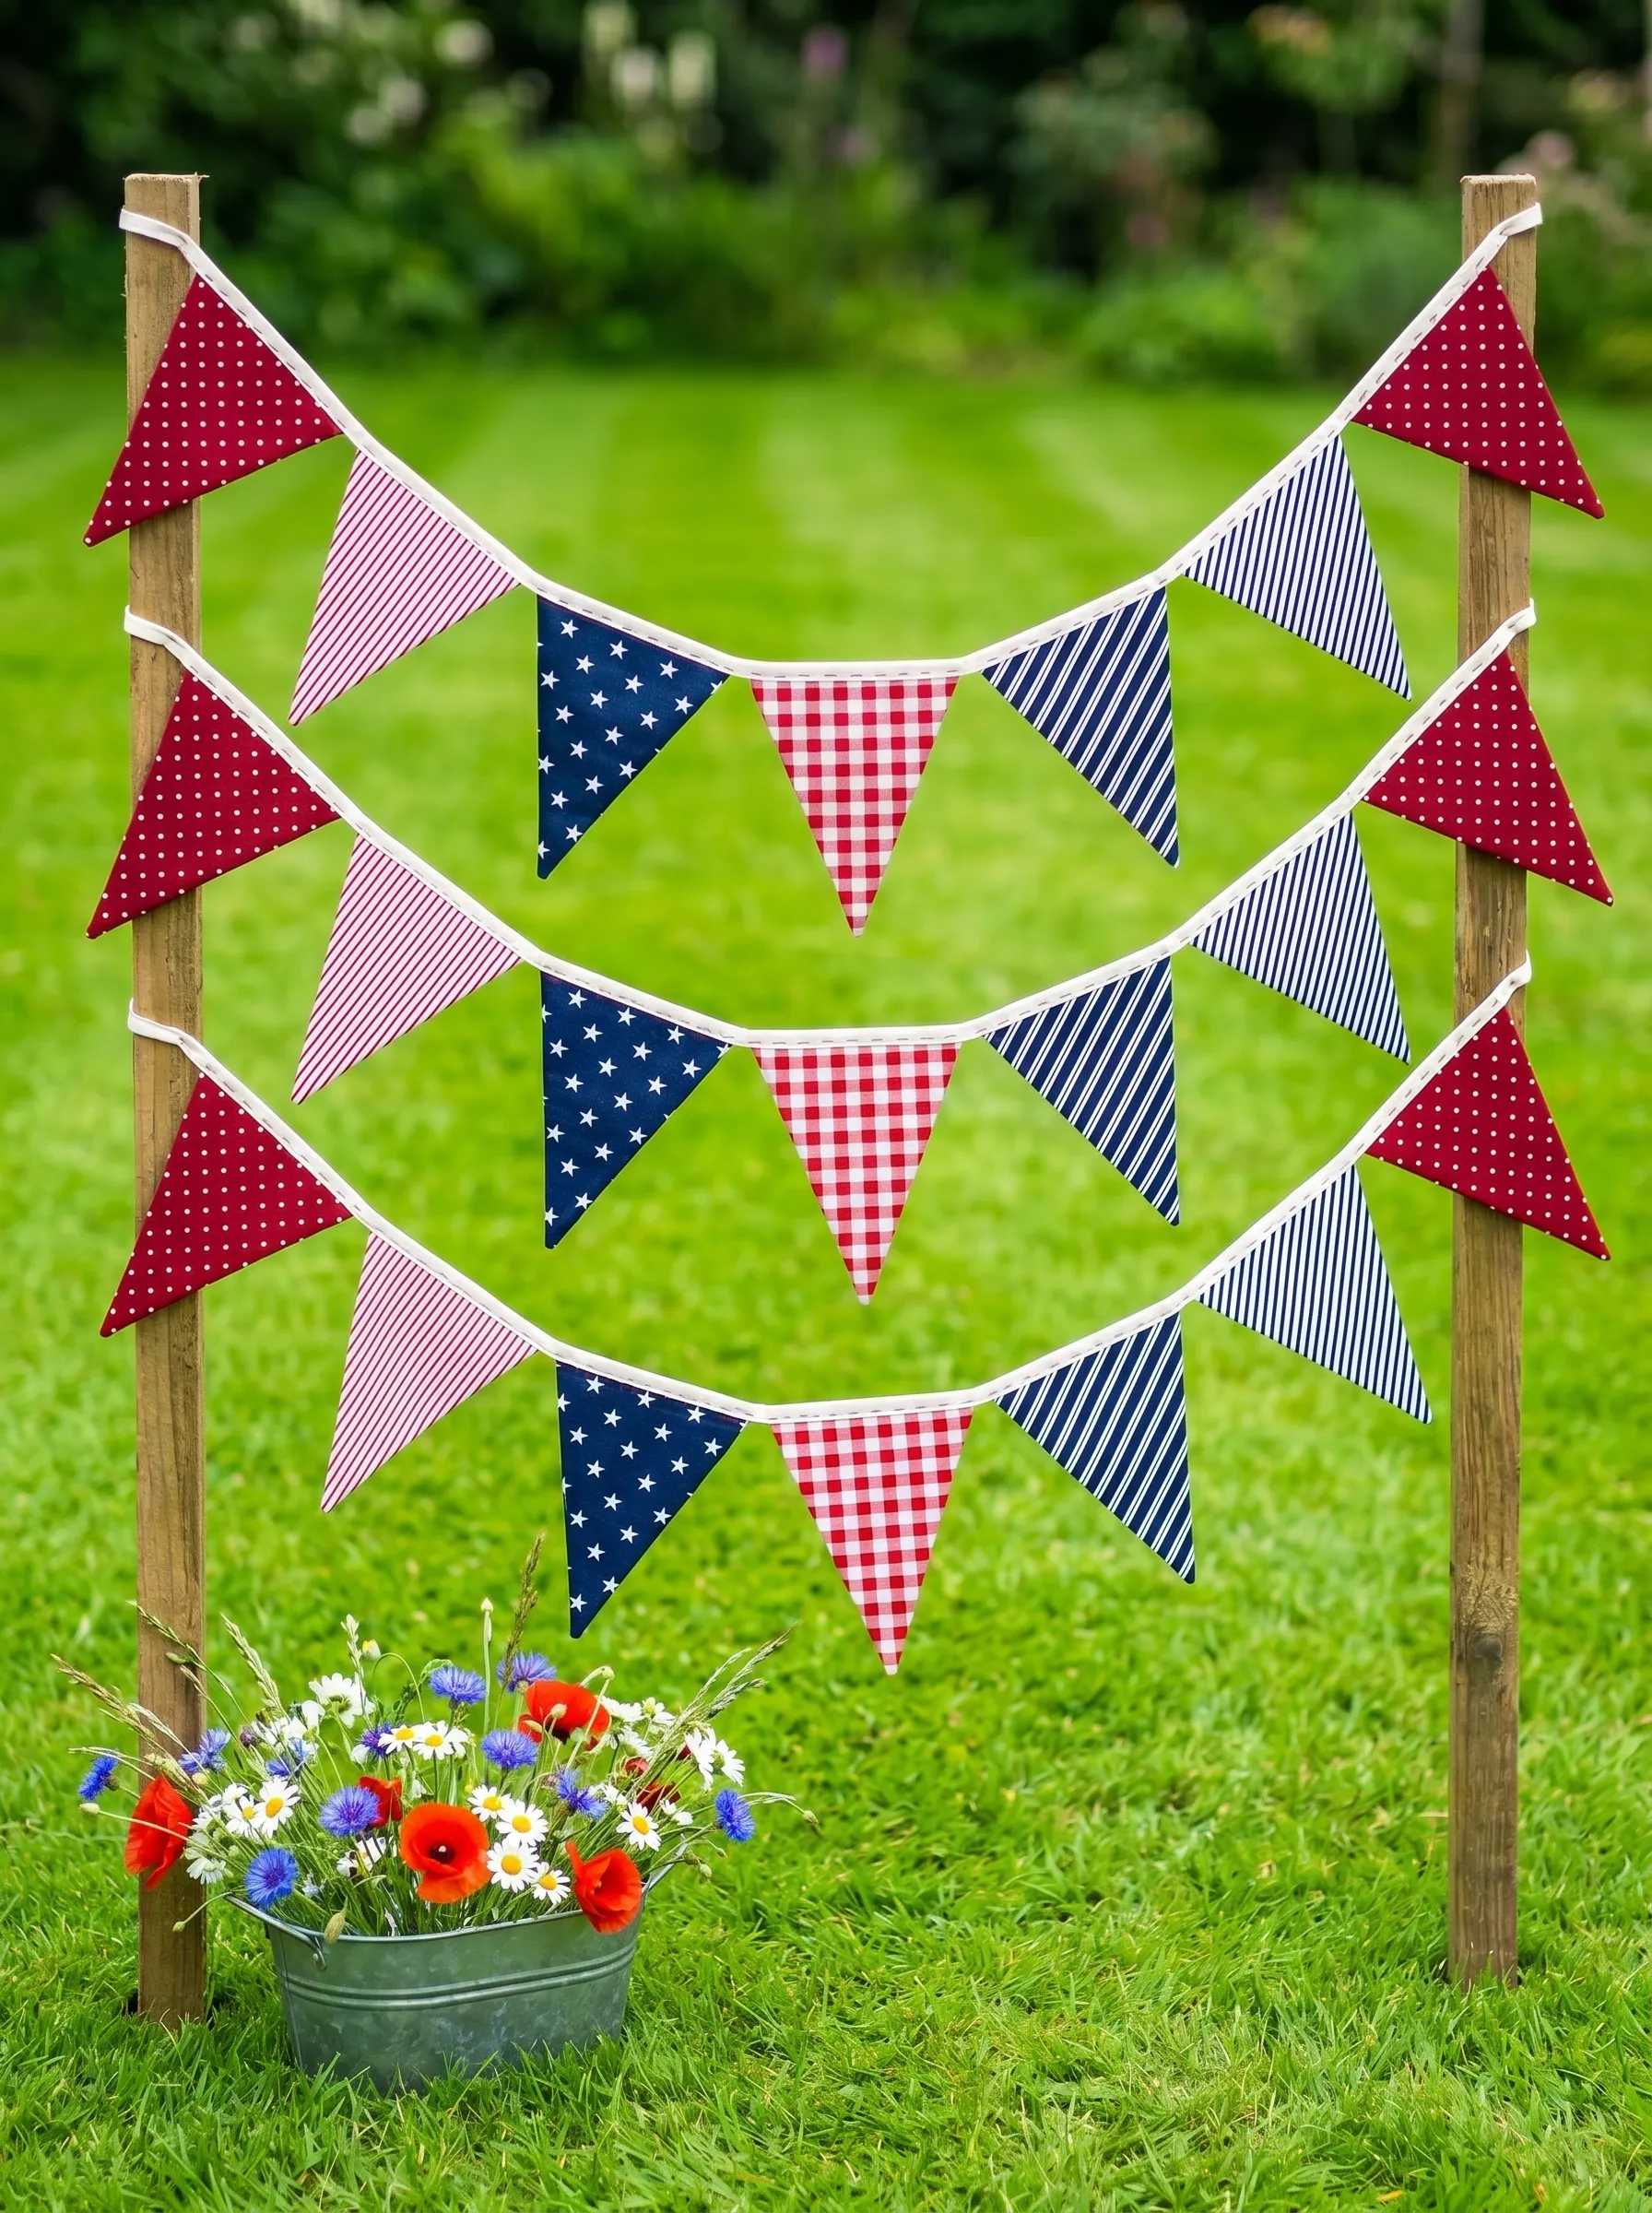
Buy or sew fabric pennant flags in a mix of prints rather than a single repeating pattern. The mix that works best: red with white polka dots, pink-red with narrow stripes, navy with white stars, red gingham check, navy with diagonal stripes. Cut each pennant to a consistent size and attach along a white ribbon or cotton string tape at approximately two-inch intervals.
Drive two wooden stakes or lengths of dowel rod into the lawn approximately eight feet apart. Tie three rows of bunting between them at descending heights — the top row higher, the bottom row lower, creating the classic layered swag effect.
At the base of one post, set a small galvanized bucket planted with a loose wildflower mix: red poppies, white daisies, blue cornflowers, oat grass. The bucket of wildflowers grounds the whole installation and brings it from decoration to vignette.
The key with bunting is the pattern variety. A single repeating flag pennant looks like a party supply purchase. A mix of different patriotic fabric prints with different patterns and slightly different scales looks like something that was assembled over time and with thought.
The Painted Wine Bottle Vase
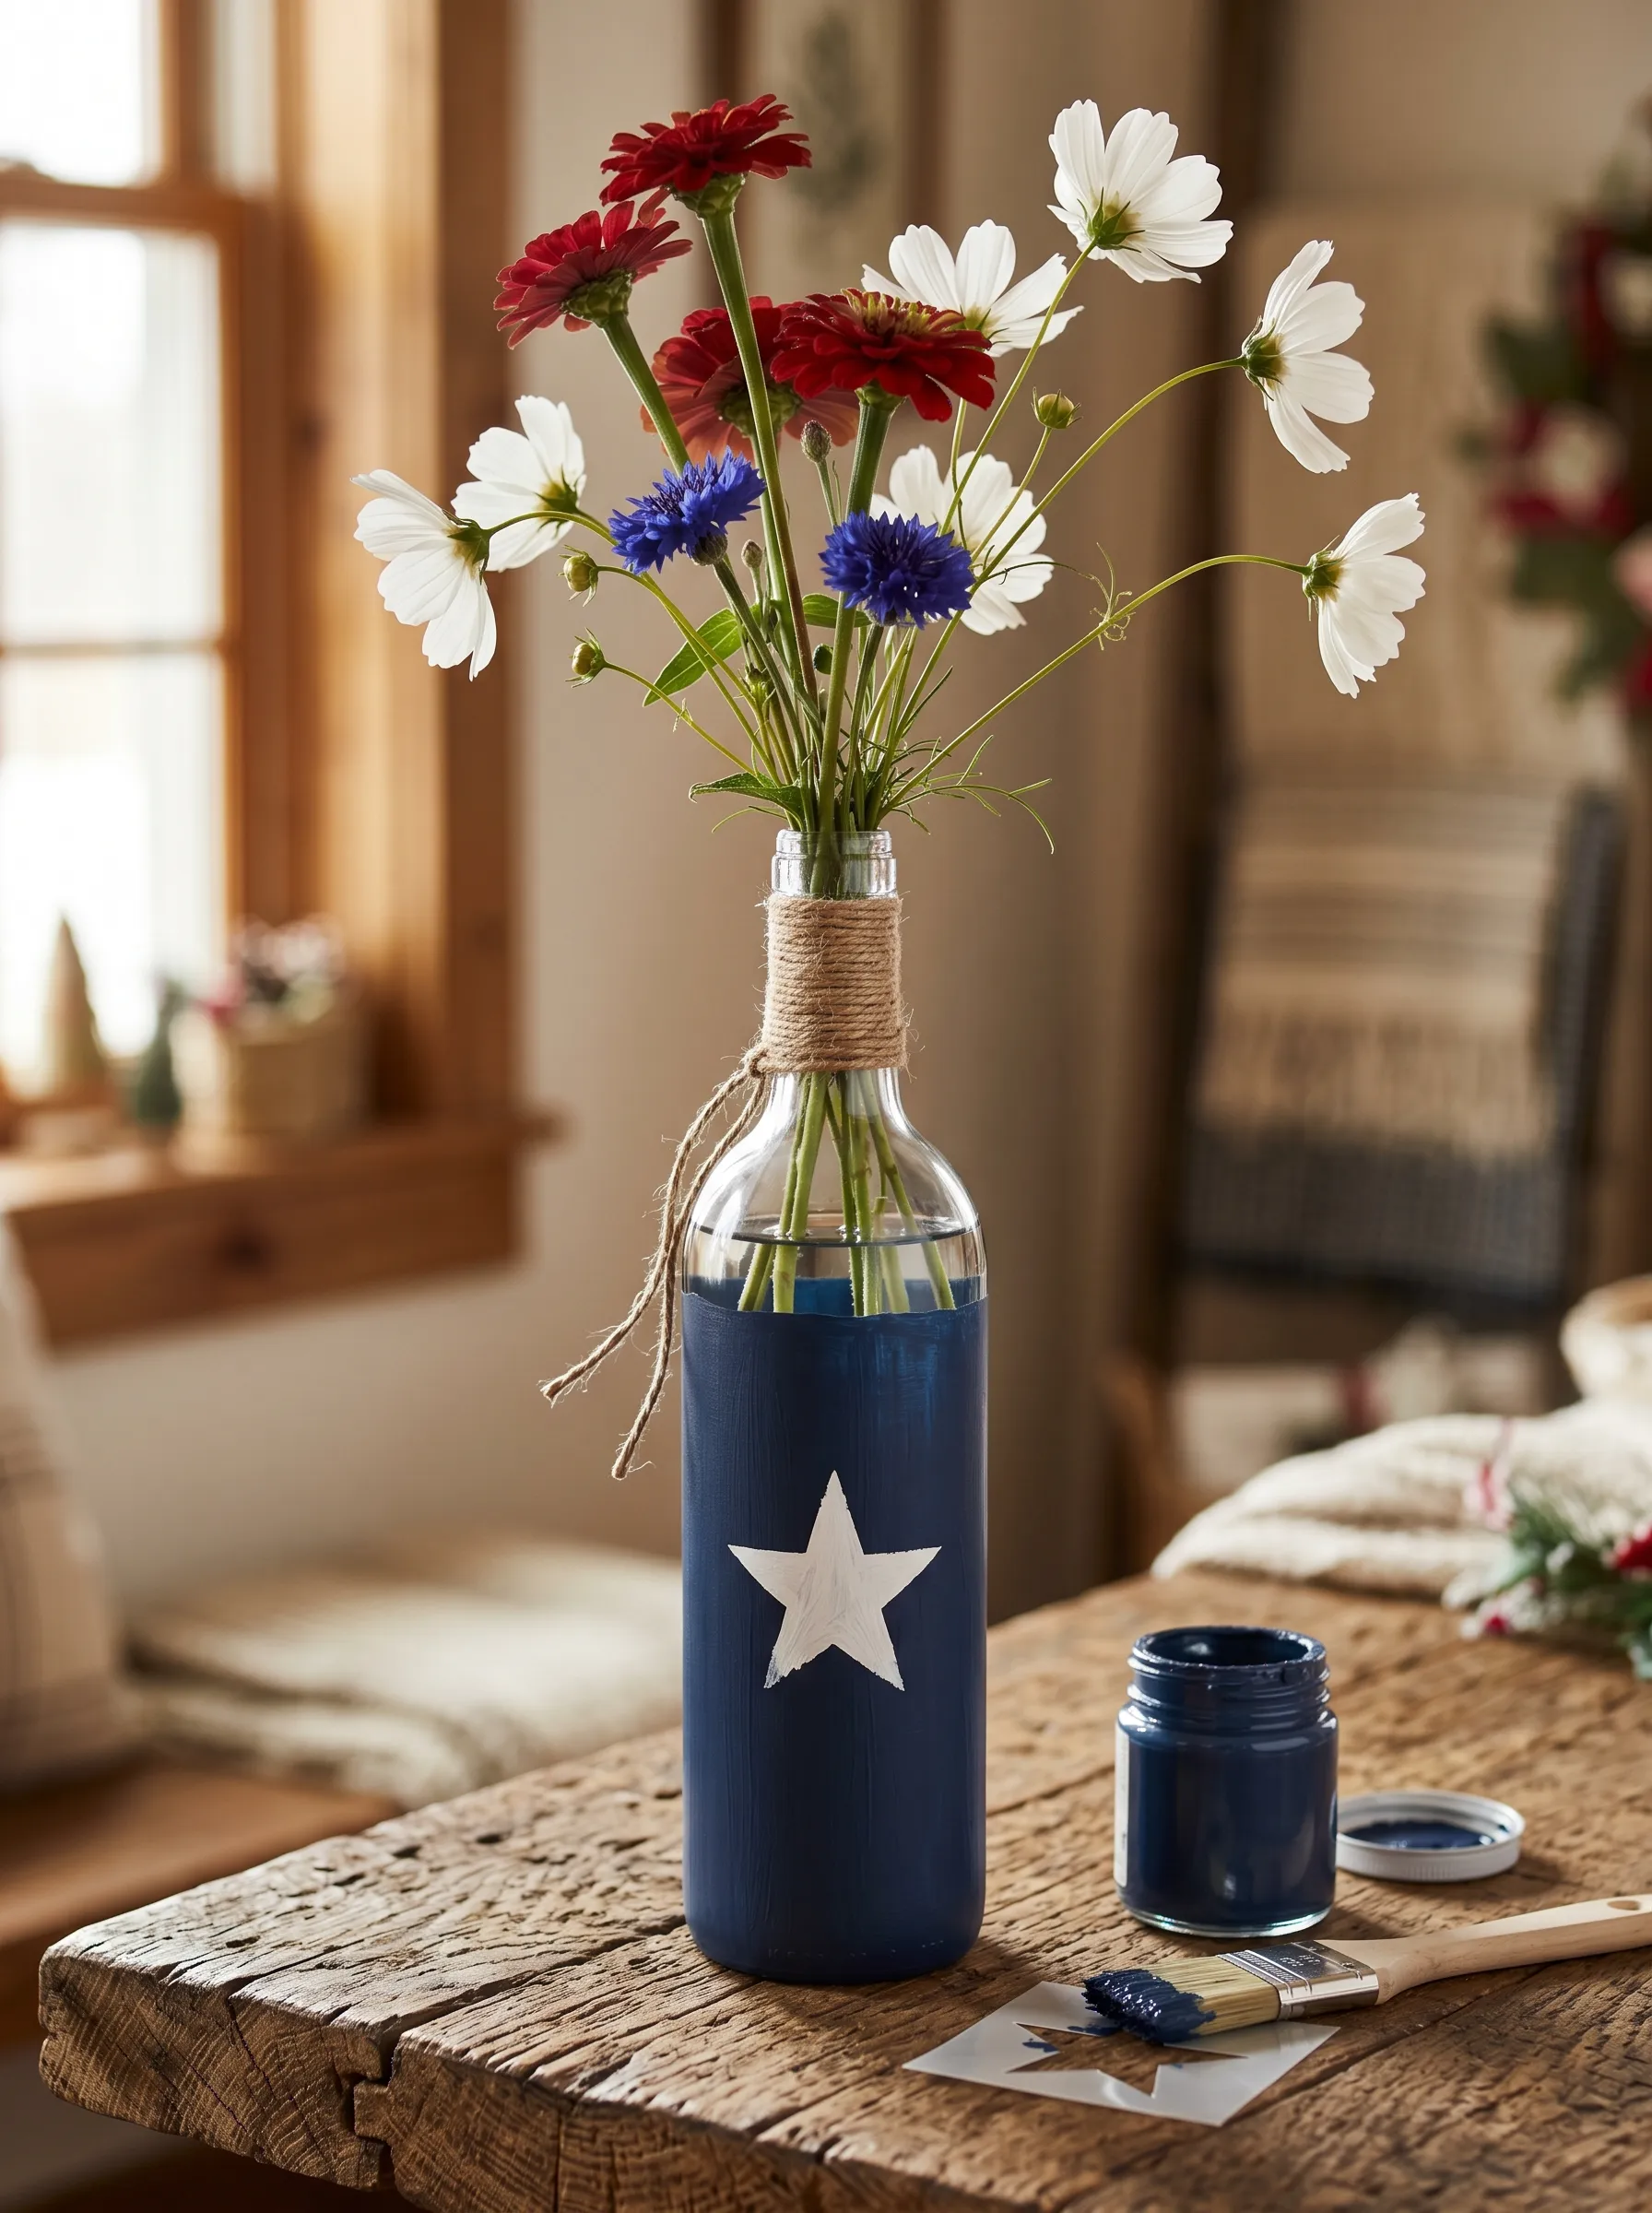
Empty a wine bottle. Remove the label completely — soak in warm water for five minutes, then peel. Dry fully.
Paint the lower two-thirds of the bottle with two coats of navy blue acrylic or chalk paint, allowing the first coat to dry before the second. The upper third of the bottle should remain clear glass.
While the navy paint is dry but before sealing, tape a star stencil to the center of the painted section and pounce a single large white star through it with a foam applicator. Remove the stencil carefully.
Wrap natural jute twine tightly around the bottle neck — the transition between the painted navy lower section and the clear glass upper section — in fifteen to twenty tight wraps. Tie off with a simple knot and leave a short tail.
Fill the bottle with water and arrange red gerbera daisies, white cosmos, and blue cornflowers loosely. Keep the arrangement open and casual rather than tightly packed.
Set on a wooden table with the navy paint can and brush visible beside it. This is an honest DIY project — it costs less than five dollars and takes forty-five minutes.
The Pallet Flag for the Porch or Exterior Wall
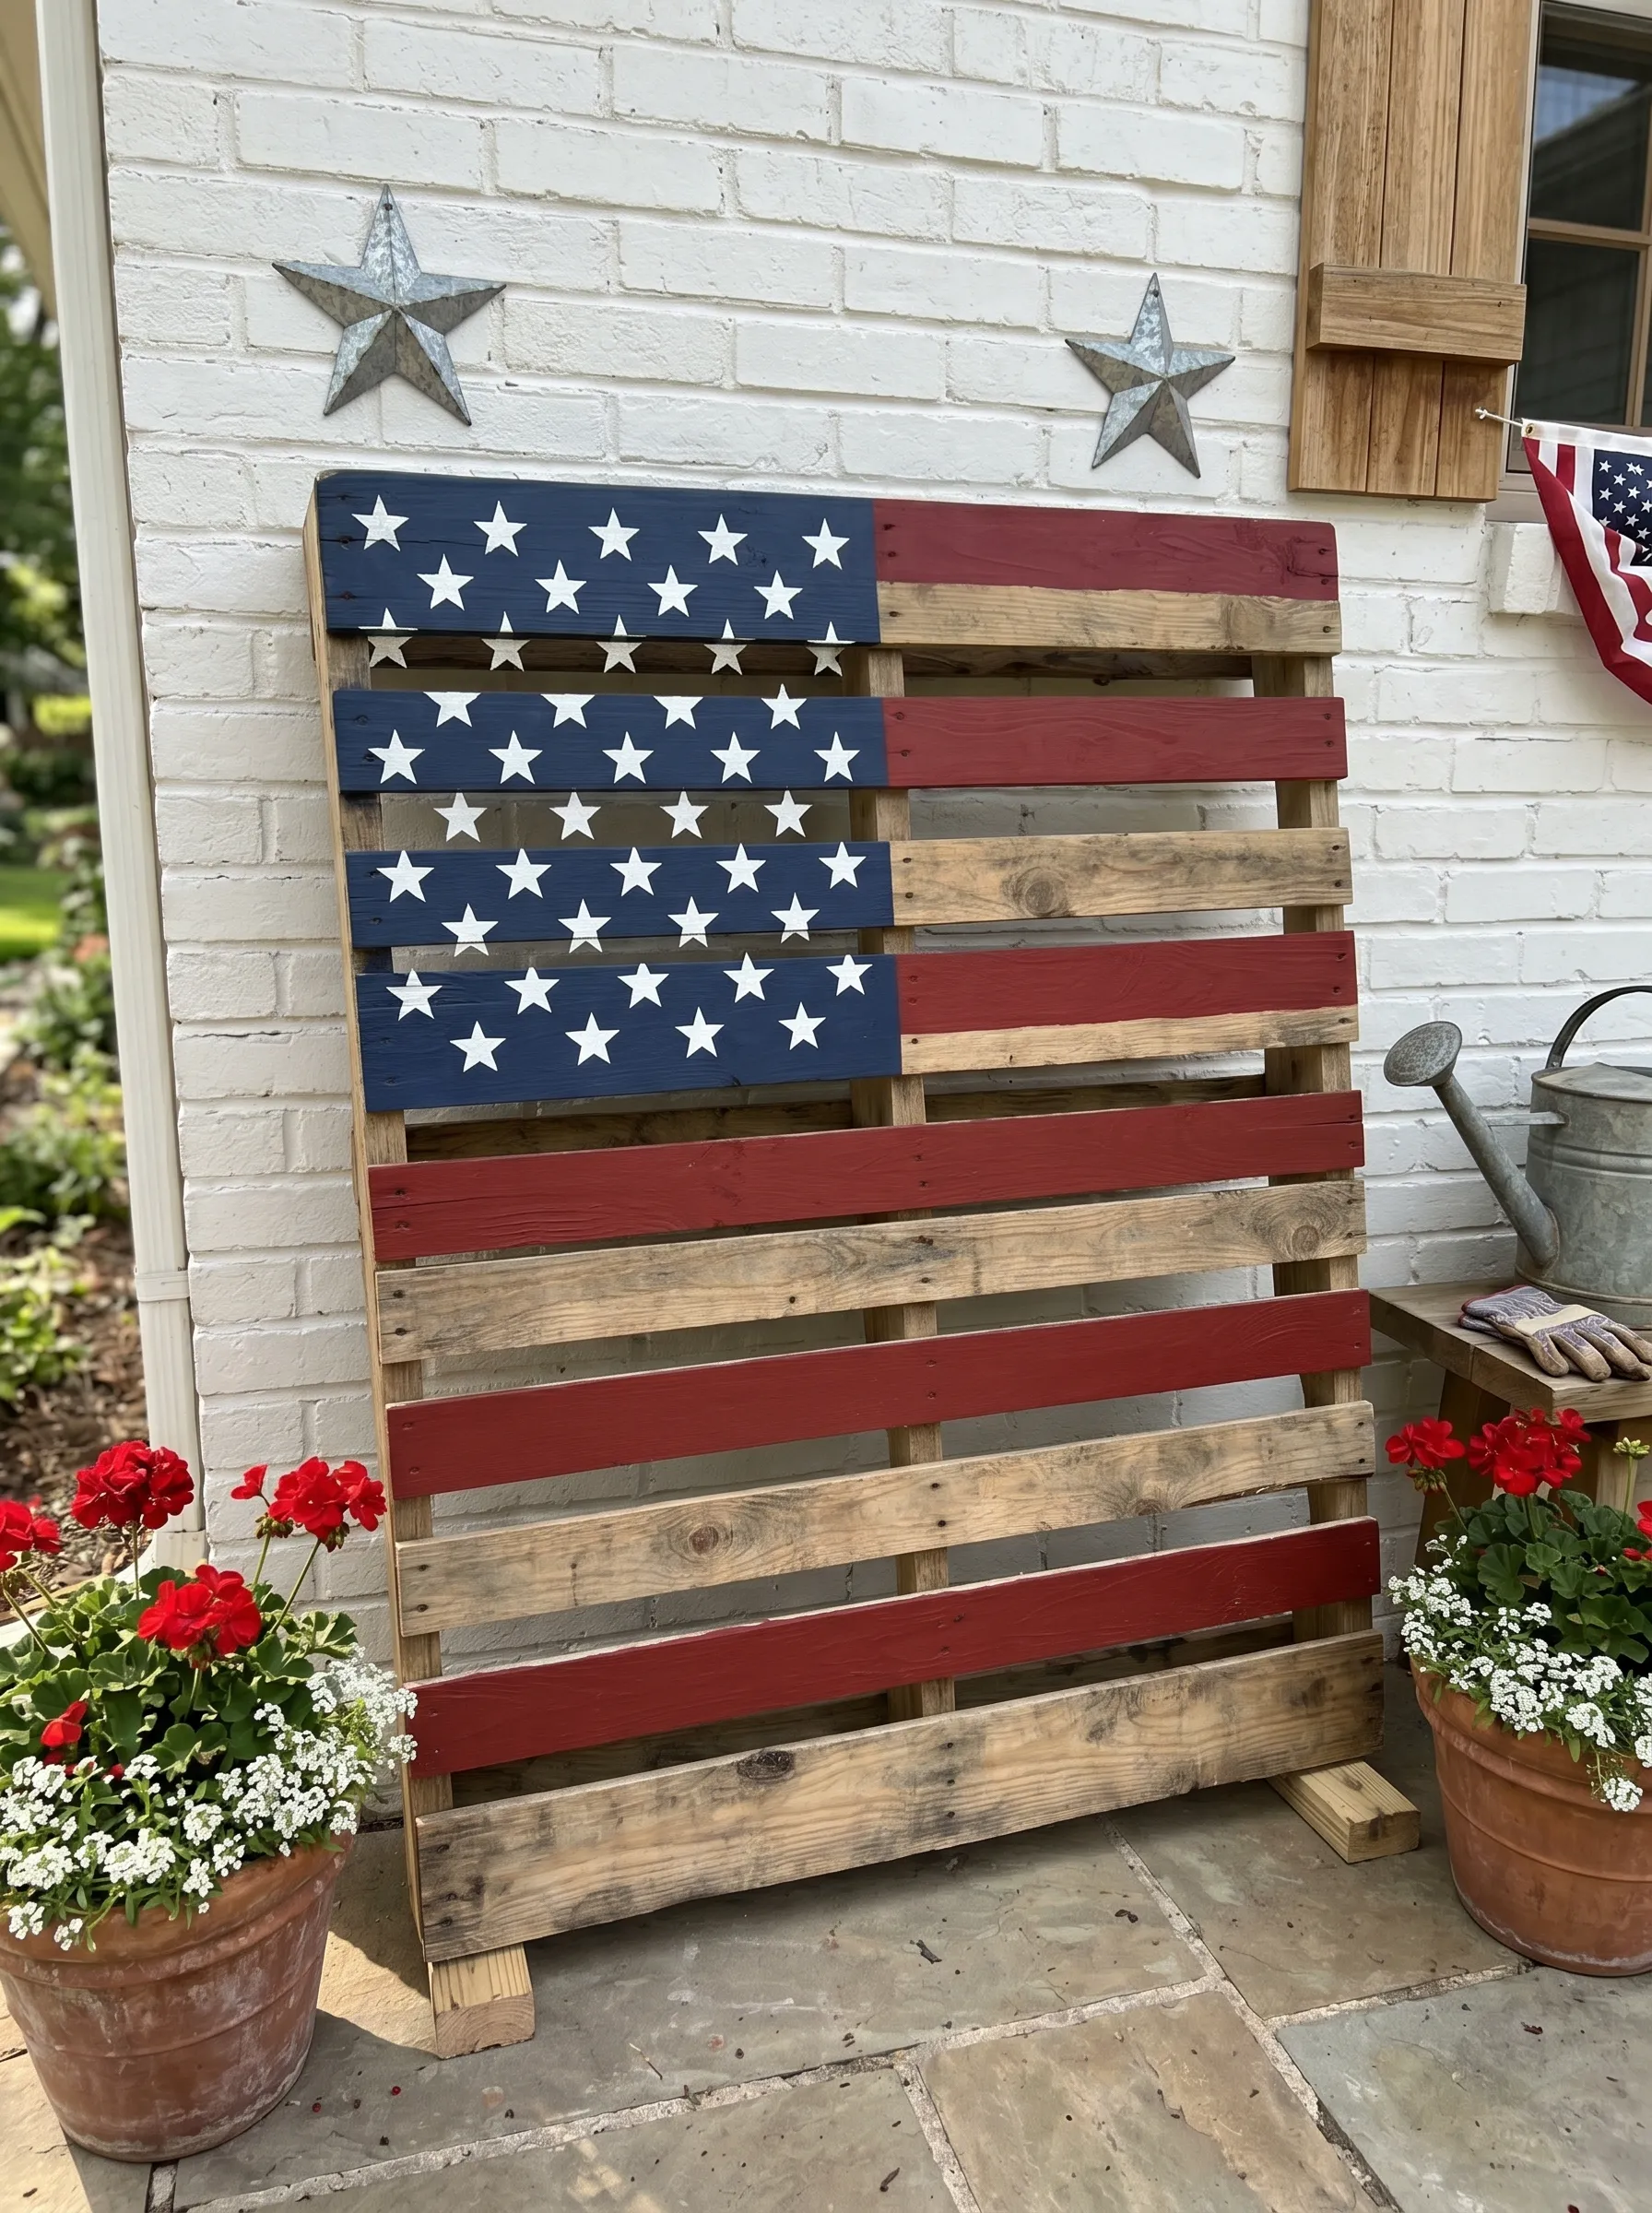
Source a full wooden shipping pallet in good condition — many businesses give them away for free. Pressure-wash it and allow it to dry for a full day in the sun.
Paint the horizontal boards of the top section with alternating red and unpainted-wood stripes. On the left upper portion, paint a solid navy rectangle large enough to cover approximately the first three boards on the left side, full width. While the navy is still slightly tacky, stencil white stars in a grid across the canton using a star grid stencil and a foam pouncer.
Allow everything to dry fully, then spray the entire pallet with clear weatherproof outdoor sealer. This step is not optional — unsealed acrylic on exterior wood will begin to peel within days in summer heat and sun.
Lean the finished pallet against a white brick or siding exterior wall. Flank it at the base with terracotta pots of red geraniums and white alyssum. Mount two galvanized metal barn stars on the wall above the pallet at a slight upward angle.
The pallet flag reads at scale from the street. It reads as commitment to the holiday. It also costs approximately eight dollars in paint and nothing for the pallet.
The DIY Patriotic Doormat
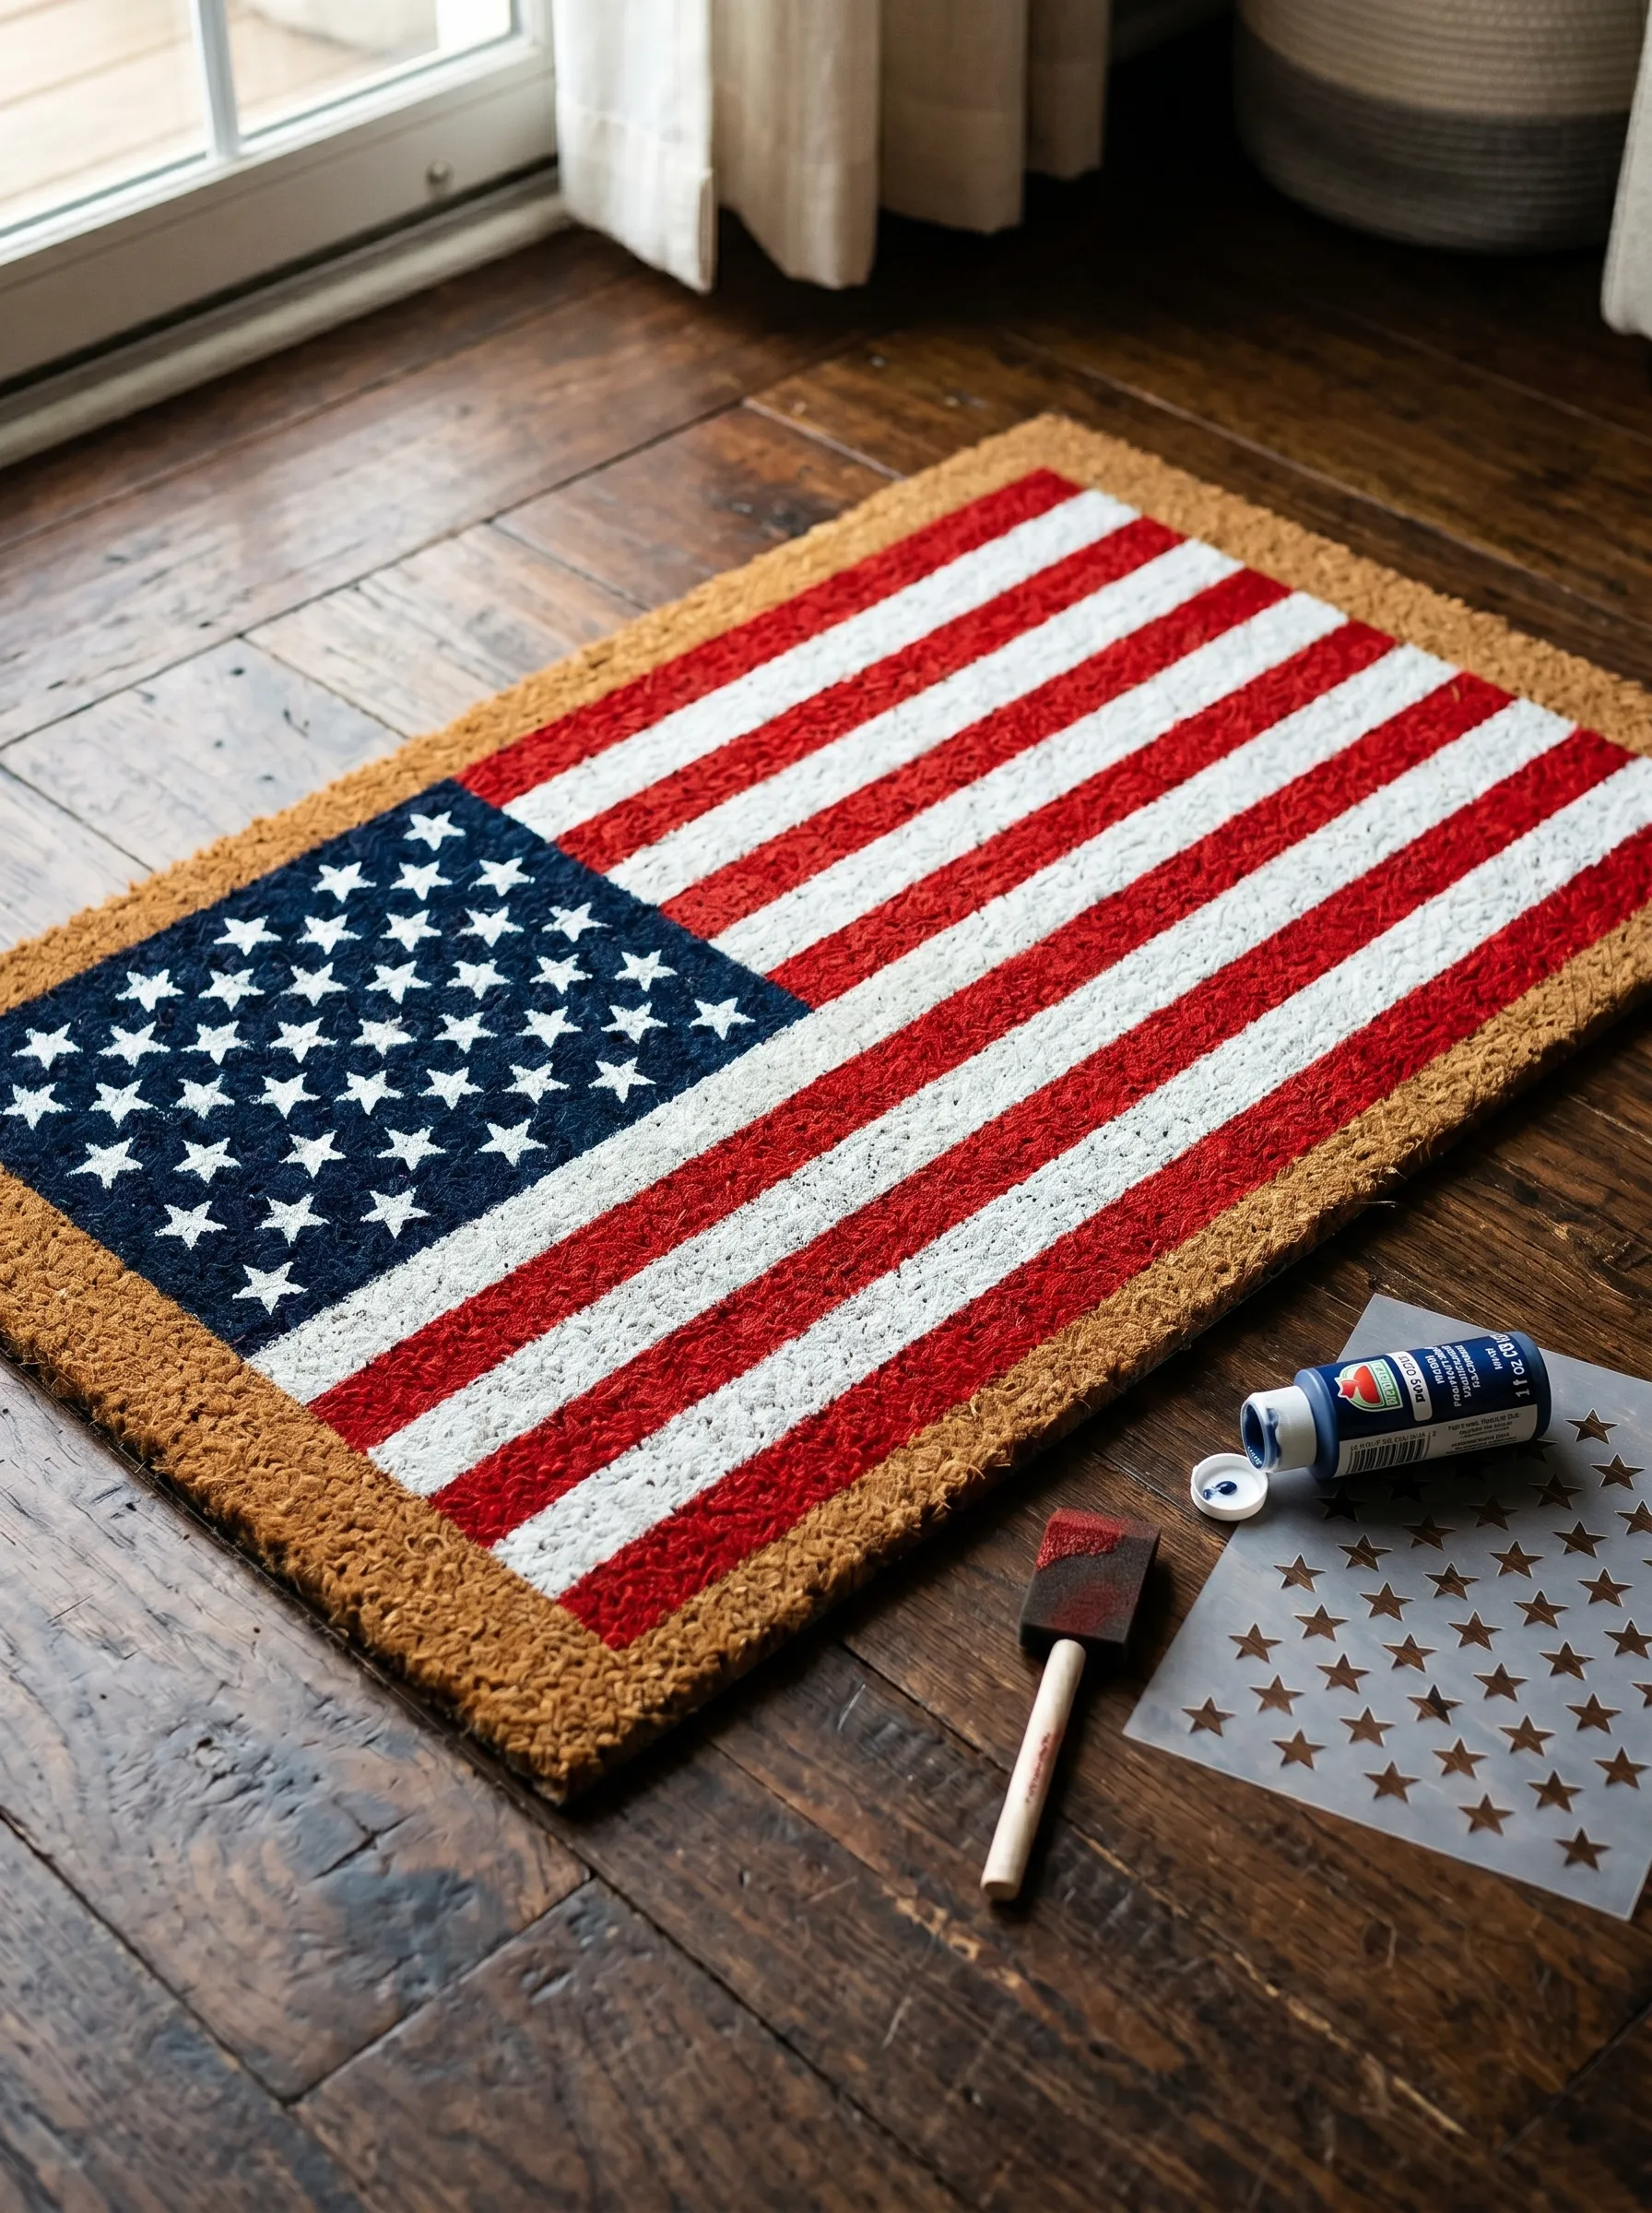
Buy a plain natural coir doormat in a standard size. The natural tan color of the coir becomes the border and the only background visible under the painted design.
Using blue painter’s tape, mask off the flag proportions on the mat surface: a rectangle for the canton in the upper left, and horizontal stripes running the remaining length. Paint the canton in navy with a foam brush — coir absorbs paint heavily, so multiple coats are needed. While the navy is still somewhat wet, press a star stencil into the canton section and pounce white paint through it. Remove quickly and wipe the stencil clean between applications.
For the stripes: using painter’s tape to keep lines clean, paint alternating horizontal bands in red, leaving every other band as natural coir for the white stripes. The natural fiber color reads clearly as white against the red.
Allow to dry for twenty-four hours before removing the tape. The coir’s texture gives the finished design a hand-blocked quality that looks better than it has any right to.
The Twine-Wrapped Mason Jar Vase
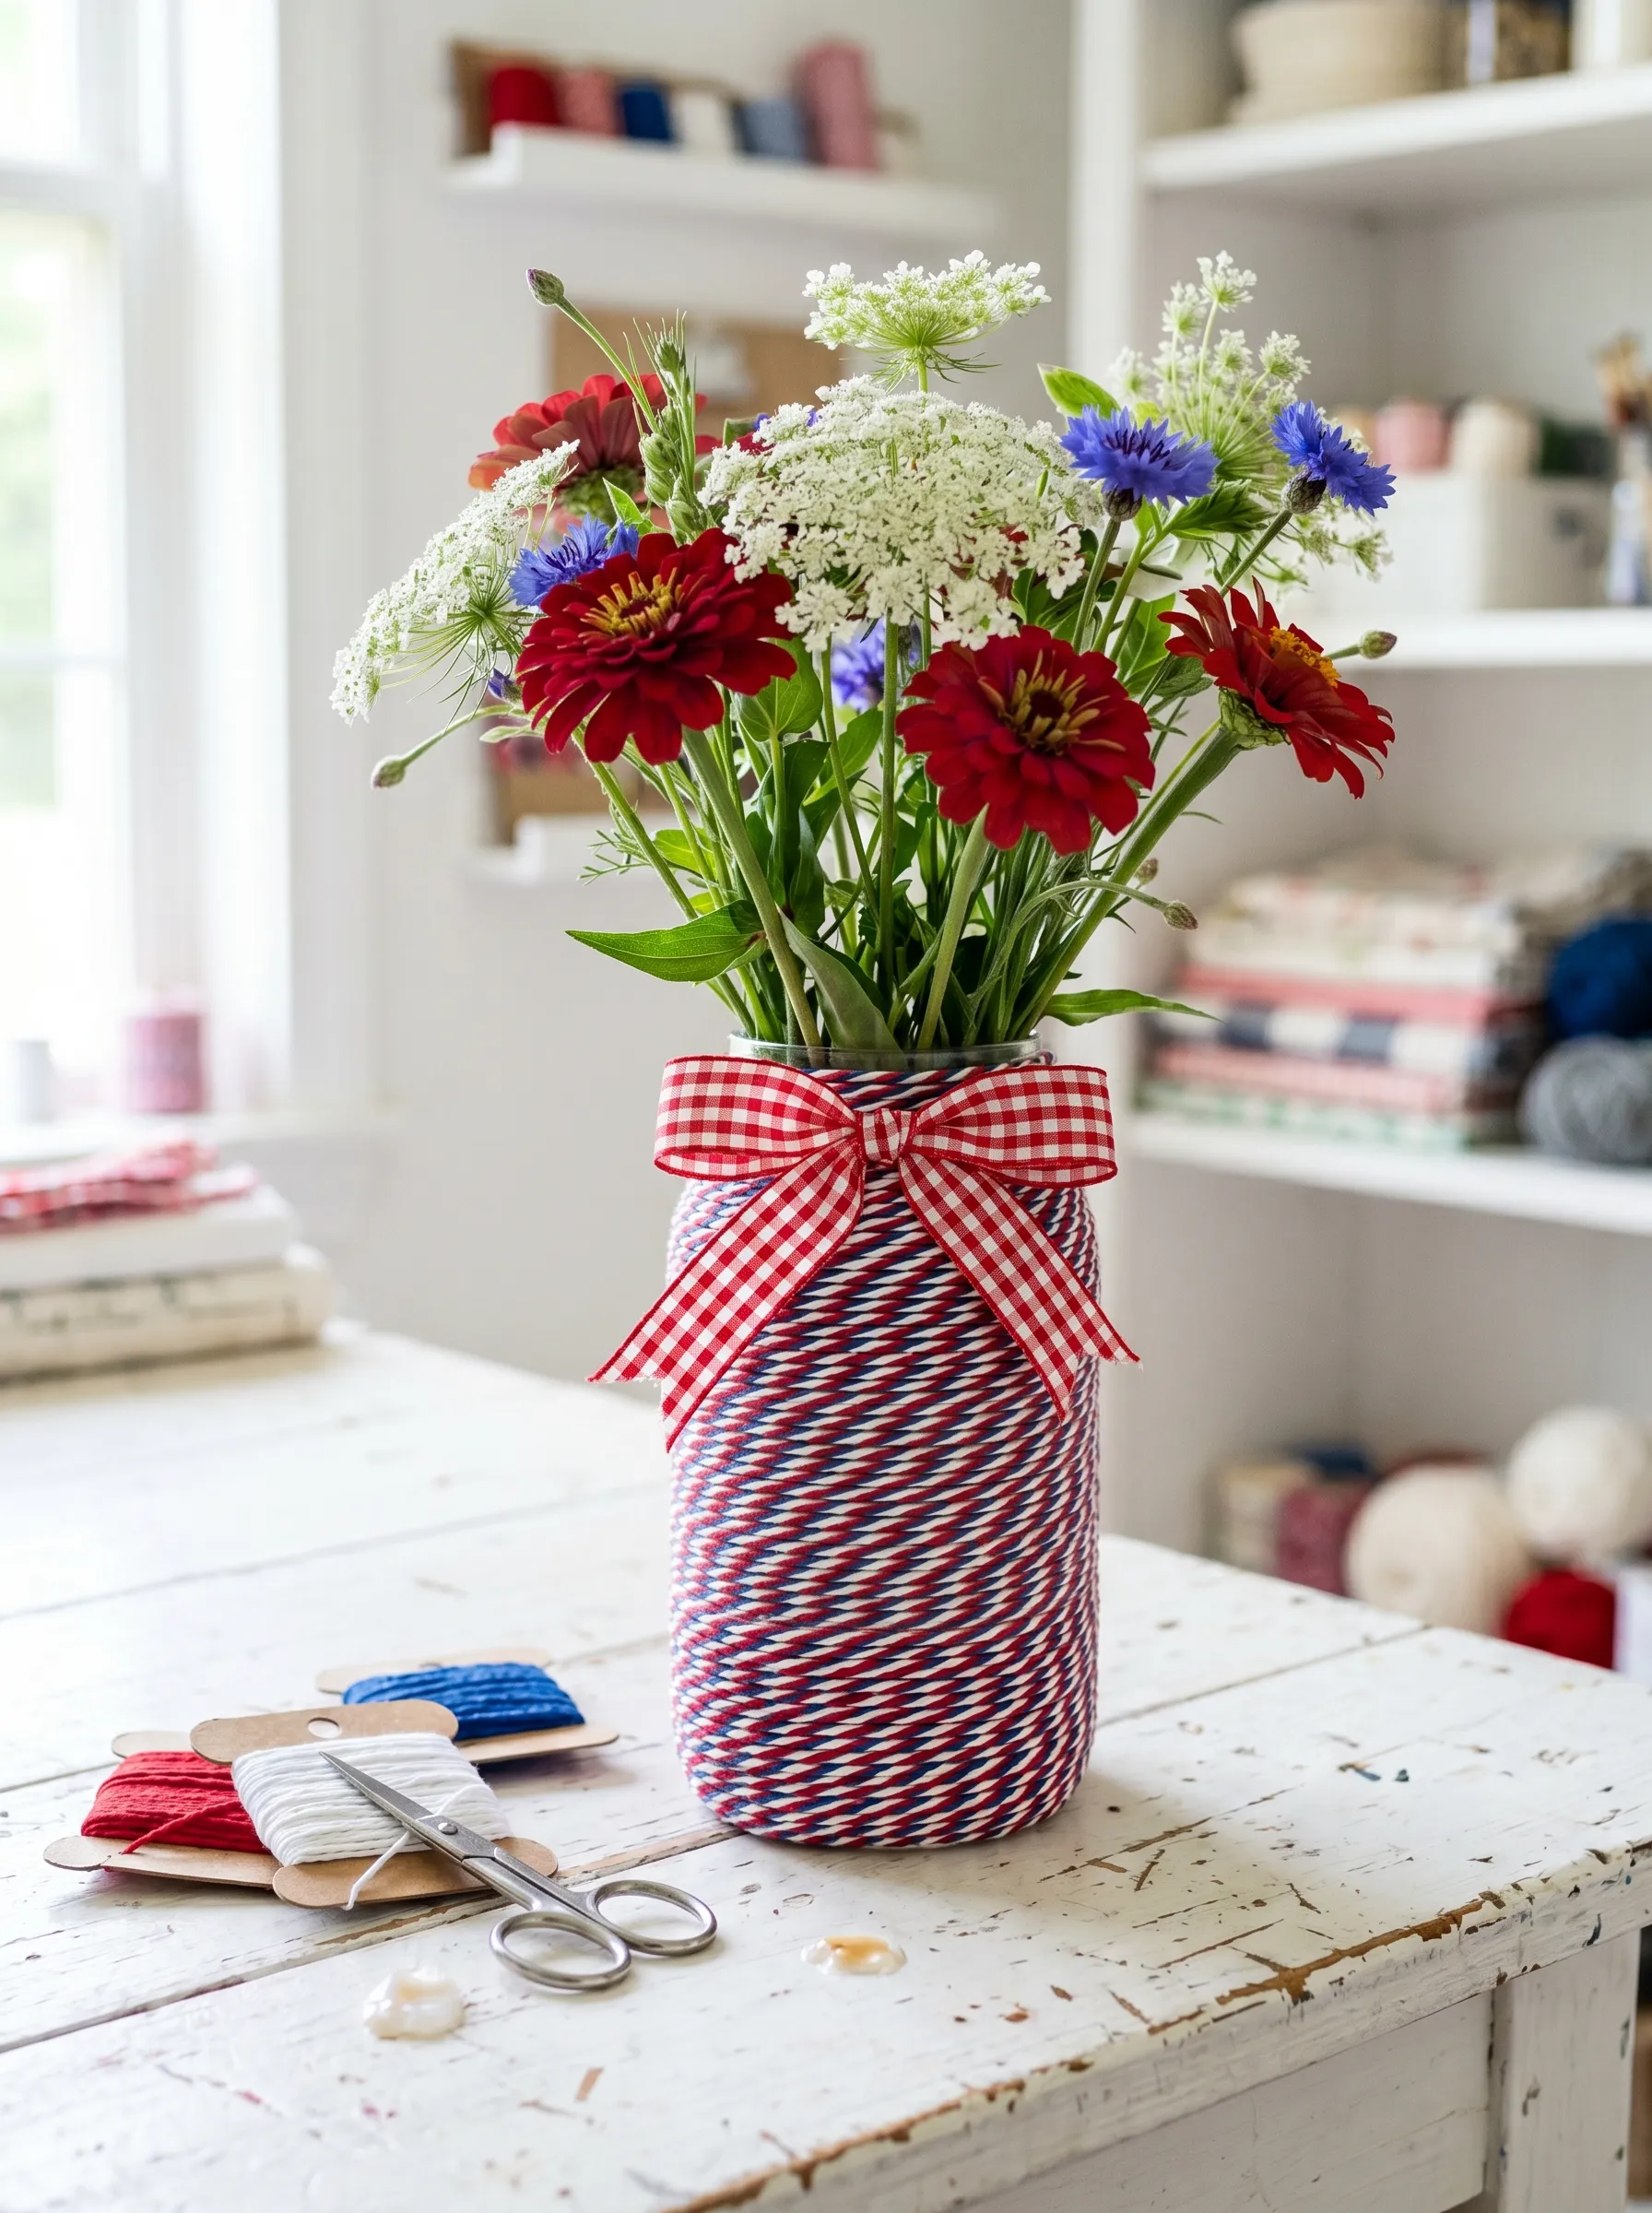
This is the project for the person who has mason jars, a ball of twine, and fifteen free minutes.
Take a wide-mouth quart mason jar. Starting at the base, apply a thin bead of hot glue around the circumference and press the end of your first twine color against it. Work upward in a continuous spiral, applying glue an inch or two ahead of the twine at a time and pressing the twine into it firmly.
Alternate twine colors as you wrap — red, white, and navy baker’s twine available on cardboard spools is the right material. The color alternation creates a chevron-like diagonal stripe effect rather than horizontal bands, because the spiral wrapping naturally angles the colors.
When you reach the jar neck, stop wrapping. Tie a red gingham ribbon bow around the neck over the wrapped edge.
Fill with water and arrange loosely: red zinnias cut to different lengths, white Queen Anne’s lace, blue cornflowers. The botanical stems should be visible through the top few clear inches of the jar.
Set beside scissors and the leftover twine spools. The evidence of making is part of the display.
The Thing About DIY That Nobody Admits
There is a version of DIY that’s about saving money. That’s fine as a reason. There’s a version that’s about having something to show guests. That’s fine too.
But the version that actually makes the holiday feel different is simpler than either of those. It’s the version where you spent time making something for the people who are coming. Where the painted rocks in the garden and the crepe paper flowers on the table are evidence of preparation that goes beyond shopping.
People feel that. They don’t always name it. But they feel the difference between a house that was decorated and a house that was prepared.
That’s what all of this is really for.