
There’s a version of dorm decorating where you spend four hundred dollars on matching sets from the same three websites and end up with the exact same room as the girl two floors above you. Nobody wants to talk about that.
Then there’s the other version. The one where someone hot-glued yarn around cardboard letters and hung them on a cinder block wall and somehow it looked intentional. Where a row of five succulents on a windowsill became the most interesting corner of the building. Where a thrift store mirror painted sage green made a dorm desk look like a café in Paris.
That’s the version worth talking about.
DIY dorm decor gets dismissed as a cheap substitute for the real thing. It isn’t. At its best, it’s more considered than anything you’d order online, because every piece required a decision. You can’t accidentally end up with something handmade.
Why Most Dorm DIY Projects Look Like a Craft Fair Reject Table
Good intentions don’t produce good rooms. A lot of dorm DIY fails not because the person lacked skill but because they didn’t understand what makes handmade work in a space.
Making Too Many Things at Once
DIY projects accumulate. You make one thing, it goes well, you make another, and six projects later your room looks like a Pinterest board exploded. The problem isn’t any one piece. It’s that nothing has room to breathe.
The best DIY dorm rooms have one or two handmade focal points and let everything else be simple. A yarn-wrapped letter is a statement when it’s alone on a wall. It’s noise when it’s surrounded by five other projects competing for attention.
Pick your one big DIY. Do it well. Support it with simple, bought pieces and let it carry the room.
Choosing the Wrong Materials for the Scale
A small macramé plant hanger on a large blank wall doesn’t fill the space — it highlights how empty the wall is. A single pressed leaf on a cinder block looks like it fell there. Scale is the most underestimated factor in any DIY project.
Whatever you make, make it big enough to matter. A dried flower wall display needs to spread across the whole wall behind the bed, not cluster in one corner. A photo string needs three rows, not one. A stacked crate bookshelf needs all three crates, not two. The rule is: bigger than you think.
Ignoring the Color Story
DIY gives you full control over color, which is both the opportunity and the trap. Most failed dorm DIY rooms have too many colors because every project was made in isolation without thinking about what it sat next to.
Before starting any project, write down your palette. Two or three colors maximum. Every piece of yarn, every pot of paint, every paper used for folding should come from that list. The rooms in these images that look cohesive — the terracotta-sage-cream combination, the all-white-and-cream ceiling installation, the warm wood-and-brass desk setups — got there because someone chose a palette first and made every decision inside it.
DIY Dorm Room Ideas
Americana Twin Beds Setup
Use a white diamond-quilted coverlet as the base layer on each bed — this specific texture is important, as it reads as classic and tailored rather than casual. Layer a navy woven throw across the foot of each bed, allowing it to drape casually over one side.
The pillow arrangement should be: two hotel-style pillow shams in white with navy border piping at the back, one navy ticking stripe bolster in the middle, and one large blue block-print or botanical print pillow at the front. Between the beds, a white cabinet with gold bar handles serves as the shared nightstand. Place two matching column lamps with white drum shades and gold bases, one on each side.
Hang blue and white small-scale botanical print curtains on a gold rod above the window. On the walls flanking the window, mount matching framed prints — flag prints in this case, but any matched pair works — at exactly the same height and distance from the center. The symmetry is the design. Do not deviate from it.
Curated Succulent Windowsill
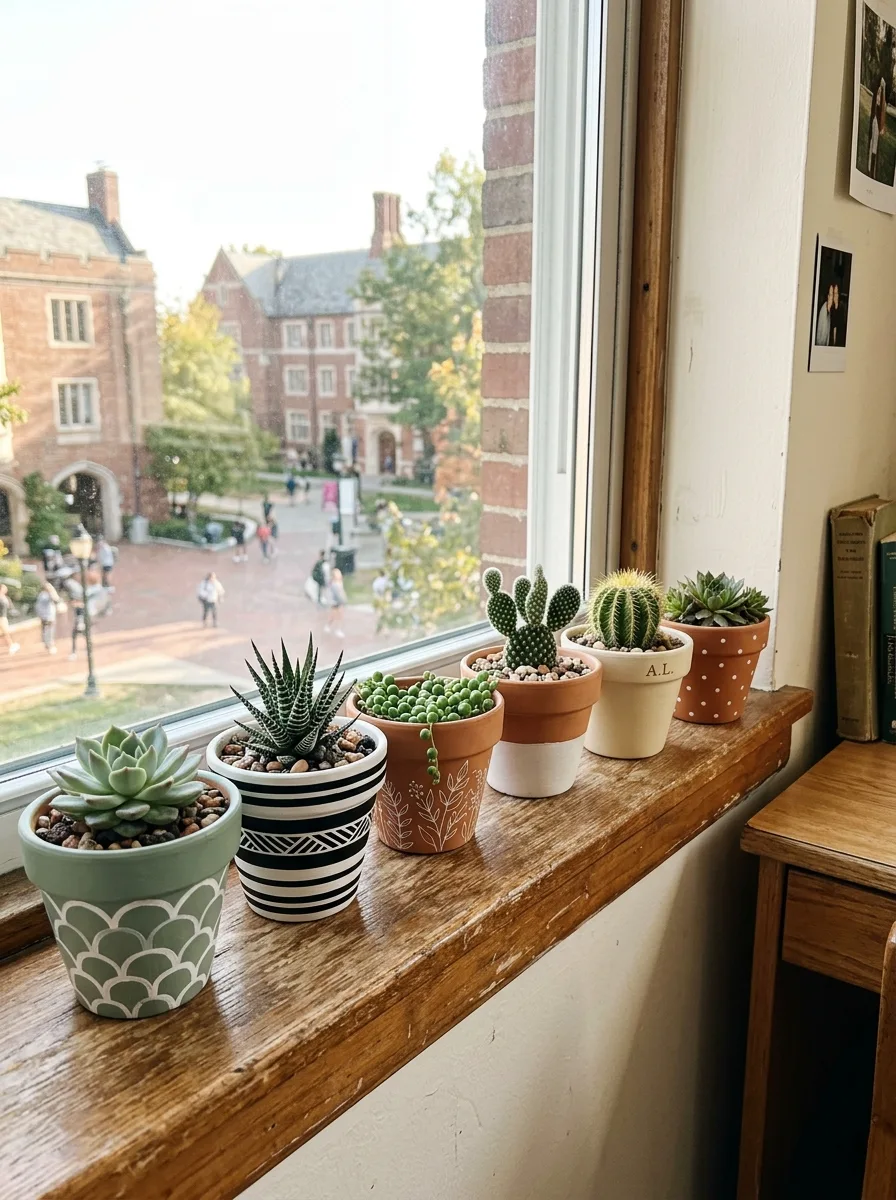
Line your windowsill with five to seven small succulents and cacti in pots you’ve painted, stamped, or selected for their varied designs. The key is treating the pots as a coordinated collection rather than a random assortment. Use two or three base colors across the group — sage green, terracotta, and cream, for example — and apply different surface treatments to each: stripes on one, polka dots on another, a botanical line drawing on a third.
Vary the plant types deliberately: one rosette succulent, one upright cactus, one trailing string-of-pearls, one barrel cactus. The variation in plant silhouette is what makes the row visually interesting rather than repetitive. Tuck a small personalized pot — initials stamped in the clay before firing, or written on with a paint pen — into the middle of the arrangement.
Finish with a thin layer of decorative pebbles on top of the soil in each pot to unify the group.
Palm Leaf Wallpaper Gold Letter Twins
Cover all walls in a blue and white palm-leaf or tropical botanical peel-and-stick wallpaper. The pattern should be large in repeat and airy — palm fronds or banana leaves rather than small allover floral — so the room doesn’t feel enclosed. Source two oversized gold metal letters — the occupants’ initials — and mount one above each bed at the same height, positioned so each letter relates to the bed below it.
Hang a single Roman shade in a blue and white chambray stripe above the window, mounted inside the frame if possible, to avoid competing with the wallpaper pattern behind it. Between the beds, an open-shelf cabinet with blue and white striped fabric bins in each cubby turns storage into decoration.
The bed styling should be deliberately soft and layered: a floral duvet in blue and green on white, a bed skirt in the same print, a pink cable-knit throw draped across the foot of each bed, and an embroidered monogram pillow in the center. Two matching brass column lamps anchor the shared nightstand surface.
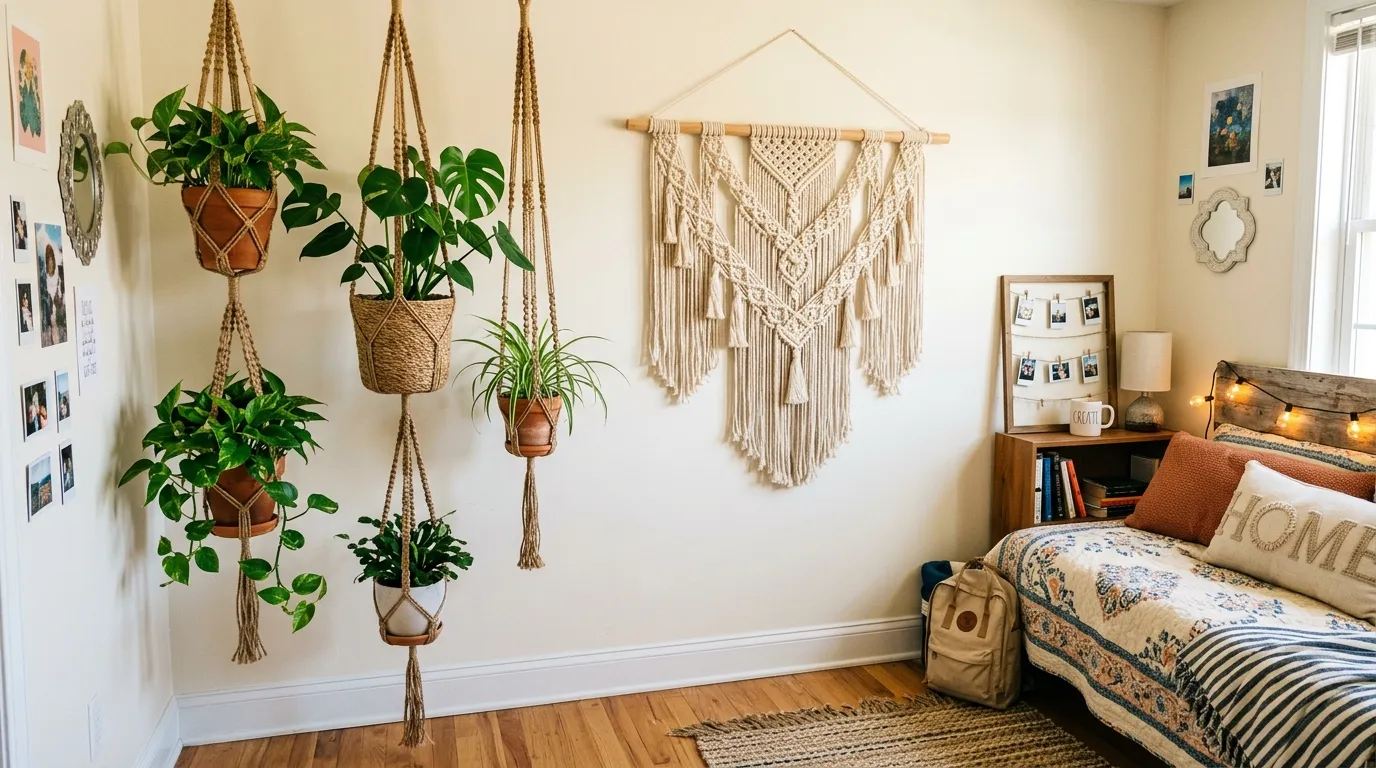
Closet Rod Macramé Plant Hangers
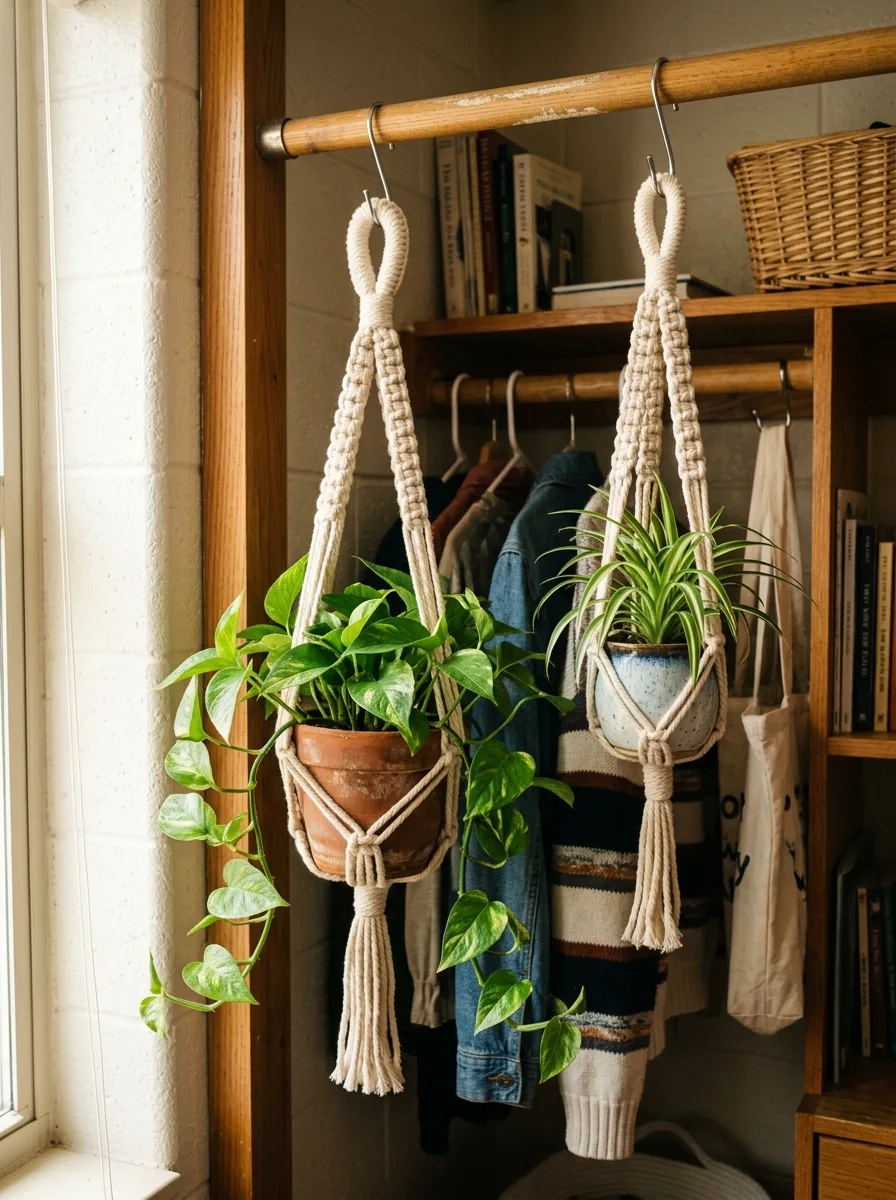
Source or make two macramé plant hangers in natural cotton cord. The spiral knotted style — where the cord wraps around itself in a continuous twist — is the easiest to make for beginners and looks the most polished. Each hanger should be long enough that the plant cradle sits at mid-height when hung from a standard closet rod.
Hang both hangers from the closet rod using large S-hooks: one holding a pothos in a terracotta pot, the other holding a spider plant in a speckled ceramic. Position the hangers near the window so the plants get light and so the trailing vines from the pothos have room to grow downward.
The combination of the natural rope against the warm wood rod and the green plants creates a living curtain effect at the closet opening that makes the wardrobe area feel finished rather than exposed.
Plaid and Platform Outdoorsy Setup
Raise the bed to platform height using a bed risers system or a platform bed frame with built-in storage cubbies underneath. The under-bed space is the first priority: fill it with a combination of woven baskets, navy fabric bins, and a shoe shelf.
Dress the bed in a tartan or buffalo plaid duvet in navy, hunter green, and cream — the specific colorway matters, as this is the anchor for the whole room’s palette. Add a cream cable-knit throw and a single large natural linen sham behind the plaid pillowcases. On the adjacent wall, build a small gallery: a navy felt pennant flag above the bed, a framed landscape print on one side, a grid of personal photos in matching frames on the other.
Mount open shelving above the desk using natural wood floating shelves — two shelves, one above the other — and dress them with a mix of plants in metal pots, framed personal photos, and a wooden sign with a motivational phrase. String warm globe lights along the perimeter of the ceiling. A tall dark wood bookshelf with a Himalayan salt lamp on one shelf grounds the room’s left side. Keep the color palette to four elements only: navy, hunter green, warm wood, and cream.
Three-Row Clothesline Photo and Print Gallery
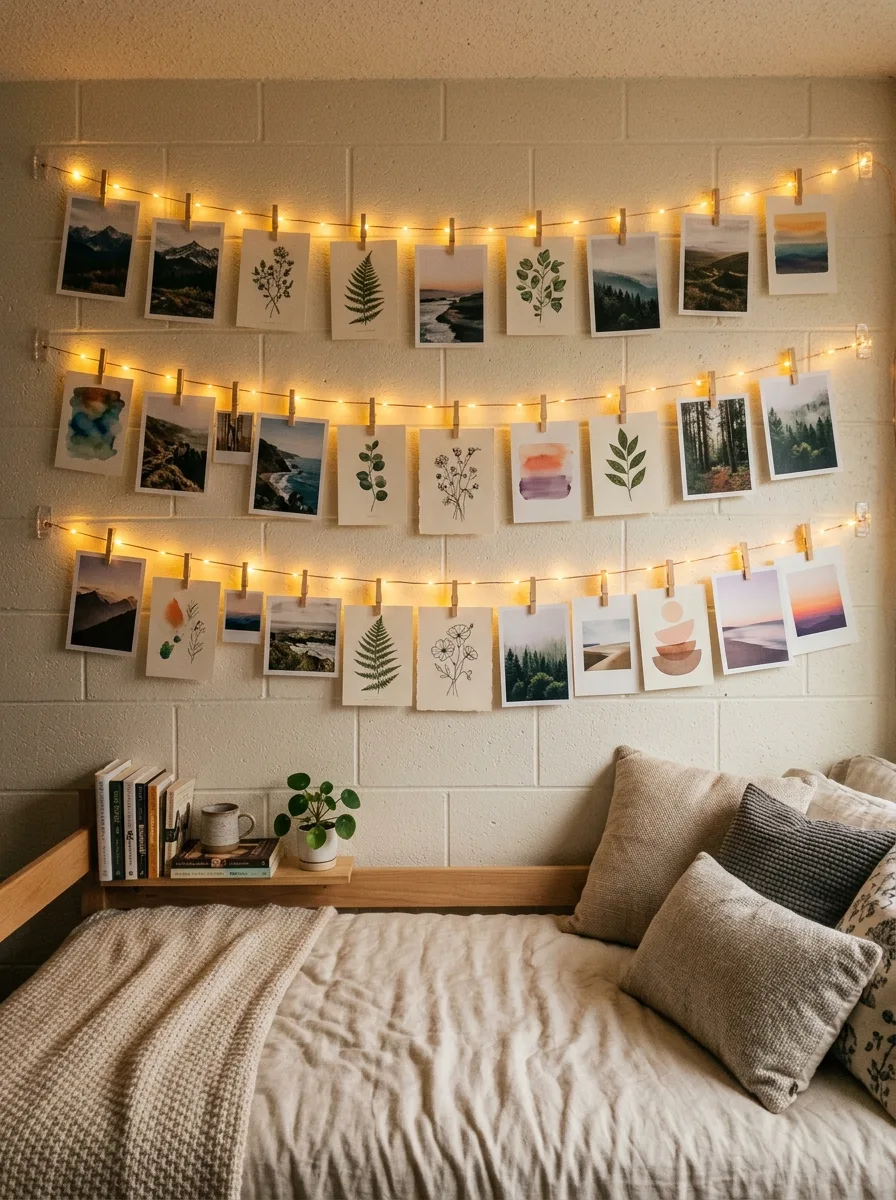
Run three parallel lines of copper wire or thin jute cord horizontally across the wall above your bed, spaced about nine inches apart vertically. Secure each end to the wall with small Command hooks. Print photos, botanical illustrations, and watercolor prints at a consistent size — four by six inches works well — and clip them to the lines with small natural wood clothespins.
Mix photo prints with art prints in a roughly two-to-one ratio: two photos for every one art print keeps the wall from feeling like a photo dump while still making it personal. The subject matter should have a loose theme: landscapes and botanicals work together; abstract prints and florals work together.
Avoid a random collection of unrelated images. Below the photo wall, a simple wood ledge shelf with a small plant and a ceramic mug provides grounding for the installation above it. The key technical note: attach the wire firmly enough that the line doesn’t sag under the weight of the prints, or the horizontal effect is lost.
Faux Ivy LED Wall Feature
Attach multiple strands of faux ivy or trailing vine garland — the plastic kind with individual leaves on a flexible wire stem — from the ceiling line of the wall behind the bed, running them vertically down the full height of the wall.
You’ll need at least eight to ten strands placed three to four inches apart to achieve a full coverage effect. Secure each strand at the top using a small adhesive hook and let the vine fall naturally, bending the flexible wire stem slightly so it curves outward at different points rather than hanging perfectly straight. Run a strip of LED lights along the very top edge of the wall where it meets the ceiling — behind the top of the ivy strands so the light source is hidden.
Set the strip to a soft lavender or warm pink rather than a harsh blue or green. The light washes the wall from the top down and glows through the faux leaves. Nestle two or three small framed pink text signs between the ivy strands at different heights. Keep the bed below in a light pink or white palette with a faux fur throw. The vine wall does everything.
Sage Linen French Memo Board

Purchase a large square of foam core or thin plywood and cut it to approximately 20 by 20 inches. Wrap it tightly in a piece of sage green linen or canvas fabric — pull the fabric around the edges and staple or tape it to the back so the front surface is smooth and taut.
Cut lengths of rose-gold or copper ribbon and arrange them diagonally across the board in a diamond grid pattern, securing each intersection with a small copper brad or decorative button pushed through from the front. The diamonds should be large enough to hold small cards and notes without looking cramped — roughly five inches across.
Mount the finished board above your desk using Command large picture-hanging strips. Slide schedule cards, motivational notes, and a sprig of dried lavender under the ribbon at intersections. The effect is a functional organizer that reads as a design piece.
Painted Mason Jar Desk Organizer
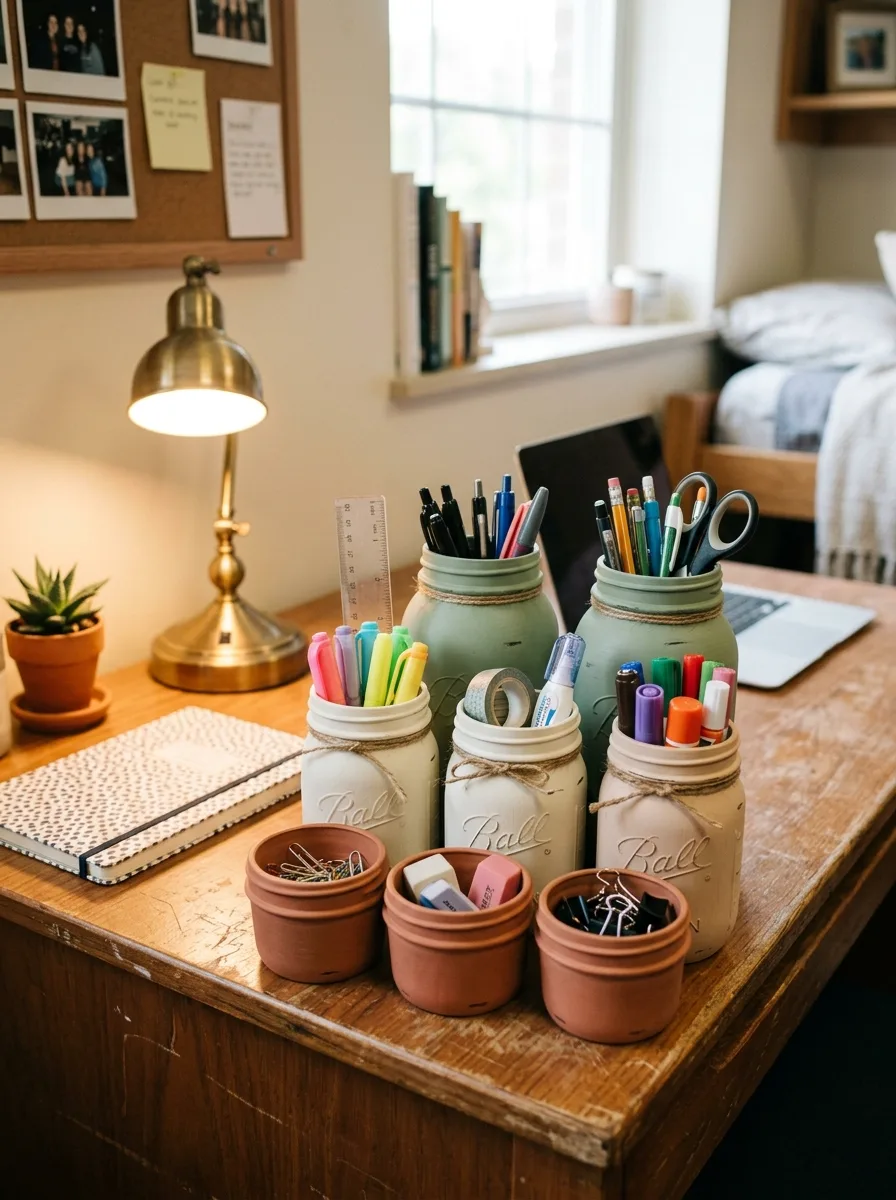
Buy six to eight Ball mason jars in a mix of sizes — pint, half-pint, and wide-mouth pint. Paint each one with chalk paint in a two-tone effect: leave the bottom third of each jar in its raw cream glass state and paint the upper two-thirds in your chosen color, blending the transition slightly so it doesn’t read as a hard line.
Sage green and terracotta work well together; dusty rose and cream work for a softer palette. Once dry, wrap a length of thin jute twine around the neck of each jar and tie it in a small knot rather than a bow. Group the jars in a cluster on your desk: three large ones at the back for pens, scissors, and rulers, and three small ones at the front for clips, erasers, and small items.
Pair with two or three small unglazed terracotta pots in matching sizes for overflow storage. The combination of painted glass and raw terracotta at the same tonal temperature reads as a coordinated set without being identical.
Stacked Crate Bookshelf with Interior Lamp
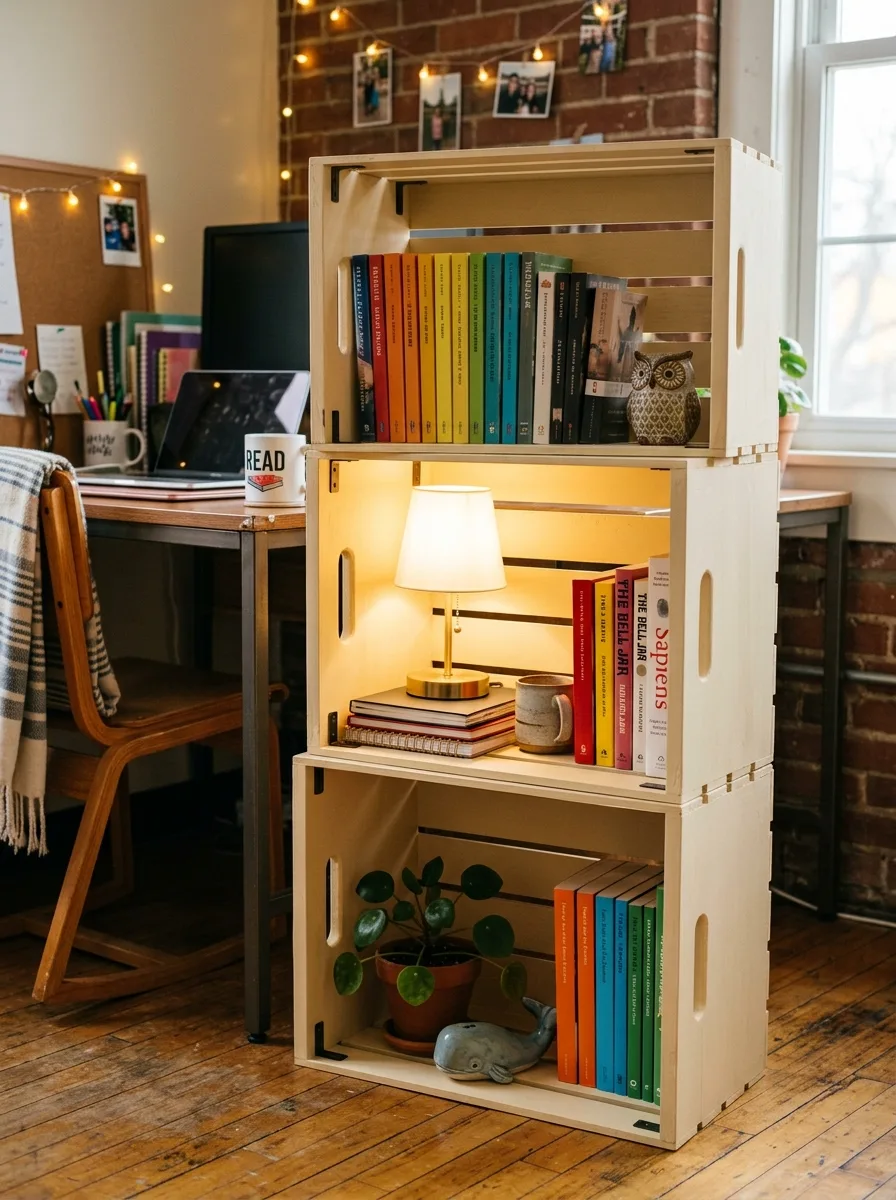
Source three unfinished wood craft crates — the kind sold at hobby stores in standard sizes. Stack them vertically, alternating the orientation: first crate facing front, second crate rotated 90 degrees so it opens to the side, third crate facing front again.
Secure the stack with small L-brackets screwed into the interior corners at each joint. Inside the middle crate, place a small cordless or battery-operated table lamp on a stack of books to bring it to the right height — the lamp inside the crate creates an illuminated niche effect that reads like a built-in feature.
Organize the top crate with books arranged by spine color — a rainbow gradient or a single color family — plus one small decorative object. The bottom crate holds a small trailing plant and more books, also color-coordinated. The whole unit functions as storage, display, and mood lighting simultaneously.
Pressed Flower Resin Bookmarks Desk Craft
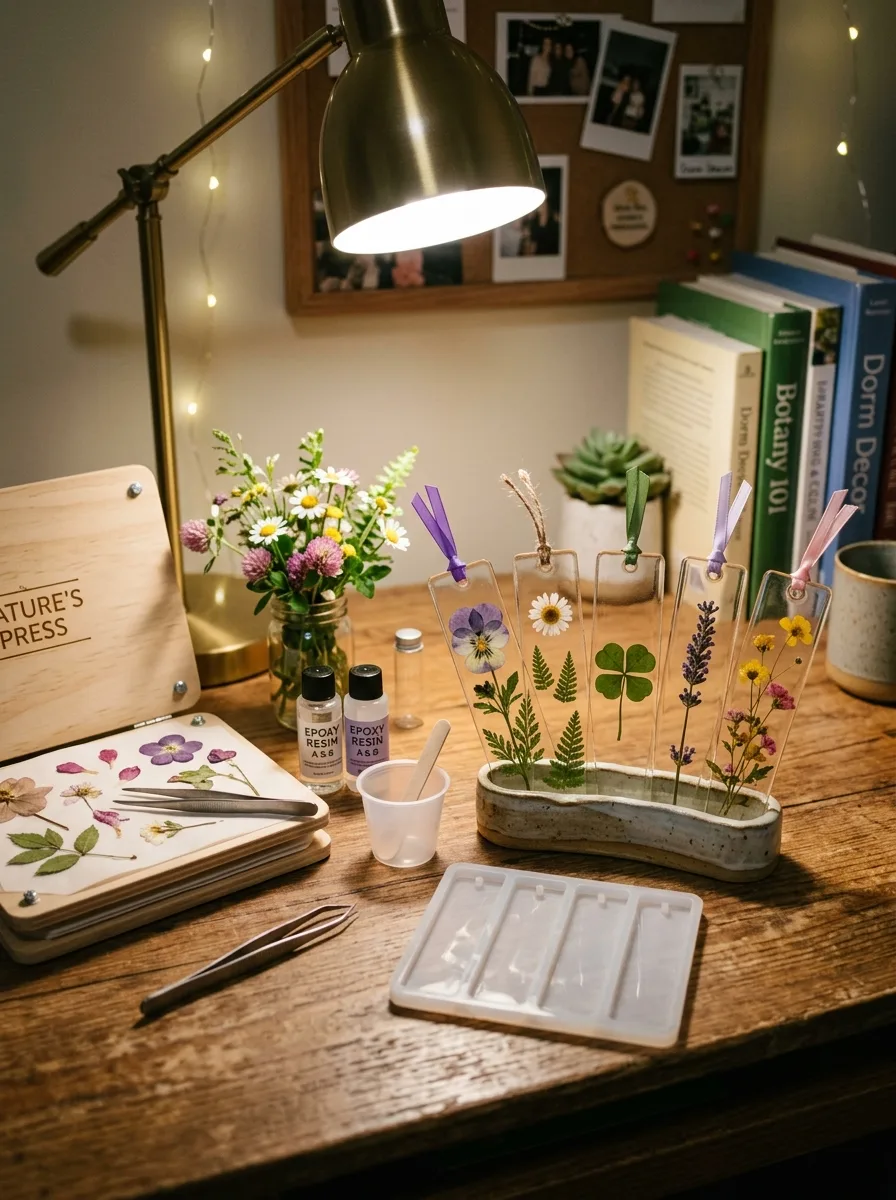
Set up a pressed flower station on your desk as both a functional craft corner and a display object. Collect wildflowers, clovers, pansies, ferns, and small daisies and press them in a wooden flower press — or between the pages of heavy books — for several days until flat and dry.
Once pressed, arrange the best specimens in a shallow ceramic or concrete tray lined with a small amount of craft clay or foam to hold acrylic rods or thin sticks upright. Prop the most beautiful specimens against these rods so they stand upright for display.
Keep a few flat resin bookmark molds on the desk beside small bottles of two-part epoxy resin, tweezers, and a mixing cup. The desk setup functions as a mini studio: the pressed flowers on display alongside the tools for using them. A brass pharmacy lamp angled over the tray gives the whole surface a warm, atelier quality.
Green Ombre Cinder Block Wall
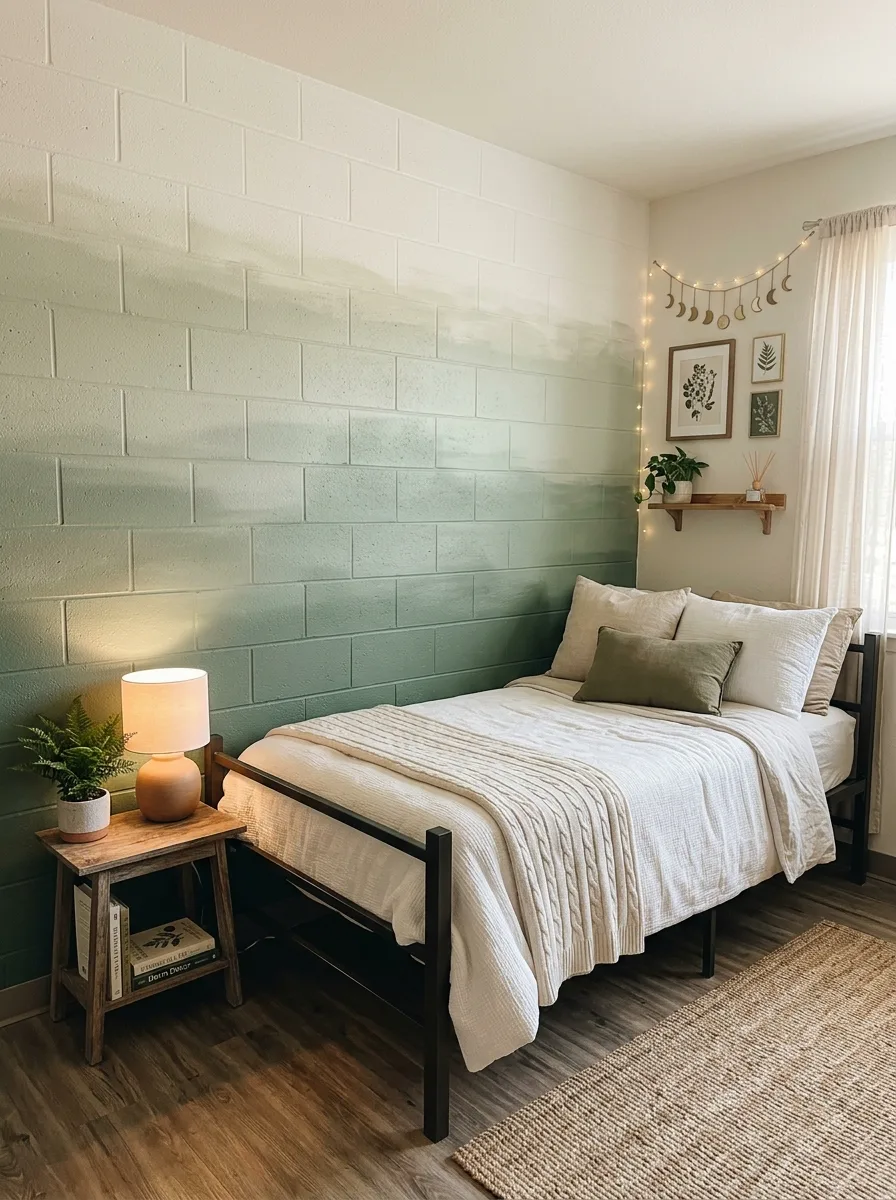
If your school allows paint — and more do than students assume, especially if you restore the original color at the end of the year — mix three shades of the same sage or forest green: full strength, half strength diluted with white, and heavily diluted to near-white. Starting at the bottom of the wall behind the bed, roll on the darkest shade for the bottom third.
In the middle third, use the mid-strength mix with long horizontal strokes that blend upward into the top third, which uses the most diluted, near-white version. The goal is a gradient that reads as a wash of color fading toward the ceiling rather than visible brush zones. Once dry, the effect is soft and atmospheric — more like a watercolor than a painted wall. Add a single floating wood shelf in honey-toned pine on the adjacent white wall.
A moon phase garland strung above the shelf and two botanical prints in matching natural wood frames complete the vignette.
Wrapped Yarn Initial Letter
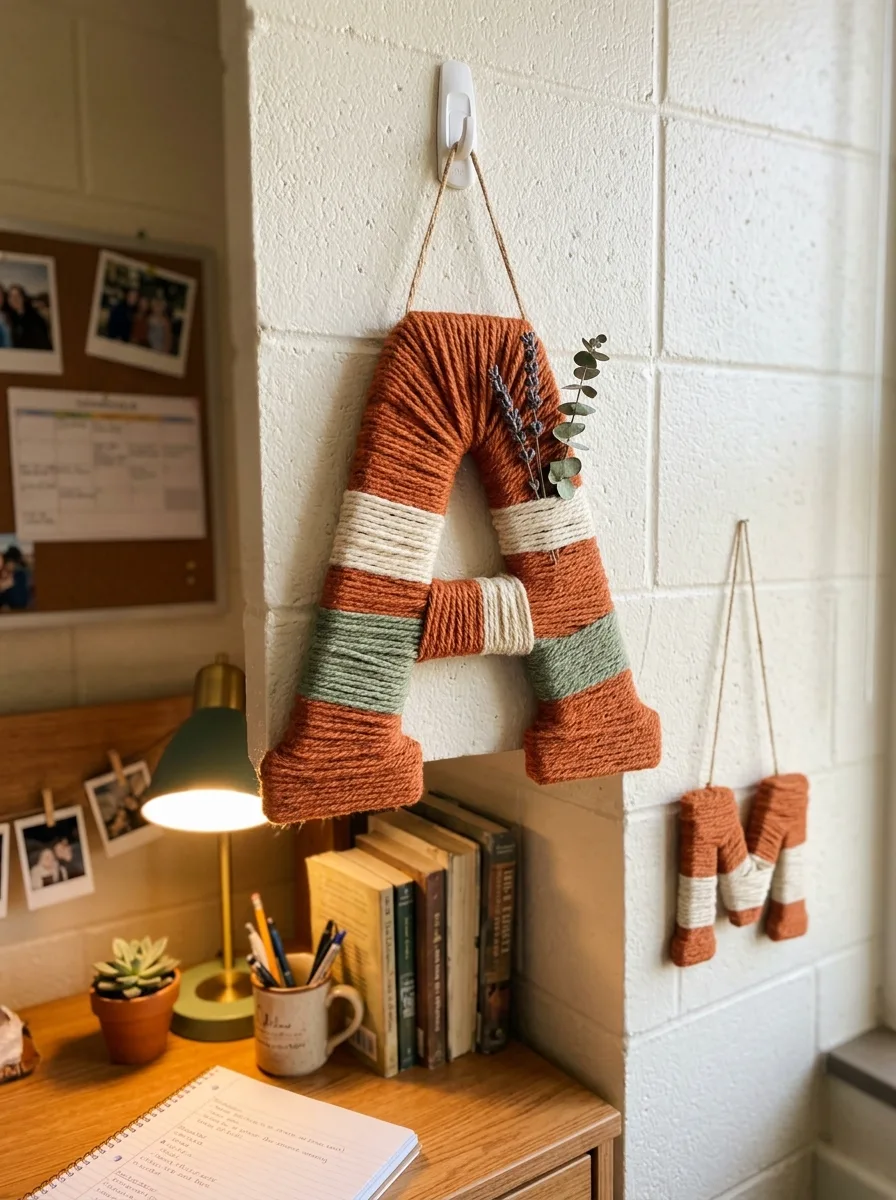
Purchase a large papier-mâché letter from a craft store — at least eight to ten inches tall so it reads clearly from across the room. Choose your color palette first: terracotta, cream, and sage green make a warm, earthy combination that photographs well and coordinates with most dorm color schemes.
Wind yarn around the letter in horizontal bands of color, changing colors every one to two inches and securing each color change with a small dab of hot glue on the back of the letter. Keep the tension firm and the wrapping tight so the surface looks full and textile-like rather than sparse.
Once the letter is fully wrapped, tuck a small sprig of dried lavender or eucalyptus into the top angle of the letter before hanging. Attach a looped length of jute twine to the back and hang from a single Command hook on the cinder block wall above the desk. If both roommates do this — matching palette, different initials — the result is a coordinated personalisation that works as a pair without being matchy.
Trailing Plant Floating Shelf
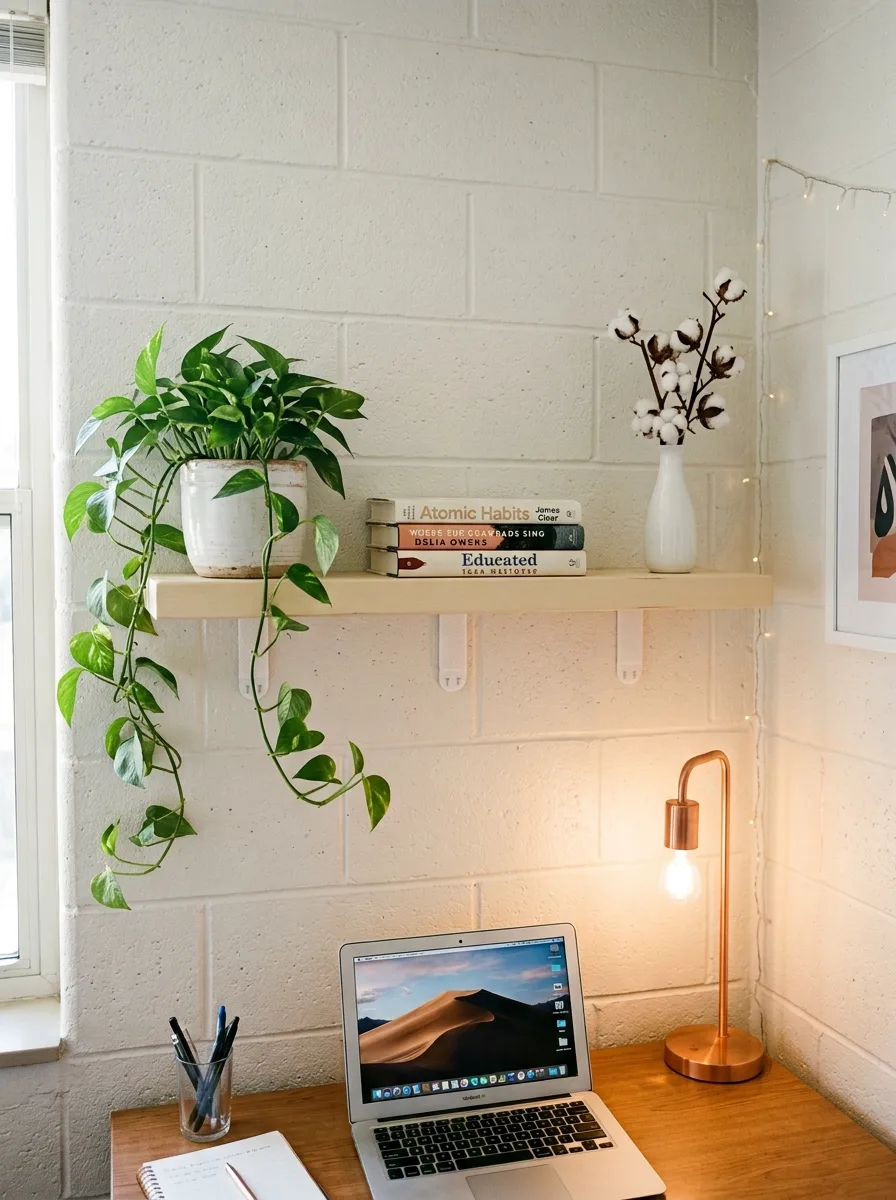
Mount a single floating shelf — a pale pine or white-painted board, approximately 24 inches long — on the wall above your desk using the heavy-duty Command shelf brackets rated for at least 15 lbs. Position it at a height where items on the shelf sit at standing eye level and the trailing plant beneath it hangs freely without touching the desk surface.
Place a pothos in a white ceramic pot with a deliberately distressed or aged surface at the left end of the shelf, positioned so the vines trail down the wall to the left. At the right end, stack two or three spines-out books horizontally — choose books with covers in a compatible color range — and place a simple white ceramic bud vase with a single dried cotton stem on top of the stack.
The desk below should hold only a lamp, an open notebook, and a single pen cup. Nothing else. The shelf does the decorating. The desk is for working.
Thrifted Mirror Chalk Paint Transformation
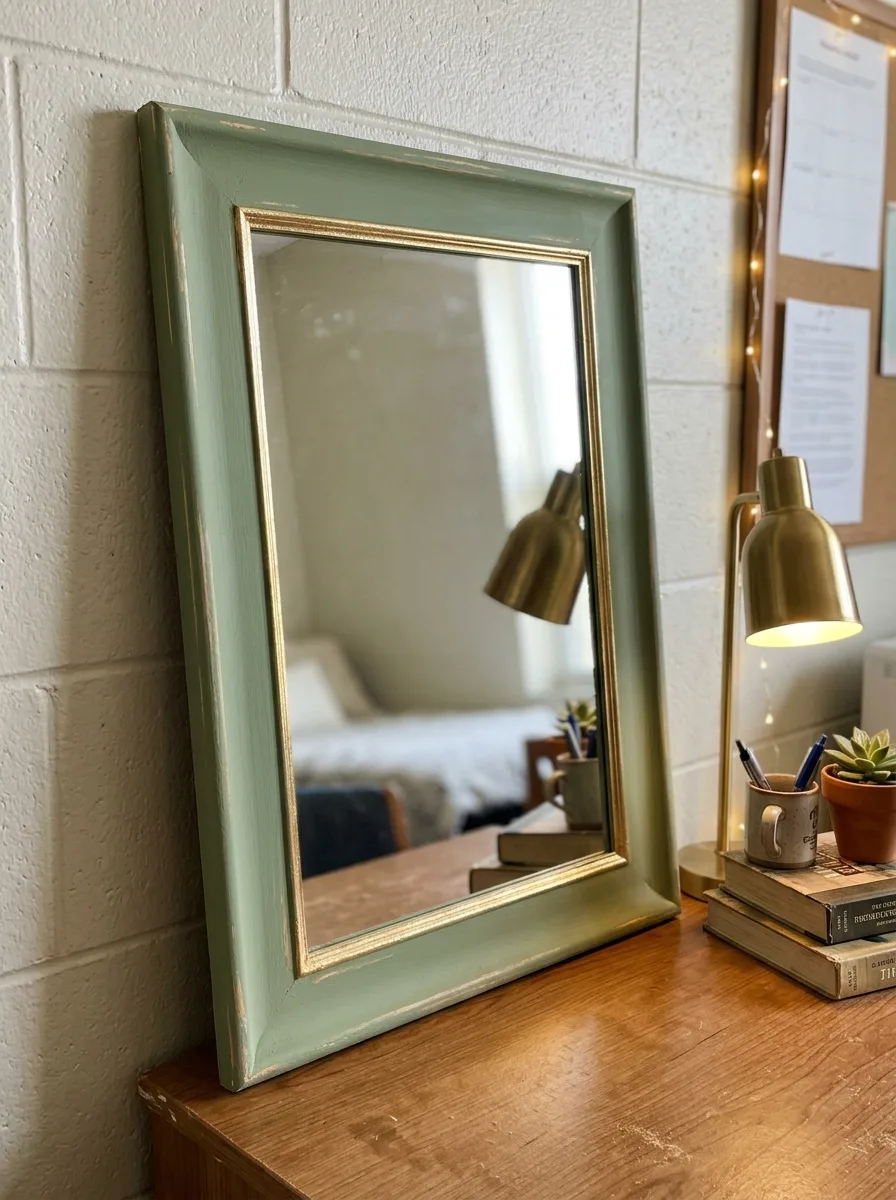
Source a rectangular wood-framed mirror from a thrift store or dollar store — the frame needs to be solid wood or MDF, not plastic, for the paint to adhere properly. Lightly sand the frame to remove any gloss finish, then apply two coats of chalk paint in your chosen color: sage green, dusty terracotta, or antique cream are all forgiving choices. Between coats, allow full drying time.
Once the second coat is dry, use a fine-grit sandpaper to lightly distress the edges and corners of the frame — where real wear would naturally occur — so that the underlying wood or original paint color shows through slightly. Finish with a coat of clear furniture wax, buffed in with a cloth, which gives the frame a soft matte sheen and protects the paint. For added detail, dry-brush a small amount of gold or bronze craft paint along the inner edge of the frame before waxing.
Prop the finished mirror against the wall on your desk rather than hanging it, which gives the desk setup a more casual, collected feel.
Ceiling Dried Flower Installation
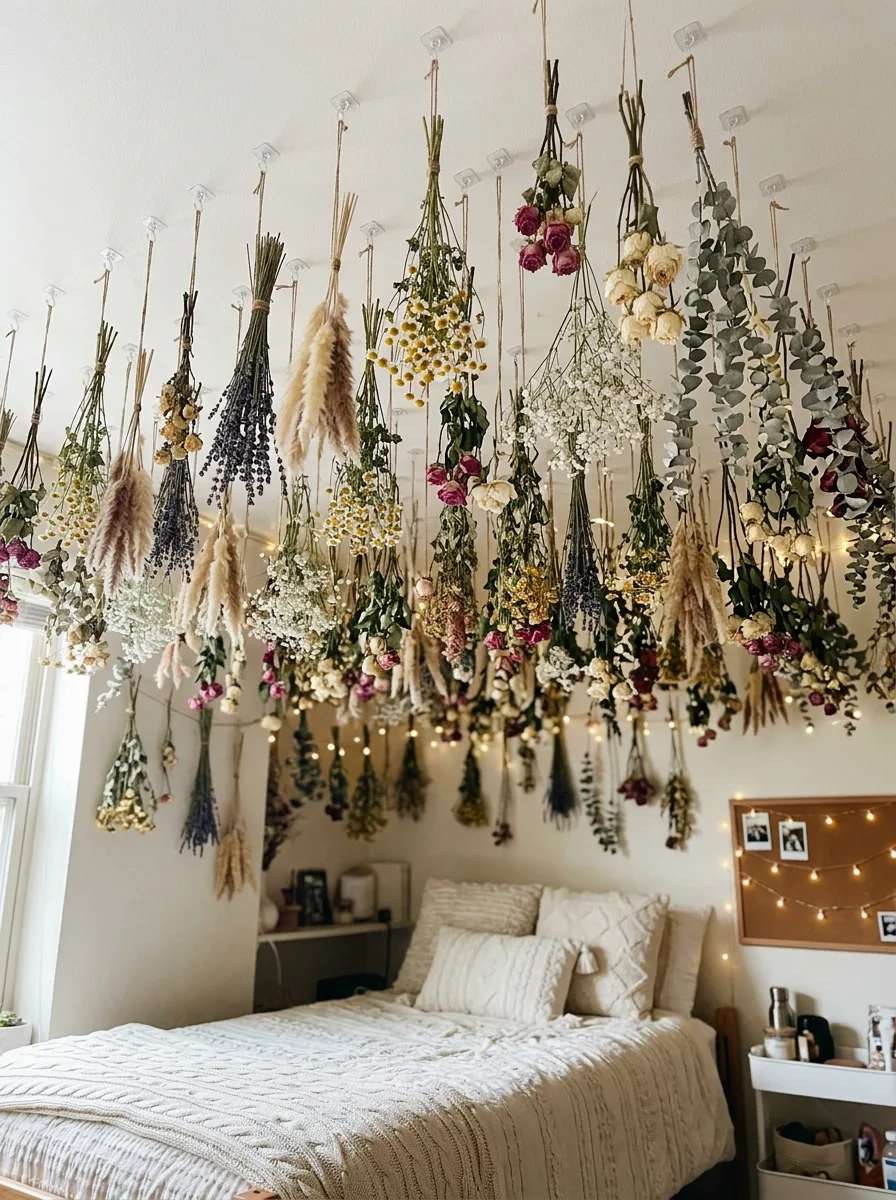
This is the most ambitious project in the list and the one with the highest visual payoff. Collect dried botanical bunches over the weeks before school starts: lavender, pampas grass, dried roses, baby’s breath, dried chamomile, eucalyptus, and strawflower all work well.
Tie each bunch with jute twine, leaving a long tail on each tie. Install adhesive ceiling hooks — specifically the type rated for 2–4 lbs and designed for ceiling use — in a grid pattern across the ceiling above the bed, spacing hooks approximately eight inches apart in both directions. Hang each bunch stem-side up, varying the height by leaving different lengths of twine between the hook and the bunch.
The varying drop heights create a layered canopy effect. For best results, cluster denser bunches toward the center and let airier, lighter bunches occupy the outer edges. String one or two strands of warm fairy lights woven between the hanging bunches for evening atmosphere. The bed below should be entirely cream and white — if the ceiling is doing this much, the bed needs to disappear.
Direct-Pin Botanical Leaf Wall
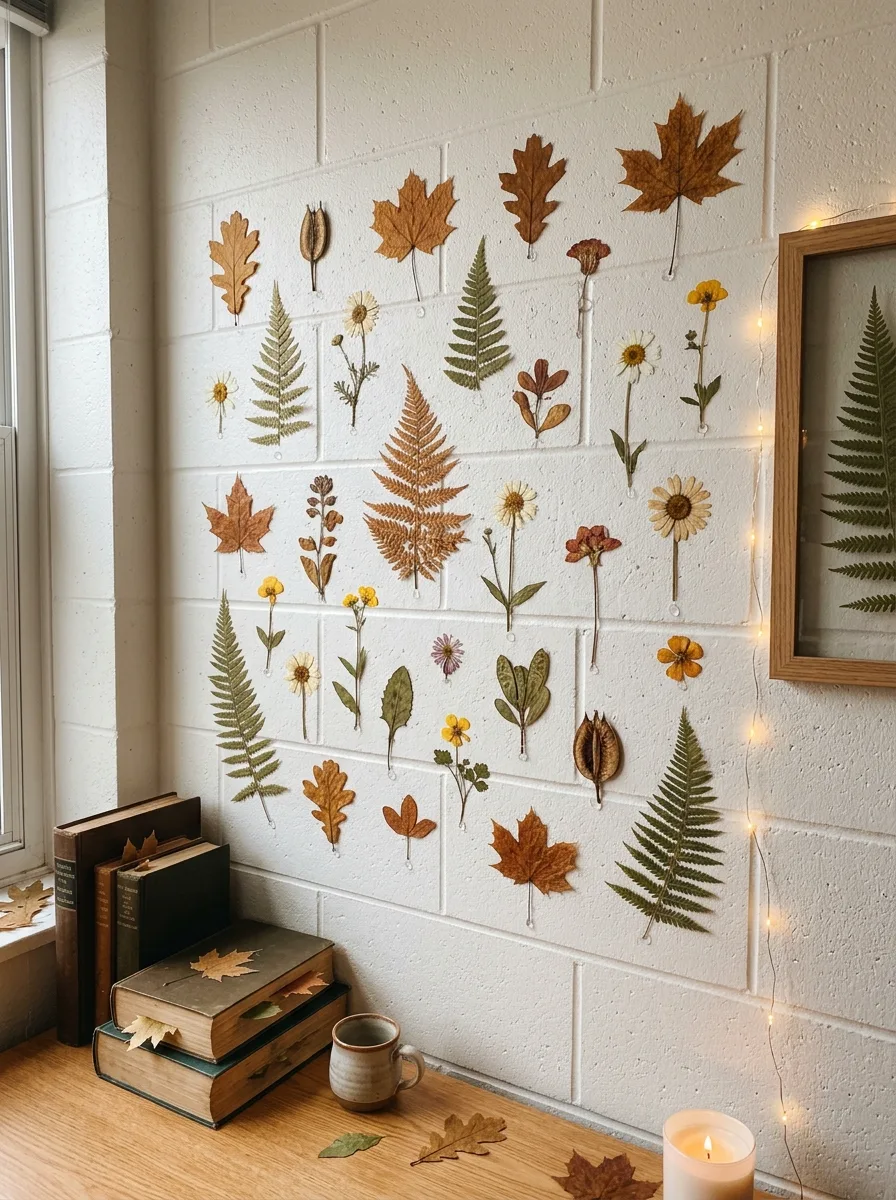
Collect and press leaves, ferns, and flowers — or purchase pre-pressed botanicals from a craft supplier — and mount them directly on the cinder block wall using small clear Command strips or removable adhesive dots rated for paper. Arrange the specimens in a loose grid across a large section of wall, spacing them so each piece has room around it but the overall composition feels filled rather than sparse.
Vary the sizes: large fern fronds anchor the center and lower sections, medium autumn leaves fill in the mid-zones, small flowers and delicate stems appear at the outer edges of the composition. The arrangement should read like a cross between a museum display case and a gathered nature collection — organized but not sterile. Below the wall display, a stack of vintage hardback books and a ceramic mug serve as grounding objects.
Warm candle light (flameless for dorm use) positioned at floor level nearby throws soft light up the wall and makes the pressed specimens cast delicate shadows.
Origami Mobile Ceiling Piece
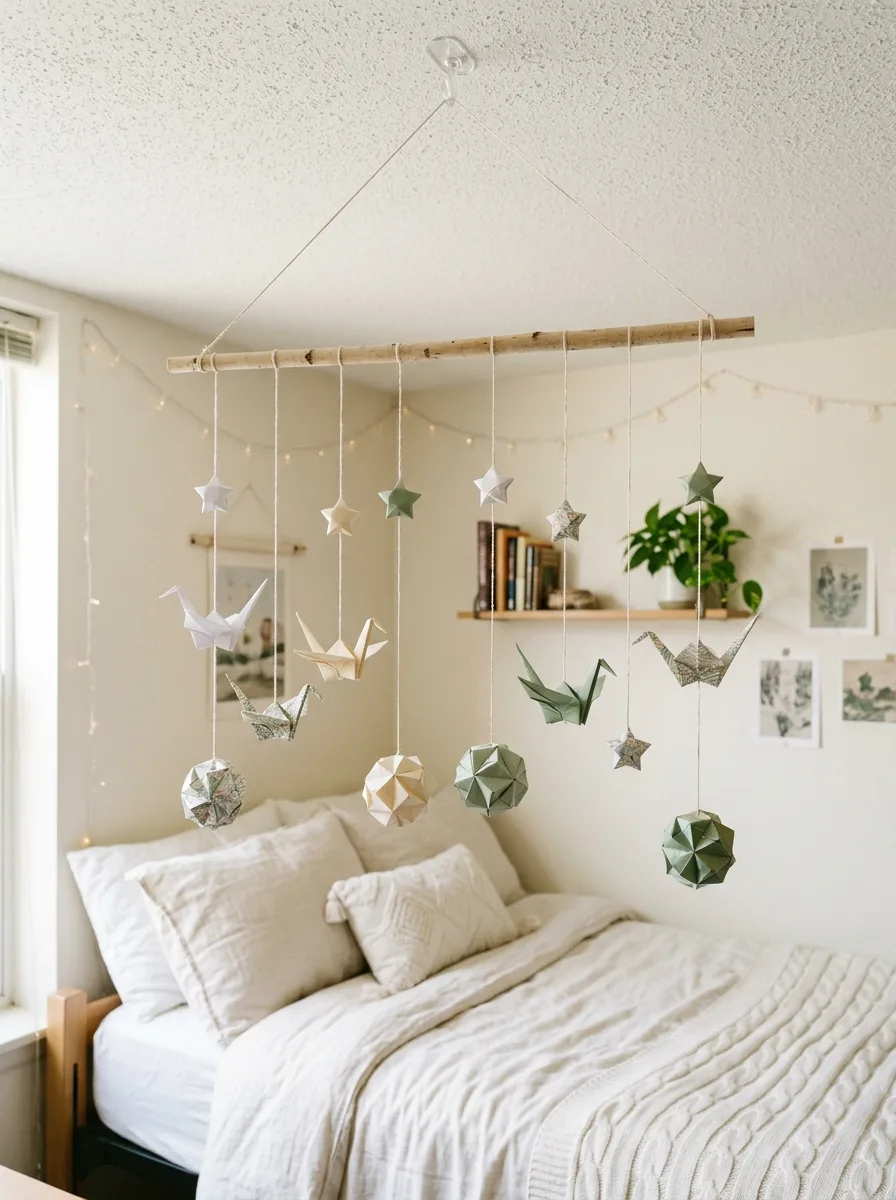
Fold a collection of origami pieces from two or three coordinating papers: natural kraft, sage green, and cream or white. The most structurally impressive combination is cranes, geometric kusudama balls, and small five-pointed stars — three different forms give the mobile visual variety without looking random.
Aim for at least twelve to fifteen pieces total. Cut lengths of thin white thread in varying lengths and tie each origami piece to its thread. Attach the threads to a natural birch branch or straight piece of driftwood, distributing them along the branch’s length so the mobile hangs balanced. Suspend the branch from the ceiling using two clear Command ceiling hooks, one at each end of the branch.
The mobile should hang above the head of the bed so it’s visible when lying down. Keep the bedding below completely plain — cream linen or white cotton — so the mobile reads against a neutral background. Add a single wall-mounted floating shelf with books and a trailing plant at eye level to ground the space beneath the mobile.
Warm Neon Word Sign
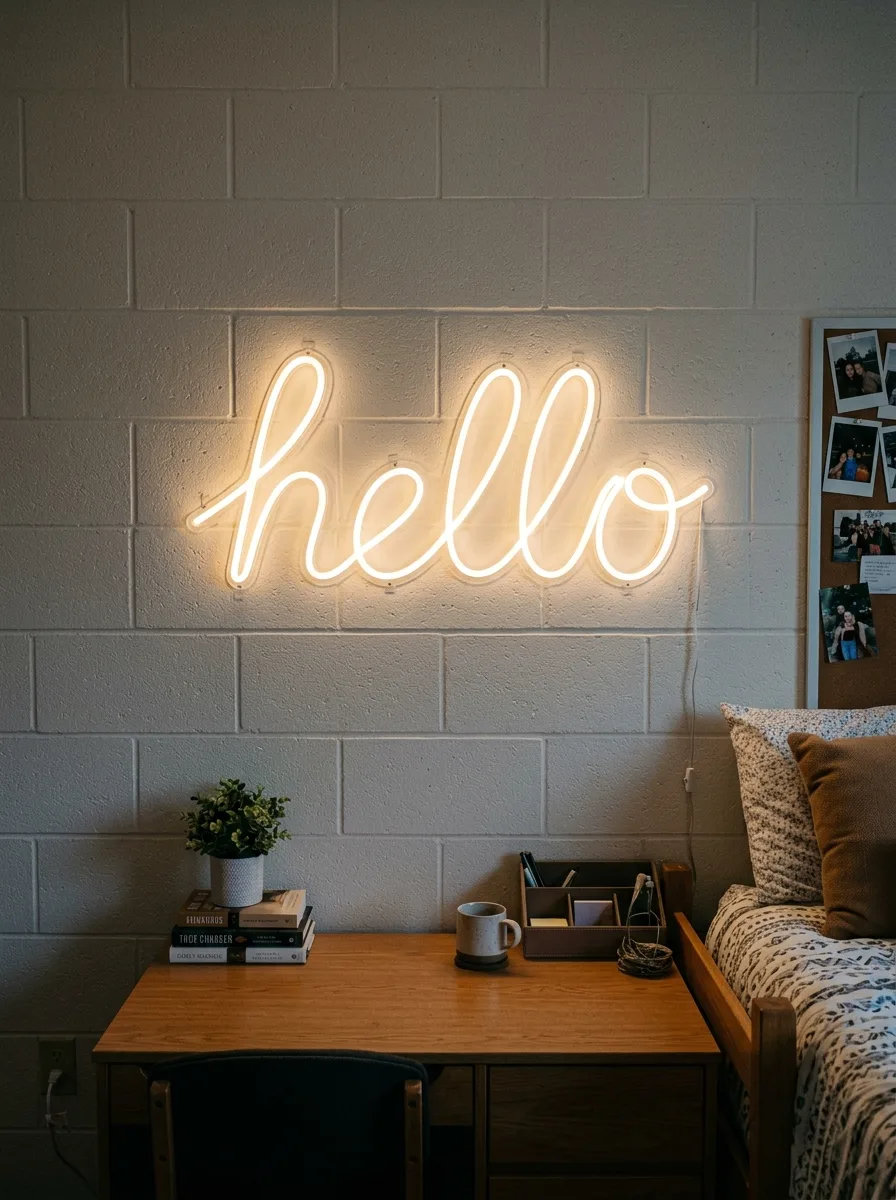
Order a custom LED neon sign in warm white rather than a saturated color. Warm white neon on a white cinder block wall reads as ambient lighting rather than decor item, which is the distinction that makes this look like a design decision rather than a novelty purchase.
The word or phrase should be short — a single word in a cursive font is more sophisticated than a multi-word statement. Mount it centered above the desk at a height where it sits in the middle of the wall space, not crowded against the ceiling or hovering just above desk height. Below the sign, the desk should be exceptionally simple: a stack of two or three books, a single ceramic mug, a small potted plant.
The desk lamp goes off when the neon goes on. The neon is the light source. A cork board with photos pinned to it alongside the sign provides a personal element without competing with the sign’s glow.
What These Rooms Have in Common That No Shopping List Can Buy
Every room in this set was built around a decision that didn’t cost much. A handful of botanicals pressed under a heavy book. Yarn wrapped around a letter. Plants hung from a closet rod with knotted cord.
The decision is the thing. What it costs is almost irrelevant.
There’s a particular confidence that comes from making something for a space rather than buying it. The thing you make gets adjusted — moved, remade, replaced — in a way that bought objects rarely do. It becomes yours in a different way than a duvet that came in a box. That’s not nostalgia talking. It’s the practical reality that when you make something, you actually think about where it goes.
Your dorm room is the first space that’s entirely yours. Not your parents’ taste, not a landlord’s beige, not a hotel. Yours.
Make something for it.