
There’s a corner of your garden doing absolutely nothing. Maybe it grows weeds. Maybe it’s where the hose lives. Maybe it’s just a vague patch of grass that nobody looks at and everybody mows out of obligation.
That corner could be the best decision you make for your child this year.
A mud kitchen isn’t a toy. It isn’t a distraction or something to keep kids busy while you drink coffee in peace — though it will do that too. It’s an invitation. It says: this part of the garden belongs to you, and you can do something real in it.
The problem is most people build or buy a mud kitchen and get it completely wrong. They pick something too small, too precious, or too polished for what it’s supposed to be. Mud kitchens are not meant to look like the inside of a Scandinavian children’s boutique. They’re meant to be used — hard, daily, and enthusiastically.
The Mud Kitchen Mistake Most Parents Make
Every parent who has ever put together a outdoor play space has, at some point, picked the wrong thing for the wrong reason. Mud kitchens are no different.
Scaling It Too Small
The instinct is to build something cute. Something proportionate to a toddler. Something that photographs well with a child standing next to it looking delighted.
Then the child grows six inches and the whole setup is useless.
Build for the age your child will be in two years. Children grow up. Their play gets more elaborate, not less. A mud kitchen they can use from age three to ten is worth ten times more than one they outgrow by school.
A good working height is between 60 and 80cm for the main counter surface. Go taller rather than shorter. Small children stand on their toes to reach things they care about. Older children don’t bend down for things that are too low.
Over-Prettying the Surface
A butcher-block-looking timber top looks beautiful on day one. By week three, it’s stained, cracked, and swollen from rain.
You have two options: embrace the weathering entirely (raw timber, natural wood, accept that it will age), or build with materials that are explicitly outdoor-rated. Hardwoods like cedar and treated pine handle the outdoors properly. Cheap plywood does not.
The alternative nobody talks about is leaning into the industrial option — blackened wood or dark-stained panels actually age better because they hide the weathering instead of showing it. A grey or near-black surface looks the same after a year of mud as it did on day one.
Forgetting Storage Is Part of Play
Mud kitchens that have nowhere to store anything train children to leave everything out. The kitchen stops being a kitchen and becomes a pile.
Open shelving below the counter, a cabinet with a door, or even a rail of S-hooks for hanging tools all serve the same purpose: they teach the child to maintain the space. A kitchen with a place for everything gets put back together after play. One without does not.
What Makes a Mud Kitchen Actually Work
The difference between a mud kitchen that gets used for three years and one that gets abandoned in six weeks is almost never about how much it cost.
The Sink Changes Everything
A stainless steel sink with an actual working tap is the single highest-return investment in a mud kitchen. Not a plastic basin. Not a tray. An inset round sink with water running to it.
Connect it to a garden tap or run a hose through the fence. Let the drain empty into a small gravel pit below. This isn’t complicated plumbing — it’s a hose fitting, a small sink, and a hole.
When water is actually flowing, children treat the mud kitchen like a real kitchen. They fill things. They wash things. They experiment with liquid in a way that plastic tubs never produce.
The Styling Is Not Optional
Here is something adults always get wrong about children’s outdoor play spaces: the way a space looks tells a child what’s allowed to happen there.
A bare table in a corner says: this is furniture. A kitchen with hanging utensils, labelled jars of sand and petals, a small pegboard of tools, and a shelf of mismatched pots says: this is a working space and you are the chef.
Stock the kitchen. Add real kitchen tools from charity shops — whisks, ladles, old pans. Fill mason jars with mud, sand, dried leaves, flower petals, pebbles. Label them. Hang the tools on hooks or a simple pegboard panel. Make it look like someone works there. The child will act accordingly.
Height Determines Who Uses It
A mud kitchen set at a fixed height serves one window of childhood and then collects spiders.
If you’re building rather than buying, build adjustable legs or plan for a raised platform that can be added later. If you’re buying, choose a design with a height you can live with at age six — not age three. Stools and step platforms can make a too-tall kitchen work for younger children. There is no good workaround for a too-short kitchen once the child has grown.
Mud Kitchen Ideas Worth Stealing
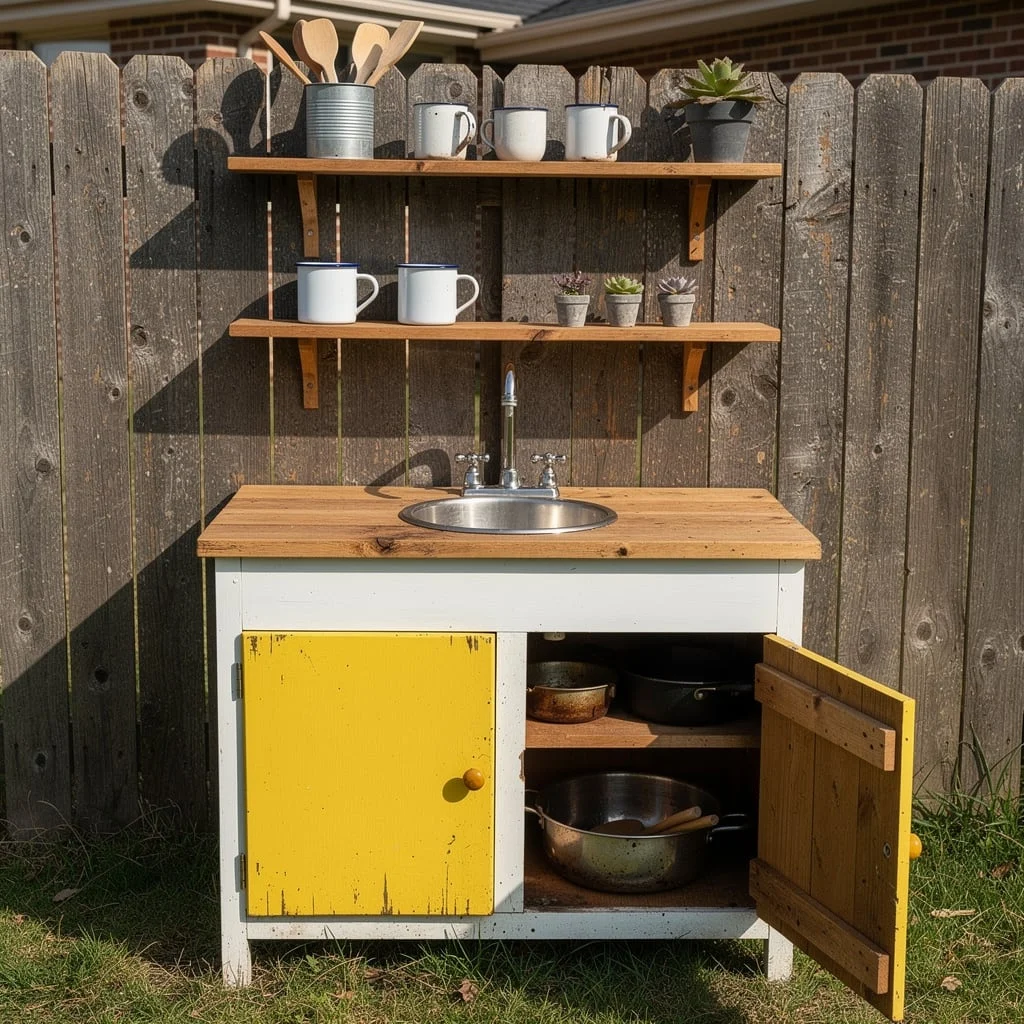
Yellow Door Salvage Kitchen
Source an old console table, sideboard, or kitchen base unit from a second-hand shop or skip. The structure matters, not the surface. Strip any loose paint or veneer and repaint the body in off-white exterior paint. For the doors — whether there are one or two — paint them in a flat, bright chrome yellow. Use exterior gloss for durability. Add a single round wooden knob to each.
Cut a hole in the top for a round sink and fit a simple wall-mount tap screwed to the fence behind. For shelving, mount two floating shelf brackets — in raw oak or pine — directly to the fence above the unit at different heights and widths. Stack enamel mugs, small succulents in grey concrete pots, and galvanised tins filled with wooden utensils on the shelves. The yellow doors against the off-white body and the raw timber shelves is a combination that looks like it was styled rather than assembled. Because it was.
Black Industrial With Pipe Frame
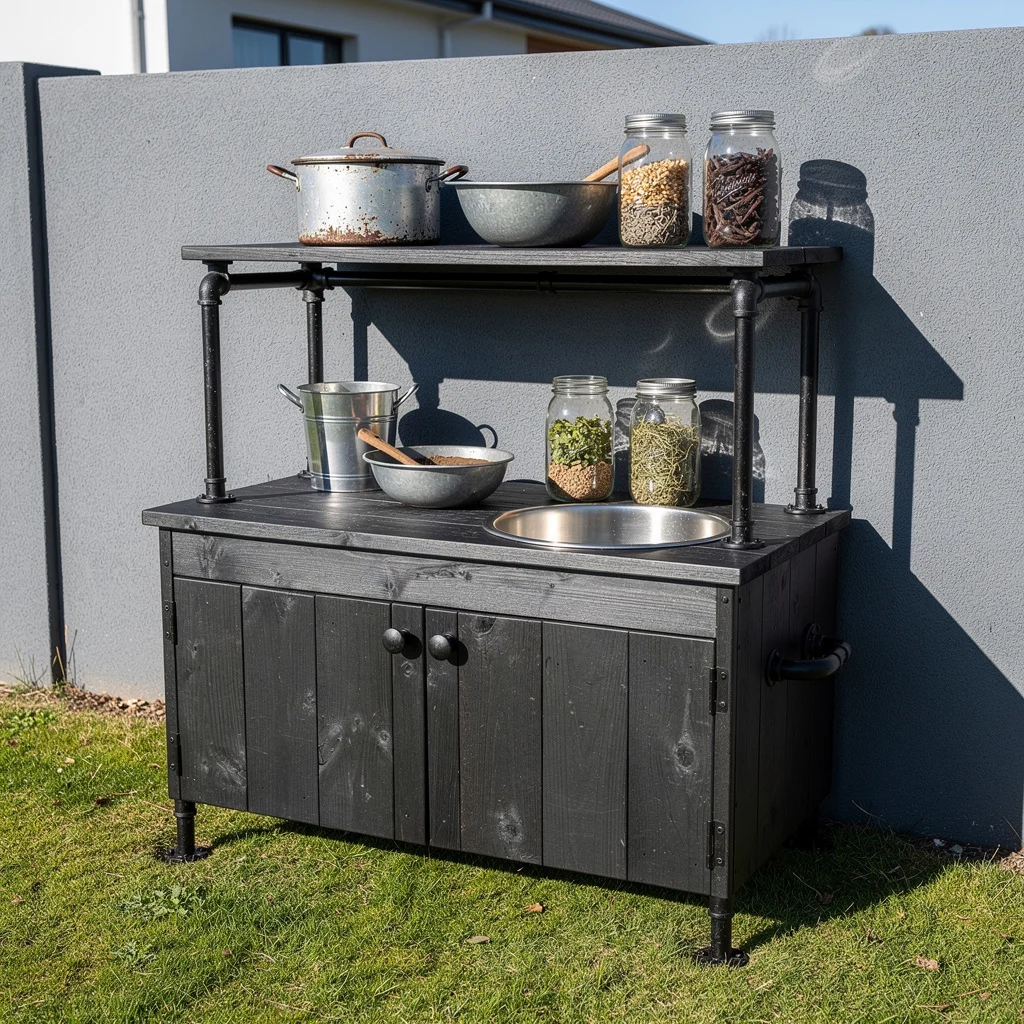
Start with a base cabinet built from rough-sawn pine boards stained black with exterior wood dye — two or three coats, let each dry fully. The goal is a charred, near-ebony finish. Build the cabinet with two hinged doors and knob hardware in black. Inset a round stainless steel bowl as the sink, set slightly off-centre.
For the upper shelf, use black iron pipe fittings — the kind sold for industrial-style shelving. Build two vertical uprights from floor flange fittings screwed into the base cabinet top, then run horizontal pipes between them at the height you want the shelf. Cut pine boards to fit as the shelf surface and stain to match the base. The pipe hardware costs less than twenty pounds from any hardware store and takes a standard spanner to assemble. Add mason jars filled with soil, pebbles, and dried botanicals to the shelf. This kitchen looks better outside than most adults’ kitchens look inside.
Double Cedar Kitchen
Build two matching kitchen units from cedar — the natural oils in cedar make it one of the best outdoor timbers available and it requires no treatment. Both units follow the same basic layout: a work surface with an inset round stainless bowl, black circle burners cut from hardboard and screwed to the surface, black round knob hardware below, and an open lower shelf.
Where the two units differ is in the upper hutch design. One has a single shelf at a lower height with a small rail of hooks below it, styled for a child who wants their tools to hand. The other has a taller hutch with two shelf levels for displaying pots and small white planters. Place both units side by side with a small gap between them in front of an existing tree or large shrub. The green backdrop makes the warm cedar glow. The pair of units together suggest collaboration: two chefs, two stations, one kitchen.
Grey L-Shape With Wooden Oven
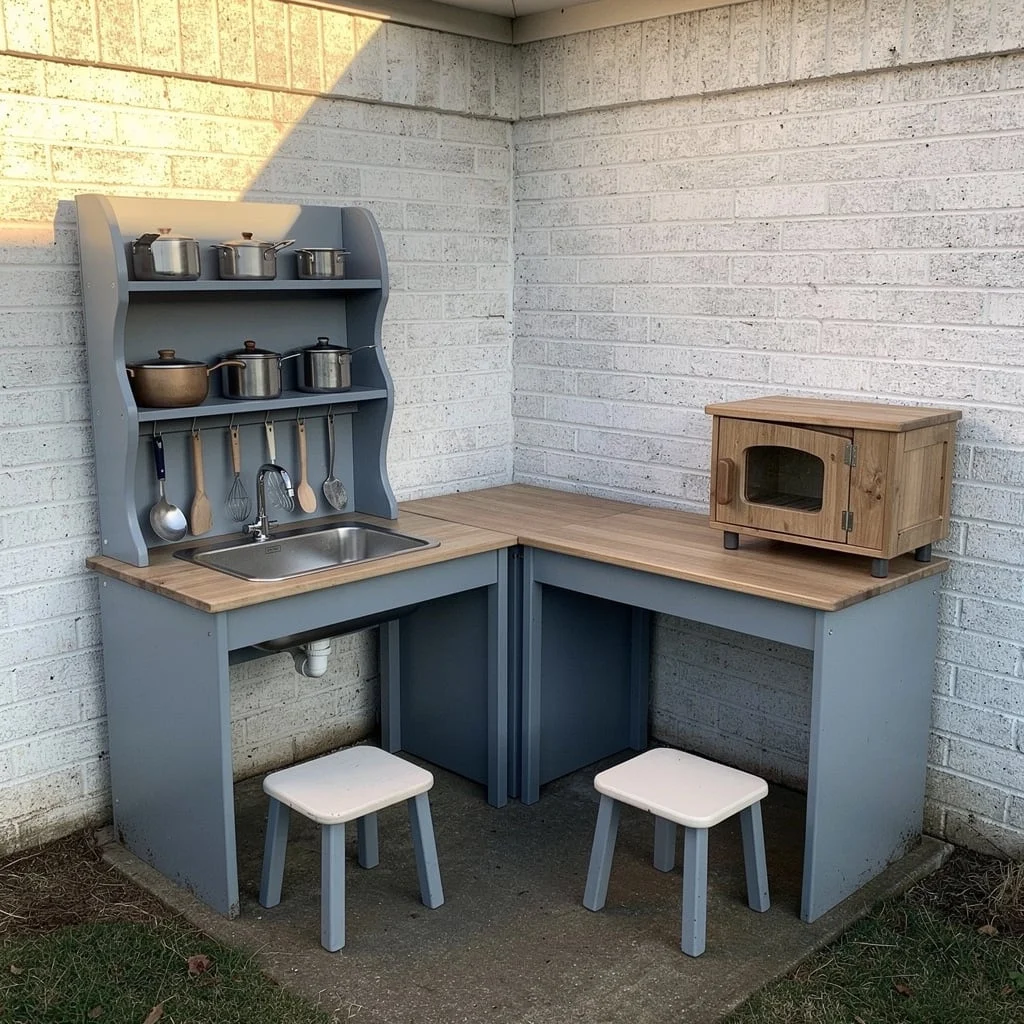
Build an L-shaped layout using two counter sections joined at a corner. Paint the entire structure in a flat mid-grey — the exact shade used on outdoor furniture rather than a bright colour. Use 18mm plywood for the carcass, then face the panels in tongue-and-groove for texture. For the counter, glue and screw lengths of untreated softwood side by side, sand lightly, and leave unsealed. It will weather to a warm honey tone over the first season.
On the left section, mount a hutch-style shelving unit with a curved scalloped top edge cut with a jigsaw. Hang a small stainless rail below the shelf for ladles and spoons. On the right counter, place a small wooden cabinet with a glass-panel door to serve as the oven — you can build this from offcuts or buy a small unfinished wooden box and add a hinge. Paint it to match. Add two low stools in the same grey under the counter for seating.
Full Mud Kitchen Zone
This is not a single unit. It’s a complete outdoor kitchen zone, and the key difference is that every element relates to every other one.
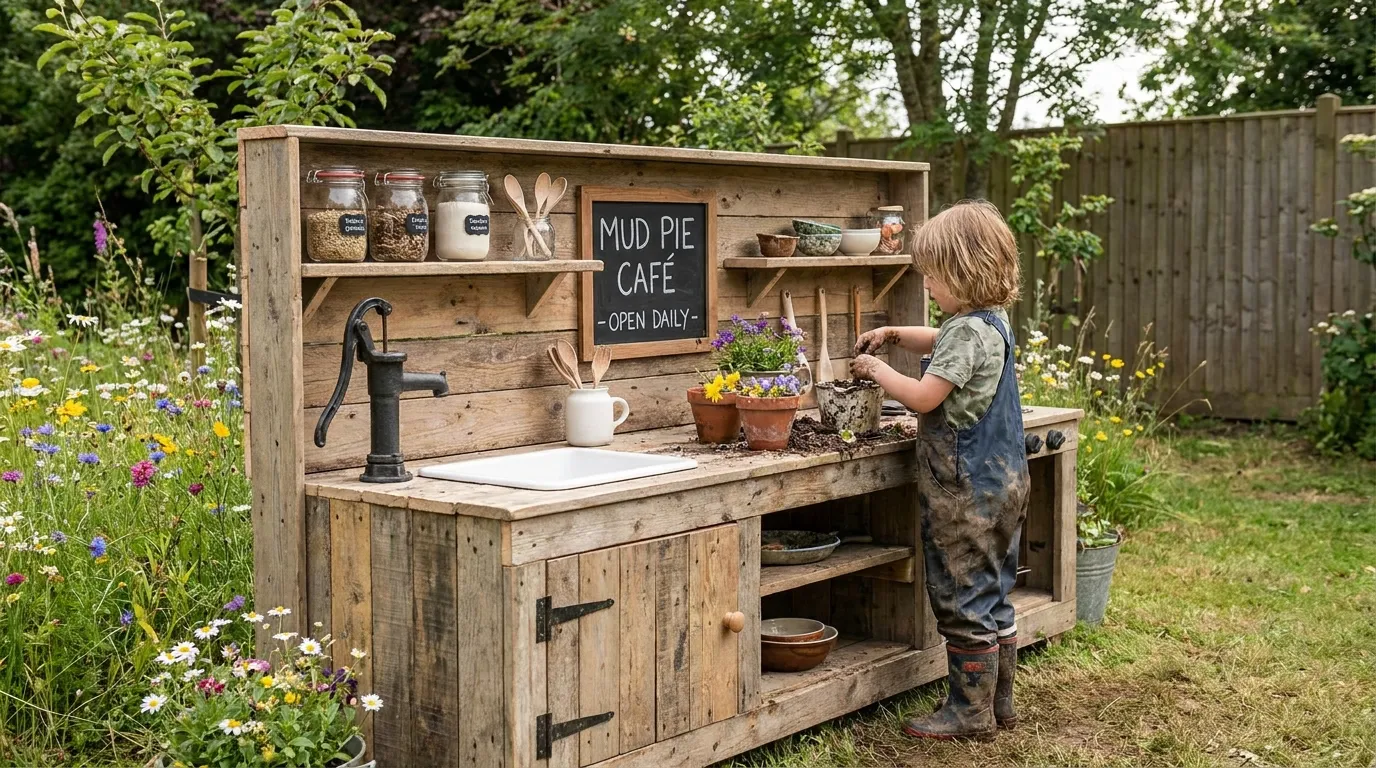
Start with an L-shaped counter arrangement built from pine boards stained in a warm honey tone. Include multiple surface heights — one section lower for younger children, one standard height for older ones. Mount a chalkboard panel at child eye level between sections of the counter; this becomes the daily menu board. Write on it. Change it. Let the children write on it. Above the counter, hang a lattice trellis panel painted grey and spell out “MUD KITCHEN” or something similarly declarative using natural materials — sticks, pressed flowers, painted stones — fixed to the lattice with small clips.
Lay bark chippings over the entire zone to a depth of at least 8cm. Add a small picnic table or low table with chairs within the zone as a serving and dining area. Stock it with coloured enamel and plastic bowls, measuring cups, and small plates. The zone signals to every child who walks into it: this is a complete place, and something happens here.
Twig-Back Forage Station
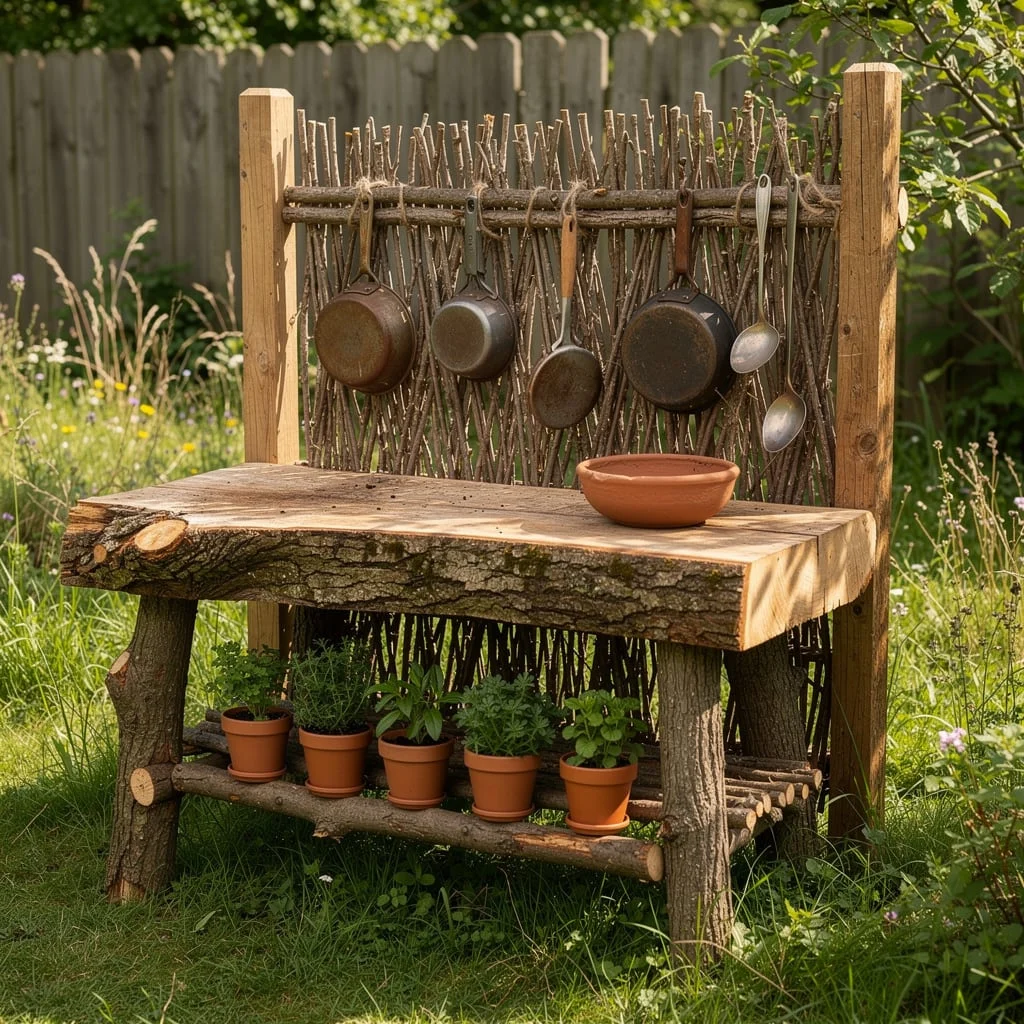
Source or cut a single thick slab of timber — reclaimed scaffolding board works well, as does a length of rough-sawn oak. This becomes the work surface. For the legs, use two large branch sections cut to matching heights and sanded at the top and bottom faces. Bolt the surface to the legs using long structural screws driven from below.
The back panel is the distinctive element. Cut dozens of straight twigs to matching lengths — hazel, willow, or any garden prunings work. Lash them horizontally between two upright posts using garden twine or thin wire, spacing them about 2cm apart. Attach this panel to the back of the workbench structure. The result is a woven twig screen that looks completely natural. Hang cast-iron frying pans and old metal ladles from the top rail using loops of twine. Below the work surface, run a lower rail of small branches as a shelf and line it with terracotta pots planted with herbs.
Sage Green Fence Kitchen
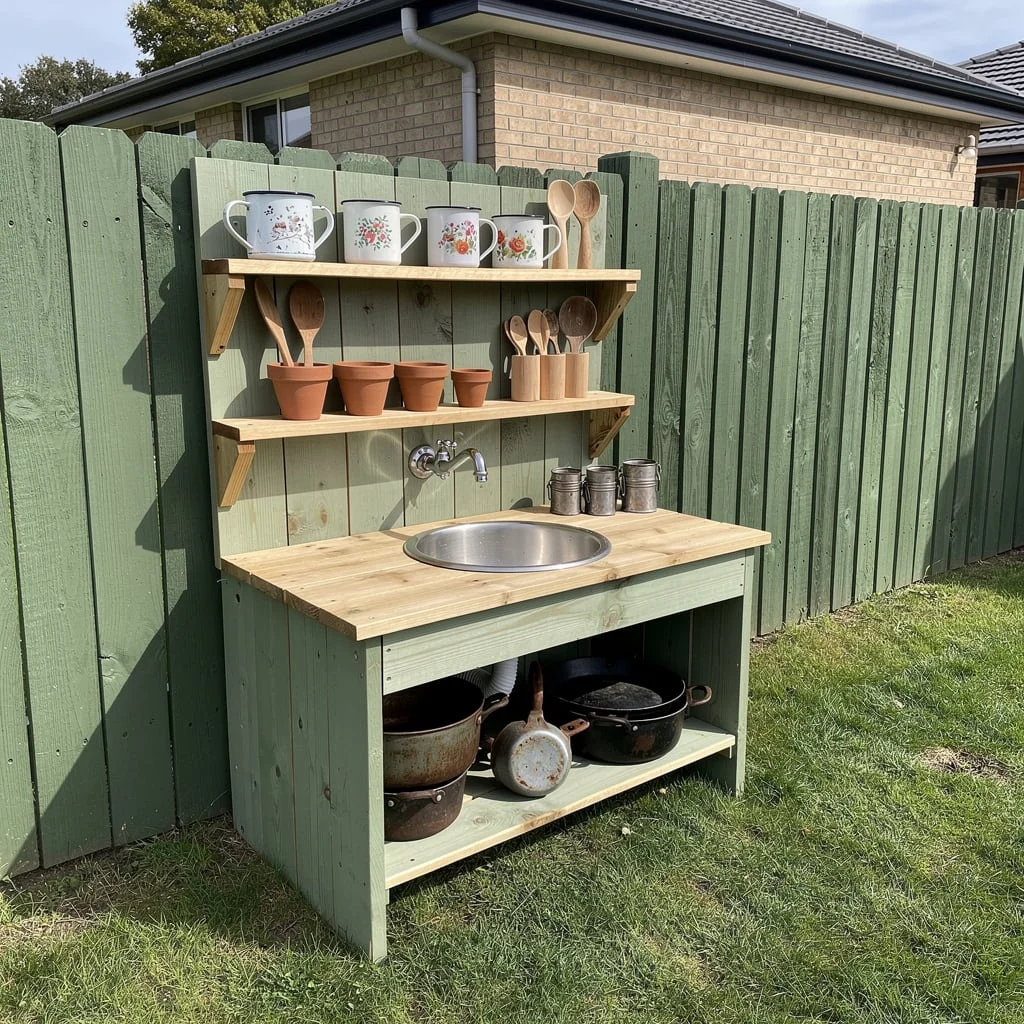
Mount this directly against a slatted fence. Paint the fence boards behind the kitchen in a muted sage green — exterior fence paint, two coats, applied to a roughly 1.2m wide section. The kitchen unit itself is a simple free-standing workbench with a butcher-block pine top and a round inset stainless sink with a small wall-mount tap screwed directly into the fence.
Build two bracket shelves above the sink, also in sage green, and space them about 30cm apart. On the upper shelf, stand a row of enamel mugs with floral patterns — source these from charity shops or markets, the more mismatched the better. On the lower shelf, line up small terracotta pots and wooden utensil holders. Leave the space under the counter entirely open as a lower shelf for pots and pans. The colour coordination between the fence and the unit is what makes this read as intentional rather than improvised.
The Full Garden Setup
The deciding principle for a full outdoor mud kitchen garden is that the space needs to function as a destination — not just a corner where a kitchen happens to live.
Start with the bark chip ground cover over the entire zone, bounded by railway sleepers or treated timber edging. This defines the borders before anything else goes in. Within the zone, position the main kitchen unit — ideally an L-shaped or multi-section setup — against the back fence. Include a chalkboard element somewhere prominent: a blackboard panel between cabinets, a hanging board, or even a painted section of fence.
Add a water trough or galvanised tub at the edge of the zone, set on a low platform so children can reach in. This is separate from the sink and serves as the water source for ingredient mixing and rinsing.
A small play hut or A-frame den adjacent to the kitchen zone transforms it from a play station into a play world. The kitchen provides the activity; the den provides the destination for the food being made. Add a low table between them as the dining zone. Stock with mismatched crockery in bright colours. The whole setup costs less than most indoor play furniture and gets used approximately ten times as much.
Mushroom Kitchen With Fairy Lights
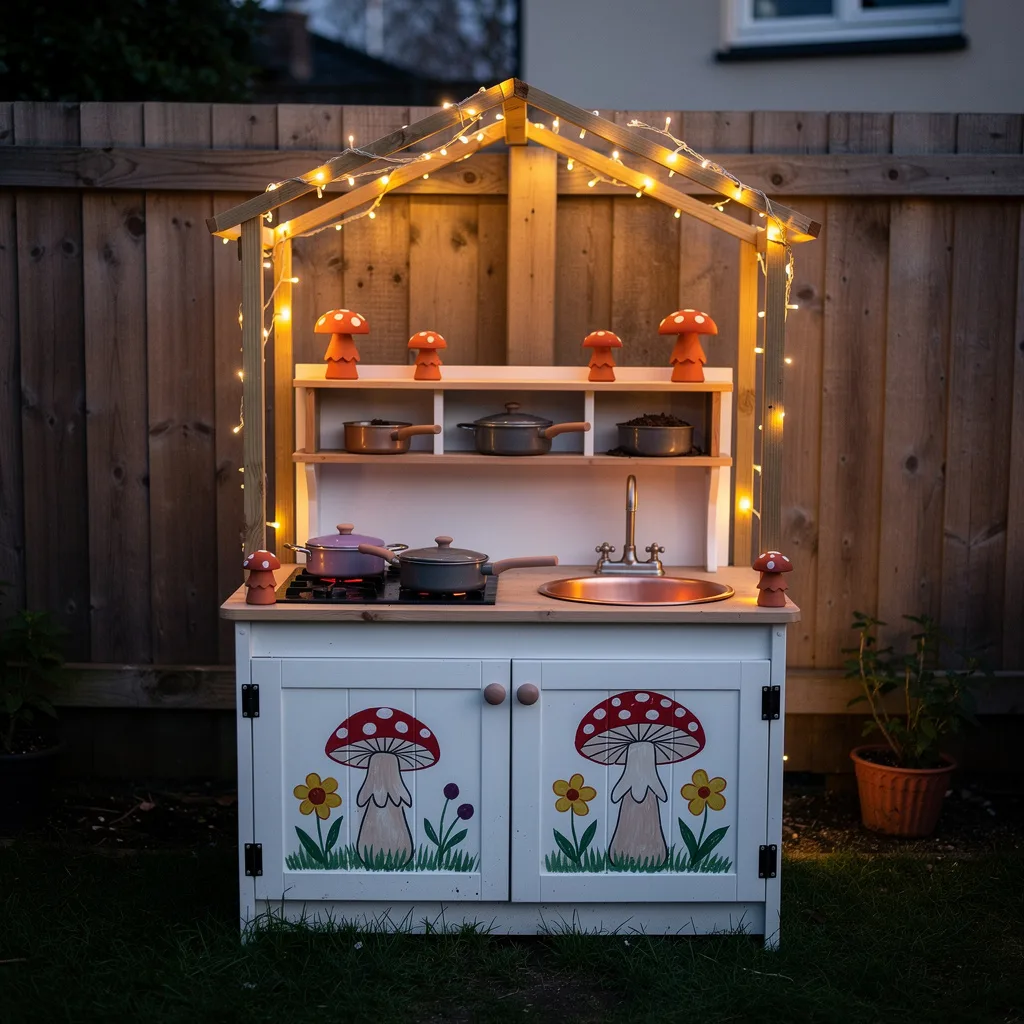
Build or buy a white-painted cabinet unit with two full-height doors. Paint large toadstool and daisy motifs directly onto the door panels using outdoor acrylic paint — bold red-and-white toadstools with simple yellow flowers. The painting does not need to be precise. Intentionally loose, slightly imperfect brushwork reads as charming rather than amateur at this scale.
Frame the entire kitchen with a triangular wooden roof structure made from two lengths of 45×45 timber meeting at a ridge, secured with a metal ridge bracket. The frame should extend slightly wider than the cabinet on both sides. Wrap warm white fairy lights — the outdoor-rated, low-voltage kind — around every edge of this frame. Add a pine shelf unit above the work surface for storing pots, and place four or five small ceramic mushroom figures along the shelf edge as decorative markers. Use this kitchen in the evening. The fairy lights at dusk turn a play kitchen into something genuinely magical.
Navy Deck Kitchen
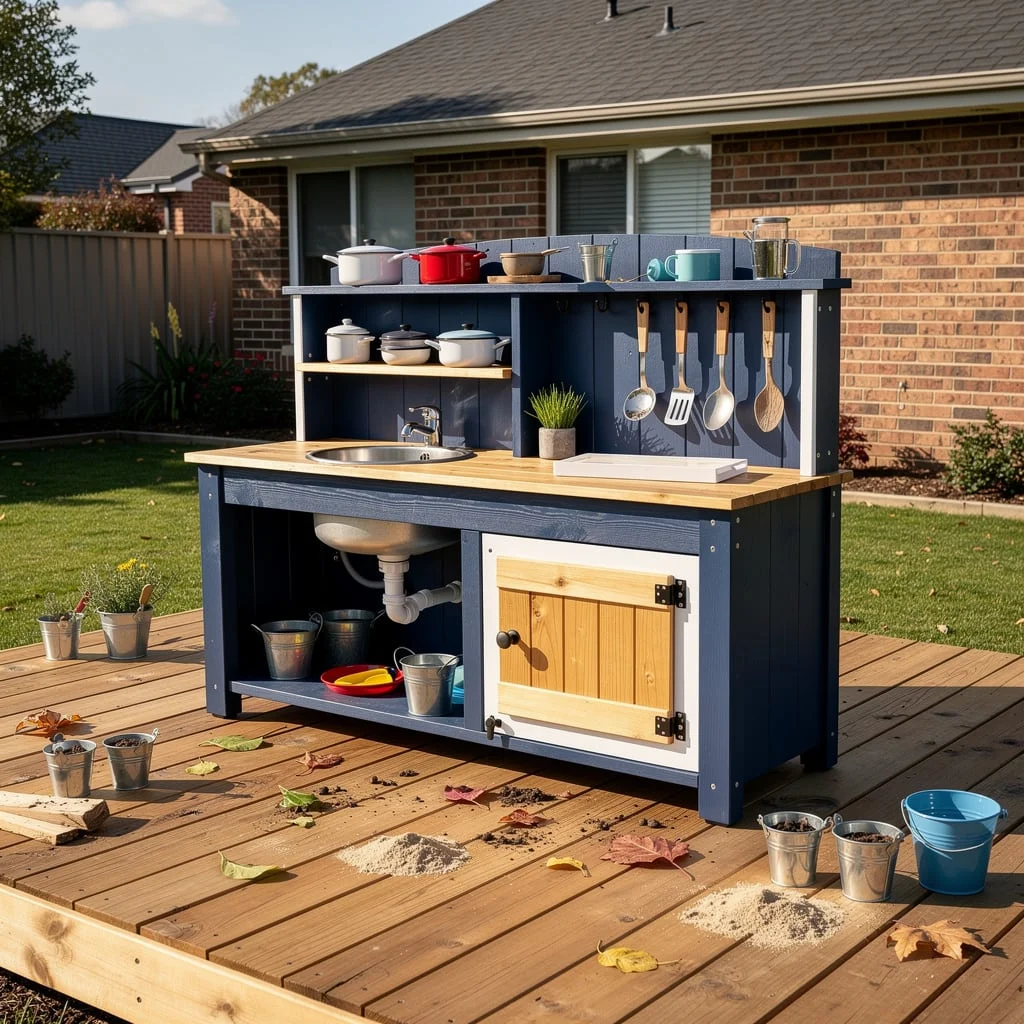
Build the kitchen unit in navy blue — exterior timber paint in a deep indigo-navy, applied to a plywood carcass with a natural pine counter top. The contrast between the dark painted panels and the pale untreated wood top is the whole visual. Mount the unit on a raised deck platform: lay 150x25mm decking boards on a simple frame of 4×2 timber, level it with the ground, and set the kitchen on top. The deck defines the play zone without fencing it in.
On the back panel, mount several large S-hooks or a short horizontal rail for hanging kitchen tools — a spatula, ladles, wooden spoons. Keep one section of the lower cabinet open and add a small natural pine door panel with black strap hinges to the other half. Add coloured enamel pots in red and teal to the upper shelf for visual contrast against the navy. Scatter small galvanised buckets around the deck as the ingredient containers.
Garden Bed Sink Station
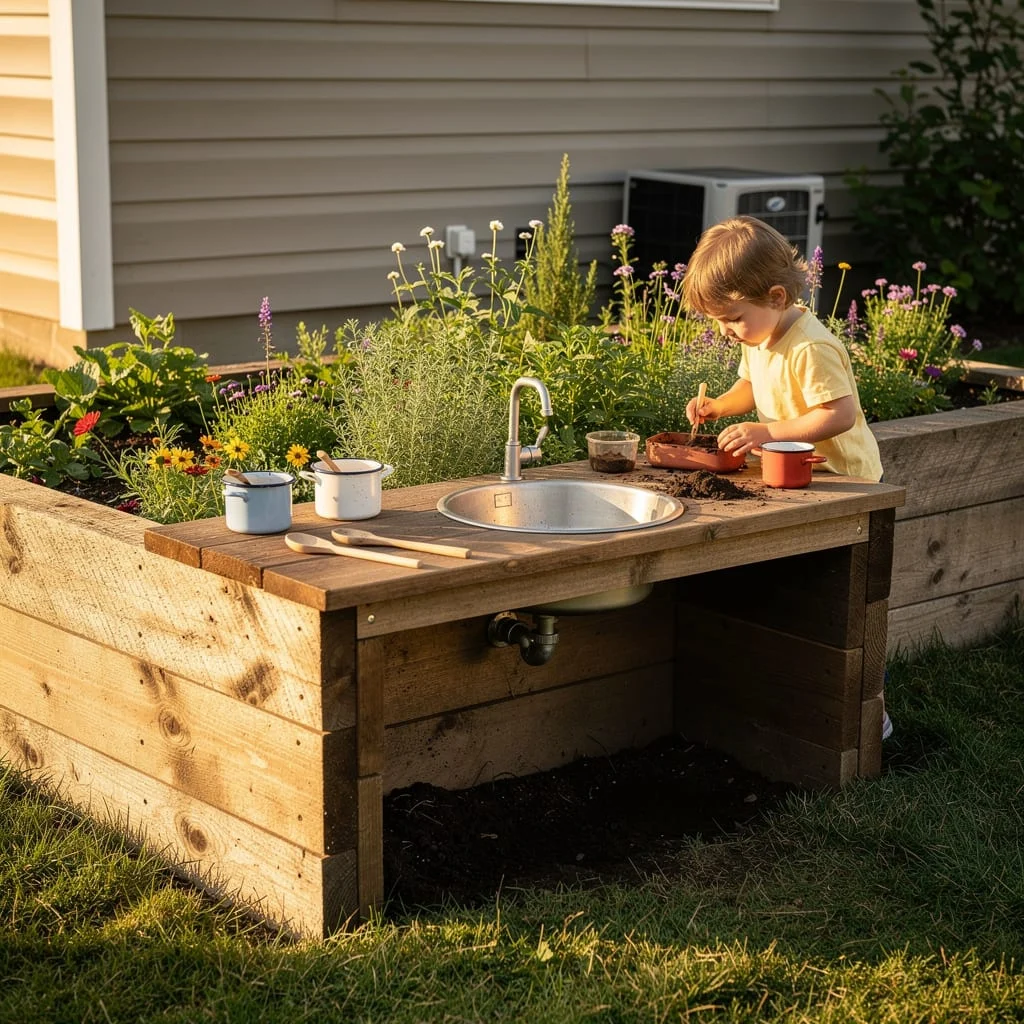
This one requires a raised garden bed already in place, or building one. Construct a rectangular raised bed from thick structural timber — 200mm wide boards are ideal. Size it so one short end can house a simple countertop insert.
At one end of the bed, mount a short length of reclaimed timber as a counter surface across the top edge. Inset a round stainless sink and run a flexible garden hose from the nearest tap, secured under the counter. The drain can run into the soil in the bed itself. Leave the rest of the bed planted with tall wildflowers and herbs — the child plays at the counter end, surrounded by living plants on three sides. This is the most naturalistic mud kitchen possible. It requires no separate footprint in the garden because the kitchen is literally part of the planting.
Pegboard Ingredient Station

Take a sheet of 18mm MDF pegboard — the kind with evenly spaced holes sold for workshop tool storage — and frame it in a border of 70x20mm timber painted in dark charcoal grey. Mount this framed board to the fence or wall above a simple painted cabinet unit. Install wooden peg hooks across the top section of the board, and hang kitchen tools from them: a wooden spoon, a ladle, a slotted spoon, a whisk, cookie cutters, a strainer. Label each hook position with a small chalkboard label.
Below the tool section, line the counter with five or six large glass mason jars. Fill each with a different natural ingredient — mud, sand, clean water, dried leaves, flower petals, small pebbles. Label each jar with a chalkboard sticker. This is a sensory pantry. The child can see what’s available, access it independently, and return it when done. Paint the cabinet in the same charcoal as the pegboard frame so the whole thing reads as one cohesive unit.
Upcycled Cabinet Mud Kitchen
An old cabinet or sideboard rescued from a charity shop or kerbside collection makes the ideal base for this build. Strip off any drawers that sit too high for child-height use and replace them with painted door panels in a contrasting accent colour — bright yellow works particularly well against a white-painted carcass. Sand the original surfaces and apply two coats of exterior wood paint in white, then paint the door panels separately before fitting.
Inset a round stainless sink into the counter top, cutting the hole with a jigsaw. Mount two floating shelves above using simple bracket-and-board construction in matching timber. The shelves carry enamel camping mugs, small succulent pots, and tin utensil holders. Leave the cabinet doors open during play so children can access stored pots and pans easily. The deliberate contrast between the crisp white body and the saturated yellow doors is what gives this kitchen its personality — and the fact that the base was salvaged rather than built makes it both cheaper and better looking than a purpose-built version.
Final Thoughts
Every mud kitchen in this post was made for a child who wanted to make something.
That is the whole point. Not the aesthetics, not the colour palette, not whether the timber is cedar or pine. Children who cook in a mud kitchen are practicing something real: sequencing, measuring, creating, cleaning up after themselves. They’re doing something that matters to them.
The best mud kitchen is the one that looks like it takes the child seriously. One that has real tools and real ingredients and a real place to wash up. One where the space itself says: what you make here counts.
Build it properly. Stock it thoughtfully. Then get out of the way.