
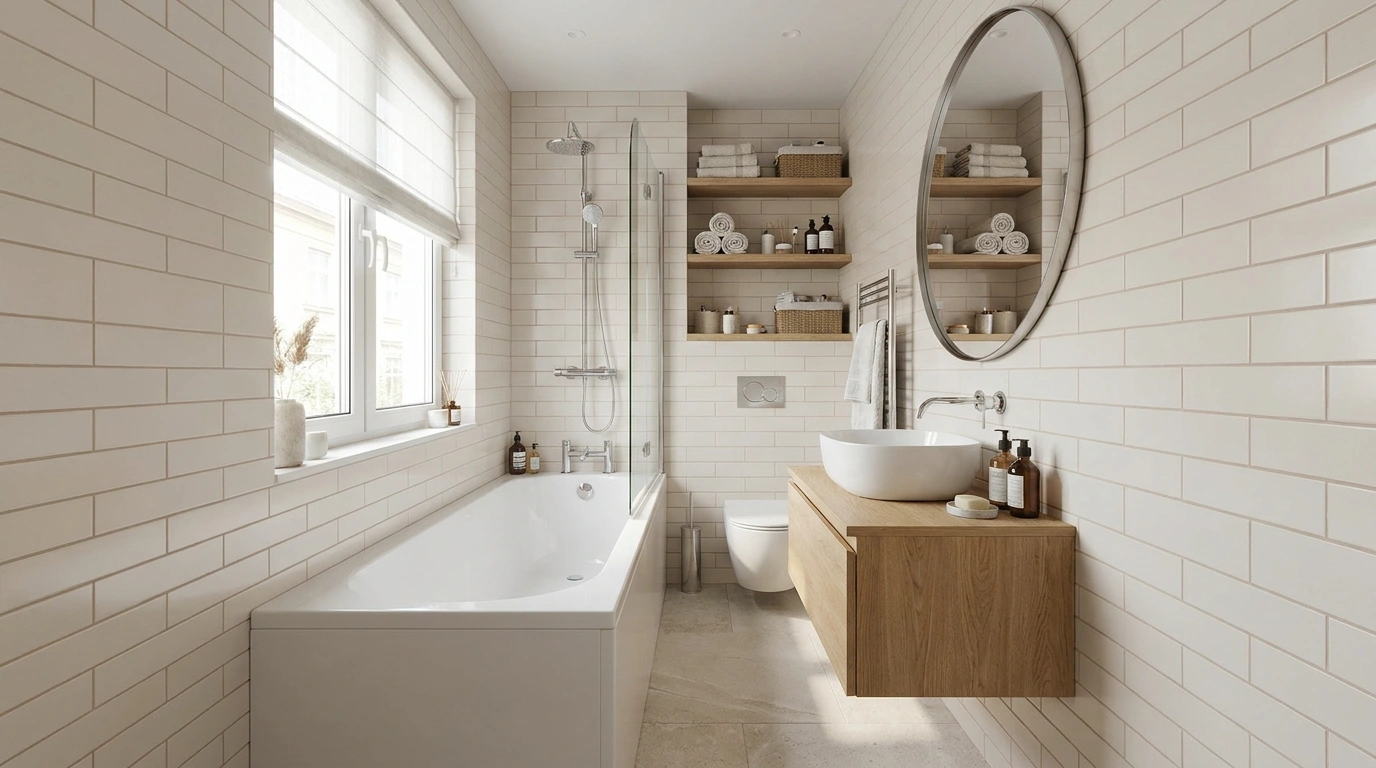
Trying to fit a bathtub into a small bathroom can turn a renovation into a game of Tetris, except the toilet won’t move, the door keeps getting in the way, and the vanity seems determined to occupy half the room. Removing the tub feels like giving up, but squeezing one into the wrong layout can make the entire bathroom feel like an obstacle course.
The good news is that a small bathroom doesn’t automatically need a smaller personality. It needs a layout that makes sense, finishes that work together, and storage that doesn’t leave shampoo bottles competing for space on the bathtub ledge.
Small Bathroom With a Bathtub Ideas
Compact Deep Soaker Tub Layout
A compact deep soaking tub tucked into the corner maximizes vertical space without making the rest of the room feel cramped. Paired with a streamlined floating vanity and integrated wall niches, every square inch serves a distinct purpose.
The minimalist concrete finish keeps the palette cohesive, while warm lighting softens the industrial edge. A patterned floor mat introduces a touch of softness to balance out the hard architectural surfaces.
Smart zoning is everything here. Keeping the bathing zone compact leaves plenty of breathing room for daily movement, proving that you don’t need a sprawling footprint to create a functional retreat.
Warm White Bathtub With a Frameless Glass Screen
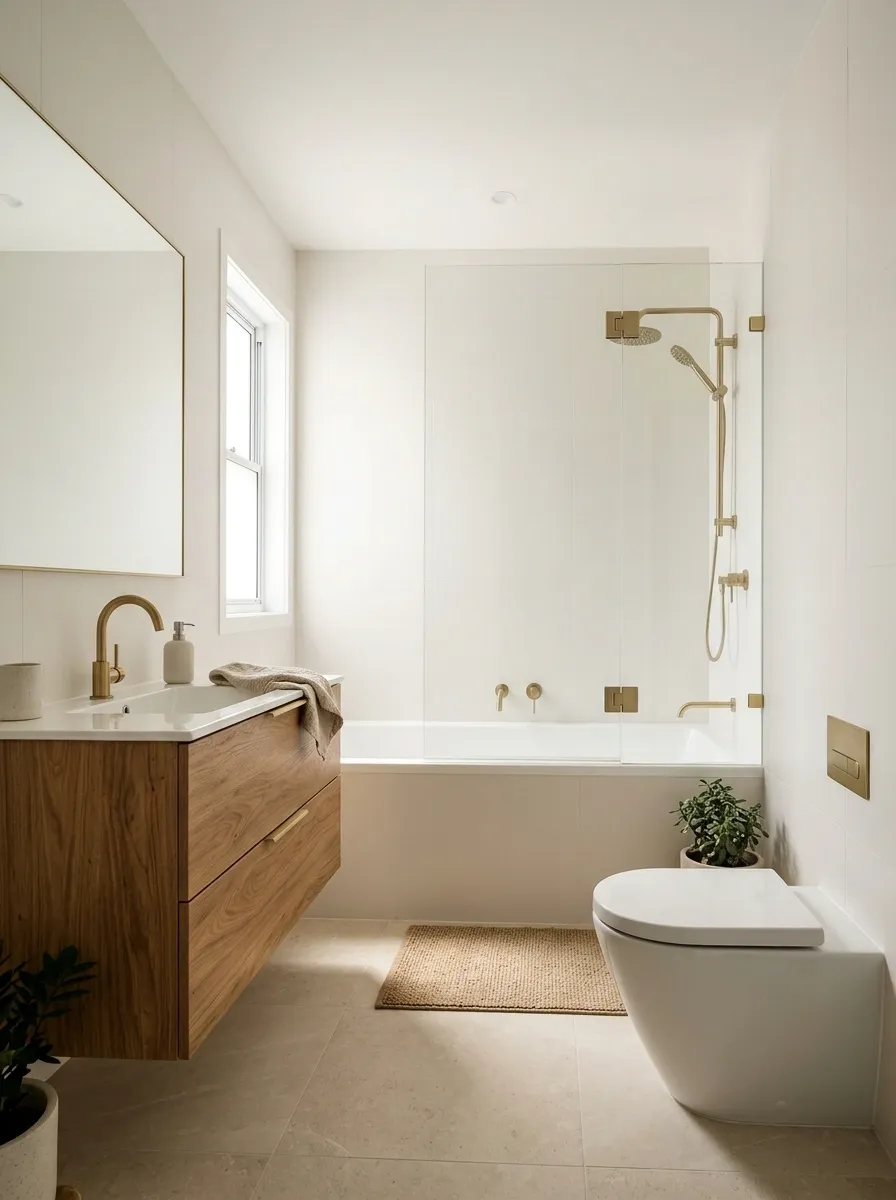
Warm white tile, a built-in bathtub, clear glass, and a floating oak vanity create a bathroom that feels open without looking cold or unfinished. The tub sits against the wall, leaving the rest of the room to accommodate the vanity and toilet without unnecessary visual competition.
The glass shower screen keeps the bathing area visible, while the wood vanity brings enough warmth to stop the room from resembling a dentist’s waiting area.
Keep the tile finish consistent across the main bathing wall, and avoid adding multiple decorative patterns. The materials already do their job. They don’t need a committee meeting.
THE FINISH FORMULA
Warm white
Main tile and walls
Natural oak
Vanity and warmth
Clear glass
Visual separation without a solid wall
Keep the strongest contrast in the vanity or hardware. Let the bathtub surround remain visually quiet.
Bright Window Tub Combination
Placing a classic bathtub beneath a frosted window fills the space with natural daylight while maintaining complete privacy. A seamless glass screen keeps the shower zone open and prevents the room from feeling sectioned off.
Fresh greenery on the windowsill adds life to the neutral tiled backdrop, while a warm textured runner brings comfort underfoot. Every element works together to maximize lightness and flow.
Keep the accessories purposeful and let the natural light take center stage. A well-placed plant and simple fixtures are all it takes to make a compact layout feel remarkably airy.
Narrow Galley Bathroom With a Tub at the End
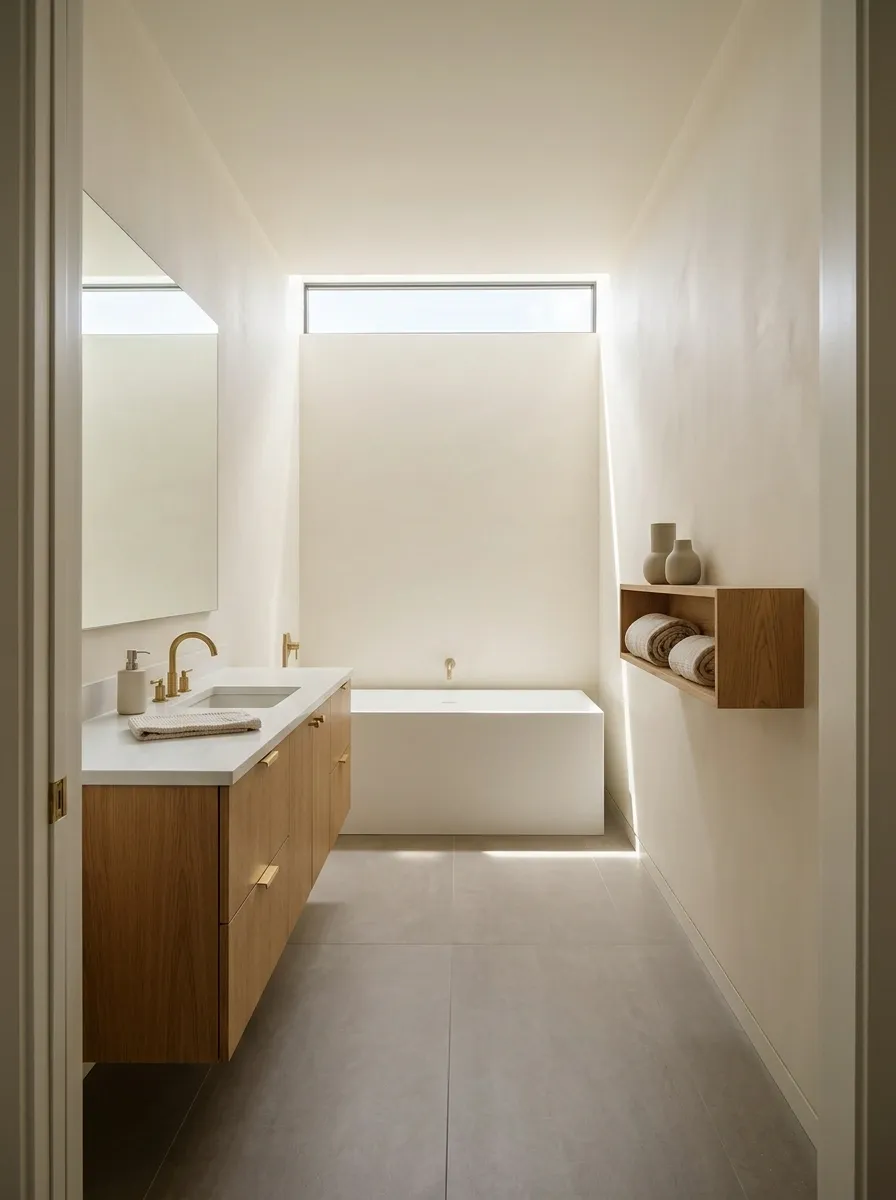
A long, narrow bathroom needs a layout that works with its shape instead of fighting it. Placing the bathtub across the far end gives the room a clear destination, while a slim vanity along one wall keeps the central walking route usable.
Repeating a similar floor finish throughout the room makes the layout feel connected. A large mirror can add visual depth, but it won’t magically create floor space. That’s what sensible measurements are for.
The main mistake is choosing an oversized vanity that narrows the walkway even further. A bathroom shouldn’t require sideways shuffling just because a cabinet looked impressive online.
READ THE ROOM
A simple layout beats a crowded floor plan.
ENTRY
Conceptual layout only, not to scale. Final positions depend on plumbing, door swings, fixture dimensions, and actual room measurements.
Statement Wallpaper and Blue Tub
A striking patterned wallpaper accent wall paired with a soft blue soaking tub transforms a compact bathroom into a design statement. The rich botanical print adds instant personality while framing the bathing area perfectly.
A sleek wall-mounted basin keeps the floor open and uncluttered, maintaining an unobstructed walkway. Polished chrome fixtures provide a clean, reflective contrast against the patterned backdrop.
Balance is the secret to making bold patterns work in a smaller space. Let the statement wall do the heavy lifting while keeping the surrounding fixtures understated and refined.
Sage Green Tile With Warm Oak and Brass
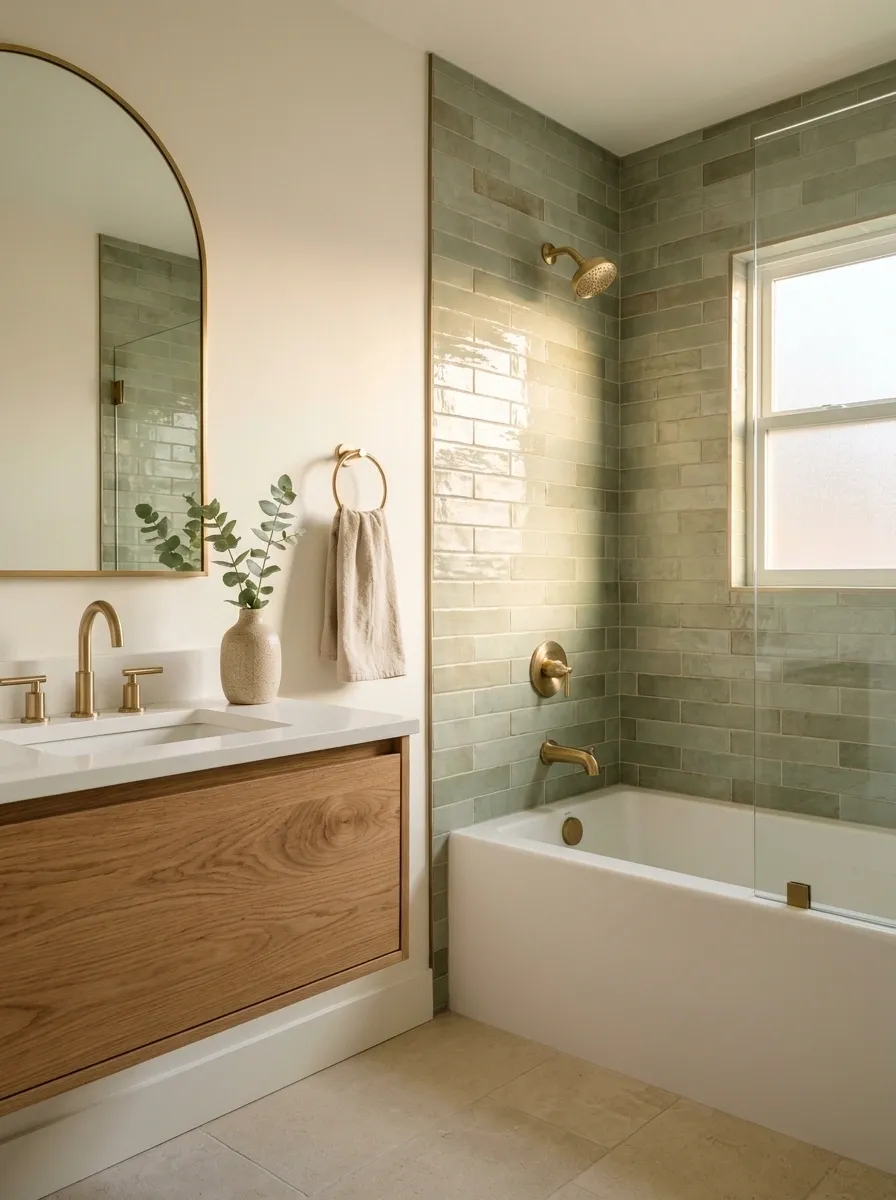
Sage green tile gives the bathing area character without turning the whole bathroom into a green box. Pair it with a white bathtub, warm oak cabinetry, and restrained brass fixtures to create contrast that feels deliberate rather than busy.
The key is giving each material a job. Green provides the color, oak softens the harder surfaces, and brass supplies a small amount of warmth. A light floor keeps the composition from becoming too heavy.
Skip the urge to add green wallpaper, a patterned floor, colorful towels, and five more accent finishes. The bathroom is allowed to have one main character.
COLOR, WITH A LITTLE SELF CONTROL
Four finishes. One coherent bathroom.
Sage green
The defining tile color
Warm white
Bathtub and light surfaces
Natural oak
Cabinetry and warmth
Brass
Small hardware accents
Teal Tiled Walk-In Tub Nook
Rich teal tiling defines the compact bathing nook, creating a vibrant focal point that anchors the entire room. Pairing the bold tile with a minimalist layout ensures the space feels intentional rather than overwhelmed.
A cleverly integrated storage shelf keeps everyday essentials neatly tucked away, while the adjacent shower area flows seamlessly into the main floor plan. Smart planning makes even the most compact corners completely functional.
Stick to a single accent color for the wet zone and keep the remaining surfaces quiet. The room gets plenty of character from the tile work without needing extra clutter.
Bathtub Beneath a Window With a Simple Stone Surround
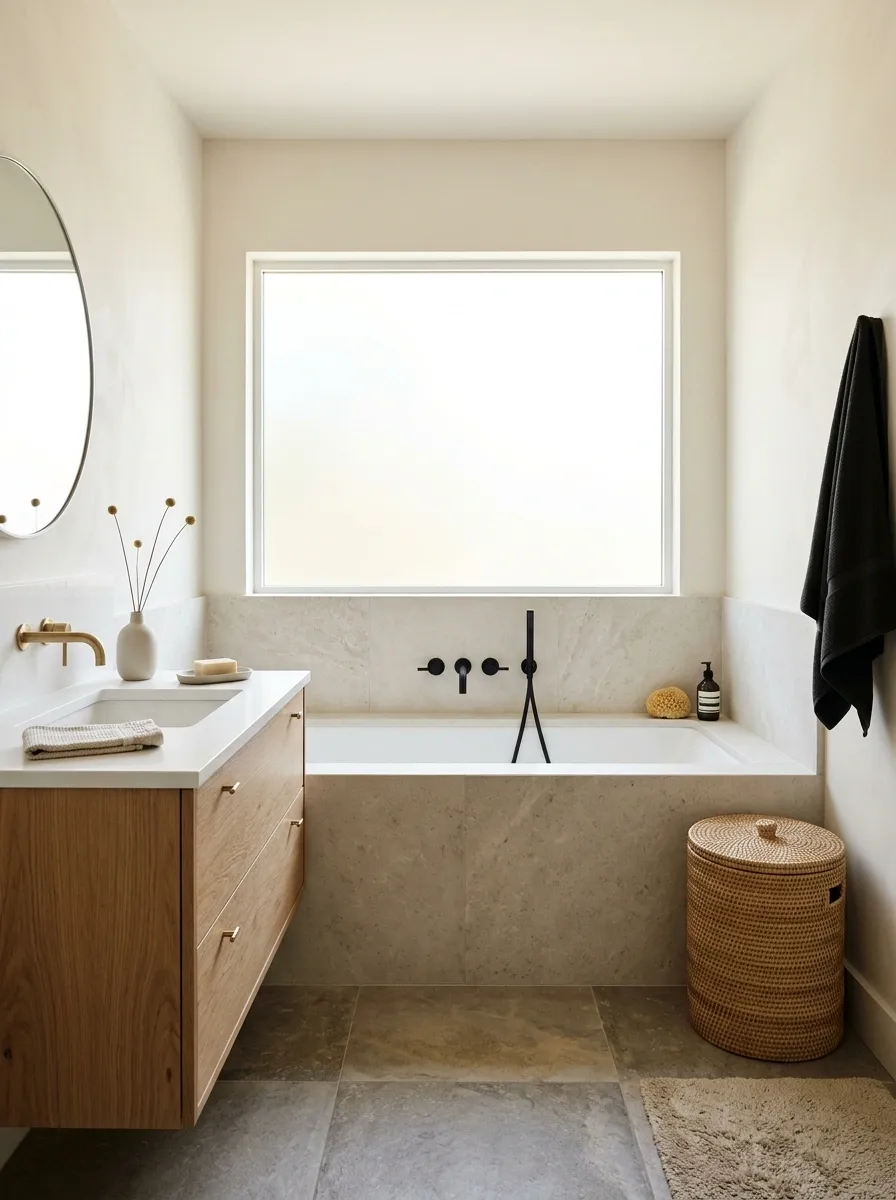
A bathtub beneath a window gives the room a natural focal point without needing an elaborate feature wall. Pale stone-look tile, simple fixtures, and a compact vanity let daylight do most of the visual work.
Privacy matters here, so frosted glazing, an appropriate window covering, or another suitable privacy solution should be planned alongside the layout. Moisture resistance and access for cleaning also deserve attention.
A pretty window isn’t particularly helpful if the only way to reach it is by climbing over the tub. Keep the finishes around the window relatively quiet and let the natural light do the decorating.
THE WINDOW CHECK
Light is good. Losing your privacy isn’t.
Plan the window treatment, water exposure, and cleaning access before committing to the tub position.
Before choosing the tub
Check sightlines, window operation, reach, and frame compatibility with a wet environment.
Elevated Round Tub Sanctuary
An elevated round soaking tub set against textured stone walls turns a compact bathroom into a luxurious spa retreat. Stepping up to the tub creates a distinct separation from the walk-in glass shower enclosure.
Warm ambient candlelight and earthy stone finishes bring organic depth to the design. The layered levels maximize architectural interest without wasting precious floor space.
Commit to the spa aesthetic by keeping the material palette unified. Natural stone and warm wood tones do all the decorating, leaving the room feeling serene and uncluttered.
Deep Forest Green Bathroom With a White Tub
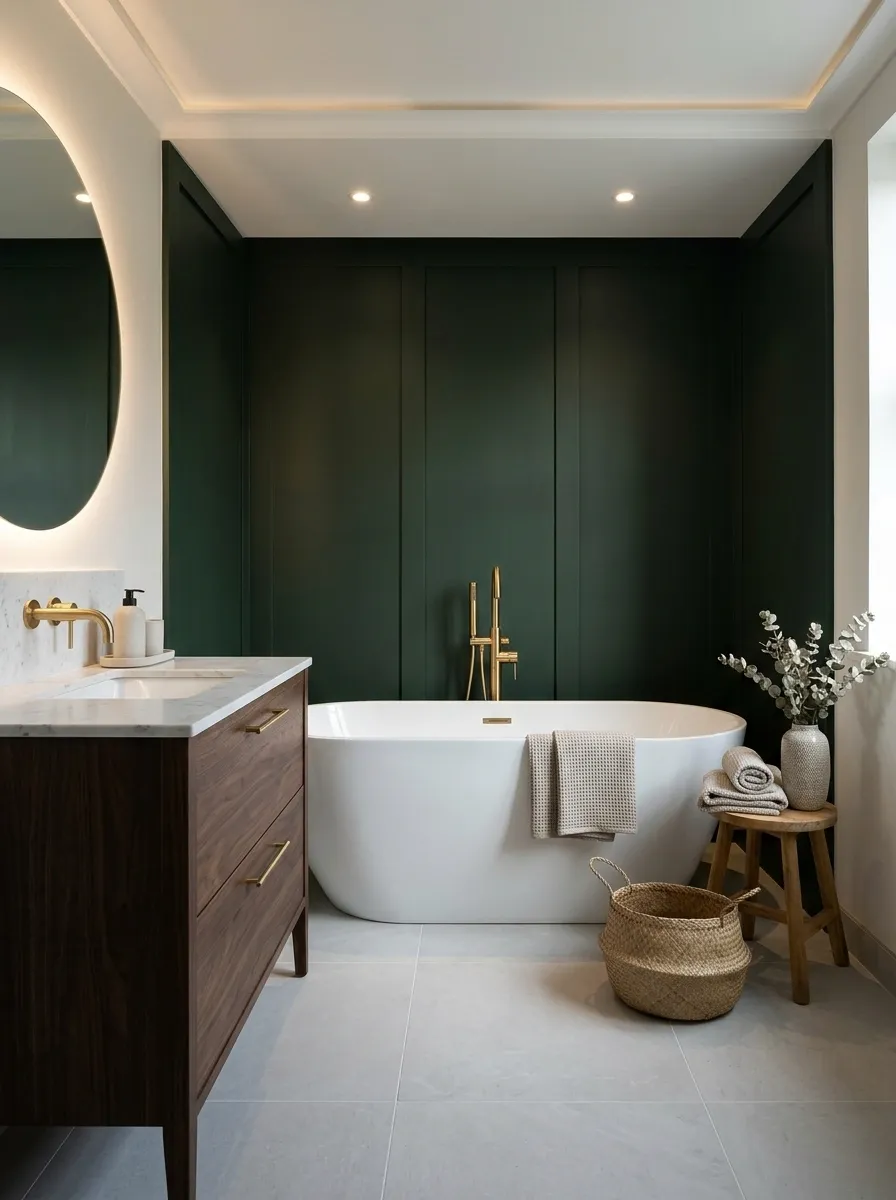
Deep forest green makes a small bathroom feel deliberate rather than plain. It works especially well behind a crisp white bathtub, where the contrast outlines the bathing area and gives the room a strong visual anchor.
A dark vanity and warm metal fixtures continue the palette, while a lighter floor prevents the room from feeling boxed in. Good lighting matters here, especially if the bathroom has little natural daylight.
The secret is contrast, not covering every surface in the darkest green available. A bathroom can be dramatic without looking like it has beef with sunlight.
DARK DOESN’T HAVE TO MEAN DINGY
Give every dark surface a lighter neighbor.
Forest green
Main feature wall
Porcelain white
Bathtub and highlights
Warm lighting
Light the mirror and bathing area properly.
Restrained brass
Repeat the finish in a few considered places.
Check the room’s daylight and lighting before committing to extensive dark finishes.
Soft Shower Curtain and Classic Bathtub in a Compact Apartment
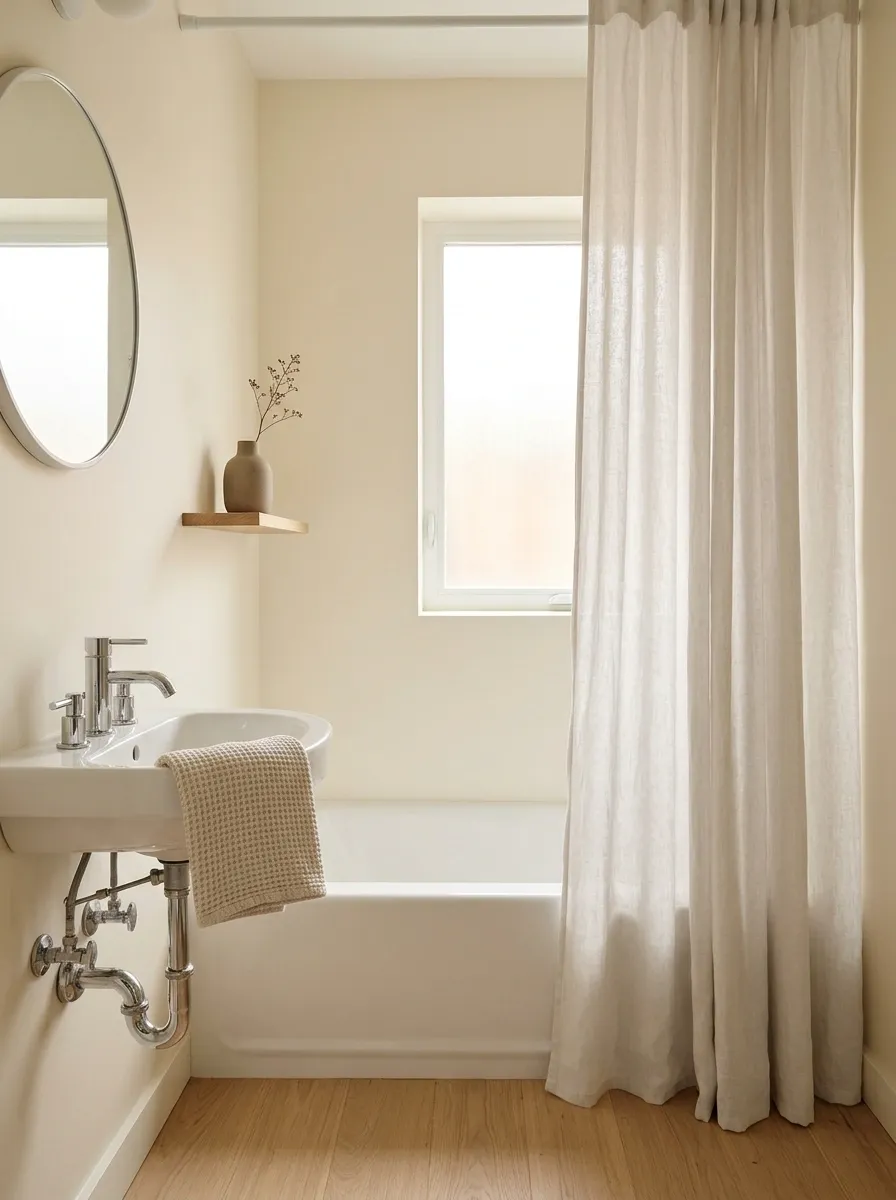
A simple white bathtub, a soft fabric shower curtain, and a petite sink can make a compact apartment bathroom feel comfortable without an expensive renovation. The curtain adds texture, hides the shower area when closed, and pulls aside when the bathtub needs to feel more open.
Cream walls and understated chrome fixtures keep the setting familiar, while a coordinated curtain brings enough softness to prevent the bathroom from feeling clinical.
The trick is choosing a curtain that hangs properly and doesn’t bunch up around the tub like a forgotten bedsheet. Keep the floor area clear, and choose a washable curtain or suitable liner that can handle repeated moisture.
THE CURTAIN DECISION
Softness outside. Splash control inside.
Fabric curtain
Easy to replace, visually soft, and convenient to pull aside. Choose a washable curtain and suitable liner where needed.
Fixed glass screen
A permanent, visually open finish that needs regular cleaning. Check splash coverage and access before choosing the screen size.
The better option depends on the bathroom. Neither fixes a poorly positioned showerhead or inadequate splash control.
Compact Freestanding Tub With a Limestone Backdrop
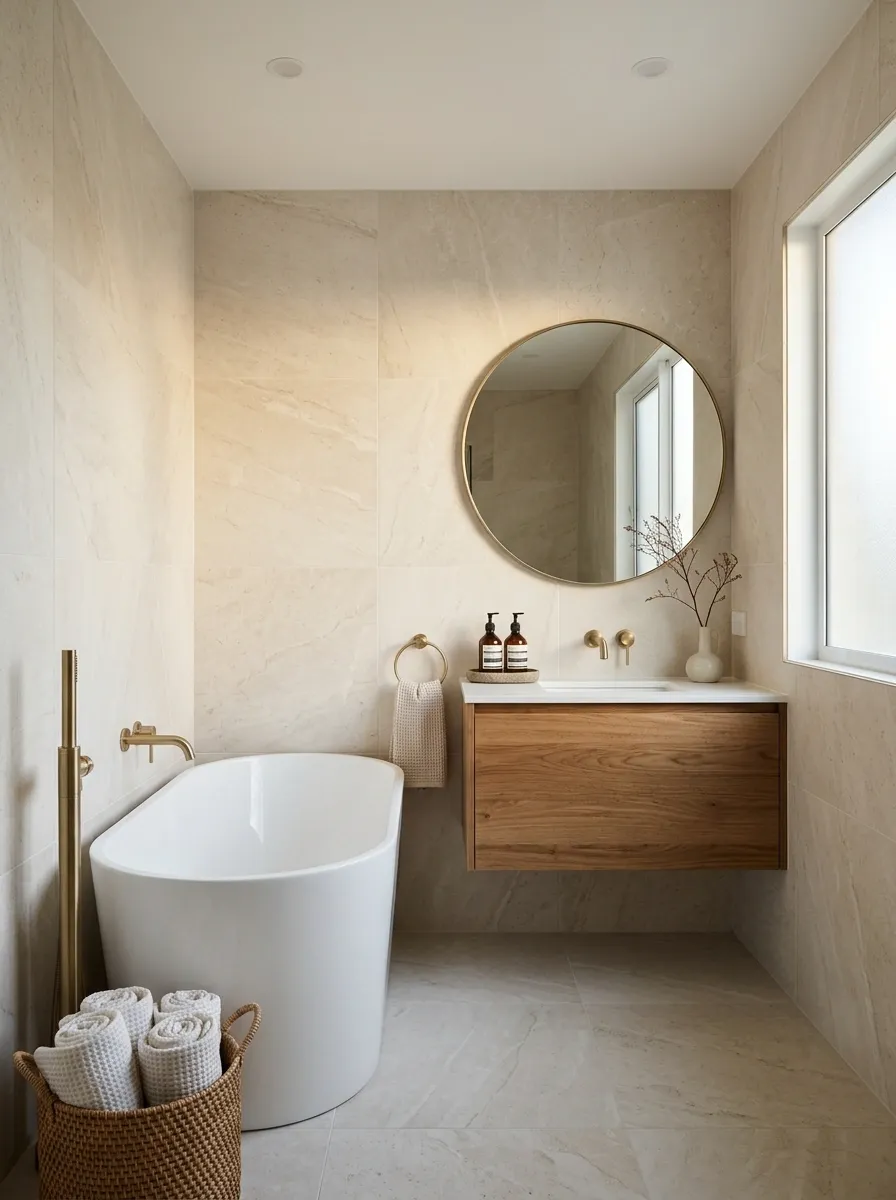
A compact freestanding tub gives the bathroom a sculptural focal point, especially when paired with pale limestone-look finishes and a warm wood vanity. The shape stands out without requiring a dramatic color scheme or elaborate decoration.
However, this look needs enough floor space around the bathtub for access, comfortable movement, and cleaning. The tub’s exterior dimensions don’t tell the whole story. The faucet location, plumbing connections, and usable clearance matter just as much.
This design is better suited to a small but comfortable bathroom than an extremely narrow one. Forcing a freestanding tub into a room that barely accommodates it isn’t luxury. It’s an expensive obstacle.
BEFORE FALLING FOR THE TUB
Measure the whole setup, not just the product photo.
Access and cleaning
Check the space needed to enter, reach the fixtures, clean behind the tub, and service plumbing.
Vanity and doorway
Confirm that cabinet drawers, doors, and the bathroom entrance remain usable.
Planning sketch, not a scaled floor plan. Use the selected tub’s installation dimensions and local clearance requirements before purchasing.
Continuous Beige Tile From Floor to Bathtub Surround
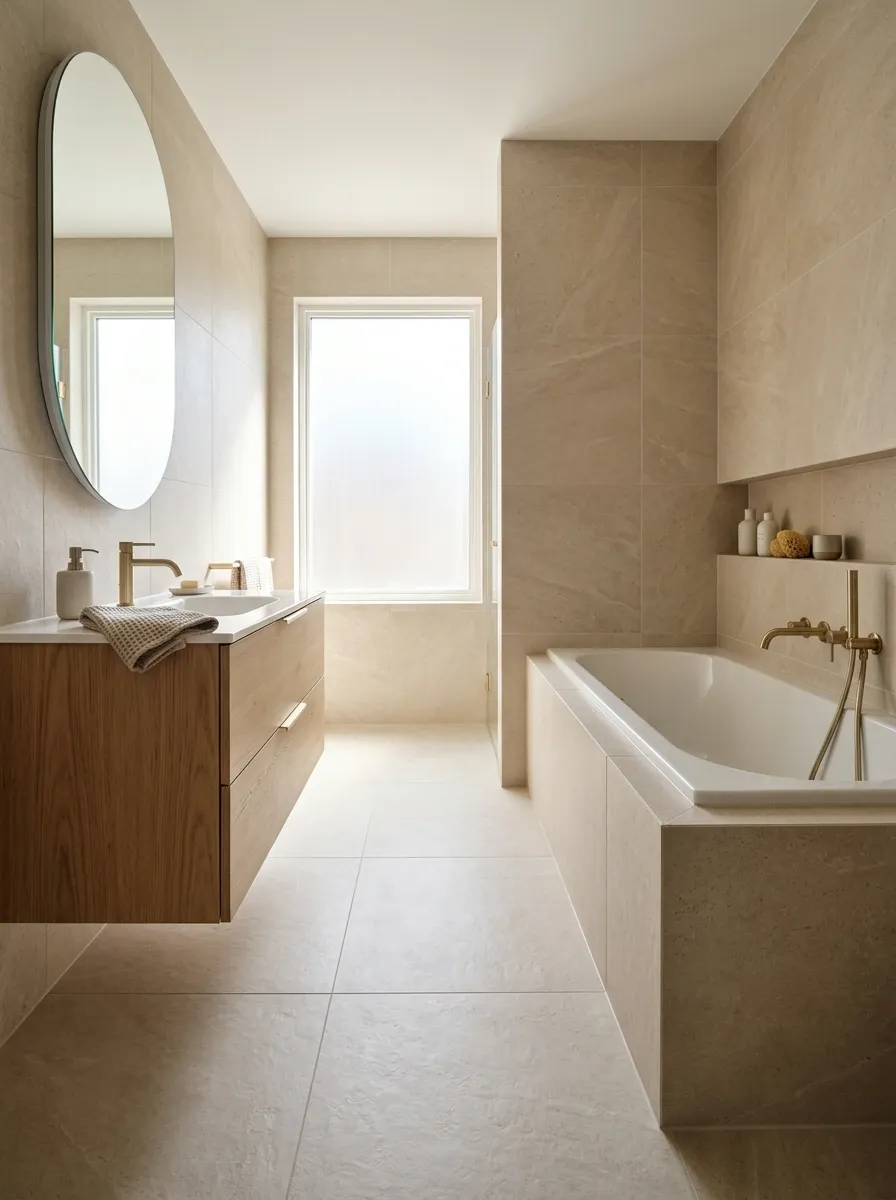
Large-format beige porcelain tile gives a small bathroom a connected, quieter appearance. Running the same tile family across the floor and bathtub surround reduces abrupt material changes, while a recessed niche keeps shower products off the tub ledge.
The color works particularly well with oak, warm white porcelain, and simple metal fixtures. There’s enough variation in the stone-look surface to prevent the bathroom from feeling flat, but not so much that every wall demands attention.
Pay attention to grout color, tile alignment, and slip resistance underfoot. A gorgeous floor that becomes unpleasantly slippery when wet is a questionable design victory.
THE CONTINUITY EFFECT
Fewer abrupt changes. A calmer-looking room.
Main floor
Choose a suitable slip-resistant tile with a finish that relates to the wall tile.
Bathtub apron
Continue the tile treatment across the tub’s front panel for a more integrated appearance.
Wall and niche
Coordinate the tile layout and grout while maintaining proper waterproofing around the bathing area.
Use matching tiles where they suit the installation. Floor and wall products have different performance requirements, so visual consistency should never override suitability.
Navy Vanity With Classic White Bathtub Tile
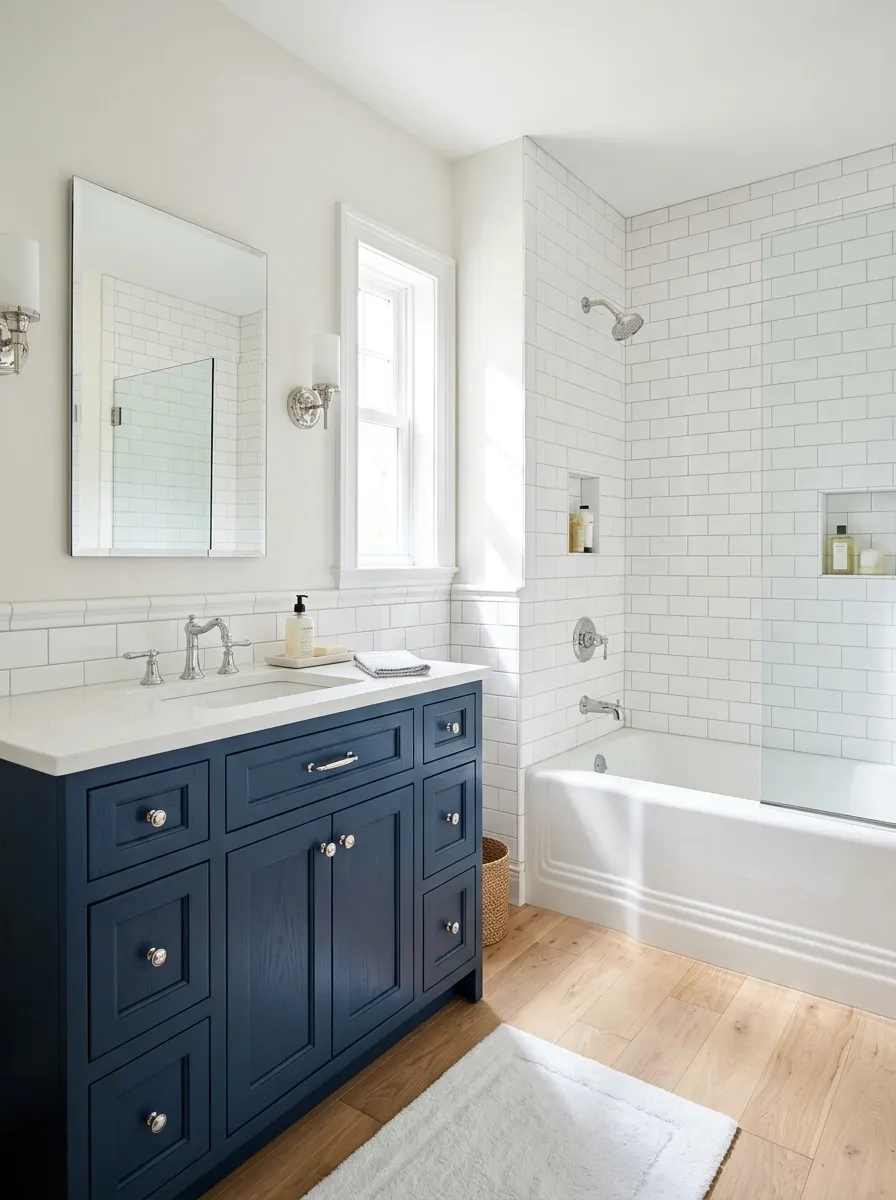
A navy vanity adds depth to a white bathroom without requiring dark walls or dramatic tile. The combination of white subway tile, a painted cabinet, chrome fittings, and a simple mirror feels classic but still has enough contrast to avoid looking generic.
The vanity becomes the main color anchor, which is useful when the bathroom doesn’t have much room for decorative features. White surfaces keep the bathing area visually clear, while small chrome details connect the fixtures.
Choose a navy with enough warmth to work alongside the room’s lighting and floor. Then stop adding accents just because there is an empty corner. Not every available surface needs a personality.
THE COLOR BALANCE
Let one bold piece do the talking.
White · Main background
Bathtub, tile, and brighter surfaces.
Navy · Focal point
Vanity cabinet and limited repeat accents.
Soft metal · Supporting finish
Chrome fittings and restrained hardware.
Built-In Bathtub With a Seamless Tiled Apron
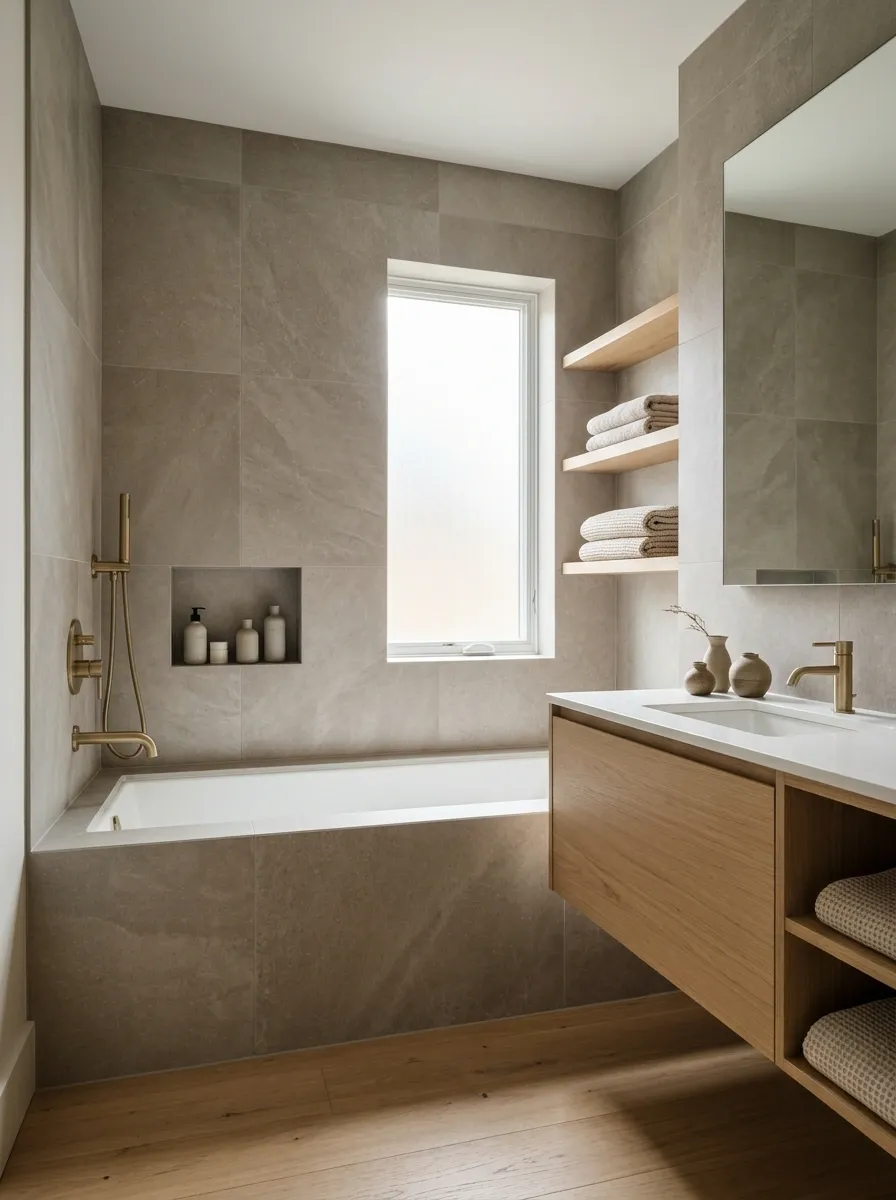
A built-in bathtub with a tiled apron gives the bathroom a more architectural finish. Instead of treating the tub as a separate white box, the surrounding tile connects it to the walls and gives the bathing area a unified appearance.
Warm gray porcelain, restrained grout lines, a recessed niche, and a simple vanity keep the materials consistent without making the room feel lifeless. The result is especially effective when the tile continues neatly around corners and across the tub’s front panel.
The important detail isn’t simply choosing the same tile. The installation must account for waterproofing, access to plumbing, manufacturer requirements, and suitable support beneath and around the tub. Beautiful tile is not a substitute for good construction.
THE FINISH PLAN
Make the bathtub look built into the room.
Tiled wall surround
Align the tile layout with adjoining surfaces where practical.
Tiled front apron
Coordinate grout lines, edges, and the finished bathtub height.
Service and access planning
Preserve required plumbing access and follow the bathtub manufacturer’s installation instructions.
The cleanest-looking finish is the one that remains serviceable after the renovation. A hidden plumbing problem should not require destroying the entire design.
Terracotta Upper Walls With Cream Bathtub Tile
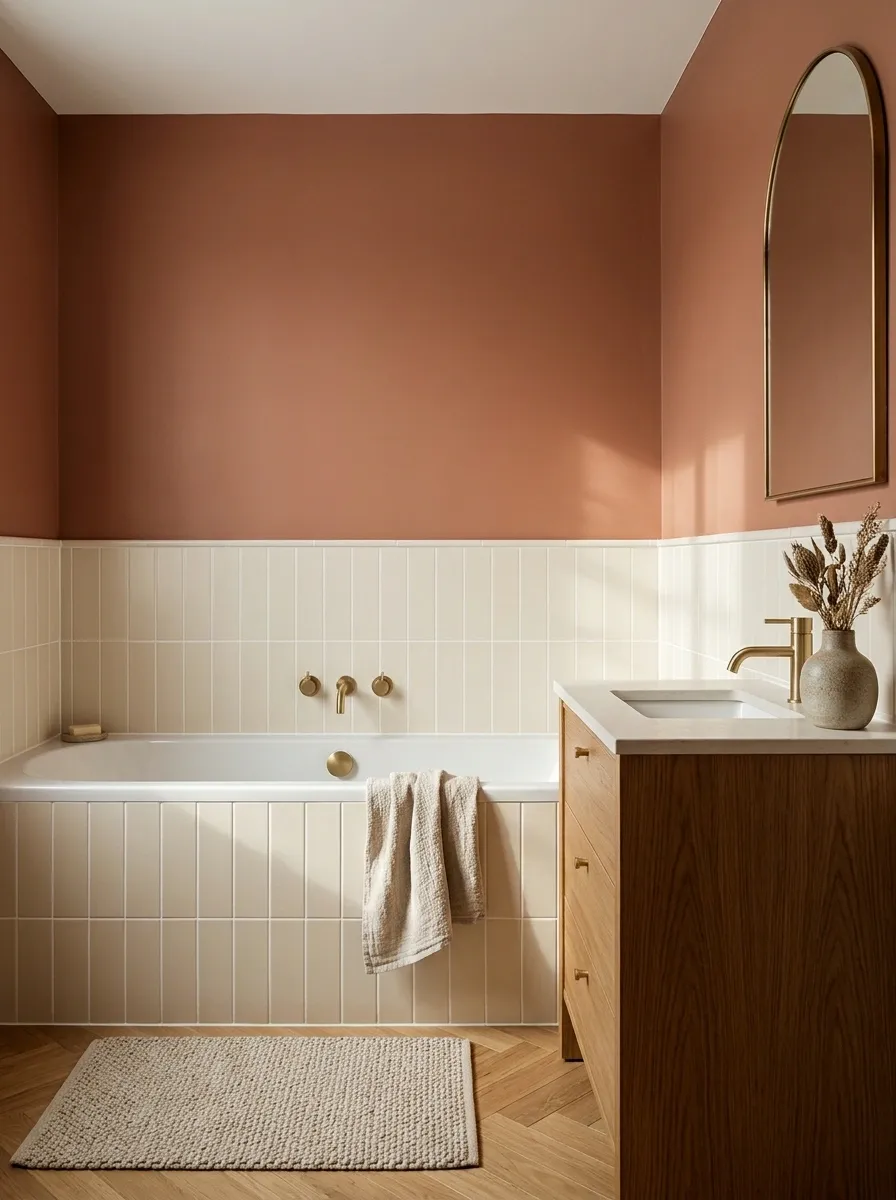
Terracotta walls bring warmth to a small bathroom without relying on another predictable white-and-gray makeover. Cream tile protects the bathing area, while the earthy paint adds personality above it. An oak vanity and restrained brass hardware complete the palette without making the room look like a themed restaurant.
The transition between tile and paint is what makes this design work. Keep the tiled area appropriate for direct water exposure, and use suitable bathroom paint on the drier upper walls.
This is also a good way to add color without committing to expensive patterned tile across every surface. The paint does the heavy lifting, which helps when the renovation budget has already been attacked by plumbing costs.
THE HALF-TILE COLOR PLAN
Warm walls without a full renovation of the color palette.
UPPER WALL
Muted terracotta paint in suitable dry areas
LOWER WALL AND TUB SURROUND
Cream tile with appropriate waterproofing
OAK VANITY ACCENT
Use the color boundary to give the room structure. Tile height should respond to the bathtub and shower arrangement, not an arbitrary decorative line.
Attic Bathroom With a Bathtub Beneath the Sloped Ceiling
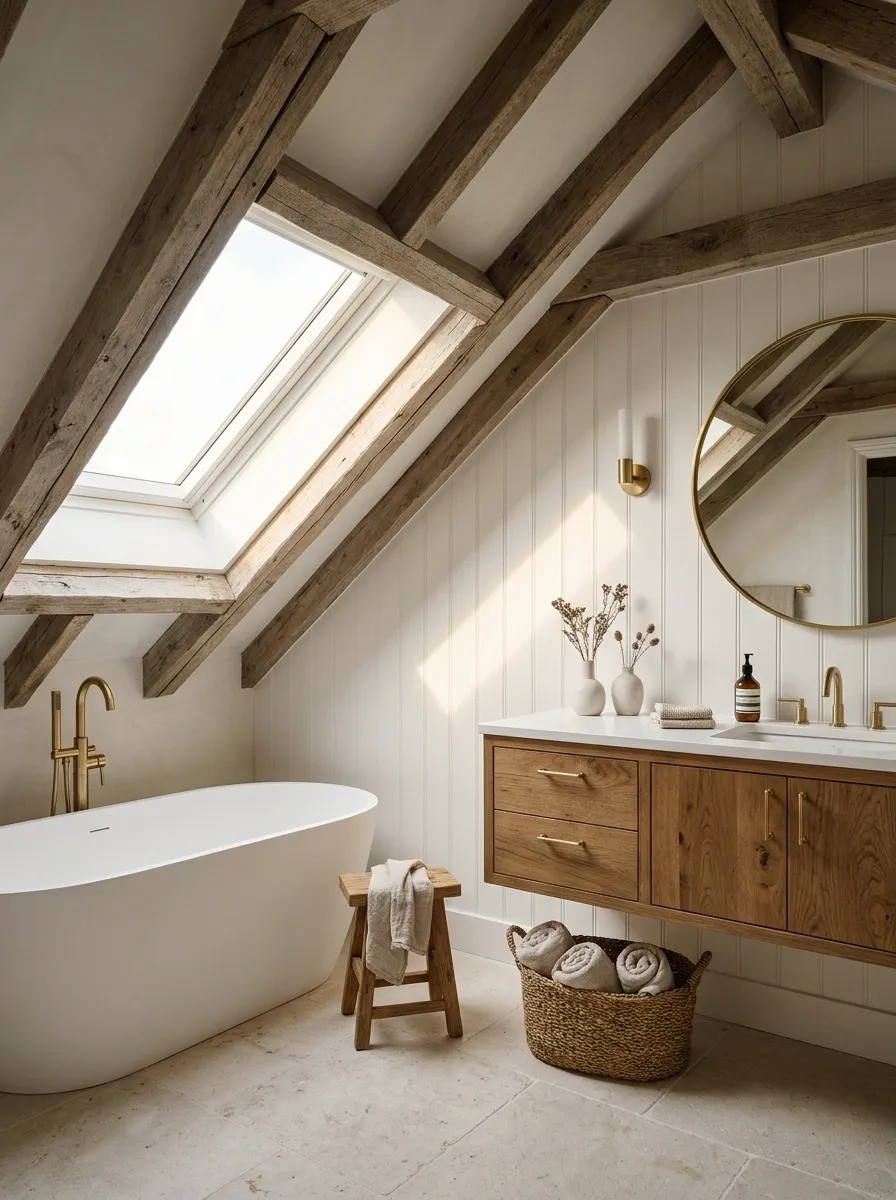
An attic bathroom has an awkward feature that can become its greatest advantage: the sloped ceiling. Place the bathtub where the roofline limits standing headroom, then reserve the taller part of the room for activities that require standing upright.
White surfaces, pale stone tile, and natural wood keep the sloping architecture visible rather than making it feel like an obstacle. A skylight can provide daylight where exterior wall windows are limited, provided the location and installation are suitable for the bathroom.
The measurements matter more than the styling here. Check usable headroom, access to the tub, roof construction, ventilation, and waterproofing before locking in the layout.
DESIGN AROUND THE ROOFLINE
Low roof for bathing. Full height for moving.
Conceptual section, not a measured construction drawing. Confirm local headroom requirements, safe access, ventilation, and structural constraints before construction.
Blush Pink Tile With Pale Oak Cabinetry
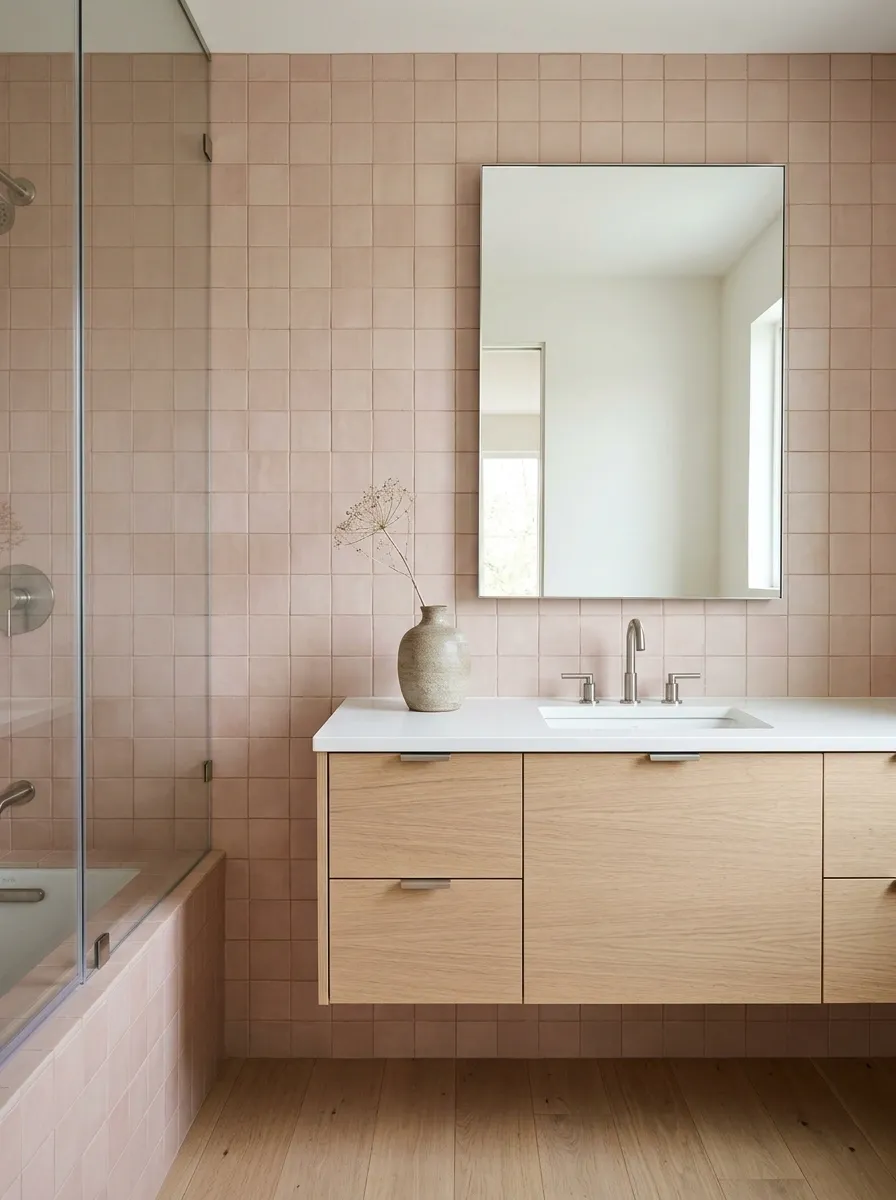
Blush pink tile adds color without making the bathroom feel overly sweet. The trick is choosing a muted shade with a slightly earthy undertone and pairing it with pale oak, white porcelain, and simple brushed nickel fixtures.
Square tiles bring a little rhythm to the bathing wall, while the oak vanity stops the pink from becoming the entire personality of the room. A simple mirror and uncluttered countertop keep the composition contemporary.
Skip the urge to add pink accessories to every corner. Matching every towel, soap dispenser, bath mat, and storage container can make a thoughtfully designed bathroom look like a gift shop celebrating Valentine’s Day in July.
PINK, WITHOUT THE SUGAR OVERLOAD
Let the tile carry the color.
Muted blush
The statement surface
Pale oak
Natural warmth
Warm white
Visual breathing room
Keep the hardware restrained.
Brushed nickel or another coordinated finish gives the tile and wood room to stand out without introducing another dominant color.
Checkerboard Floor With an Uncomplicated White Bathtub
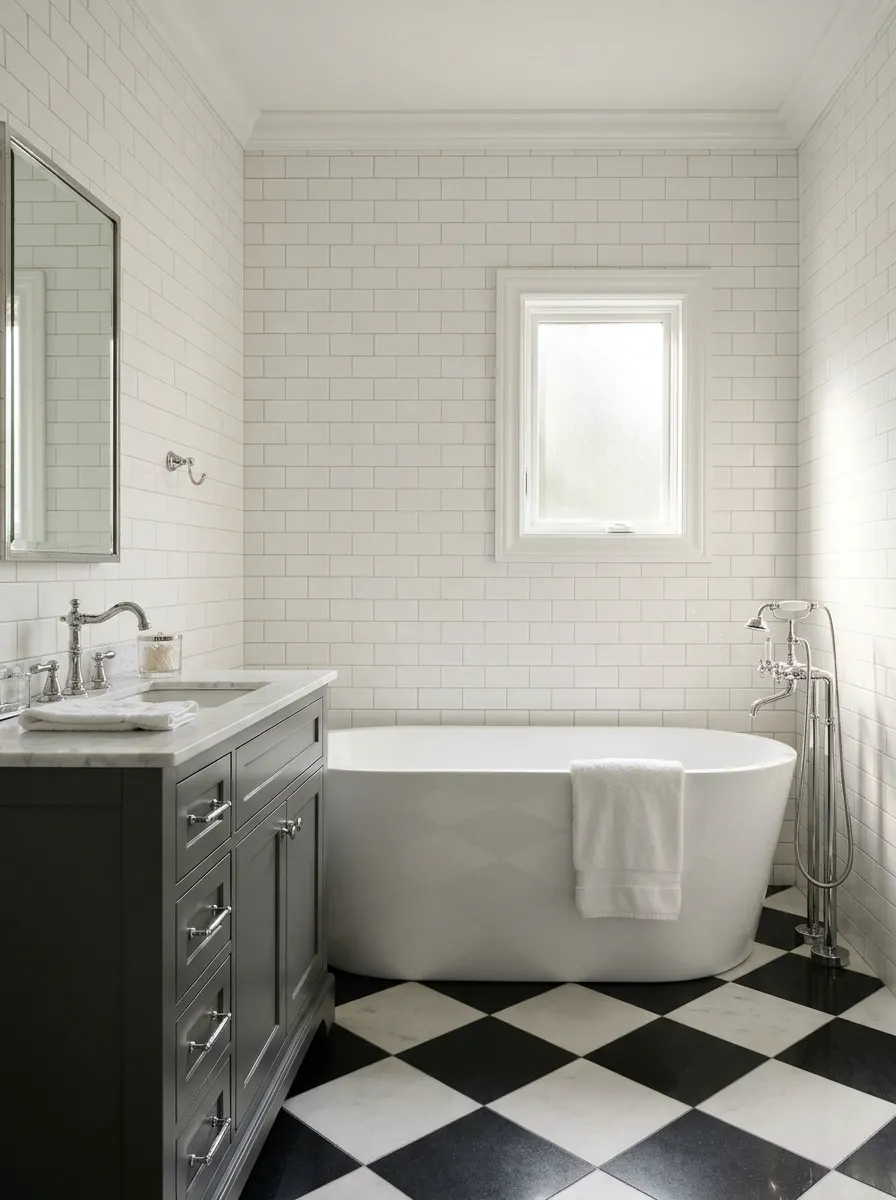
A checkerboard floor gives a small bathroom a strong visual identity without requiring a complicated wall treatment. Black and white tiles establish the pattern, while the white bathtub and plain wall tile provide a calmer background.
A charcoal vanity can connect the darker squares to the rest of the room, while chrome hardware keeps the traditional scheme crisp. The result has character without relying on decorative accessories to do all the work.
The scale of the checkerboard matters. Very large squares can dominate a tight floor, while tiny contrasting tiles can make the room visually noisy. Choose the pattern with the room’s actual dimensions in mind, and use suitable slip-resistant flooring for wet conditions.
THE PATTERN NEEDS A QUIET NEIGHBOR
One graphic floor. Plain walls. Job done.
Black: gives the floor its graphic structure.
White: balances the pattern and echoes the bathtub.
The graphic shows the pattern principle, not a recommended tile size. Keep wall patterns restrained and verify that the selected floor tile is suitable for wet areas.
Deep Soaking Tub With Natural Wood and Stone
A deep soaking tub, natural stone, and warm wood create a bathroom that feels calmer than its dimensions might suggest. The design relies on material quality and a clear focal point rather than a collection of decorative objects.
Pale stone keeps the room light, while wood adds warmth to the vanity and selected details. Soft lighting supports the atmosphere, but task lighting around the mirror still needs to do its actual job.
A soaking tub can also be deeper or bulkier than a standard bath, so check its capacity, entry height, installation requirements, and footprint before committing. The serene look is worth pursuing, but practicality still gets a vote.
THE MATERIAL HIERARCHY
Build the room around three materials, not thirteen competing ones.
Natural stone
The main architectural surface, with suitable sealing and maintenance.
Warm wood
A natural counterpoint through moisture-appropriate cabinetry and details.
White porcelain
A clean bathtub focal point that keeps natural finishes from feeling heavy.
The practical check
Confirm the soaking tub’s dimensions, water capacity, floor loading where relevant, and entry clearance. Use appropriate materials in wet areas and keep lighting functional as well as atmospheric.
Patterned Feature Wall Behind a Simple Bathtub
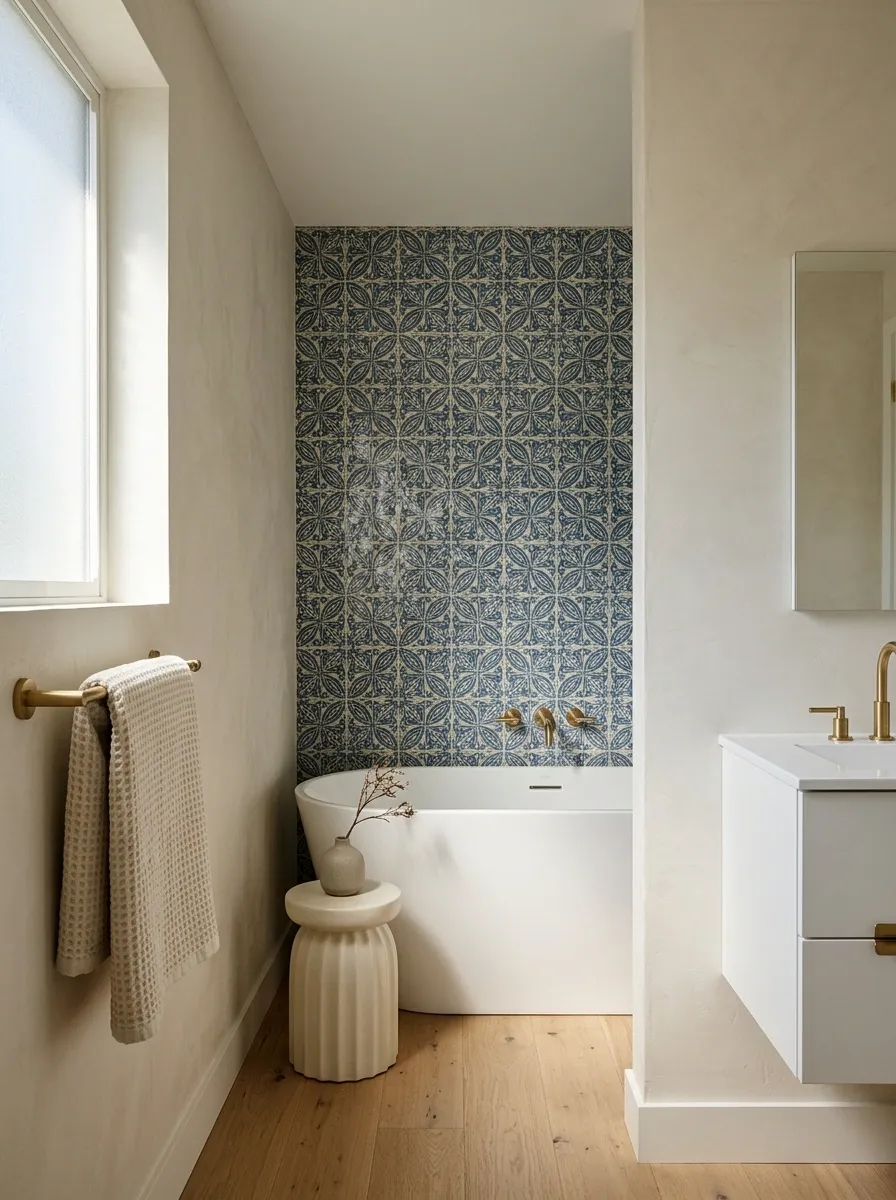
A patterned wall behind the bathtub gives a small bathroom a focal point without demanding a complete renovation of every surface. Blue and cream tiles bring movement to the bathing area, while plain walls, a white tub, and a simple vanity keep everything else under control.
The trick is treating the pattern as the main event. Choose one tile design with a clear palette, then pull a quieter color from it for the surrounding finishes.
Pattern placement matters, too. A feature wall at the end of a narrow bathroom naturally draws the eye forward, while a pattern wrapping around every wall can make the room feel busier.
THE FEATURE WALL FORMULA
Give the pattern one place to shine.
Patterned tub wall
The main visual statement
Quiet walls
A calmer supporting backdrop
The rule worth keeping
Repeat one color from the feature tile in a small detail elsewhere. Skip additional competing patterns unless they genuinely share the same visual language.
Open Wet-Room Layout With a Built-In Tub
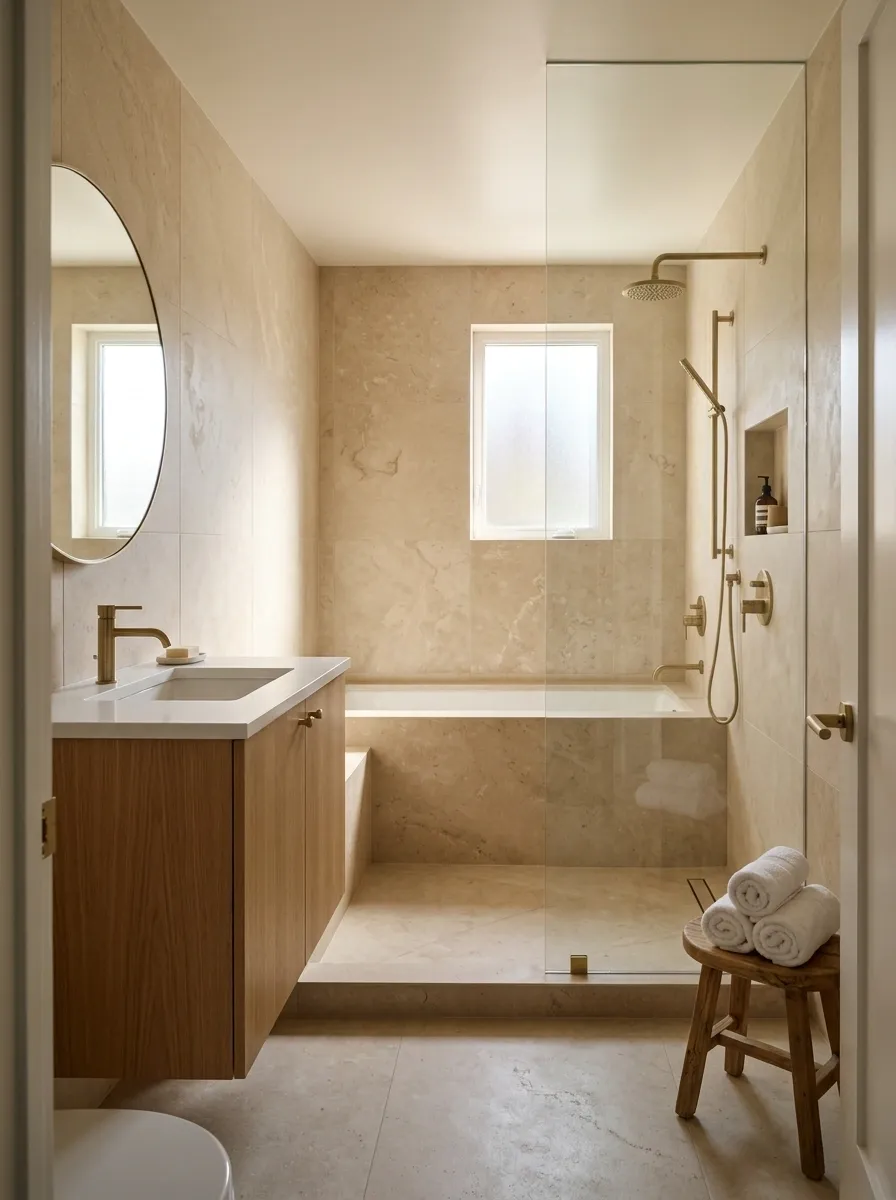
A wet-room layout brings the bathtub and shower into one coordinated bathing zone. A fixed glass screen helps manage splashes without cutting the bathroom into several visually separate sections, while matching floor and wall finishes make the room feel cohesive.
This arrangement can work especially well when a conventional shower enclosure would make an already tight room feel awkward. However, fewer visible barriers don’t mean fewer technical requirements.
Waterproofing, drainage, floor gradients, splash direction, and ventilation all need proper planning. Use a recessed shower niche instead of lining the tub edge with bottles, and keep the dry area distinct enough for towels and storage.
PLAN THE WET ZONE
Open sightlines. Proper splash control.
Bathing zone
Tub and shower positioned within a properly waterproofed area.
Glass screen
Placed to limit splashes without blocking the entire view.
Dry area
Protected access to the vanity, towels, and bathroom entrance.
Before choosing this layout
Confirm waterproofing details, drainage, floor slope, glass placement, and local construction requirements with a qualified installer.
Floating Vanity and Mirrored Storage Beside the Tub
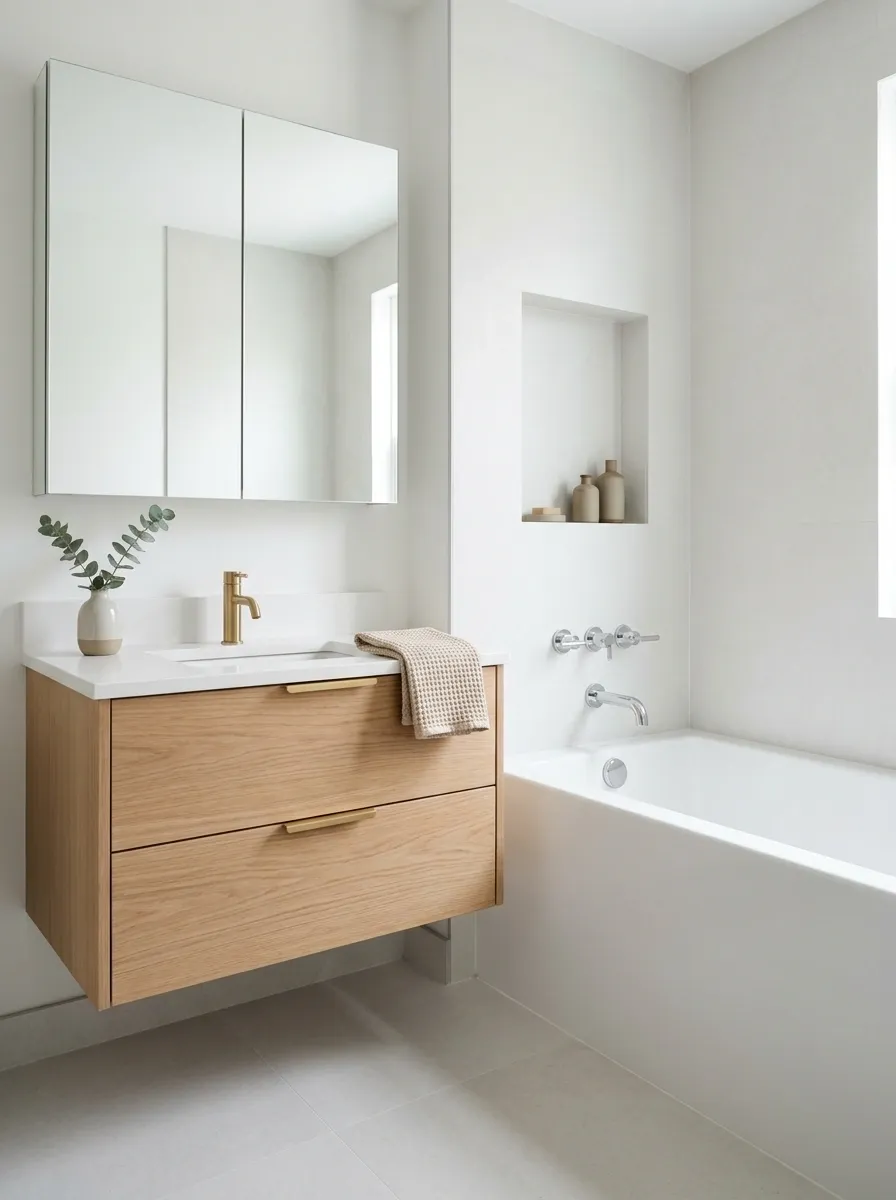
A floating vanity and a mirrored medicine cabinet make a compact bathroom work harder without filling it with extra furniture. The wall-mounted cabinet leaves more visible floor underneath, while the mirror conceals everyday essentials that would otherwise take over the countertop.
Pair the vanity with a built-in white tub, light tile, and simple fittings for a clean, practical finish. Drawers are especially useful for separating daily products, while a recessed niche near the bathtub keeps shampoo and soap within reach.
The important detail is choosing cabinetry that actually fits the room. A floating vanity isn’t automatically space-saving if it’s so deep that everyone has to turn sideways to pass it.
THE STORAGE THAT EARNS ITS PLACE
Everyday essentials deserve an actual home.
Behind the mirror
Toothbrushes, skincare, and small daily-use products.
Inside the vanity
Hair tools, spare toiletries, and items that don’t need to sit out.
Inside the shower niche
Shampoo, conditioner, and bathing products used regularly.
Measure around plumbing, drawer travel, electrical fittings, and moisture exposure before installing storage. The most useful cabinet is one that opens properly and holds what the household actually uses.
Vintage White Bathtub With Old-House Details
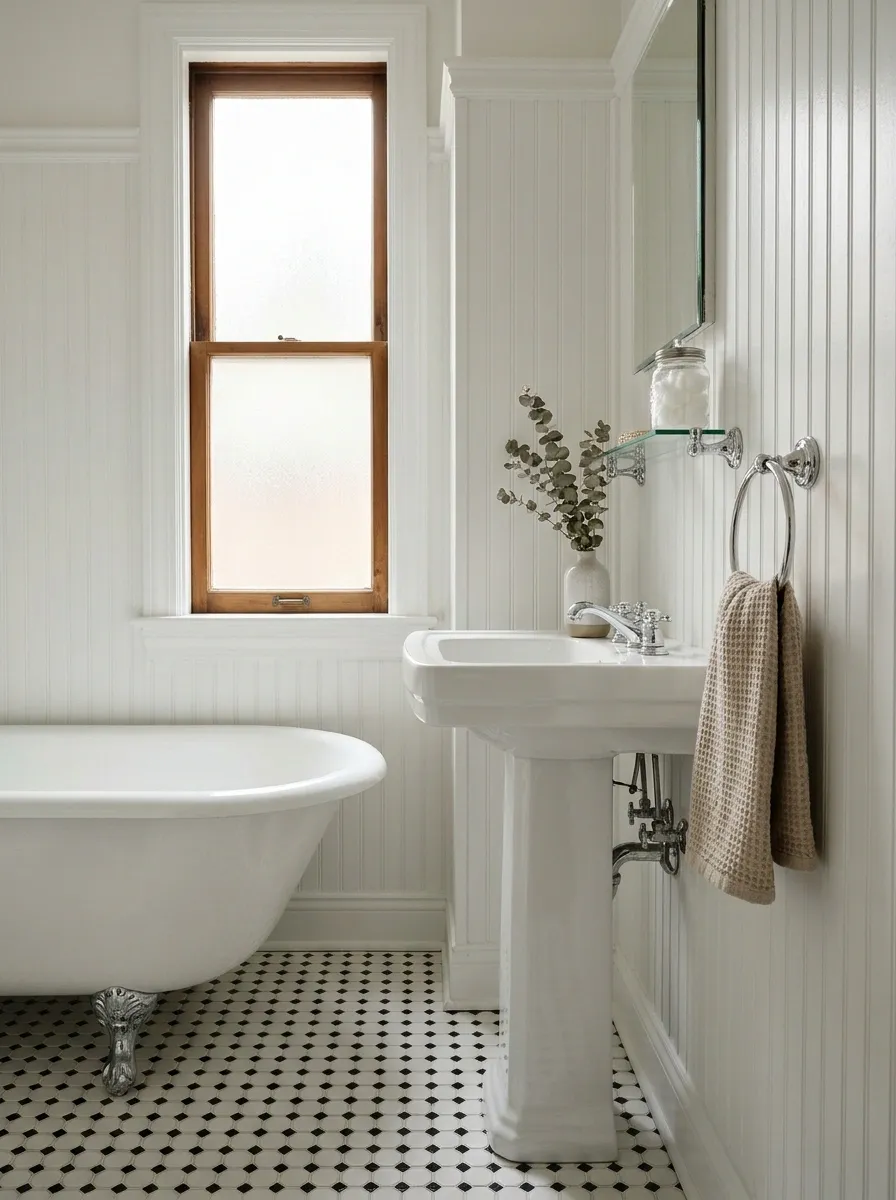
A classic white bathtub, pedestal sink, chrome fixtures, and a black-and-white mosaic floor give this bathroom the character of an older home without making it feel stuck in another century.
The restrained palette is doing more work than it gets credit for. White porcelain keeps the room bright, the patterned floor supplies personality, and traditional fixtures give the space its identity.
This approach suits older homes particularly well, where the architecture may already have interesting proportions or traditional details. In a very tight bathroom, a pedestal sink can free up visual space but sacrifices concealed storage, so a compact vanity may be the more sensible choice.
THE OLD-HOUSE EDIT
Keep the character. Skip the clutter.
White porcelain
The classic foundation
Mosaic flooring
The main decorative feature
Chrome fittings
A restrained traditional finish
The modern compromise
Choose a pedestal sink for an especially airy look or a compact vanity when concealed storage matters more. Both can work with traditional fixtures and flooring.
Curved Shower Curtain Rail Around a Standard Bathtub
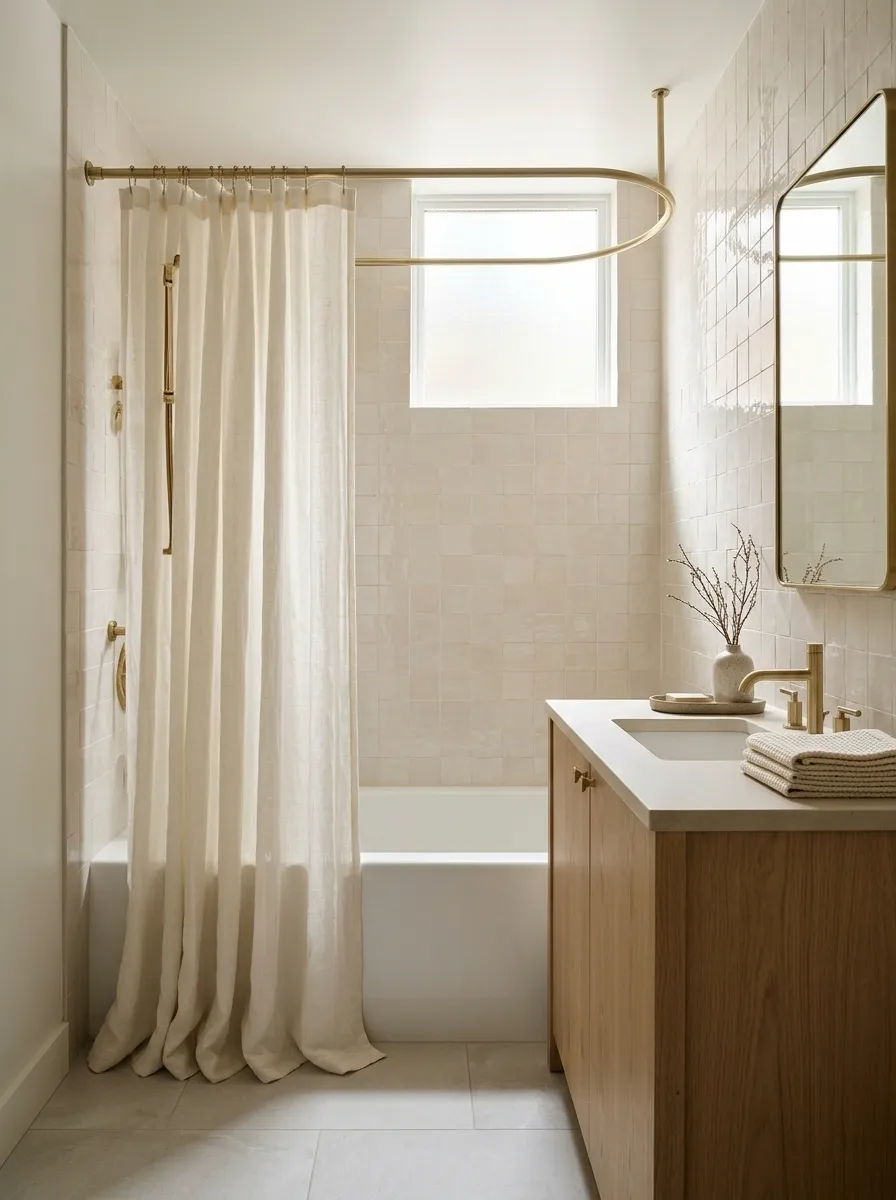
A curved shower curtain rail gives a standard bathtub a little more breathing room inside the showering area without requiring a bulky glass enclosure. Paired with a full-length curtain, pale tile, and a compact vanity, it creates a soft, uncomplicated bathroom that still works for everyday use.
The slight curve changes how the curtain sits around the bather, while the fabric adds texture to a room otherwise full of hard surfaces. A ceiling-mounted arrangement can also help create a clean vertical line when the installation suits the ceiling and tub.
Choose the rail based on the bathtub dimensions and showerhead position, not just the appearance in a product photo. The curtain needs to contain splashes, clear the tub properly, and remain easy to open.
THE SHOWER CURTAIN CHECK
A little extra room, without a renovation circus.
OVERHEAD CONCEPT
BATHTUB
AND SHOWER AREA
Curved rail shown conceptually, not to scale.
Check the curve
Make sure the rail leaves sufficient usable room without obstructing nearby fixtures.
Check the curtain
Confirm the drop, tub coverage, liner arrangement, and ease of cleaning.
Use a rail and fixings rated for the installation conditions, and position the curtain to control splashing rather than assuming the curve will solve everything.
Marble-Look Porcelain With a Compact Oak Vanity
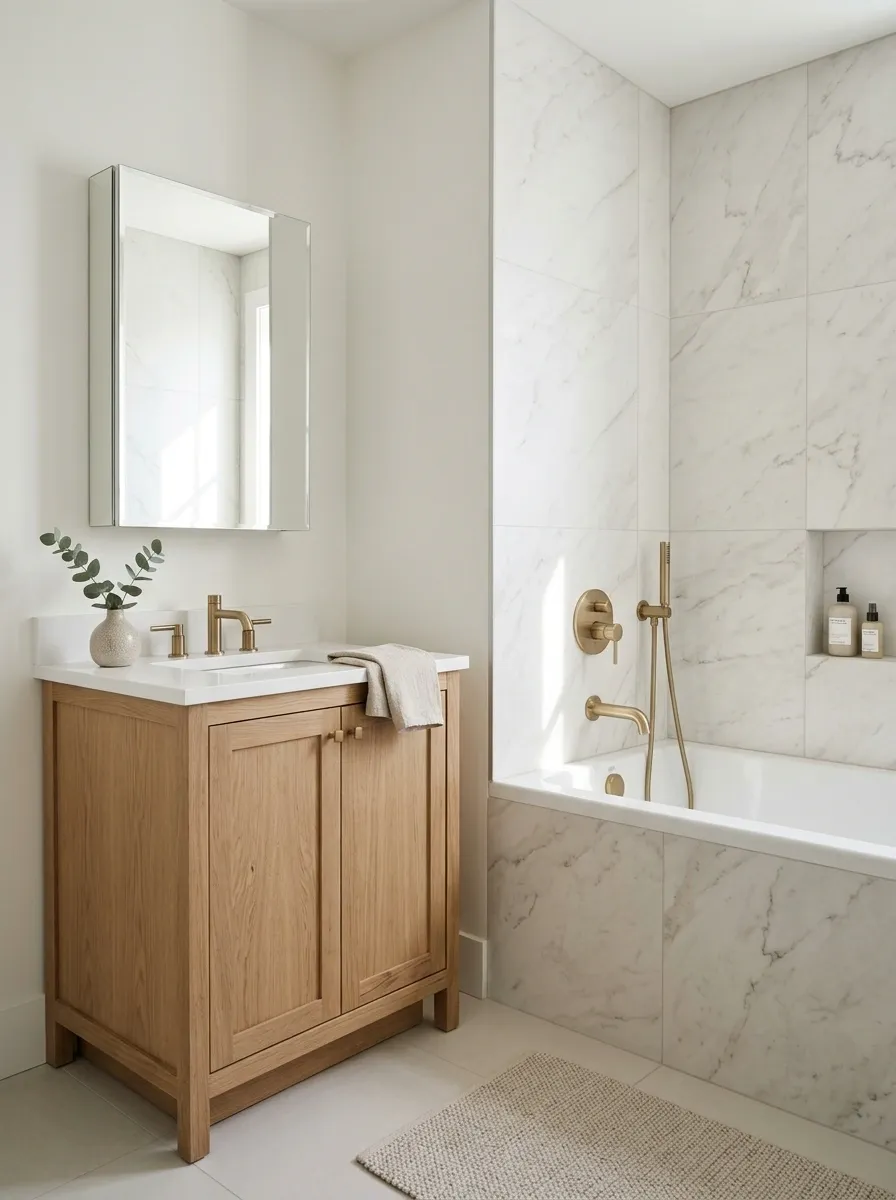
Marble-look porcelain brings a refined finish to a small bathroom without requiring every surface to become a luxury showroom display. Subtle veining around the bathtub creates visual interest, while a compact oak vanity adds warmth and prevents the room from feeling too cold.
Keep the marble pattern fairly restrained, particularly when the bathroom has several short walls. Heavy veining on every surface can make a small space feel visually restless, which rather defeats the point of choosing a calm palette.
A mirrored cabinet, simple hardware, and light flooring complete the look. Porcelain is also available in finishes that can be easier to maintain than natural marble, although grout, surface texture, and product specifications still matter.
THE MARBLE-LOOK BALANCE
Let the veining have some breathing room.
Marble-look porcelain
Use as the main bathing-area feature.
Natural oak
Bring warmth through the vanity.
Keep the other surfaces quiet.
Pair the veined porcelain with a simple floor, restrained grout, and minimal hardware. Check slip resistance on the floor and suitability for wet-area use before selecting a finish.
Space-Saving Tub Layout With a Pocket Door
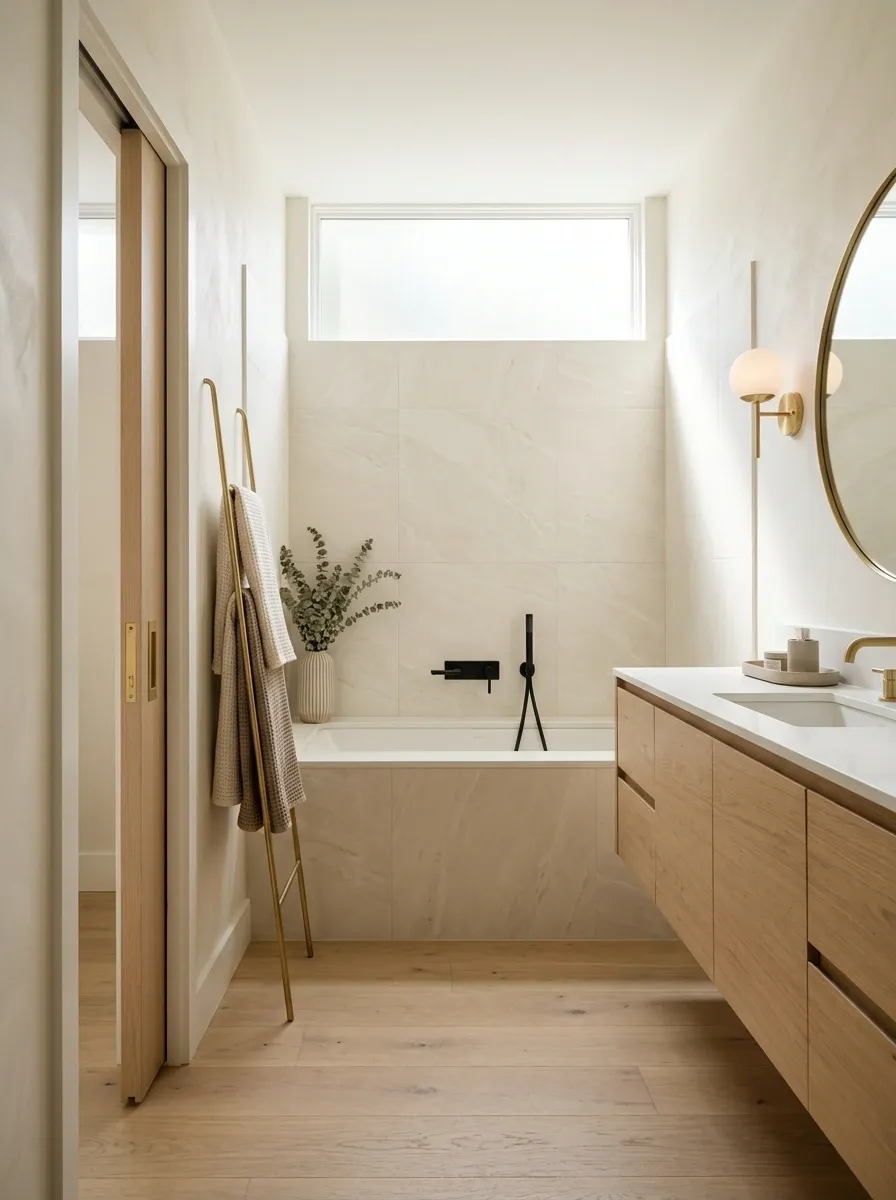
A pocket door can make a noticeable difference when a bathroom entrance competes with the vanity, toilet, or bathtub. Instead of swinging into the room, the door slides into a wall cavity, freeing up the floor area normally reserved for its arc.
Combine that arrangement with a compact built-in tub, a shallow vanity, and light finishes for a bathroom that feels organized rather than squeezed together. The benefit comes from the layout itself, not from adding another mirror and hoping for the best.
There is one important catch. A pocket door needs a suitable wall cavity, and plumbing or electrical services can limit where it can go. Retrofitting one may involve more work than expected, especially in an existing bathroom.
THE DOOR-SWING PROBLEM
An entrance shouldn’t eat the usable floor.
HINGED DOOR
The door needs room to swing and can compete with nearby fixtures.
POCKET DOOR
Slides into a wall cavity, freeing the swing area when the wall permits it.
Conceptual comparison, not a measured plan. Confirm cavity depth, structural constraints, service locations, privacy, and door hardware before specifying a pocket door.
Terrazzo Bathtub Surround With a Muted Green Vanity
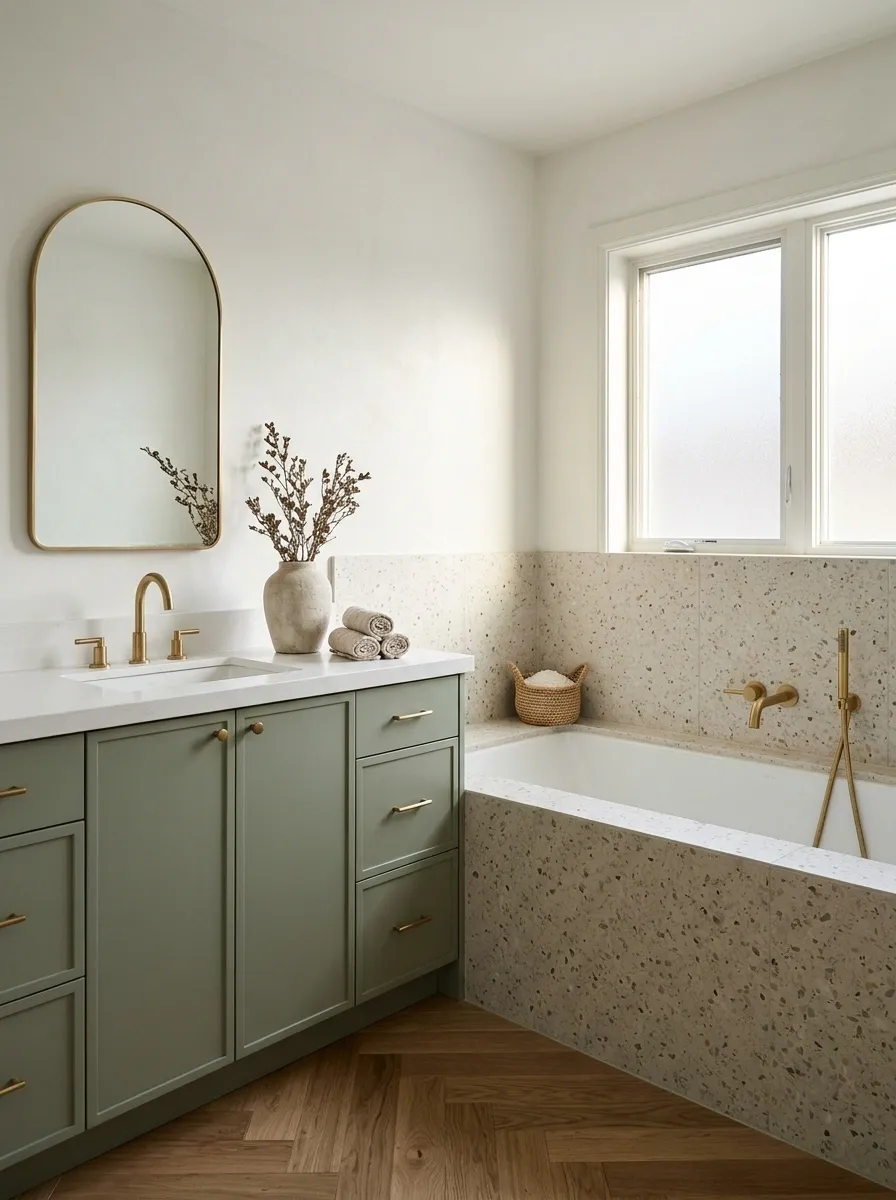
Terrazzo-look tile adds texture and personality without relying on a loud pattern. Pair it with a muted green vanity, white porcelain, and a warm neutral floor to create a bathroom that feels distinctive but still easy to live with.
The speckled surface gives the eye something interesting to look at, while the solid green cabinet creates a more substantial color anchor. This combination works best when the terrazzo’s smaller colors relate to the other finishes instead of introducing an entirely unrelated palette.
Choose the tile pattern carefully. Large, high-contrast chips can dominate a small room, while a quieter design gives the bathroom more flexibility.
PATTERN MEETS COLOR
One textured surface. One solid anchor.
Terrazzo-look tile
Pattern and color variation around the bathtub.
Muted sage vanity
A solid finish that gives the pattern a visual resting point.
The edit
Pull one subtle color from the terrazzo for the vanity or accessories. Keep the remaining surfaces calm instead of introducing another competing pattern.
Black-Framed Shower Screen With Walnut Cabinetry
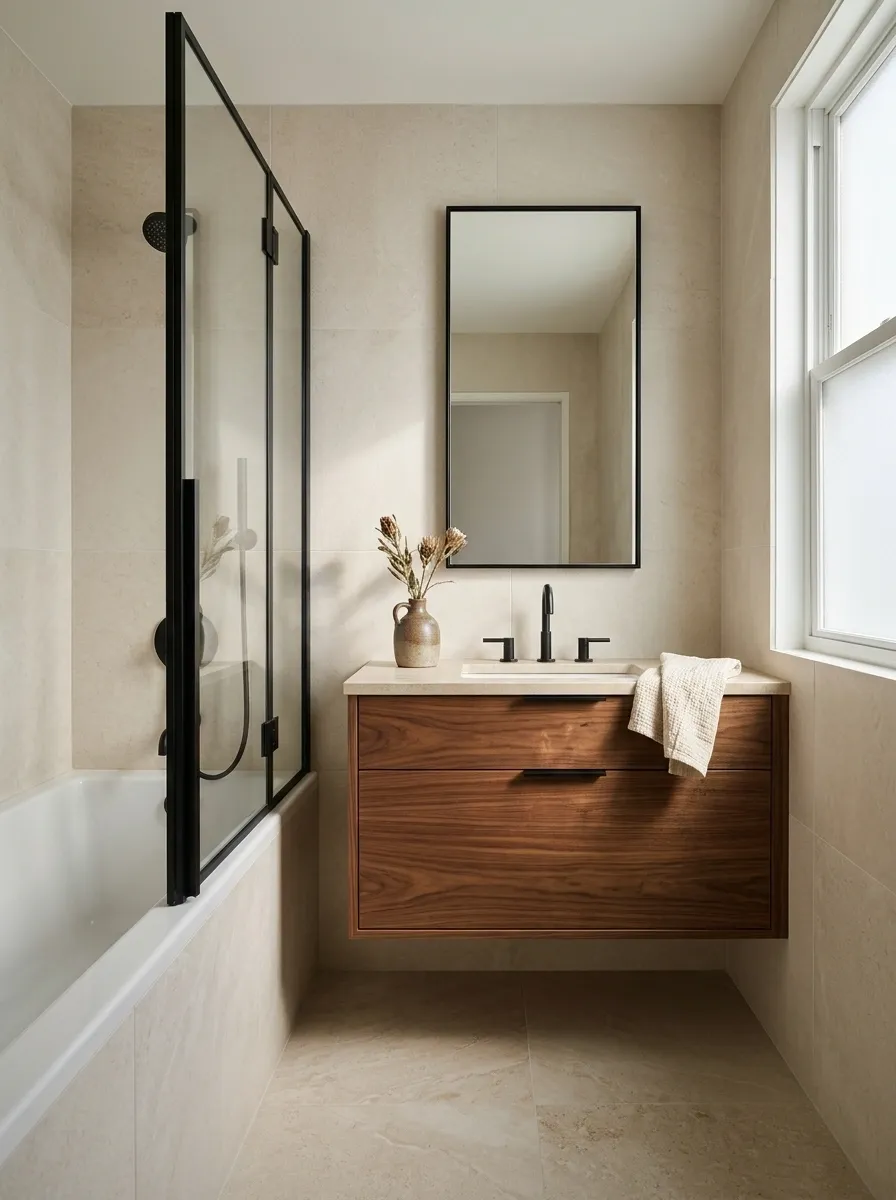
A slim black-framed shower screen gives a small bathroom more architectural definition, while walnut cabinetry adds warmth against pale tile. The combination feels contemporary without depending on an all-white palette or flashy decorative details.
The black frame creates a strong outline around the bathtub and shower, making the enclosure part of the design instead of something that disappears into the background. Walnut softens that contrast and provides enough richness to keep the room from feeling stark.
The proportion of the frame matters. Thick, heavy divisions can make the bathing area feel visually boxed in, particularly in a narrow room. Repeat black sparingly in the tapware or mirror edge, and let the walnut remain the main warm element.
THE LINE-WEIGHT RULE
Use black to define the room, not dominate it.
Slim frame
Defines the glass without creating excessive visual weight.
Heavy frame
Can overwhelm a compact bathroom when repeated across too many surfaces.
Bring in the walnut.
Use walnut cabinetry to offset the black frame and light tile. Coordinate remaining metal finishes, and check glass-screen dimensions and splash coverage before installation.
Rental-Friendly Bathtub Refresh With Removable Finishes
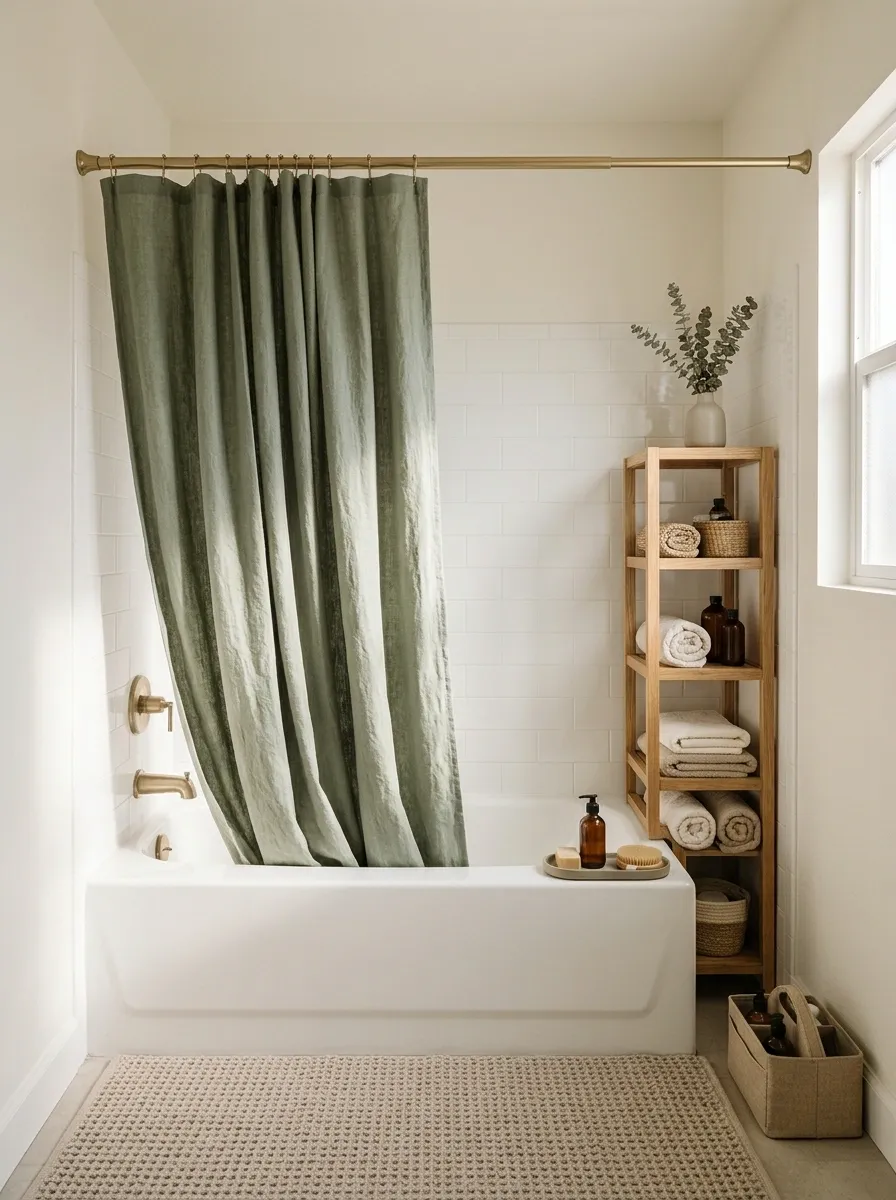
A rental bathroom doesn’t need new plumbing or a full tile replacement to feel more considered. An existing white tub, a coordinated shower curtain, a neutral bath mat, a compact storage piece, and a few removable accessories can make the room feel more personal without permanent alterations.
Muted sage, warm beige, and natural textures work especially well against standard white bathroom fixtures. Keeping the palette consistent also prevents everyday products from becoming the dominant design feature.
Before using peel-and-stick finishes or adhesive accessories, check the surface condition, moisture exposure, product suitability, and lease restrictions. Bathrooms are difficult environments for products that rely on adhesive, and removing something damaged by water can turn a budget refresh into a deposit dispute.
THE NO-DRAMA RENTAL REFRESH
Make it feel different without making it permanent.
Textiles
A coordinated shower curtain, washable bath mat, and towels introduce a consistent palette.
Freestanding storage
Use a slim shelf or portable organizer where there is enough clearance and ventilation.
Removable accessories
Choose portable hooks, countertop organizers, and compatible products that don’t damage finishes.
Before sticking anything to a wall
Check the lease, manufacturer instructions, surface compatibility, and moisture exposure. Avoid blocking ventilation or placing storage where it interferes with safe access to the tub.
Make Room for the Bathtub Without Sacrificing the Bathroom
A small bathroom deserves better than a collection of expensive finishes arranged around a layout that never worked. Start with the actual room dimensions, decide which bathtub style makes sense, and plan the vanity, storage, and walking route before falling in love with tile.
Then choose a visual direction that feels right for the home. Warm oak and white tile create a softer look, deep green adds drama, and a patterned floor brings character without needing decoration on every wall.
The best result is a bathroom that looks intentional on the days it’s freshly cleaned and still functions when the laundry basket appears, the shower curtain is wet, and everyone is running late.