
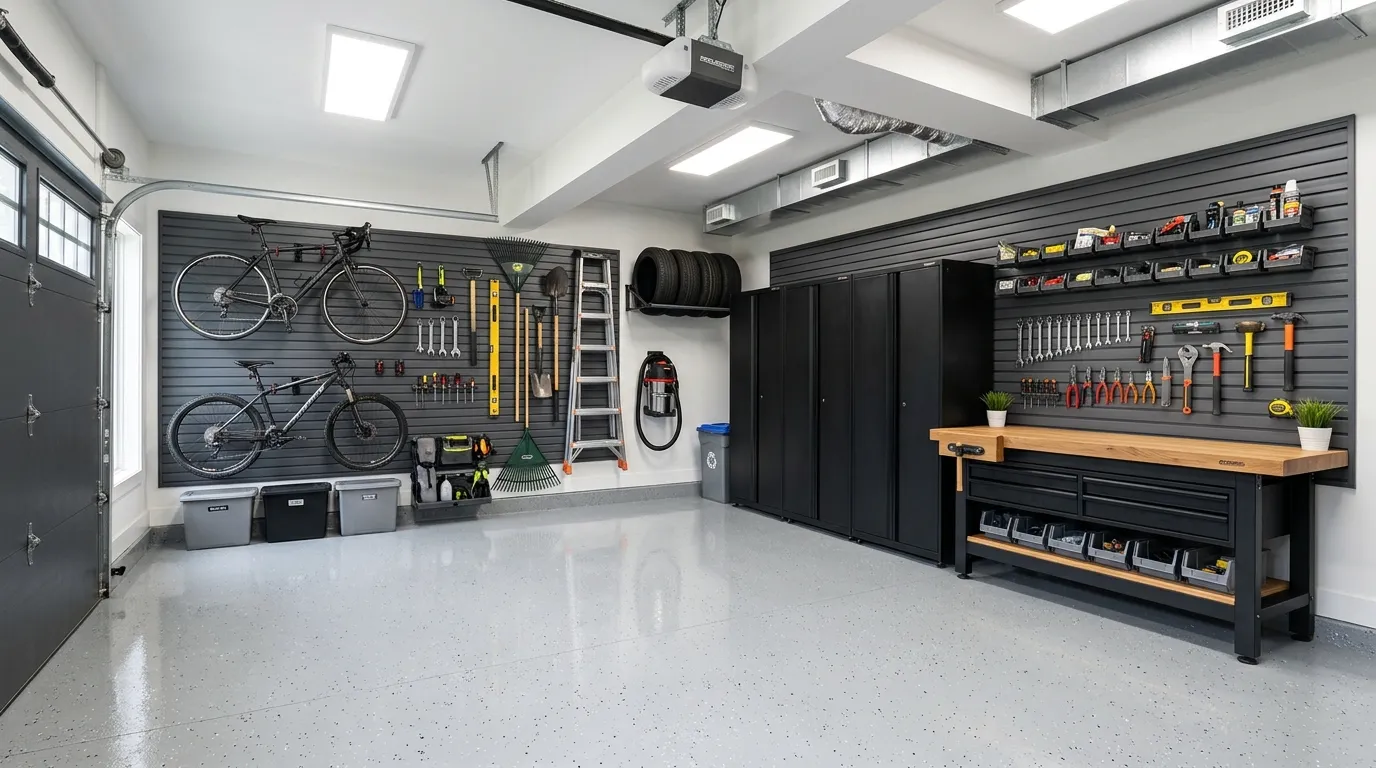
Your garage isn’t cluttered because you own too much stuff. It’s cluttered because nothing in it has a real home. That’s the truth most organizing advice skips right past.
You buy bins. You stack them. Three months later, the bins are buried under things that never made it back where they belonged, and you’re back to stepping over a rake to get to the lawn mower. DIY garage organization ideas work when they solve that root problem instead of just hiding it behind plastic totes.
This isn’t about making your garage look like a showroom. It’s about building a system where every tool, box, and bike has one specific spot, so putting things away takes ten seconds instead of ten minutes of decision-making.
DIY Garage Organization Ideas
Built-in Mudroom Locker Systems
Unless you want your garage floor to remain a graveyard for half-dead sneakers and a mountain of stray jackets, you need a dedicated landing zone. Open lockers are just an invitation to hoard, but actual cabinets hide your family’s lack of discipline behind closed doors.
Don’t bother with those flimsy, build-it-yourself wooden cubes that wobble if you breathe on them too hard. Invest in solid, wall-mounted units that can actually handle the weight of heavy gear without sagging, because looking at a drooping storage unit is almost as depressing as the clutter itself.
Dedicate specific hooks and cubbies to the stuff that usually ends up on the floor. If you give everyone their own spot, they might actually use it—though if you believe that, I’ve got a bridge in Brooklyn to sell you.
Pegboard Wall With Custom-Cut Tool Silhouettes
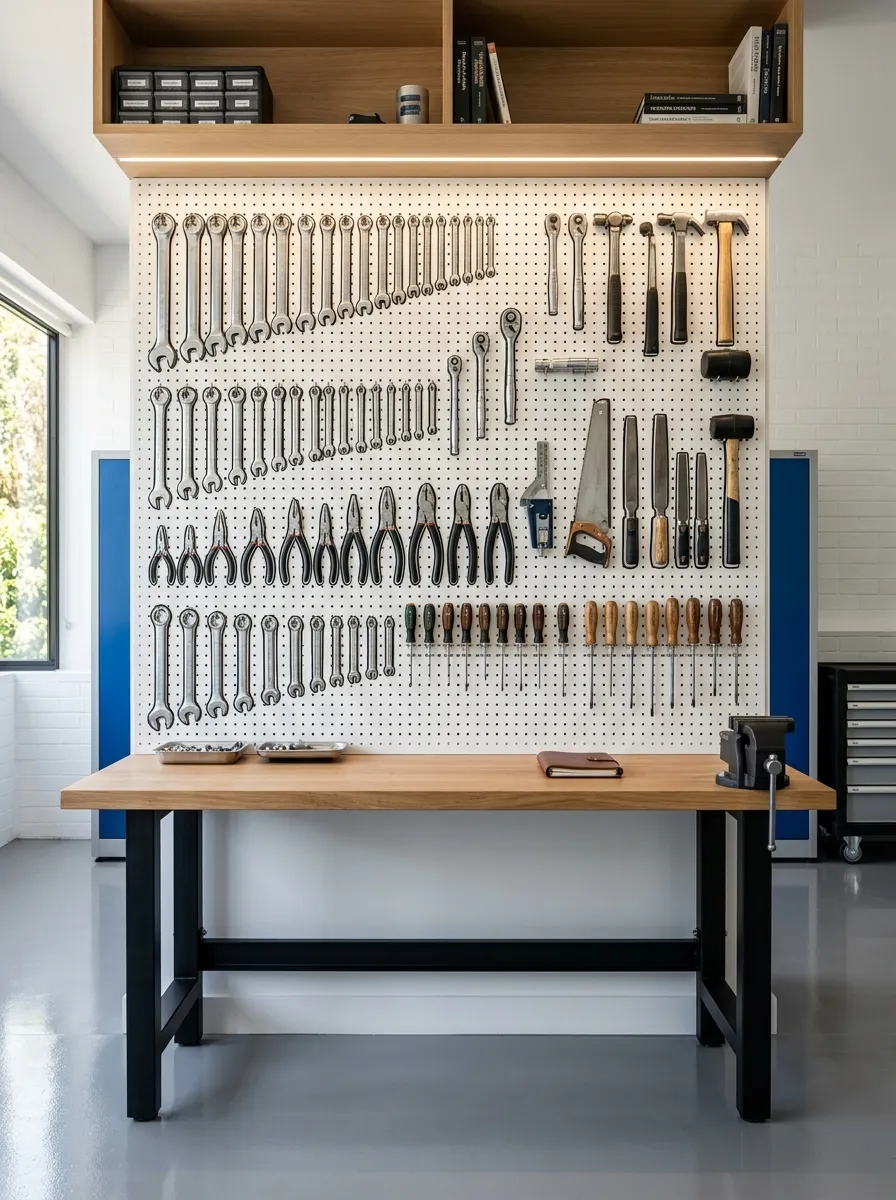
A pegboard alone doesn’t solve anything. It’s the silhouette outlines, traced in paint or marker behind each hook, that make it work. The second a tool’s missing, the gap is obvious.
Trace each tool’s outline before you hang it for the first time. Group by function: cutting tools together, wrenches together, yard tools on their own section.
- Cost: low, mostly the board and paint
- Time: one afternoon
- Best for: hand tools you reach for weekly
Beginner
2-3 Hours
Low
Steel Modular Cabinetry Units
There’s a reason high-end garages look like they belong to someone who actually gets things done: modular steel cabinets. They hide your chaos in a sleek, industrial shell that makes it look like you’re running an actual shop instead of just dumping your home improvement failures into a pile.
Stop pretending that stacking random plastic bins on top of each other counts as an organizational strategy. Steel modular systems provide a level surface, drawer slides that don’t bind, and a frame that won’t crack the moment you put a single heavy power tool inside.
Buy a set that spans the entire wall length if your budget allows; breaking up the visual flow with mismatched furniture is just an expensive way to keep your garage looking like a junkyard. Bolt these to the wall permanently so you stop using the ‘I might rearrange later’ excuse to keep your gear cluttered.
Overhead Ceiling Racks for Seasonal Bins
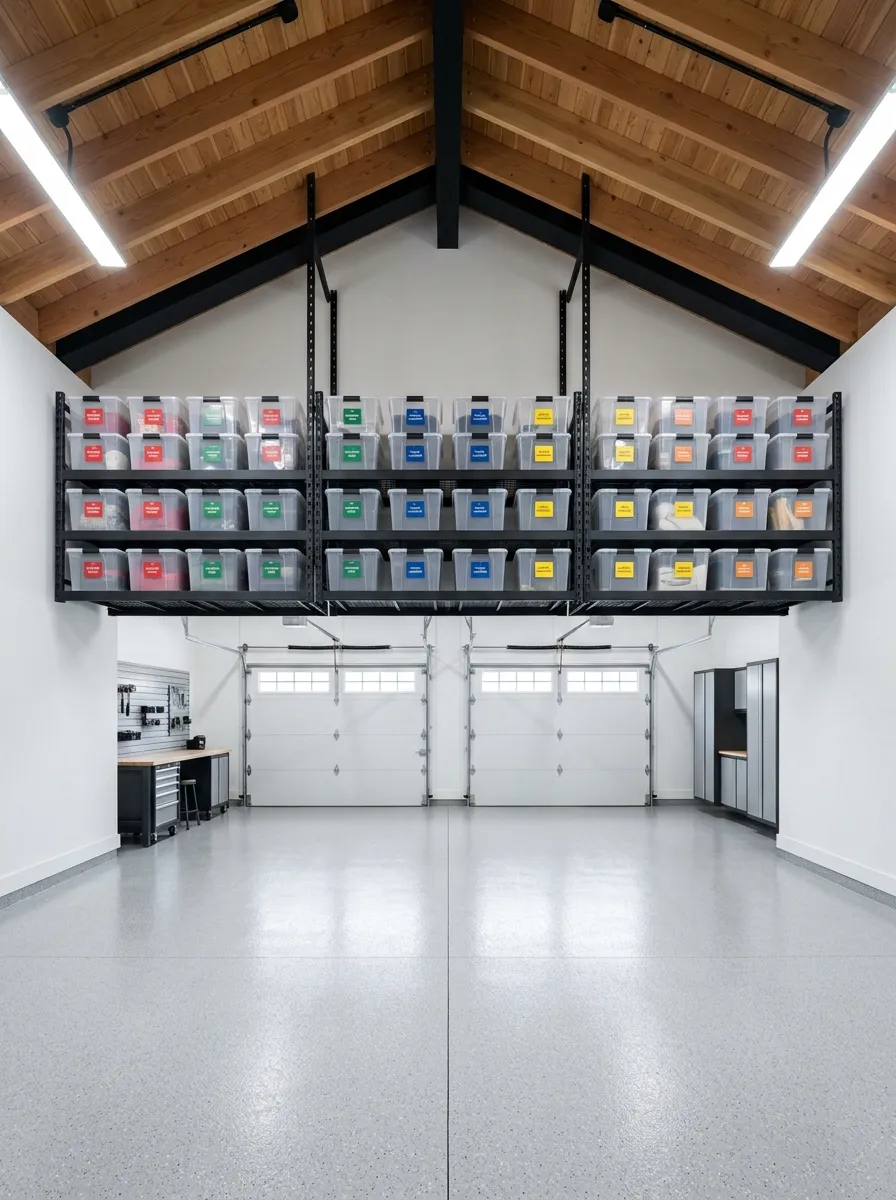
Christmas decorations, luggage, camping gear. None of it gets touched more than a couple times a year, and none of it belongs on your floor. Ceiling racks move that dead weight up and out of the way permanently.
Before you buy a rack, gather what actually needs a spot up there. Not everything belongs overhead, just the truly occasional stuff.
- Confirm your ceiling has exposed joists, not just drywall
- Measure rack clearance against your garage door track
- Sort bins by season before loading them up
- Label bin lids so you’re not climbing up to check contents
Slatwall Panels That Replace Drywall Storage
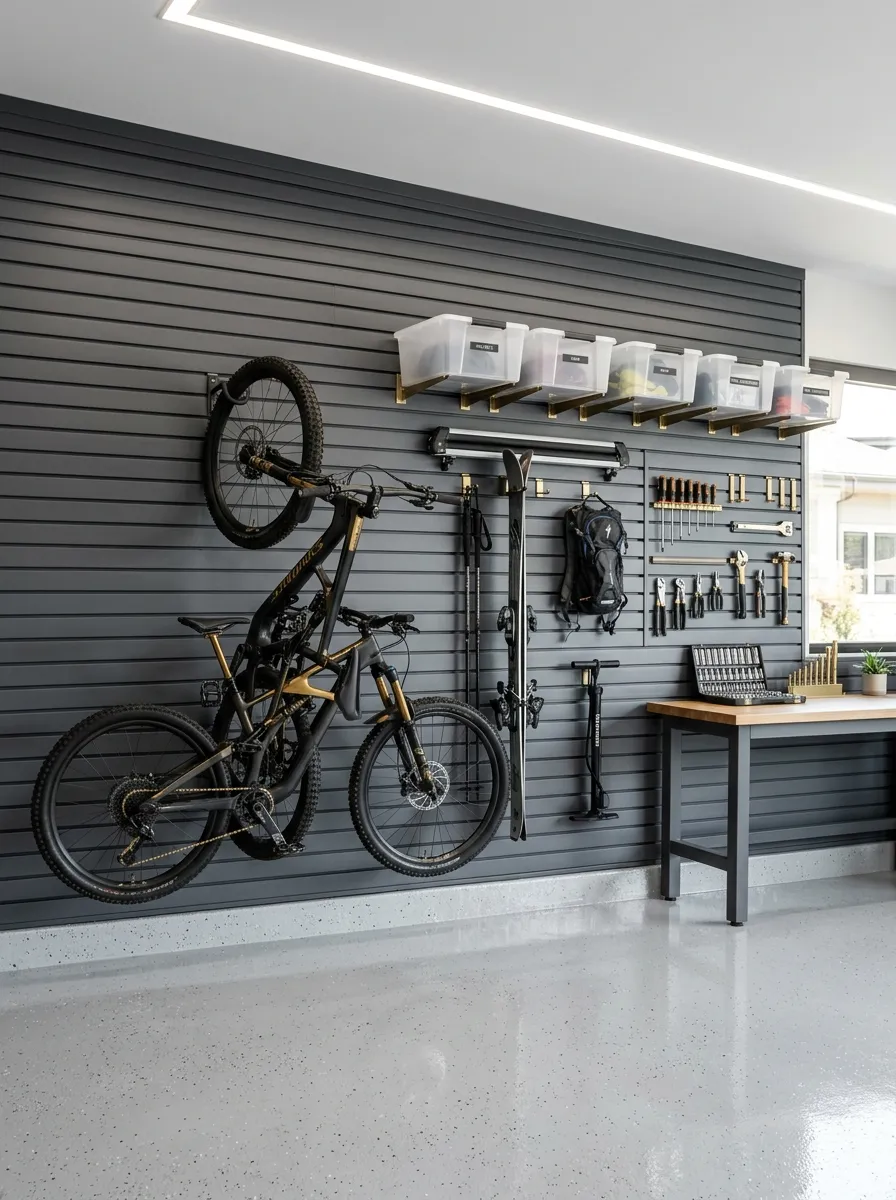
Bare drywall holds nothing. Slatwall holds almost everything, and it looks intentional instead of makeshift. Swap out one full wall, and you instantly gain hanging space for bikes, bins, hooks, and baskets that shift around as your needs change.
The panels cost more upfront than pegboard, but the accessories snap in and out without new holes every time you rearrange. That flexibility is what makes it worth the extra cost long term.
A Dedicated Zone for Every Category of Gear
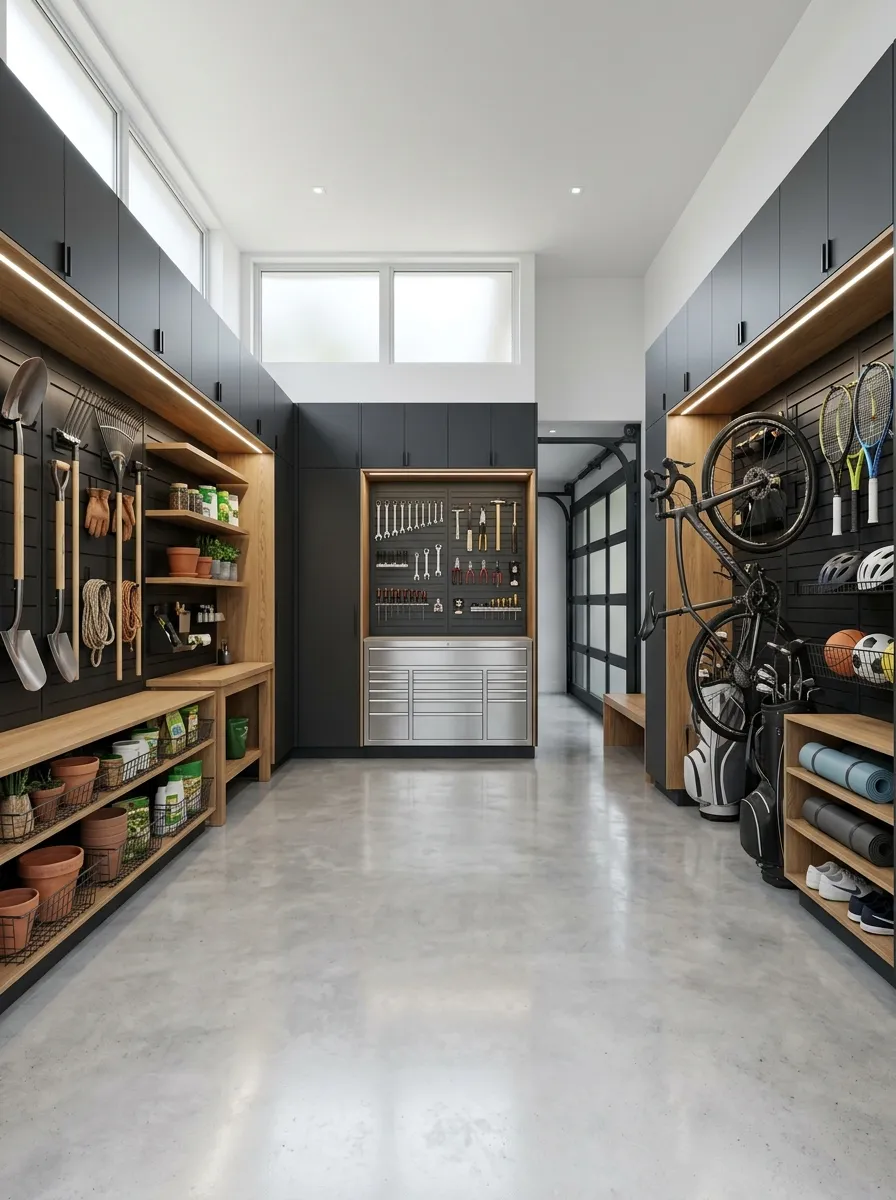
Walk into most garages and the yard tools, sports gear, and car supplies all blend into one pile. That’s the zoning problem from earlier, and this idea is where you actually fix it.
Map your garage into sections before you buy a single organizer. Then build storage that fits each zone’s specific gear, not generic bins that fit everything and organize nothing.
- Sketch your garage floor plan on paper first
- Assign one zone per category: yard, sports, automotive, tools, seasonal
- Build or install storage sized to that zone’s actual items
- Keep a small buffer zone empty for overflow, not permanent stuff
Magnetic Strips for Loose Metal Tools
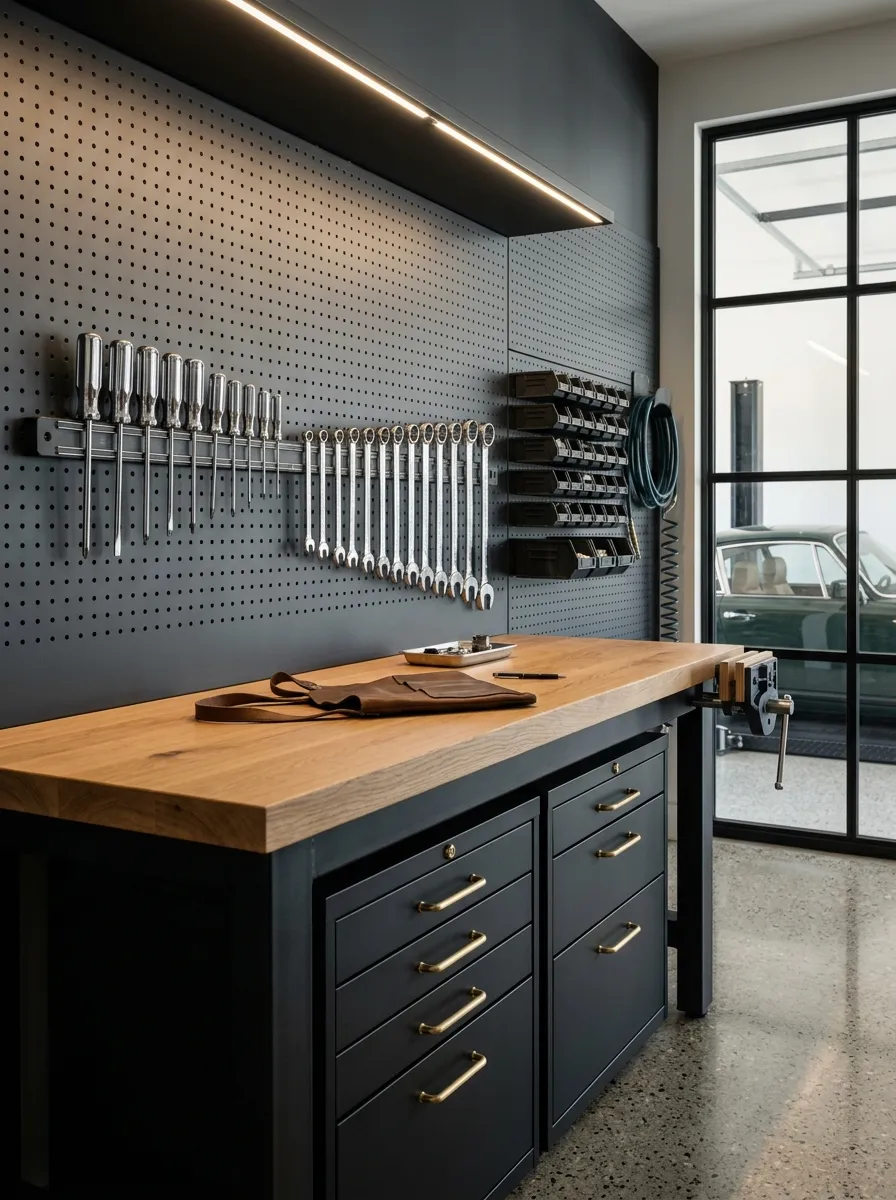
Screwdrivers and wrenches always end up loose in a drawer, tangled together, impossible to grab the right one fast. A magnetic strip mounted at eye level fixes that instantly. Every tool’s visible, every tool’s grabbable in one motion.
Mount it near your main workbench, not tucked in a corner. The whole point is speed. If it’s out of reach, you’ll stop using it within a week.
Visibility: full
Visibility: none
Clear Bins Labeled by Contents, Not Guesswork
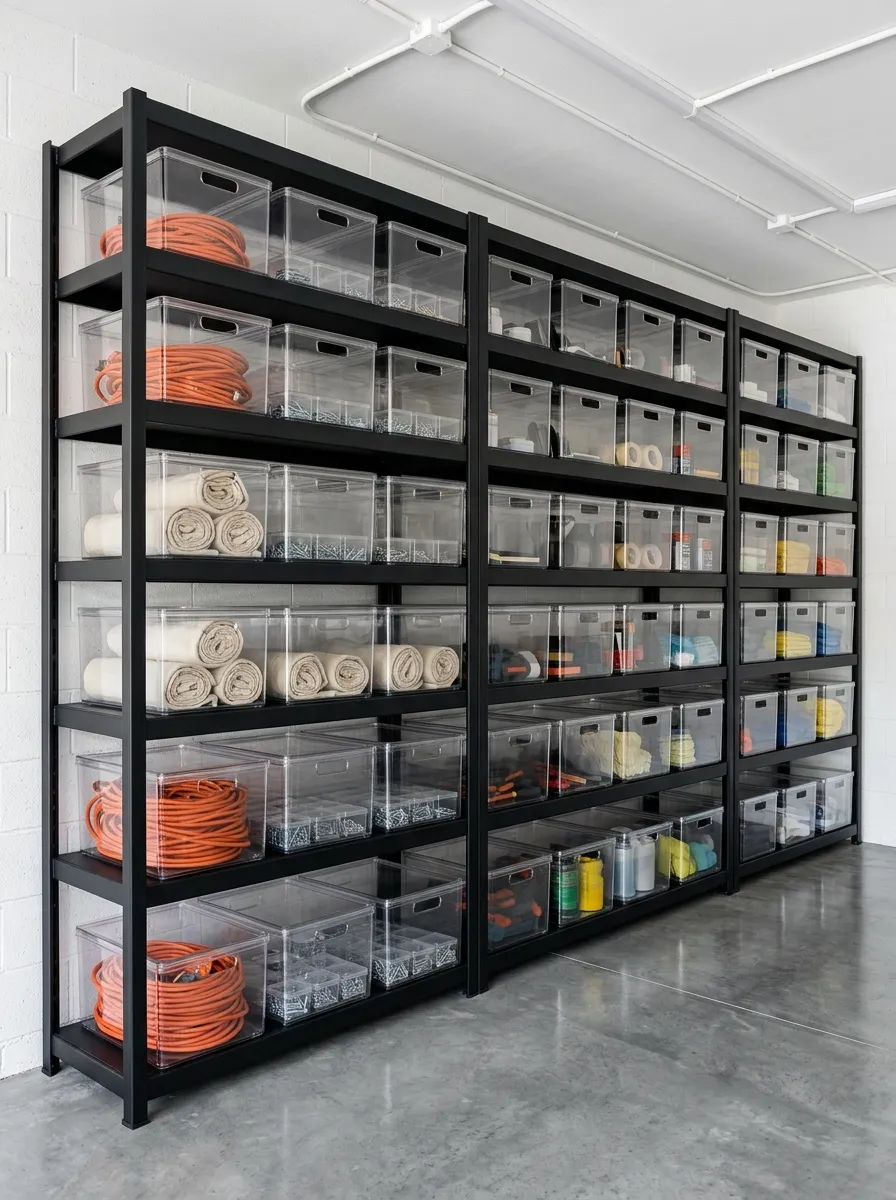
Opaque bins are where organization goes to die. You can’t see inside, so you stop trusting your own system and just start digging through everything looking for one part. Clear bins remove that guesswork completely.
Label the short side too, not just the lid. Bins get stacked, and lid labels disappear the second something’s on top.
A Fold-Down Workbench That Reclaims Floor Space
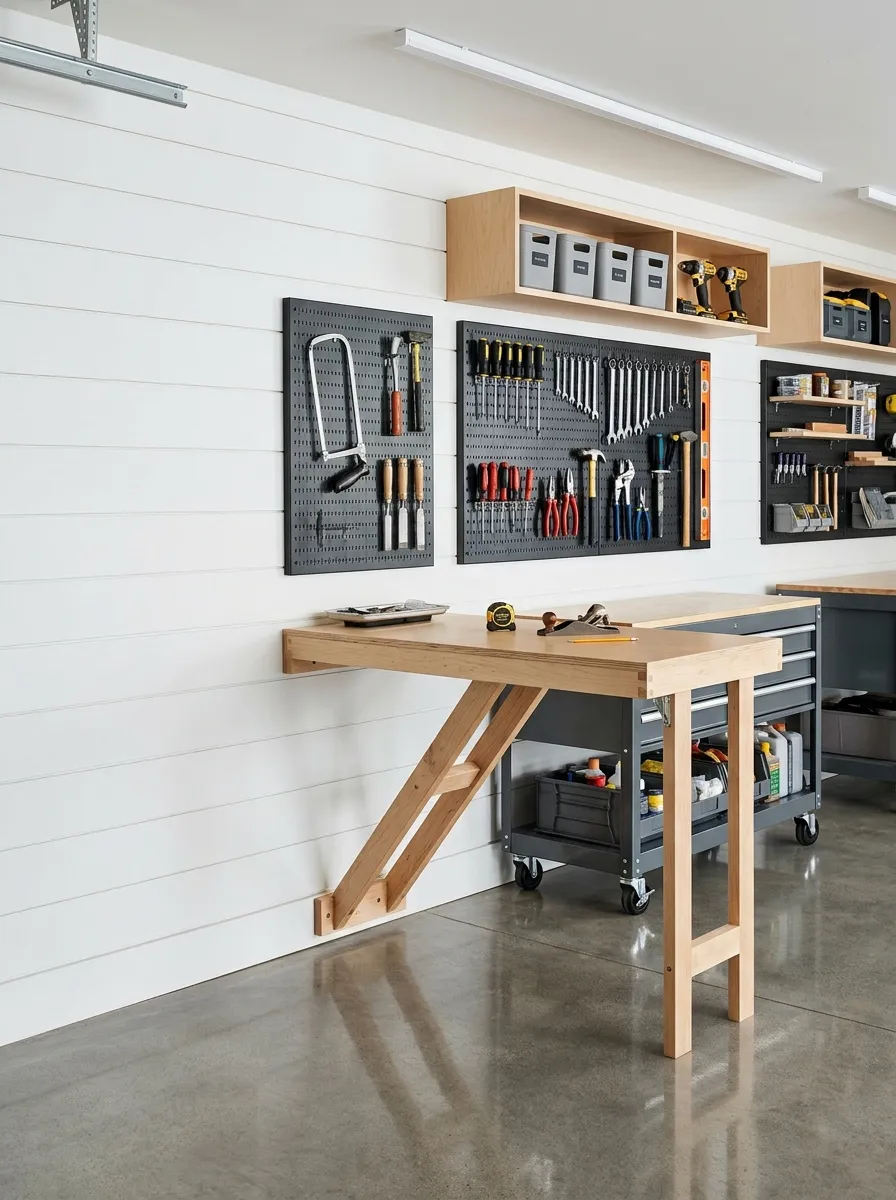
If your garage doubles as a workspace, a fixed workbench eats floor space you need for the car most of the day. A fold-down bench solves that. Hinge it to the wall, prop it with a folding leg, and it disappears when you’re done.
Build the frame from 2x4s, top it with plywood, and add a simple leg brace that swings flat against the wall.
- Cut and mount the wall cleat at workbench height
- Attach the tabletop with a piano hinge
- Add a folding leg brace to the front edge
- Fold up and secure with a hook latch when not in use
Vertical Bike Hooks Instead of Floor Racks
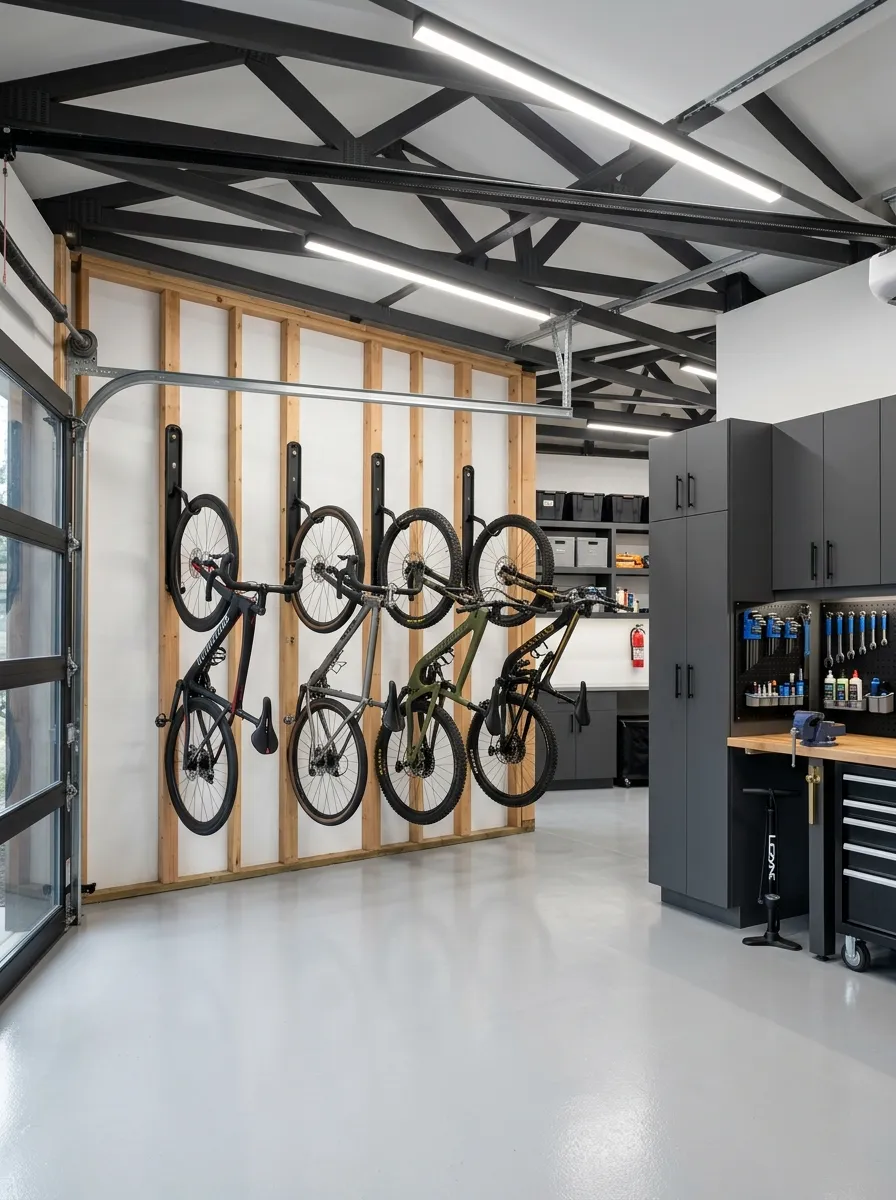
Bikes take up an enormous footprint when they’re leaned against a wall or parked on a kickstand. Vertical wall hooks flip that. One bike hangs in about eight inches of wall depth instead of two feet of floor space.
Mount hooks into studs, not just drywall anchors. A loaded hook takes real weight, and drywall alone won’t hold it long.
A Recycling and Trash Station Built Into a Cabinet
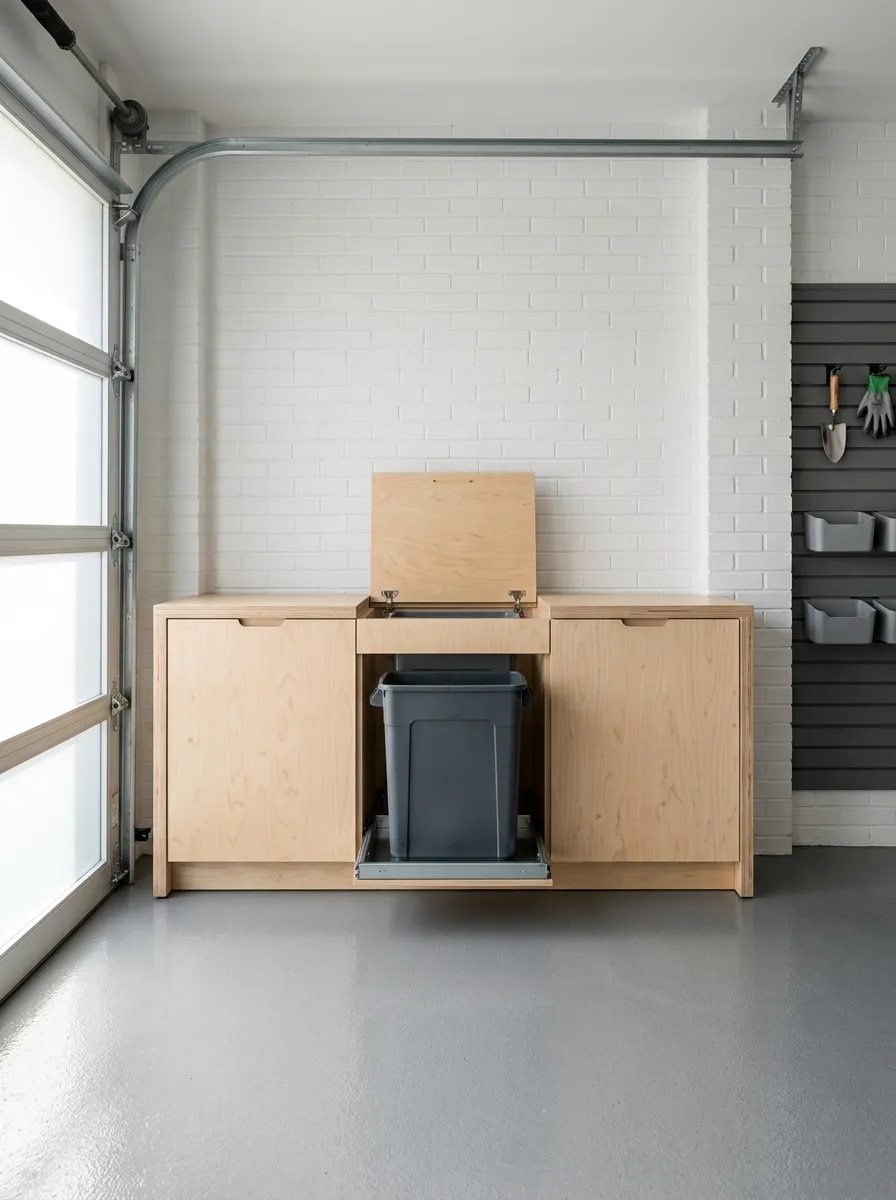
An open trash can in a garage attracts pests and smells worse in summer heat. Hiding cans inside a simple plywood cabinet with a hinged lid solves both problems and keeps the whole station looking clean instead of like a dump corner.
Build separate compartments for trash, recycling, and cardboard. Add a slide-out tray under each for easy bag changes.
PVC Pipe Dividers for Long-Handled Tools
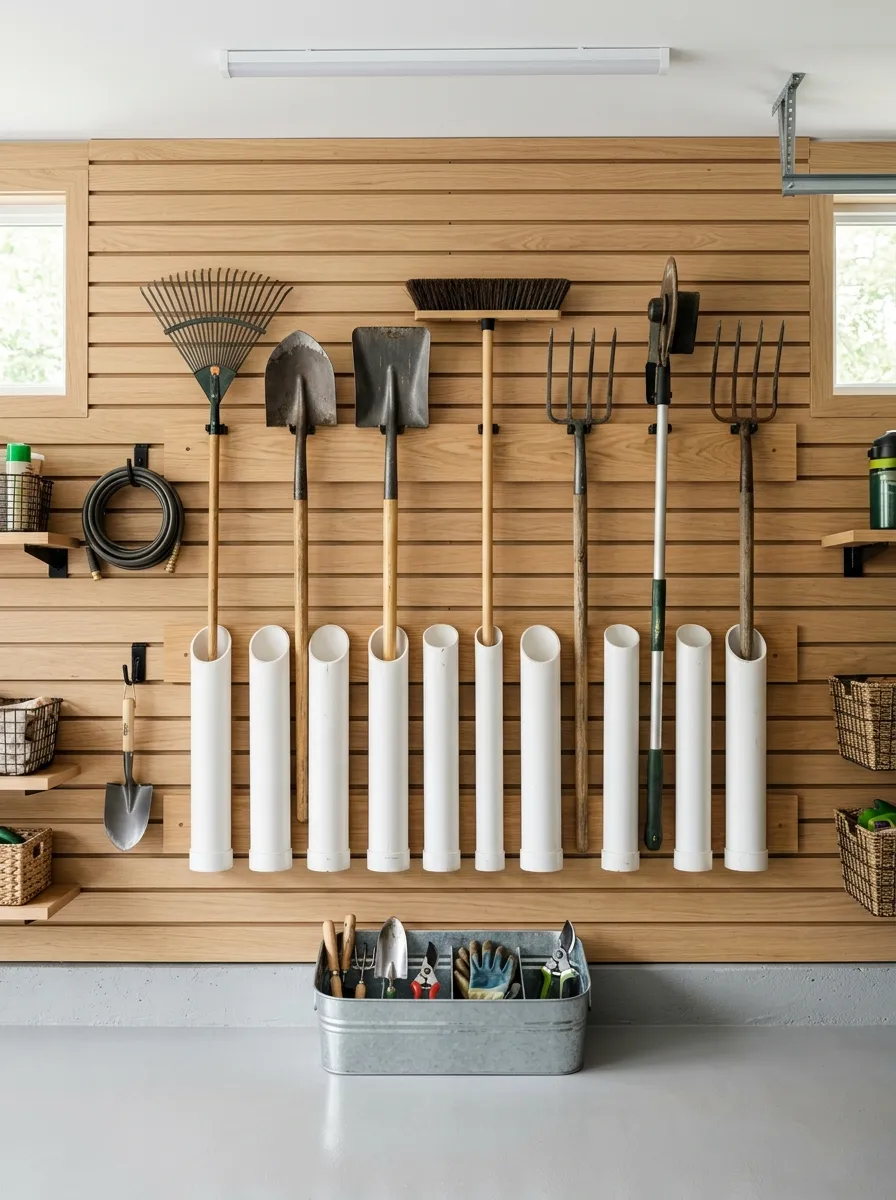
Rakes, shovels, and brooms always tip over and slide down the wall no matter how you lean them. Cut sections of PVC pipe, mount them upright in a row, and each tool gets its own slot that actually holds it in place.
Space the pipes based on handle width, not evenly. Rakes need wider slots than a broom handle.
- Cut PVC into 8 to 10 inch sections
- Mount a top and bottom board to hold pipes upright
- Space slots by handle width, not uniform spacing
- Add a hand tool bin underneath for smaller yard tools
A Charging Station for Cordless Tool Batteries
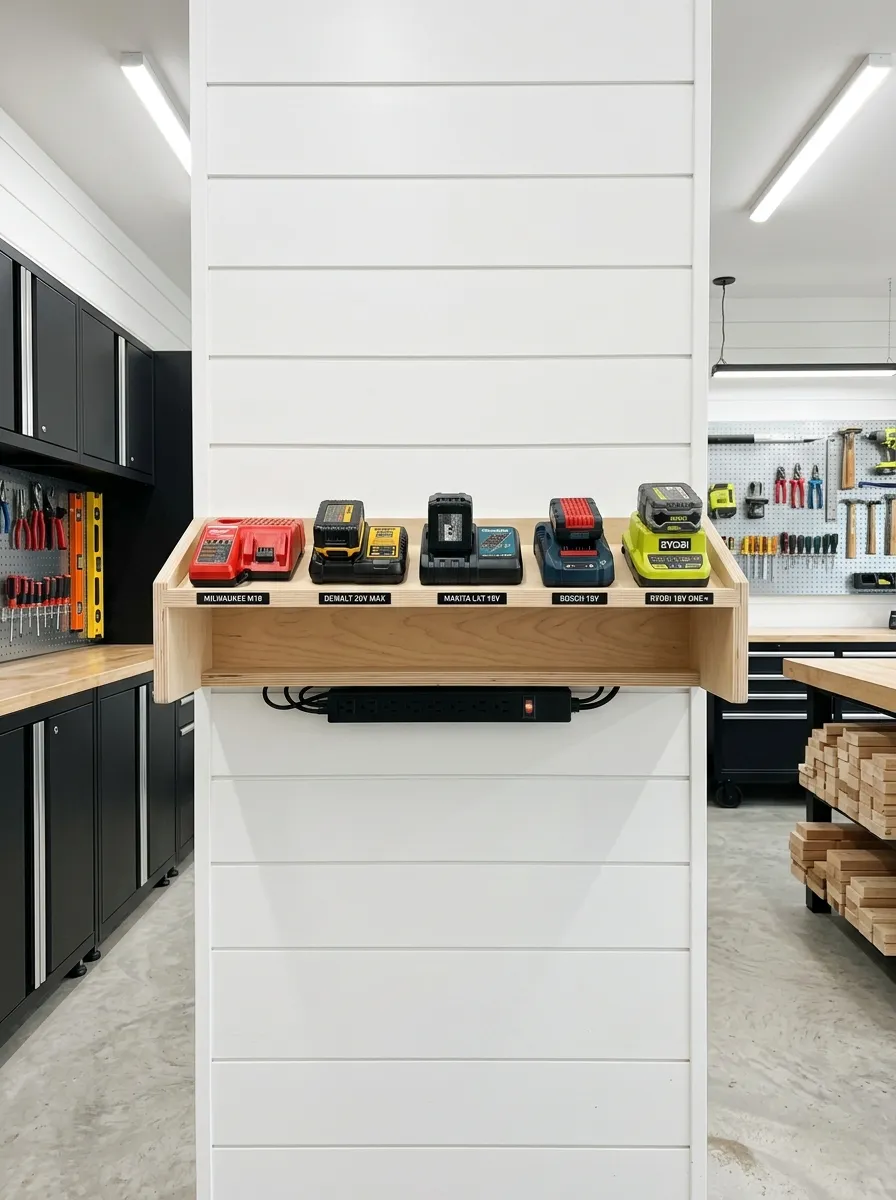
Cordless tools are useless with a dead battery, and most people just toss batteries in a drawer where nobody remembers what’s charged. A dedicated charging shelf with outlets built in fixes that permanently. Every battery lives in one spot, plugged in and ready.
Mount a power strip to the underside of the shelf so cords stay hidden. Label each charger slot by tool brand if you run more than one system.
10-12 inches
Surge-protected strip
1 afternoon
A Scrap Wood Cutting Station With Built-In Storage
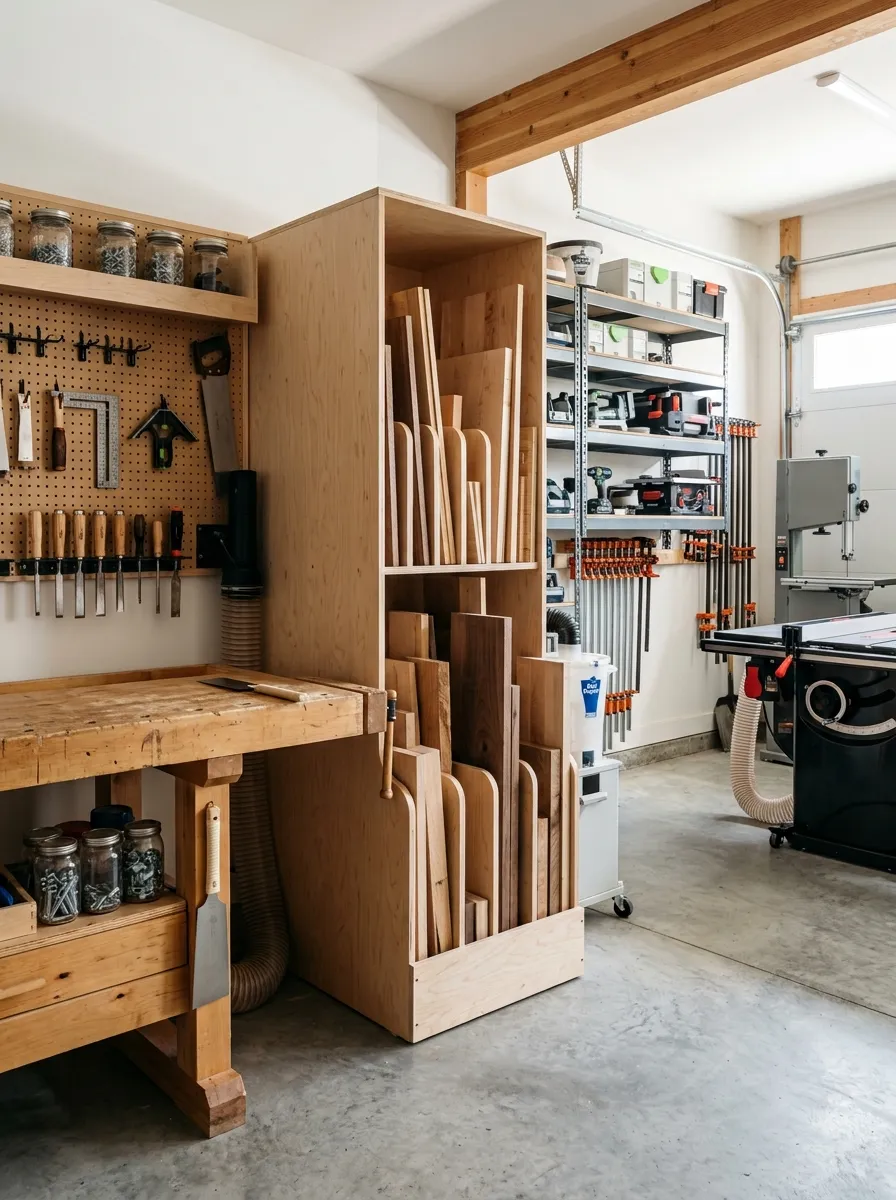
If you do any woodworking, scrap pieces pile up fast and end up scattered across the floor. A simple vertical bin next to your cutting station keeps offcuts sorted and out from underfoot, and it gives you a real reason to save the good pieces instead of tossing them.
Build the bin from leftover plywood itself. It doesn’t need to be fancy, just tall enough to hold boards upright.
Boards: stand upright cleanly
Boards: can slip through gaps
Hanging Baskets for Sports Equipment
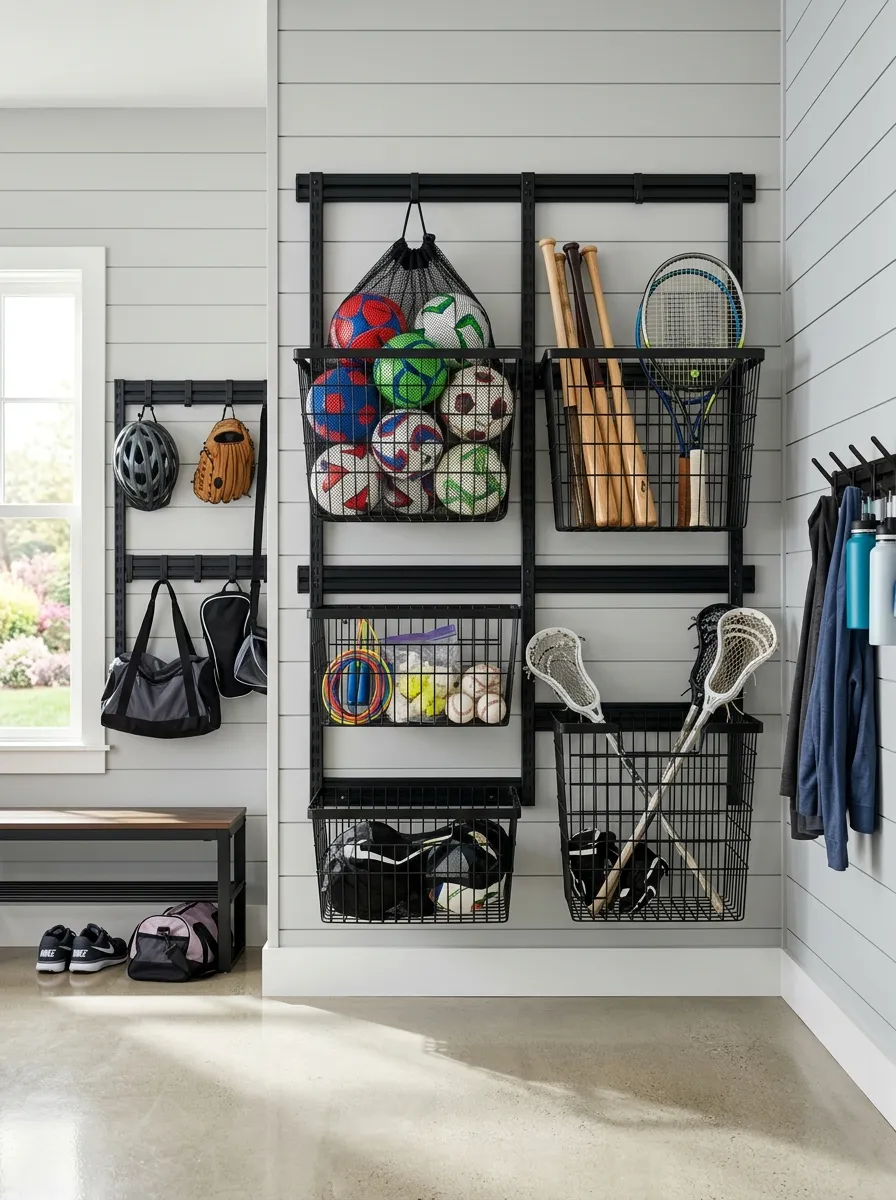
Balls roll. Bats tip over. Loose sports gear is one of the messiest categories in any garage because none of it stacks well on its own. Wire hanging baskets solve that by giving each type of gear its own contained, visible spot.
- Mount baskets at kid height if kids grab their own gear
- Use one basket per sport, not one giant catch-all
- Hang a small net bag inside for loose items like cleats or gloves
- Keep the heaviest basket, usually balls, closest to the door
A Label System That Actually Gets Followed
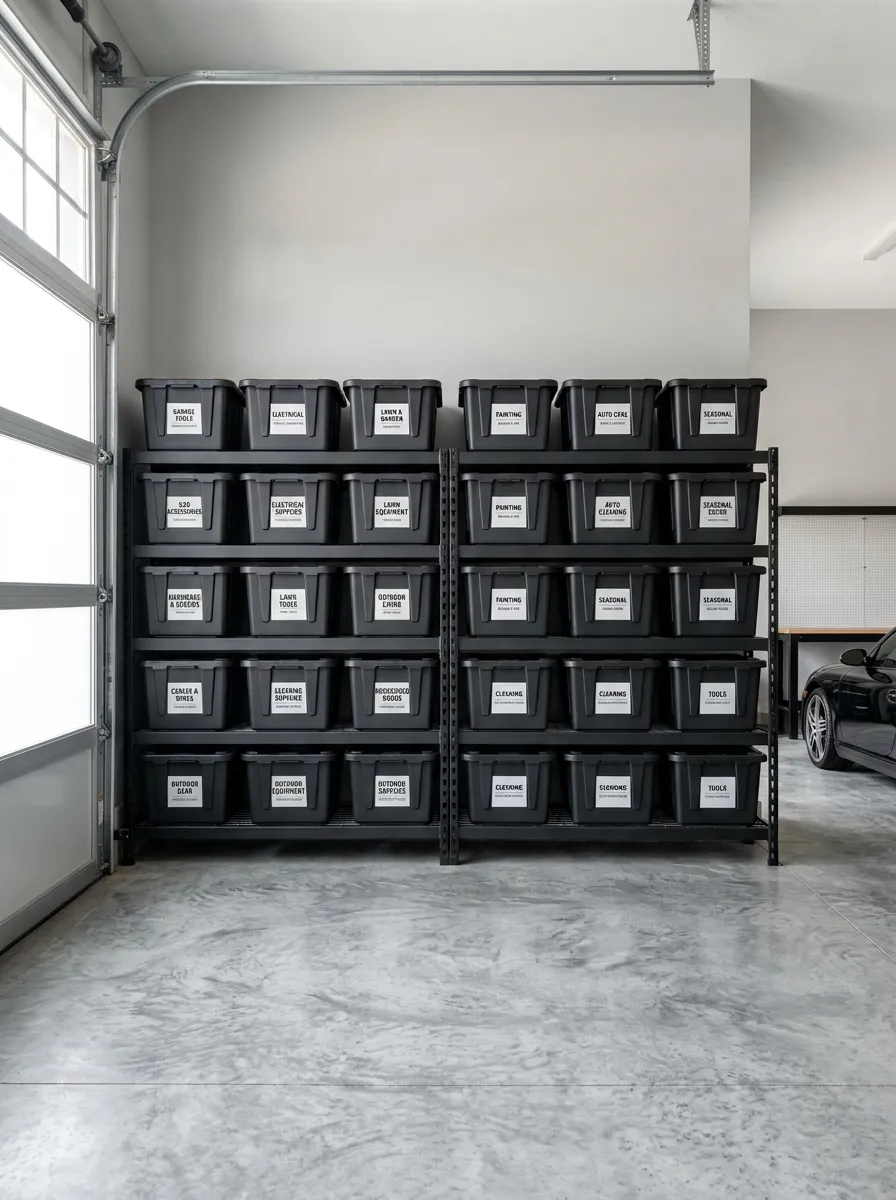
Most label systems fail because they’re inconsistent. One bin says “misc,” another says “garage stuff,” and within a month nobody trusts the labels enough to check them first. Pick one format, a category name plus a short description, and use it on absolutely everything.
Handwritten labels fade and smear. A basic label maker costs less than a single takeout order and lasts years longer.
Under $20
One evening
Long-term
Wall-Mounted Extension Cord Reels
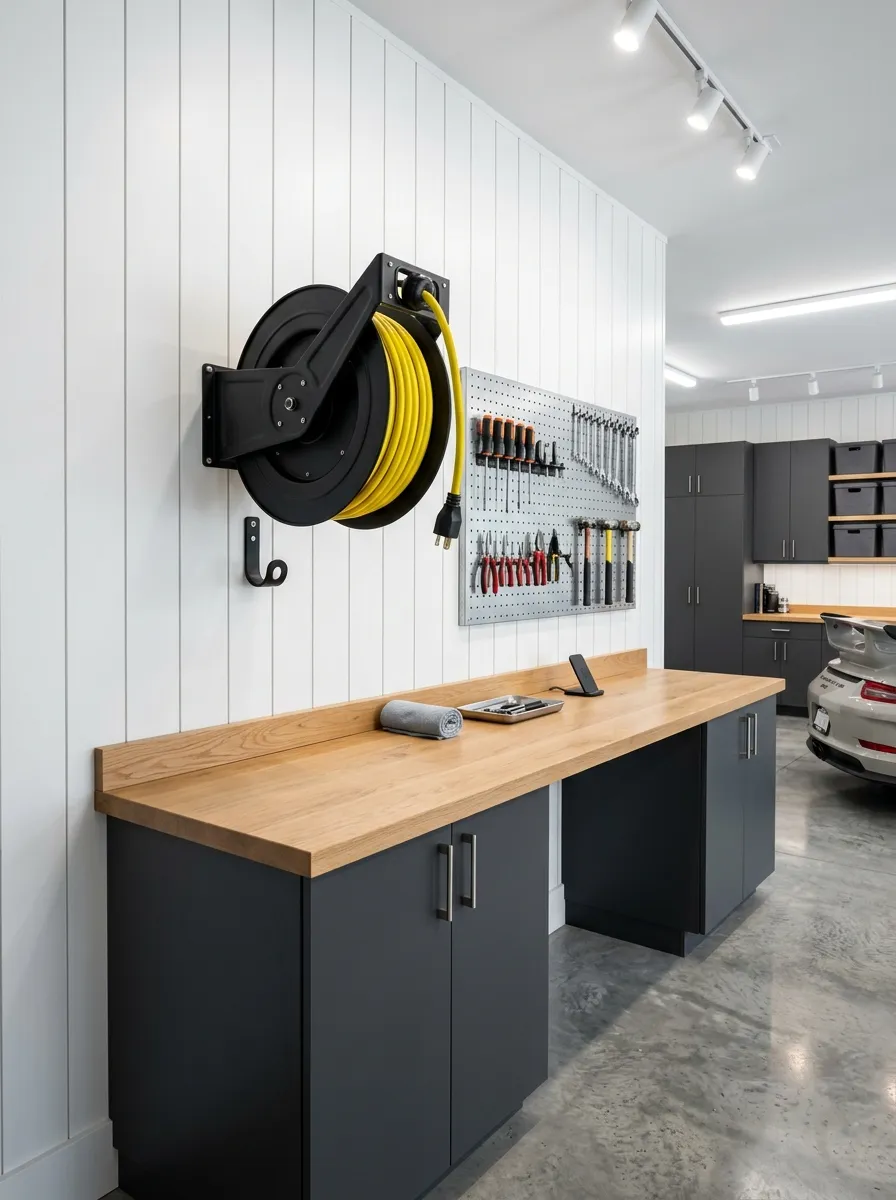
Loose extension cords tangle themselves into knots the second they hit the floor, and untangling one always eats ten minutes you didn’t plan to spend. A wall-mounted reel keeps the cord wound and ready, with just the working length pulled out.
Mount reels near outlets you actually use, not just wherever there’s open wall space.
A Dedicated Gardening Tool Wall
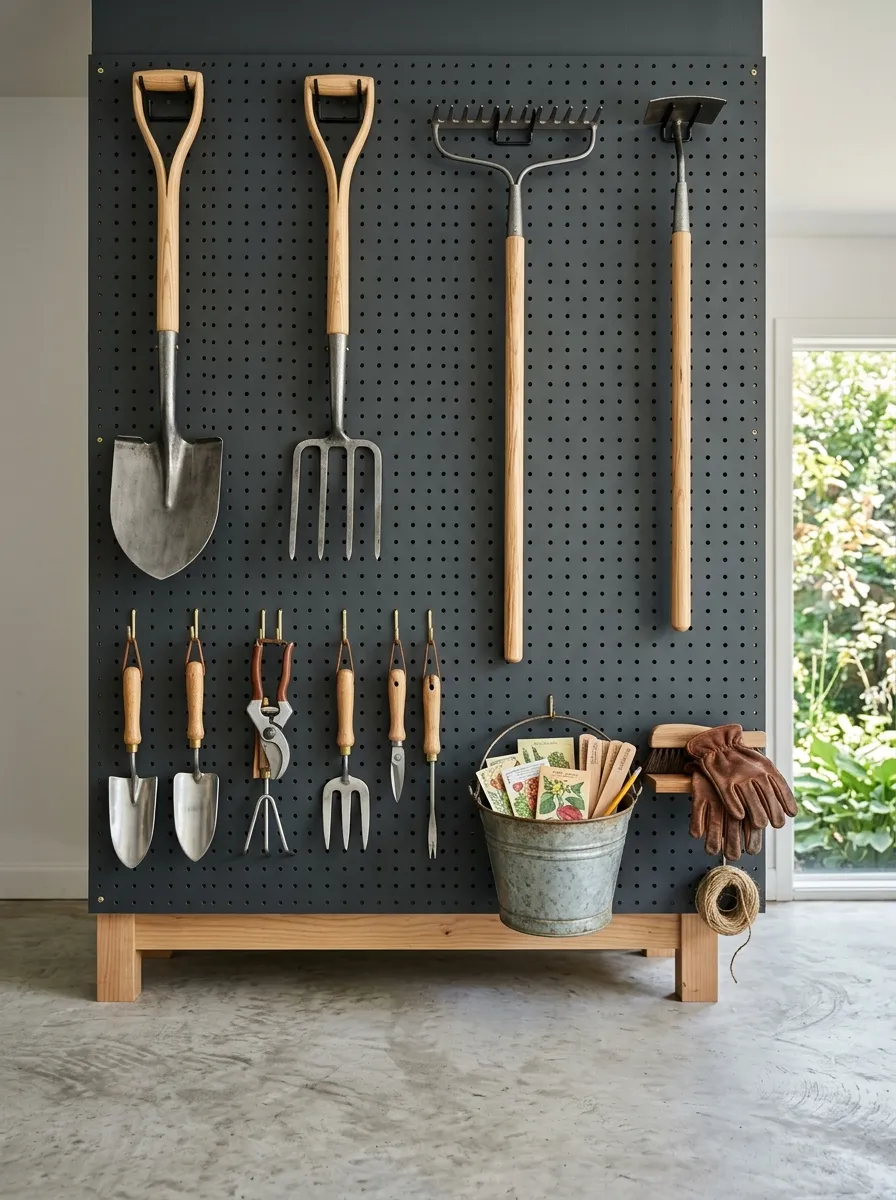
Trowels, pruners, and gloves scattered across a shelf get lost fast because none of them have a fixed spot. A gardening wall groups everything by task, planting tools together, cutting tools together, so you grab a full kit in one trip instead of hunting room to room.
Hang a small bucket at the bottom for loose seed packets and plant tags. It keeps paper clutter from drifting into every other zone.
Long tools
Hand tools
Bucket + gloves
Under-Shelf Sliding Bin Drawers
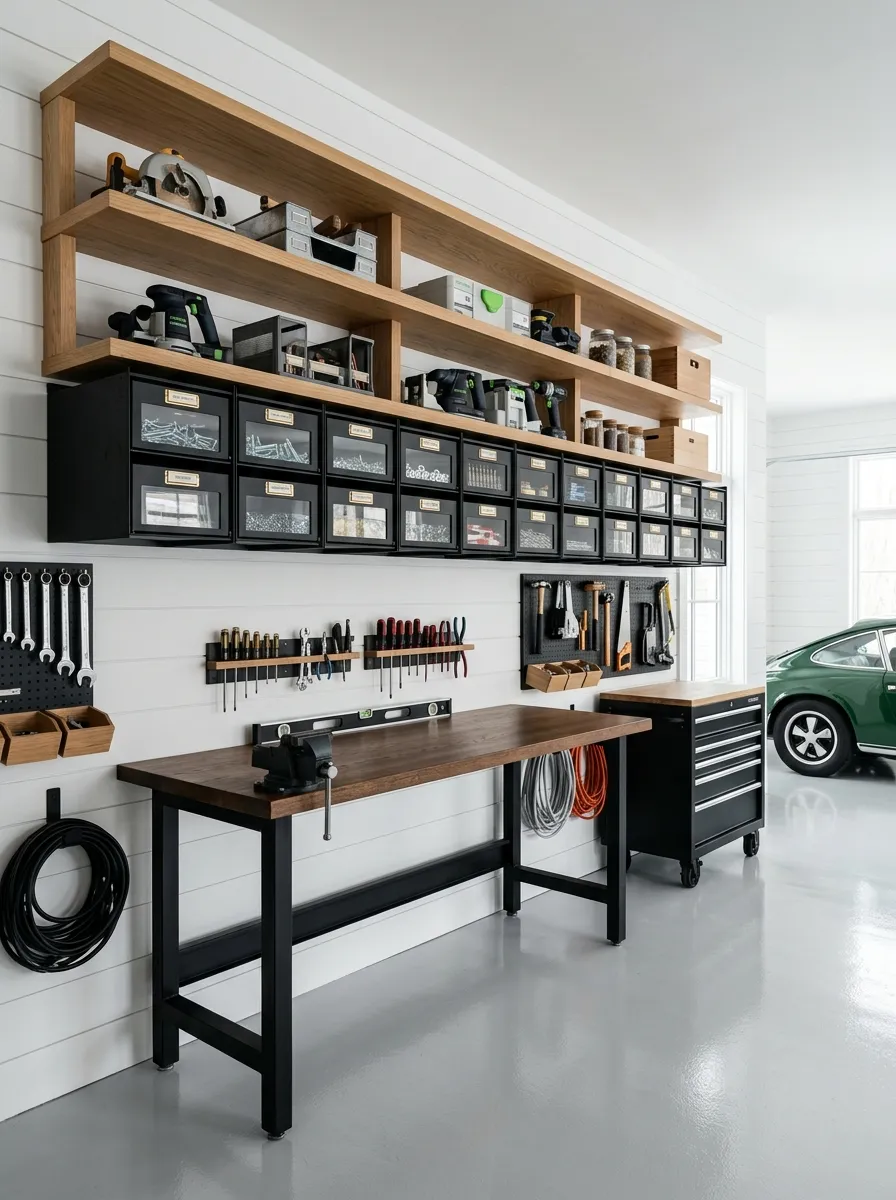
Wasted space sits right under every fixed shelf, and sliding drawers mounted to that gap put it to work. It’s a small addition, but a set of three under-shelf drawers can absorb an entire category of small parts without touching your existing shelving.
- Measure clearance under the shelf before ordering drawer kits
- Use shallow drawers for hardware, deeper ones for tape and glue
- Add a stop block so drawers can’t be pulled out too far and tip
- Label the drawer front, not just the inside
A Paint Can Storage Shelf With Lid Labels
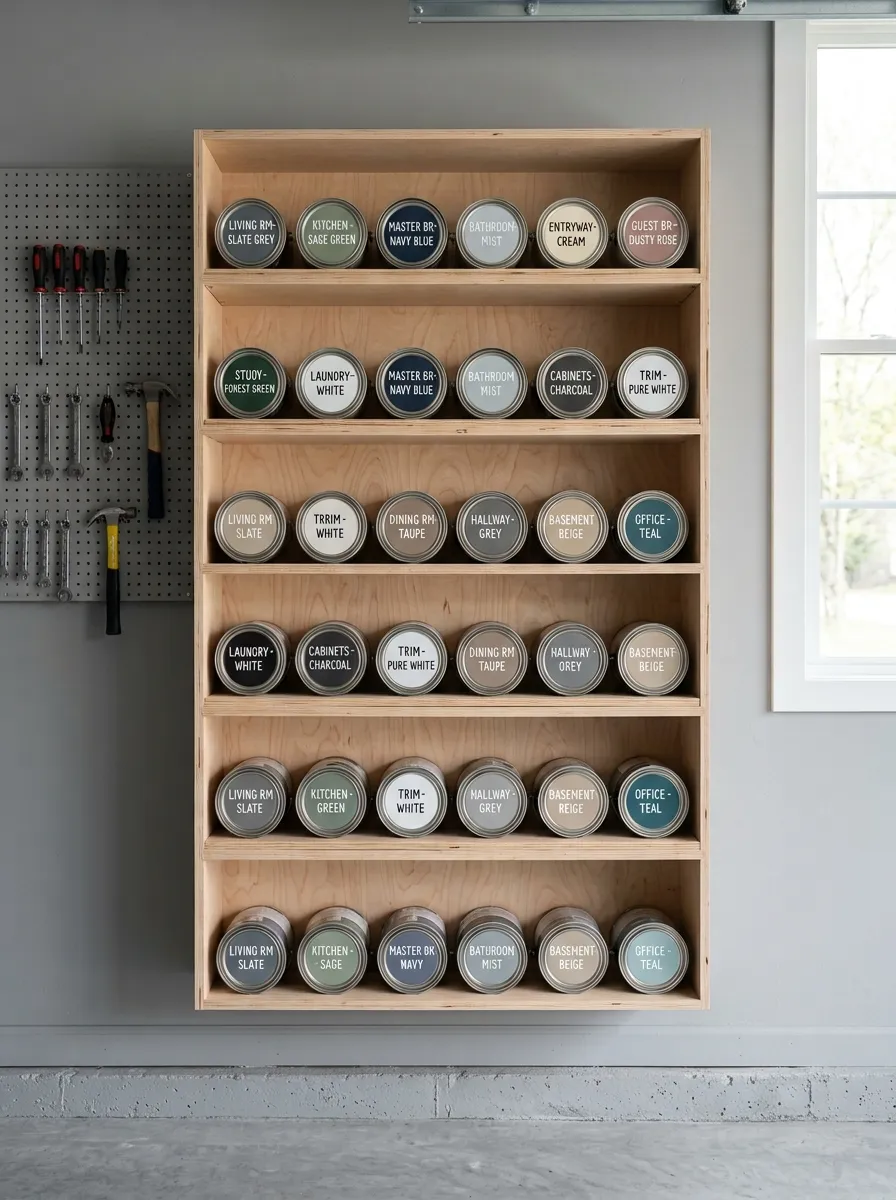
Half-used paint cans get shoved in a corner and forgotten until you need a touch-up and can’t remember which can matches which wall. A narrow shelf sized for cans, with the color and room written right on the lid, solves that in one build.
Store cans upside down. It reseals the lid seal with paint and keeps the surface from skinning over between uses.
8-9 inches
12 inches apart
Paint pen on lid
Ceiling-Mounted Kayak or Ladder Hoists
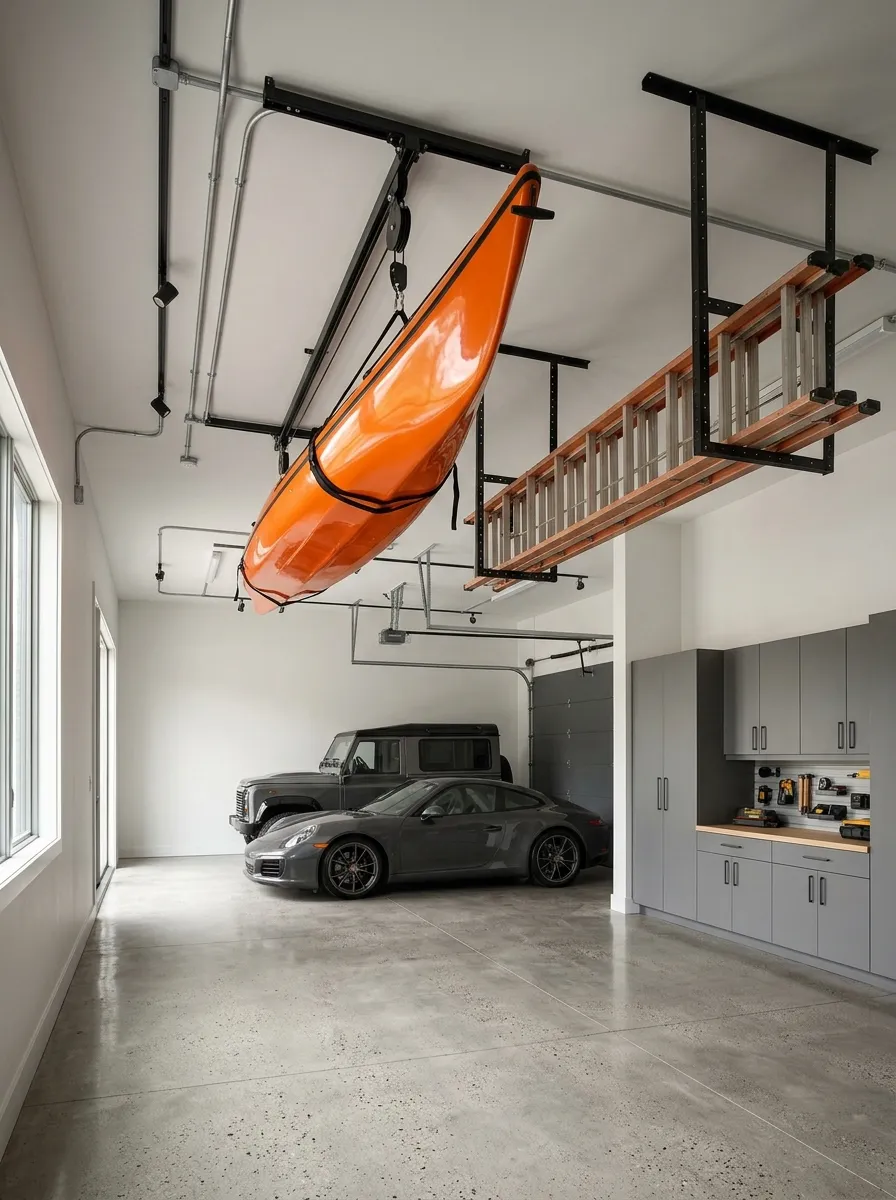
Long, awkward items like kayaks and extension ladders never fit neatly against a wall, and they end up blocking a whole section of floor. A pulley hoist lifts them flat against the ceiling, out of the way completely until you actually need them.
French Cleat System for Swappable Storage
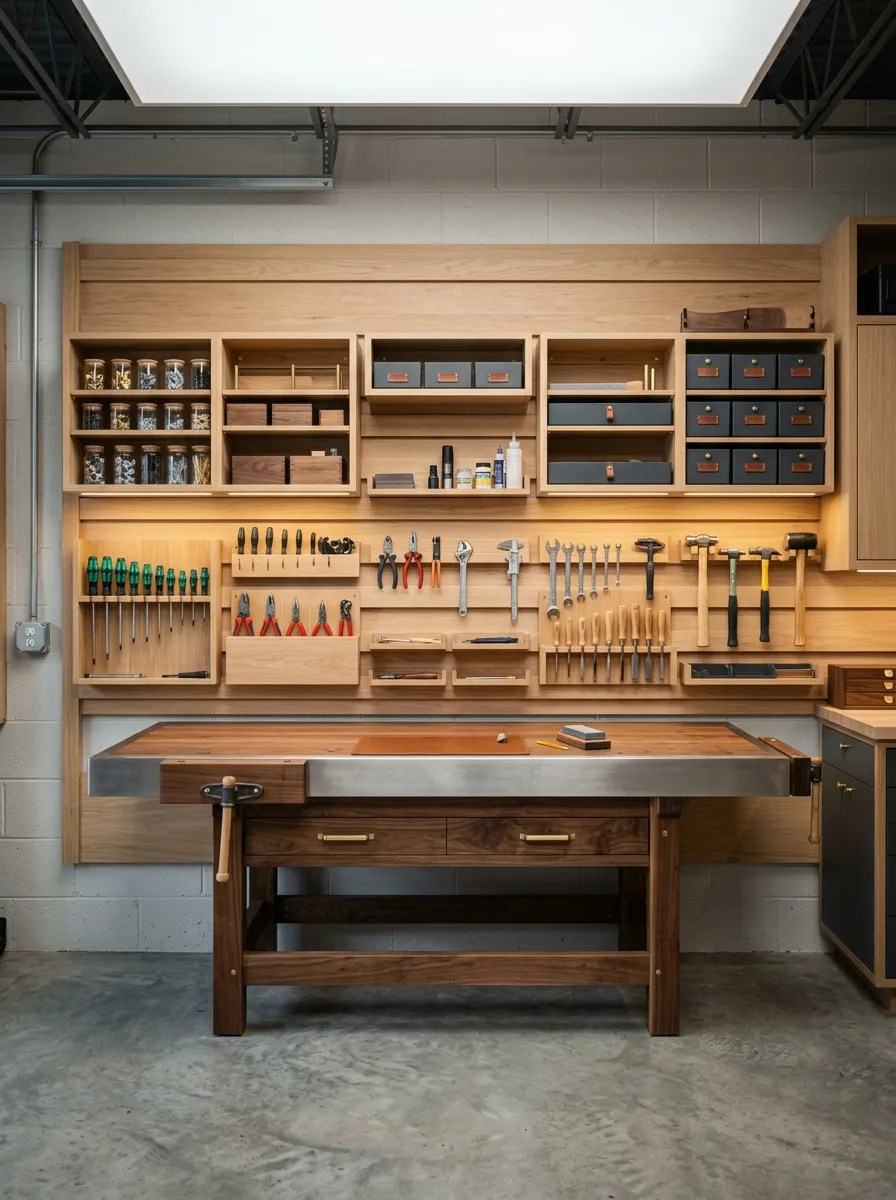
A French cleat wall lets you swap tool holders, shelves, and bins around without drilling new holes every time your storage needs change. One angled cleat strip on the wall, matching cleats on the back of each accessory, and everything hangs securely but moves whenever you want.
It takes more planning upfront than a fixed shelf, but it’s the one system on this list that actually grows with you instead of locking you into today’s layout.
A Small Parts Organizer Wall for Screws and Bolts
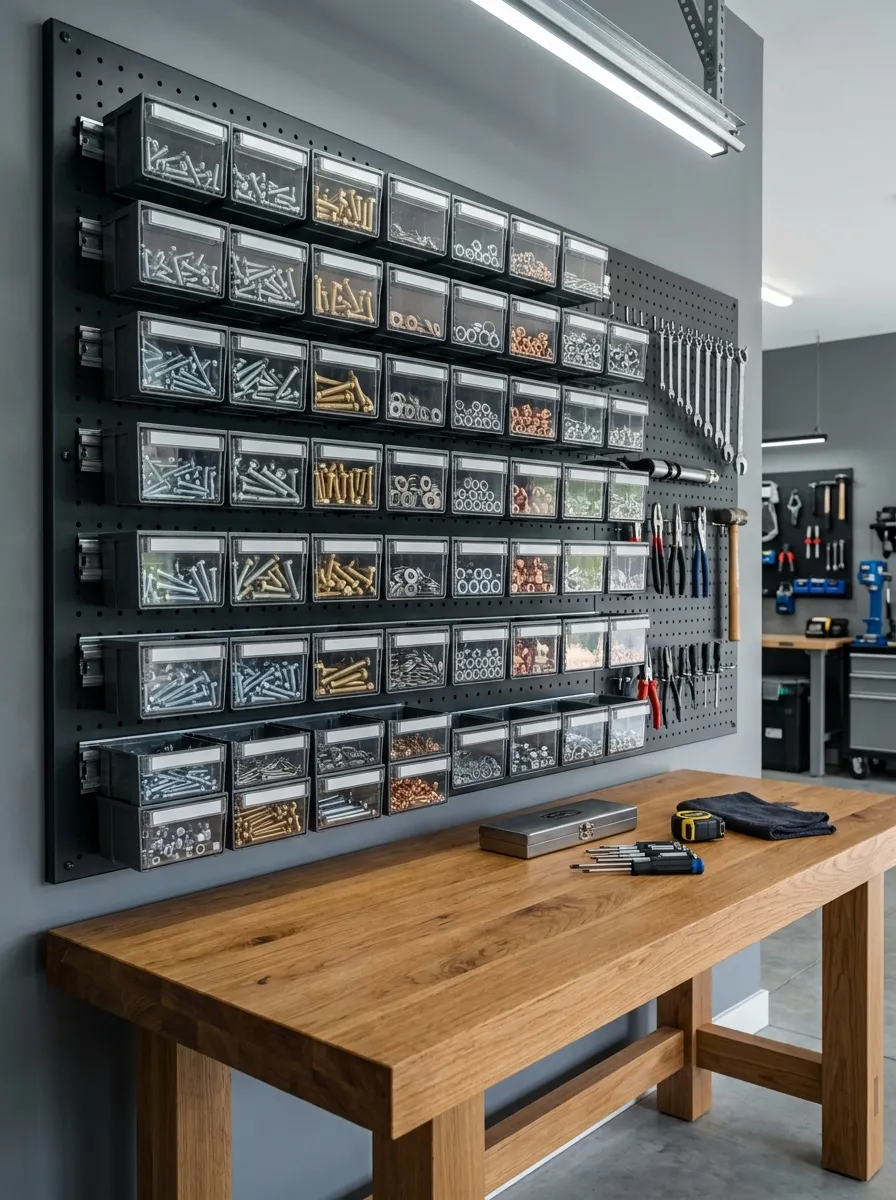
Loose screws and bolts end up mixed together in one junk drawer, which means every small repair starts with ten minutes of digging. A wall of small parts bins, each one holding a single size or type, ends that search completely.
Sort by size first, then by type. Trying to sort by type alone still leaves you digging through six sizes of the same screw.
Everything mixed together
Every size has its own bin
A Seasonal Rotation System for Holiday Decor
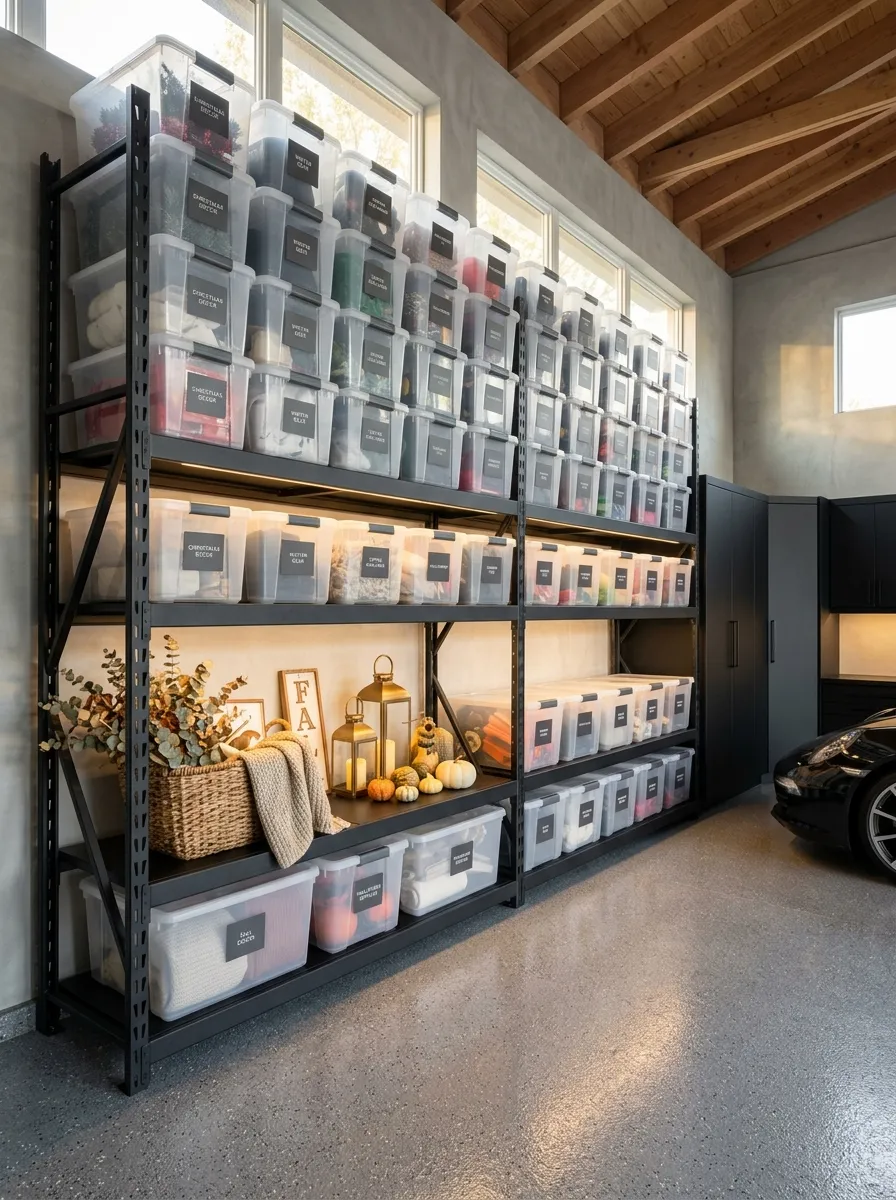
Holiday decor only needs to be accessible a few weeks a year, yet it often sits in prime, easy-to-reach storage all twelve months. A rotation system fixes that by swapping what’s front-and-center based on the actual season.
- Store decor by holiday in separate labeled bins
- Keep the current or upcoming season’s bin in easy reach
- Move off-season bins to the highest shelf or overhead rack
- Do the swap the same weekend each season so it becomes routine
A Final Walkthrough Checklist Before You Call It Done
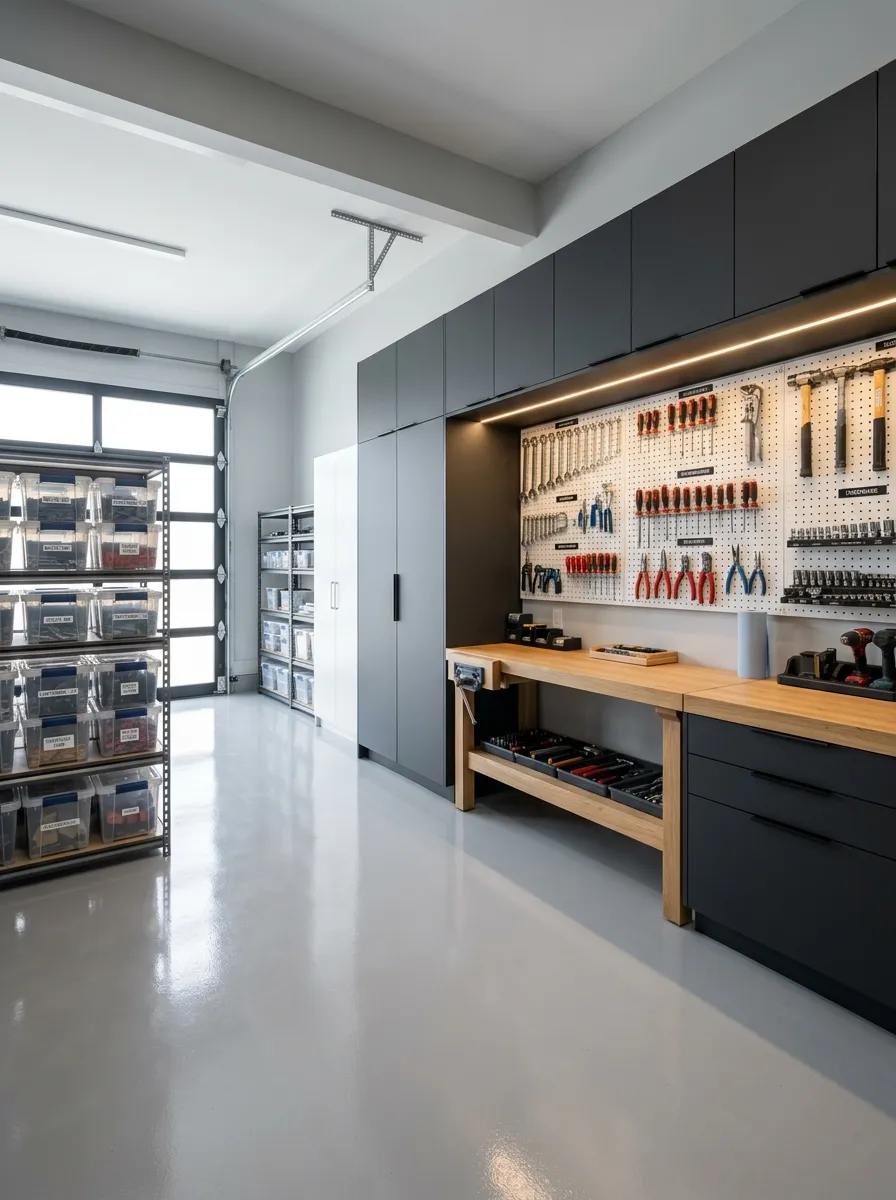
Once every system’s built, walk the garage one more time as if you’re seeing it for the first time. This step catches the small gaps, an unlabeled bin, a hook that’s too high, a zone that’s still a little crowded, before they turn back into clutter.
Do this walkthrough monthly, not just once. Systems drift over time, and a five-minute check keeps the whole garage running the way you built it.
Wrapping It Up
None of these DIY garage organization ideas work in isolation. The pegboard needs the zoning. The labels need the bins. Build a few pieces at a time, and the whole garage starts functioning like one connected system instead of a pile of separate fixes.
The real payoff isn’t how it looks on the first day. It’s six months in, when putting a tool back still takes five seconds because it still has a home. That’s the actual test of whether a system worked.
Start with whichever idea solves your biggest daily frustration first. Save this list for the next project weekend, you won’t get through all 25 at once, and that’s fine.