
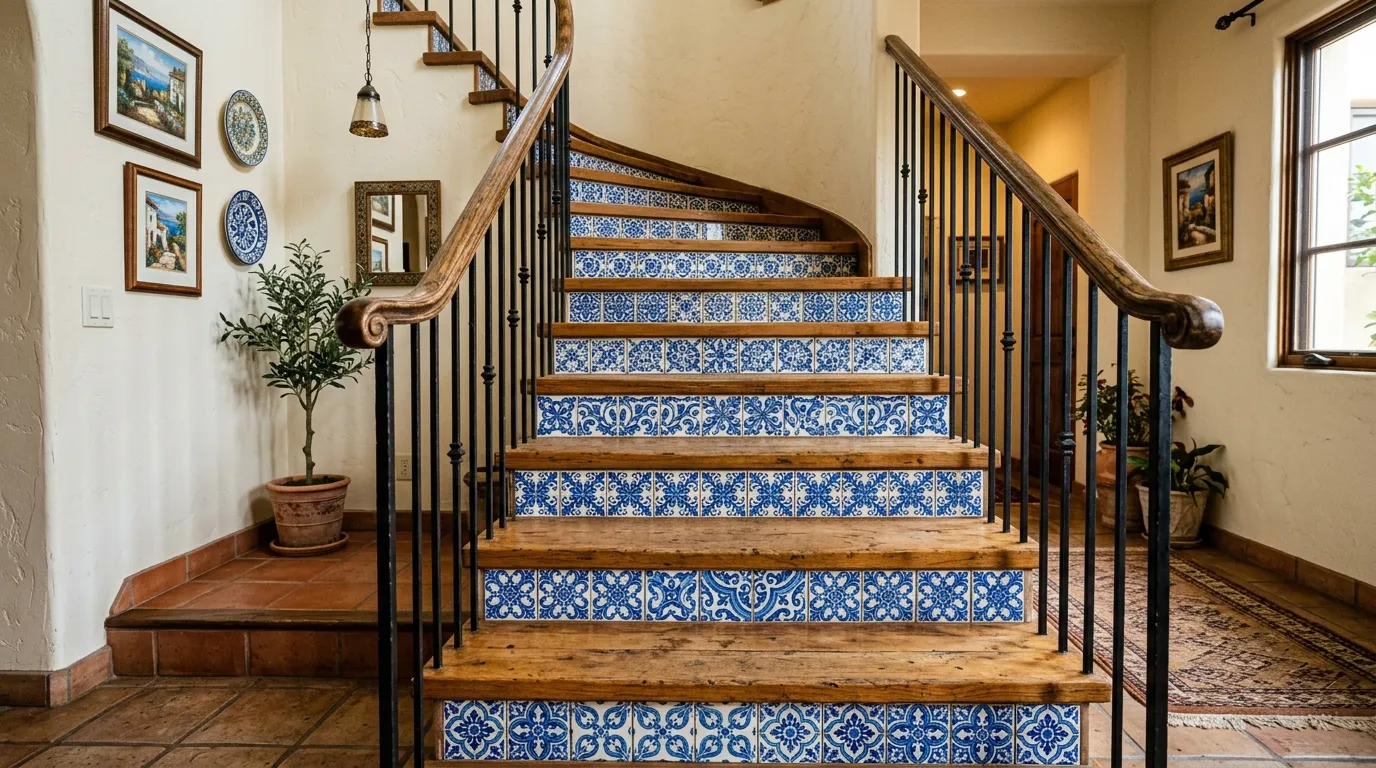
You pick the flooring, you argue over paint colors, you obsess over the runner rug, and the risers just sit there in builder grade white until one day you realize they’re the first thing anyone sees walking through your front door. That gap between the treads isn’t a leftover space. It’s twenty five small canvases you’re currently wasting.
Most stair riser ideas online fall into two traps. Either they’re so subtle nobody notices the effort you put in, or they’re so loud you’ll want to repaint by spring. Neither one respects how much visual weight a staircase actually carries in an entryway or open floor plan.
This list skips the vague advice and gets specific. Every idea here works with real materials, holds up to foot traffic vibration, and won’t leave sticky residue when you eventually want to switch it up. If you’re searching for stair riser ideas that actually look intentional instead of like a Pinterest board come to life badly, you’re in the right spot. Let’s get into it.
Stair Riser Ideas
Peel-and-Stick Wallpaper Risers
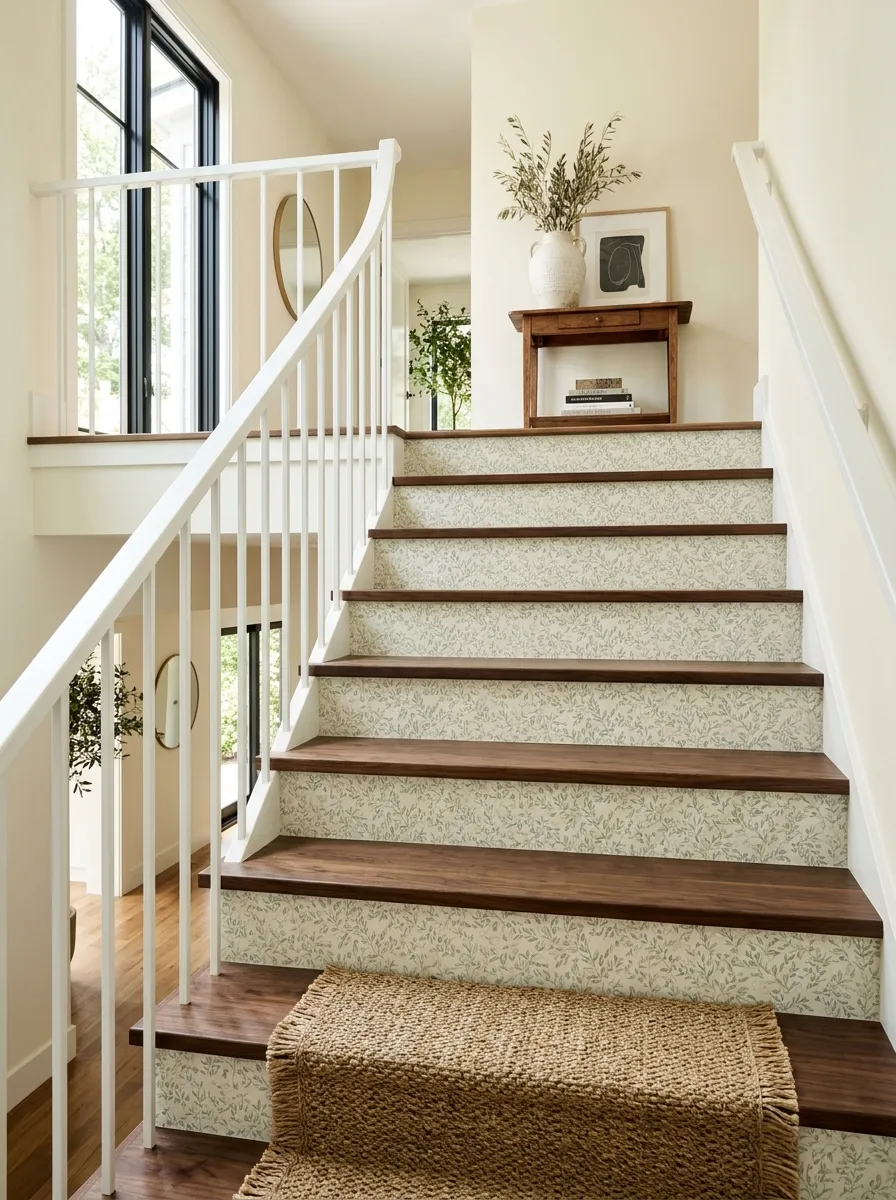
Painting risers takes a weekend and a steady hand you might not have. Peel-and-stick wallpaper skips both problems entirely. Cut a sheet to size, press it into place, and you’ve got a crisp, factory-finish pattern in under an hour per riser.
Go with a small, repeating print instead of anything with a large-scale motif, since a big pattern will get chopped awkwardly at each riser’s edge. Look for a matte or low sheen finish so the pattern doesn’t flash under stair lighting. If you rent, this is the safest stair riser idea on the whole list since it peels off clean at move out.
Ombre Gradient Paint Risers
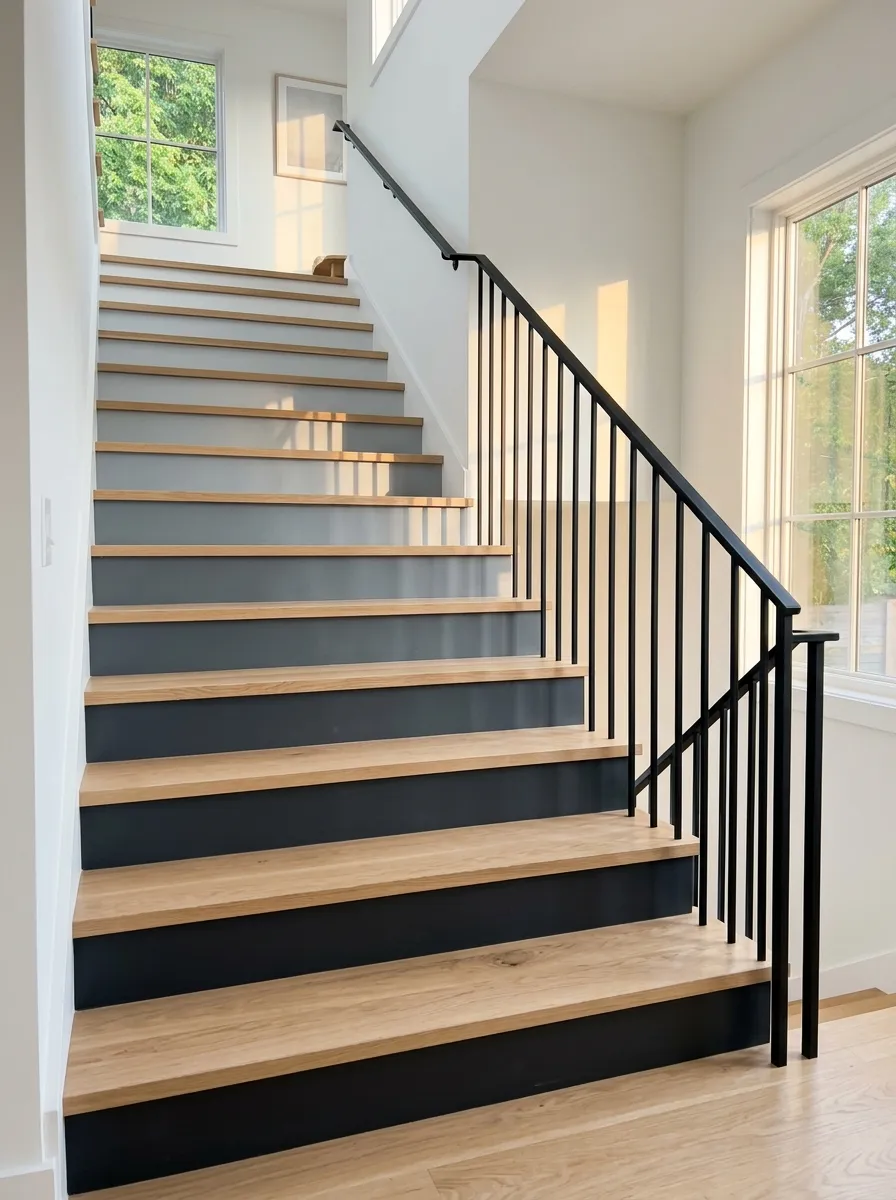
A gradient does something a single paint color can’t: it makes a straight staircase feel like it’s moving. Start with your darkest shade on the bottom riser and lighten by one or two shades every two or three steps until you land on your lightest at the top.
Sample pots are enough since each riser only needs a couple coats. Painter’s tape keeps your lines crisp between treads. This works best on staircases with at least twelve steps, since a shorter run doesn’t give the gradient enough room to actually read as intentional rather than mismatched.
Moroccan Stencil Pattern
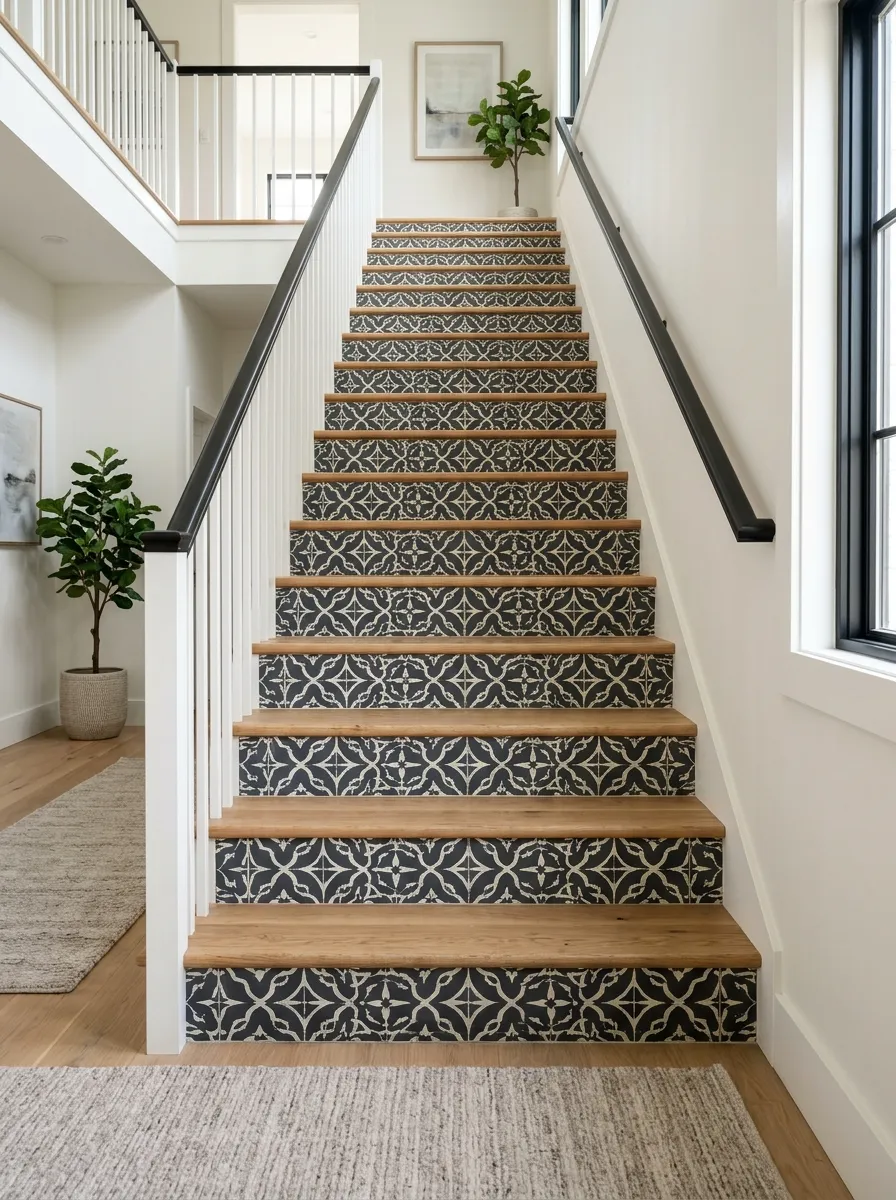
Grab a single stencil sheet and reuse it on every riser instead of buying a set. Line it up against the same edge each time using painter’s tape as your guide, so the pattern stays level across the whole staircase. Dab paint on with a stencil brush rather than a roller.
A roller pushes paint under the edges and blurs the design. Work top to bottom so you’re not leaning over wet paint on your way down. Two coats of stencil paint keeps the pattern from looking patchy once it’s fully dry.
Vinyl Quote Decals
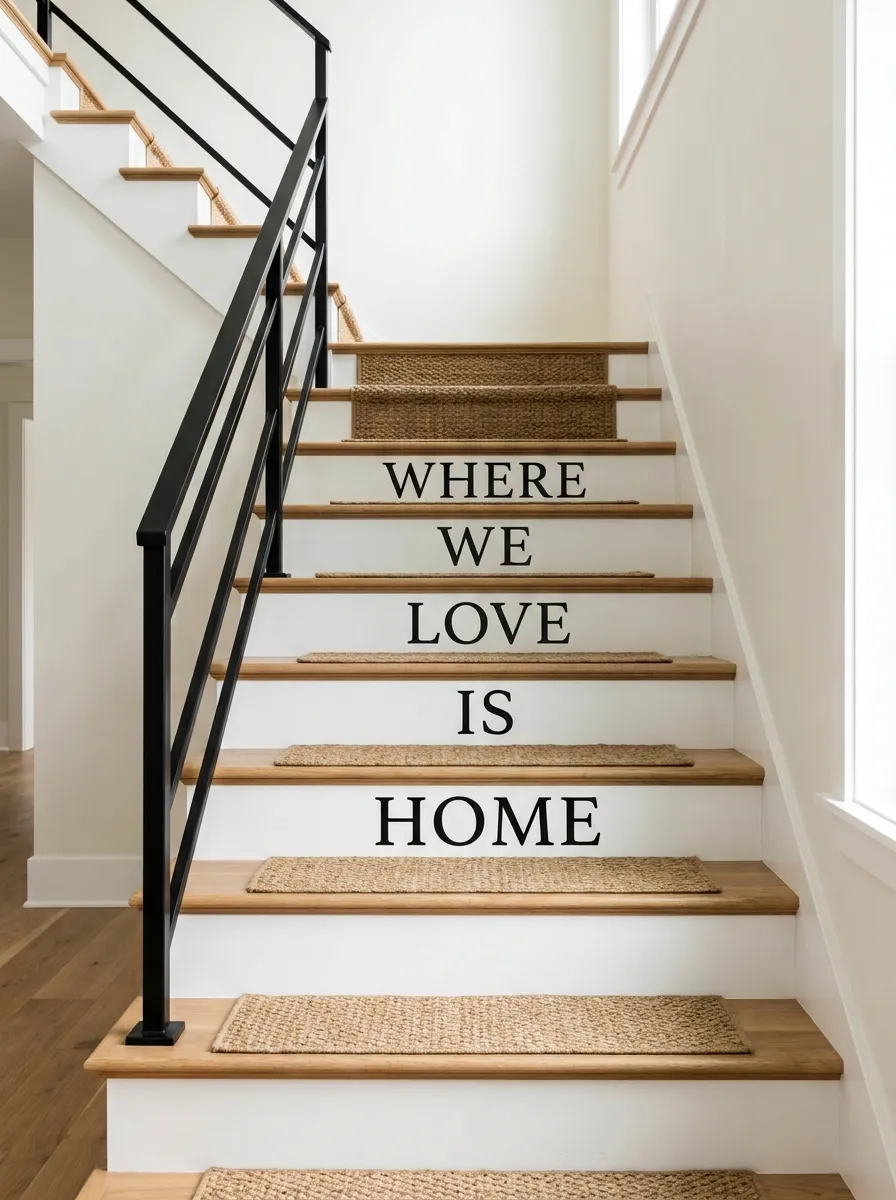
Quote decals split people into two camps: staircases that feel personal, and staircases that feel like a coffee shop chalkboard. The difference is restraint. One short phrase spread across three or four risers reads as intentional. A different quote on every single riser reads as cluttered fast.
Pick a phrase tied to your home specifically, a family motto, house rules, or lyrics that mean something, rather than a generic inspirational line you’d find on a mug. Order in matte vinyl, not glossy, so it doesn’t catch glare from stairwell lighting.
Countdown House Numbers on Risers
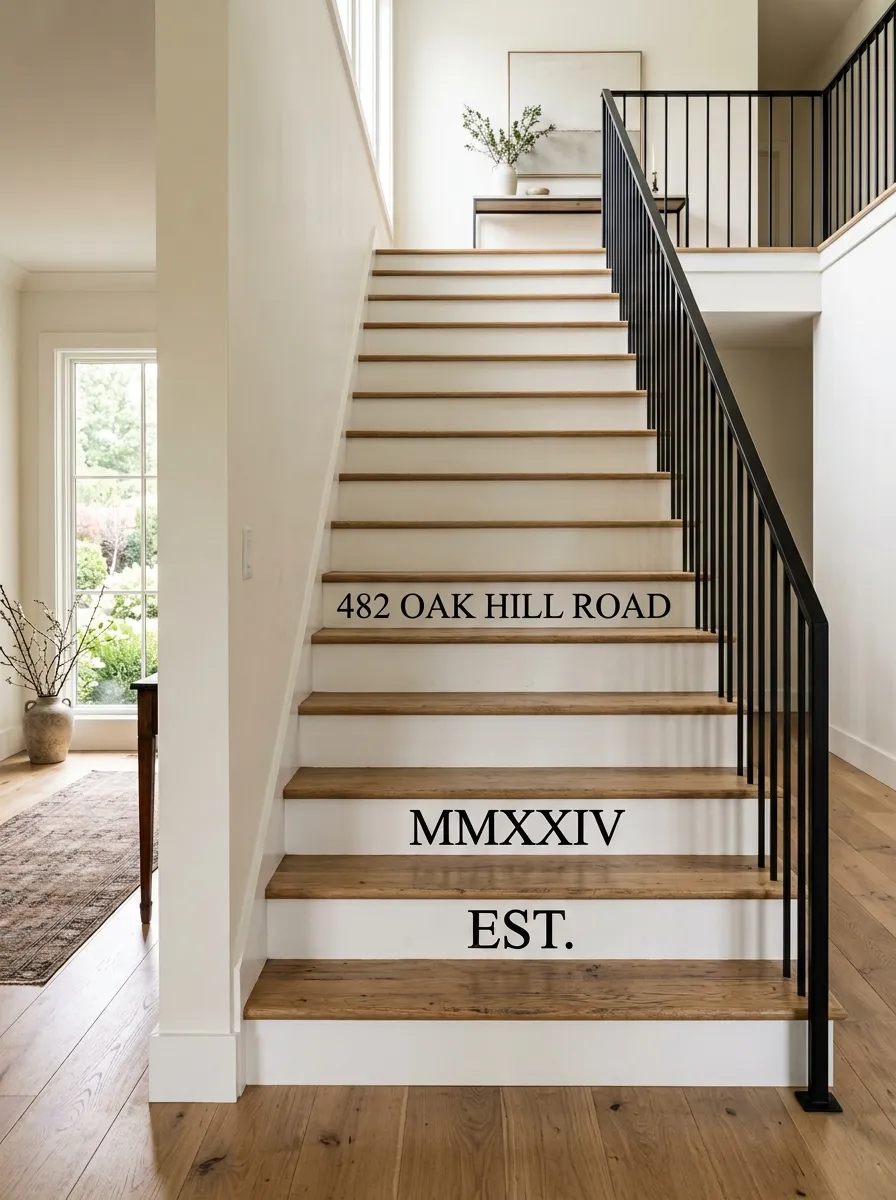
People slap house numbers straight up the staircase in plain sequence and call it done, but that’s the least interesting version of this idea. Mix in the street name, install year, or a meaningful date on one or two risers instead of pure numbers the whole way up.
Vinyl numbers in a bold serif font read best from a distance, thin sans-serif tends to disappear against busy flooring. Keep a consistent size across every riser even if the numbers themselves have different digit counts, since mismatched scale is the fastest way to make this look unplanned.
Botanical Print Decals
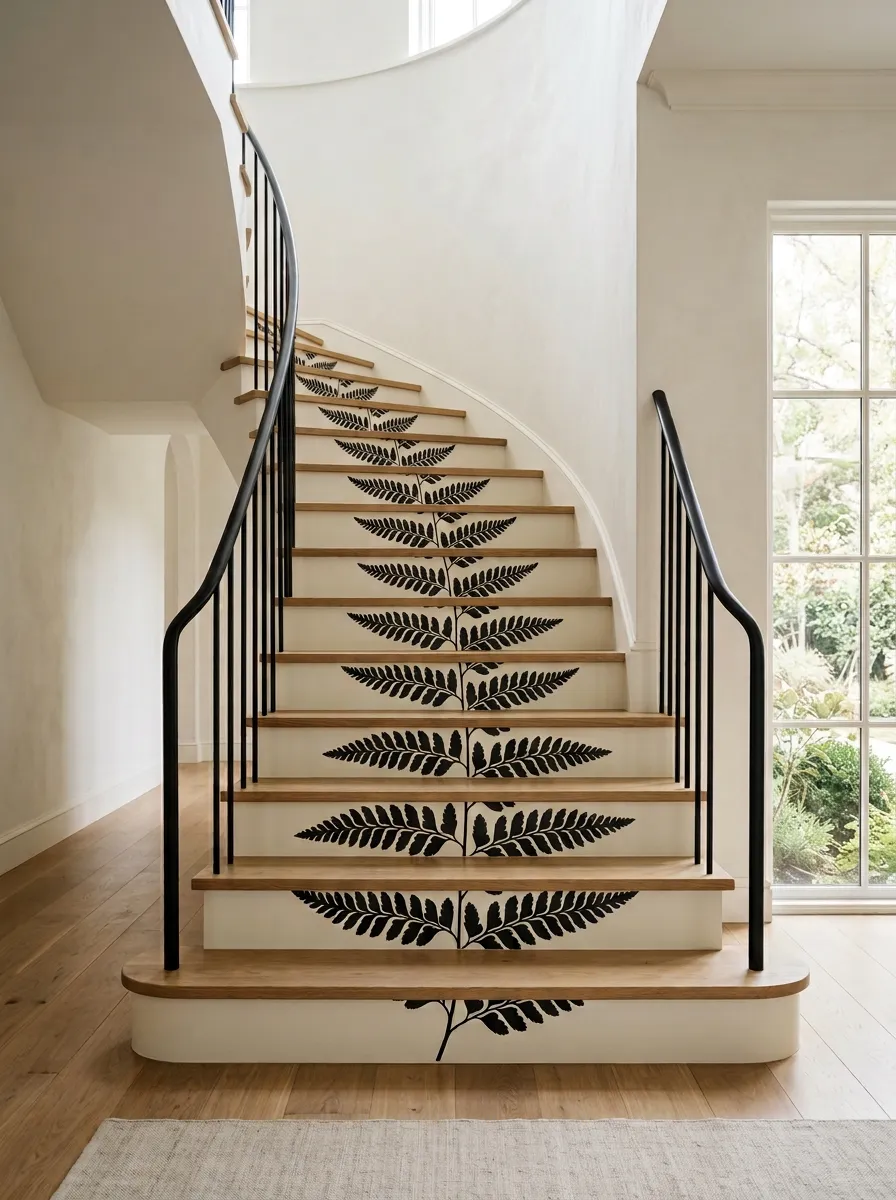
A single fern frond stretching corner to corner across a riser reads completely differently than a busy floral repeat crammed into the same space. Botanical decals work best when the print is oversized and simple, one leaf, one branch, one stem, rather than a tiny pattern multiplied dozens of times.
Cut the print so it appears to grow from riser to riser, continuing the same stem line as it climbs. Matte black or deep green ink on a cream riser background gives the cleanest, most gallery-like result. Avoid metallic gold botanical prints near stair lighting, since they glare more than they shine.
Chalkboard Paint Risers
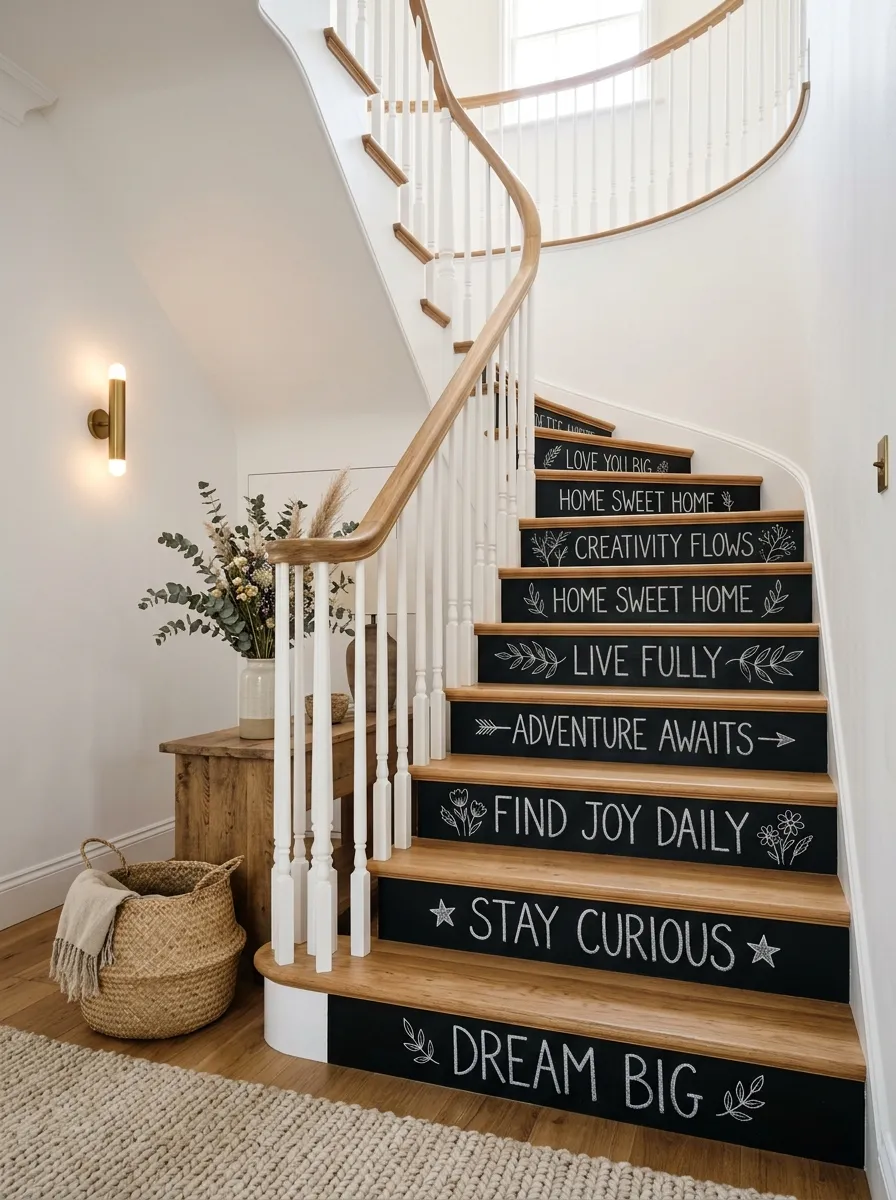
Chalkboard paint on risers isn’t just for kids’ rooms. That’s the assumption that keeps people from trying it, and it’s wrong. Two coats of matte black chalkboard paint on every riser gives you a rotating surface for quotes, countdowns, or even a running family joke that changes every few weeks.
The trick is treating it like a feature, not a decoration you set once and forget. Wipe with a barely damp cloth only, since soaking the surface wears down the chalkboard texture faster than daily chalk use ever would.
Sheet Music Risers
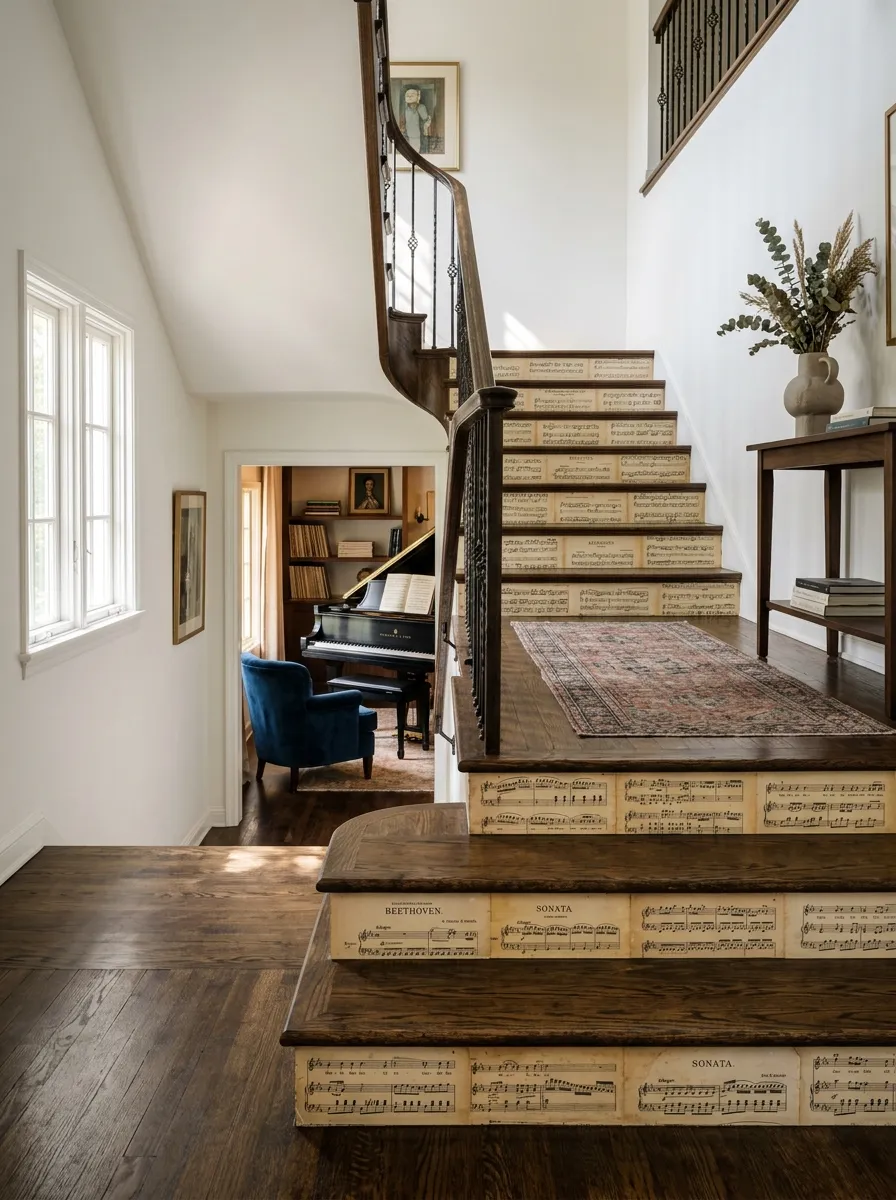
Old sheet music yellows in a beautiful way that new paper can’t fake, which is exactly why thrifted pages work better here than anything printed fresh. Decoupage actual sheet music pages directly onto risers using wallpaper paste, overlapping edges slightly so no white gaps show through. Seal with two coats of matte polycrylic once dry. This idea earns its keep near a music room, piano landing, or any staircase where someone in the house actually plays an instrument, since it turns hallway wall space into something that means something instead of decor for decor’s sake.
Geometric Color-Blocked Risers
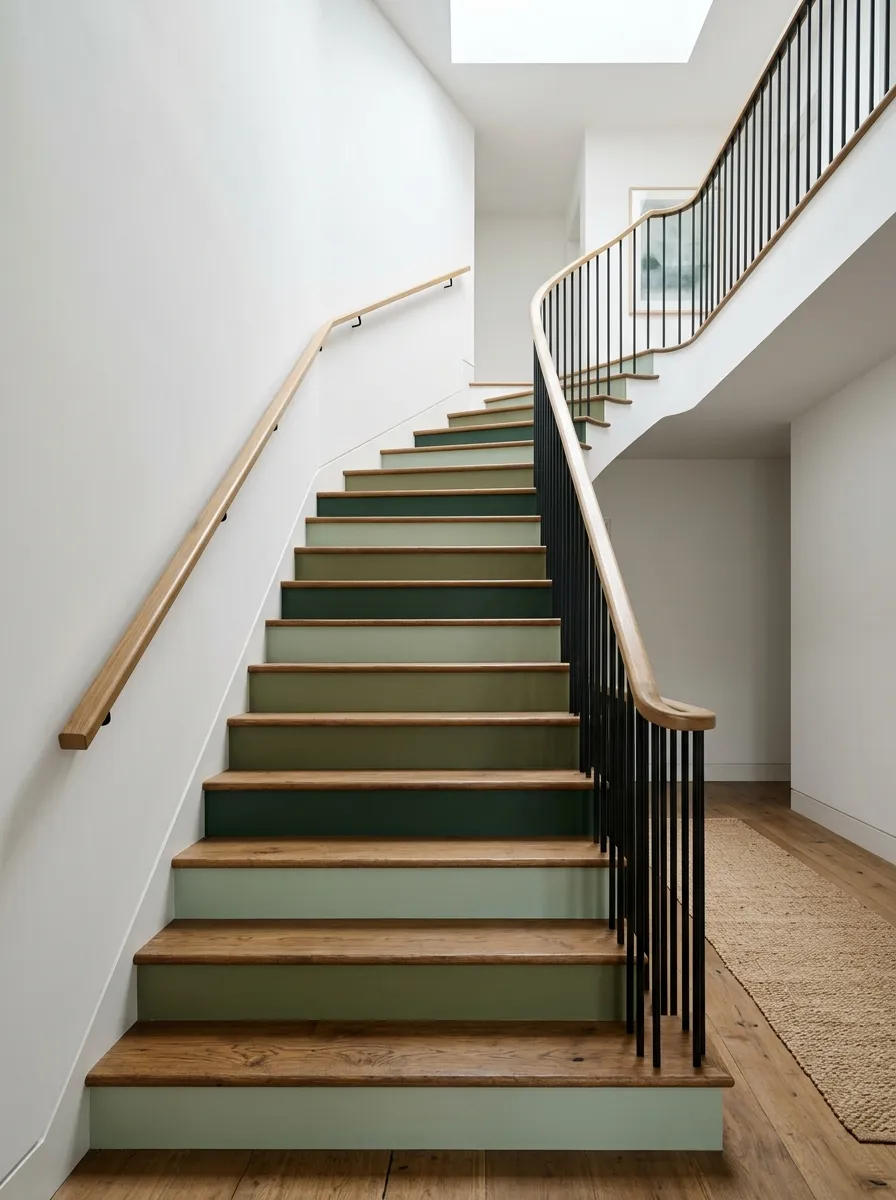
Two paint colors alternating riser to riser looks flat. Three or four colors in a deliberate, repeating sequence looks designed. Pick shades from the same family, different saturations of one hue work better than clashing primary colors, and map out the sequence on paper before you touch a brush. Painter’s tape gets you sharp edges between blocks if you’re splitting a single riser into two colors rather than committing a whole riser to one shade.
Faux Tile Stencil Pattern
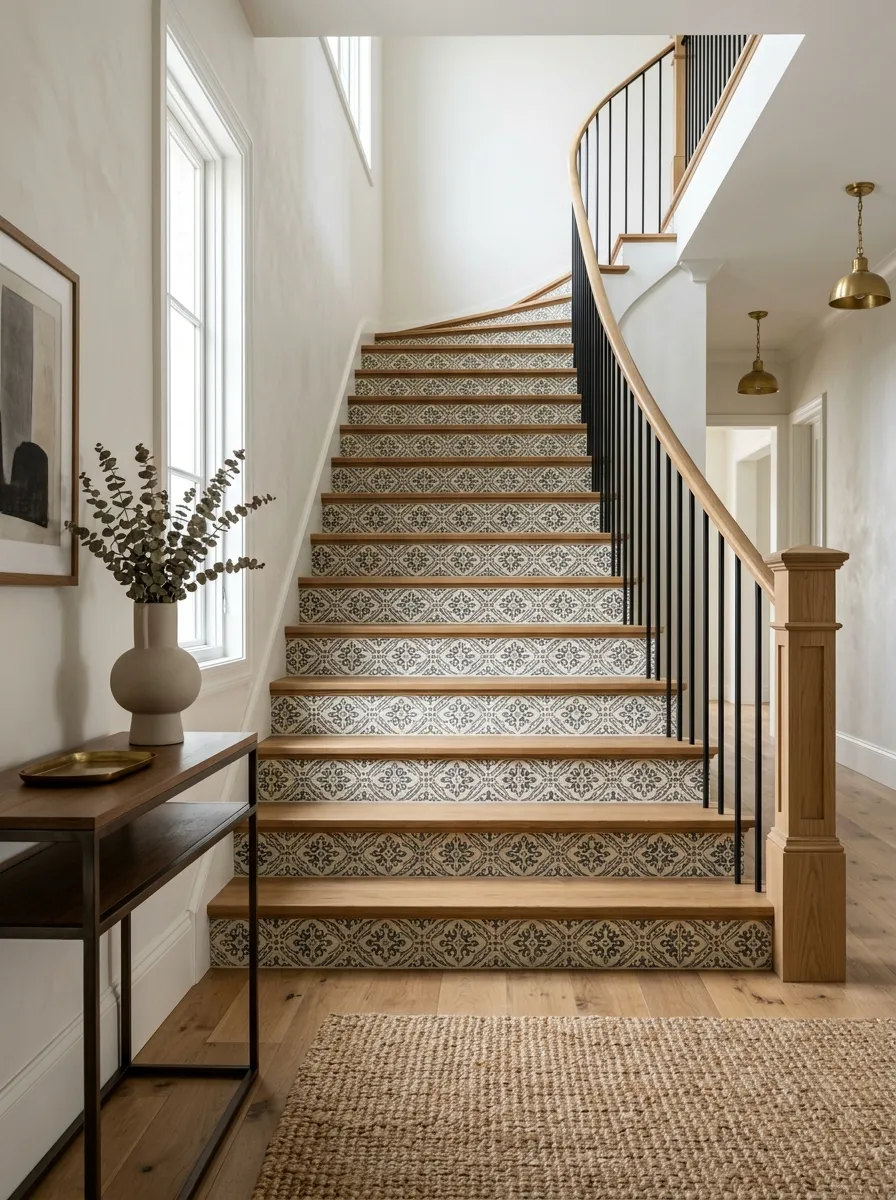
This one fools people every time. A tile-look stencil painted directly onto risers reads as real encaustic tile from three feet away, at a fraction of the cost and none of the weight. Start with a solid base coat in your lightest shade and let it cure fully before stenciling. Rushing this step is the number one reason the pattern smudges. Work one riser at a time, lifting the stencil straight up rather than peeling at an angle, which keeps lines crisp instead of smeared.
Wood Veneer Accent Risers
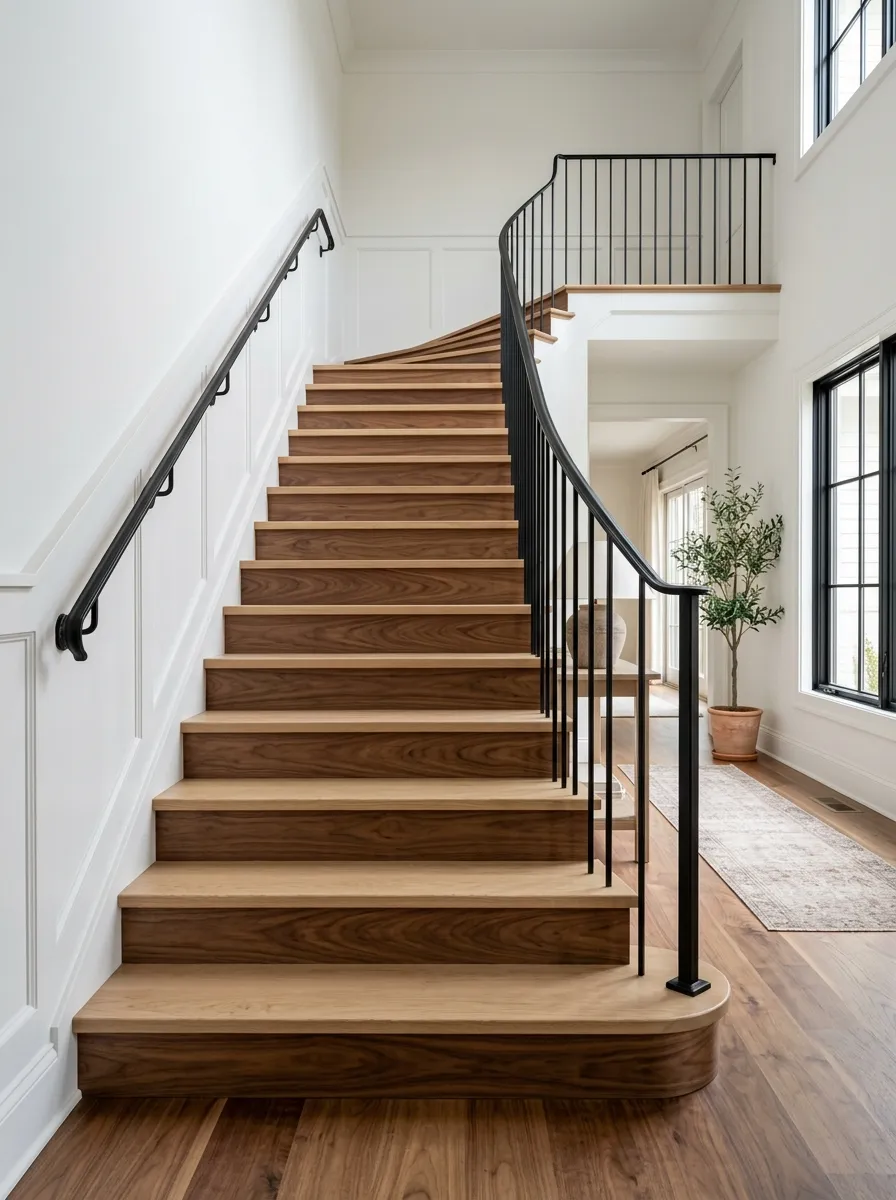
Painted risers can feel flat next to natural wood treads. Peel-and-stick wood veneer solves that mismatch by giving risers real grain texture that actually relates to the stairs around it, instead of competing with them. Choose a veneer tone a shade or two darker than your treads so the risers read as an intentional accent, not an accident of leftover material. Sand the edges lightly after application so seams don’t catch on socks.
Mirror Tile Risers
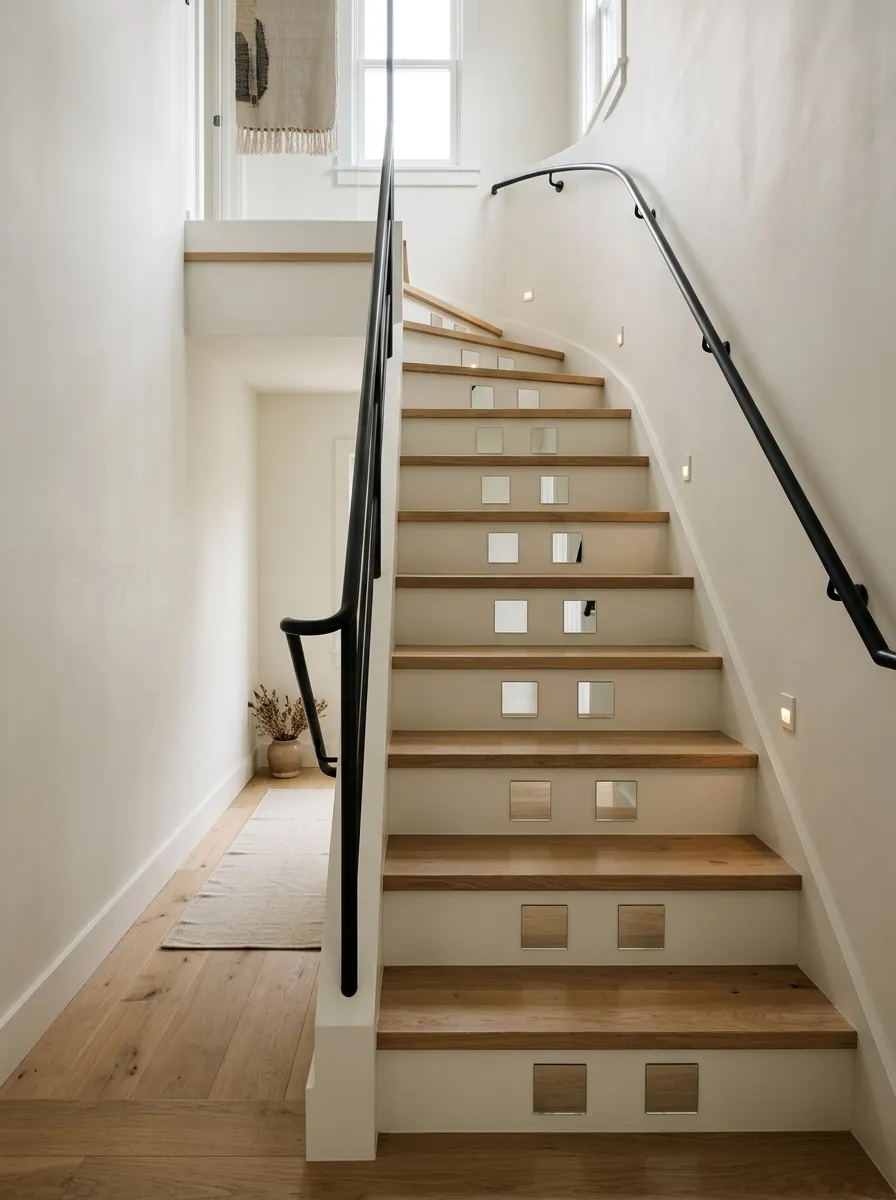
Small mirror tiles applied to risers bounce light back into stairwells that usually run dark, especially basement stairs or any staircase tucked away from windows. Use adhesive-backed mirror tiles rated for vertical application, not glass cut for tabletops, since regular glass can crack under repeated foot vibration. Keep the tile count low, two or three small squares per riser rather than a full mirrored surface, so the effect stays subtle instead of turning the staircase into a disco ball.
Cork Board Risers
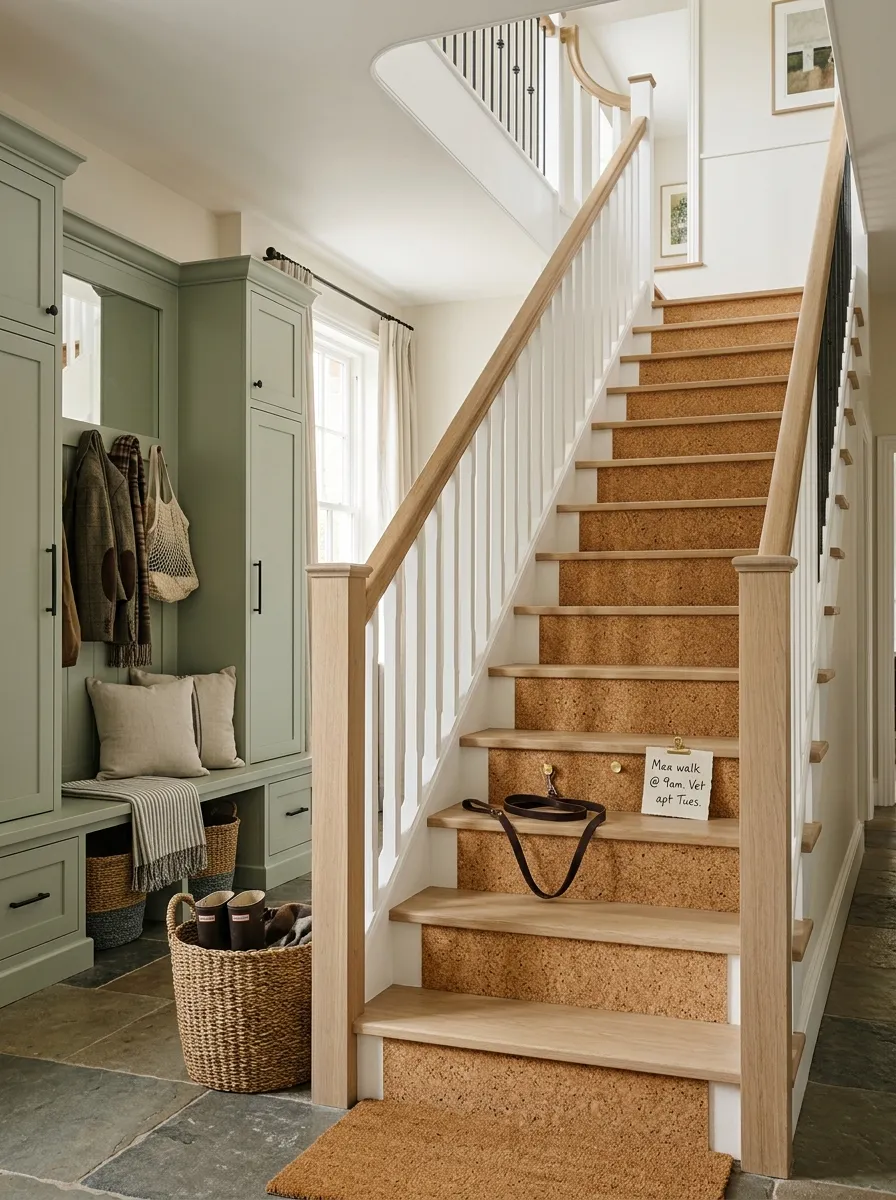
Mudroom staircases take a beating from backpacks, leashes, and mail nobody sorts. Cork tile risers turn that daily chaos into a feature instead of a mess. Cut cork tiles to riser size and adhere with construction adhesive rather than basic craft glue, since craft glue lets go under repeated bumping. Push pins hold notes, dog leashes, or seasonal reminders right at the base of the stairs where everyone actually sees them on the way out the door.
Fabric-Wrapped Risers
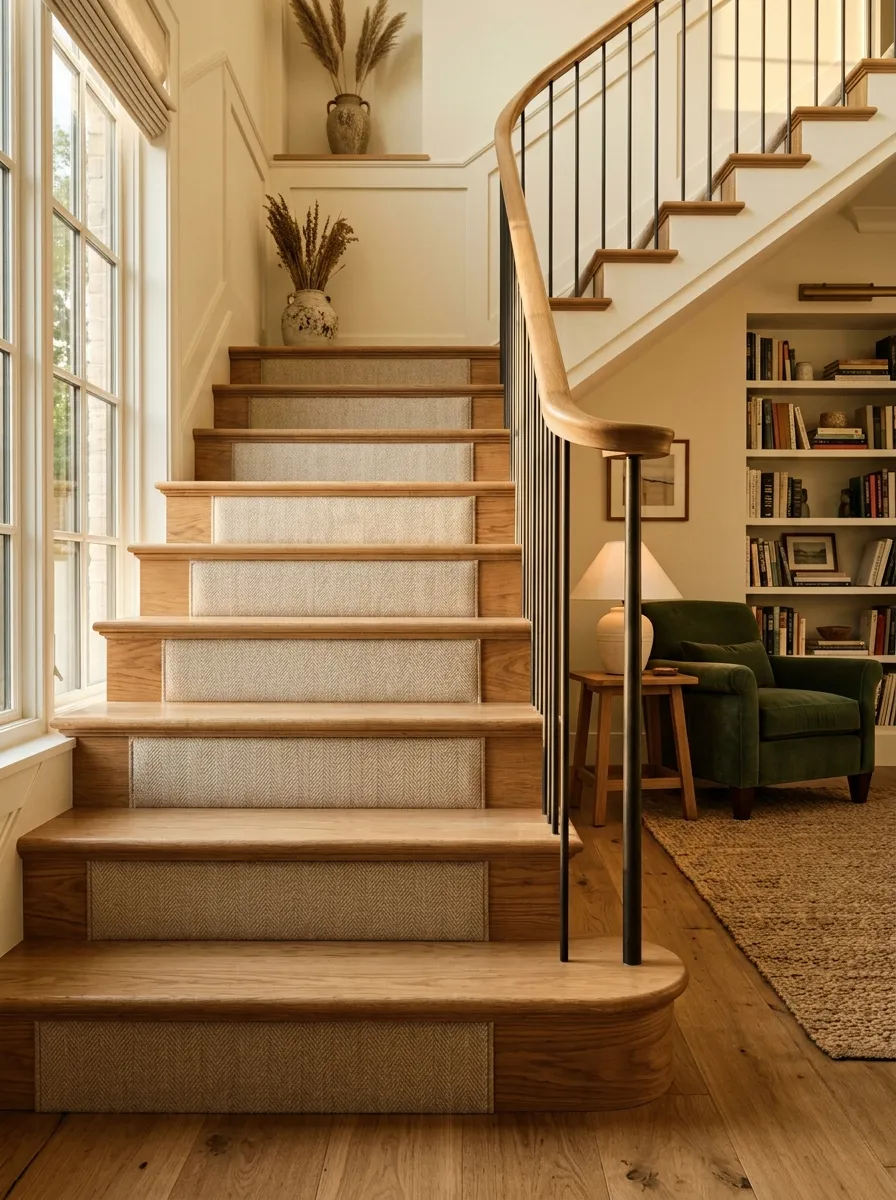
Staple gun, fabric, batting, done. Fabric-wrapped risers get you texture and softness that no paint or paper can fake, which matters most on staircases near a living room or reading nook where the whole point is comfort. Wrap thin quilt batting around a cut plywood insert first, then staple your fabric over it tight enough that there’s no sag. Choose a durable upholstery weight fabric, not quilting cotton, since thin fabric wears through at friction points fast.
Grasscloth Wallpaper Risers
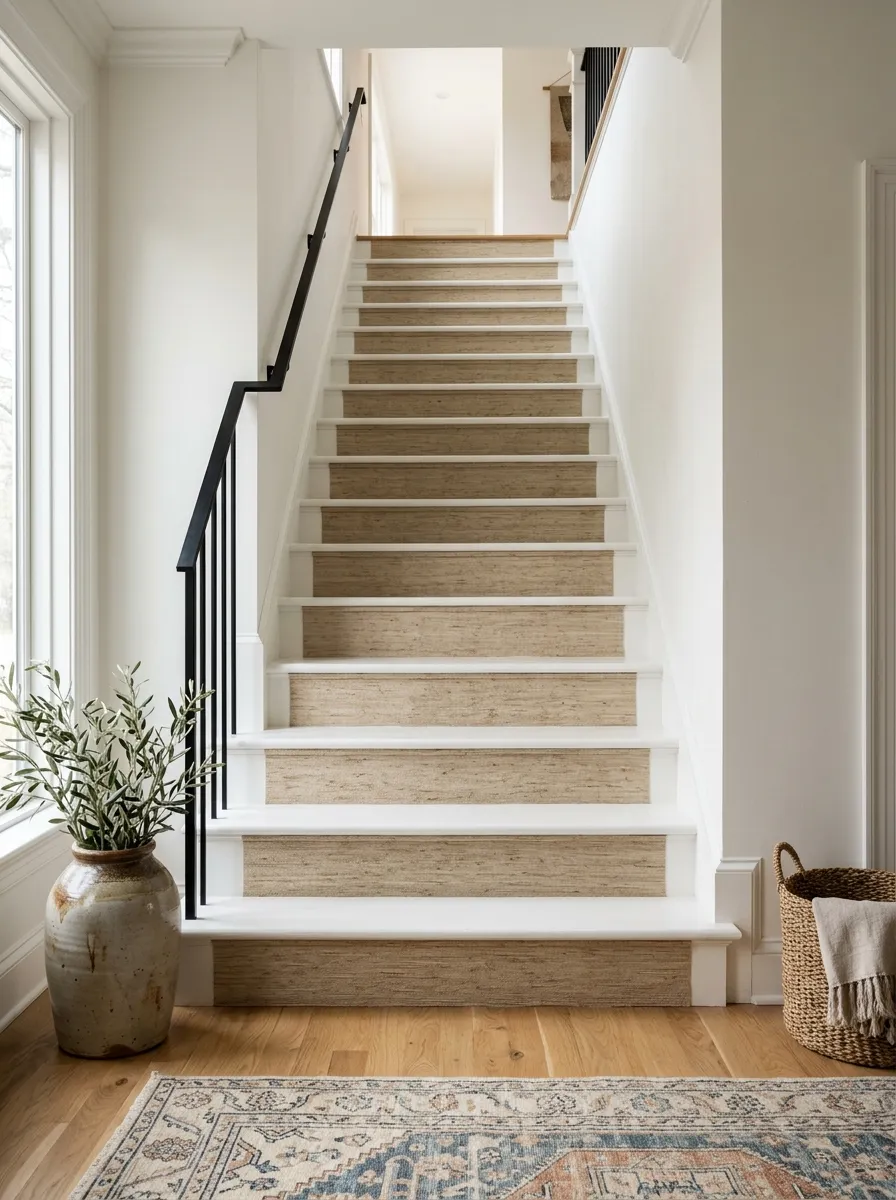
Grasscloth brings texture without pattern, which makes it the safest bold move on this entire list. It reads as expensive and intentional even in a single neutral tone, since the natural weave does the visual work that color or print usually has to do. Order paste-the-wall grasscloth rather than paste-the-paper for an easier solo install. Handle the edges carefully during application, grasscloth frays if you crease it, unlike vinyl wallpaper that forgives a rough edge.
Seasonal Removable Riser Decor
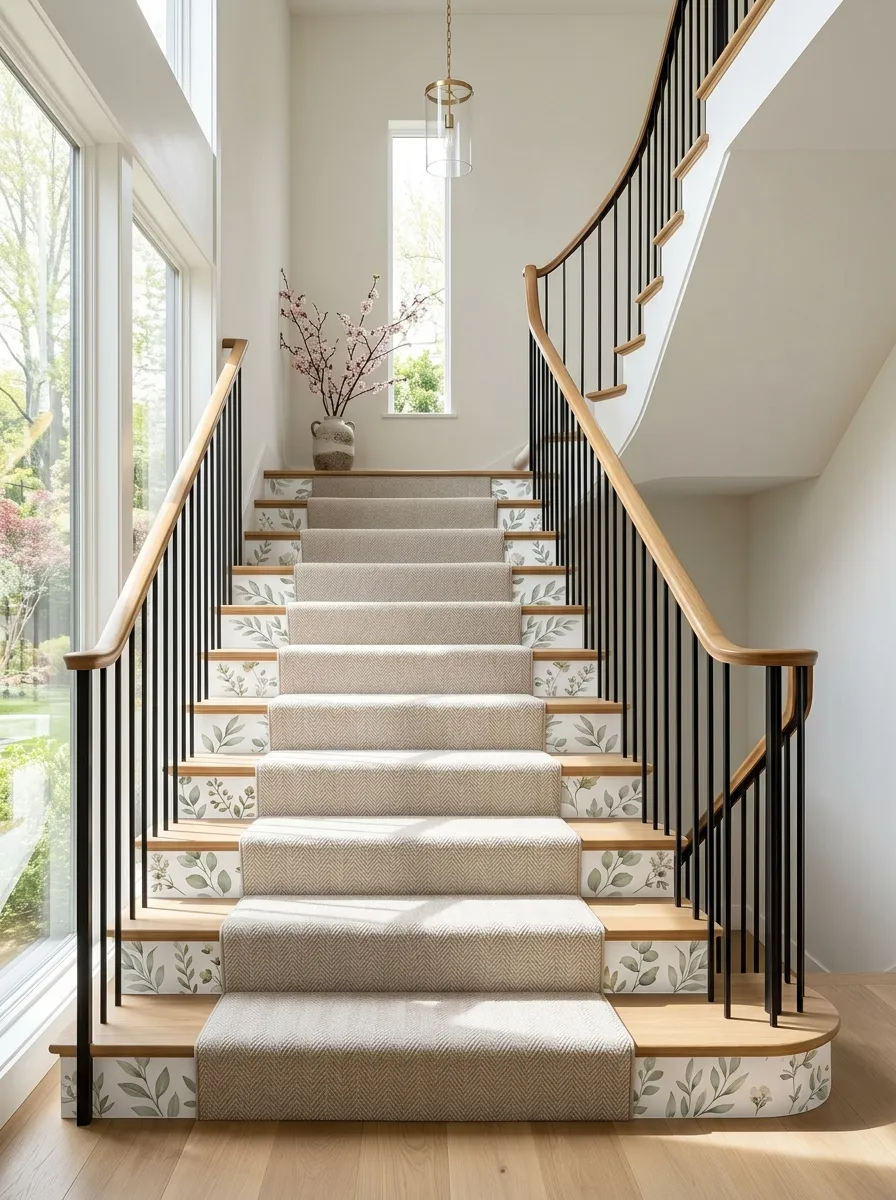
Committing to one permanent riser design forever is a lot of pressure. Removable options let the staircase shift with the season instead. Static cling decals need zero adhesive and peel off without residue, which makes swapping designs four times a year realistic instead of a chore you dread. The trade-off is durability, cling decals wear faster than anything pasted or painted, so know what you’re choosing before you commit a whole staircase to either approach.
| Method | Lasts | Effort to swap |
|---|---|---|
| Static cling | One season | Low |
| Removable vinyl | 6-12 months | Medium |
Nature Scene Mural Risers
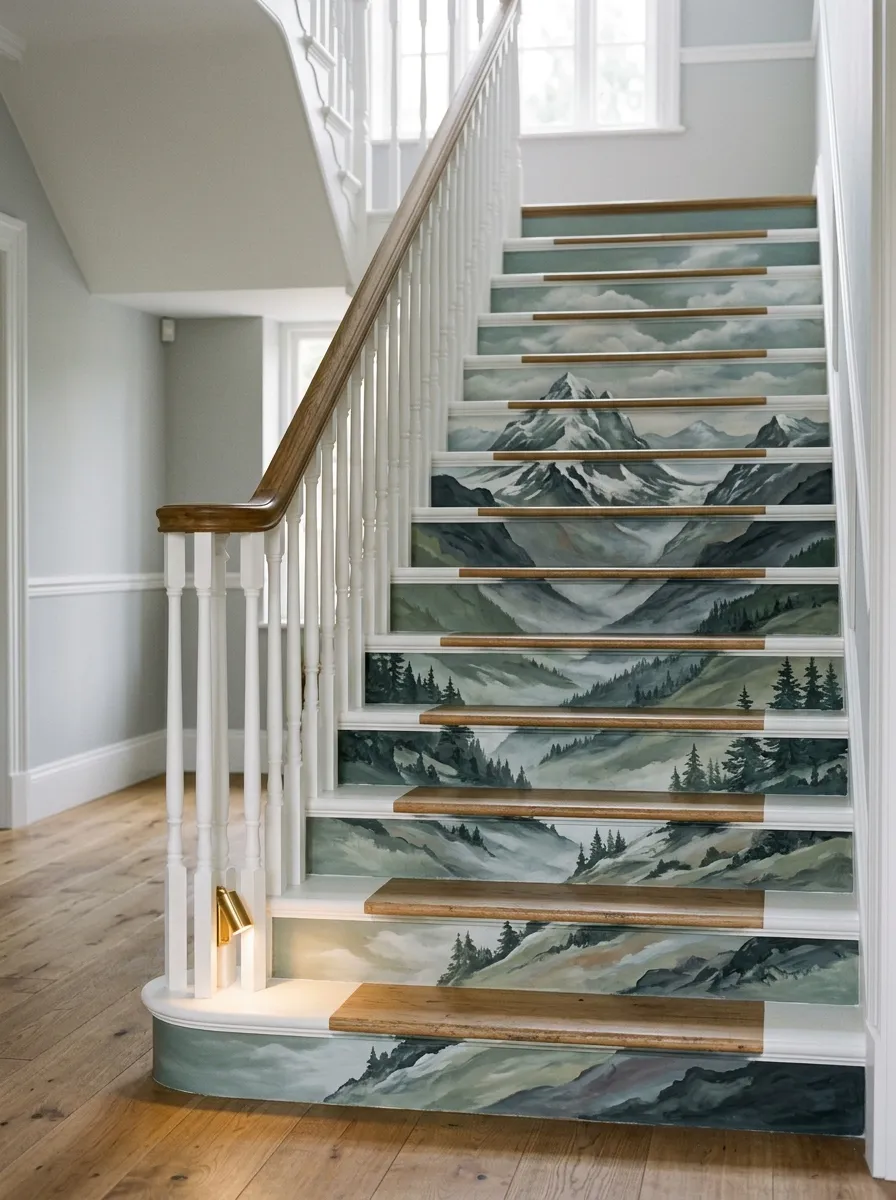
A continuous mountain range or tree line stretched across every riser turns a full staircase climb into one unfolding image, which is a completely different effect than any single-riser idea on this list. Have the mural pre-split by riser height before printing, this is not something to eyeball with scissors at home. Matte finish keeps glare off during the day. Hang a small light at the base of the stairs to catch the lowest riser, since that’s the panel most likely to sit in shadow.
Textured 3D Wall Panel Risers
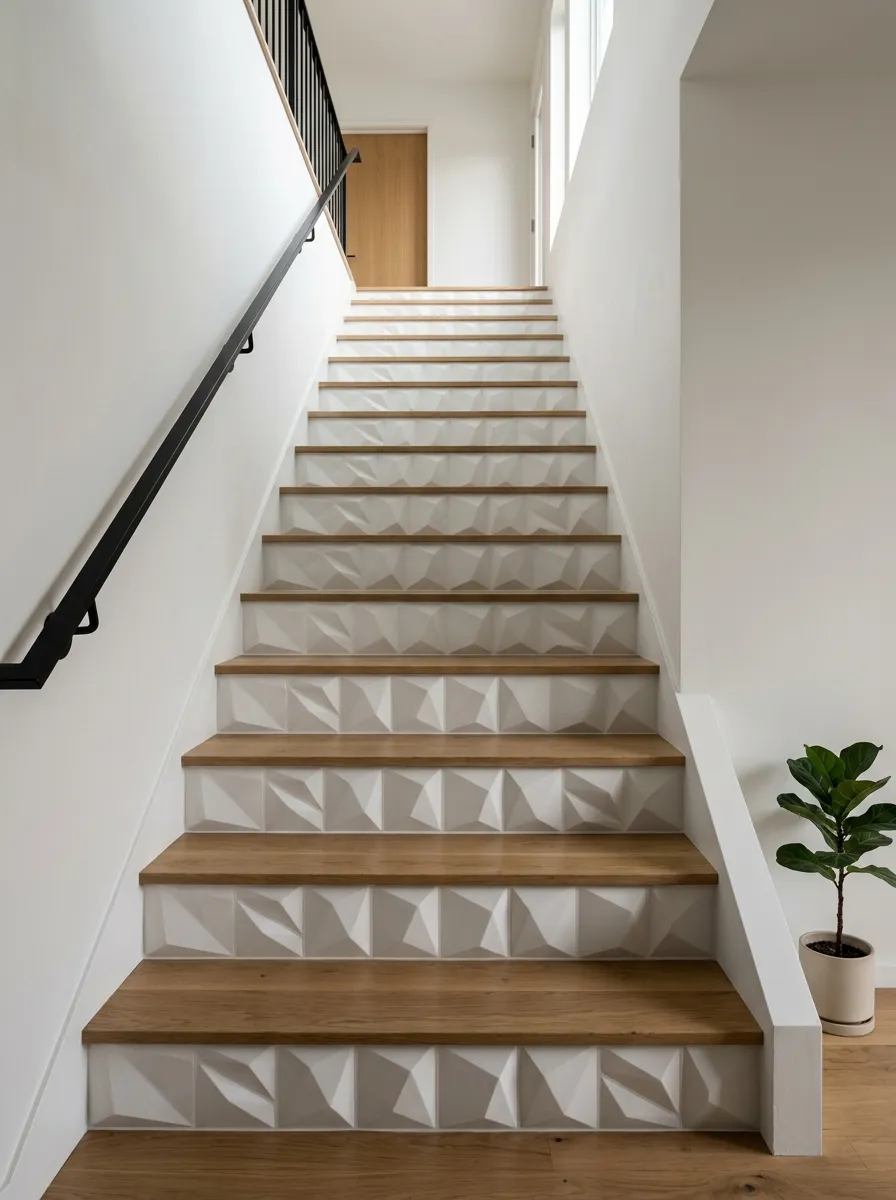
Flat surfaces dominate most staircases, so a few textured panels break that monotony fast. PVC 3D wall panels, the kind usually reserved for accent walls, cut down easily to riser size with a basic utility knife. Paint them a single tone after install rather than before, so the shadow play in the raised pattern reads clearly instead of getting lost in a busy multi-color finish. This idea carries real weight visually, so use it on every riser or skip it entirely. Doing it on just two or three looks unfinished.
Metallic Contact Paper Risers
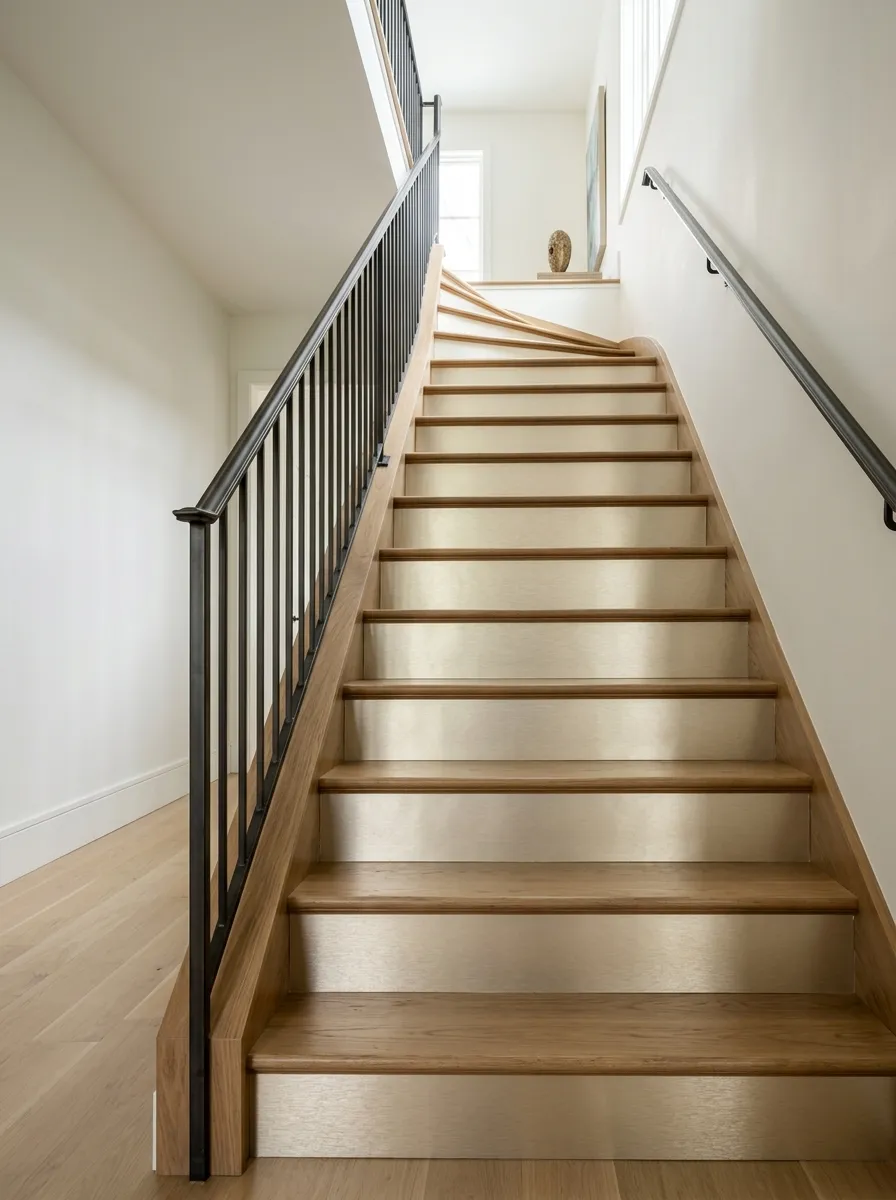
A little shine goes a long way in a dim stairwell. Metallic contact paper catches ambient light and bounces it back, which makes a dark hallway staircase feel brighter without adding a single new fixture. Brushed metal finishes hide fingerprints and dust better than high gloss chrome, worth knowing before you order a roll. Smooth application matters more here than with matte papers, since any bubble or crease shows up as a visible flaw the second light hits it.
Encaustic Tile Decal Risers
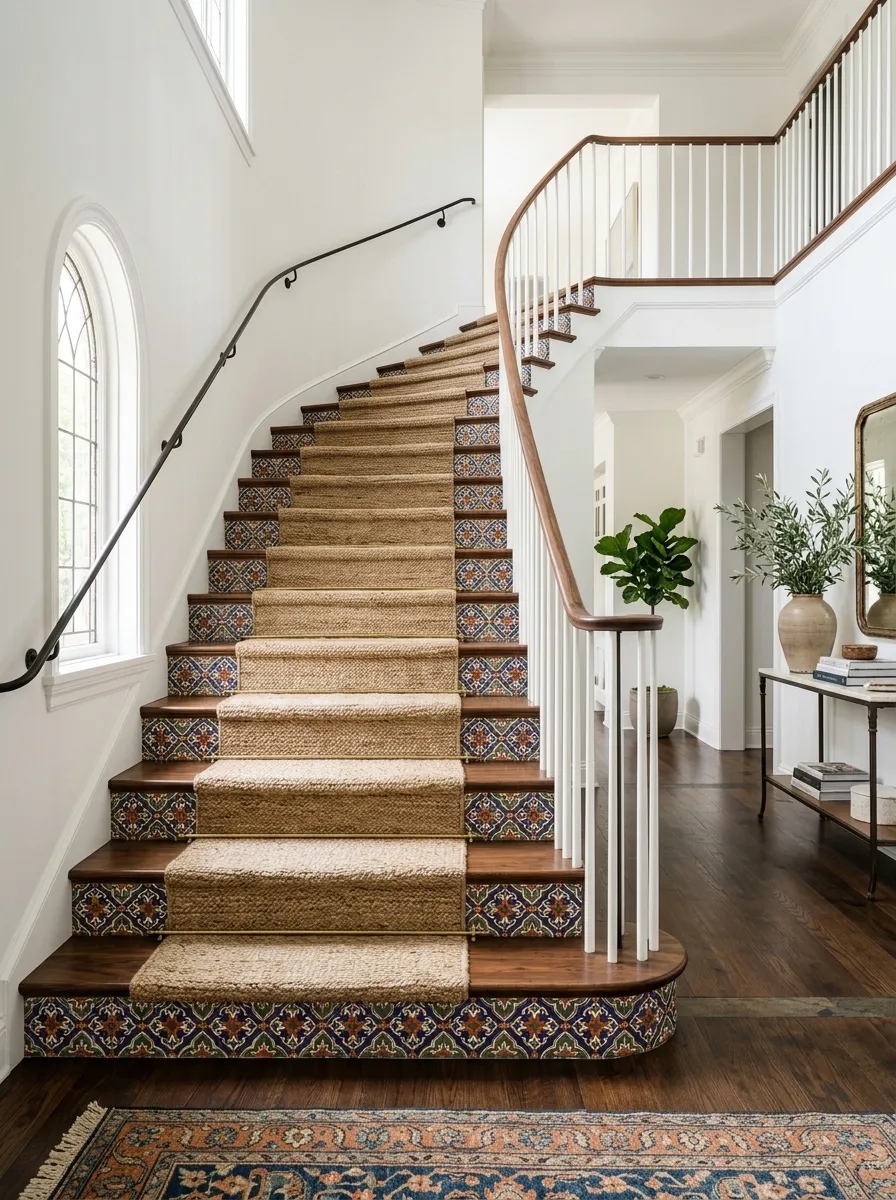
Real encaustic tile is heavy, expensive, and not something you’re installing on a vertical riser surface without serious structural work. Decal versions solve that problem completely, giving you the same bold geometric look at a fraction of the weight and cost. Order decals sized exactly to riser dimensions rather than trimming down a larger sheet, since hand-cut edges rarely stay perfectly straight. Press from the center outward when applying to push air bubbles toward the edges instead of trapping them in the middle.