
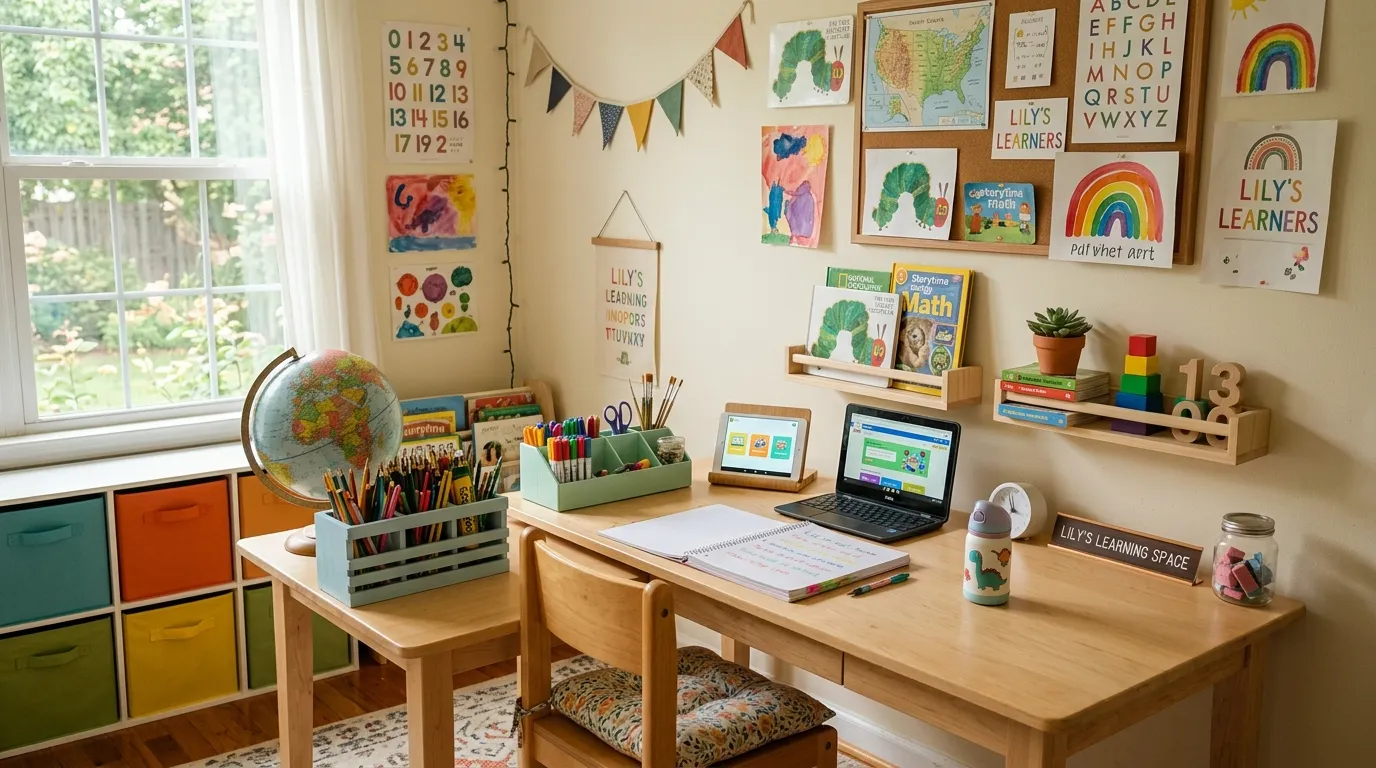
Most parents ruin their living room the second they decide to homeschool. They buy primary colored alphabet rugs, staple laminated posters to the drywall, and shove a bulky wooden desk into the corner.
That works in a massive suburban basement, but it destroys a small home. You don’t have the square footage for a dedicated classroom, and pretending you do only creates a cluttered house that stresses everyone out.
Finding small homeschool setup inspiration usually means looking at impossible Pinterest mansions or depressing folding tables. There is a better way. You can build a highly functional learning environment right in your main living space without sacrificing your home’s adult aesthetic.
The secret isn’t buying more plastic bins. It’s about using vertical space, modular furniture, and ruthless organization to create zones that disappear at 5 PM. Stop trying to replicate a public school classroom in a 1,200 square foot house. Here is exactly how to do it right.
Small Homeschool Setup Inspiration
Built-In Desk Towers
If you are tired of your dining table looking like a disaster zone, it is time to stop pretending you can clean up a workspace in five minutes. You sandwich a piece of butcher block between two pre-made bookcases and call it a day, essentially building a dedicated trap for your child to finish their worksheet.
The sage green paint job is intended to distract guests from the fact that you have sacrificed your living room aesthetic for the sake of long division. It creates an illusion of high-end custom cabinetry that hides the reality of a thousand loose erasers swept under the desk.
Keep the middle space clear by utilizing the shelves for things you only need once a year, like those science kits you bought in a fit of educational enthusiasm. The goal here is to look organized enough to satisfy your own guilt while maintaining a footprint that barely fits a single ergonomic chair.
Rolling Cart Resource Stations
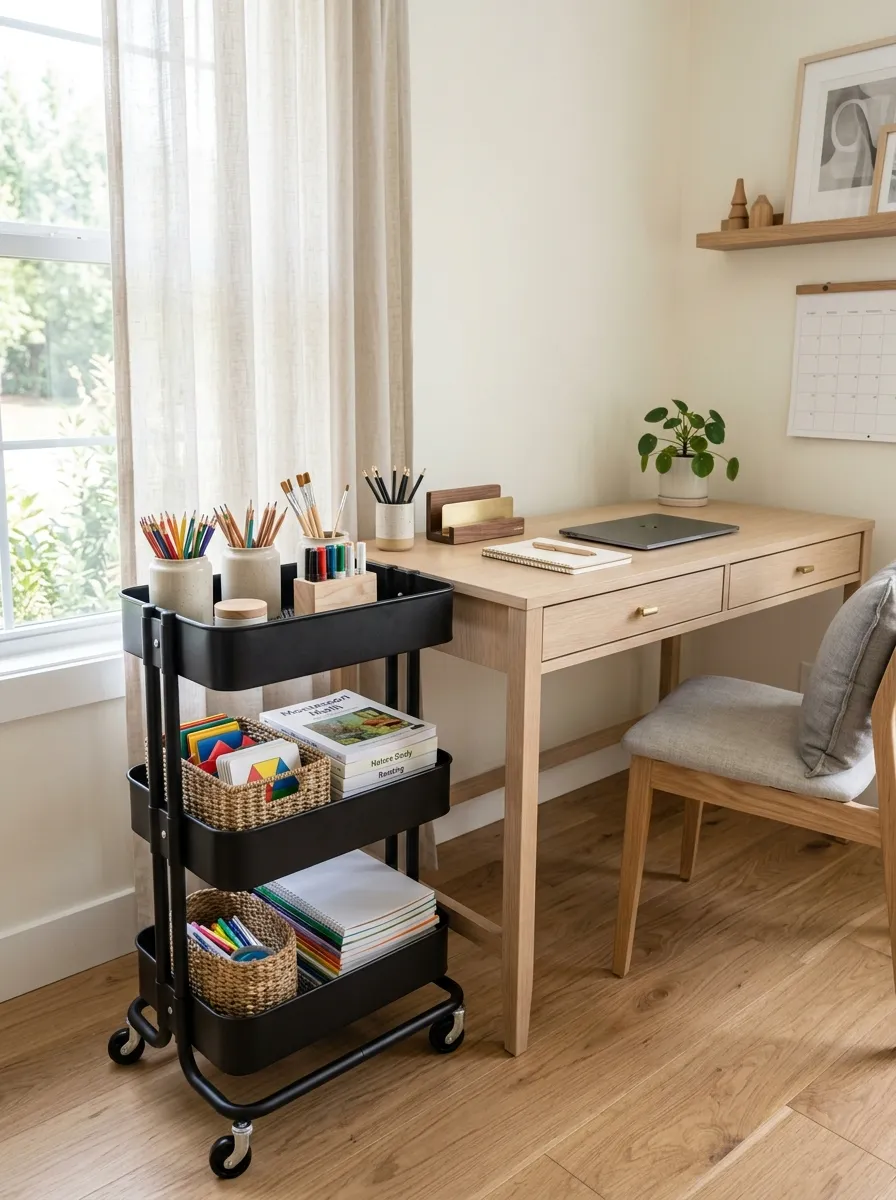
You sit down for a math lesson and realize the protractor is missing. A three tier metal rolling cart eliminates this exact wasted time.
Keep the cart organized by usage rate to maintain sanity:
- Top tier holds daily pencils, erasers, and markers.
- Middle tier fits current reading books and tablets.
- Bottom tier catches bulky art supplies and manipulatives.
Shared Minimalist Workstations
Putting two desks side-by-side is a bold strategy if your children have any capacity for bickering, but at least the clean lines look good on Instagram. By using simple drawer units as legs, you avoid the headache of complex carpentry while ensuring there is just enough desk space for both of them to compete for your attention simultaneously.
The twin pegboards are a nice touch for those who enjoy the aesthetic of hanging pens in perfect rows, though we all know they will be cluttered with random crafts within forty-eight hours. It is the perfect setup for parents who want to document their organized homeschooling life while ignoring the actual chaos just out of frame.
Everything is white and beige, which is obviously a fantastic choice for a room full of markers and glue sticks. Just accept that you will be wiping this down daily, but hey, at least the light-filled workspace might trick you into thinking learning is peaceful.
Pegboard Supply Walls
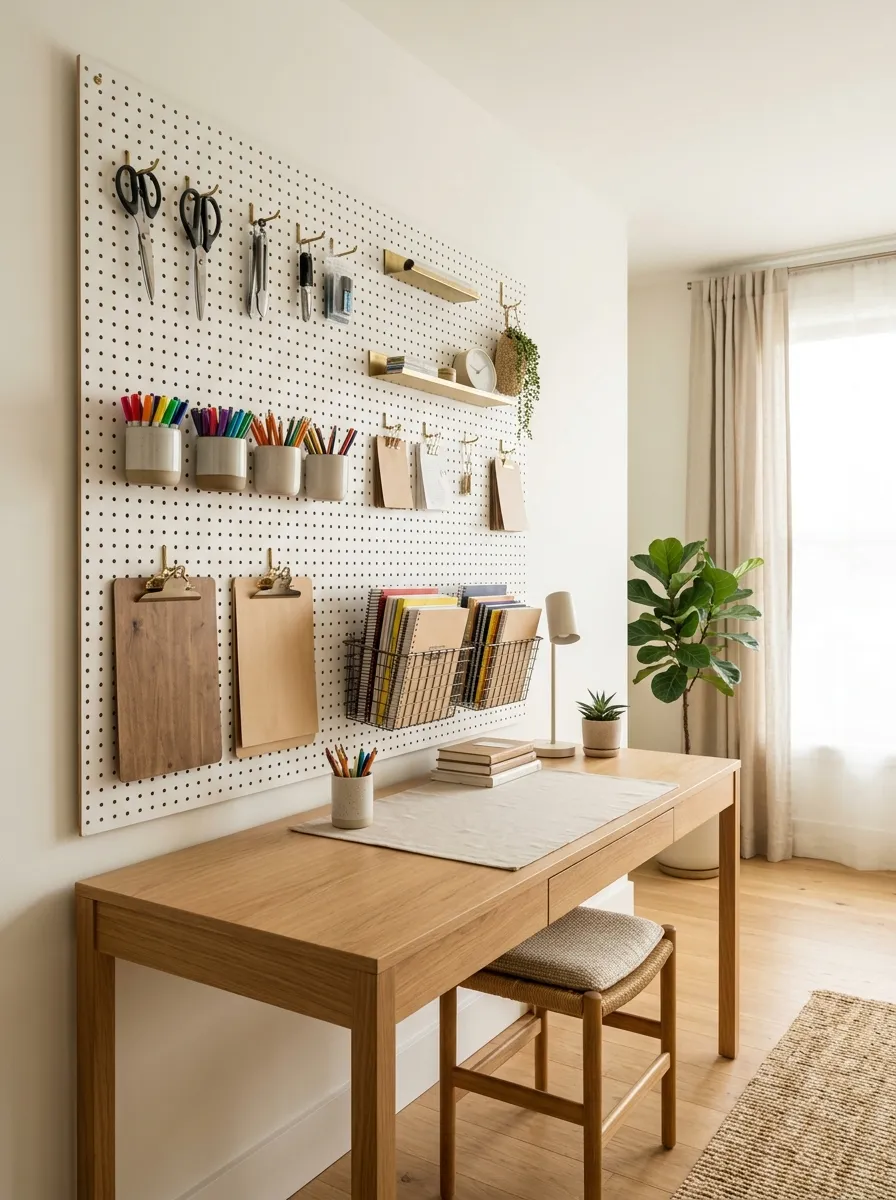
Storing scissors, tape, and rulers in a drawer guarantees they will get tangled and lost. The solution is vertical visibility.
- Paint the board the exact wall color.
- Hang small metal cups for loose markers.
- Use deep wire baskets for heavy workbooks.
You get everything off the table and keep the daily essentials at eye level. This stops kids from dumping out entire drawers just to find a single glue stick.
Closet-to-Cubby Conversions
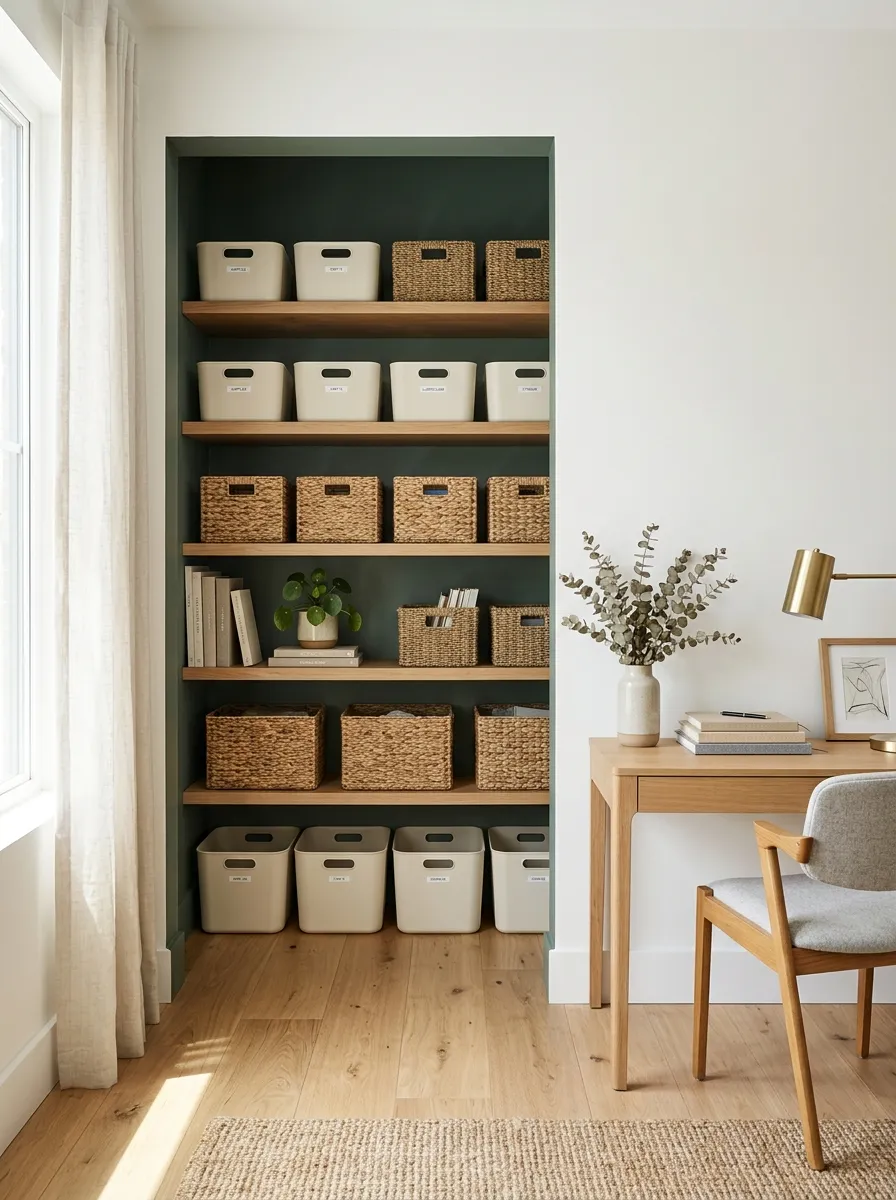
People cram school supplies into deep hallway closets and can never reach the stuff in the back.
Rip the doors off a standard closet and remove the hanging rod. Install heavy duty wooden shelves all the way up. You just created a massive built in storage alcove without losing an inch of floor space. Paint the interior a contrasting color to make it look intentional, and use uniform opaque bins to hide the visual noise of loose paper.
Under-Sofa Storage Boards
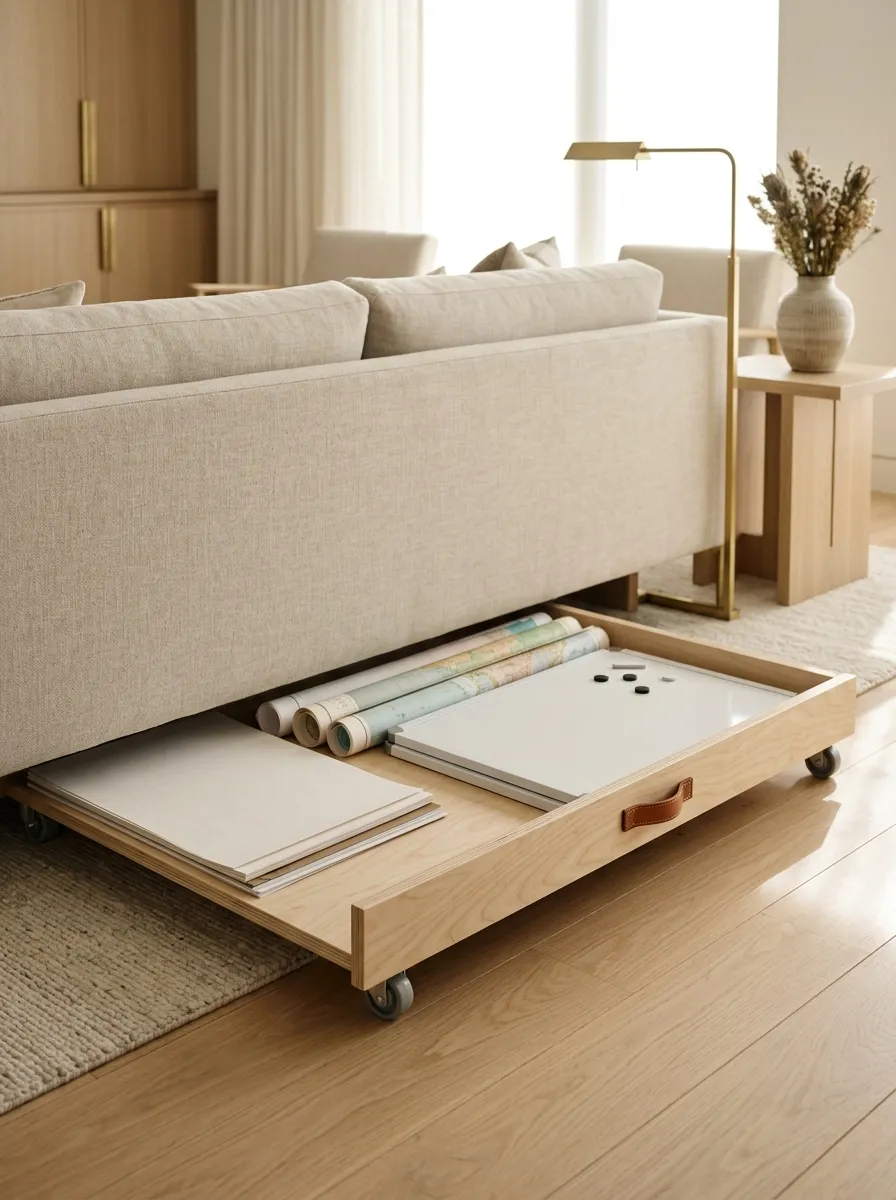
If there is a gap under your couch, you must use it. Standard plastic boxes look terrible and snag on rugs.
Instead, build a flat rolling board using quarter inch plywood and caster wheels. This holds oversized items like maps, large art paper, and whiteboards perfectly. You pull it out by a small leather tab, and it vanishes entirely when pushed back into the shadows.
Window Sill Desks
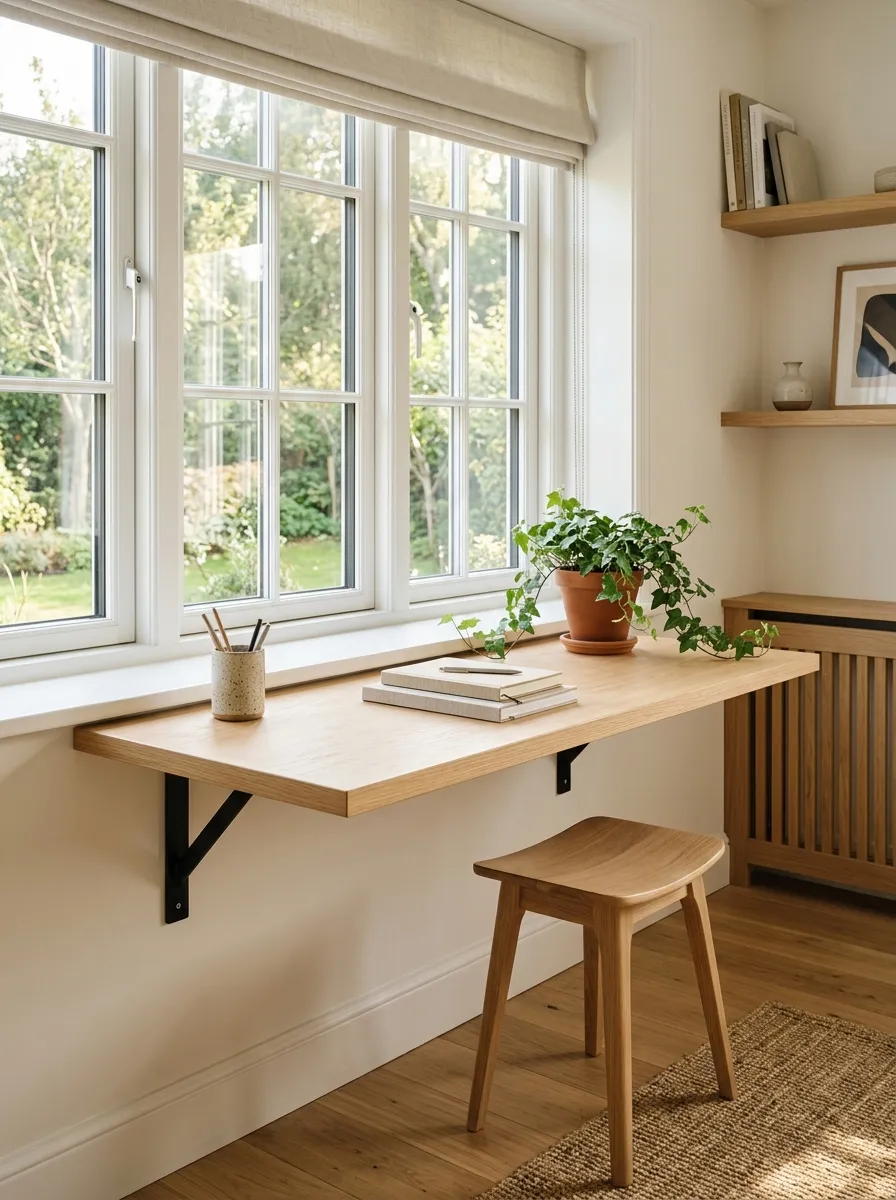
Expand your deep window sills into floating work surfaces. If your home has standard depth sills, you already possess the framing for a minimalist standing or stool-height desk.
Just screw a piece of edge-banded plywood directly over the existing sill, extending it outward by 12 inches. Add heavy-duty L-brackets underneath into the wall studs. You instantly gain a sunlit workspace without taking up a single square foot of your floor layout.
Color-Coded Canvas Bins
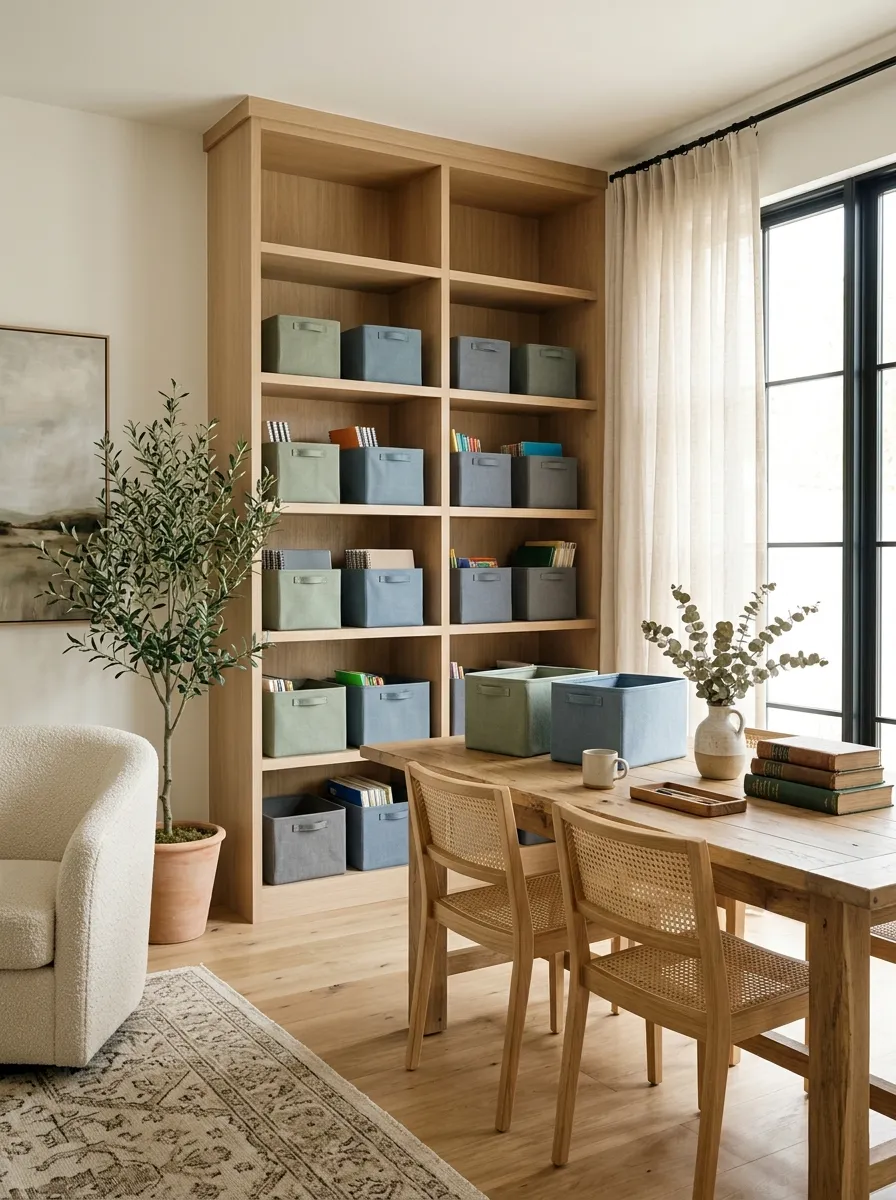
Shaving twenty minutes off your daily transitions changes everything. When kids know exactly where to grab their math books without asking, the whole day flows better.
Assign a specific color to every subject.
Math gets green canvas bins, language arts gets blue, and science gets gray. Don’t use plastic tubs. Fabric bins look mature on your living room shelves and hide the chaotic spiral notebooks inside. When it’s time for a lesson, they pull the specific colored bin straight to the table.
Clip-On Task Lighting
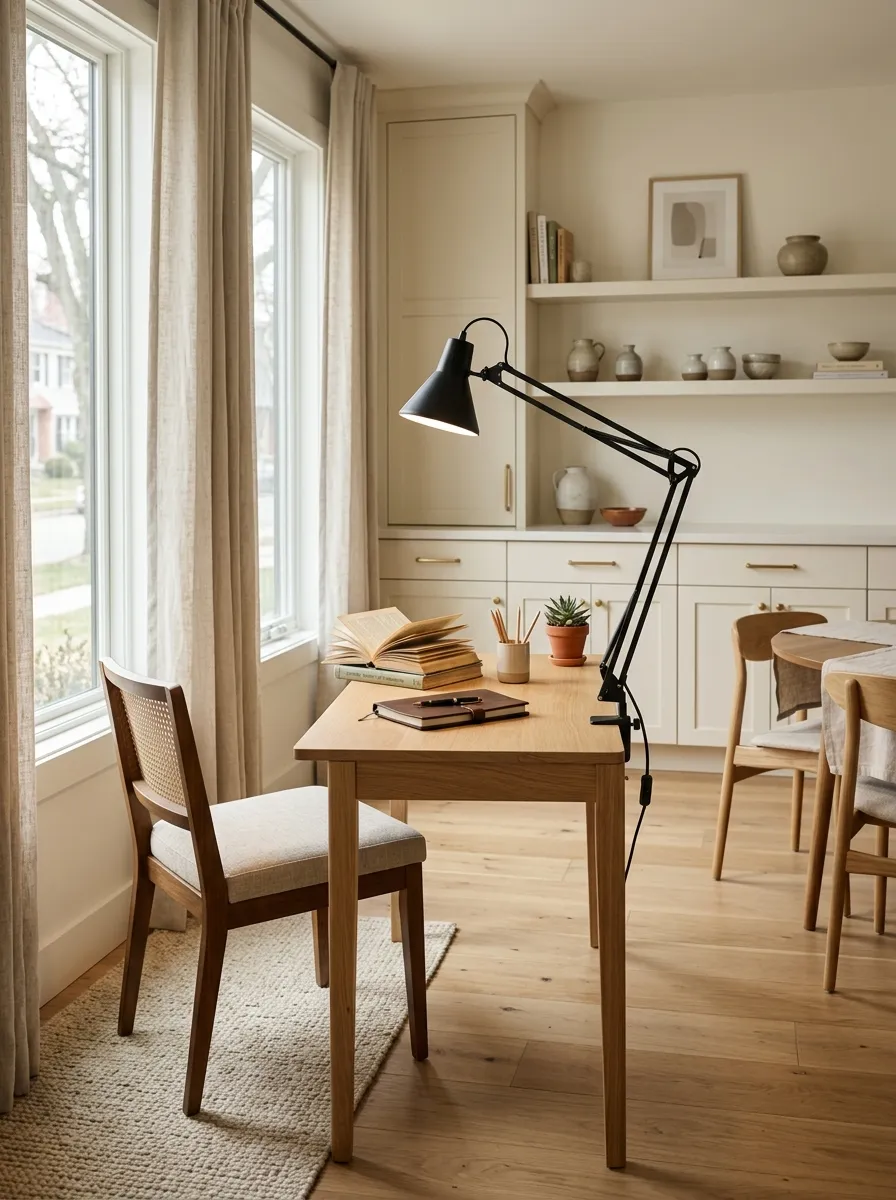
Relying on your living room ceiling fan light guarantees eye strain and headaches. Recessed lighting casts terrible shadows right where your kid needs to focus on their handwriting.
Clip-on architectural task lamps fix the lighting deficit immediately.
Buy matte black or brass clamp lamps and attach them directly to the edges of your dining table or window sill desks. They provide direct, focused illumination and easily unclamp when you put the room back together for the evening.
Fold-Down Murphy Desks
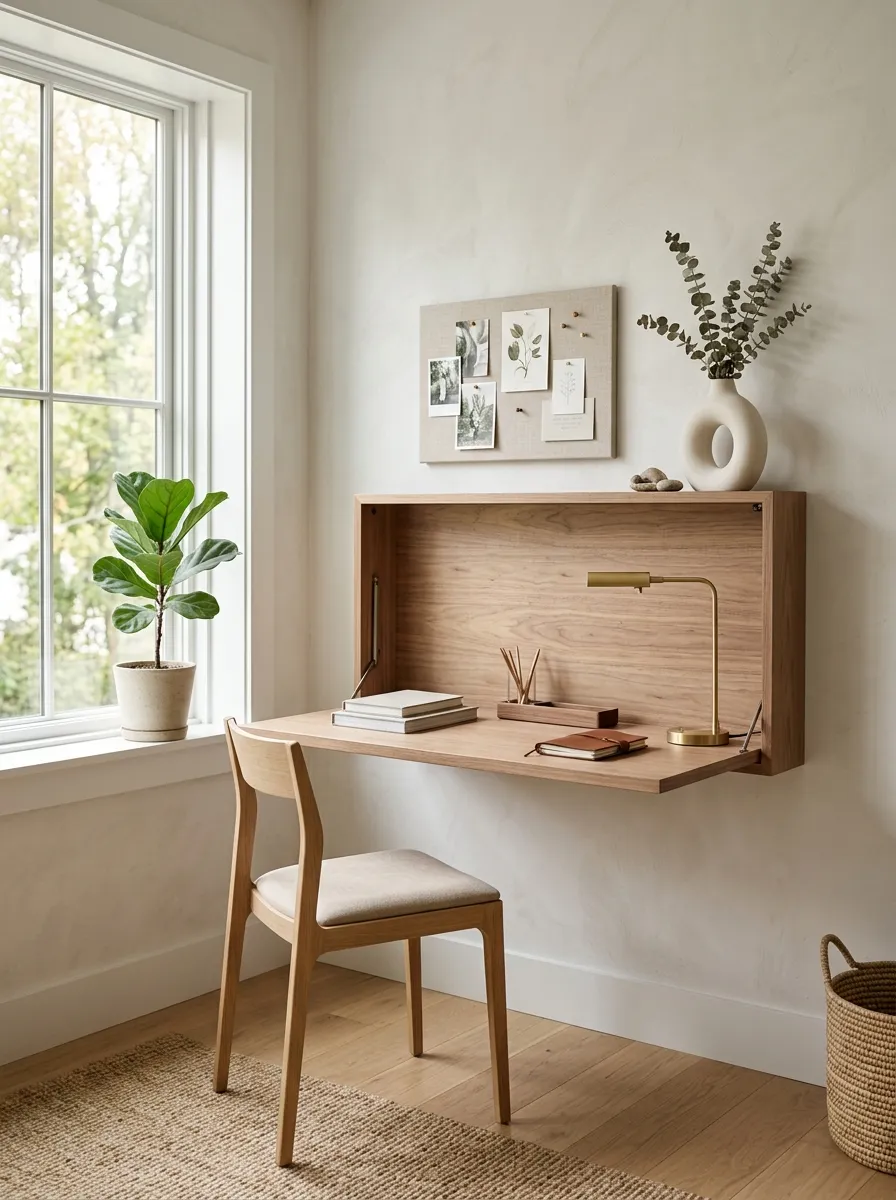
A closed wooden box flat against the wall looks like modern art, not a piece of school furniture. Murphy desks are the ultimate space-saving cheat code.
- They fold down on heavy hinges.
- They provide a rock solid writing surface.
- They hide a shallow interior meant for laptops.
When the math test ends, you fold it flat. The visual mess disappears entirely behind a sleek wood panel. Just ensure you mount it at the correct ergonomic height for your child’s seating.
Middle Schoolers: Mount the desktop surface at 27 inches from the floor.
Note: Always measure while the child sits in their dedicated chair.
Over-the-Door Organizers
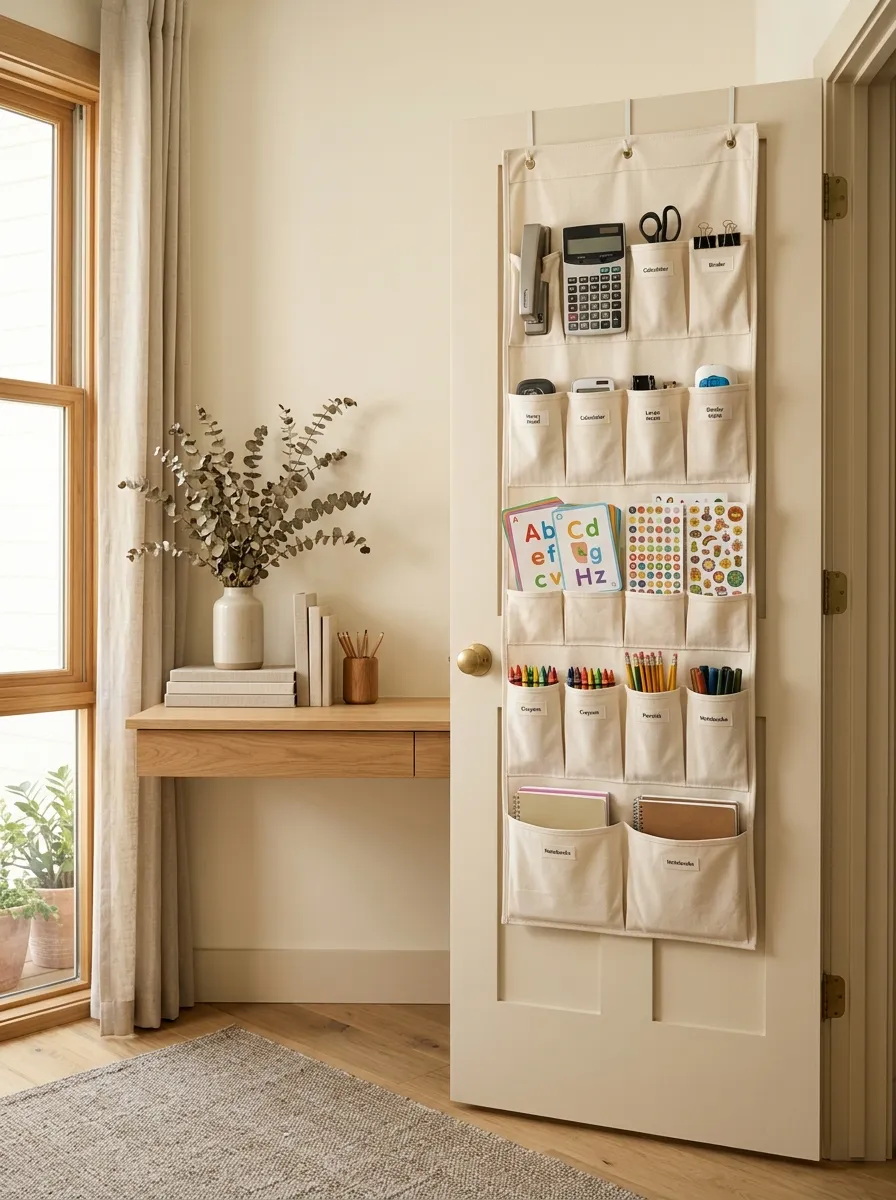
Flashcards, calculators, and glue sticks inevitably scatter across every flat surface by noon. You need micro-storage that doesn’t eat up your premium shelf space.
Hang a heavy-duty canvas shoe organizer on the inside of your coat closet door.
It creates twenty-four distinct pockets for loose items. Dedicate the bottom rows to things the kids need to grab themselves, and keep the sharp objects up top. It takes exactly zero square feet of floor space and keeps your counters pristine.
| Pocket Material | Durability | Best Use Case |
|---|---|---|
| Clear Plastic Vinyl | Prone to tearing at seams | Lightweight items (flashcards, stickers) |
| Opaque Canvas Canvas | Highly durable | Heavy tools (calculators, staplers, scissors) |
Hidden Printer Cabinets
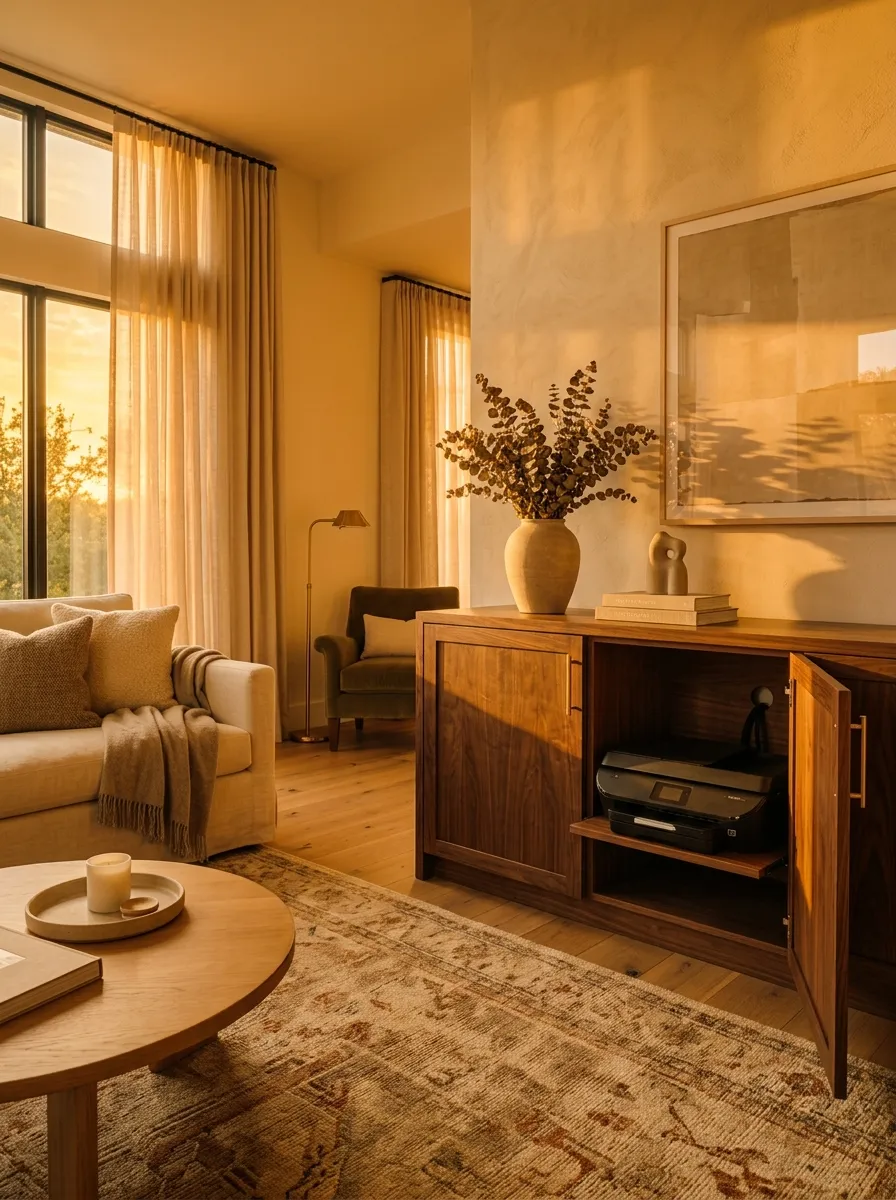
You print worksheets every morning, and that bulky plastic machine dominates your sideboard. Printers are a massive eyesore. Don’t leave yours out on display like it’s office furniture.
Hide it completely. Drill a two-inch hole in the back of a standard living room console cabinet. Route the power and USB cables directly through the back panel to the wall. You keep the doors closed 99% of the time, maintaining your adult living room aesthetic, and only open them when you actually need to retrieve a paper.
Magnetic Chalkboard Walls
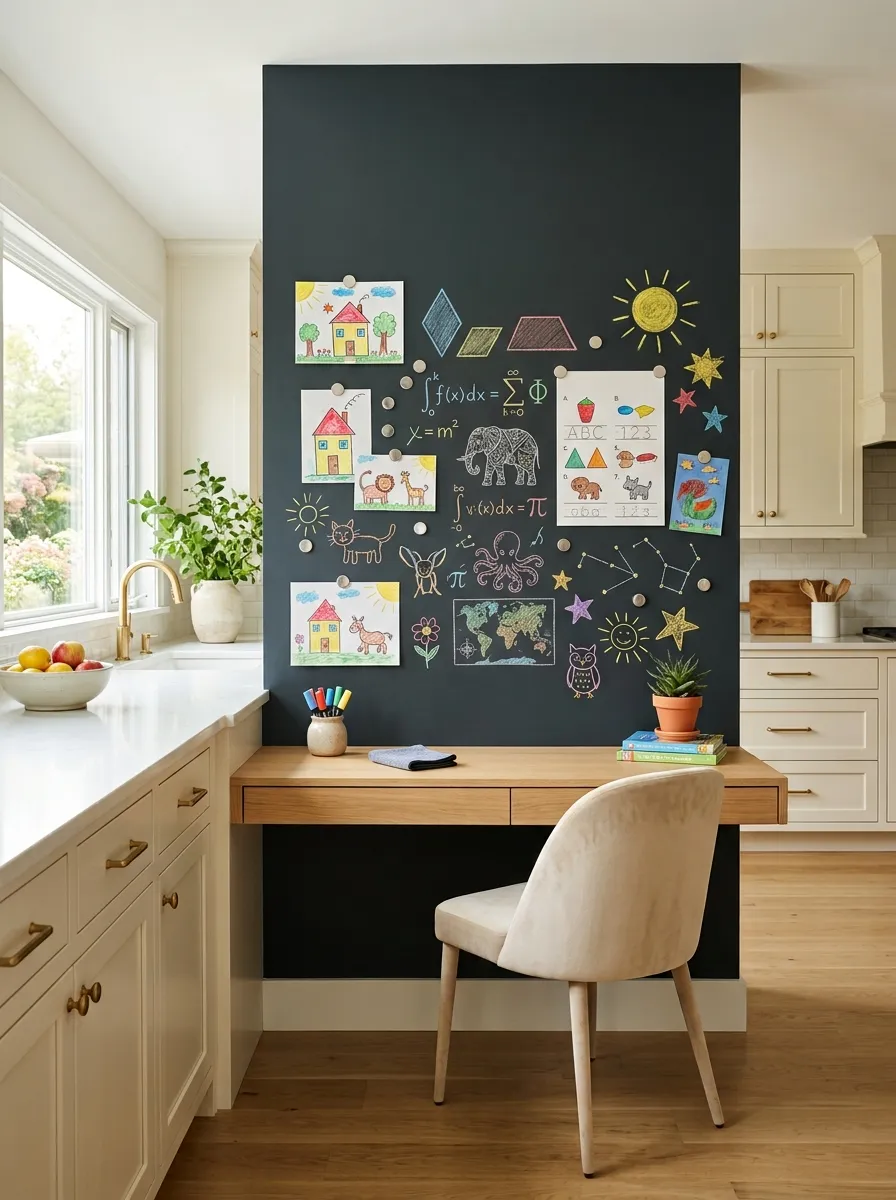
People paint massive chalkboard walls in their kitchens and immediately regret the mess. Traditional chalk coats your baseboards and floors in a fine white powder within minutes.
The concept of a vertical writing space is solid, but the execution usually fails. You’ll fix this entirely by switching to magnetic primer and zero-dust chalk markers. You get the massive, dark aesthetic of a chalkboard and a huge magnetic surface for hanging art, and you won’t need a vacuum at the end of the day.
Rug-Defined Learning Zones
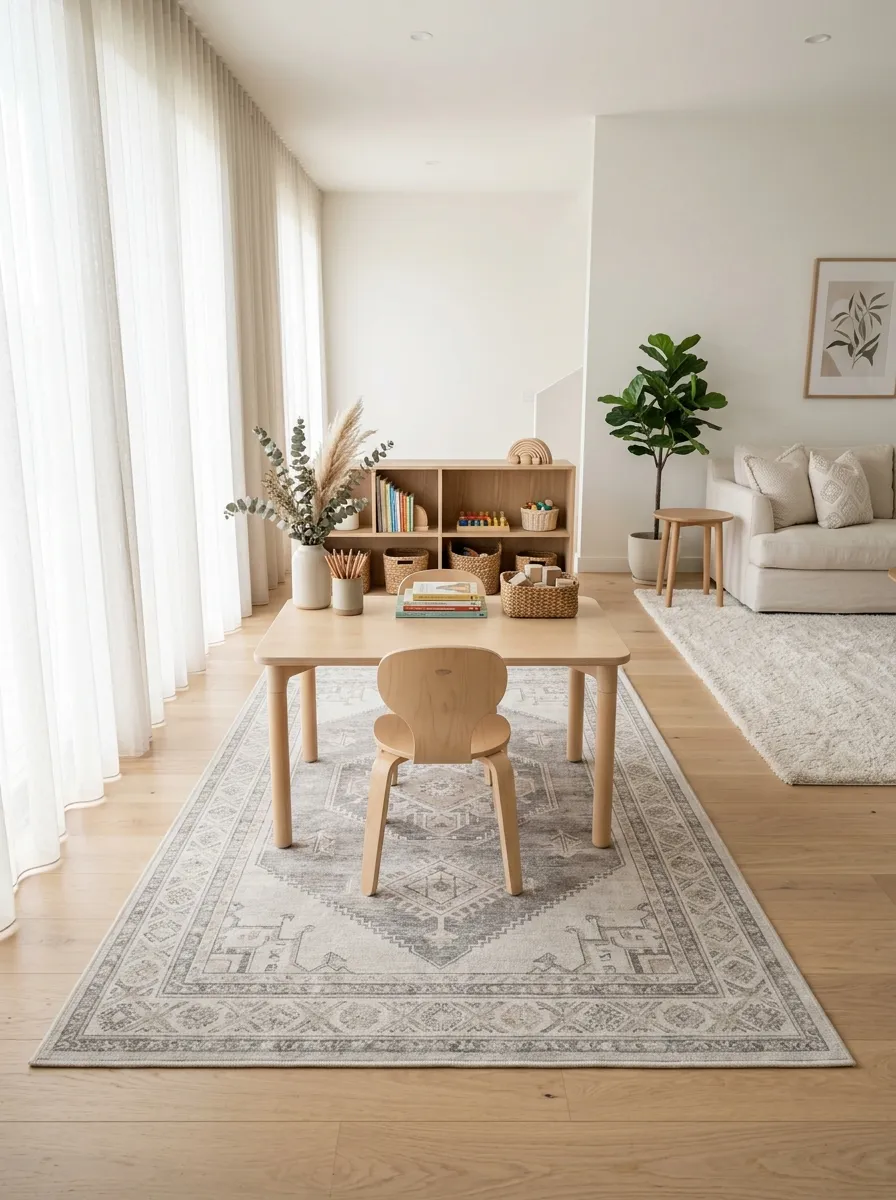
Visual boundaries matter more than physical walls in an open concept home. You don’t need a heavy room divider to separate the school area from the living area.
A simple 5×8 area rug dictates the exact boundaries of your learning space. Kids inherently understand that the space inside the rug’s border is for schoolwork. When their chair slides off the edge, they know they left the zone. Choose a low-pile, washable rug to handle dropped markers and rolling chairs without getting ruined.
Floating Book Ledges
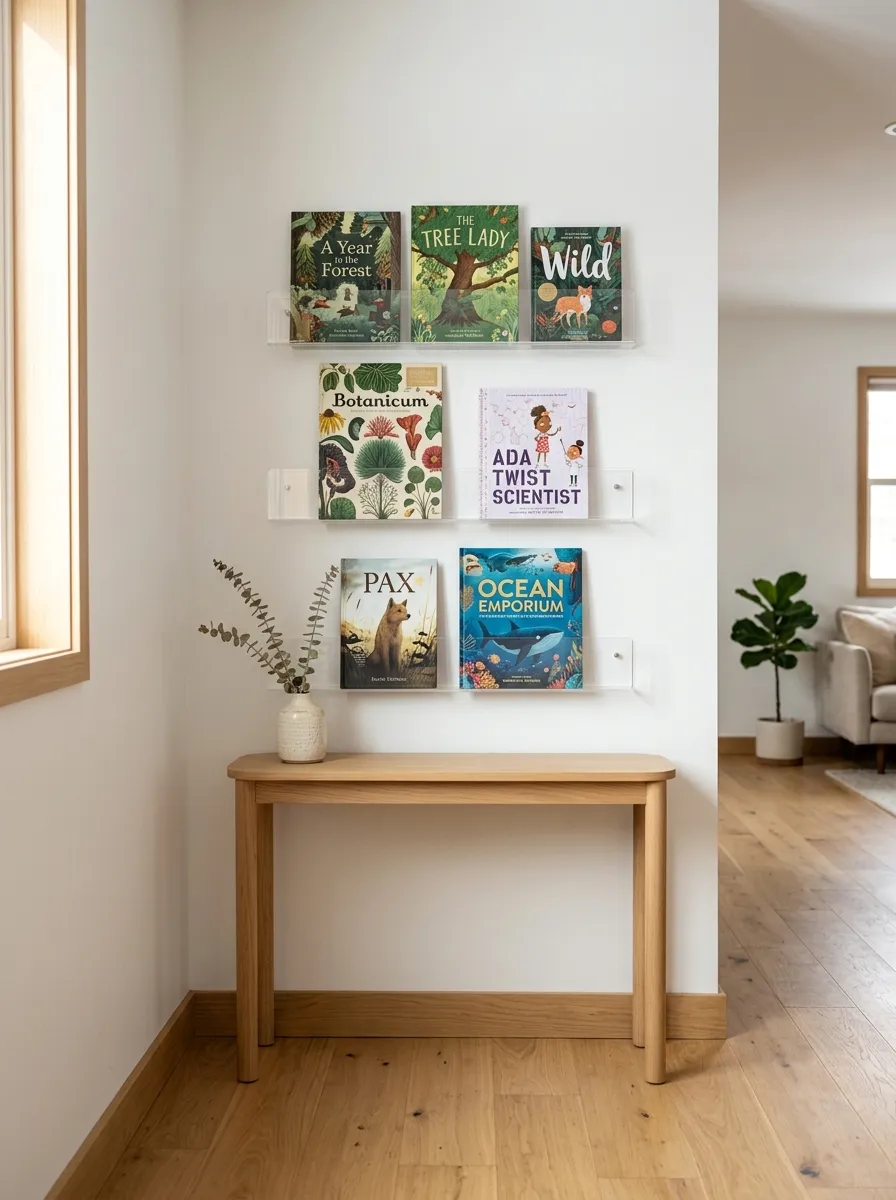
Front-facing books get read ten times more often than spined books. Traditional deep bookcases bury the covers and invite kids to shove items haphazardly onto the shelves.
Swap them for shallow, floating acrylic ledges. They hold only a curated selection of current reading materials and display the covers like artwork. Because they’re only three inches deep, they won’t block the walking path. You can mount them right behind open doors or in narrow hallways to maximize dead space.
Stackable Floor Cushions
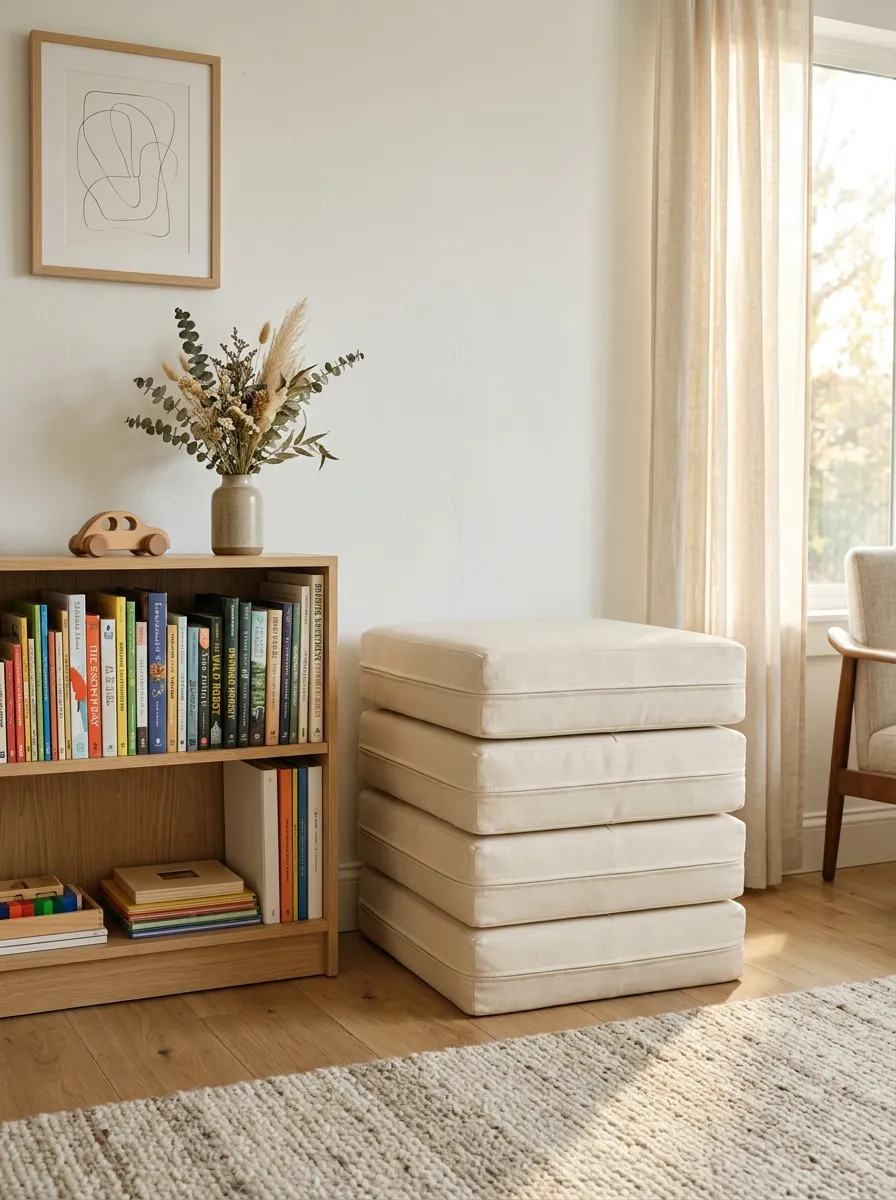
Kids refuse to sit in rigid chairs for four hours straight. They inevitably end up on the floor doing their reading or math.
Don’t fight the floor time. Support it properly. Invest in high-density foam floor cushions instead of floppy bean bags that leak and lose their shape. When the school day wraps up, firm cushions stack neatly into a compact tower in the corner. They pull double duty as extra seating for adult guests and keep your floor layout entirely flexible.
The Corner Banquette Desk
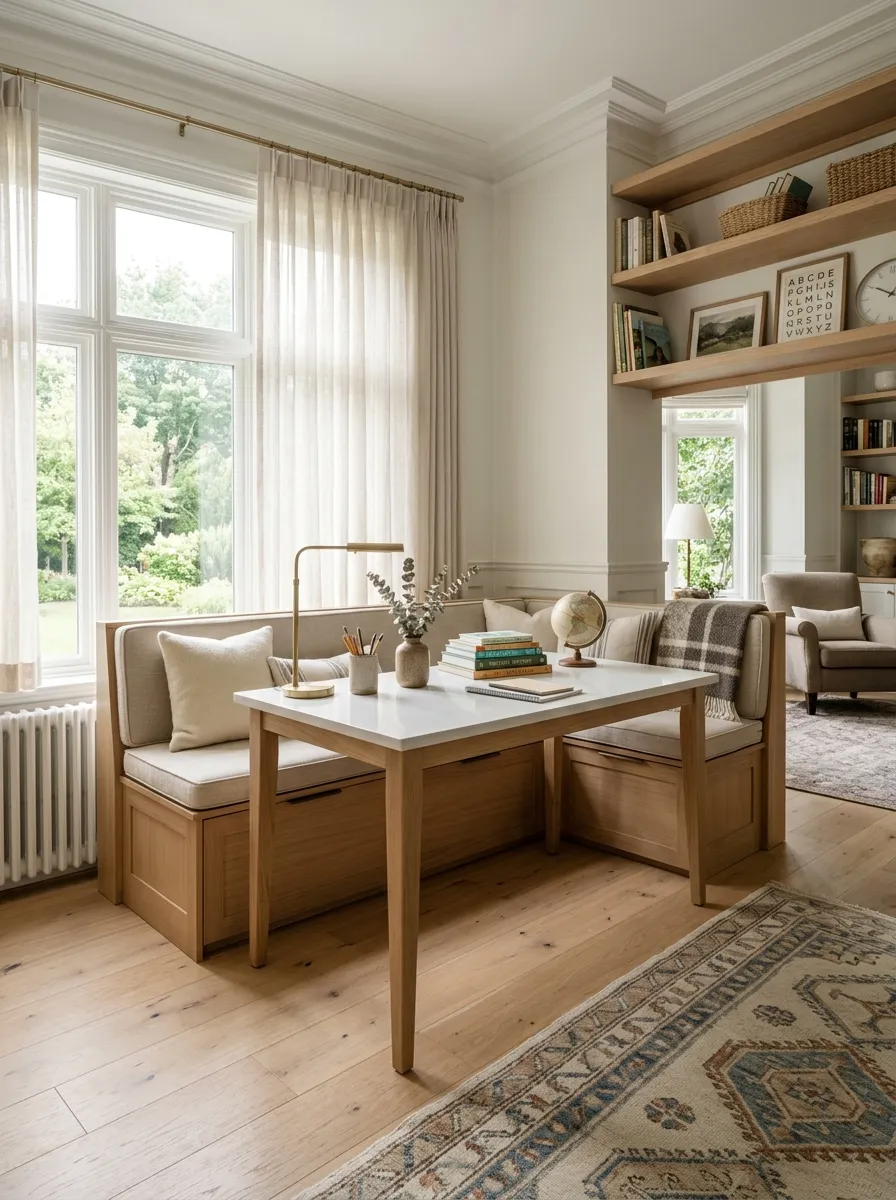
Unused living room or breakfast nook corners are goldmines for space efficiency. Standard desks leave awkward dead space behind them and require clearance for pulling out chairs.
Build or buy L-shaped banquette seating with lift-up top lids.
- The bench seating accommodates multiple kids side by side.
- The interior holds months of past curriculum and extra paper.
- The overall layout takes up half the footprint of traditional desk setups.
Pair it with a narrow rectangular table for a dedicated study hub that doubles as a cozy reading corner on weekends.
Mobile Whiteboard Partitions
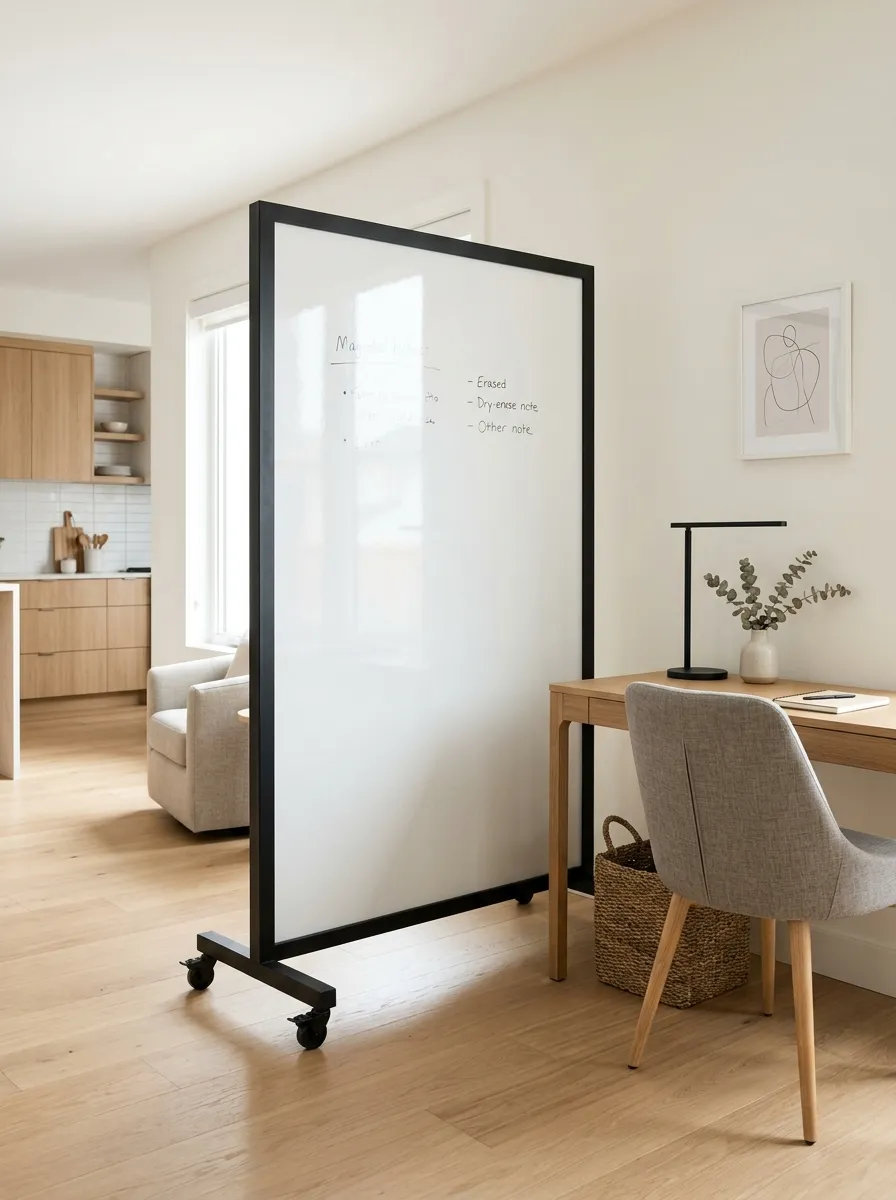
A small room often lacks enough wall space to mount a full-size whiteboard. Small handheld boards end up lost, while giant wall boards ruin living room decor.
Use a thin, mobile whiteboard on a minimalist rolling frame.
It acts as a physical room partition during instruction time, blocking visual distractions from the kitchen or TV area. When class ends, roll it straight into a closet or slide it flat against the side of the refrigerator.
Ottoman Storage Cubes
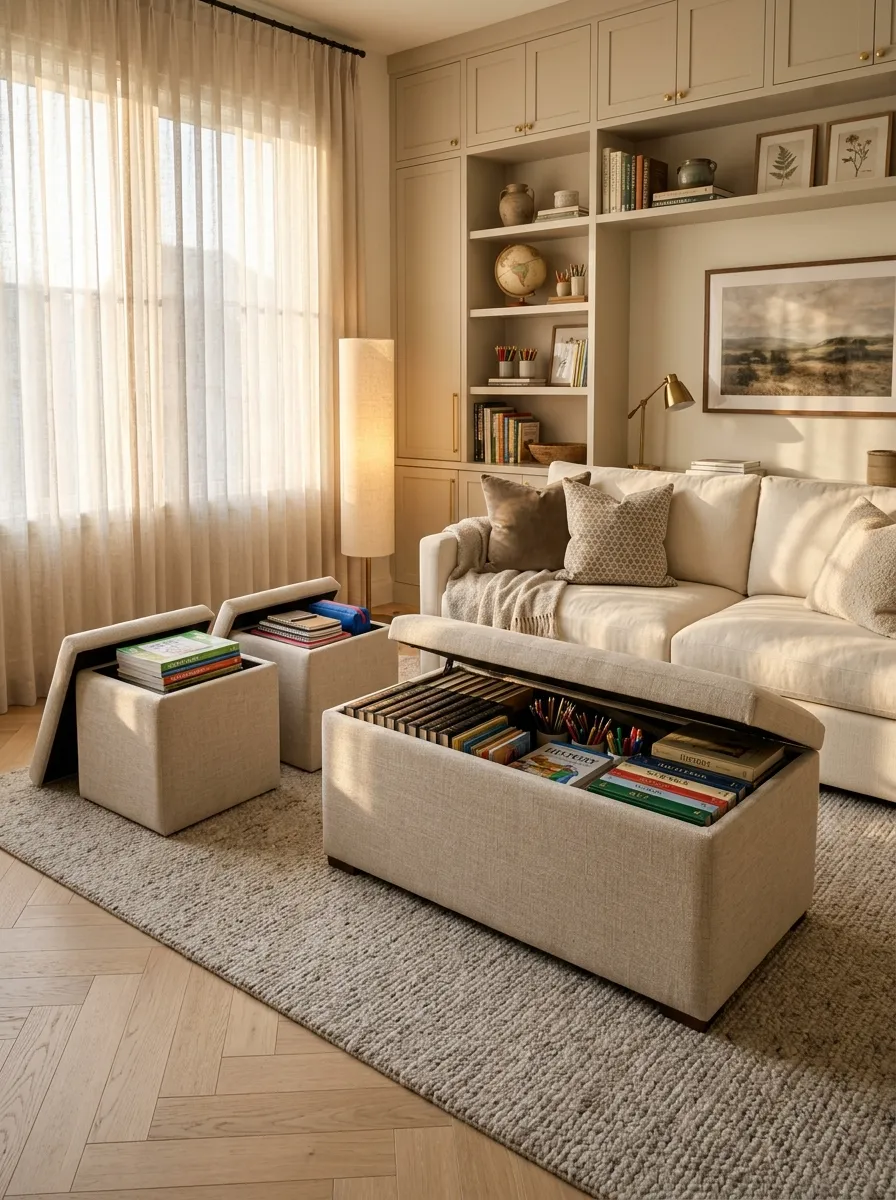
Squeezing extra wooden chairs into a small living area creates clutter and restricts walking paths. You need versatile seating that hides school supplies when not in use.
Replace standard chairs with upholstered storage ottomans.
- They tuck completely under the dining table when not in use.
- They provide padded seating that encourages comfortable posture.
- The tops lift off to reveal deep internal storage space.
Use them to store heavy items like history encyclopedias and science kits that don’t need to be out every single day.
Tension Rod Art Displays
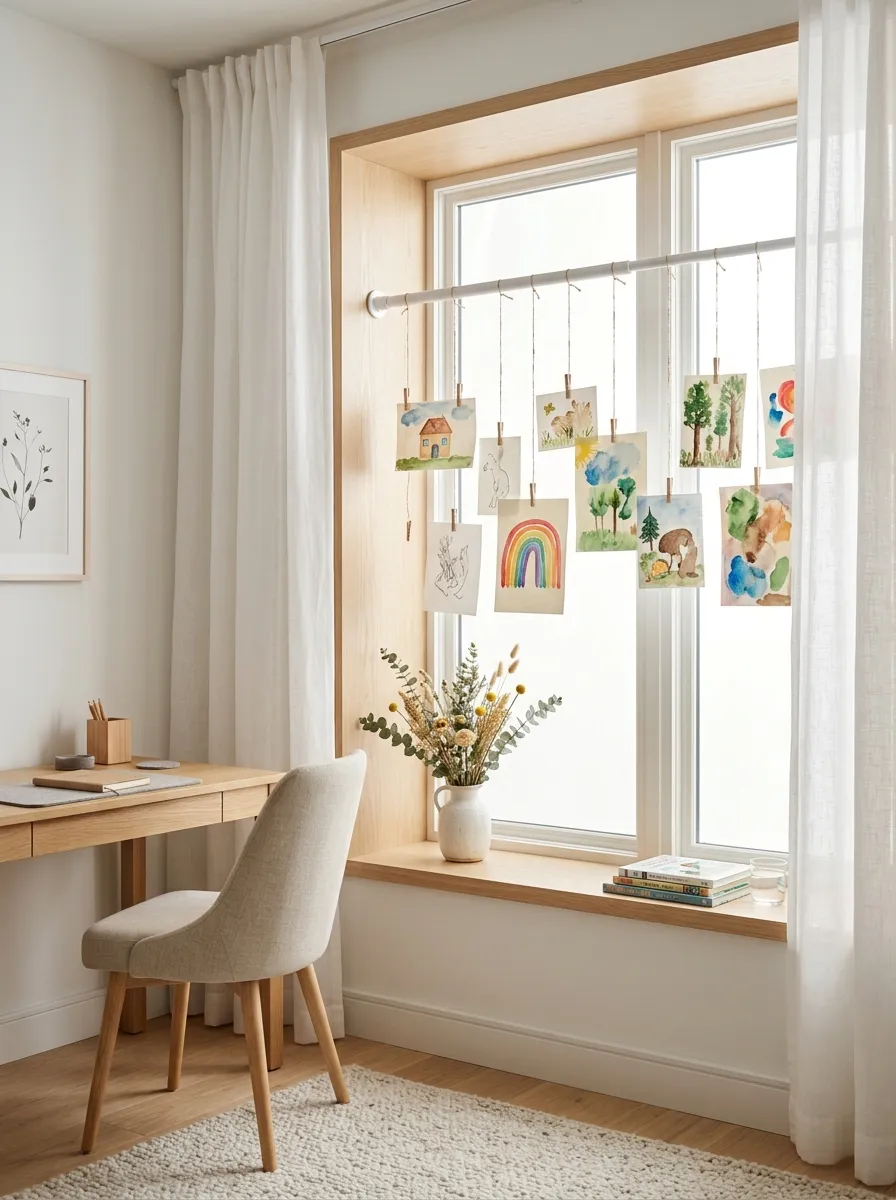
Taping wet painting projects or art pieces to the walls damages your paint and creates visual chaos. You need a dedicated, damage-free drying zone.
Install an adjustable tension rod inside a window frame or between two narrow walls.
Attach small wooden clothespins to the rod using twine. Kids hang wet artwork immediately after finishing, keeping it off tables and countertops. It transforms your window or nook into a temporary gallery space that takes up zero physical floor area.
The Under-Stair Nook
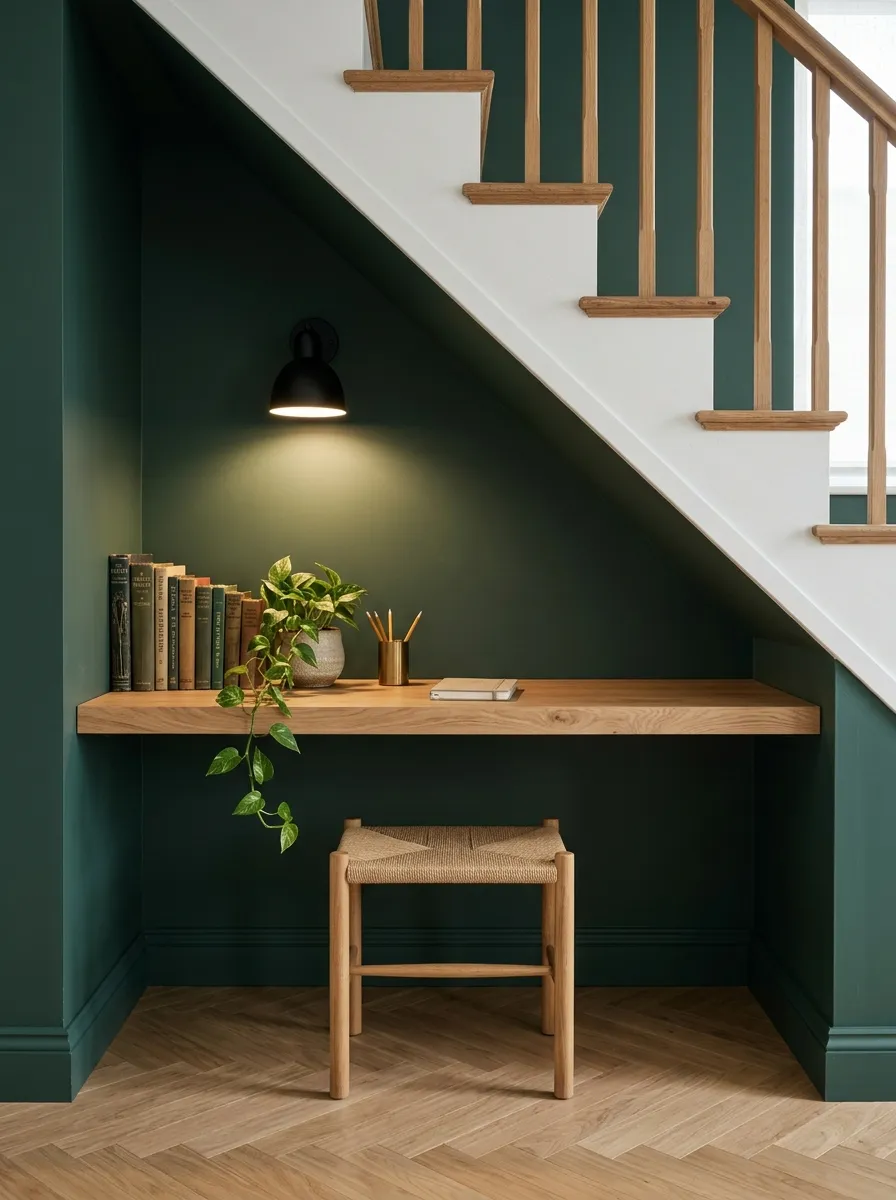
That weird, angled space beneath your stairs usually just collects old vacuums and winter coats. It is actually the perfect footprint for a high-focus reading station.
Clear out the junk and paint the inside a warm, deep color like forest green. Install a simple floating desk across the widest section. The natural enclosure of the stairs creates a distraction-free pod that kids naturally gravitate toward for quiet reading blocks or independent math work.
Rotating Supply Trays
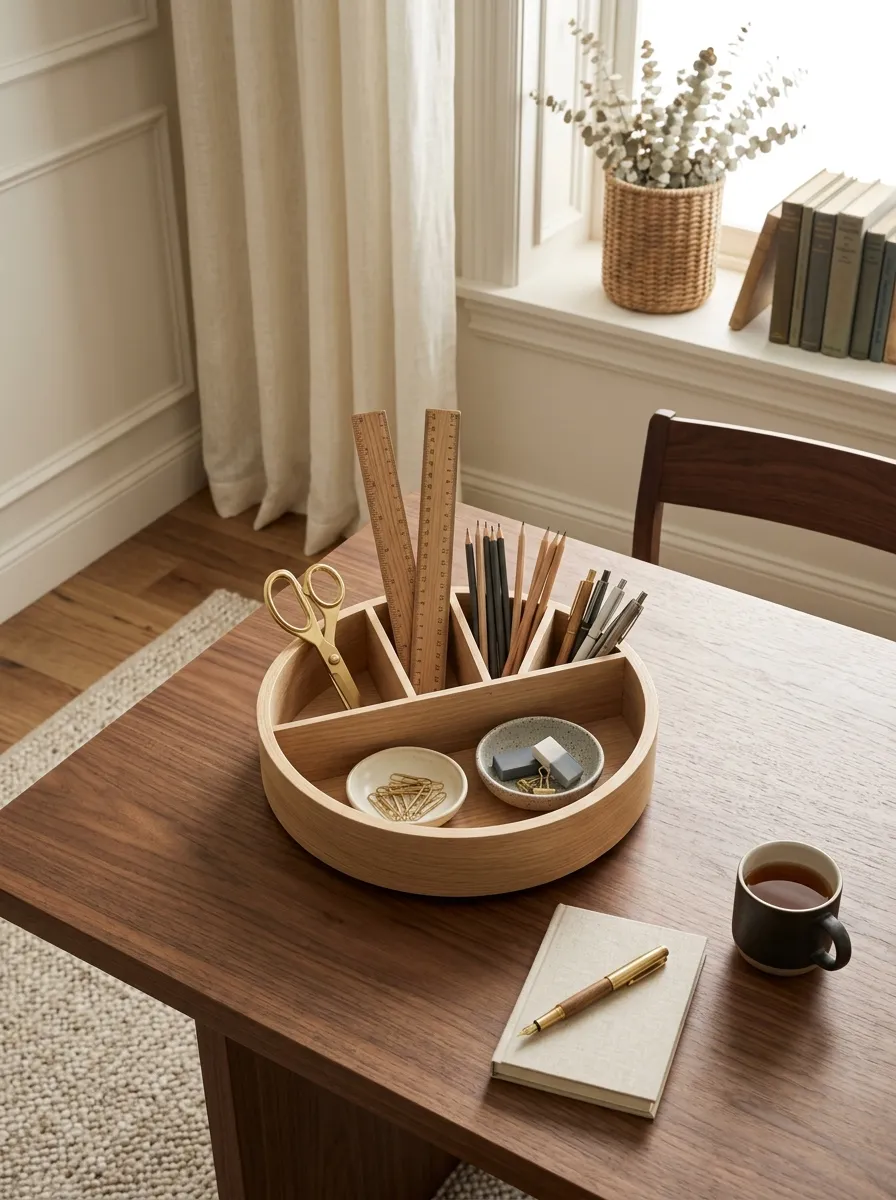
Keeping common items in individual pencil boxes means constant opening and closing, and lost lids scattered across the dining table.
Consolidate the daily shared tools into a spinning lazy Susan. Place it directly in the center of the table during work hours.
- Everyone reaches what they need without standing up.
- It corrals the mess into a tight, manageable circle.
- One swift motion moves all the supplies back to the cabinet when lunch begins.
- Divided Compartments: Crucial for keeping paperclips separated from erasers and pushpins.
- High Sides: Ensures tall scissors and heavy rulers don’t tip outward during rotation.
- Rubber Base Pads: Prevents the tray from scratching the dining table finish when spun quickly.
Expanding Drawer Inserts
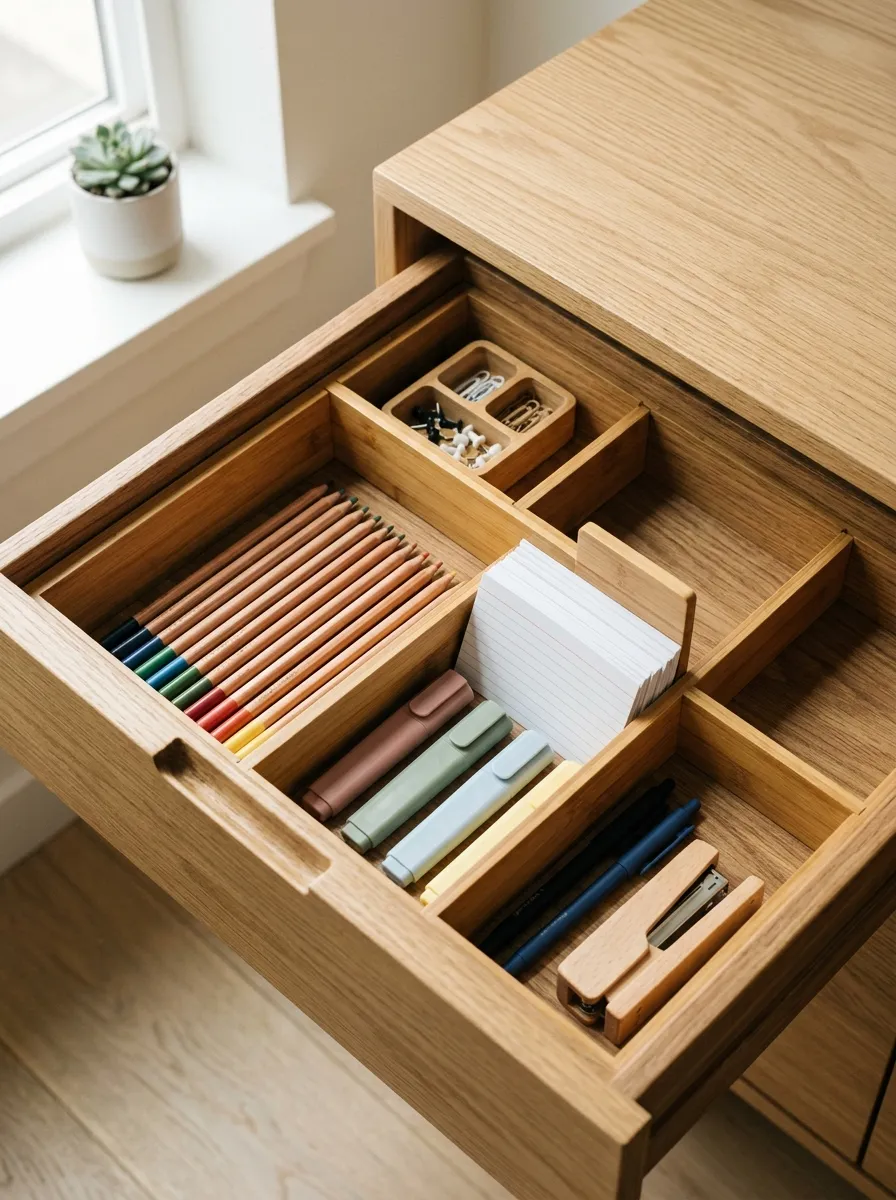
Living room sideboard drawers become black holes of crumpled paper and broken crayons. When drawers lack structure, supplies mix into an unusable pile within days.
Bamboo expanding inserts fix this. They slide directly into standard shallow drawers and push outward to fit the exact width. This locks the organizer in place so it won’t slide around when you slam the drawer shut, keeping the highlighters permanently separated from the index cards.
Depth Requirement: Standard inserts require a minimum drawer height clearance of 2.5 inches to prevent jamming.
Bungee Cord Book Keepers
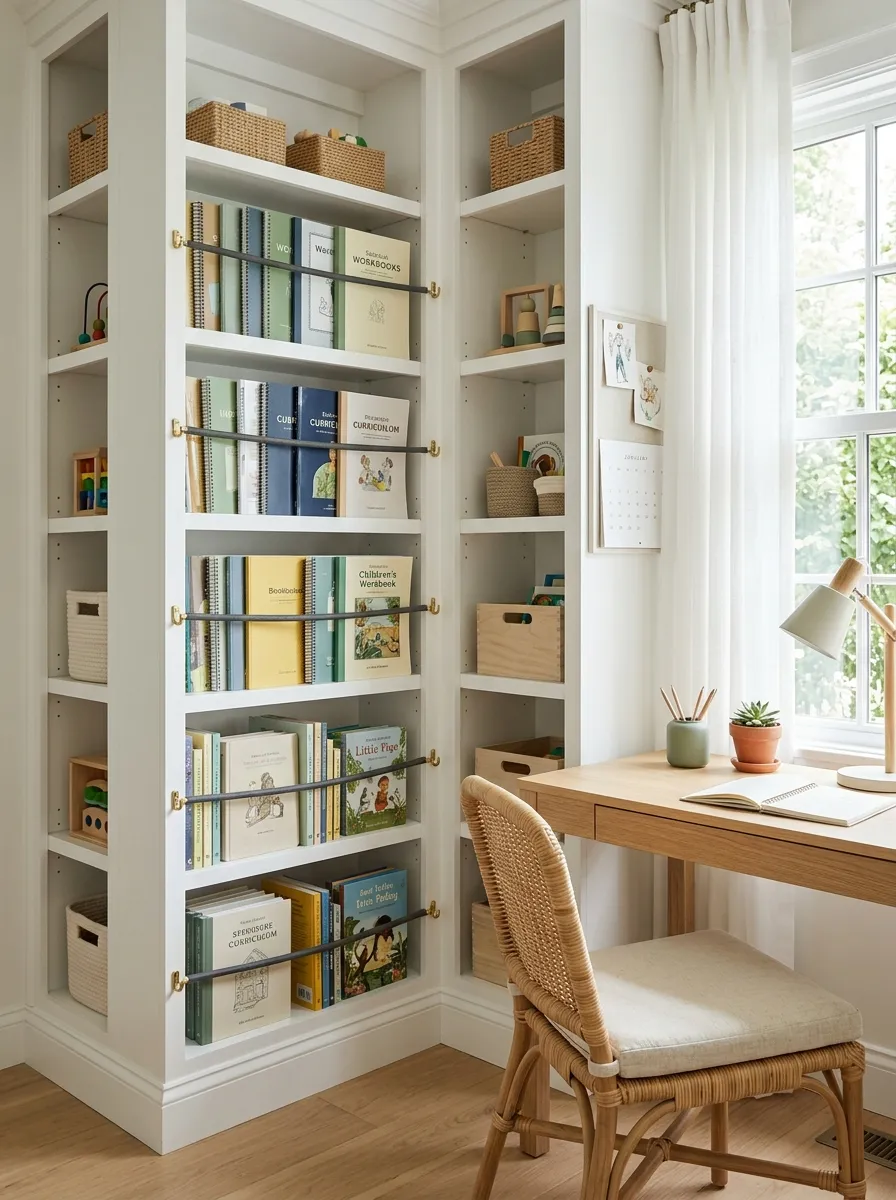
Softcover workbooks and spiral bound curriculums slump over instantly on regular shelves. Flimsy metal bookends just slide out of the way under their weight.
Skip the rigid bookends. Drill small hooks into the sides of your bookcase and stretch thick bungee cords tightly across the front of the books. It acts as a flexible retention wall. The books stand perfectly upright, and kids just slide them out from behind the cord without unhooking anything.
| Method | Durability | Performance on Softcovers |
|---|---|---|
| Metal L-Bookends | High | Poor (books slide and slump) |
| Taut Bungee Cords | Moderate (elastic degrades over years) | Excellent (applies uniform front pressure) |
The Hallway Command Center
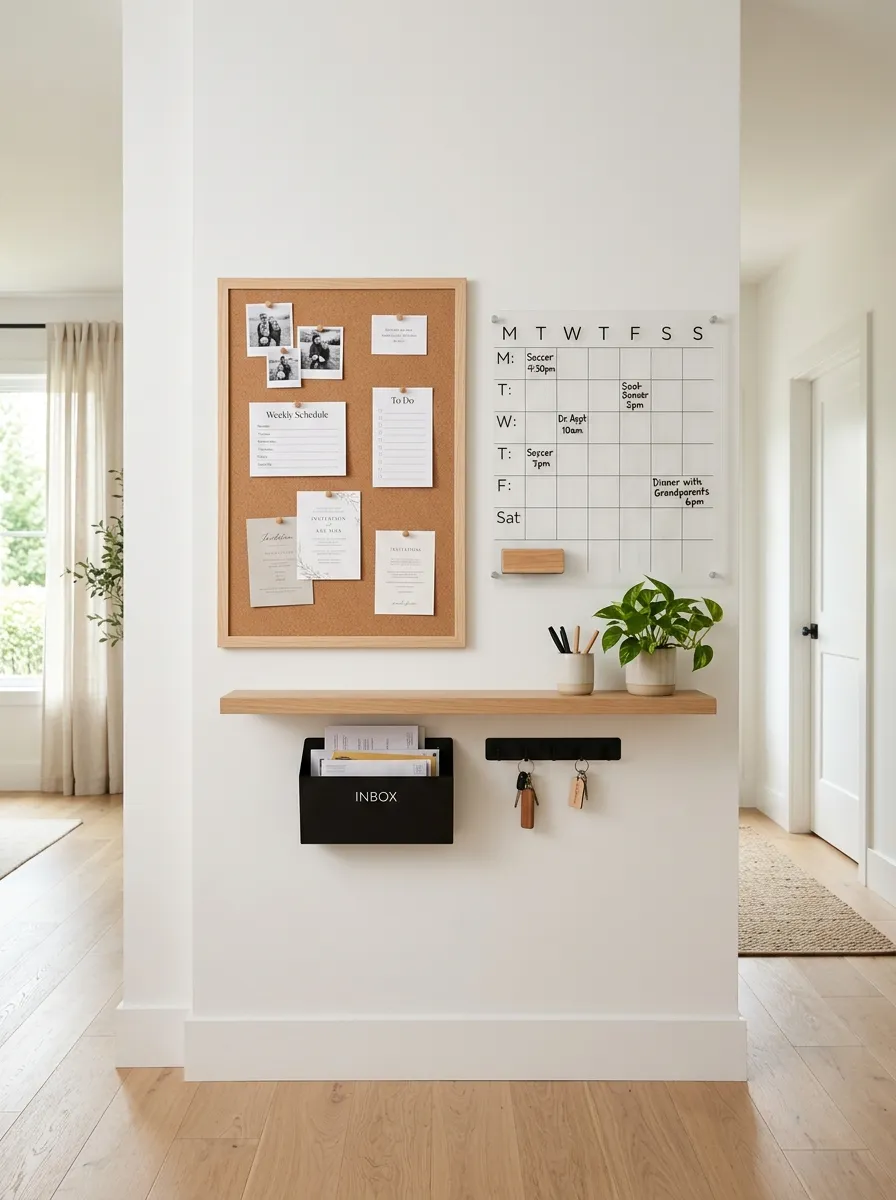
Every family needs a central hub for weekly schedules, upcoming field trips, and library due dates. Sticking this to the kitchen fridge creates visual noise in the heart of your home.
Relocate the schedule hub to an unused transitional space, like a hallway wall. Hang a large cork board and a framed weekly planner right at eye level. This forces kids to check the schedule as they walk between rooms, and keeps the kitchen aesthetic completely clean.
Conclusion
You don’t need a sprawling suburban house or a dedicated classroom to teach your kids effectively. What you actually need is discipline regarding your storage and a willingness to use vertical space aggressively. Stop trying to recreate a public school environment. Use your dining table, hide your supplies when the day ends, and enforce strict boundaries with rugs and closed cabinets. Your home can operate as an incredibly efficient learning environment while still looking like an adult space in the evening. Execute these small homeschool setup inspiration strategies and reclaim your living room.