
There’s a particular kind of frustration that comes from scrolling beautiful garden accounts and feeling like the entire thing requires a landscaper, a budget, and a design degree. It doesn’t. Most of the gardens that stop you mid-scroll were built with junk, patience, and a willingness to try something that might look stupid for a weekend before it looks great forever.
The ideas here use things people already own or can find cheaply: old barrels, pallets, scrap timber, worn-out ladders, tires that were headed for the tip. The material cost is low. The creative investment is the whole point. That’s not a consolation prize. It’s what makes a yard feel like yours rather than a showroom.
Every idea here has a working method behind it. Nothing is “just add flowers.” Each one is a process you can actually follow.
What Makes a DIY Project Look Designed Instead of Crafty
There is a specific difference between something that reads as intentional garden design and something that reads as a school project in your backyard. It usually comes down to three things: material consistency, the quality of the finish, and placement.
Material Consistency Across a Space
If you use galvanized metal for one project, use it again somewhere nearby. If you use terracotta, repeat it. If your containers are earthy and warm, don’t introduce something bright turquoise in the same line of sight unless that contrast is the whole point.
Repetition of materials across a space is what makes a yard look like a yard rather than a collection of unrelated experiments. You don’t need many different ideas. You need a few ideas done well and repeated with variation.
The Seal Is Not Optional
Outdoor DIY projects that skip the finishing coat — exterior sealant, weather-resistant paint, outdoor varnish — look great for one summer and terrible after that. The five minutes of sealing is the difference between a project that becomes a permanent feature and one that you’re quietly removing in two years.
Painted stones need two coats of outdoor sealer. Wooden markers need exterior paint or wood stain plus varnish. Mosaics need grout sealer. Copper tubing patinas naturally and doesn’t need treatment, but the wire connections should be sealed against corrosion. Do the last step. It changes the lifespan entirely.
Placement as the Final Decision
Where something sits in the garden changes what it is. A container planter in the middle of a lawn is an obstacle. The same container at the corner of a path, anchoring a turn, is a focal point. A garden ornament buried in the back of a border is invisible. The same piece set slightly forward, catching the eye as you enter the garden, is a destination.
Before you commit any project to a permanent spot, try it in three or four places first. Walk away, come back, look at it fresh. The right spot is usually obvious once you’ve seen the wrong ones.
DIY Yard Ideas Worth Making This Weekend
The Mosaic Tree Stump Seating
Leave tree stumps in place after felling — or source large sections of hardwood log cut to 30 to 40cm height for use as stools. Allow to dry thoroughly — at least six months for fresh-cut wood to reduce cracking.
Apply a thin coat of exterior tile adhesive to the flat top surface. Set mosaic tile pieces — broken glazed tiles, ceramic crockery, coloured glass — into the adhesive in a circular mandala pattern. Work from the outer edge inward, maintaining the concentric ring structure. Use a spiral of warm yellows and oranges in the outer rings, transitioning to cool teals and blues toward the centre.
Allow adhesive to cure for 24 hours, then grout with an exterior-grade sanded grout in a mid-grey, pressing firmly into all gaps with a grout float and wiping clean with a damp sponge before full set. Seal with outdoor tile sealer. The natural dark bark of the stump sides contrasts dramatically with the jewel-bright mosaic tops, and the paving context amplifies the visual impact.
The In-Ground Stone-Lined Fire Pit
Mark a circle on the lawn approximately 1 to 1.2 metres in diameter. Remove the turf within the marked circle. Excavate to a depth of approximately 40 to 50cm, sloping the sides slightly inward from top to bottom so the opening is wider than the base.
Tamp the base firmly and add a 10cm layer of coarse gravel for drainage — hazelnut-sized leca clay balls or angular gravel both work. Stand a single layer of standard clay bricks on end around the inner circumference of the pit, pressing the flat base into the gravel. They don’t need mortar; the soil holds them adequately.
Collect flat, irregular natural flagstones. Lay them around the outer rim of the pit on the grass surface, pushing them slightly into the turf so they sit just above lawn level. The stones should overlap the pit edge slightly and meet each other without needing to be cut. No mortar. Fill gaps between flagstones with fine soil or moss. The result is a fire pit that looks ancient, costs almost nothing in materials, and involves nothing more than digging and collecting stone.
The Hanging Painted Tire Planter
Take a single passenger tyre and clean thoroughly. Apply two to three coats of exterior spray paint in a bold, saturated colour — turquoise, coral, cobalt, or lime green. Allow to cure fully for 48 hours.
Drill three equally spaced holes through the tyre sidewall at the 12, 4, and 8 o’clock positions. Thread heavy-duty chain links through each hole and gather the three chains above with a D-ring or carabiner to a single hanging point. Hang from a strong tree branch using a rated metal hook secured to the branch. Test the hanging point for at least twice the expected weight before filling.
Fill the bottom interior of the tyre with potting mix — the tyre walls hold it in a natural bowl shape. Plant with three to four Calibrachoa or trailing Petunia plugs in complementary shades of pink, purple, and deep magenta. The plants cascade over the inner edge and fill the circle of the tyre as they mature.
Position at a height where the planting is at eye level. Add a small garden ornament — a gnome, a stone bird, a small ceramic figure — positioned inside the circular frame of the tyre as a visual focal point framed by the flower cascade.
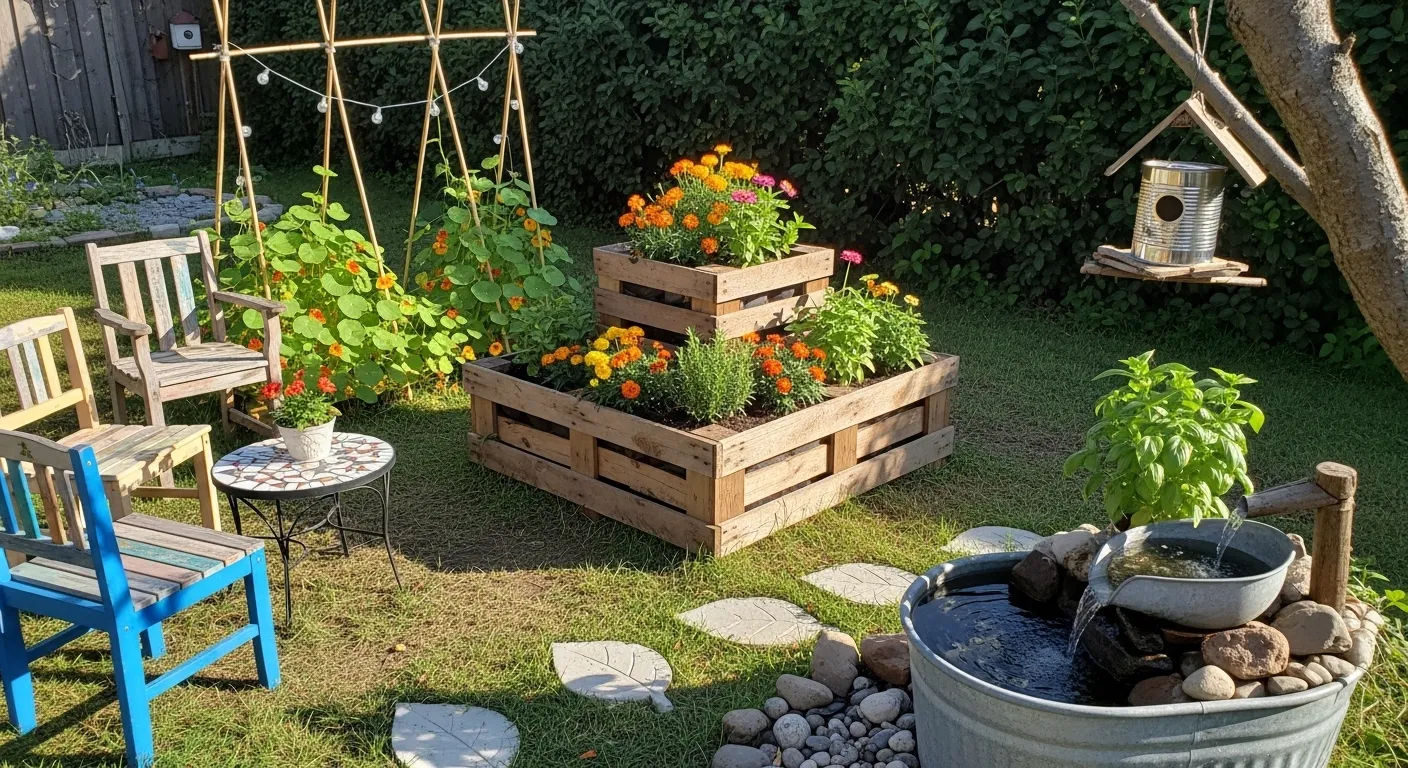
The Whiskey Barrel Water Feature with Copper Pipe Spout

Source one full-size wine or whiskey barrel (available from wine merchants, homebrew suppliers, or online resellers — often sold once they’ve been used and can no longer hold liquid) and one half-barrel, which will serve as the lower basin. Build a simple wooden stand from pressure-treated 4×4 posts and 2×6 cross beams to elevate the whole barrel at roughly knee height and tilted at approximately 30 degrees. The stand requires only basic carpentry — four legs, two cross braces, two angled cradle supports.
Seal both barrels with food-safe pond liner inside each one. Fit a small submersible pump in the lower half-barrel, run the pipe up through the upper barrel, and connect it to a short copper elbow that emerges from the open end of the tilted barrel. The pump recirculates water continuously through the copper spout into the lower basin.
Plant the lower basin as a miniature pond: Iris ensata for vertical height and purple bloom, Cyperus papyrus for fine texture and movement, and Lysimachia nummularia ‘Aurea’ for trailing greenery over the rim. Arrange river rocks around the base of the whole structure on bare soil. The copper pipe oxidises gradually to a warm verdigris that complements the dark stained barrel beautifully.
The Mosaic Stepping Stone Path
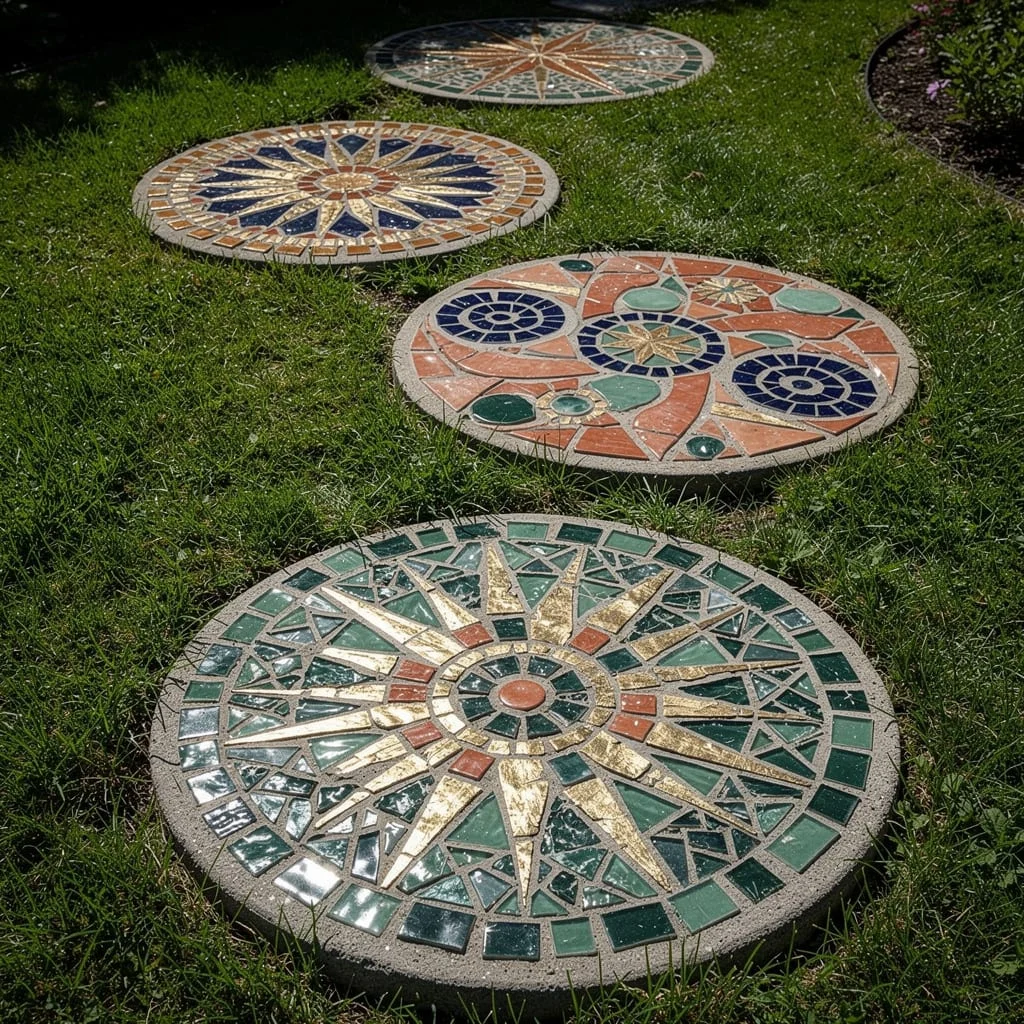
Purchase pre-cast concrete stepping stone rounds, or cast your own using a circular form filled with a 1:2 cement-to-sand mix. Each round should be approximately 40 to 50cm in diameter and at least 5cm thick.
Collect broken ceramic tiles, crockery, decorative glass pieces, and mirror fragments. Sketch a compass rose or starburst pattern on paper first. Break tiles using a tile nipper or by wrapping in a cloth and tapping with a hammer — wear eye protection. Adhere the pieces to the concrete surface using tile adhesive, working from the centre outward, maintaining consistent grout gaps of 3 to 5mm. Allow to cure for 24 hours, then apply unsanded tile grout in a mid-grey tone, pressing into all gaps and wiping clean with a damp cloth before it sets fully. Seal with outdoor tile sealer once fully dry.
Use colour families deliberately across the set of stones — navy, terracotta, gold, and teal read as a coherent palette even when the individual patterns differ. Lay the completed stones in a gentle arc through a lawn or border, set slightly below the grass level so the lawnmower can pass over without catching the edges.
The Weathered Ladder Plant Display
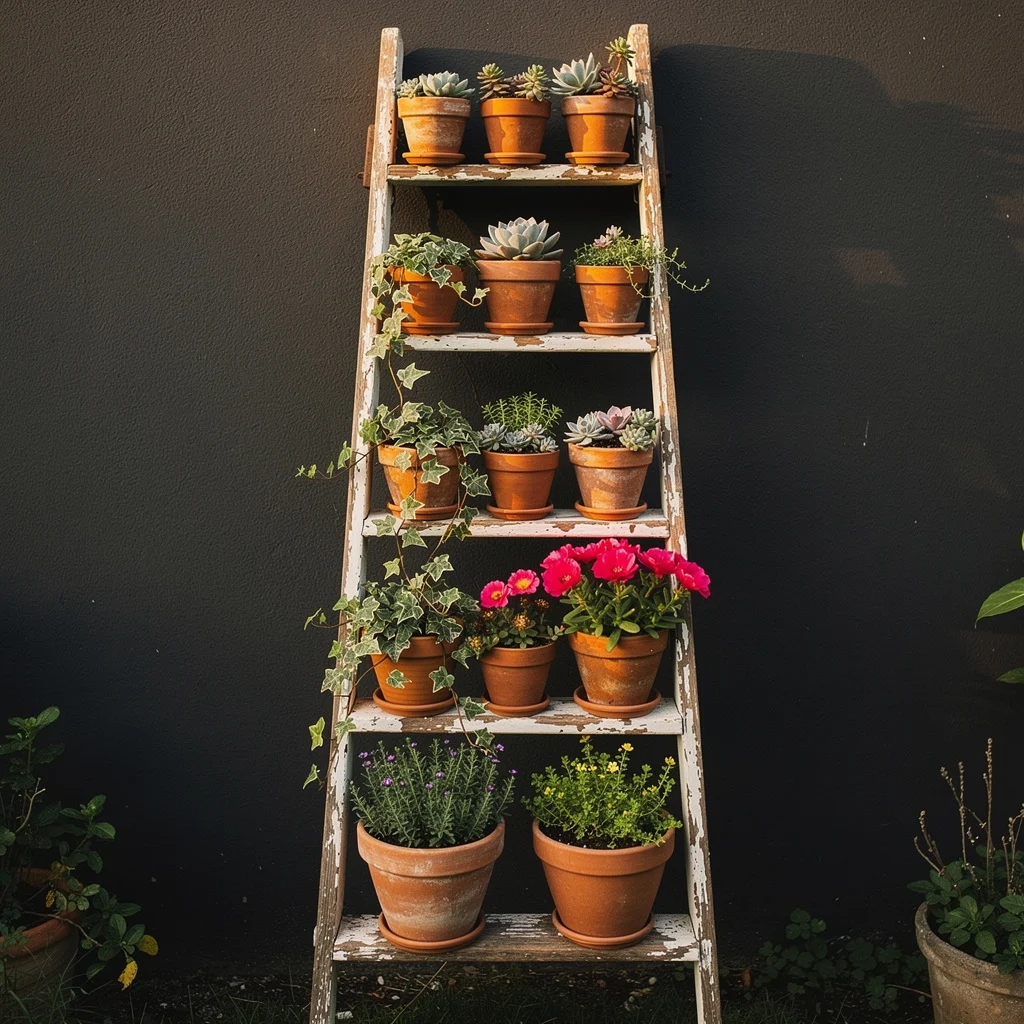
Find an old wooden step ladder — estate sales, charity shops, and skips are reliable sources. The more paint-peeled and weathered it is, the better it looks against a dark wall or fence. Do not sand it down or repaint it.
Stand the ladder open against a dark exterior wall. Use the rungs and the top platform as shelves. Place the largest terracotta pots at the bottom — 20 to 25cm pots of lavender and golden-flowered herbs. On the next rung up, place medium pots of portulaca in bright magenta for colour. Continue up with smaller pots of succulents — Echeveria, Sempervivum, haworthia — in terracotta pots of varying age and patina. Let one pot of variegated ivy trail down from a mid-rung position across the ladder face.
The key is using all terracotta consistently and varying only the sizes, finishes, and age of the pots. No plastic. No glazed ceramic. The warm earth tones of the pots against the dark wall create a composition that looks extremely deliberate with almost zero effort.
The Stacked Painted Tire Planter Tower
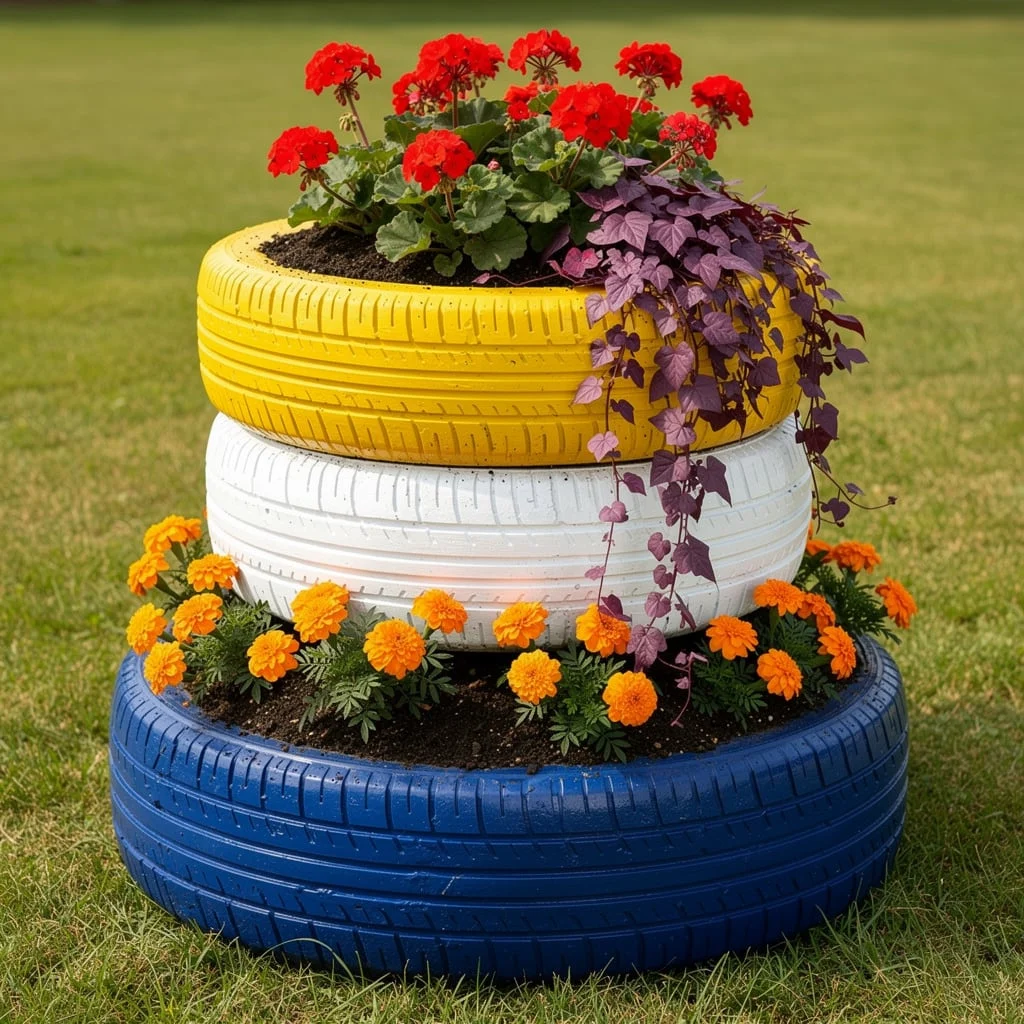
Collect three car tyres of graduated sizes — standard passenger tyres work; a slight size difference between each tier creates the tapered tower shape. Source from a tyre shop or garage; most are happy to give away used tyres. Clean thoroughly, allow to dry completely, then apply a bonding primer followed by exterior spray paint or brush-on exterior latex in three distinct solid colours. The colour palette matters: choose three from the same family (yellow, white, navy is classic; terracotta, cream, sage is more naturalistic) rather than random unrelated colours.
Stack the tyres largest at the base, smallest on top. Fill each tyre with quality potting mix and plant into the exposed cavity. For maximum impact: red Pelargonium (Geranium) at the top for bold vertical colour, dark-leafed sweet potato vine (Ipomoea batatas ‘Blackie’) trailing from the top tier, and orange French marigolds in the bottom tier. Position on a flat lawn surface with no other visual competition nearby so the colour reads clearly.
The Galvanized Container Deck Display
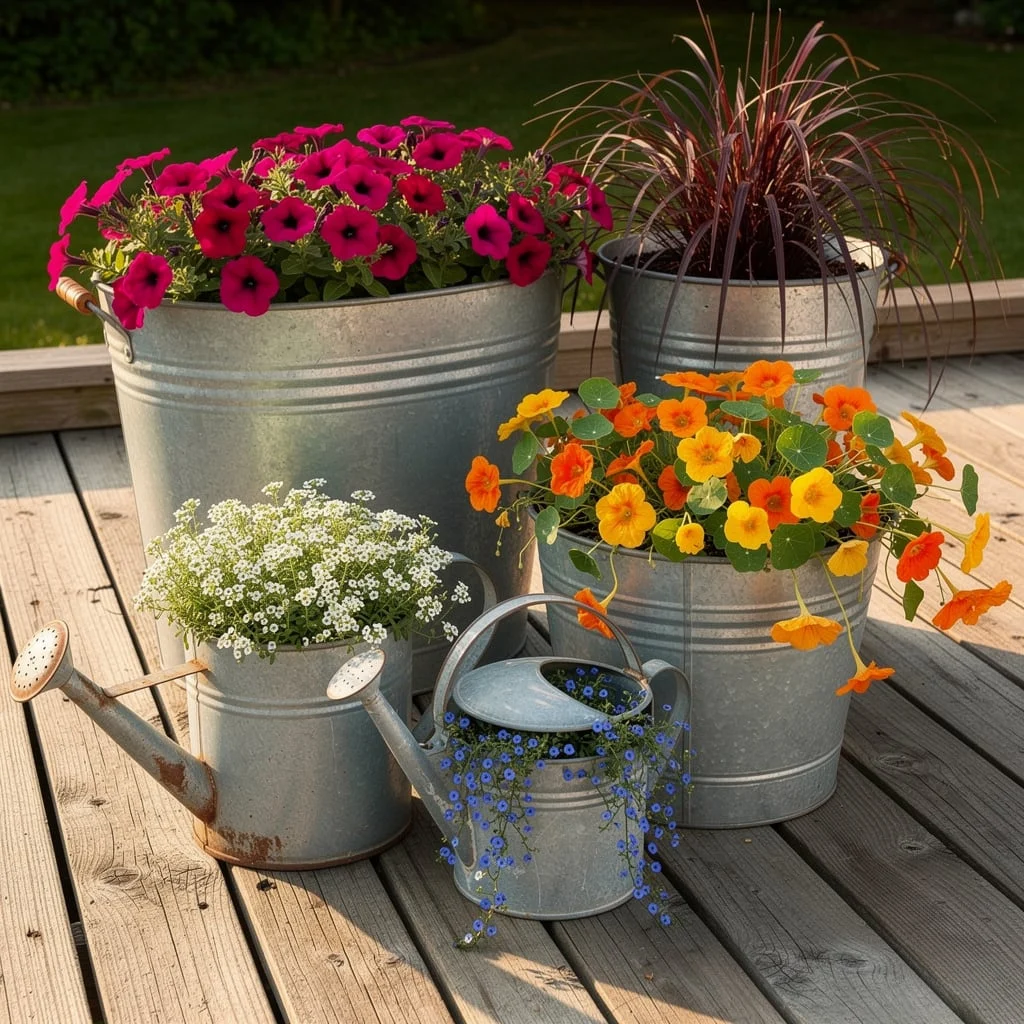
Source galvanized metal containers from farm supply stores, hardware stores, or online vintage-style retailers. A large galvanized tub, one tall galvanized bucket, one smaller bucket, and two old galvanized watering cans of different sizes create a five-piece grouping.
Drill drainage holes in the base of each container — a 1cm drill bit through the metal base, five to six holes per container. Fill with well-draining potting mix. Plant each container with a single-focus planting: the large tub with trailing hot-pink Calibrachoa or Wave Petunias, the tall bucket with a single specimen of Pennisetum ‘Rubrum’ (purple fountain grass), the smaller bucket with a Nasturtium mix in orange and yellow, and the two watering cans with Alyssum in white and trailing Lobelia in blue.
Arrange as a grouped vignette on a deck or paved area, with the two tallest containers at the back and the watering cans at the front. The variation in container height and the contrast between the cool silver metal and the warm flower colours are what make this work.
The Copper Tube and Driftwood Wind Chime
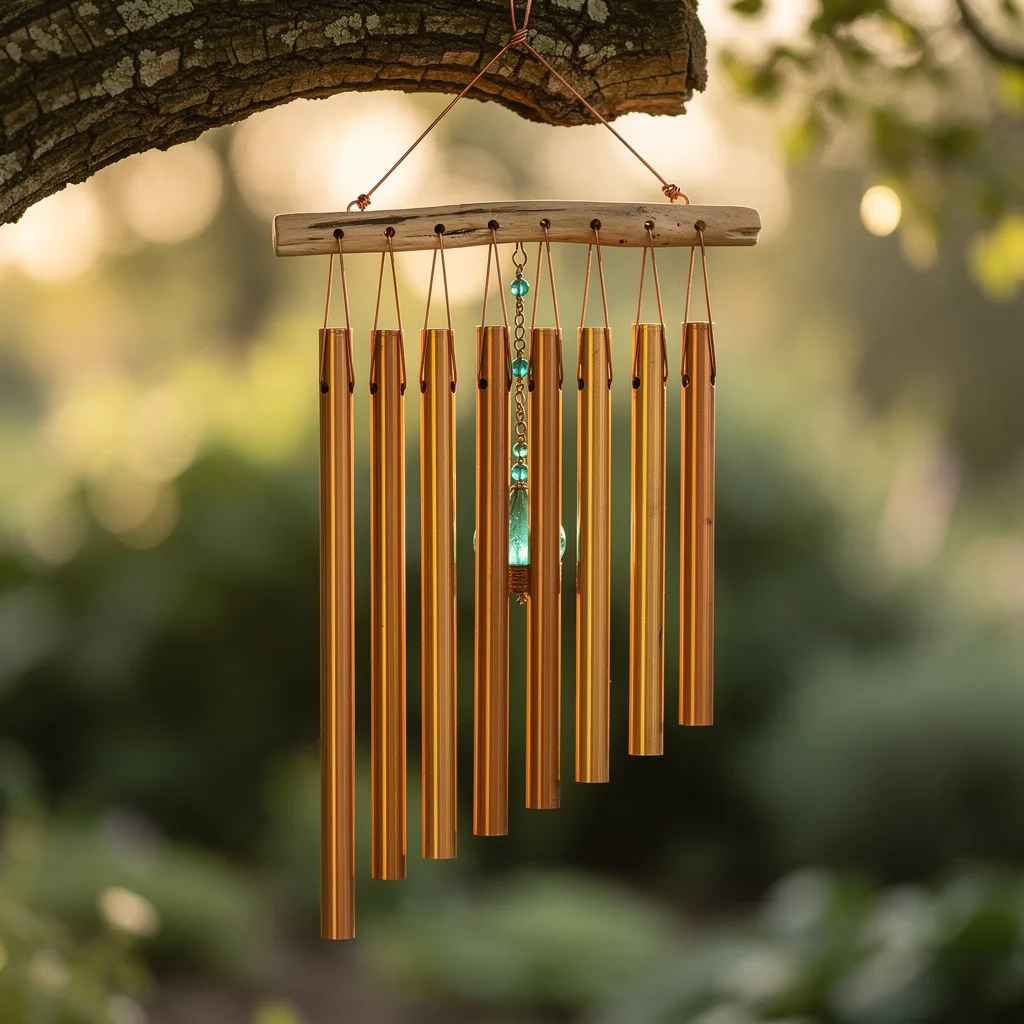
Find a straight piece of driftwood or weathered branch approximately 30 to 35cm long. Sand lightly if needed but preserve the natural surface character. Drill evenly spaced holes along the top face — nine or ten holes at 3cm intervals — and a central hole for the hanging wire.
Cut copper tubing (15mm diameter plumber’s copper pipe works perfectly) into graduated lengths: start at approximately 15cm and increase by 2 to 3cm per tube. The length determines the pitch. Sand the cut ends smooth. Drill a small hole near the top of each tube. Thread fine copper wire through each hole and tie securely. Hang each tube from the driftwood bar, suspending the shortest and longest on the outer edges with the graduated sequence running outward from centre.
At the centre, hang a clapper — a small piece of driftwood or a glass bead cluster on a short wire — that can swing freely and strike the tubes. Attach the main hanging cord through the central top hole of the driftwood bar using copper wire twisted into a loop. Hang from a tree branch in a spot that catches the breeze. The copper develops a warm honey-gold patina within weeks and a green verdigris over months, both beautiful at different stages.
The Solar Mason Jar Garden Light Stakes

Source a set of solar-powered garden stake lights — the kind fitted with a small solar panel at the top. Replace the generic shade with actual Ball mason jars in mixed colours: standard clear, amber canning jars, and light blue vintage-style jars. The solar panel lid typically fits a standard wide-mouth jar opening directly.
Push stakes into a planting border at varying heights, grouping them in a loose cluster rather than a straight row. Mix the jar colours — two amber, three clear, two blue — within the group. The warmth of the golden-hour light at dusk is amplified by the amber glass and diffused softly through the clear and blue jars.
Position the grouping in a border that contains Miscanthus ornamental grass — the feathered plumes catch the same low light and create an atmospheric backdrop for the jars. Plant lavender, salvia, and Zinnia around the stakes so the lights emerge from a living planting context rather than sitting in bare soil.
The Hand-Painted Rock Garden Border
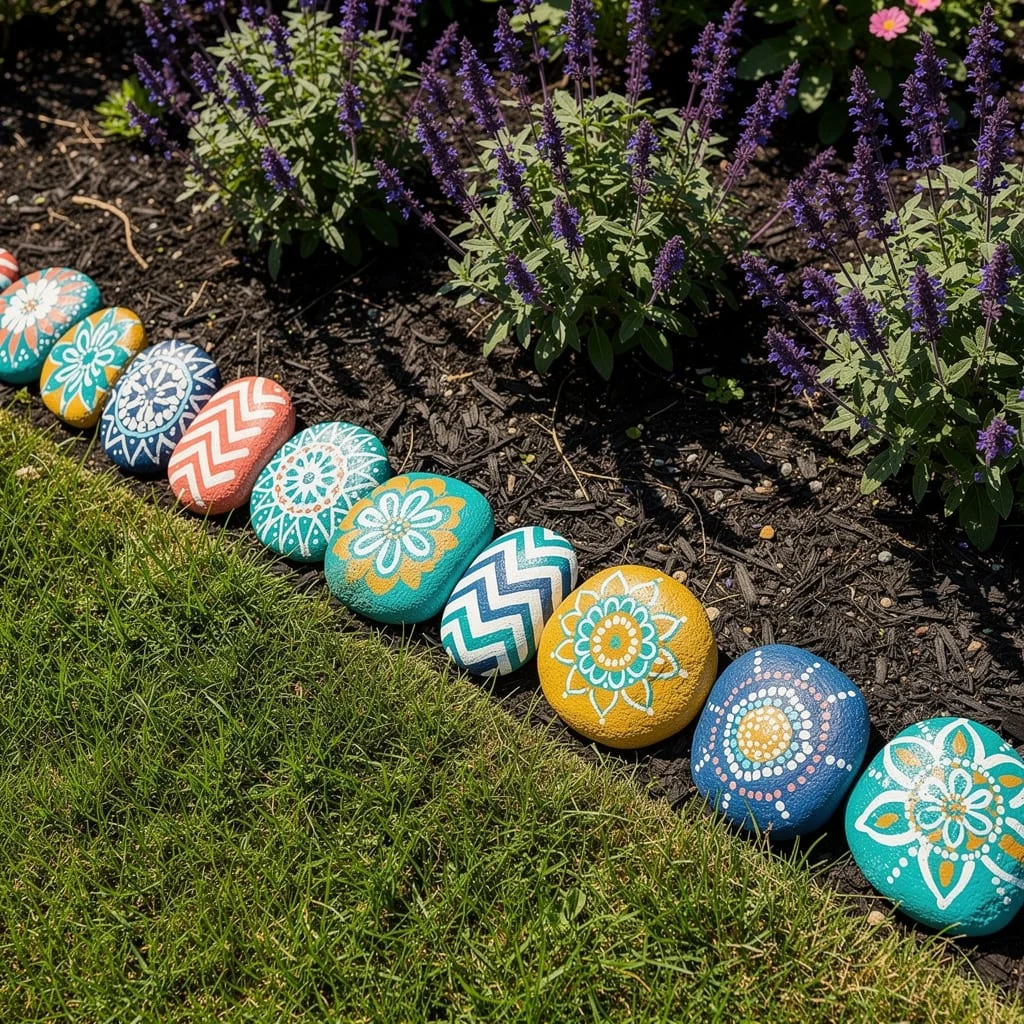
Collect smooth, palm-sized river rocks — flat-bottomed oval shapes work best. Clean and dry thoroughly. Apply a base coat of exterior craft paint to each rock in a solid colour: teal, cobalt, gold, coral, and deep ocean blue. Allow to dry completely.
Paint the decorative pattern over the base coat using a fine detail brush and white exterior craft paint. Mandala patterns (concentric rings of dots, petals, and geometric lines from the centre outward) and bold chevron patterns are the most legible at garden-border scale. Seal with two coats of outdoor polyurethane or exterior mod podge.
Lay the finished rocks end-to-end along the grass edge of a planting bed, alternating patterns and base colours rather than grouping same colours together. The individual designs should be varied; the colour palette across all rocks should be unified. Set them sitting flush with the lawn so they read as a continuous decorative line rather than isolated objects.
The Cedar Log Slice Tiered Flower Tower
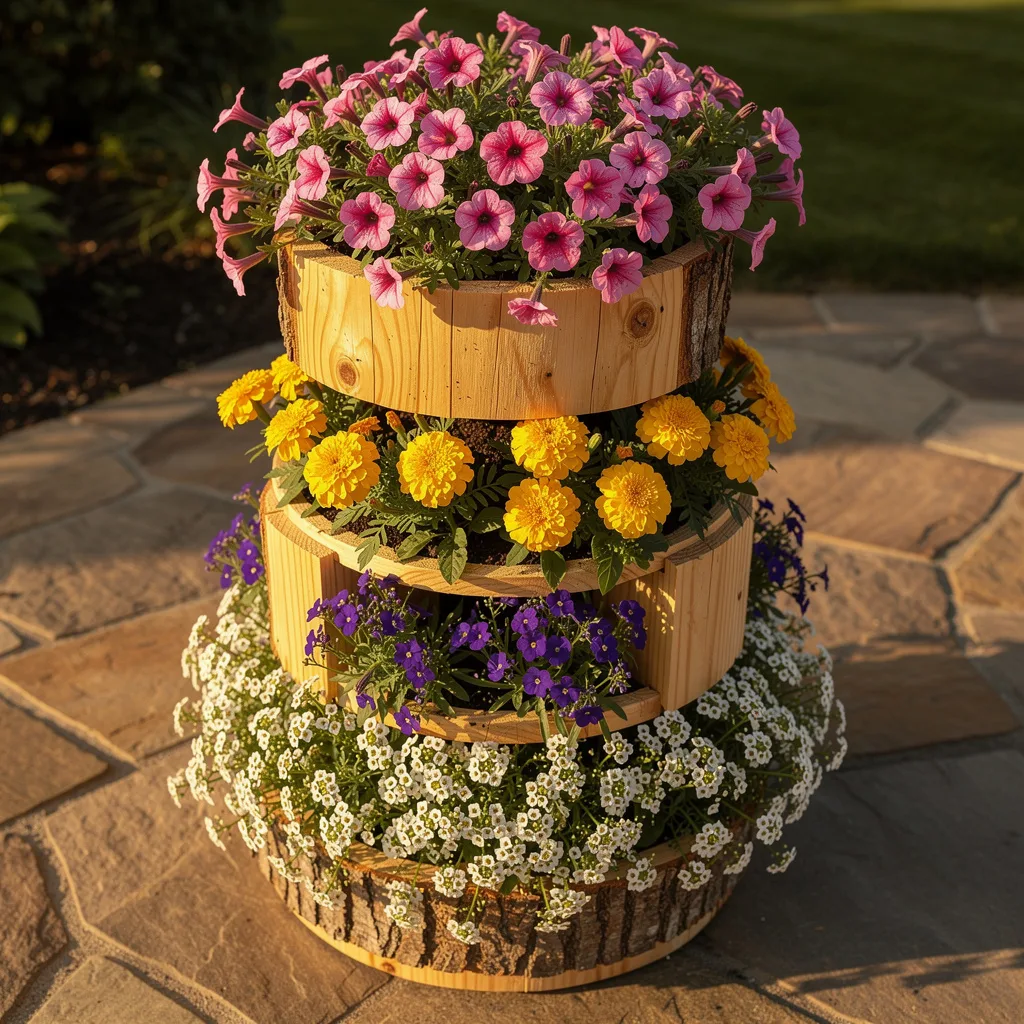
Cut a cedar log or purchase cedar lumber to make three round-bottomed drum forms of graduated diameters: 50cm base, 35cm middle, 20cm top. Each drum should be 15 to 20cm deep. A simpler version uses actual log slices — cut rounds from a felled tree — with a channel carved or routed around the top circumference to hold soil and plants.
Stack the three rounds on a hard surface, placing them centred on each other with the natural bark edge showing. Fill each tier with a rich potting mix. Plant distinctly per tier: the top tier with trailing Pink Calibrachoa for a cascading crown effect, the middle tier with yellow Marigolds for contrast and scent, and the base tier with white Alyssum and purple Verbena for a spreading froth at the ground level.
The effect is a living floral tower. The warm cedar tones of the wood give it a natural, crafted quality that painted alternatives lack. Position on a stone or paved surface rather than on grass so moisture doesn’t accelerate rot at the base.
The Carved Hypertufa Succulent Trough
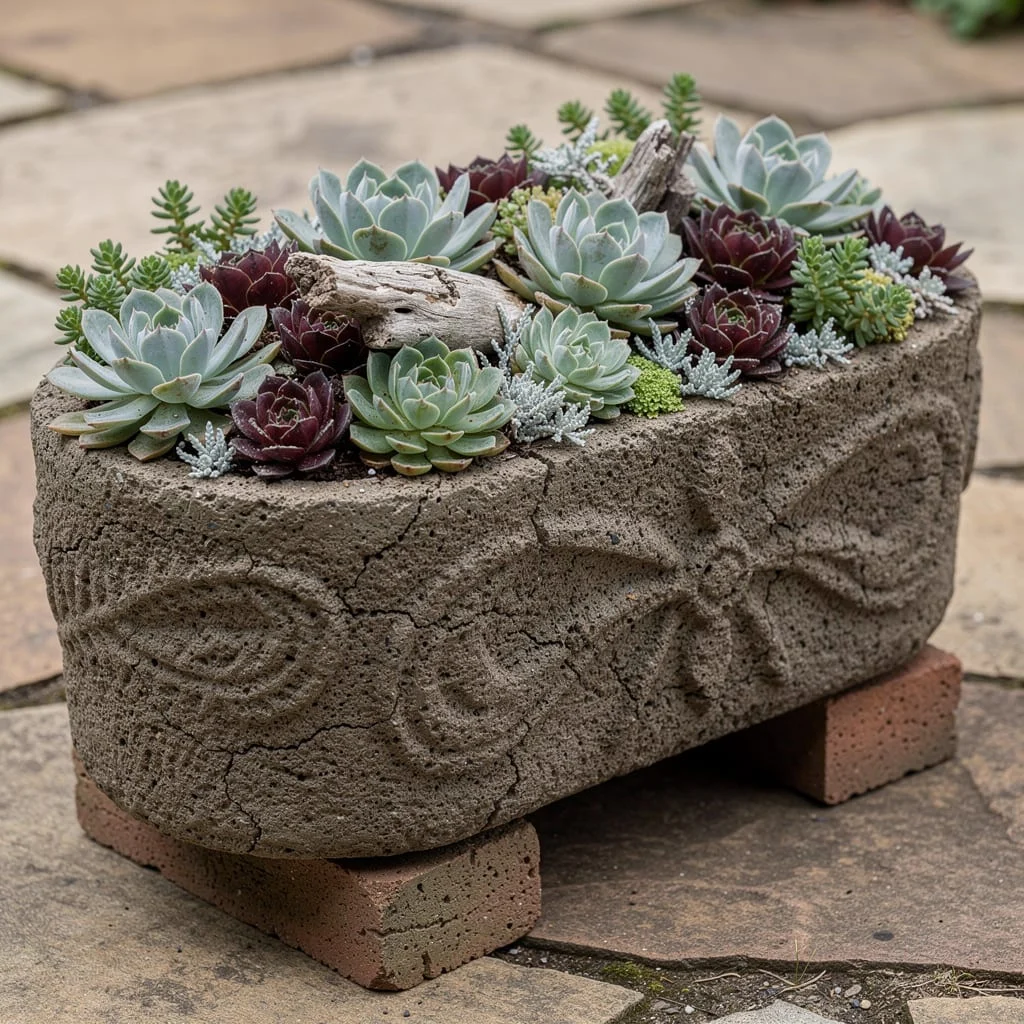
Mix hypertufa: combine one part Portland cement, one part sharp sand, and two parts peat-free coir in a bucket. Add water slowly, mixing until the consistency resembles cottage cheese — clumping when squeezed but not liquid. Wear gloves throughout.
Press the mix into a cardboard box mould (approximately 40 x 25cm base) working up the sides to a 4 to 5cm wall thickness. Allow to set for 24 hours before the mix firms enough to handle. Remove the outer cardboard. While the surface is still slightly soft — around the 24 to 36 hour mark — press simple motifs into the surface using a stick, wire, or stamp: dragonflies, leaf forms, or abstract lines. These impressions hold permanently once fully cured.
After 48 hours of further curing, hollow out the interior if needed, create drainage holes in the base, and allow to cure outdoors for a further 10 to 14 days, covering with wet hessian to prevent cracking. Once fully cured, elevate on two brick risers for drainage and plant with a mix of silver-grey Echeveria, dark burgundy Sempervivum, bright green Sedum, and pale Dymondia or silver thyme as filler. Add two or three small pieces of driftwood as compositional accents.
The Driftwood Sculpture Focal Point

Collect three pieces of driftwood with interesting natural forms — bleached, smooth, with grain lines and small fissures. Two should be long enough to cross each other at approximately mid-height; the third should be the tallest, forming the vertical spine of the structure.
Anchor the tallest piece in the ground first, setting it 30 to 40cm deep for stability. Lean the other two pieces against it from opposite angles, crossing at roughly 50 to 60cm height. Bind the crossing points with lengths of galvanised wire twisted tightly, or use lengths of jute rope for a more natural finish. The result is a freestanding tripod-like sculpture that is entirely natural in material and completely abstract in form.
Surround the base of the sculpture with a shaped planting bed. In the inner ring closest to the driftwood, plant Lavandula angustifolia in drifts. In the next ring out, plant white Shasta Daisies. The outer edge can be left as lawn, or California Poppies in orange and gold can be seeded directly for a wildflower surround. The contrast of the bleached white driftwood against the purple-silver-orange palette is dramatic.
The Raised Bed with Chalkboard Panel Labels
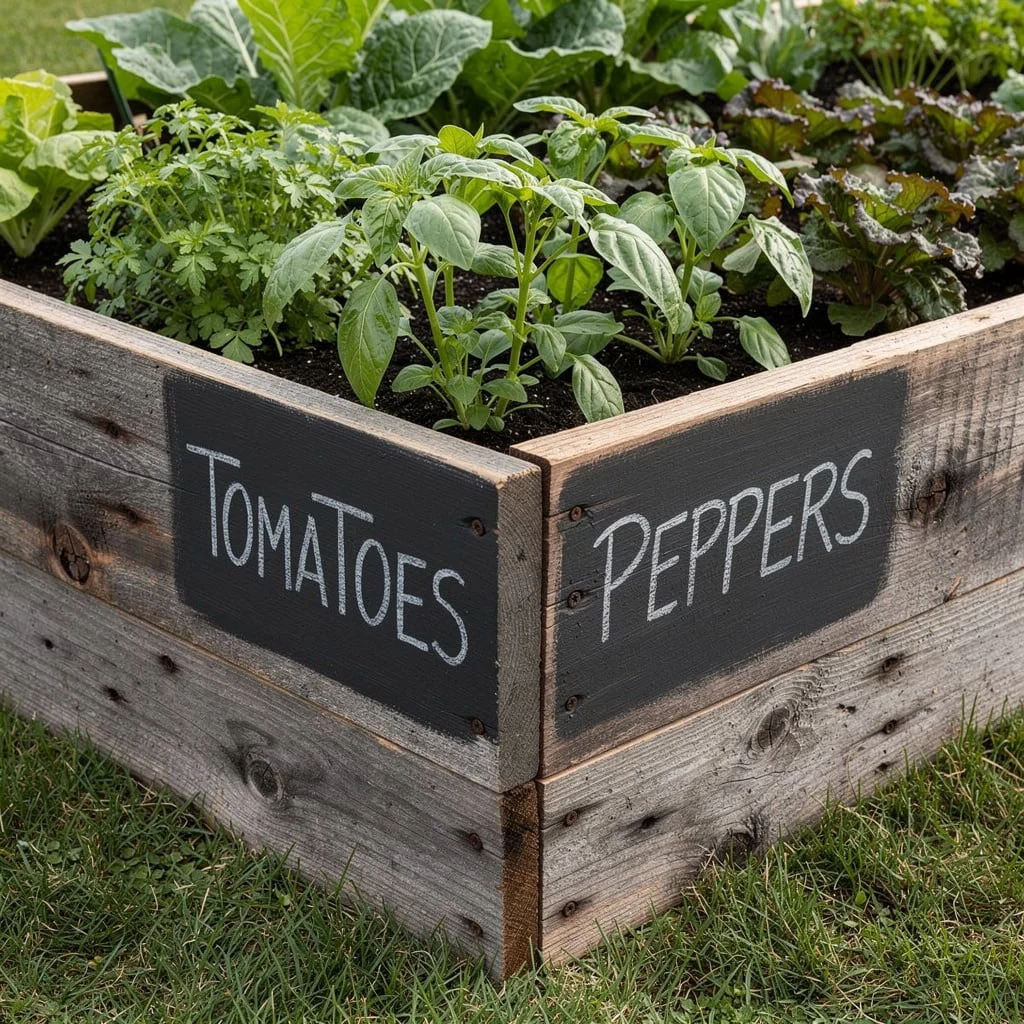
Build a simple two-course raised bed from reclaimed timber — scaffold boards, old sleepers, or rough-sawn planks. The width of the board becomes the bed depth; two courses creates roughly 35 to 40cm depth. Join corners with galvanised brackets or wooden stakes driven into the ground inside each corner.
Before assembling, cut recessed rectangles into the face of the front boards — approximately 20 x 12cm per panel. Fill these recessed areas with a coat of exterior chalkboard paint (dark grey, not black) applied with a small roller and allowed to cure for at least 72 hours before writing on it. Label each bed zone with chalk in a confident, slightly irregular hand — all capitals, intentionally imperfect.
The contrast between the raw, weathered grey of reclaimed timber and the flat matte black of the chalkboard panels is surprisingly sophisticated. The labels serve a functional purpose and remove the need for any other decoration. Fill with a rich growing mix and plant in clear zones.
The Rustic Hand-Painted Wooden Herb Markers
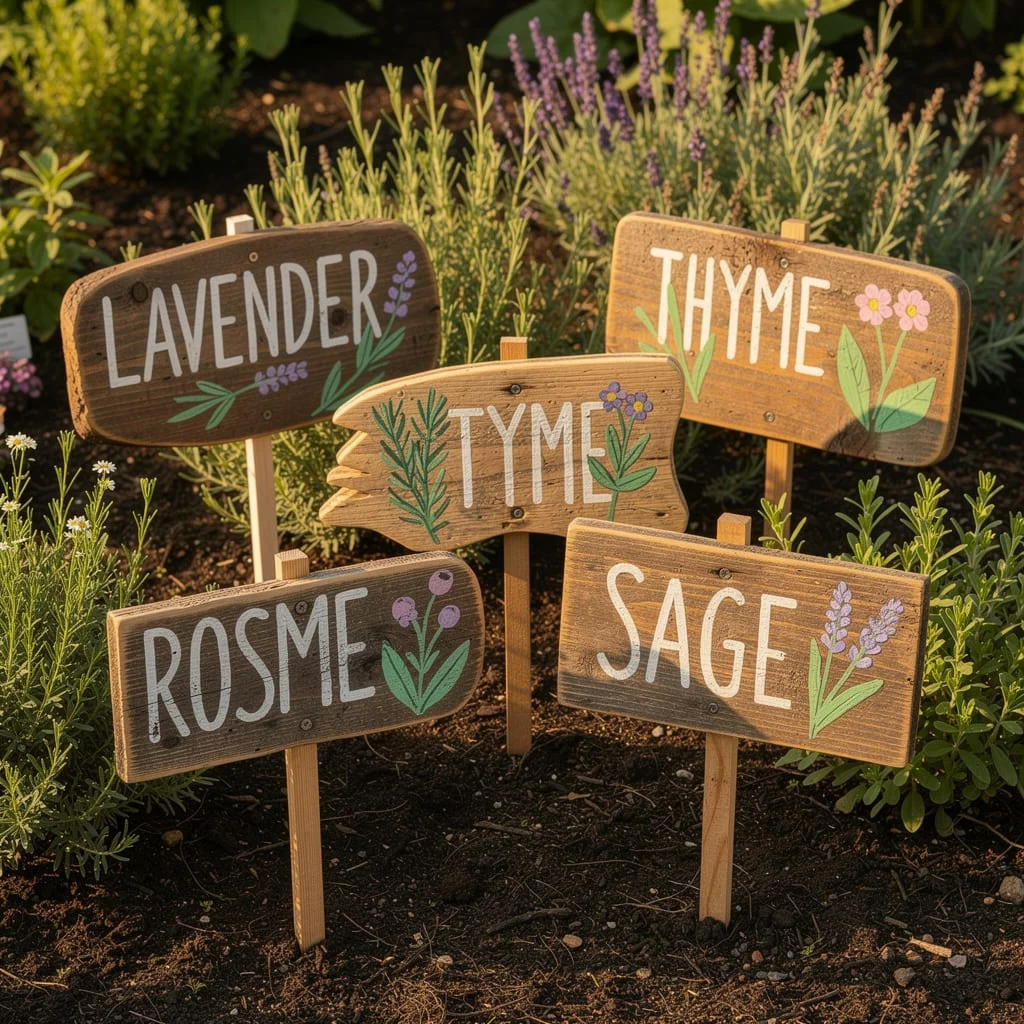
Cut scrap timber or pallet wood into marker shapes: rectangles, arrow points, and irregular rounded-corner signs all work. Aim for 15 to 20cm of sign plus 15 to 20cm of stake below. Sand the face smooth only — leave the sides and back rough.
Apply a base coat of mid-brown or dark walnut wood stain rather than paint. Allow to dry. Use a fine brush and white exterior craft paint to write the herb names in a freehand, slightly uneven lettering style — all capitals reads well at small scale. Add small botanical illustrations alongside each name: a sprig of lavender flowers beside LAVENDER, a leaf shape beside THYME, small berries beside ROSEMARY. These don’t need to be perfect. They need to be clearly hand-done.
Apply a coat of exterior varnish over the finished face. Push stakes directly into the soil directly in front of the relevant herbs, angled slightly forward so the painted face is visible from a standing position. Group multiple markers at slight variation in height and angle — nothing perfectly uniform.
The Pallet Vertical Herb Wall
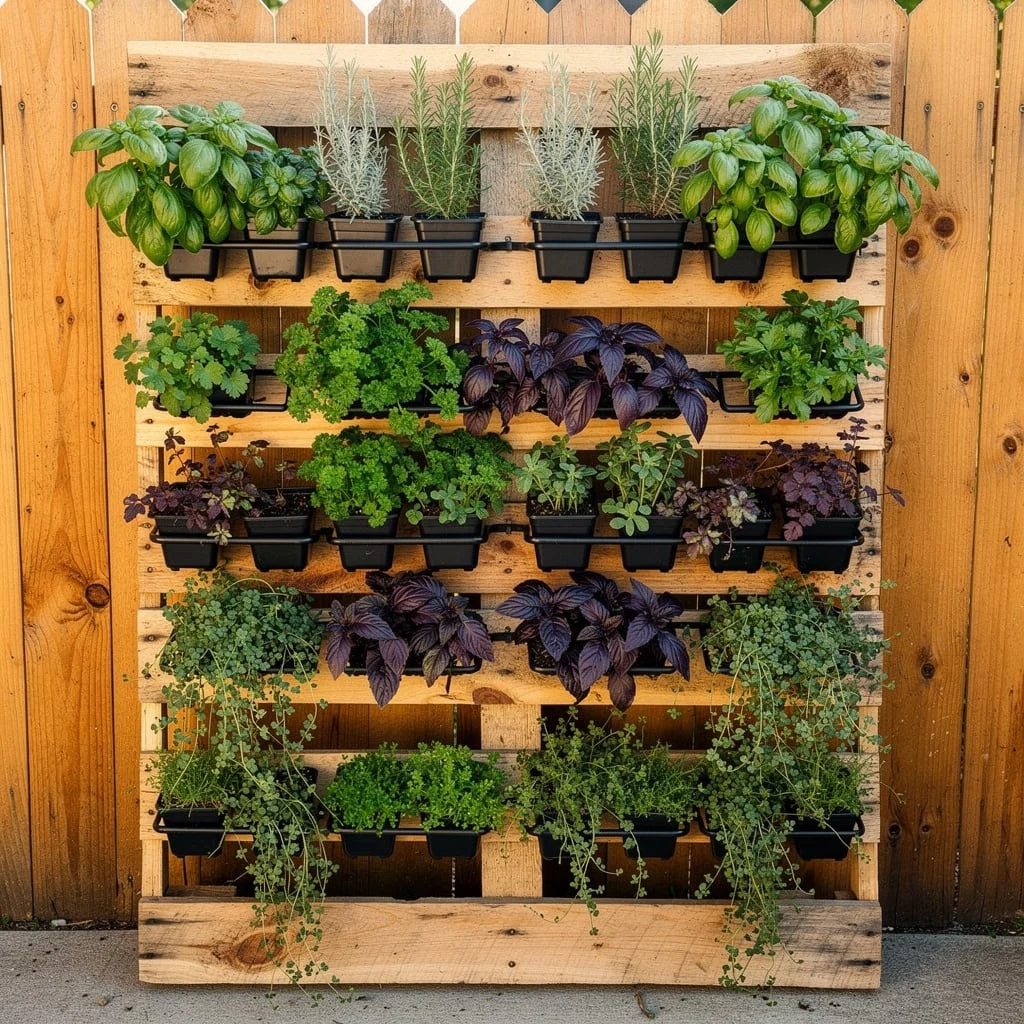
Source a heat-treated wooden pallet — check for the IPPC HT stamp before using, as chemically treated pallets are unsuitable for growing food. Sand any sharp edges. Stain with exterior wood stain in a warm cedar or honey tone.
Attach a series of black metal trough planters — the kind sold for window boxes — to the horizontal pallet slats using appropriate bracket screws or metal strapping. Space them across the width of the pallet, using all four or five horizontal slat levels. Fill each trough with quality potting mix combined with perlite for drainage.
Plant each trough with a single species or pair of compatible herbs. Top row: basil and rosemary. Second row: flat-leaf parsley and purple basil for colour contrast. Third row: curly parsley and bronze fennel. Fourth row: more purple basil and lemon thyme. Bottom row: creeping thyme to trail down. The colour play between the deep purple basil and the bright greens is genuinely beautiful and completely edible.
Stand against a fence or wall, securing the top to a fence post with wire for stability. Situate where it receives at least six hours of direct sun.
The Rule That Ties Every DIY Yard Project Together
Every single project here works for the same reason. Not because it’s clever. Not because it’s made from something unusual or costs very little. Those are nice bonuses. They work because someone finished them.
The half-done mosaic that got rained on. The barrel that never got a pump installed. The pallet leaning against the fence with three pots on it and bare slats everywhere else. These are the projects that don’t make it to the beautiful garden accounts.
Starting is easy. The idea is the fun part. What turns a DIY yard project into something real is the moment you go back out after two days and do the parts you didn’t feel like doing. The seal. The grout. The second tier of planting. The edging that makes the whole thing read as a decision.
Do that part. That’s the whole method.