
Grass worn thin in a diagonal line from the back door to the fence. A vague muddy track that appears every spring without being asked. Your feet already know where they want to go. The question is whether your garden will bother acknowledging it.
Most garden walkways are an afterthought. The beds get designed, the lawn gets laid, and then someone realizes people need to walk through it all without destroying things. A path gets added. It connects two points. Job done. Nobody looks at it twice.
That’s not a walkway. That’s a concession to foot traffic.
A walkway done properly is one of the most compositionally significant decisions in a garden. It determines the pace at which you experience the space. It sets the visual tone before you even reach the destination. It can make a small garden feel generous or a large one feel intimate. Getting it right changes everything around it.
Here’s what that actually requires.
Garden Walkway Ideas Worth Building
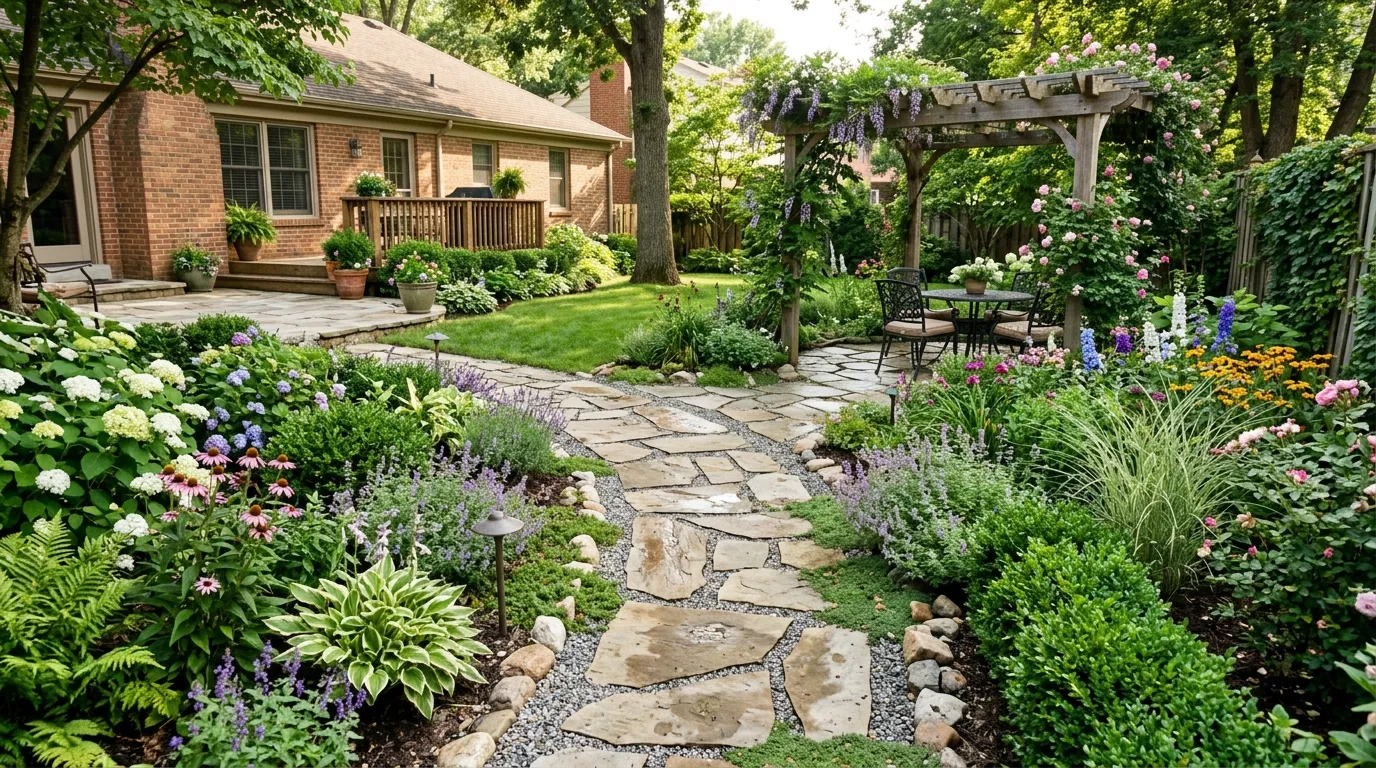
Flagstone and Black Gravel Bordered Path
Excavate the path to a depth of fifteen centimetres and compact a layer of crusher run as the base. Set your flagstone pieces — irregular natural stone in warm ochre and buff tones — directly into a dry-laid bed of sharp sand, fitting the pieces closely together like a puzzle.
Fill the gaps between stones with angular black basalt or slate chippings, raking them level with the stone surface. This negative space is the design element. The dark infill creates a strong visual contrast with the warm stone and makes each individual slab read as a distinct compositional element.
Edge both sides of the path with a single course of rectangular pale limestone blocks set vertically as a kerb, creating a clean boundary between the black gravel and any lawn or border material alongside.
Light the path with low angled solar spotlights set back in the border planting, aimed to cast shallow grazing light across the stone surface at night.
Grass-Jointed Flagstone Cottage Path
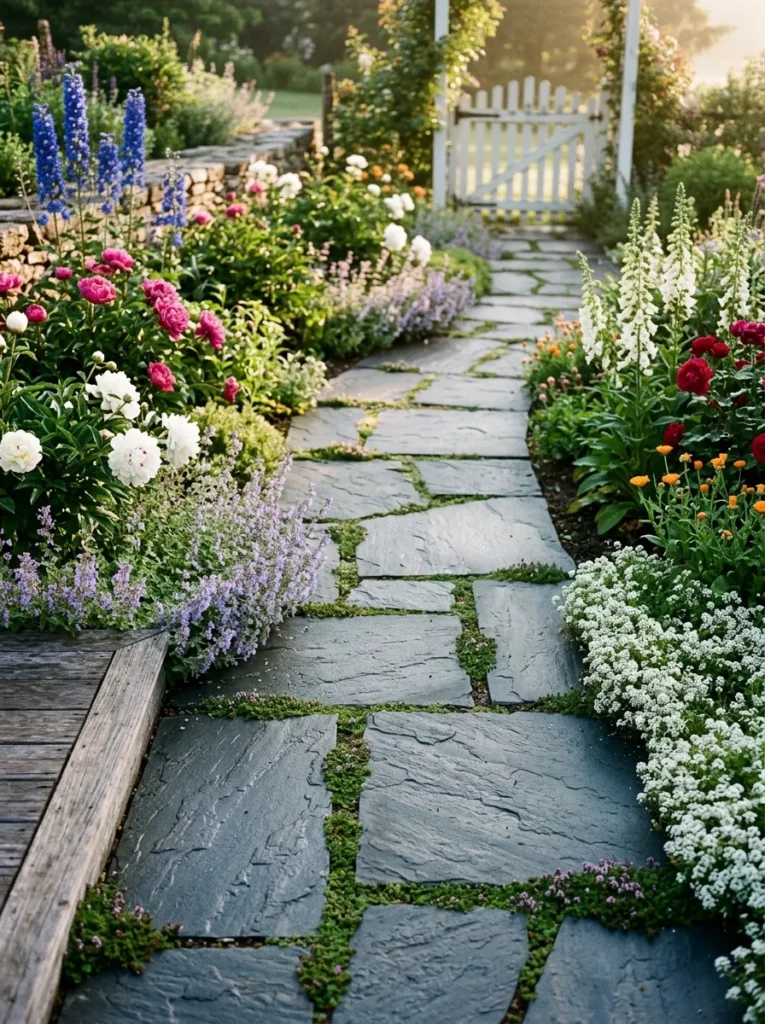
Large irregular flagstones laid in a continuous surface with generous joints between them, filled with creeping thyme or moss, create a path that feels simultaneously formal and entirely natural. The key is the joint width — too narrow and the ground cover can’t establish; too wide and the stones feel disconnected.
Plant the borders on both sides to billow generously over the path edges. Catmint, alyssum, lavender, and low geraniums all work well — soft enough to brush as you walk, resilient enough to recover. The path should feel enclosed by planting, not simply bordered by it.
The combination of the cool grey stone, the green joints, and the flower borders on both sides creates a path that looks best in early summer morning light. It earns that view by requiring almost no maintenance once established beyond an annual trim of the border edges.
Large Organic Stepping Stone Lawn Path
Cut out each step location precisely in the lawn using a spade, removing a section of turf and excavating to about eight centimetres. Set each large-format irregular stone — minimum fifty centimetres in its smallest dimension — into a bed of sharp sand so its top surface sits flush or very slightly proud of the lawn.
The step spacing should correspond to a natural walking pace: roughly sixty to seventy centimetres between step centres. Lay two steps, then walk the spacing naturally. Adjust before proceeding. Wrong spacing is immediately obvious and uncomfortable to correct later.
Set the stepping stones at a very slight angle to the direction of travel, alternating which way each stone angles so they read as a rhythm rather than a rigid row. This creates movement and prevents the path from looking like pavement.
Maintain the grass right to the stone edges with a half-moon edging tool each season. The crispness of that edge is what makes the design work.
Grass-Jointed Concrete Slab Curved Path
Take large format cast concrete paving slabs — the consistent, uniform kind — and lay them two across in a curved run, maintaining a uniform gap of about two centimetres on all sides for grass to fill.
The critical factor here is the grass management. The path only reads as designed if the grass joints are kept perfectly even and the grass on the slab faces is managed precisely at the joint line. A lawn edger passed along both sides of the path twice a season is the minimum. The crispness of that edge is everything.
Border the path on one side with mass planting of ornamental grasses — multiple varieties, including blue fescue, hakonechloa, and pennisetum — contained in a well-defined mulched border. On the other side, a single specimen tree with a circular mulched base creates a strong focal point. The geometry of the slabs, the movement of the grasses, and the anchor of the tree are the three elements of the composition.
White Cottage Flagstone Front Path
This path works through deliberate contrast: pale grey-white stone against dark bark mulch, clean curves against richly planted borders.
Lay large-format pale grey flagstone pieces in an irregular interlocking pattern with tight joints, filling gaps with grey polymeric jointing sand that prevents weed growth without looking sealed. The path should be wide — at least ninety centimetres — and should curve gently rather than running straight to the door.
The border beds on both sides should be built up generously with dark shredded bark mulch, which offsets the pale stone and keeps the composition readable. Plant with a mixture of mounding and upright forms: rounded hydrangeas, arching rose shrubs, and spires of salvia or agastache. Place a substantial rounded boulder or two in the borders at irregular intervals — not as ornaments but as structural anchors.
The path should feel like it arrives, not just connects. Widen it slightly as it approaches the door.
Mosaic Stepping Stone Cottage Path
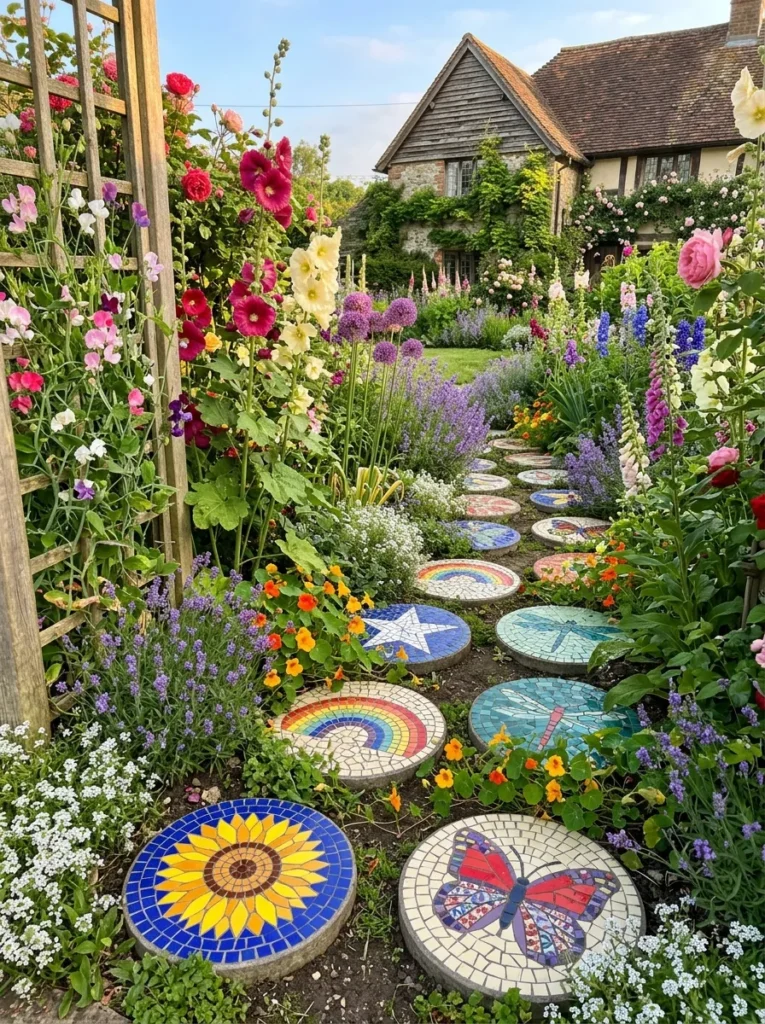
Cast circular concrete discs at home using a simple mould — a large round plastic tray or an old bucket lid works. Mix the concrete stiff, fill the mould to about eight centimetres deep, allow to partially cure for twenty-four hours, then embed your mosaic tiles into the surface while the concrete is still firm enough to hold them but not yet fully set.
Each disc becomes its own composition: a sunflower radiating outward from the centre, a dragonfly in blue glass fragments, a geometric star. The subjects don’t need to relate to each other — the inconsistency is part of the charm.
Set the finished discs in a cottage border at irregular spacing, not in a rigid line. The path meanders slightly. The discs appear at irregular rhythm. Plant thickly around them with low cottage border plants — alyssum, geranium, astrantia — so the path feels discovered rather than installed.
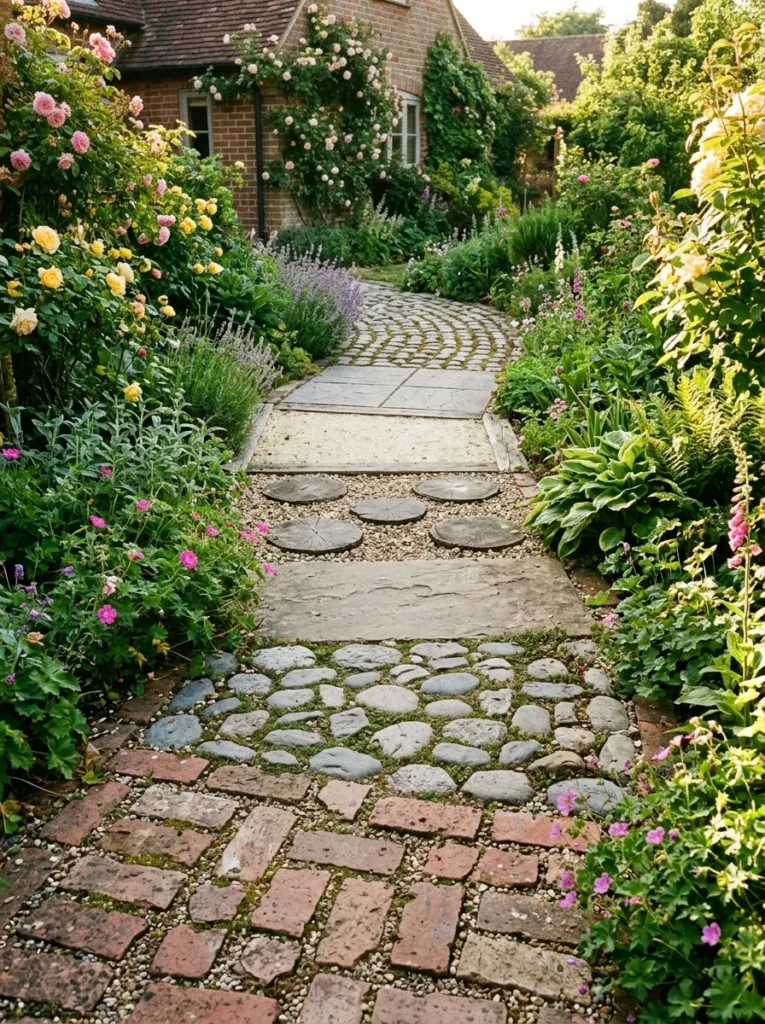
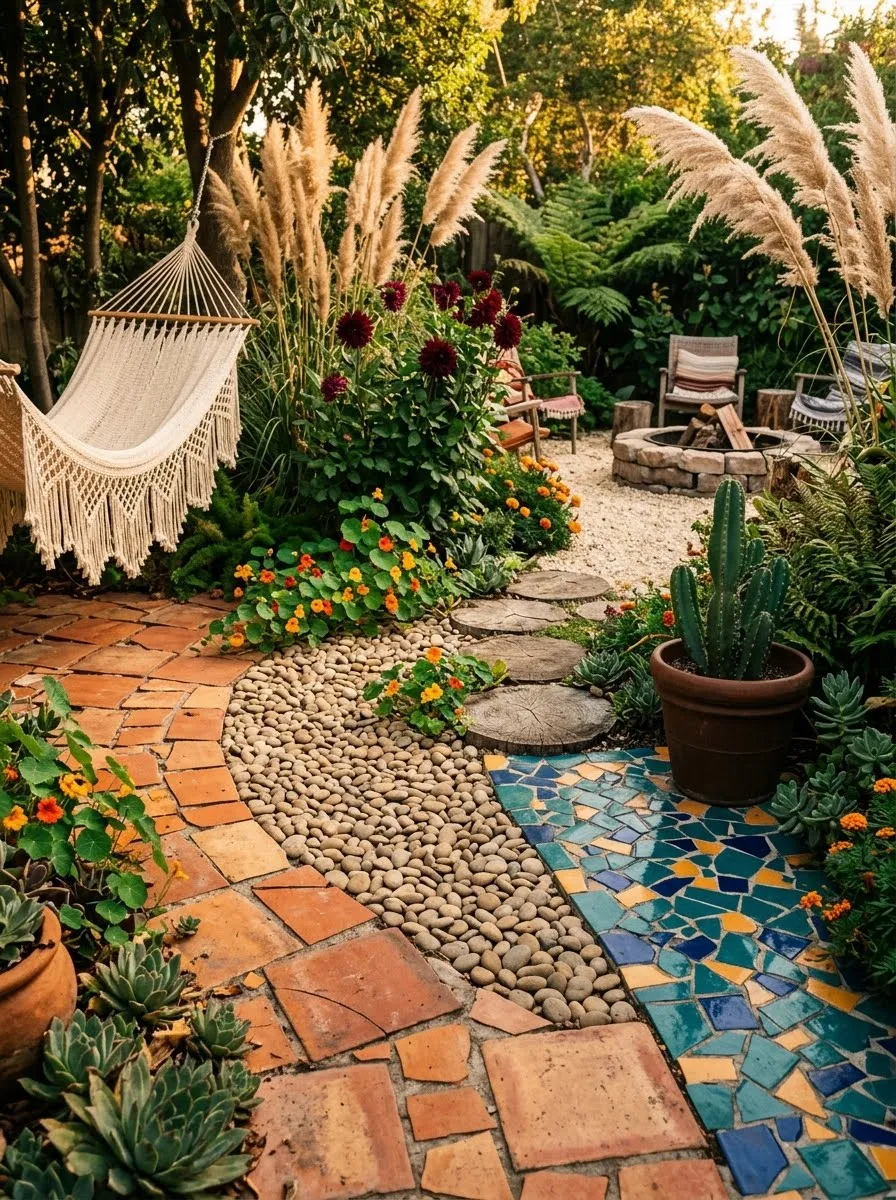
Mixed Materials Collector Path
The single rule for this path is that every material used must have provenance or character. Nothing new and uniform.
Begin with a section of reclaimed red brick laid in a running bond pattern. Transition into a band of large flat river stones packed tightly with fine pea gravel between. Move into a section of large irregular flagstone pieces. Transition into a section of wood round slices — cross-sections of logs approximately eight centimetres thick and thirty centimetres across — set into the soil.
Each material zone should be at least sixty centimetres long — long enough to register as intentional rather than accidental. The transitions between zones can be abrupt or gradual; both work. What matters is that each zone is resolved before the next begins.
This path works only in a garden with relaxed, abundant planting on both sides. In a spare or formal garden it looks confused. In a cottage or potager setting, it looks as though it grew naturally over decades.
Mixed-Era Cottage Collector Path
This one takes planning. Every section of the path uses a different historic material, and the path reads as a record of the garden’s history rather than a recent installation.
Start at the gate end with reclaimed red brick laid flat in a herringbone or running pattern. Transition into a section of large rounded river cobbles set on edge in sand — the kind of surface that takes effort to lay but looks magnificent. Move into a section of large cut flagstone slabs. Insert a short passage of small circular log slices embedded flush with the path surface for variety of texture underfoot.
Plant the borders so closely that they encroach on both sides of the path, reducing the perceived width in places. Lavender, catmint, and geranium all work well for this — they billow forward onto the path edges and can be trimmed back annually without damage. The path should feel as though it has been modified and added to over many years, because that is exactly what it represents.
Curved Russet Flagstone Lawn Path
This path works by letting the material and the curve do all the compositional work. There should be nothing else.
Lay irregular pieces of iron-rich red-orange flagstone — the kind with warm ferrous colouring — in a random irregular pattern within a contained width. Use amber-coloured pea gravel as the infill between the stones, which reinforces the warm tone of the rock rather than contrasting with it.
Edge both sides with rectangular concrete curbing in a warm grey tone, slightly raised above the adjacent lawn level to create a clean defined channel. The curbing must be continuous — no gaps — and it must follow the curve precisely, with small cut pieces used at the tightest sections rather than trying to bend a long piece.
The curve itself should be generous, not sharp. A path that turns ninety degrees in a tight radius is uncomfortable to walk. A path that curves over a distance of four to five metres feels natural and unhurried.
Plant nothing along the path edges in the immediate vicinity. The lawn is the foil. The path is the object.
Clover-Ground-Covered Farmhouse Stepping Path
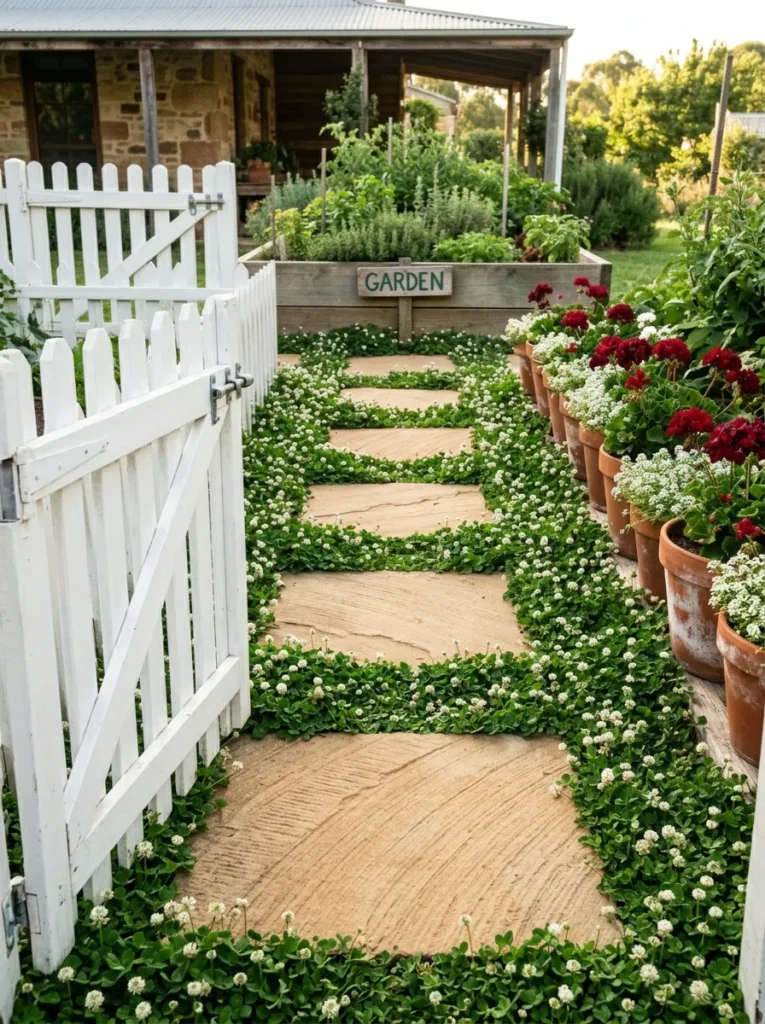
Set large irregular sandstone or limestone slabs as stepping stones within a path width, spacing them for natural walking pace. The gap between and around each stone is the key decision: it should be generous enough to allow a ground cover to establish fully, not so wide that the steps feel disconnected.
Seed or plant the entire path area between and around the stones with white-flowering clover rather than grass. Clover stays lower than lawn grass, tolerates being walked on, requires no mowing, fixes nitrogen from the soil, and flowers prolifically in soft white from early summer onward. It also draws pollinators in quantities that will make the path hum on warm afternoons.
Allow the clover to billow gently beyond the path edges into the adjacent areas without a hard boundary. The white gate at the entrance to the path is the visual full stop.
Timber and Gravel Minimalist Path
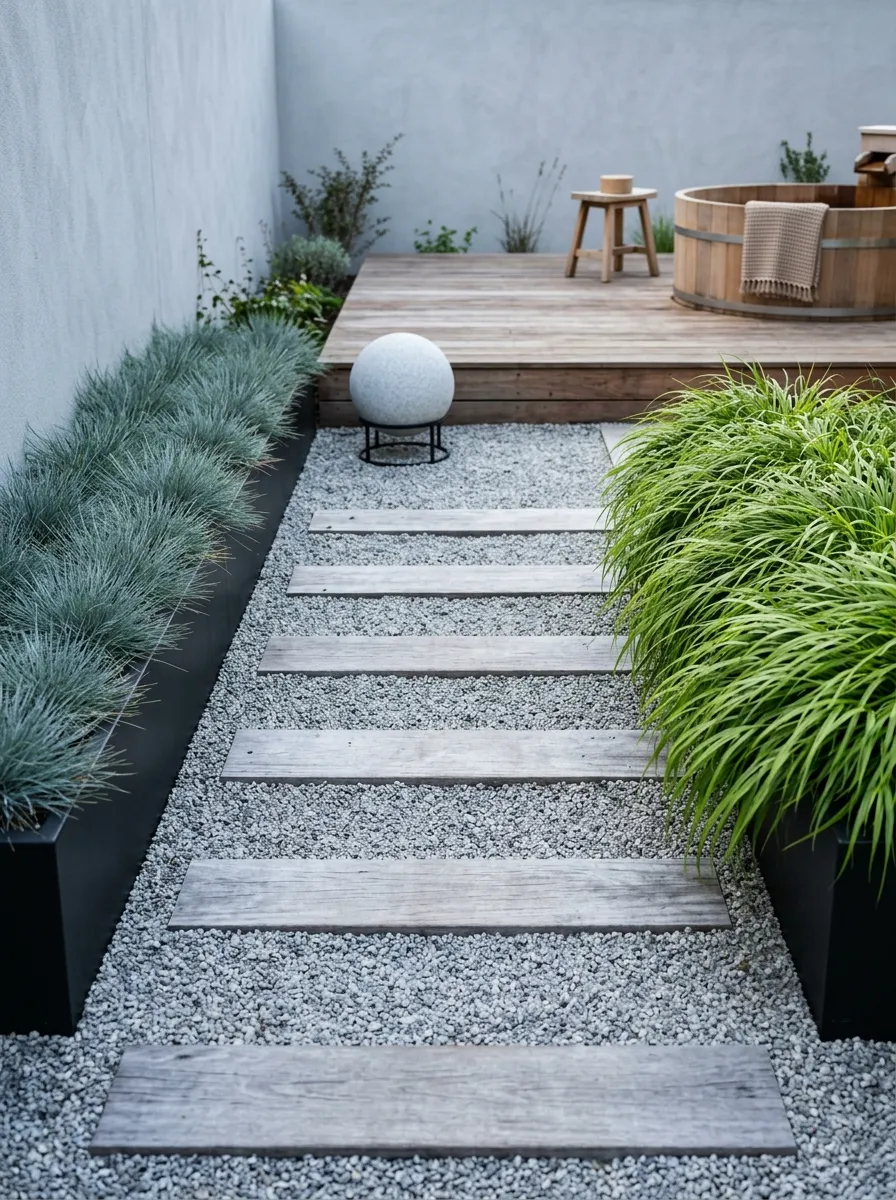
Lay a bed of fine pale gravel — white or light grey granite chips — to the full width of the path, contained within black powder-coated metal edging strips set flush with the adjacent surface. Into the gravel, set horizontal lengths of weathered hardwood decking boards as the walking surface, spaced approximately five centimetres apart so the gravel is visible between each board. The boards should run across the path width, not along it, creating a ladder-like pattern that reads clearly from the moment you approach.
Flank the path on both sides with low-profile black powder-coated raised planters, planted with mounding blue-grey fescue on one side and arching hakonechloa on the other. The colour contrast between the two grass types, the pale gravel, and the warm grey wood is the entire composition. There should be nothing else.
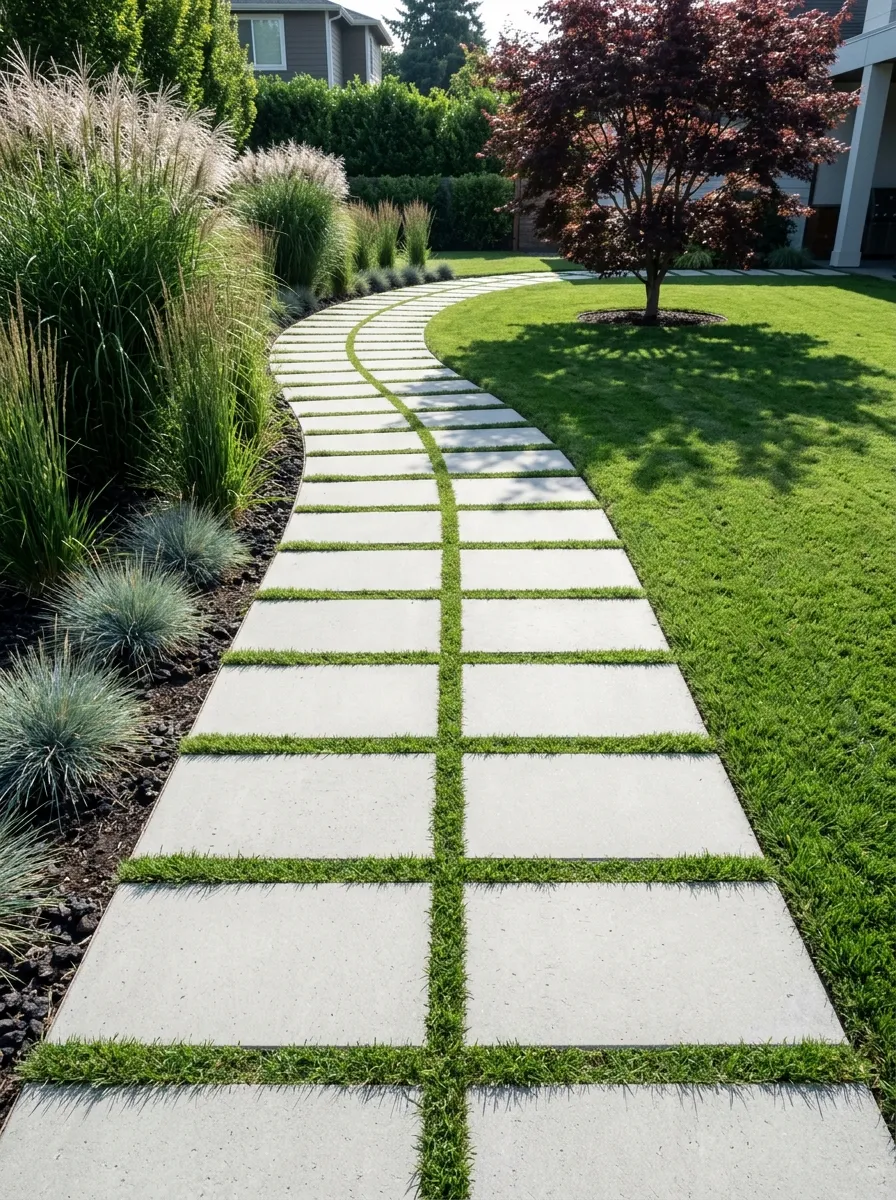
Contemporary Grass-Jointed Concrete Path
Cut the path form using large format concrete or porcelain paver slabs — minimum sixty by ninety centimetres per slab — set in pairs side by side to create a double-width path. Use a pale grey, almost white, concrete-look surface that will bleach further in sunlight over time.
Set each slab into the lawn with a gap of approximately two centimetres on all sides. Allow lawn grass to grow into these gaps naturally. The green lines of grass growing between the pale slabs is the composition. For this to work, the gaps must be maintained. A thin oscillating scraper tool or even a sharp knife run along the joints each spring keeps them clean. Grass growing over the slab faces and obscuring the joint lines destroys the effect.
The path should run in a single smooth curve, not a series of angles. The formal geometry of the slabs combined with the organic gentleness of the curve creates productive tension.
Moss and Stepping Stone Shade Path
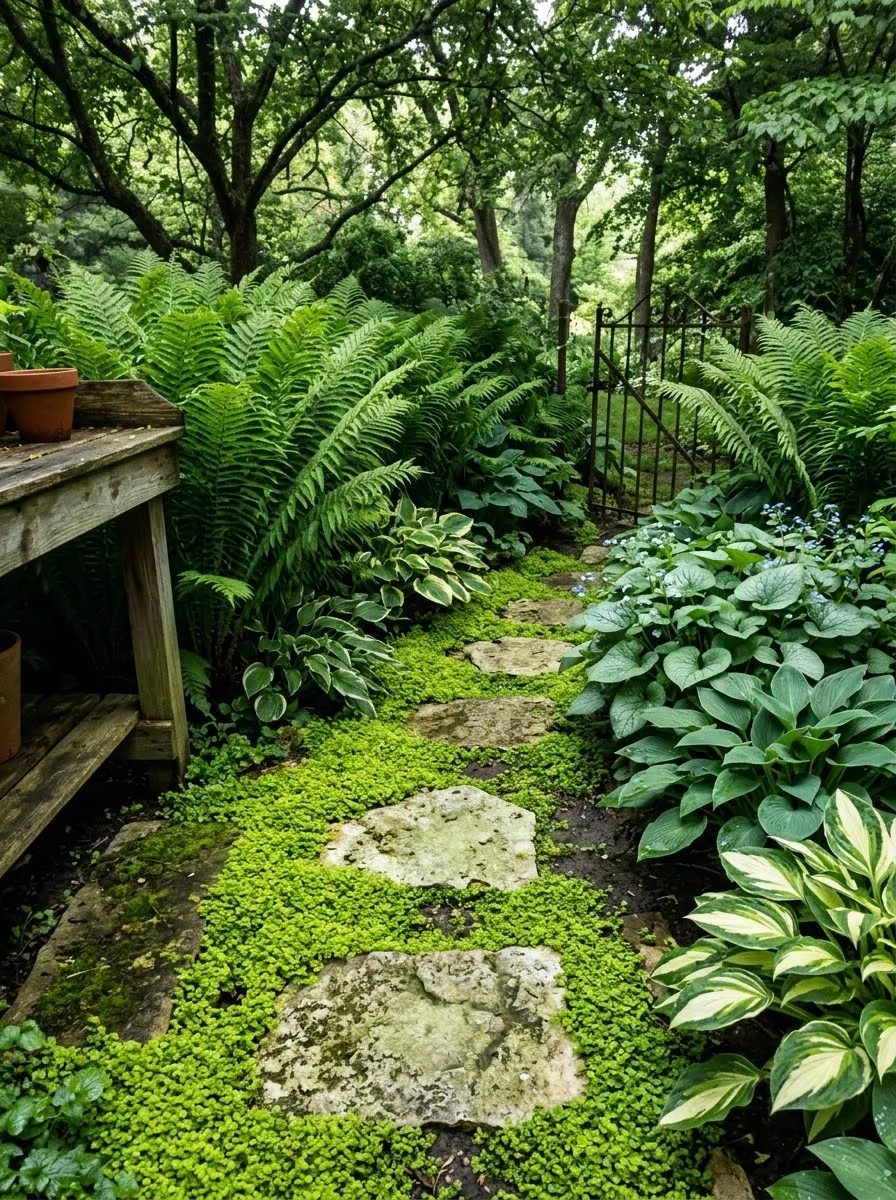
This path exists only in conditions that most gardeners treat as problems: shade, moisture, and tree root competition. Source large irregular pieces of sandstone or limestone — the kind with already-pitted, weathered surfaces — and lay them as stepping stones in a bed kept moist. The key is the ground between: establish creeping Soleirolia (baby’s tears) or the moss-like Sagina procumbens as dense ground cover filling every inch of the path floor between the stones. These plants need no maintenance once established in shade and reach only two to three centimetres in height.
Plant the borders densely with hostas in multiple sizes and varieties, large-fronded ferns, and hellebores. Allow the plantings to overhang the path edges until they almost touch across the centre.
The path is not about the stones. It is about what grows between them.
Kitchen Garden Timber-Edged Gravel Path
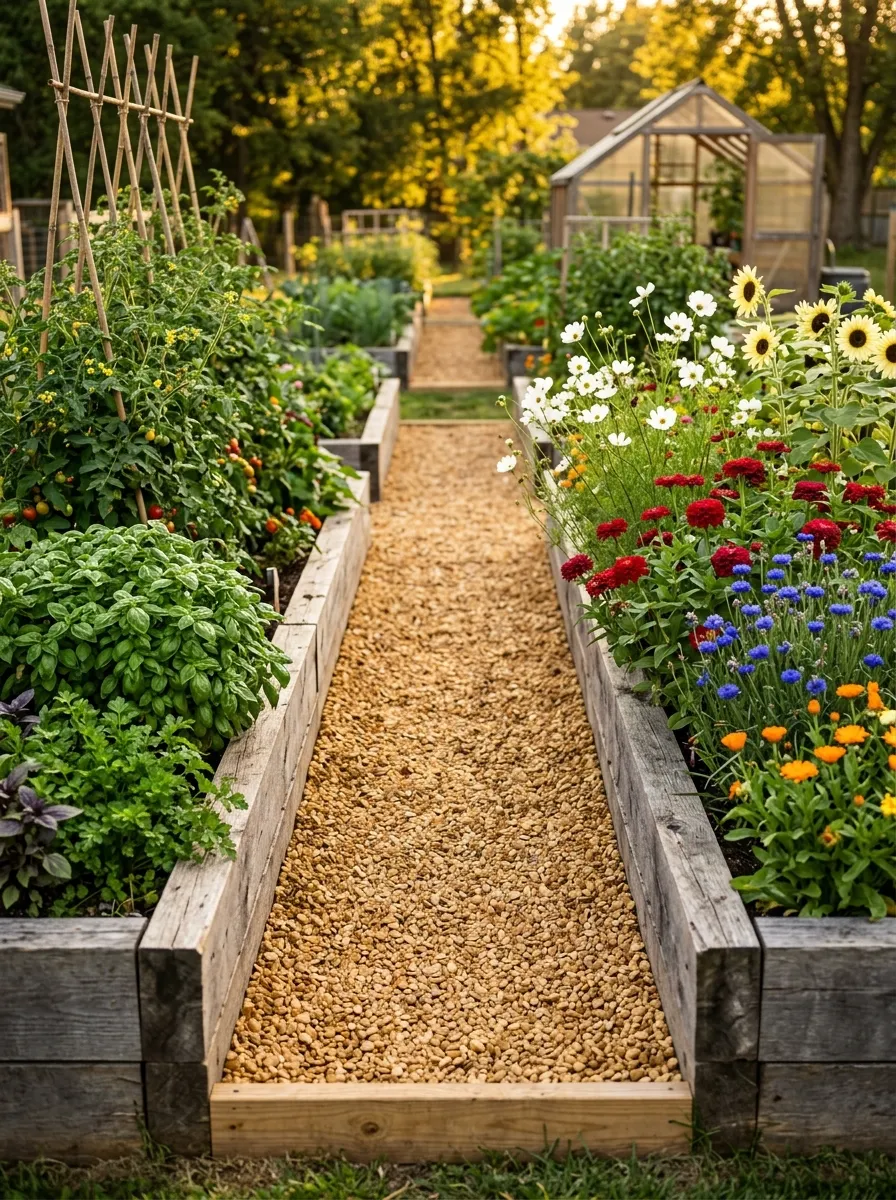
Build raised bed frames from rough-sawn weathered timber — old sleepers or scaffold boards, any timber with weight and character. Position them in parallel rows with a consistent gap between them that forms the path. Fill the path channel completely with golden gravel — a warm amber-toned pea gravel that reads as warm against the grey timber. No stepping stones, no additional surfacing. The gravel is level with the raised bed bases and the timber edges contain it cleanly.
The path should run straight and level from end to end. The geometric order of the kitchen garden — rows of crops, pairs of beds, consistent spacing — is the context that makes a straight path appropriate here. It would look wrong in a naturalistic setting. In an ordered kitchen garden, it looks exactly right.
Add bamboo cane wigwams at the ends of beds for climbing beans and sweet peas. The vertical structure at path-end draws the eye forward and makes the path feel purposeful.
Painted Patriotic Concrete Walkway
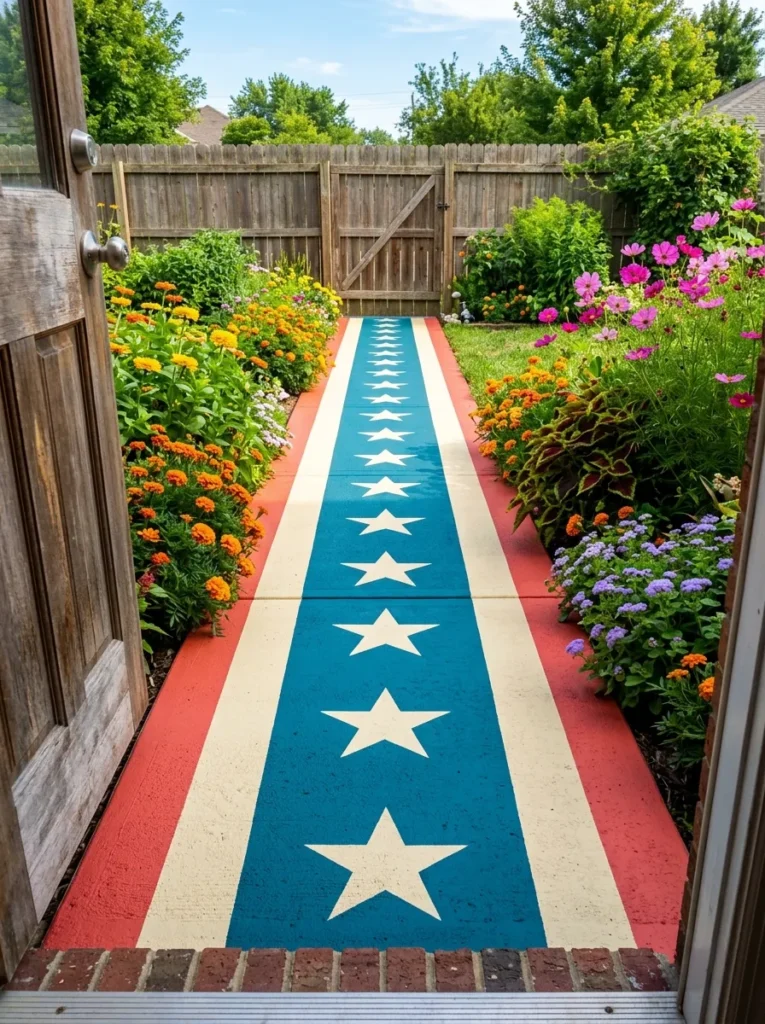
This works only on a clean, sound concrete surface. Cracked or flaking concrete should be repaired before painting begins. Clean the concrete thoroughly with a pressure washer and allow it to dry for at least forty-eight hours. Apply a concrete primer suitable for exterior use.
Mask out the design with painter’s tape: a wide centre stripe in deep navy blue flanked by cream white stripes on each side and outer stripes in strong terracotta red. Cut the lines as precisely as possible — use a chalk line snapped onto the surface as your masking guide. Apply two coats of exterior floor paint in each colour, waiting for full cure between coats.
Once the base colours are set, cut star stencils from thin acetate and apply white stars down the navy centre band using a stippling brush rather than a roller, which gives a crisper edge. Finish with two coats of clear exterior floor sealer to protect against foot traffic and weathering. This will need refreshing every two to three years depending on traffic and exposure.
Minimal Concrete Square Stepping Path
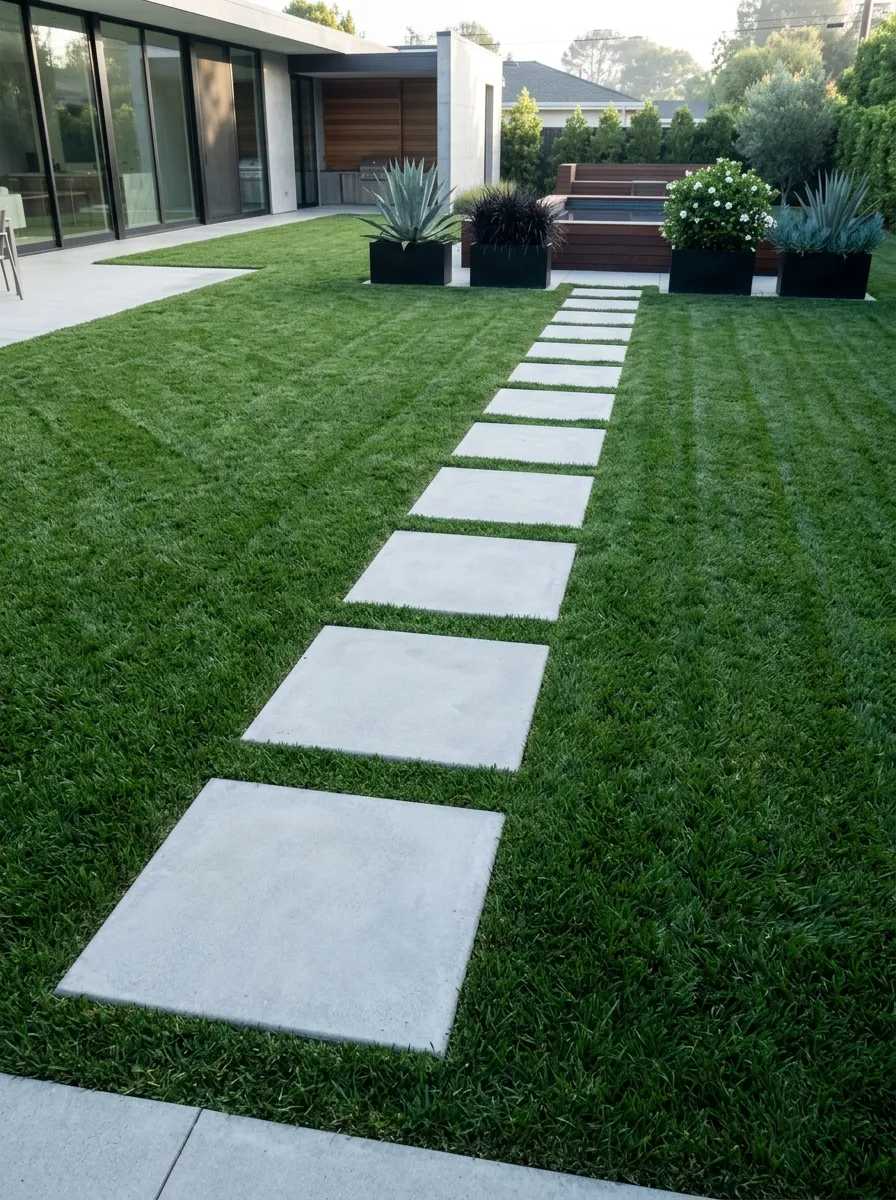
Nothing about this path asks for your attention. That is the design. Select large-format pre-cast concrete paving slabs — sixty by sixty centimetres minimum — in a pale near-white colour. Set them in a single-file row across a well-maintained lawn, with each slab spaced at natural walking pace from the last. There should be no curve. No variation in slab size. No planting between the slabs.
The lawn around the path is cut to the same height everywhere, with no special treatment at the slab edges. The path is distinguished only by the material.
This design exists to make the other elements of the garden more visible. The specimen trees, the planted borders, the architecture of the house — these benefit from a path that doesn’t compete. The minimal walkway is confidence. It says the garden is interesting enough that the path doesn’t need to be.
Final Thoughts
A path is a promise.
It tells the person walking where they’re going, at what pace they’ll arrive, and what kind of garden they’re entering. A path that meanders through abundance is an invitation to slow down. A path of precise geometric paving across a manicured lawn is a statement about clarity and control. A path of mosaic rounds through a cottage border is playfulness encoded in stone.
None of these is wrong. What’s wrong is a path that says nothing.
Your garden has a character. Probably several. The walkway is the first and most persistent expression of that character — walked every day, in every season, by everyone who enters.
It deserves more thought than a morning spent laying whatever was stacked at the back of the garden centre.