
There’s a specific moment every pool owner reaches. It’s the moment you go outside to find a chair, and instead find a pile of deflating flamingos, a unicorn with a slow leak, six pool noodles in four colours, and a beach ball that’s somehow always half under a bush.
That moment is not a storage problem you can ignore. It’s a problem that compounds. Every summer adds inventory. Nothing leaves. The pile grows until it has its own weather system.
The good news is that pool float storage is one of the most satisfying organisational problems to solve, because the objects themselves are huge, colourful, and impossible to hide by accident. You’re not tidying away small annoying things. You’re either containing chaos or putting on a show. Most of the solutions below do both.
Pool Float Storage Ideas Worth Building
Slatted Cedar Rolling Cabinet
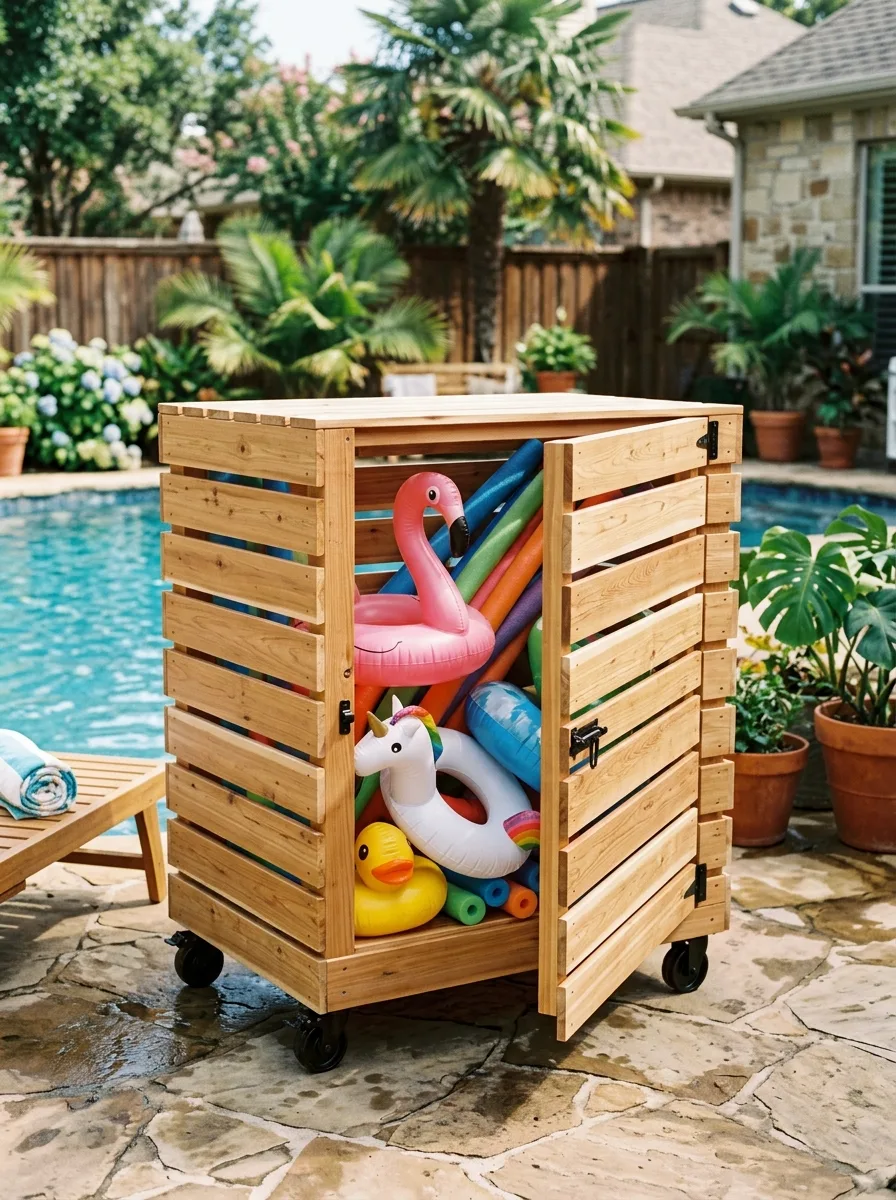
Build a tall cabinet from cedar slats with gaps between each board — wide enough for airflow but narrow enough to contain large items. Mount the whole thing on locking caster wheels so it can be rolled against a wall or fence when not needed, and rolled poolside when it’s party time. Add two hinged doors on the front with simple slide bolts, also built from matching slatted cedar.
Inside, the cabinet should be tall enough to stand pool noodles upright and deep enough to stack inflated rings and floats without crushing them. The slatted construction lets chlorine-damp items air dry inside the cabinet rather than mildewing in a sealed box. Leave the cedar unfinished or apply a single coat of clear weatherproofing oil — the natural wood tone works with any backyard palette.
Industrial Wire Mesh Locker
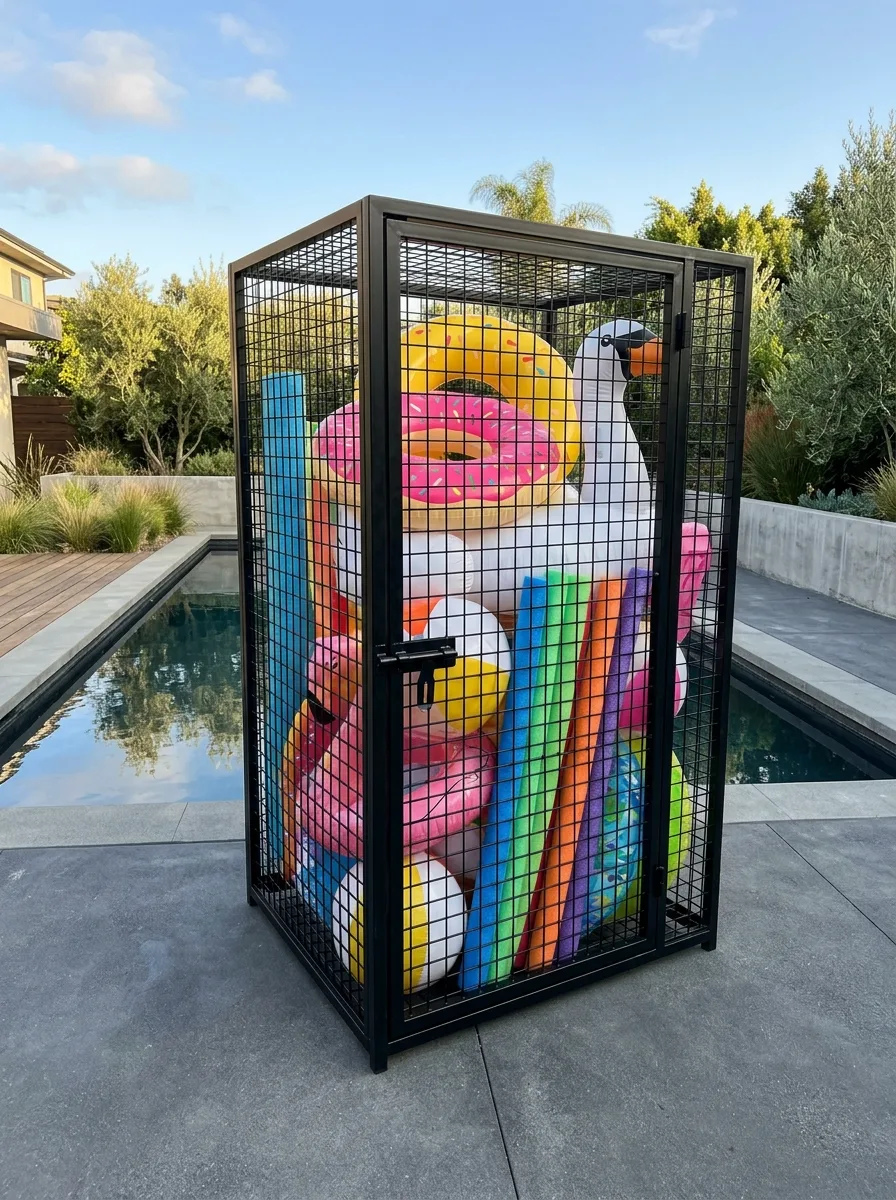
Construct a tall rectangular frame from black powder-coated steel angle iron, and panel all sides and the door in heavy-gauge wire mesh. Add a simple slide-bolt latch with a padlock loop on the door. The mesh allows full visibility and ventilation while containing everything inside.
This works best for households with a large volume of inflatables that need to stay inflated between uses — the mesh prevents UV degradation from direct sun exposure while letting air circulate to prevent mould. Group floats by size with the largest at the back. The black frame reads as architectural rather than utilitarian, especially against a concrete or stone pool surround.
Whitewashed Trunk With Rope Handles
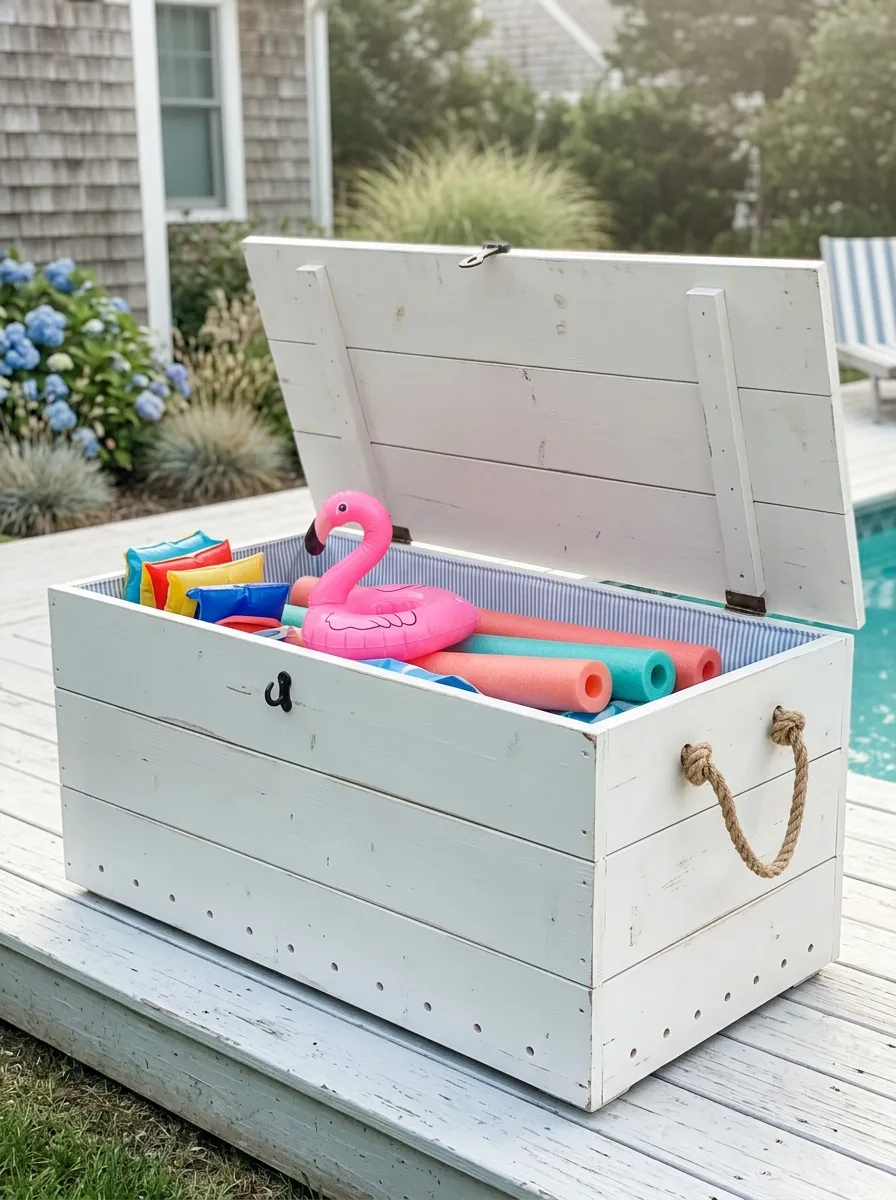
Build a simple rectangular trunk from tongue-and-groove cedar boards, finished in a whitewash that lets the wood grain show through. Add a hinged lid with a simple hook-and-eye latch, and attach thick jute rope handles to both ends for moving it. Line the interior with striped ticking fabric stapled to the inside walls — this protects the wood from damp inflatables and adds a small detail that elevates the whole piece.
This size works for a household’s regular rotation of arm bands, smaller rings, and a couple of noodles — not the entire inventory, but the things used every weekend. Keep it on the deck where it can also double as a side table or extra seat when closed.
Flamingo Hammock Float Net
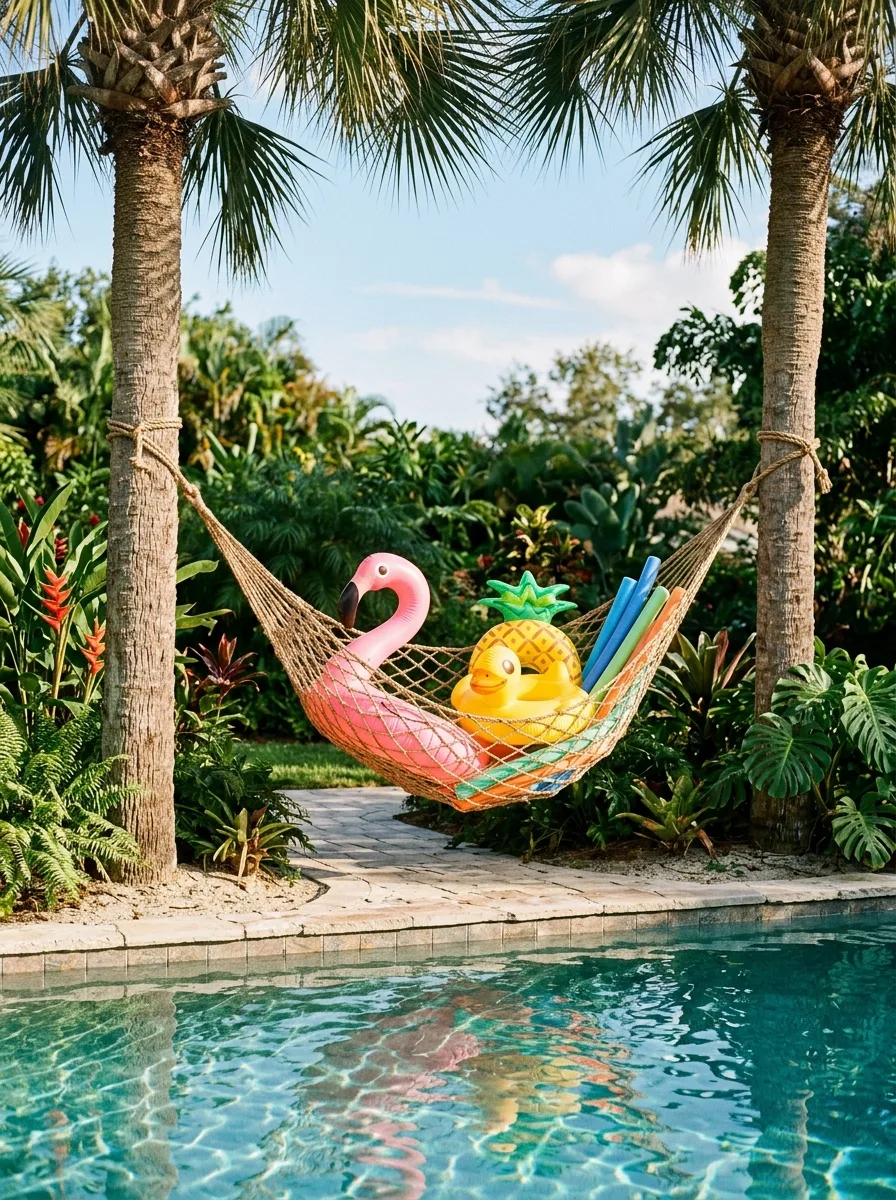
Hang a rope hammock — the kind shaped like a flamingo, woven from natural jute — between two palm trees or sturdy posts near the pool. Fill it with lightweight inflatables: beach balls, small rings, foam noodles. The hammock shape itself becomes part of the display, with the flamingo’s woven head and neck visible above the floats it’s holding.
This only works for lightweight items — nothing heavy enough to stretch the rope permanently — and it only works in a setting with the trees or posts to support it. But where it fits, it turns float storage into the most photographed corner of the yard. Keep the float colours varied; the rope’s natural tone is neutral enough to handle any combination.
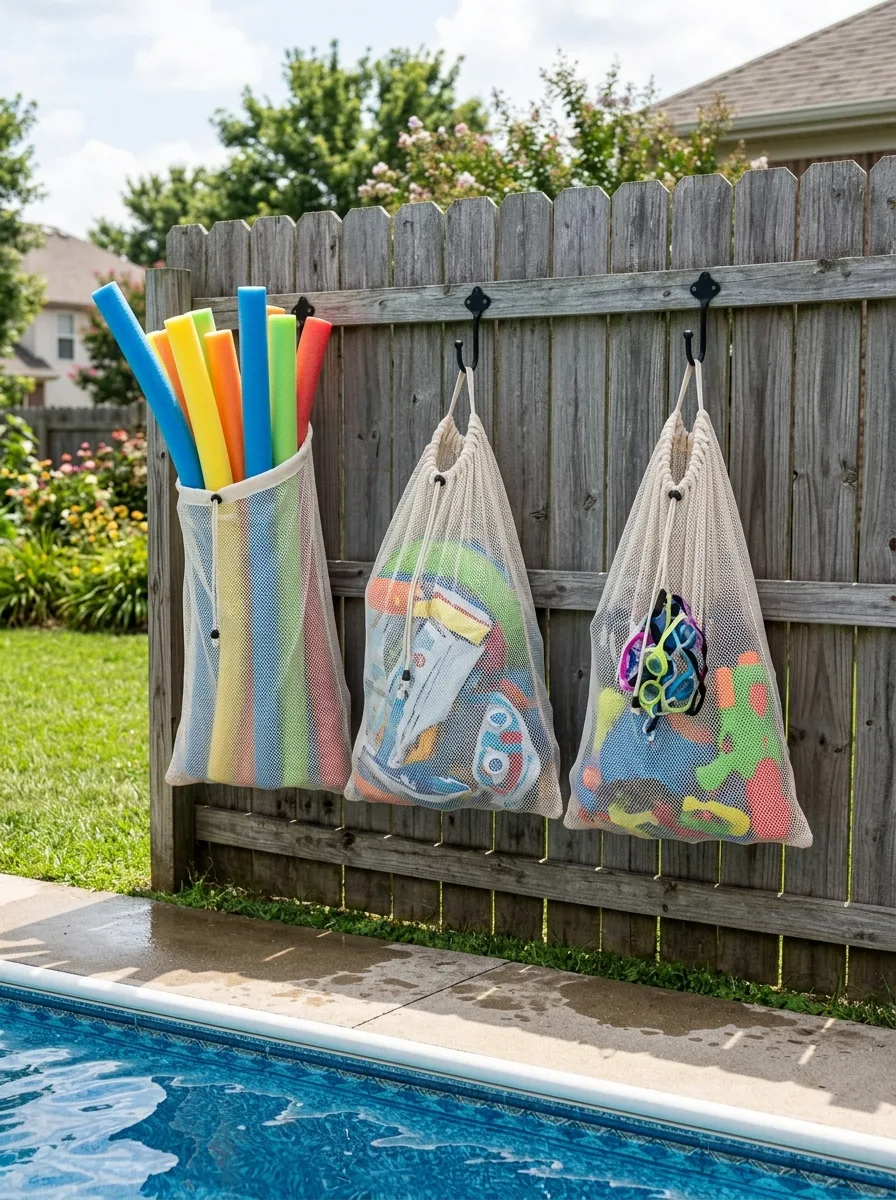
Rainbow Wall of Hooks
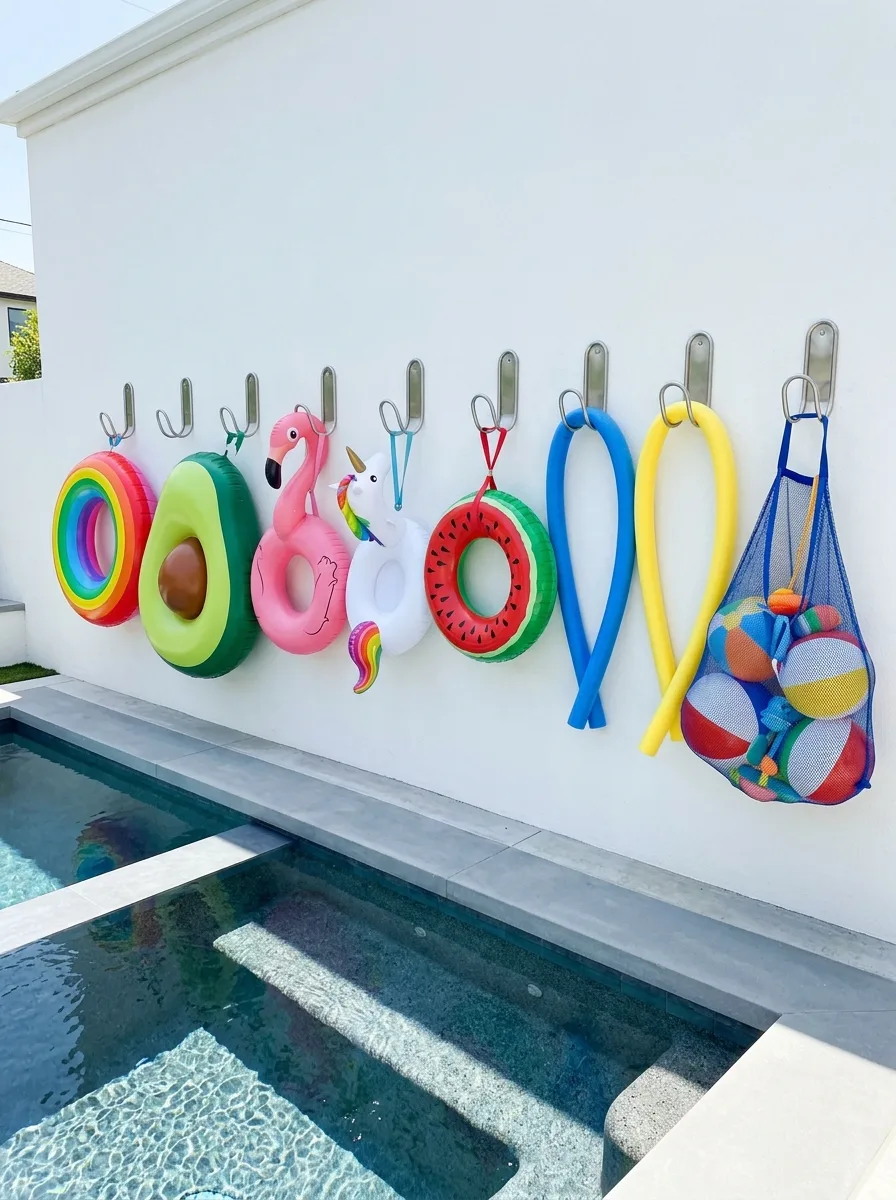
Mount a row of large stainless steel coat hooks directly onto an exterior wall at consistent height and spacing. Hang each inflatable ring, float, or mesh bag from its own hook, arranged left to right by colour or size for visual rhythm. Mix in one or two mesh drawstring bags for smaller items like balls and dive toys.
This is the simplest possible solution and also one of the most effective for households that want gear visible and instantly accessible. The wall becomes a feature in its own right — a row of bright shapes against a plain wall reads as intentional, almost like art. Keep the wall itself plain and pale so the floats provide all the colour.
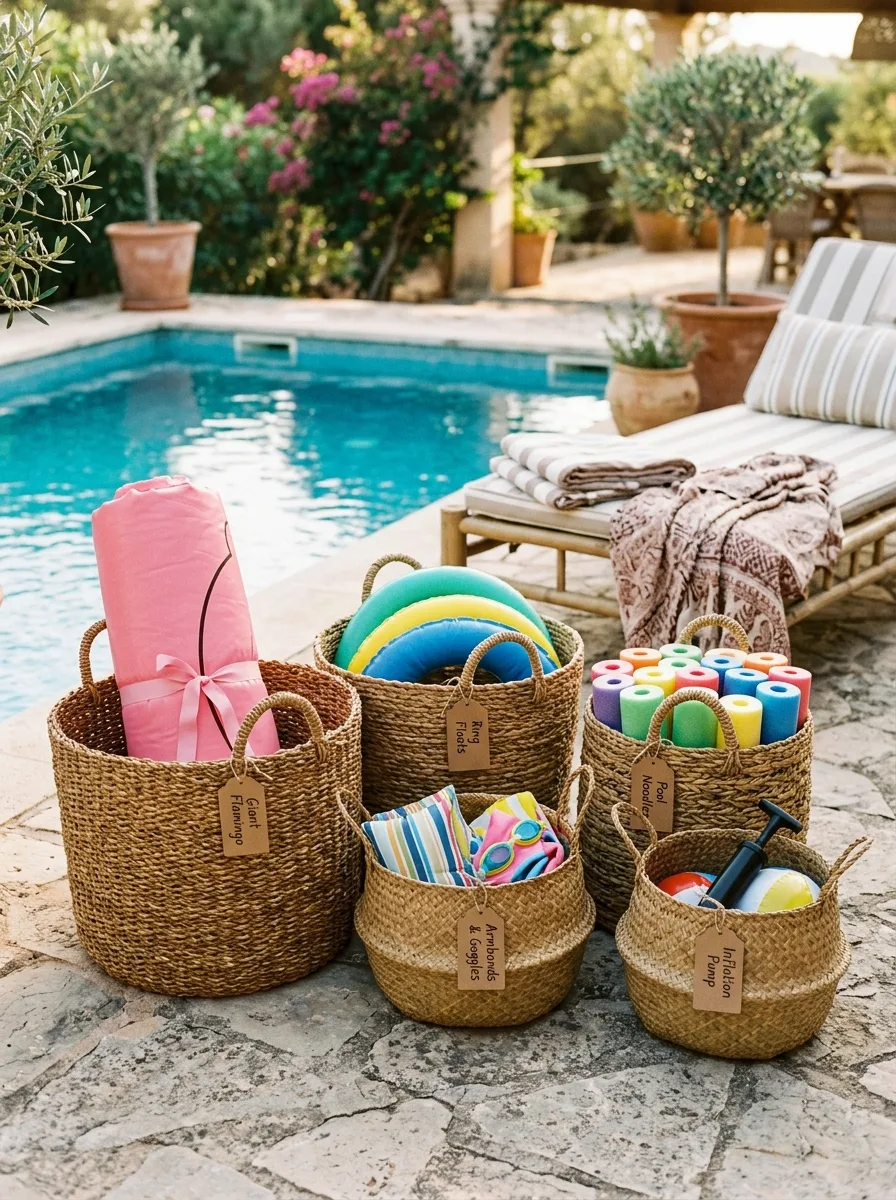
Woven Basket Tote Collection
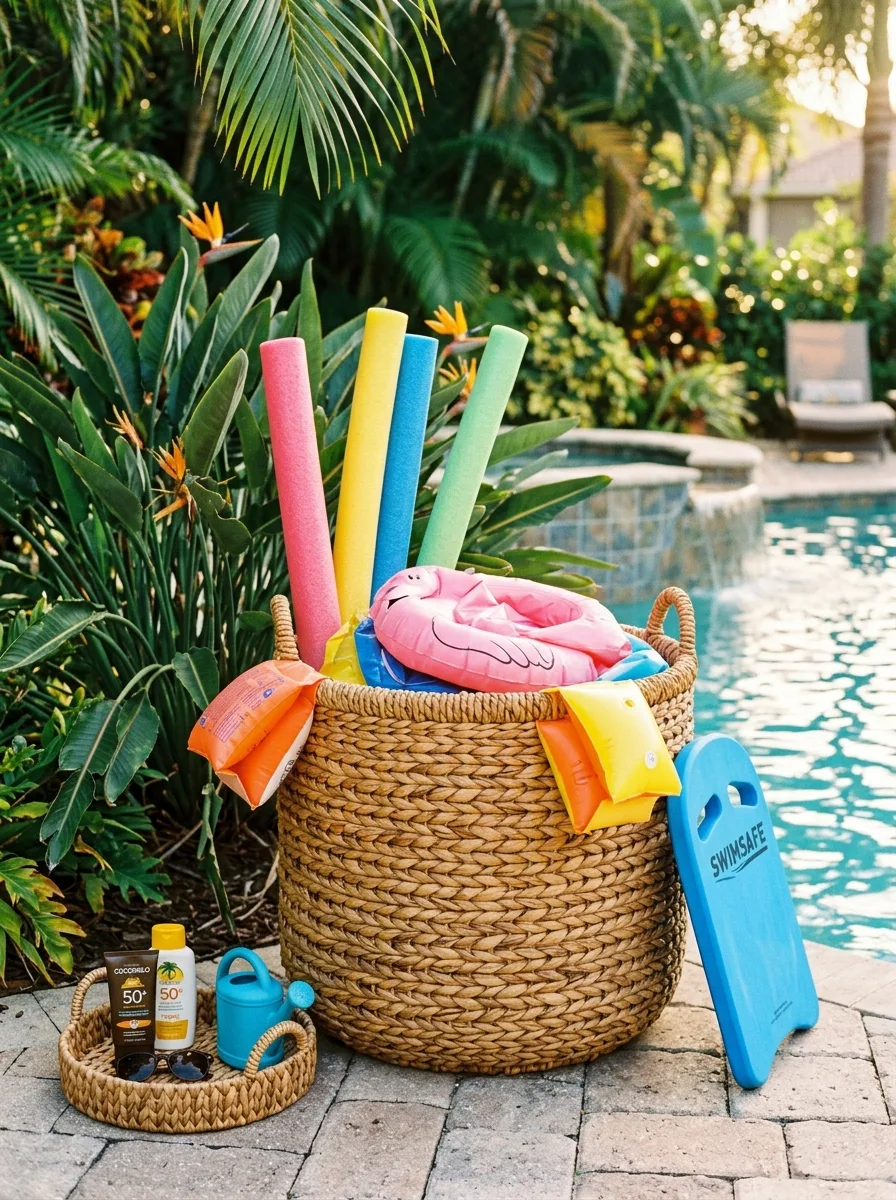
Assemble a set of woven seagrass baskets in graduated sizes, each with sturdy handles. Add a small kraft paper label to each basket identifying its contents — arm bands and goggles, pool noodles, inflation pump, ring floats, a rolled beach mat. Group the baskets together near a lounger when in use, and stack or nest them in a shaded spot when not.
The labelling is what makes this system work long-term — without it, baskets become just another place for things to get lost. The natural woven texture against a stone pool surround creates warmth without competing with the water or the landscaping. This system suits smaller households where the full inventory fits across five or six baskets rather than needing a dedicated structure.
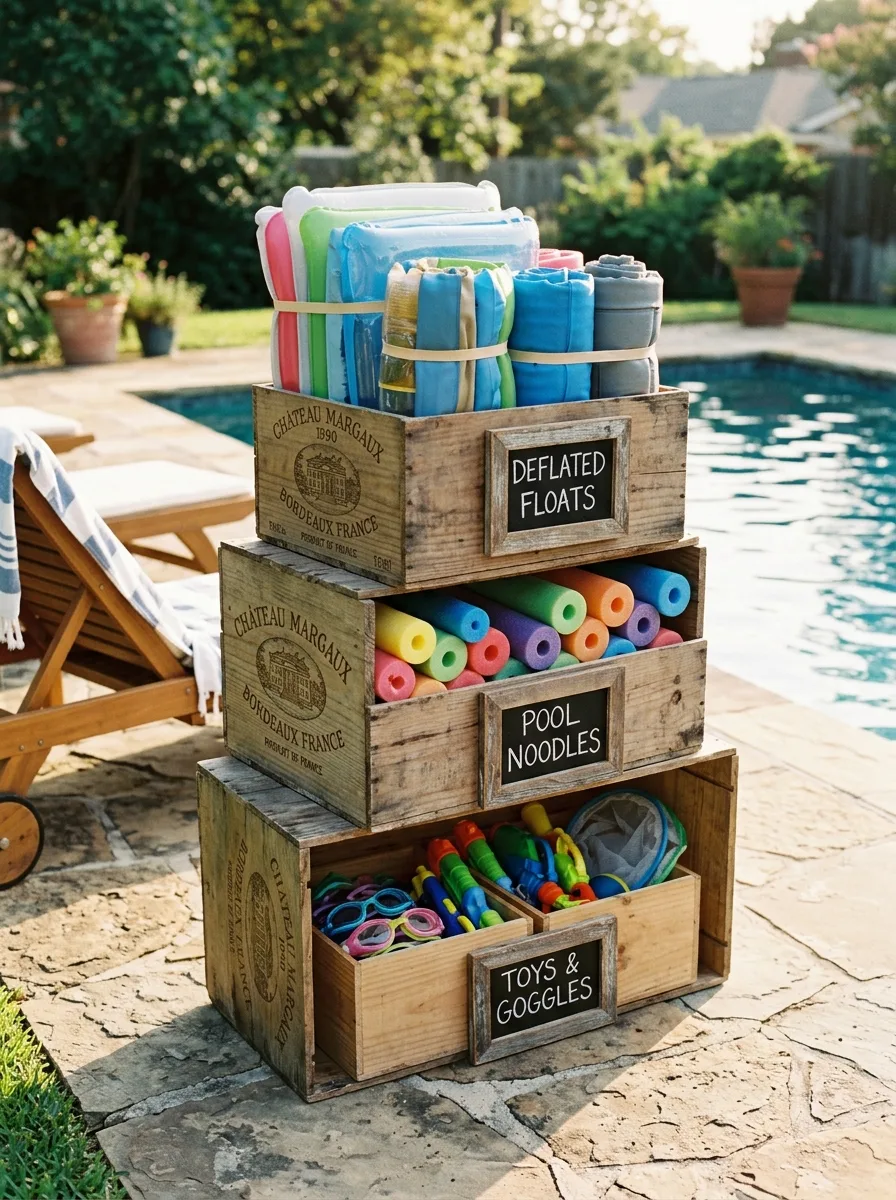
Stacked Wine Crate Labels
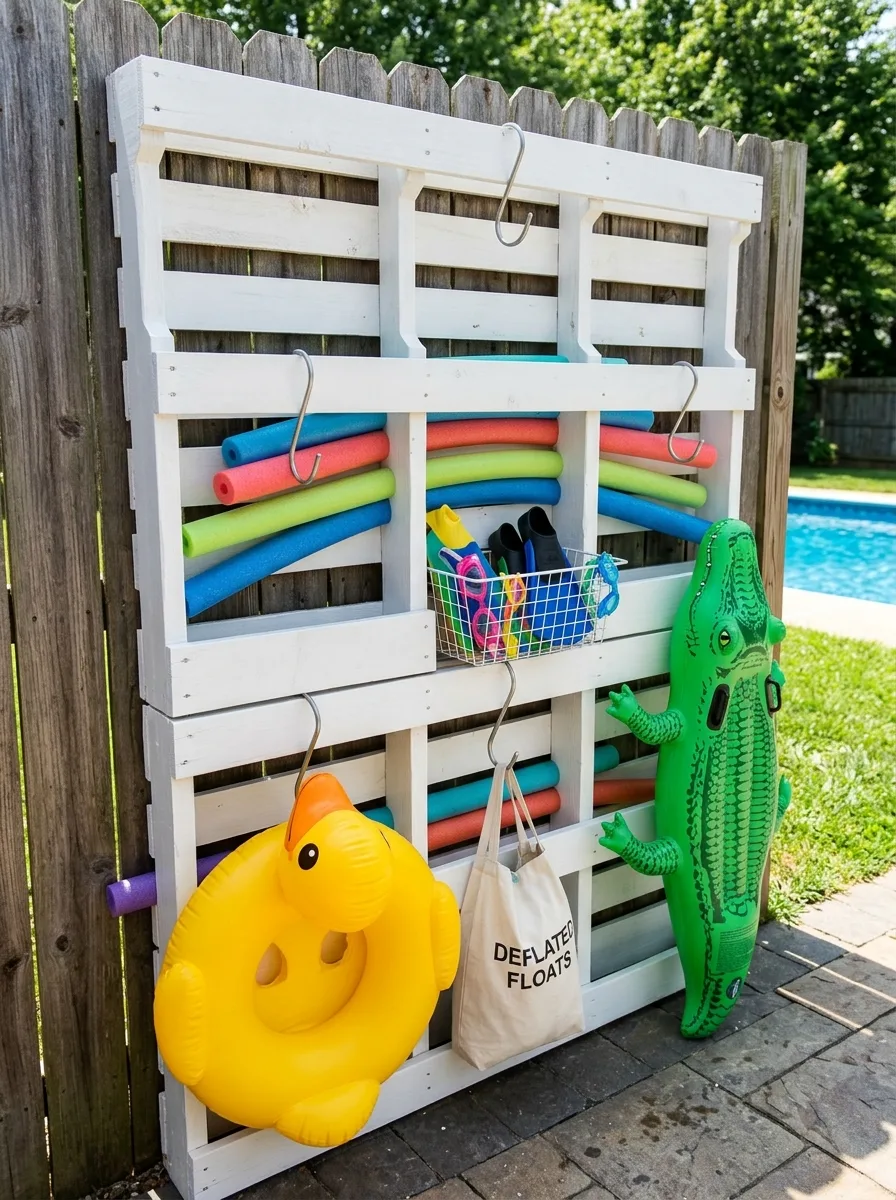
Source three wooden crates, ideally with a printed wine label stencil already on the side, and stack them in a pyramid — two on the bottom, one on top, or a simple ascending stack. Add a small chalkboard label to the front of each crate: deflated floats, pool noodles, toys and goggles. Use the crates strictly by category — nothing goes in the wrong box.
This works because the categorisation does double duty: it’s functional sorting and it’s also the visual interest. The repeated wine crate branding gives the stack a collected, slightly vintage look that works especially well in a backyard with other reclaimed or rustic elements. Keep the crates dry — line them with a folded towel if anything inside is damp.
Hampton Style Bench With Hidden Storage
Choose a long outdoor storage bench in white-painted aluminium or weather-resistant composite, styled like a coastal deck bench with a slatted lid that lifts on hydraulic hinges. Inside, fit a mesh net pocket on the underside of the lid for small items like goggles and arm bands, plus open space below for larger inflatables and a pump.
The bench serves double duty — seating when closed, storage when open — which makes it ideal for pool decks where space is at a premium. Keep one or two pool noodles standing upright beside the bench rather than inside it; noodles are often too long for bench depth, and a few visible noodles read as intentional styling rather than overflow.
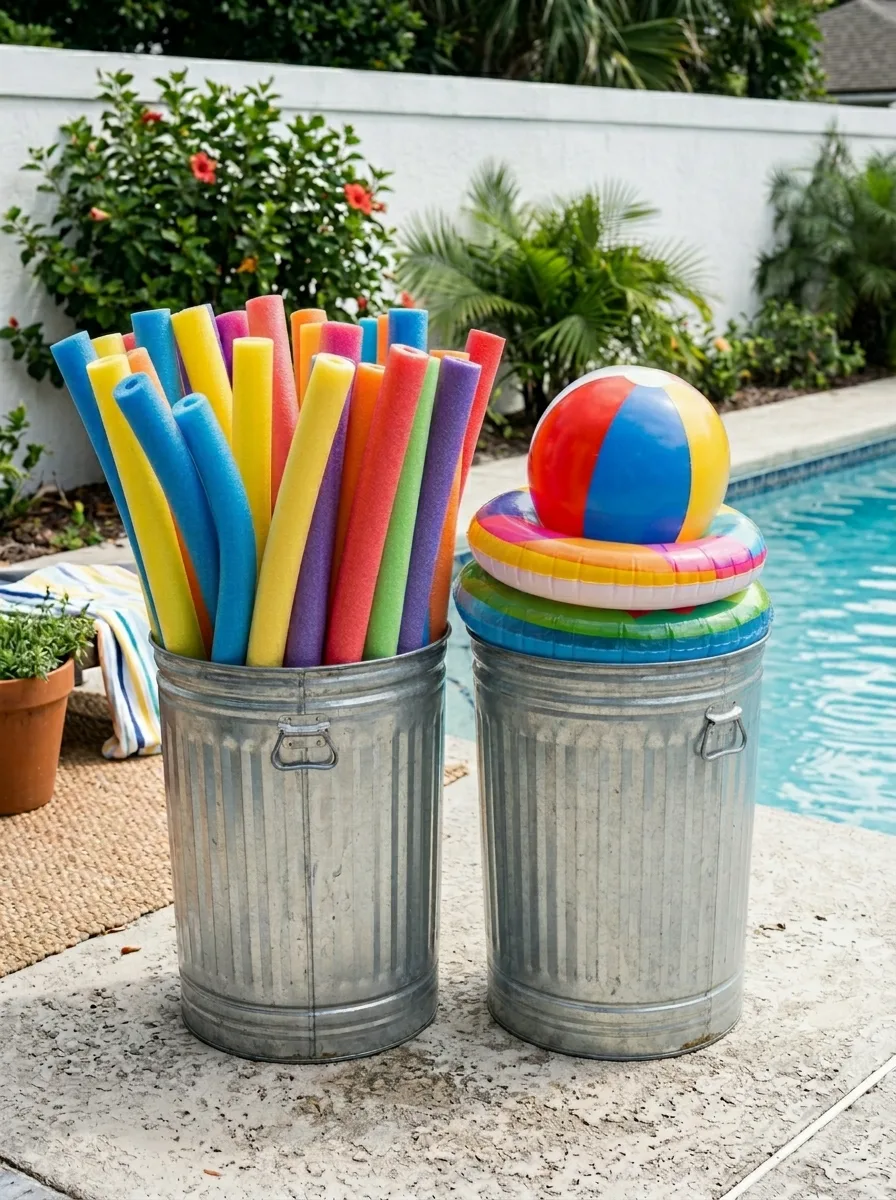
Galvanised Bin Noodle Stand

Source two galvanised steel bins — the kind that look like oversized buckets with handles — and use one exclusively for pool noodles, standing upright, organised loosely by colour. Use the second for stacking ring floats and a beach ball, largest at the bottom.
The galvanised finish is genuinely weatherproof and develops a soft patina over time that looks better with age, not worse. This is the lowest-effort, lowest-cost solution on this list and it works because it commits to simplicity — two bins, two functions, no attempt to do more than that. Place them at the corner of the pool deck where they’re accessible but out of the main walking path.
Macramé Hanging Net Display
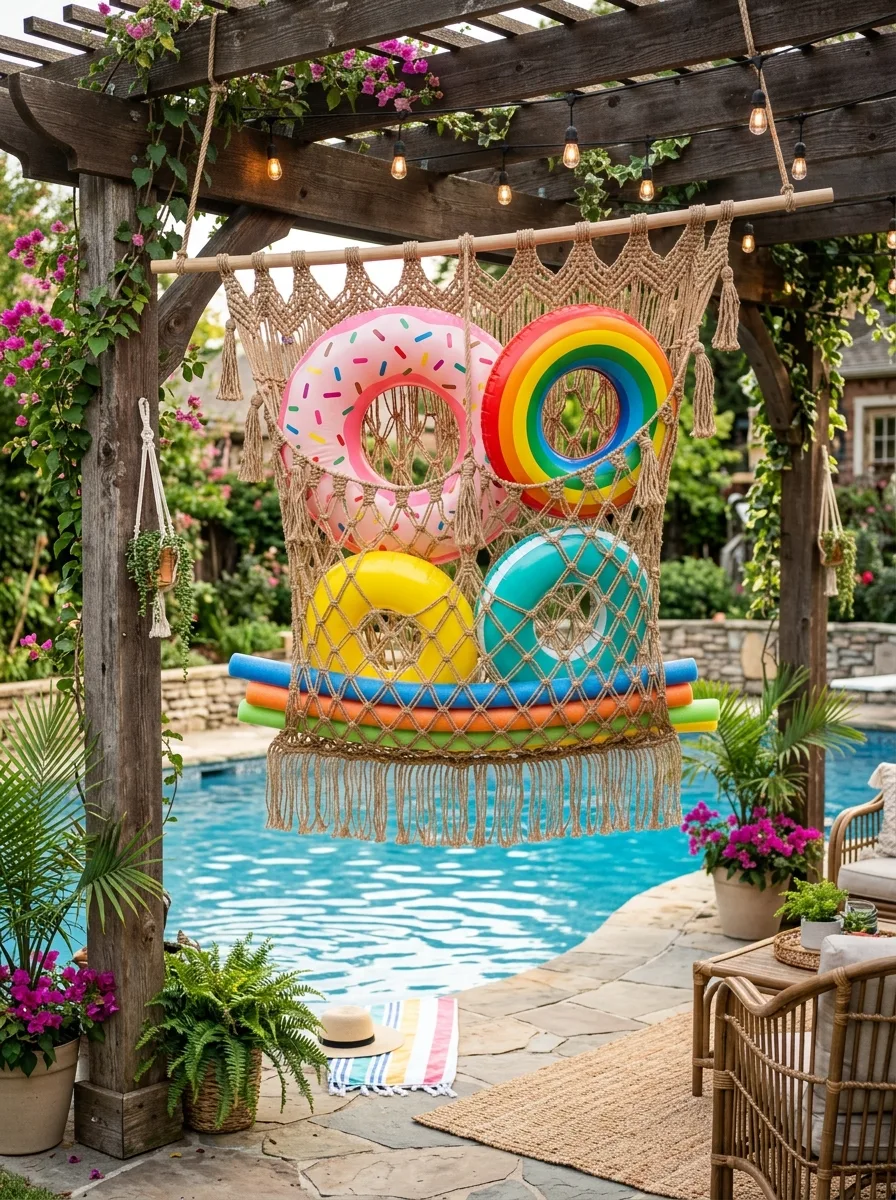
Build a large macramé net panel — a wide diamond-weave pattern with a fringed bottom edge — and hang it from a pergola crossbeam using a wooden dowel. Load the net with ring floats, arranging them so the largest sit at the bottom where the weave is strongest, with smaller rings nestled into the upper diamonds.
This is a display piece first and storage second — it suits households with a pergola or covered seating area near the pool, and works best with a curated selection of floats rather than the entire collection. The jute against the bright float colours and the surrounding greenery creates a genuinely boho-resort feel. Don’t overload it; the weave needs to maintain its shape, and a net stuffed past its structural limit looks more like storage overflow than display.
Floating Mesh Toy Boat
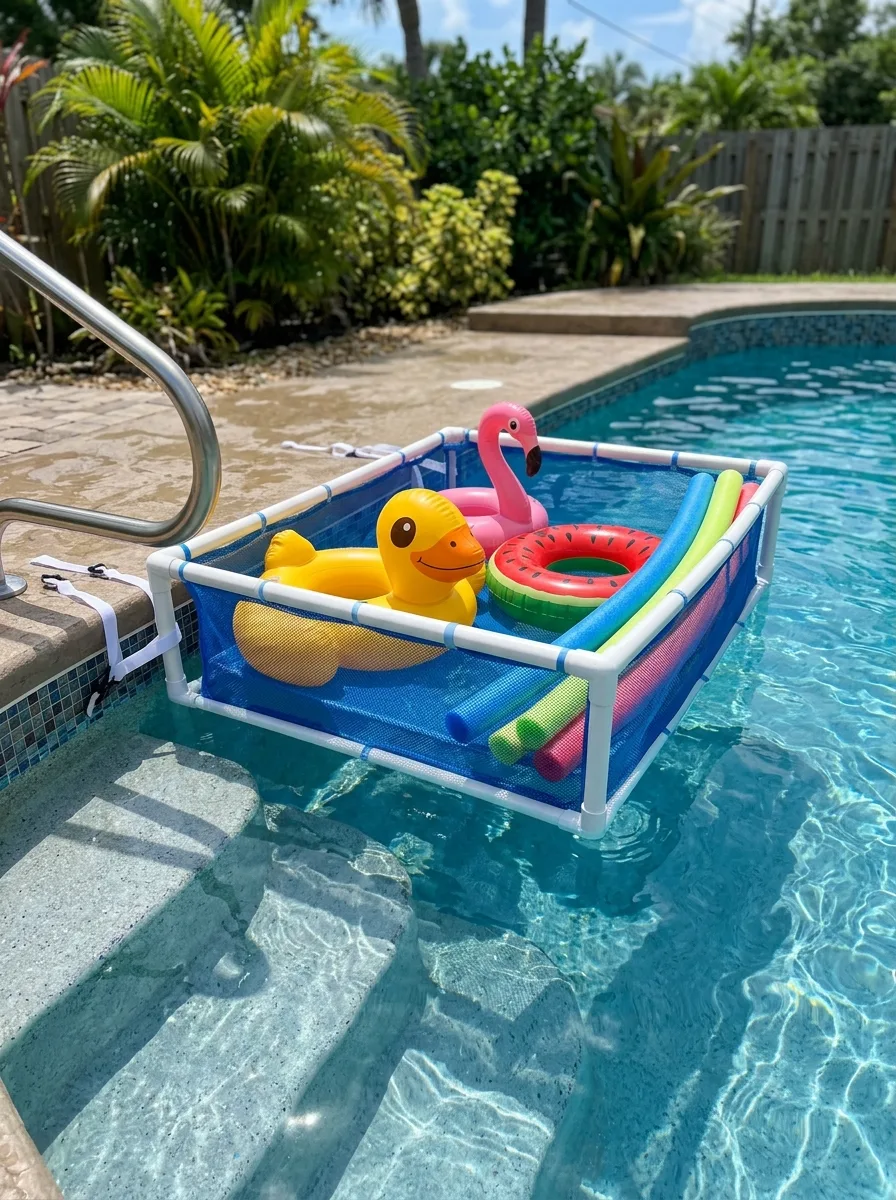
Construct a rectangular frame from white PVC pipe, joined at the corners with elbow fittings, and stretch blue mesh fabric across the base and sides to create a shallow floating tray. Add foam pool noodle sections inside the corner pipes for buoyancy if needed, or rely on the PVC’s natural float.
This solution lives in the water itself — it floats at the pool’s edge, holding rings, a duck float, and a couple of noodles, ready to grab without anyone needing to walk to a storage unit. It’s not a complete solution on its own, but as a “currently in rotation” holding spot, it removes the temptation to just leave things floating loose in the pool when not in use.
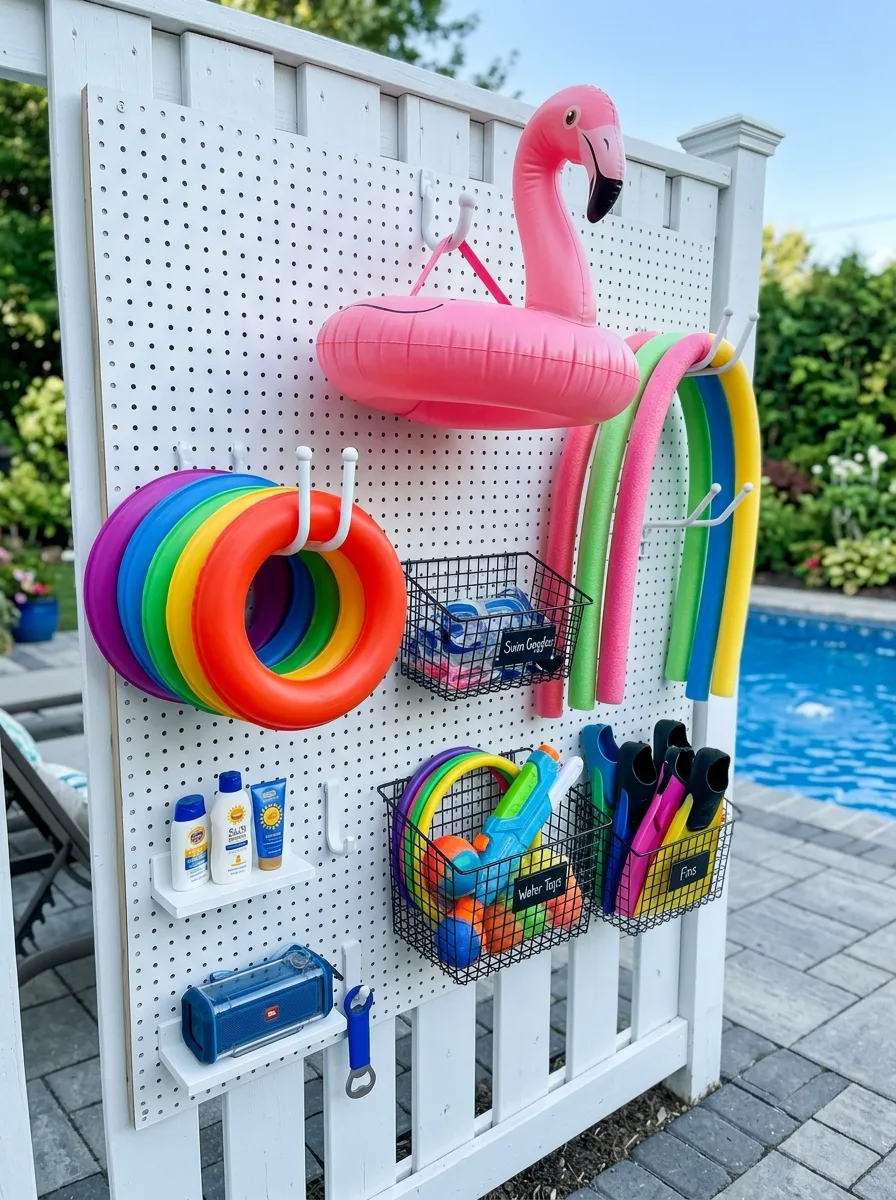
Pegboard Command Centre
Mount a full sheet of white pegboard to a fence or wall, and outfit it with a mix of pegboard hooks, small wire baskets, and narrow shelves. Use the hooks for hanging noodles and ring floats, the wire baskets for goggles and small toys with labels, and the shelves for sunscreen and a speaker.
The pegboard system’s strength is total flexibility — as the collection of gear changes season to season, the hooks and baskets can be rearranged without any new construction. Keep the labelling consistent and the white background uninterrupted; the gear provides all the colour, and a white pegboard reads as a considered system rather than a hardware store display.
PVC Pipe Noodle Tubes

Mount sections of large-diameter PVC pipe horizontally against an exterior wall using simple pipe brackets, angled very slightly downward toward the open end so rainwater drains out. Group them in a grid — four or five tubes per row, stacked in two or three rows — and slide pool noodles into each tube, sorted by colour.
Add a few large hooks below the grid for ring floats and mesh bags. This solution is almost entirely DIY-buildable from hardware store materials and solves the noodle problem completely — each tube holds multiple noodles standing on end, fully protected from weather, with the colourful ends creating a graphic pattern against the plain wall.
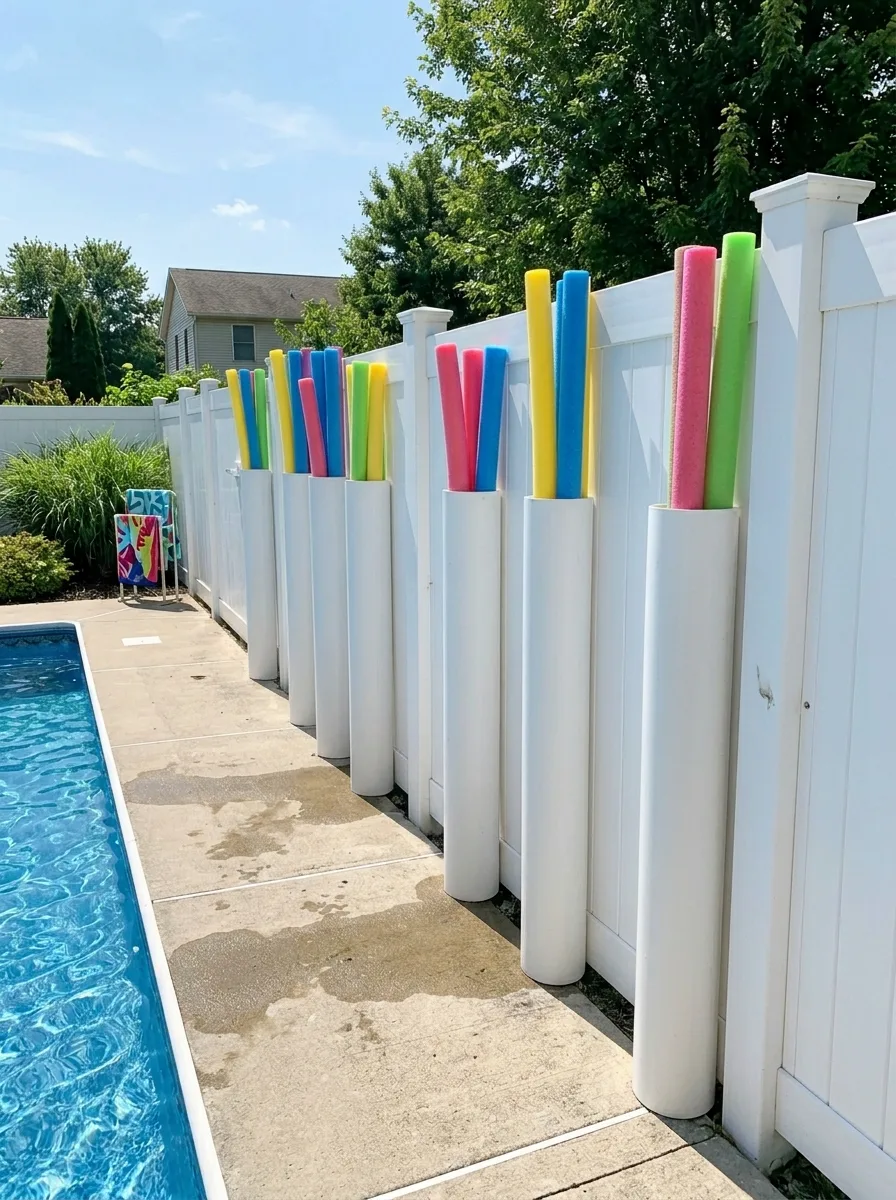
Vertical PVC Sleeve Posts
Install tall, narrow PVC sleeves vertically along a fence line, spaced evenly, each one sized to hold three or four pool noodles standing upright with several inches protruding above the rim. Secure each sleeve to the fence with brackets at the base and partway up.
Unlike horizontal tube storage, this vertical version turns the noodles themselves into the visual feature — a row of colourful tops poking above white tubes reads almost like a planted border. It works along any fence line with consistent access to the pool and requires minimal materials. Keep the noodle colours varied for visual interest, or sort them by colour per tube for a more graphic effect.
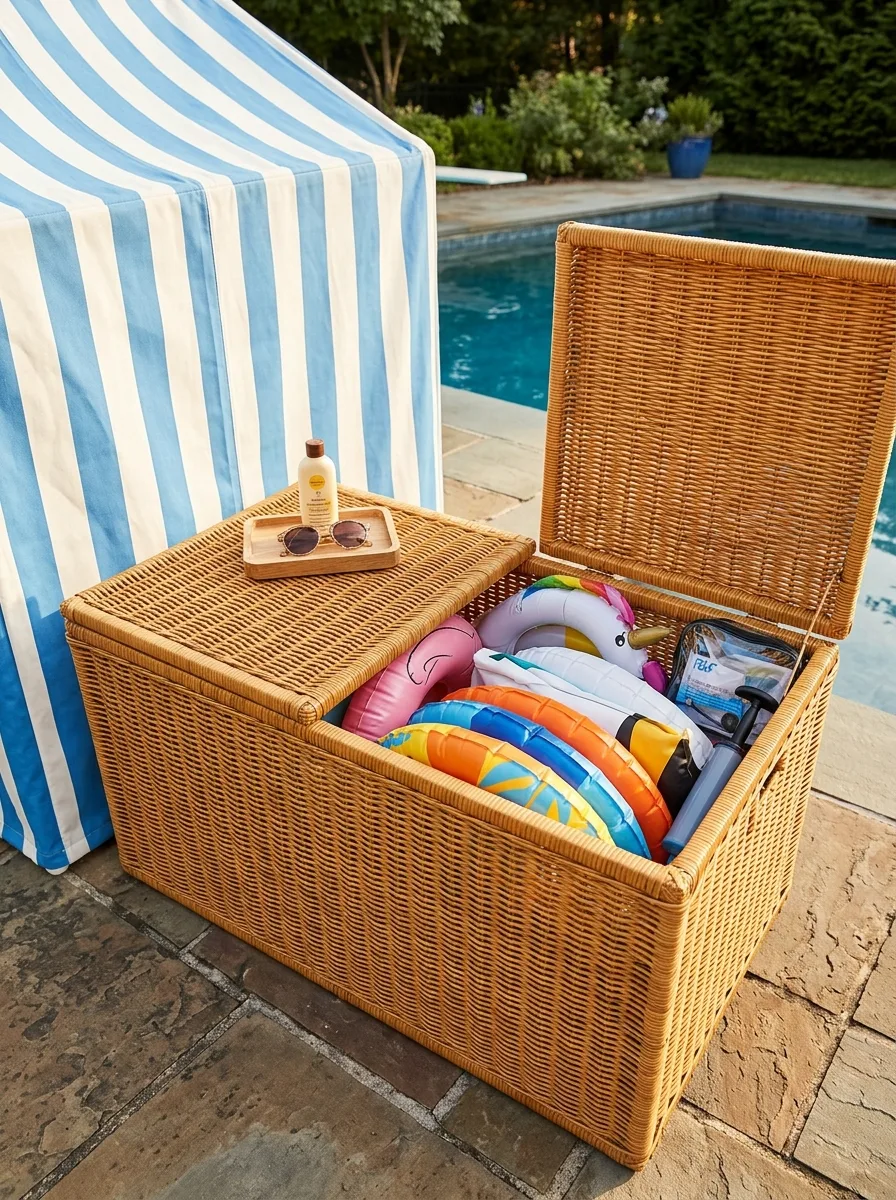
Cabana Style Woven Trunk
Choose a large woven resin wicker trunk with a hinged lid, in a warm honey or caramel tone, positioned near a matching cabana or daybed. Use it to store the most frequently used inflatables — the ones in daily rotation during pool season — alongside a small tray for sunglasses and sunscreen on top of the closed lid.
The woven texture and warm tone tie this storage piece into a broader outdoor furniture set rather than treating it as a separate utility object. This only works if your other poolside furniture shares a similar material language — wicker, rattan, or woven resin. Dropped into a space with painted wood or metal furniture, it will look mismatched rather than coordinated.
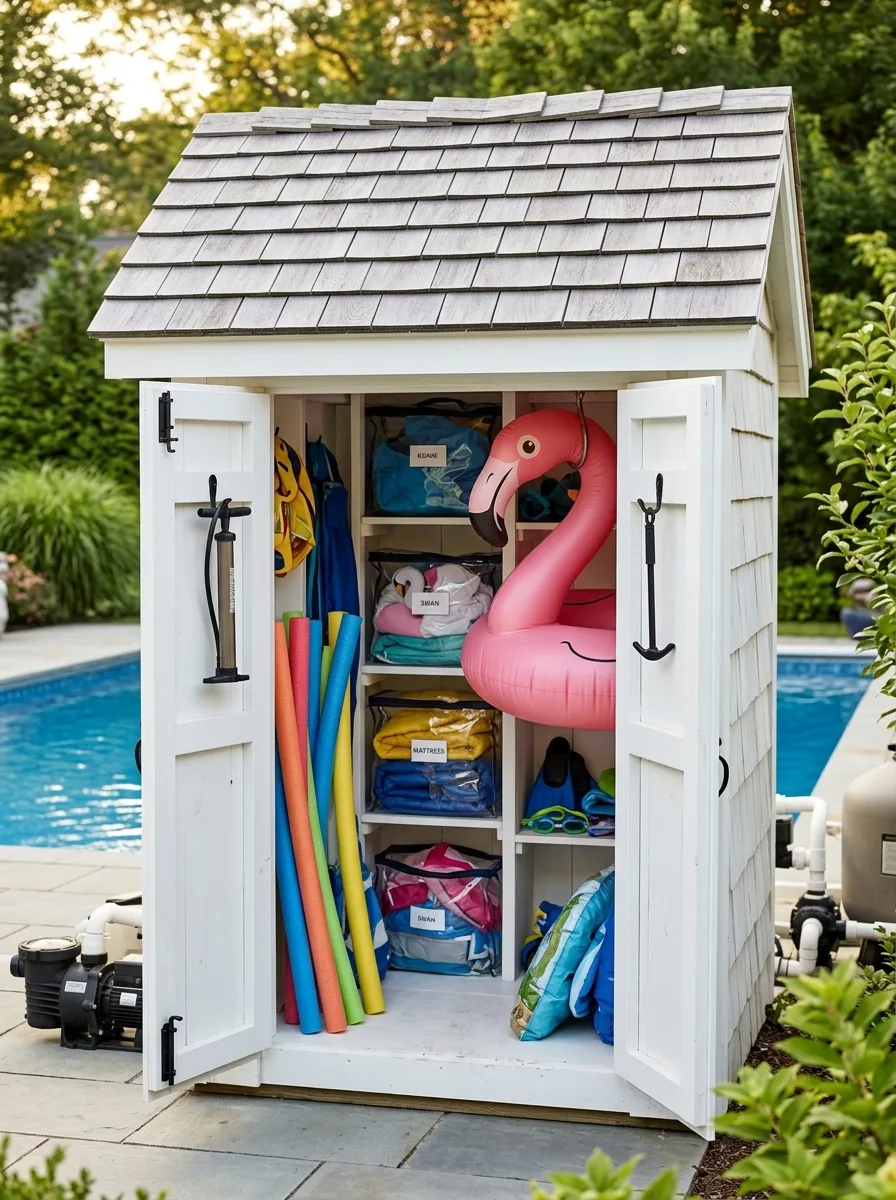
Cape Cod Storage Shed
Build or install a small shed styled like a miniature Cape Cod cottage — cedar shingle roof, white-painted door and trim, proportioned at about the size of a large dollhouse. Inside, fit adjustable shelving with labelled clear bins for each category: kids’ swimwear, smaller floats, towels, goggles and fins. Mount hooks on the inside of each door for hanging items, and stand pool noodles in the floor space beside the shelving.
This is the most substantial build on this list and suits a backyard where pool storage needs to handle a genuinely large inventory — multiple kids, multiple seasons of gear, pump and maintenance equipment included. The shed’s architecture should echo the main house’s style in miniature; a mismatched shed style undermines the considered look the structure is otherwise capable of.
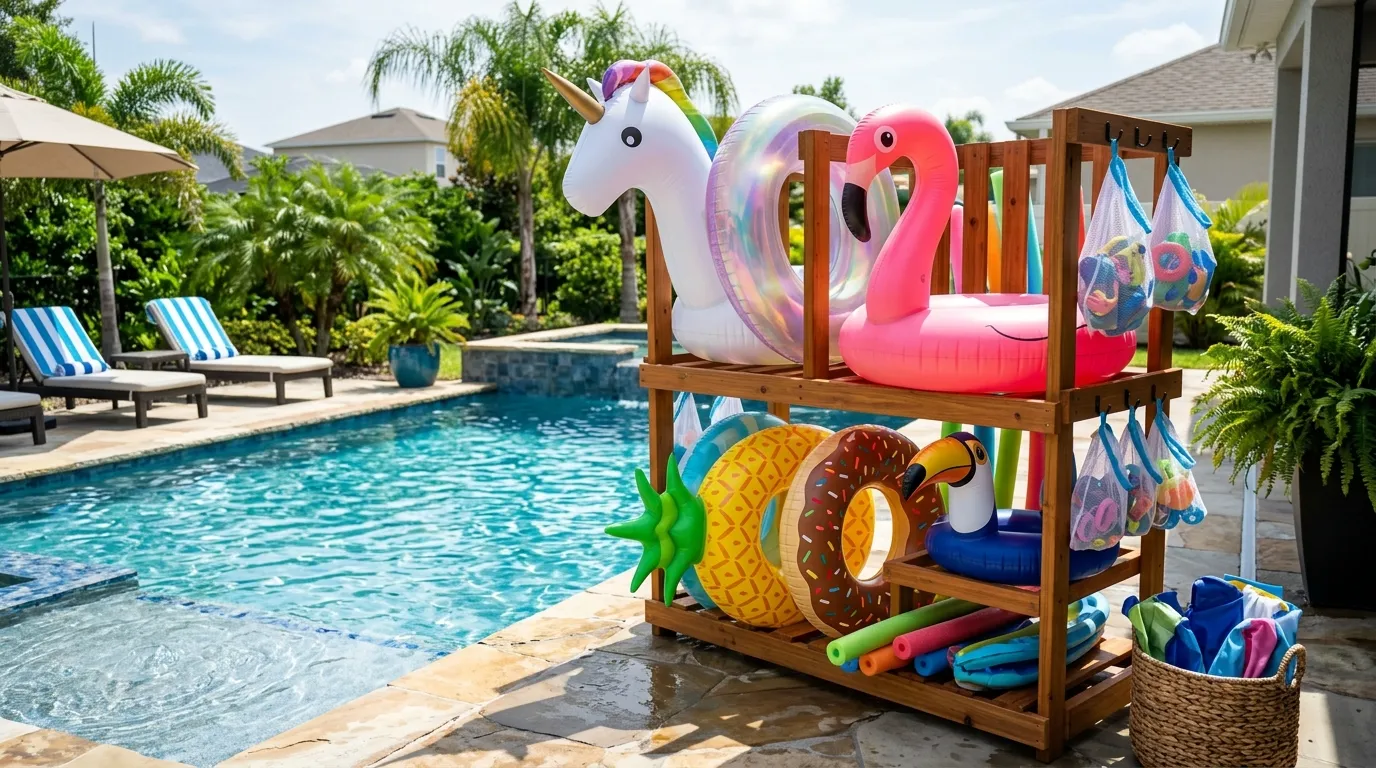
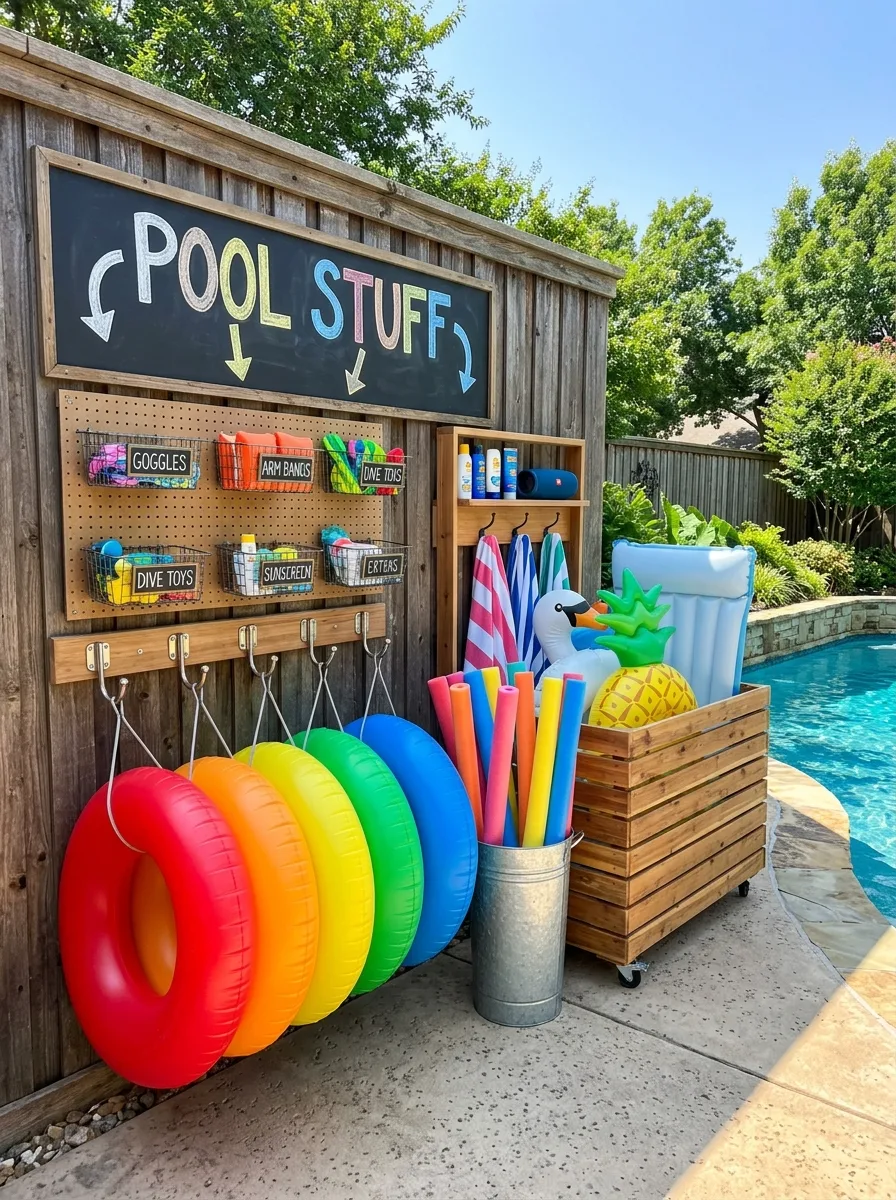
Chalkboard Sign Pool Stuff Station
Build a wall-mounted station combining several elements: a large chalkboard sign at the top reading “Pool Stuff” with hand-lettered arrows, a pegboard section below fitted with labelled wire baskets for goggles, arm bands, sunscreen, and dive toys, a row of hooks for ring floats sorted by colour, and a slatted wooden crate on wheels for noodles and larger inflatables.
This is a full system rather than a single object, and it works because every component has a clearly labelled job. The chalkboard sign isn’t just decorative — it’s the index for the whole station, telling everyone where things go and, more importantly, where things go back. Reclaimed or weathered wood throughout ties the various components into one cohesive station rather than a collection of separate parts.
Stacked Storage Tower Pool Toy Cage
Build a tall, narrow cabinet on locking casters from cedar or pine, with two hinged doors on the front secured by simple latches. Size the interior specifically to hold a large collection of inflatables upright and loosely packed — this is volume storage, not curated display.
Position it against a fence or wall where it can be rolled out of the way entirely when the pool area is in active use, then rolled back to absorb the end-of-day cleanup. The wheels are the key feature here — without them, a cabinet this size becomes a fixed obstacle. With them, it becomes a tool that moves with the day’s activity.
Wine Crate Float Stand
Take a single large wooden crate, line it loosely, and use it to hold a mixed collection of inflatables and a pool noodle bundle — positioned at the edge of the pool deck as a grab-and-go station for the day’s swim. Keep a galvanised bucket beside it for noodles standing upright.
This is the minimal version of pool storage — one container, positioned where it’s needed, holding what’s currently in rotation. It is not a long-term solution for an entire season’s inventory, but as the “what we’re using today” station, it removes the need to walk back and forth to a larger storage unit every time someone wants a different float.
Trunk With Branded Labels Multi-Item
Use a single, large outdoor storage trunk — wicker, resin, or painted wood — with a hinged lid, dedicated entirely to the floats currently in active rotation. Add a small tray on top for sunglasses and sunscreen, kept separate from the float storage itself. Group floats inside loosely by size so the largest items go in first and smaller items nestle into the gaps.
The simplicity here is the point. One trunk, one job, positioned exactly where people are sitting. It won’t hold everything, and it’s not supposed to — it holds today’s gear, and everything else lives somewhere less central. The trunk’s material should match the surrounding furniture so it reads as part of the seating area rather than a separate storage intervention.
Final Thoughts
None of these solutions are complicated. A few hooks. Some wire mesh. A wooden crate with a label on it. What separates the backyard that looks considered from the one with a flamingo pile is not the complexity of the system — it’s whether anyone actually decided on one.
The float pile happens by default. Every solution in this list happens by choice. That’s the entire difference, and it costs less than you’d think to make.
Decide where things live. Decide what’s in rotation and what’s packed away. Then build — or buy — something sized for what you actually have, not what you wish you had less of.
Your pool deck will thank you. So will the next person who steps on a stray pool noodle in the dark.