
Your neighbour’s front yard has rocks in it. Yours has rocks in it too. Theirs looks like a landscape. Yours looks like someone ran out of grass seed and panicked.
The difference is not the rocks. It’s not even the mulch. It’s every decision that happened before either of them arrived.
Rock and mulch landscaping is one of the most practical, drought-tolerant, low-mow approaches you can take with a front yard. It is also one of the most common ways to produce something that looks like an afterthought dressed up in materials. The gap between the two versions is not budget. It is not even skill. It is understanding what you are actually building before you build it.
This blog is about that gap. And about how to close it.
The Rock-Dumping Phase Is Not a Design Plan
There is a phase most front yard projects go through. Mulch gets spread. A bag of gravel shows up. Some rocks get placed somewhere near the edge. Everyone steps back and agrees it looks better than it did. Then six months later you realise it looks like a construction site that got distracted.
When the Rock Has Nowhere to Go, It Goes Everywhere
The most common problem in rock landscaping is not ugly rocks. It is rocks without a job.
A rock that is just sitting in a mulch bed is not a design feature. It is debris that has not been removed yet. Rock needs a role: structural anchor, border definition, pathway material, or textural contrast. The moment you can explain what the rock is doing there, it becomes part of the design. Until then, it is just sitting.
The other version of this problem is using too many rock types in one space. River pebbles, lava rock, granite boulders, and pea gravel in the same bed do not create visual interest. They create visual noise. Pick two materials and commit.
A single bold decision always reads better than five cautious ones.
The Mulch Island That Forgot It Was an Island
Mulch beds need edges. Not suggestions of edges. Actual, deliberate, maintained edges.
A mulch bed without a clean border will expand slowly into the lawn over one season and look dissolving and unintentional within two. The shape of the bed matters as much as what is planted in it. A generous, confident curve reads as designed. A wavy edge that meanders without purpose reads as neglect.
Steel edging is the most reliable option for a crisp, permanent separation. It sits low and virtually disappears from a distance, letting the bed shape do the visual work. Poured concrete edging gives a more structured look. Even a simple spade edge, maintained twice a year, is better than no edge at all.
The bed shape is the first thing visitors see. Make it worth seeing.
Why “Low Maintenance” Becomes the Most Maintained Yard on the Block
Rock and mulch gets sold as the lazy option. It is not.
Mulch needs replenishing every one to two years as it breaks down. Rock beds collect leaves, dirt, and debris that cannot be easily blown or raked out without disturbing the stone. Gravel migrates. Lava rock fades in some climates. Weeds still find a way through, especially if the landscape fabric underneath is cheap or was installed without overlap.
The honest version of “low maintenance” is: lower maintenance than grass, done correctly from the start. That start includes quality weed barrier, proper depth of mulch or rock, and edging that actually holds. Skip those steps upfront and you will be maintaining more than your neighbour’s lawn, not less.
Your Mulch Colour Is Doing More Work Than You Think
Most people choose mulch based on what is cheapest at the garden centre. That is how you end up with a red-dyed mulch bed in front of a red brick house, which is the landscaping equivalent of wearing your shirt as a hat.
Dark Mulch Is a Background, Not a Feature
Black or very dark brown mulch does one thing brilliantly. It disappears.
When mulch disappears, your plants appear. The rocks appear. The edging appears. Every element you have placed in the bed suddenly has contrast behind it, and contrast is what makes things readable from the street. This is why dark mulch consistently photographs well and why well-designed yards almost always use it.
Natural brown mulch is warm and pleasant up close. From the curb, it competes with everything else in the bed. Nothing stands out because everything is the same value.
The goal of mulch is to make the other elements of your landscape look better than they would without it. Dark mulch does this. Most other mulch colours just fill the space.
The Gravel Colour That Fights Your House vs. the One That Finishes It
White and cream gravel draws the eye immediately. That is a tool, not a default.
Against a grey or white rendered home, white pea gravel looks intentional and crisp. Against a warm red or tan brick house, the same white gravel looks like it belongs in a different zip code. The temperature of your gravel needs to match the temperature of your home’s exterior, the same way a rug needs to relate to the walls in a room.
Warm cream, buff, or tan gravel reads naturally against brick. Cool white, grey, or blue-toned gravel works with modern render and concrete. River rock — which contains a natural mix of warm and cool tones — is the most forgiving and tends to work with almost anything.
Test a small sample against your exterior before ordering a tonne of anything.
Contrast Is the Only Thing That Makes Rock Read as Intentional
Light gravel and dark mulch. Black lava rock and white marble chip. Warm sandstone and silver-green ornamental grass. Every yard that looks intentional is built on contrast.
Contrast does not mean clashing. It means separating elements so the eye knows where to look and why. A bed of medium-brown mulch filled with medium-brown river rock is technically fine. Visually, it reads as one beige mass. Add a dark steel edge and a cluster of dark green shrubs and suddenly all three elements have a foil. They read as separate. They read as chosen.
Contrast is what turns a collection of materials into a composition.
Rock and Mulch Front Yard Ideas
The Large Flagstone and Cobble Path Leading to a Backyard
This is for yards where the path needs to feel like an arrival rather than a shortcut. Use large-format sandstone or limestone slabs — some up to 600x900mm — and set them in a river cobble surround that extends at least 300mm on either side of the stone.
The paving slabs should be genuinely large. The urge to use modest, manageable pieces is the wrong instinct here. Large slabs set into river cobble create a ratio of hard surface to texture that reads as expensive and intentional. Small slabs in the same cobble look like you ran out.
Line the cobble channel on both sides with low, drought-tolerant plantings: lomandra, fan palms, or low ornamental grasses. The tall architectural plants on the flanks frame the path without blocking it. The destination — whether a door, a gate, or a pool area — should be visible from the start of the path. A path that cannot see where it is going creates anxiety rather than anticipation.
The Dry Creek Bed That Actually Handles Your Drainage Problem
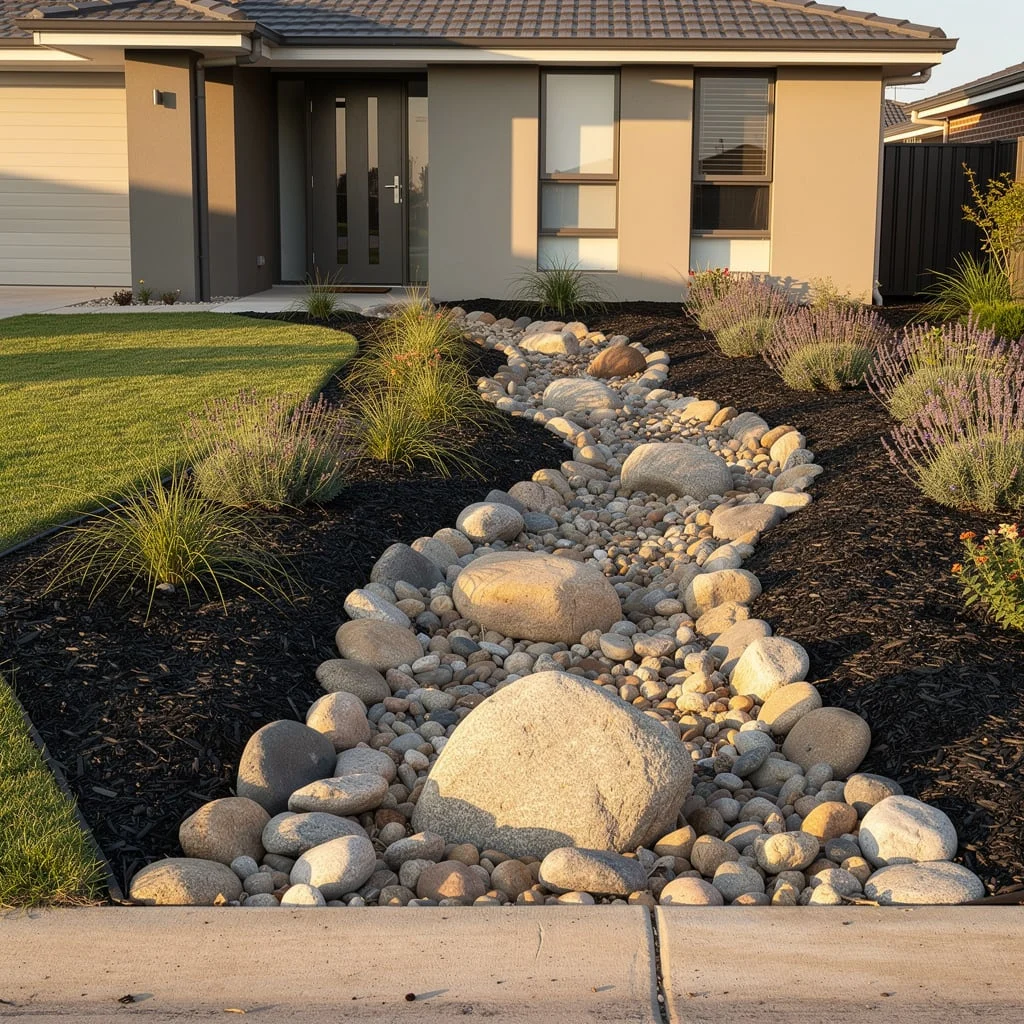
Lay out your creek line before you place a single rock. It should follow the natural slope of your yard, curving gently rather than running in a straight line, starting wider at the high point and narrowing toward the outlet.
Dig the channel down by about 150-200mm. Line it with heavy-duty weed matting before adding any stone. Start with your largest stones — rounded river boulders 200-300mm across — and place them along the outer edges of the channel first, partially buried. Then fill the centre with a mix of mid-sized cobbles and small river pebbles, varying the size so the fill looks natural rather than uniform.
Plant the mulch beds on either side of the creek with ornamental grasses and low drought-tolerant flowering plants like lavender or salvia, set in black mulch. The contrast between the pale stone of the creek and the dark mulch flanking it is the whole visual argument.
The White River Rock Foundation Bed on a Traditional Brick Home
Against red or warm tan brick, use white or cream river rock rather than angular crushed white stone. The rounded, varied surface of river rock is softer and more natural next to the irregular texture of brick. Angular white gravel against brick looks like a parking lot happened near the front door.
Set a generous quantity — at least 100mm deep — across the full foundation planting zone. Edge it with a low brick soldier course or a clean concrete edging that matches the existing pathway material. Keep the edging flush rather than raised. This is not a place for raised beds.
Plant rounded evergreen shrubs in a symmetrical arrangement if the house architecture is formal: matching pairs flanking the entry, single specimens at corners. The white rock ground cover will brighten a dark or shaded foundation area considerably, which is its greatest practical advantage. Against the rich warmth of the brick, it reads as crisp and classic rather than cold.
The Boulder Cluster Bed That Makes Grass Look Redundant
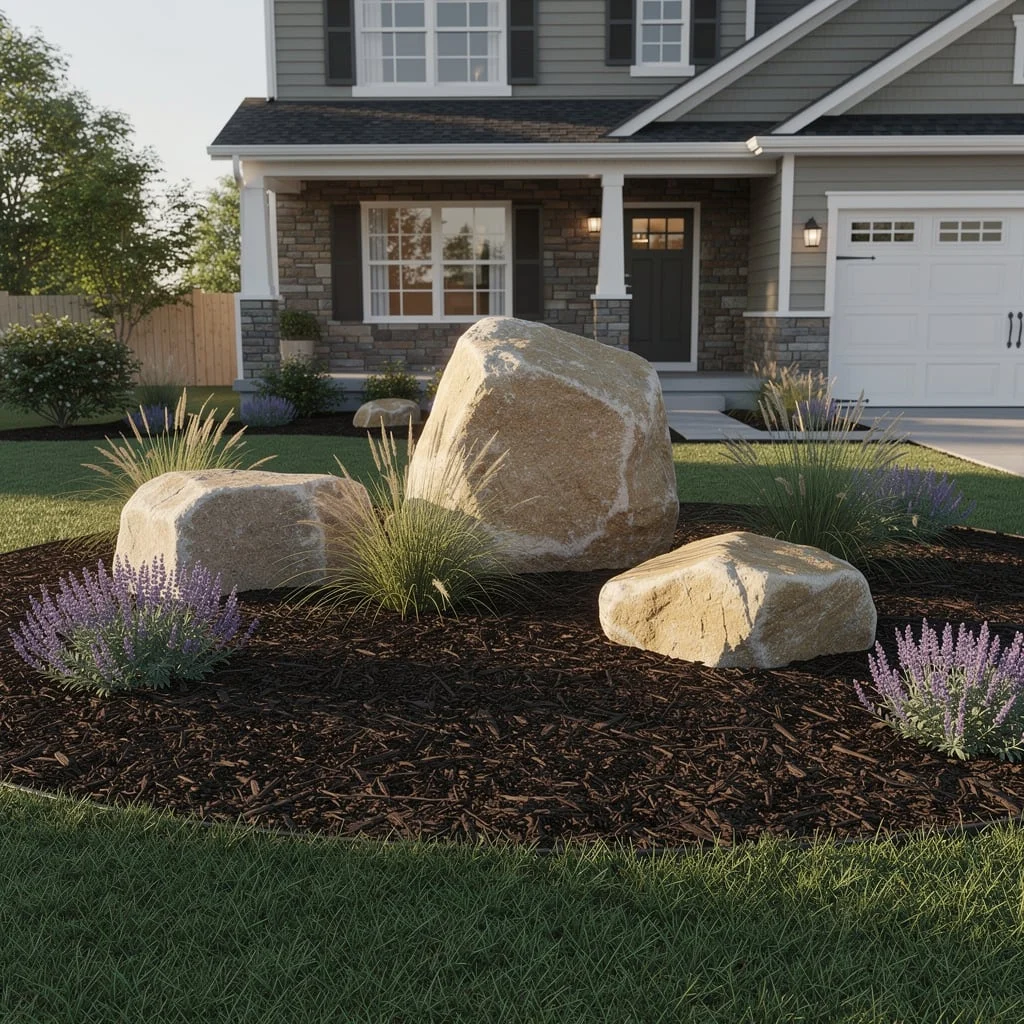
Start with three fieldstone or sandstone boulders in noticeably different sizes — think of them as a family, not a set. The largest should be roughly knee-height, the mid-sized about calf-height, and the smallest mostly buried at soil level to suggest it has been there long enough to sink.
Position them in an asymmetric triangle within a generous, oval-shaped mulch bed. Use very dark bark chip mulch — almost black — as your base. Between and around the boulders, plant compact ornamental grasses like blue oat grass or feather reed grass for vertical contrast. Finish the edges of the bed with low-growing lavender for both colour and texture.
The key is burying the base of each boulder by at least a quarter of its height. Rocks that sit on top of soil look like they were placed last Tuesday. Rocks that sink into the earth look like they belong.
The Specimen Tree and Gravel Circle Yard Built on Geometry
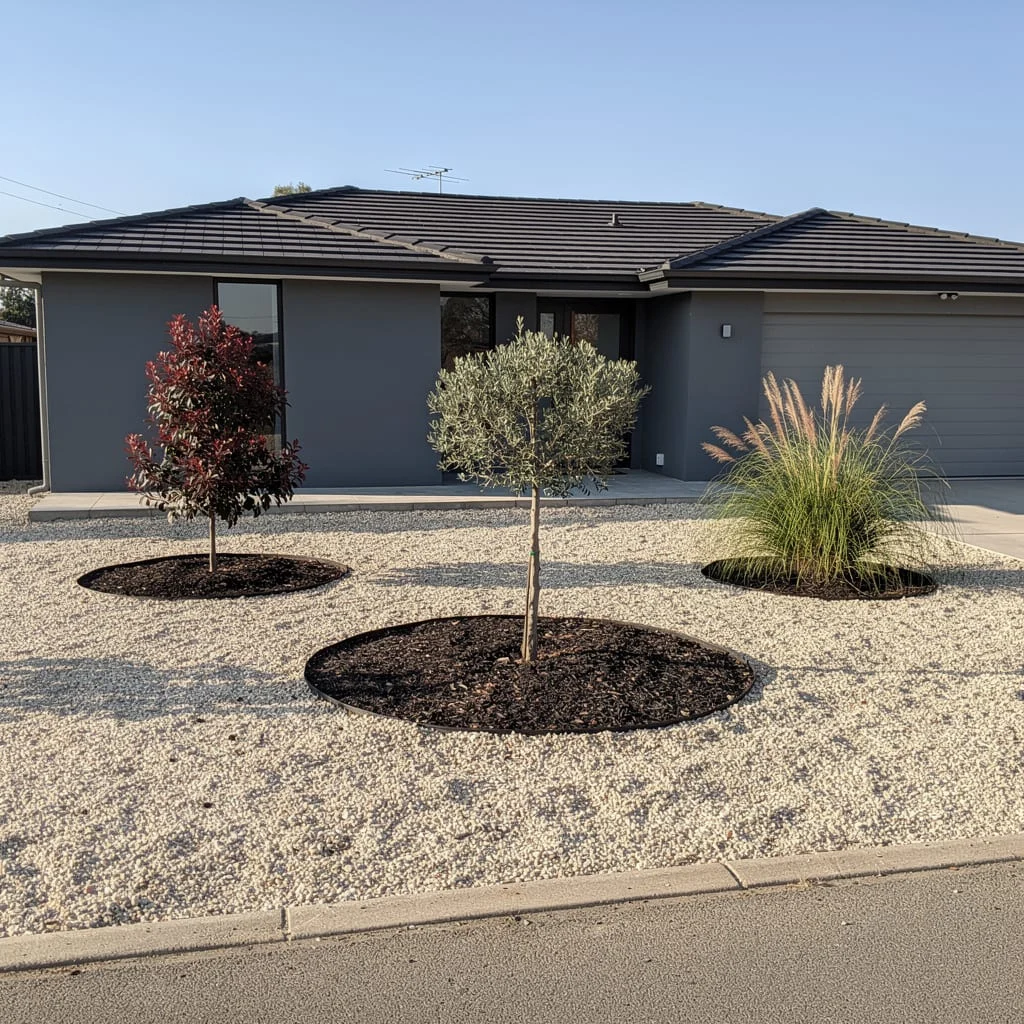
Replace your lawn entirely with crushed white or cream gravel, laid to a depth of at least 75mm over quality weed matting. Then cut clean, perfect circles in the gravel — one for each specimen tree — and fill those circles with dark bark mulch.
Choose three trees with strong individual character: a burgundy photinia for colour, an olive tree for Mediterranean elegance, and a large ornamental grass like pampas for movement and texture. Space them in a loose, asymmetric line across the yard rather than centred. Centred always looks cautious.
The circle shape of each mulch pocket is what makes the whole composition read as designed. The contrast between the pale gravel field and the dark mulch rings is stark and graphic. It is one of the most maintenance-light approaches you can take and one of the most visually resolved from the street.
The Yin-Yang Lava Rock and White Marble Chip Garden Bed
This one requires precision, so plan it before you touch a single stone.
Decide on your bed shape first — a rounded or D-shaped bed works best. Then sketch the yin-yang division line inside it: one flowing S-curve from top to bottom, dividing the bed into two equal halves. Use a flexible garden hose or irrigation tubing pressed into the soil to establish this line before installing your edging.
Use a low-profile steel edging strip to hold the division line. On one side, fill with black or dark grey lava rock to 75mm depth. On the other, fill with white marble chip or white decorative stone to the same depth. The S-curve separator must hold with no crossover.
Plant rounded white ceramic pots directly into the white stone zone, without plants in them — the pot form is the feature, not the plant. Along the outer edge of the black lava zone, plant hosta in a loose cluster. The large, variegated green leaves against the black lava rock are the strongest plant contrast available in a shaded bed.
The restraint of this design is everything. Two materials, one plant type, two pots. That is all it needs.
The Dark Cobblestone Border That Makes a Mulch Bed Look Finished
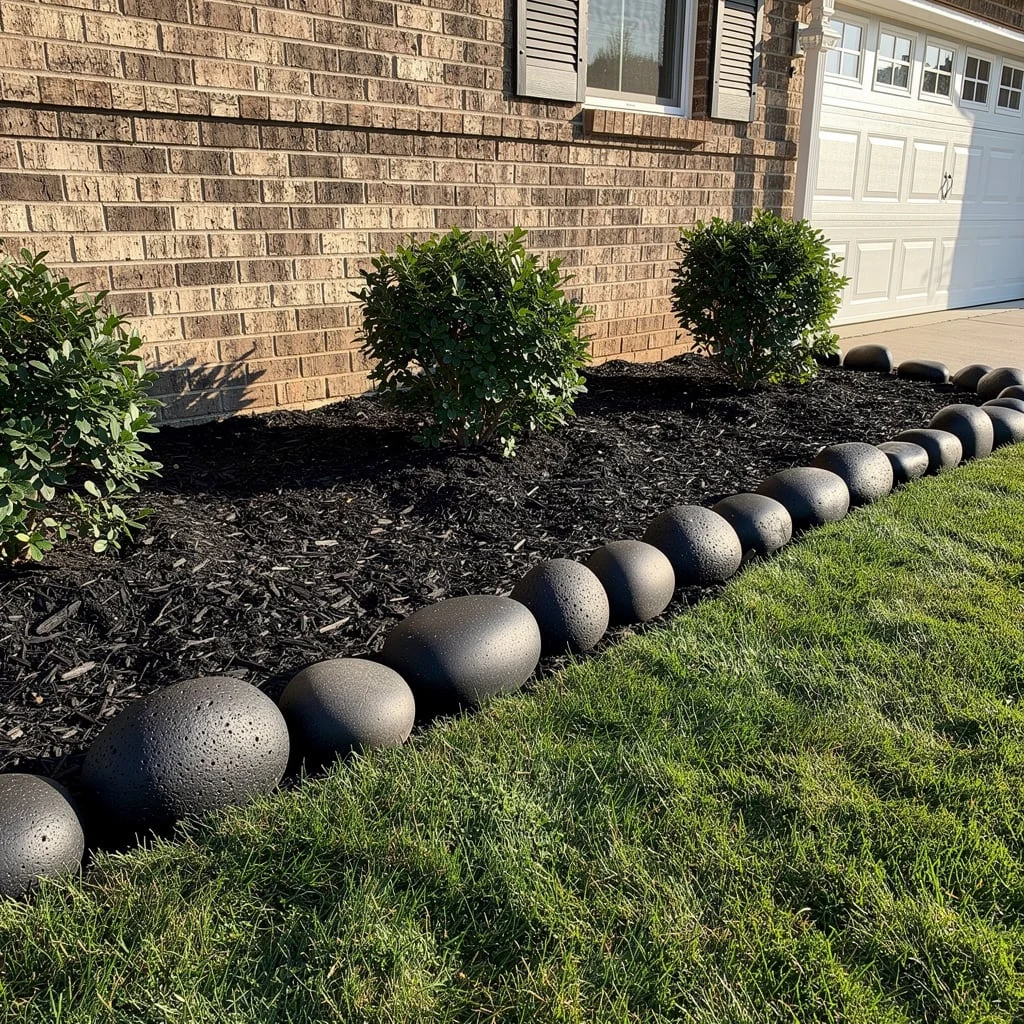
Source rounded cobblestones or polished river stones in a dark charcoal or near-black tone. They should be similar in size — roughly the size of a large grapefruit — and consistent enough that they read as a deliberate series rather than a collection of whatever was available.
Set them in a single line along the outer edge of your mulch bed, half-buried in the soil so they sit stable and low. The curve of the line is important: make it confident and generous, following the outer edge of the bed without wobbling.
Behind the stone border, keep the mulch dark and the plantings simple: rounded boxwood or holly shrubs are the right companions here. The dark cobblestone edging acts as a frame. It is quiet, architectural, and makes everything inside the bed look more intentional than it might otherwise.
The Golden Boulder and Black Mulch Bed Built on Raw Contrast
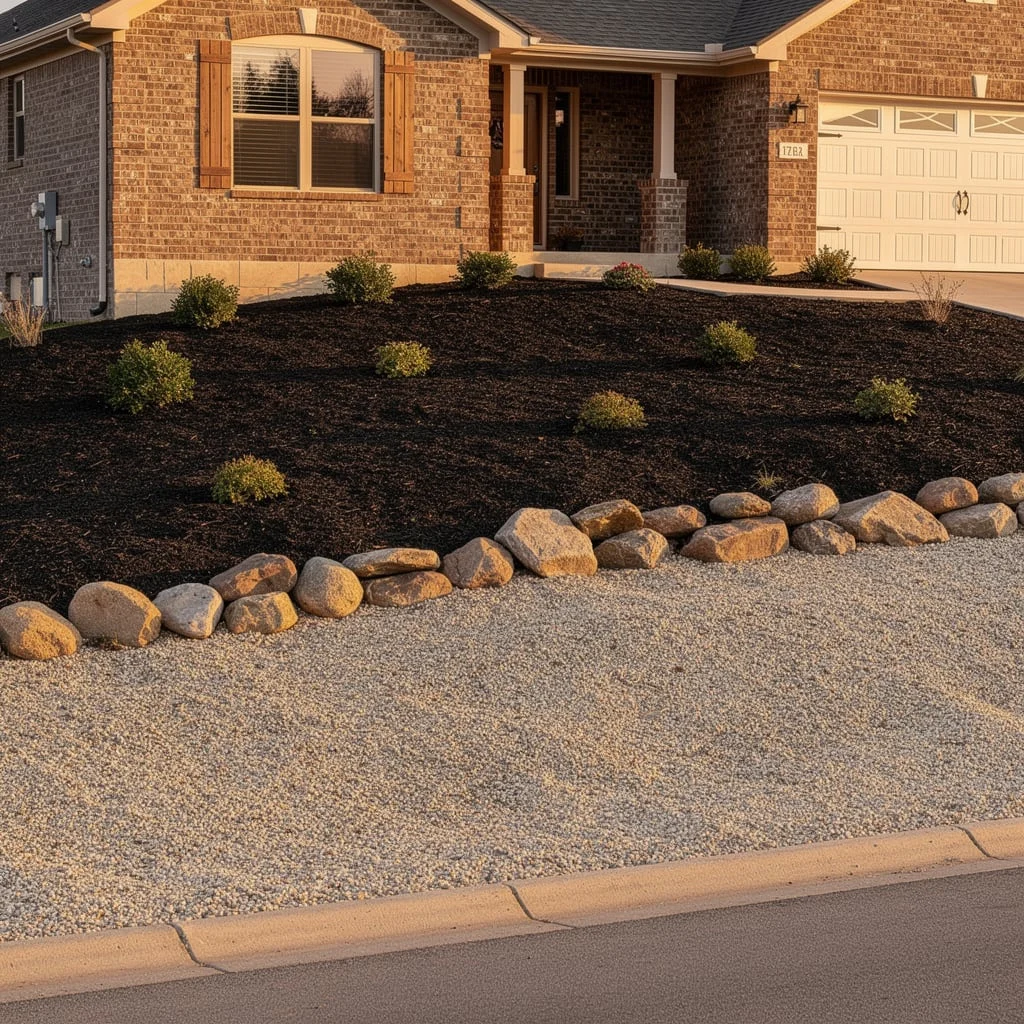
Choose warm-toned, naturally weathered boulders in sandy ochre or buff gold. Place them in a graduated line along the front edge of a deep, dark mulch bed, using larger pieces on the outer corners and smaller pieces filling in between.
The boulders here are doing two things at once: creating a visual border between the mulch bed and a gravel strip or driveway, and providing scale and weight to a bed that would otherwise read as flat. They should be irregular in shape and sit low and wide rather than tall and narrow.
Plant the mulch bed behind them with compact evergreen shrubs at the back and sparse, low ground cover between the boulders. The emptiness of the mulch field between plantings is not a mistake — it is what allows the boulders and the plants to be visible as individual elements.
The White Gravel and Dark Mulch Front Bed with Architectural Geometry

Define two distinct zones along your home’s foundation: a foreground zone of white marble chip or white pea gravel, edged cleanly with a black steel profile, and a background mulch bed against the wall. The transition line between gravel and mulch should be precise and straight.
In the gravel foreground, plant agapanthus — the tall, blue-flowering variety — for strong vertical presence. In the mulch bed behind, alternate rounded evergreen shrubs with upright ornamental grasses in a regular rhythm. The shrubs provide solidity; the grasses provide movement. Neither should dominate.
The white gravel strip pulls the composition forward visually, making the whole foundation planting readable from the street. The dark mulch behind it gives the shrubs and grasses a backdrop dark enough to make them pop.
The Driveway Strip Done Right with Gravel and Repeating Plants
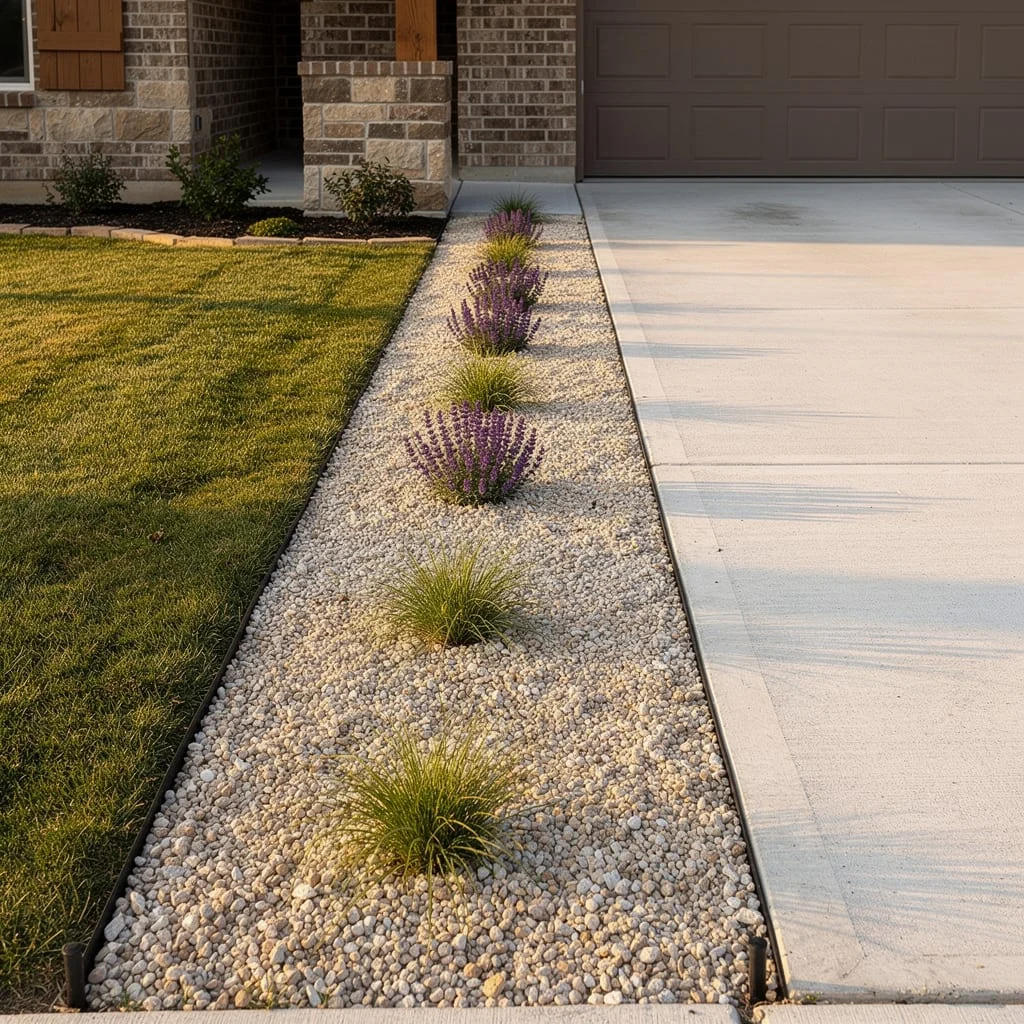
Excavate the strip between your lawn and driveway to a depth of 100mm. Lay weed matting across the full length, then fill with pea gravel or crushed limestone to the surface. Use a low-profile steel or aluminium edging strip along both sides to hold the gravel cleanly in place.
Plant directly into the gravel in a repeating sequence: one ornamental grass clump, one salvia, repeat. The spacing should be close enough that the plants look intentional — roughly 400-500mm apart. Keep the plants to a maximum of three species and alternate them in a simple rhythm.
The effect from the street is one of clean linearity: a pale gravel strip running the full length of the driveway edge, punctuated by soft, wispy plants in a measured rhythm. It is one of the most understated and effective approaches to a transition zone that most people leave as bare lawn.
The Organic Island Bed System Set in Gravel
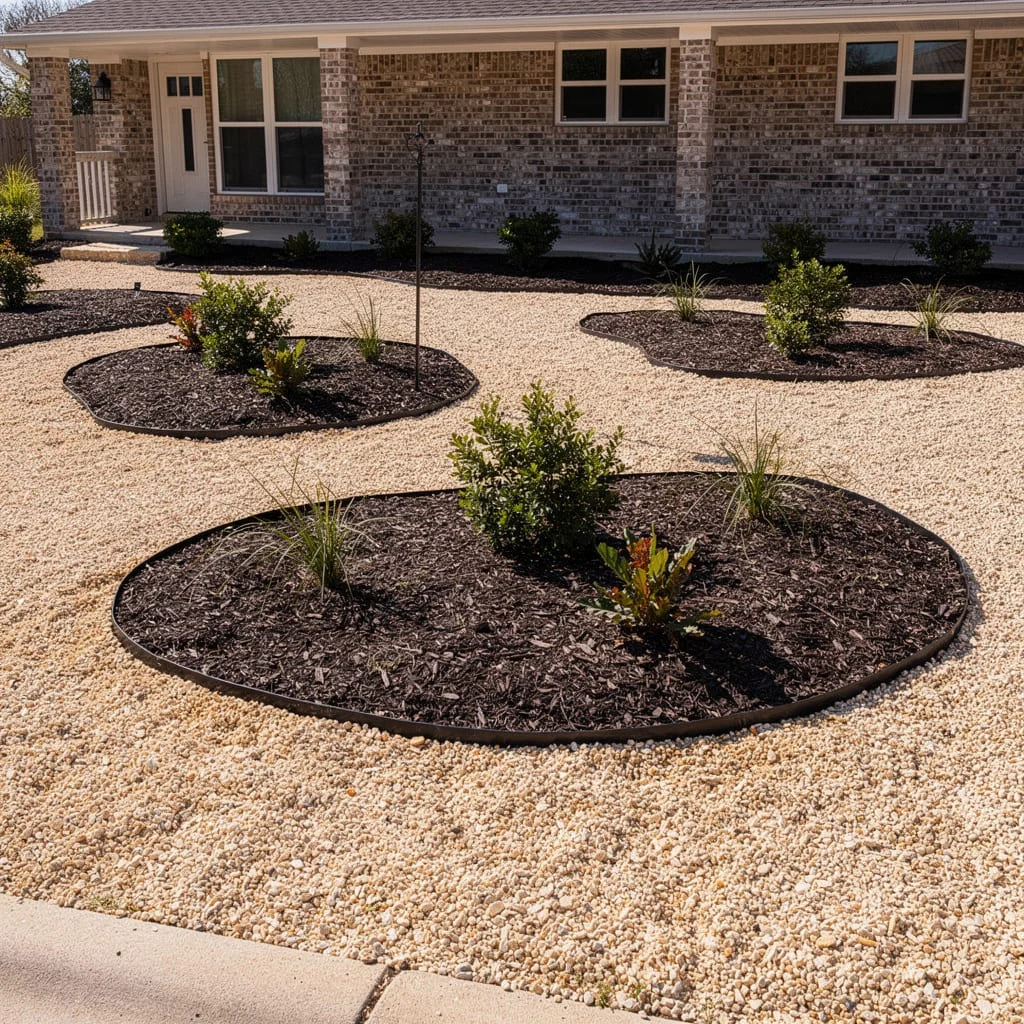
Remove all the lawn. Lay a base of crushed tan or cream gravel across the entire front yard to a depth of 75mm over weed matting. Then cut your island bed shapes — rounded, organic, generous — and fill them with dark bark mulch.
Each island should feel like it could float independently, but the collection of them should create a navigable composition across the yard. Two or three larger islands toward the front, smaller clusters near the foundation. Plant each island with a small shrub as the centrepiece, one or two ornamental grasses for texture, and seasonal colour at the edges.
The steel edging rings that define each island are doing critical work. They must be pressed firmly into the soil and sit just above the gravel surface so the contrast between dark mulch and pale gravel reads cleanly. Loose or poorly installed edging will let the mulch bleed out and the whole graphic composition will dissolve.
The Red Lava Rock Bed That Refuses to Be Boring
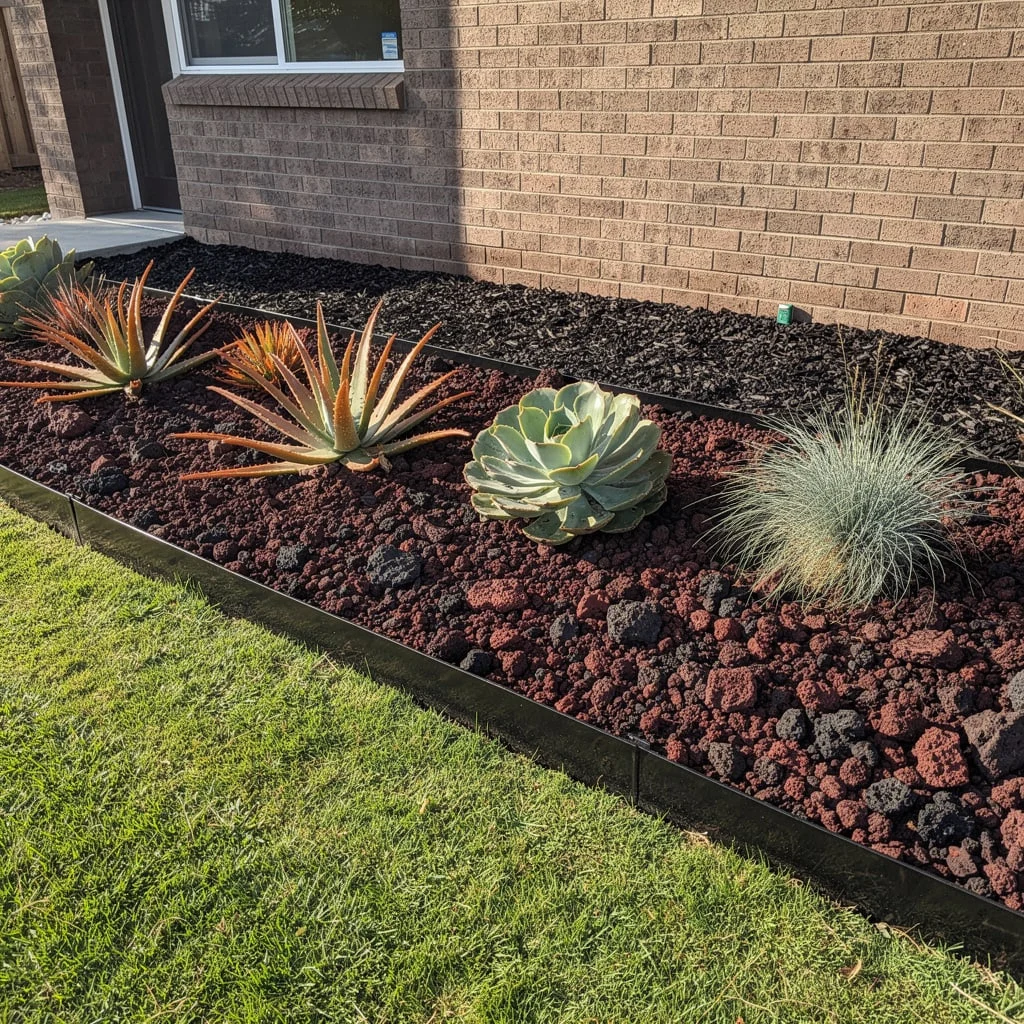
This only works if you commit to it completely.
Start with a clean steel-edged bed. Fill it with red lava rock to a depth of 75mm. The colour is dramatic — deep burgundy-red with a rough, porous texture — and it will either look extraordinary or look like something is on fire, depending on what you plant in it.
The correct plants are succulents and cacti. Specifically, combine aloe varieties with strong architectural spines, large echeveria rosettes in silver-green or blue-grey, and a single blue fescue or silver grass for softness. The combination of red, blue-grey, and silver-green is pulled from the desert and feels genuinely considered.
The lava rock itself needs to be deep enough that soil is not visible between pieces. And the bed edge must be kept absolutely clean — even a small amount of grass creeping over the edge will ruin the effect immediately. The contrast between the red rock and the green lawn is the point. Protect it.
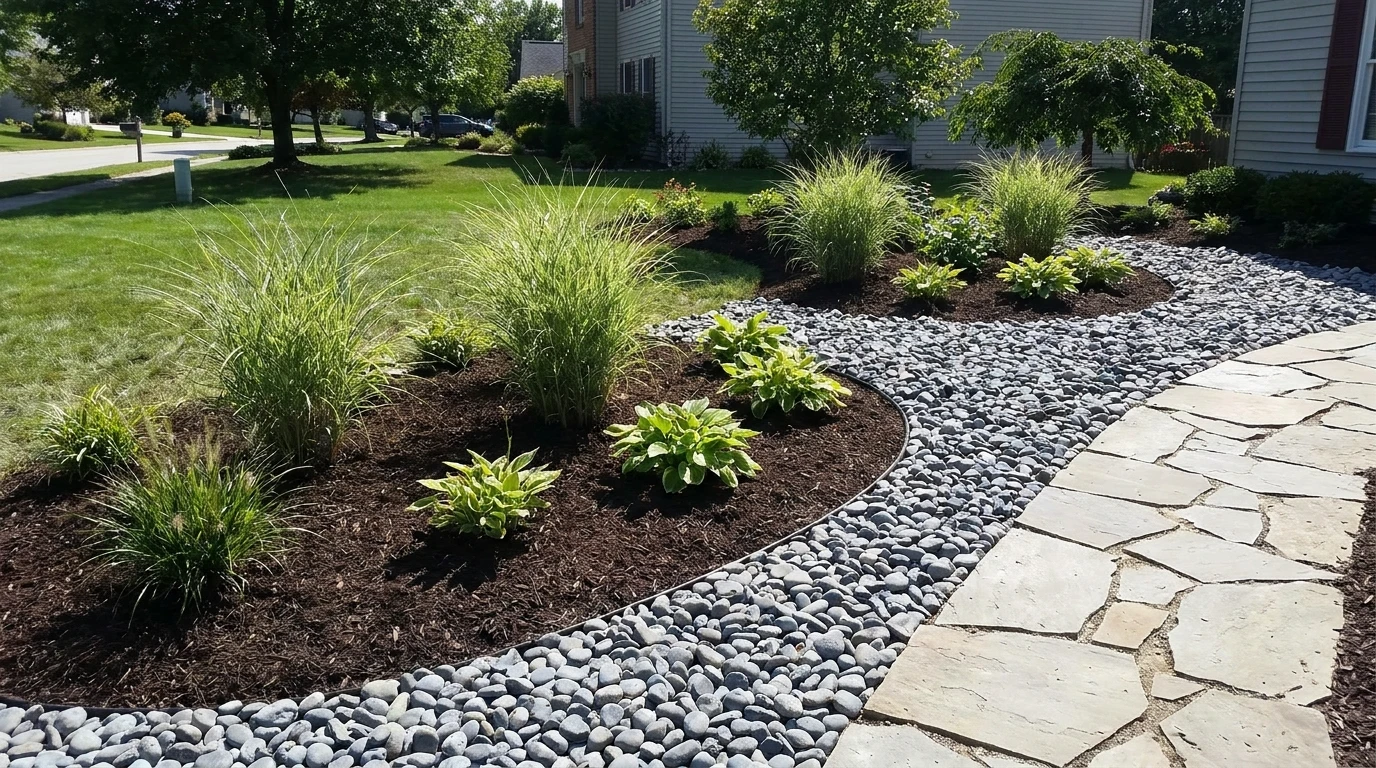
The Rounded River Rock Border with Classic Black Mulch
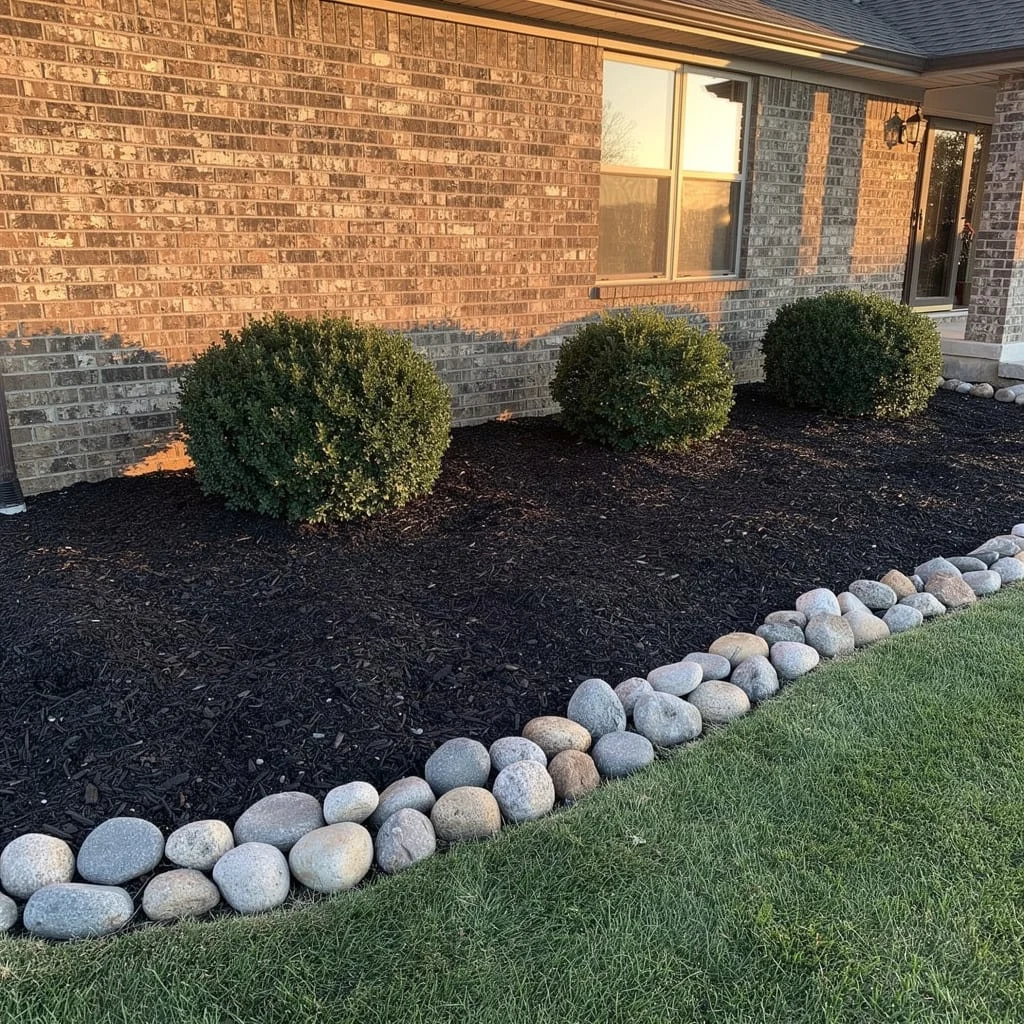
The most versatile edging approach in the front yard is also the most straightforward: large, rounded river stones laid in a generous, overlapping line along the outer edge of a dark mulch bed.
Source stones in the 150-250mm diameter range in a natural grey-white tone. Set them in a double or triple row along the bed edge, nestled against each other so they sit snug rather than scattered. They should look as though a river deposited them there over time, not as though someone arranged them by hand — which means they should vary slightly in size and angle, not sit in a perfectly uniform line.
Behind the stone border, keep the planting simple: three or five rounded boxwood shrubs in the dark mulch, evenly spaced. Nothing else. The restraint is what makes this combination look elegant rather than safe.
The Flagstone Stepping Stone Path Through an Ornamental Grass Garden
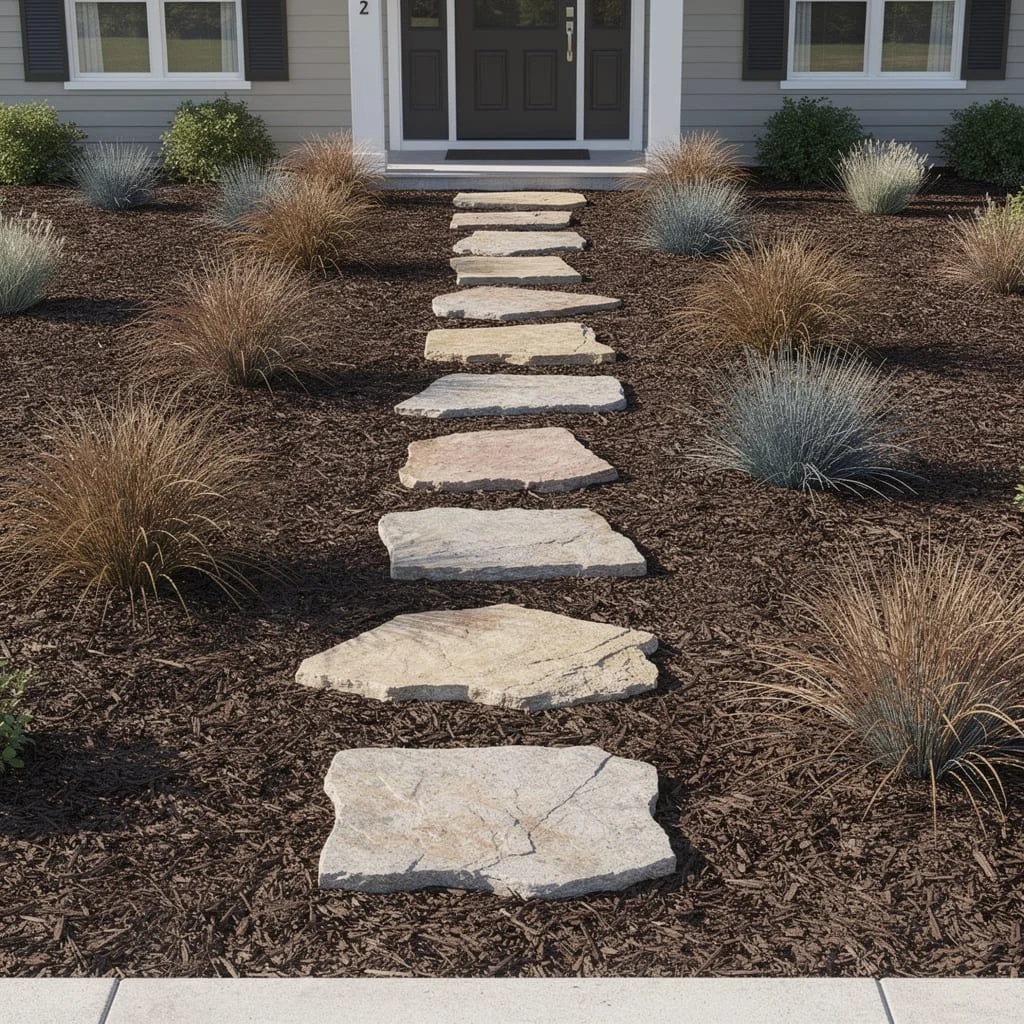
Lay your path line first. Use a garden hose to work out the exact route from the street to your front door, adjusting the curve until it looks natural and generous. Mark it with spray paint.
Source large, irregular flagstones in a warm sandstone or limestone finish — each piece should be at least 400x400mm and thick enough to sit stable underfoot (minimum 40mm). Set them in the dark mulch bed at comfortable stride intervals. They should look like they are sitting in the earth, not balanced on top of it, so dig a pocket for each one and bed it in firmly.
On either side of the path, alternate blue fescue grass (silver-blue, low and tufted) with taller feather reed grass (warm bronze in autumn) in a regular alternating pattern. The contrast between the irregular, warm-toned stone and the precise, cool-toned grass planting is the whole design argument.
The Dark Slate and River Pebble Path Flanked by a Pollinator Garden
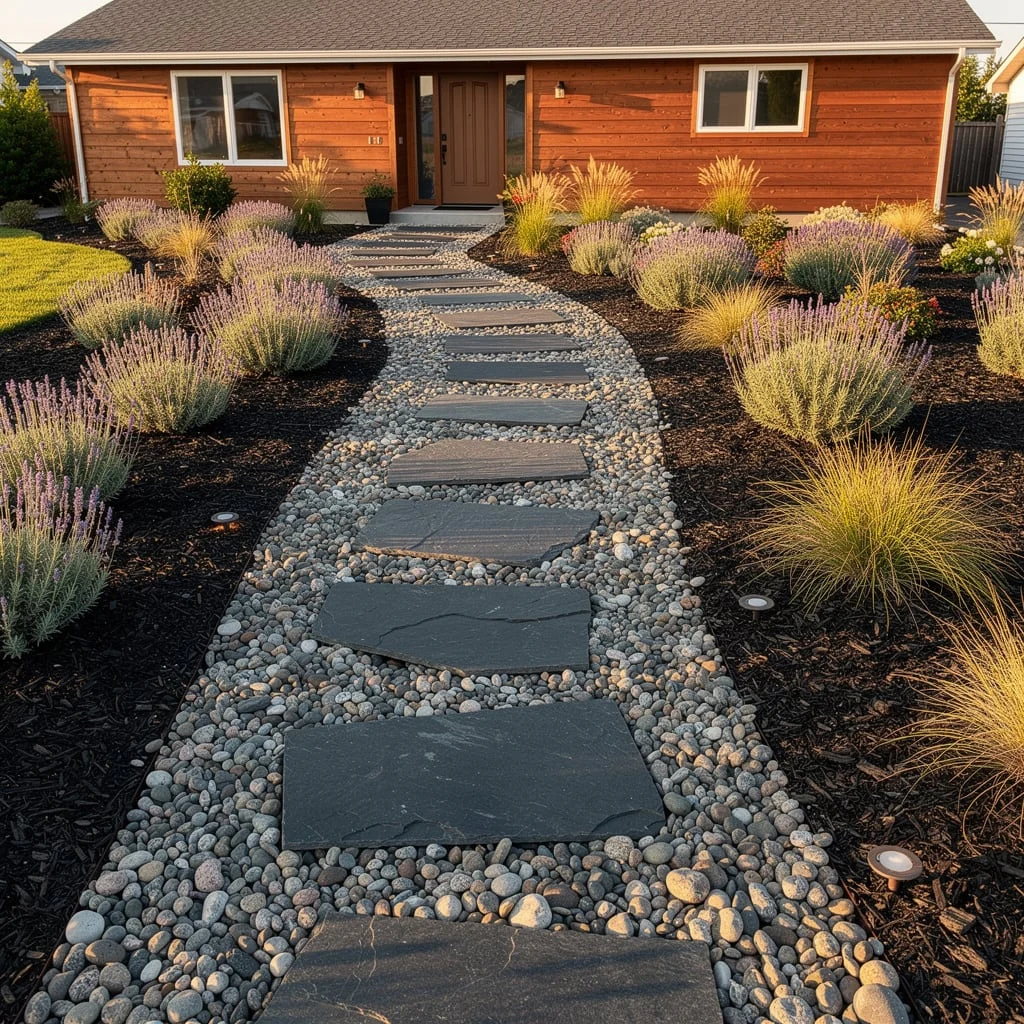
The path starts with the river pebble channel. Excavate a strip roughly 600-800mm wide from your gate or street to your door. Fill it with small, smooth grey river pebbles — 20-40mm size — to a depth of 80mm. Within this pebble channel, set your dark slate stepping stones at comfortable pace intervals: large, rectangular cut bluestone or slate pieces, roughly 600x400mm, positioned so each one is firmly level and stable.
On either side of the pebble channel, lay a wide mulch bed and plant it heavily with lavender, ornamental grasses, and low-growing flowering plants. The contrast between the dark slate, pale pebble channel, and soft flowering plants on either side creates an arrival sequence that actually rewards the walk to the door.
The low-voltage path lighting installed flush in the pebble channel is the finishing move. It makes the whole composition dramatically better at dusk without needing to be visible or intrusive during the day.
Final Thoughts
Every yard in this list is doing the same thing, just with different materials and different vocabularies. It is committing to a single clear decision and then not apologising for it.
The boulder cluster that makes grass look redundant made a decision: rocks are the feature, not the accessory. The yin-yang lava bed made a decision: geometry is more interesting than randomness. The dark slate pathway made a decision: the journey to the front door should feel like something. None of these are complicated decisions. They are just made.
What separates a front yard that works from one that does not is not the price of the materials. Gravel is gravel. Mulch is mulch. The difference is in the clarity of what the yard is trying to be, and whether every element is in service of that.
Pick one strong idea. Build everything else around it. Your neighbours will be staring at your yard from the street wondering what you did differently. The answer is nothing complicated. You just decided.