
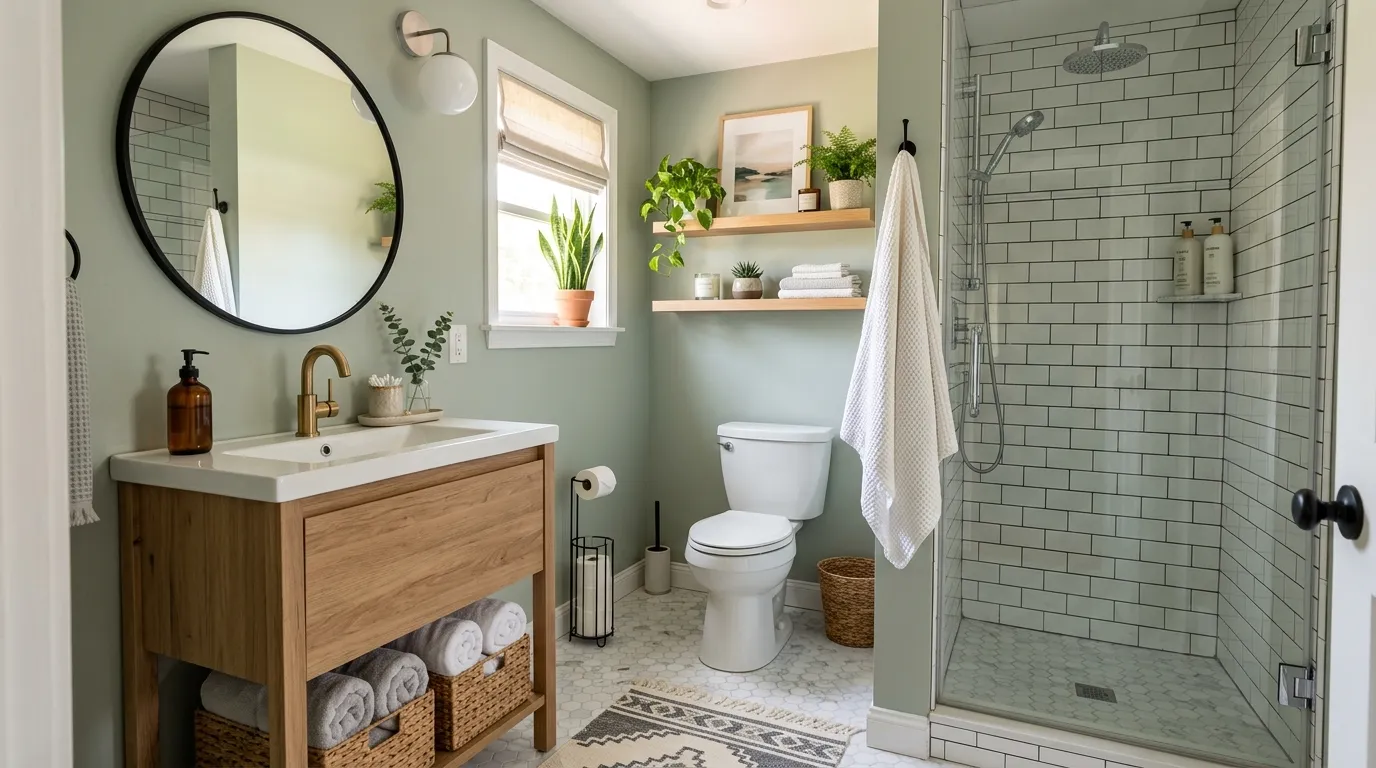
Cramming a full bathtub, a vanity, and a working toilet into less than 50 square feet feels like trying to fit a king-size bed into a closet. Most people treat a tight footprint like an inescapable punishment. They pack in tiny furniture, slap on bright white paint, and hope the room magically stops feeling suffocating. That approach never works.
When you tackle small full bathroom ideas, you cannot design for an imaginary palace. You have to design for the physical reality of human elbows, swinging doors, and wet zones. Shrinking everything down to dollhouse proportions just leaves you with zero storage and a room that feels like an airplane restroom.
The secret isn’t buying smaller fixtures. It’s eliminating visual breaks and reclaiming the dead space hiding behind your sheetrock.
Once you change how sightlines and clearance paths move through the room, forty square feet can easily function like eighty. Here is exactly how to stop fighting your square footage and make a compact bathroom actually work.
Smart Moves to Maximize Your Small Full Bathroom
Elevate Your Built-in Nooks
Why clutter your limited counter space with every soap bottle you own when you could just carve holes into your expensive tile work? Adding recessed shelving into the shower and bath zones is the perfect way to make your cleaning products look like deliberate decor choices rather than items you forgot to stash.
Since your bathroom is likely the size of a postage stamp, utilizing the dead space inside your walls for storage is the only way to avoid feeling like you’re bathing in a shipping container. It’s a simple trick for people who hate visual clutter but refuse to actually throw anything away.
By keeping your shampoos and lotions off the edges of the tub, you stop the inevitable buildup of slime and grime that makes your shower look like a science experiment. Your bathroom stays clean, your stuff stays hidden, and you maintain the delusion that you live in a minimalist spa.
Swap the Swinging Door for a Solid Pocket Door
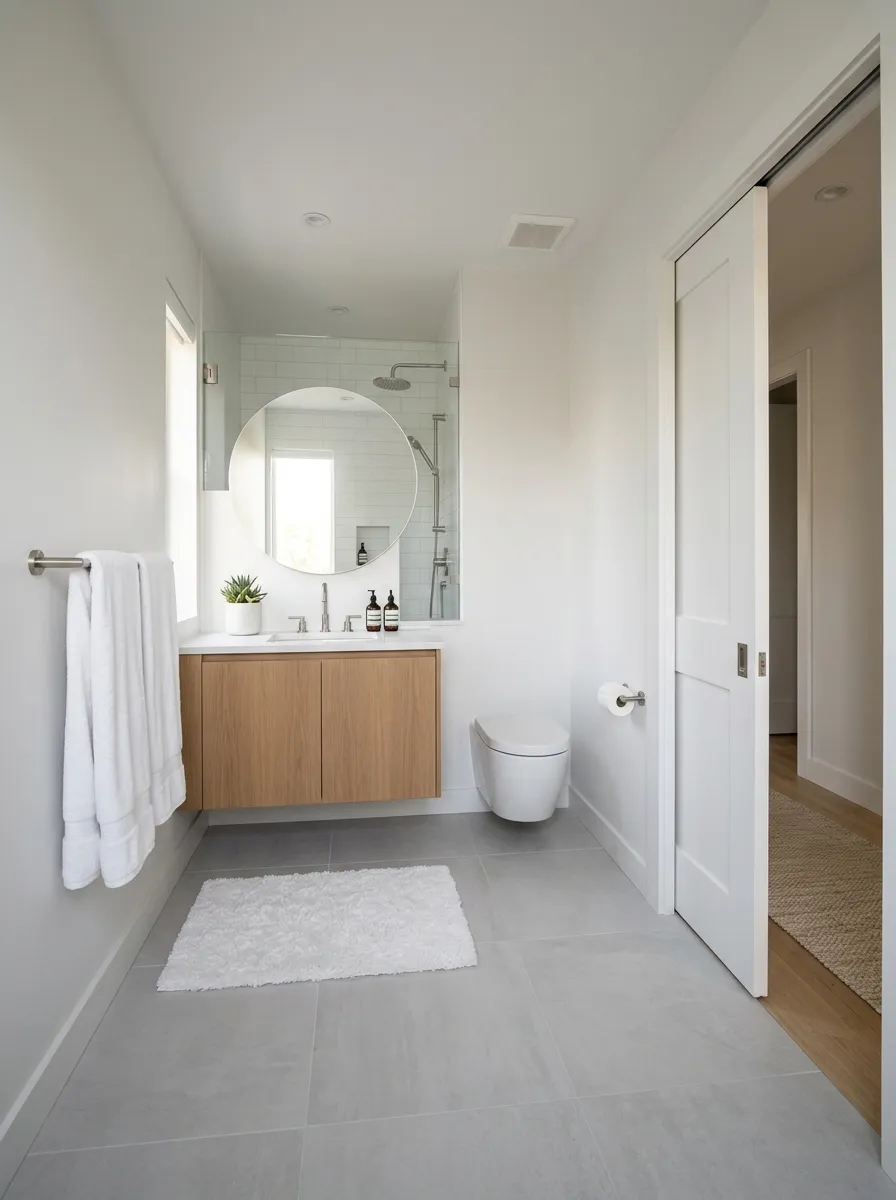
A standard interior door demands nearly nine square feet of open floor space just to swing open. In a tight full bath, that arc blocks your towel rack, hits the vanity edge, and forces you to perform awkward contortions just to shut yourself inside.
Toss the traditional hinges. Sliding a solid wooden door directly into a wall frame instantly frees up critical clearance around your sink and toilet zone.
Consumes 8.5 sq ft of swing radius. Blocks vanity cabinet drawers and towel racks.
Zero footprint intrusion. Reclaims 100% of usable wall and floor clearance.
Go Vertical with Lighting
Nothing screams ‘I have no floor space’ quite like trying to cram a vanity, a sink, and a lighting fixture into a room that barely fits a human. Moving your light sources to the wall, especially with integrated LED strips, creates a glow that distracts from how cramped the rest of the layout actually is.
Floating your storage and vanity off the floor isn’t just a design trend for people who love vacuuming; it’s a desperate bid to reclaim a few square inches of visual breathing room. When you can see the floor under your furniture, you get to pretend your bathroom is twice as large as it really is.
Pairing a backlit mirror with warm wall lighting makes the room feel less like an interrogation chamber and more like a place you might actually want to exist. It’s amazing what a little light manipulation can do to hide the fact that your elbows hit the walls every time you wash your face.
Mount a Floating Vanity to Expose Floor Tile
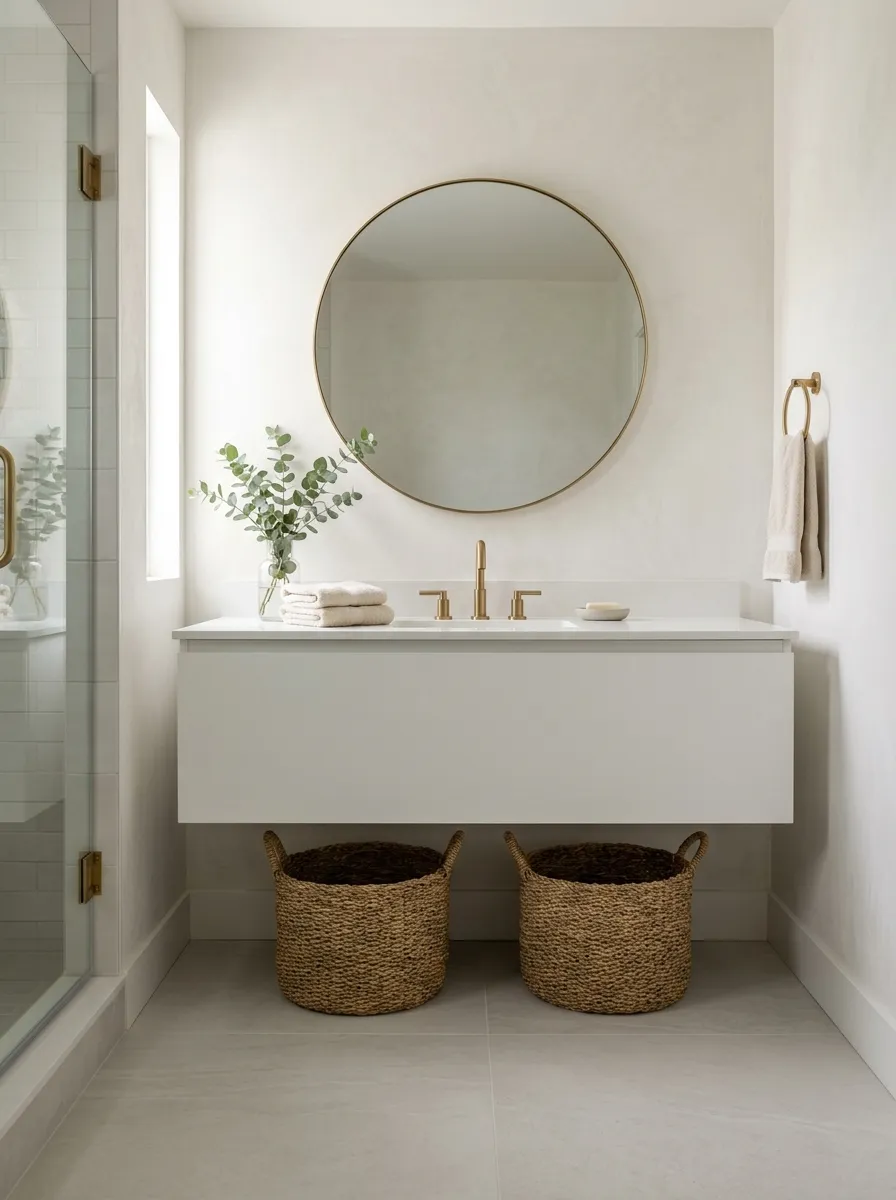
Exposing your floor tile all the way to the baseboard tricks your eye into sensing a much larger room.
When a cabinet sits flat on the floor, your eyes mark that spot as the boundary of the room. Mounting a streamlined vanity off the floor creates a continuous line of sight underneath the sink.
It leaves plenty of room for small woven storage baskets below while keeping the overall footprint light and airy.
Designer Height Pro-Tip
Mount your floating vanity 34 to 36 inches above the finished floor. Leave at least 10 inches of open clearance beneath the cabinet to maximize visual depth and keep woven floor bins accessible.
Shelving Inside the Architecture
If you have a weird, narrow sliver of wall space, stop looking at it like a design flaw and start using it for vertical storage. Custom shelving that mimics the structural lines of your home makes a tiny bathroom feel like a high-end architectural project rather than an afterthought.
Standard cabinets are bulky, aggressive eyesores that steal your precious elbow room. By opting for integrated shelving, you force your daily essentials into a vertical line, which magically makes the room seem taller and less like a suffocating box.
Keep your random knick-knacks and radios out of the way on these high-mounted shelves so your counter remains clear for the one or two things you actually use. It’s a great way to display your personality without sacrificing the tiny bit of usable space you desperately need.
Run Large-Format Tiles from Floor Straight Up the Wall
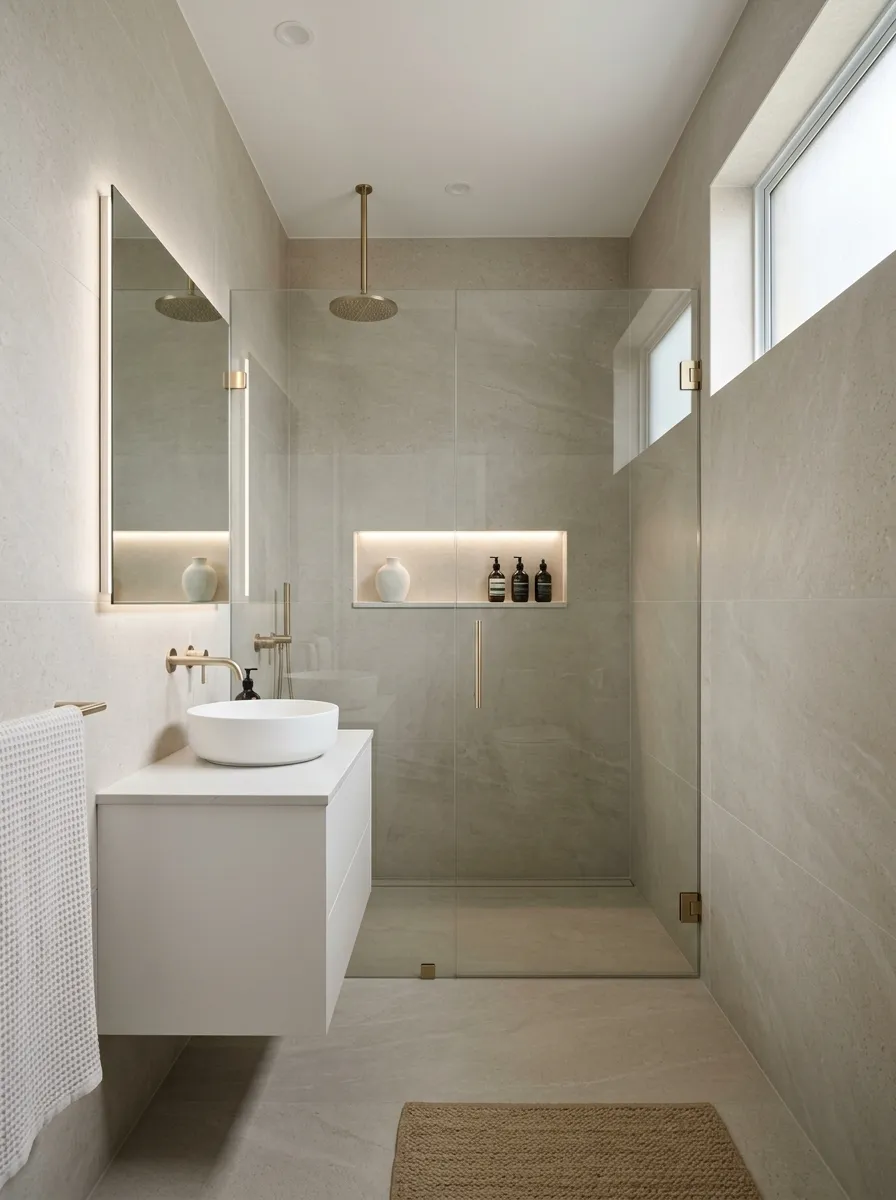
Small tiles with dozens of dark grout lines don’t make a room feel cozy. They make it look cluttered and busy.
Switching to large-format porcelain slabs minimizes grout breaks, creating a smooth visual surface across the room.
Carrying the same continuous tile design from the floor right up the shower walls eliminates hard horizontal dividing lines. Your eyes slide upward without stopping, which dramatically raises the perceived ceiling height.
Tile Scale vs Grout Grid Density
Embrace the Dark Aesthetic
Most people are terrified of using dark colors in a small bathroom, which is exactly why their tiny rooms look so painfully predictable. Painting your fixtures and cabinetry in matte black creates depth that makes the walls seem to recede into the shadows, rather than closing in on you.
Pairing dark, moody tones with high-end lighting makes the room feel like an expensive hotel bathroom instead of a cramped utility closet. You aren’t ‘shrinking’ the space, you’re giving it personality, which is a rare upgrade for most sad, builder-grade bathrooms.
Floating your storage and wall-mounting your toilet allows the dark floor tile to extend uninterrupted, further tricking the eye into believing the room has actual depth. Just make sure your lighting is intentional, or you’ll just end up with a very stylish, very dark cave.
Ditch the Curtains for a Frameless Glass Fluted Screen
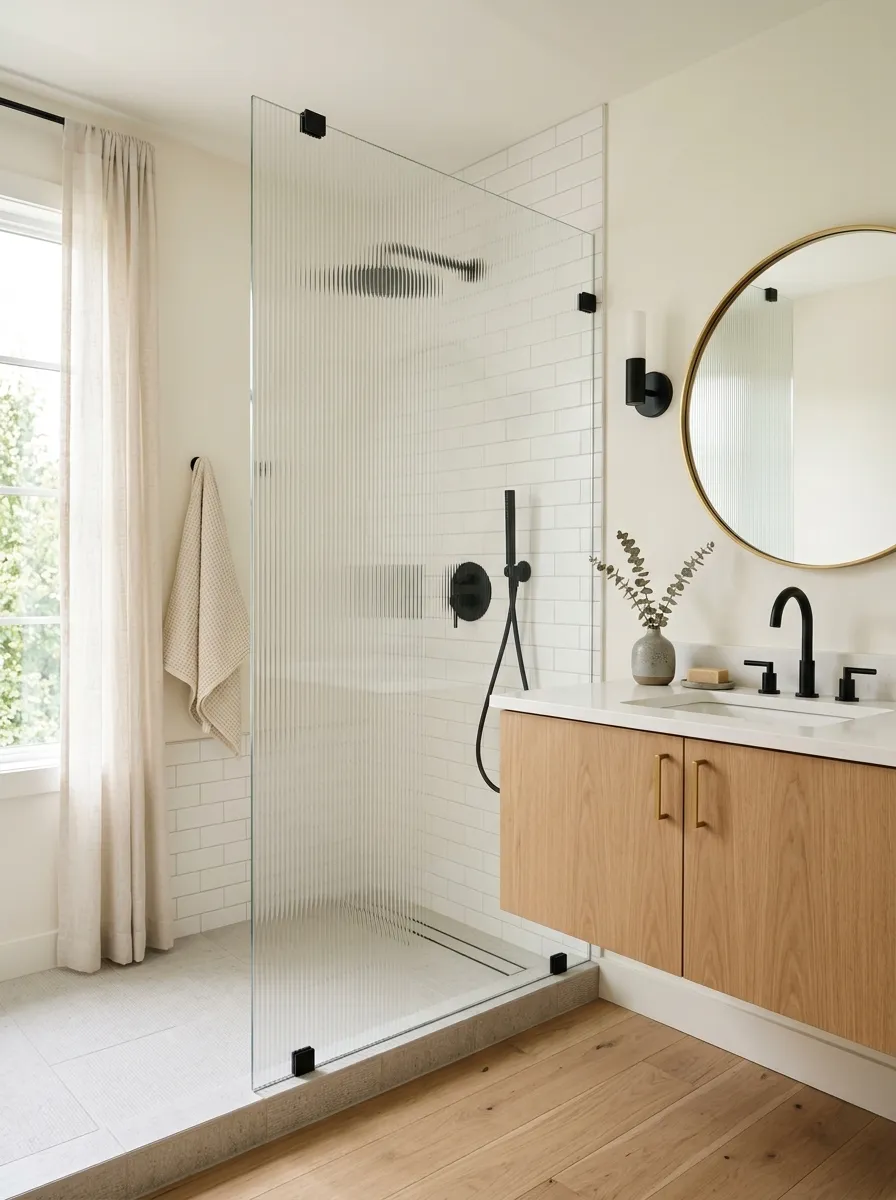
Fabric curtains soak up natural light and chop your room in half the second you pull them shut.
A stationary glass panel lets light bounce through the shower while keeping water where it belongs.
If you want privacy without creating a solid dark wall, fluted glass is your best friend. The subtle texture diffuses light effortlessly and hides water spots while keeping the room totally open.
Glass Screen Selection Checklist
Maximize Narrow Vertical Storage
That awkward gap between your shower and the wall isn’t a problem, it’s a golden opportunity for a tall, narrow storage tower. By utilizing the vertical height of the room, you stop fighting for horizontal space that simply doesn’t exist.
Using a tall, built-in cabinet with glass-fronted doors adds a layer of depth and reflection that bounces light around the room. It effectively doubles as a mirror and a closet, keeping your towels and supplies tucked away from the humidity of the shower.
Keeping your storage consolidated in one narrow, vertical column keeps the floor footprint tiny. It’s the perfect way to store a small apartment’s worth of products without making the room feel like a cluttered disaster zone the second you bring in a new bottle of shampoo.
Build a Recessed Medicine Cabinet Between Wall Studs
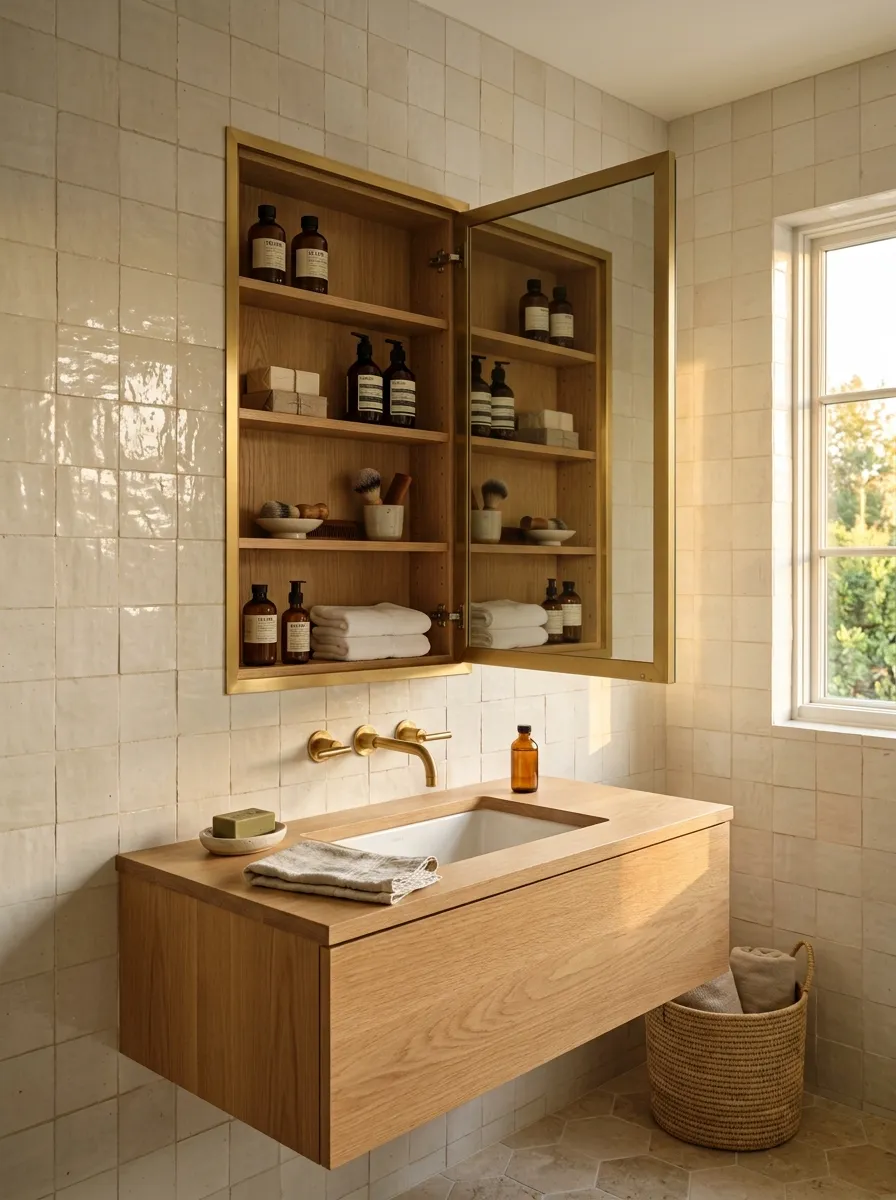
Stop mounting thick, boxy medicine cabinets that stick out four inches directly over your faucet.
You already have empty space sitting behind your drywall between the wooden studs. Cutting into that wall cavity lets you sink a tall mirror unit completely flush with your tile.
You gain four deep shelves of hidden storage for bottles and razors without losing an inch of elbow room over the sink basin.
Projects out into your head clearance area. Creates dark overhead shadows on faucet hardware.
Sits completely flush inside 2×4 stud space. Maintains unobstructed vertical standing room.
Extend Your Countertop Right Over the Toilet Tank
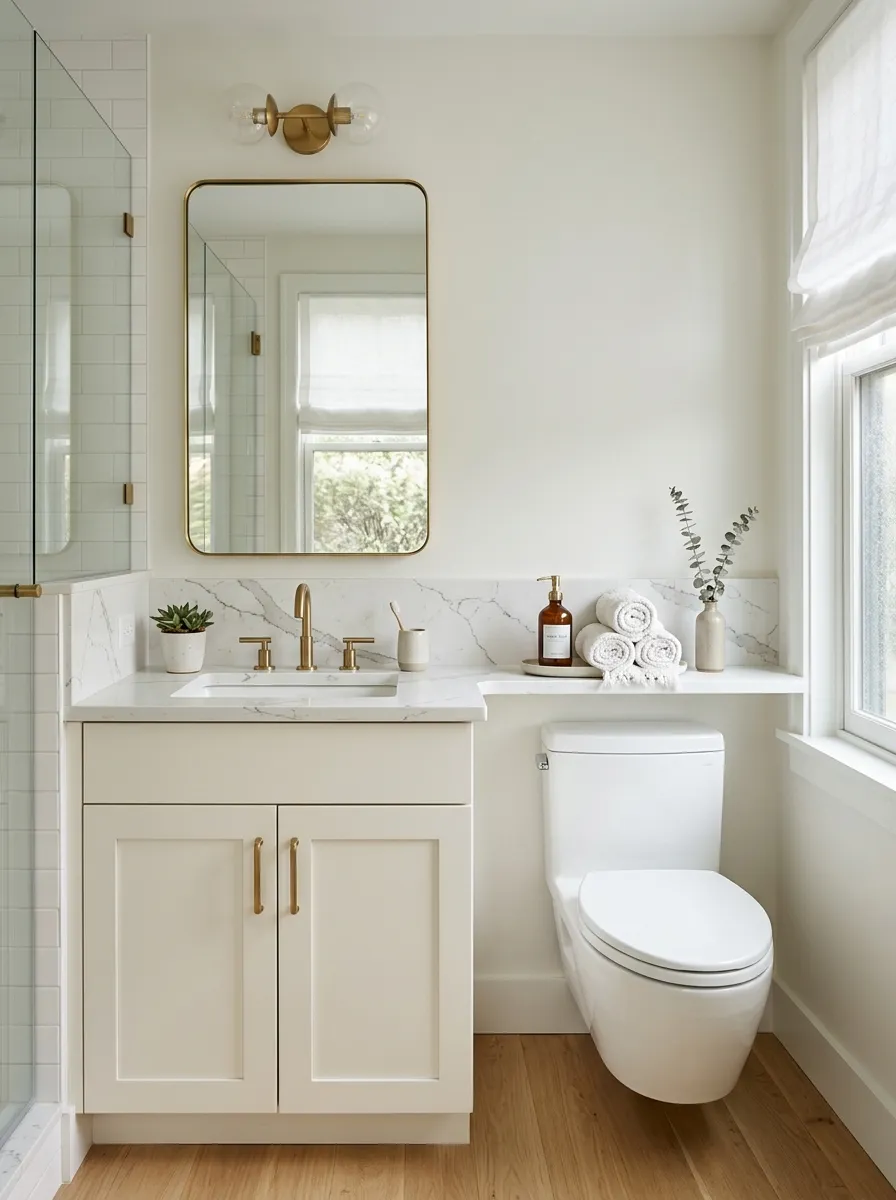
A standard vanity top ends right where the cabinet stops, leaving dead, useless wall space above your toilet tank.
Extending your vanity slab straight across the back wall creates a slim, continuous ledge.
It gives you a perfect shelf for soap, trays, or rolled hand towels without taking up extra floor space or making the room feel crowded.
Install a Wall-Mounted Faucet to Reclaim Counter Depth
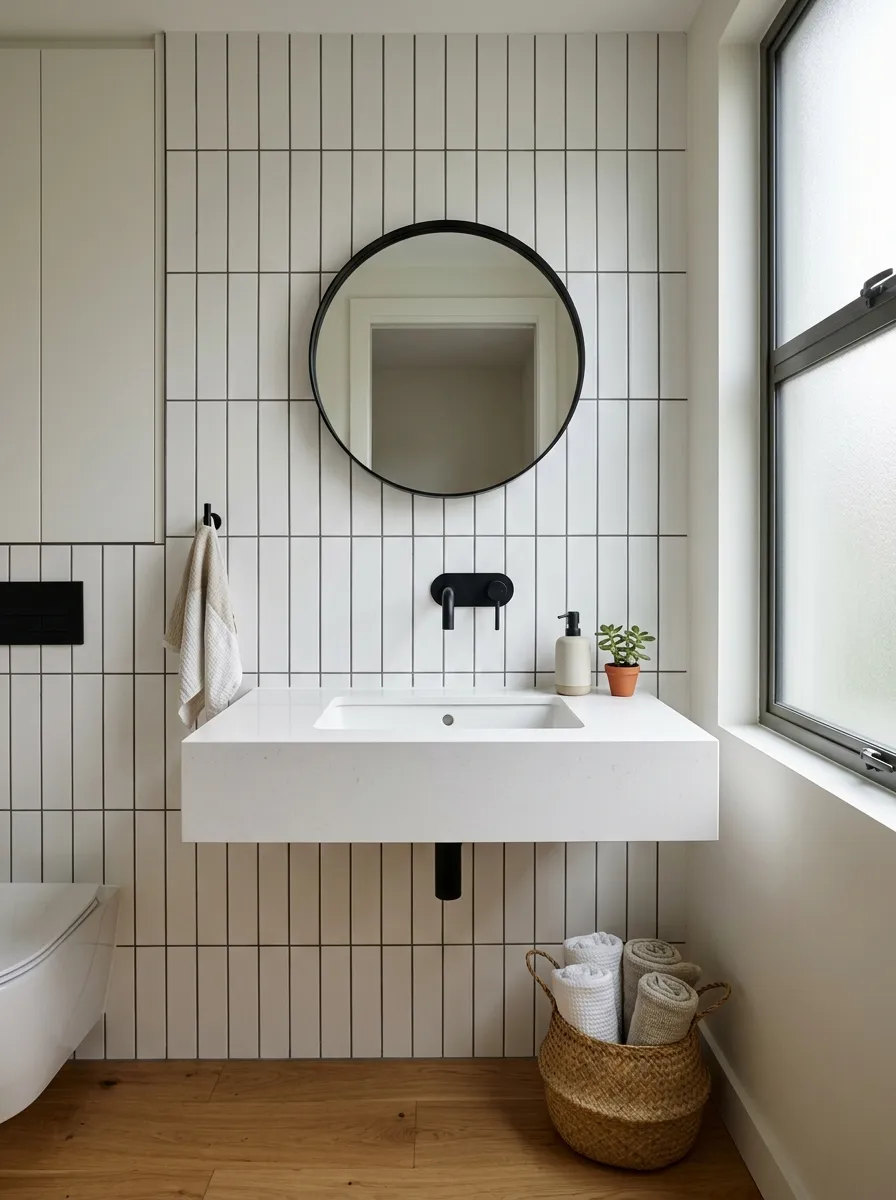
Deck-mounted faucets steal three to four inches of precious space behind your basin. In a shallow vanity setup, that loss forces you to use tiny, impractical sinks where washing your hands splashes water everywhere.
Shift the plumbing directly into your wall studs.
Placing the controls on the wall lets you push the basin back closer to the drywall, opening up usable counter space right where you need it most.
Tuck a Tiled Shower Ledge Across the Entire Back Wall
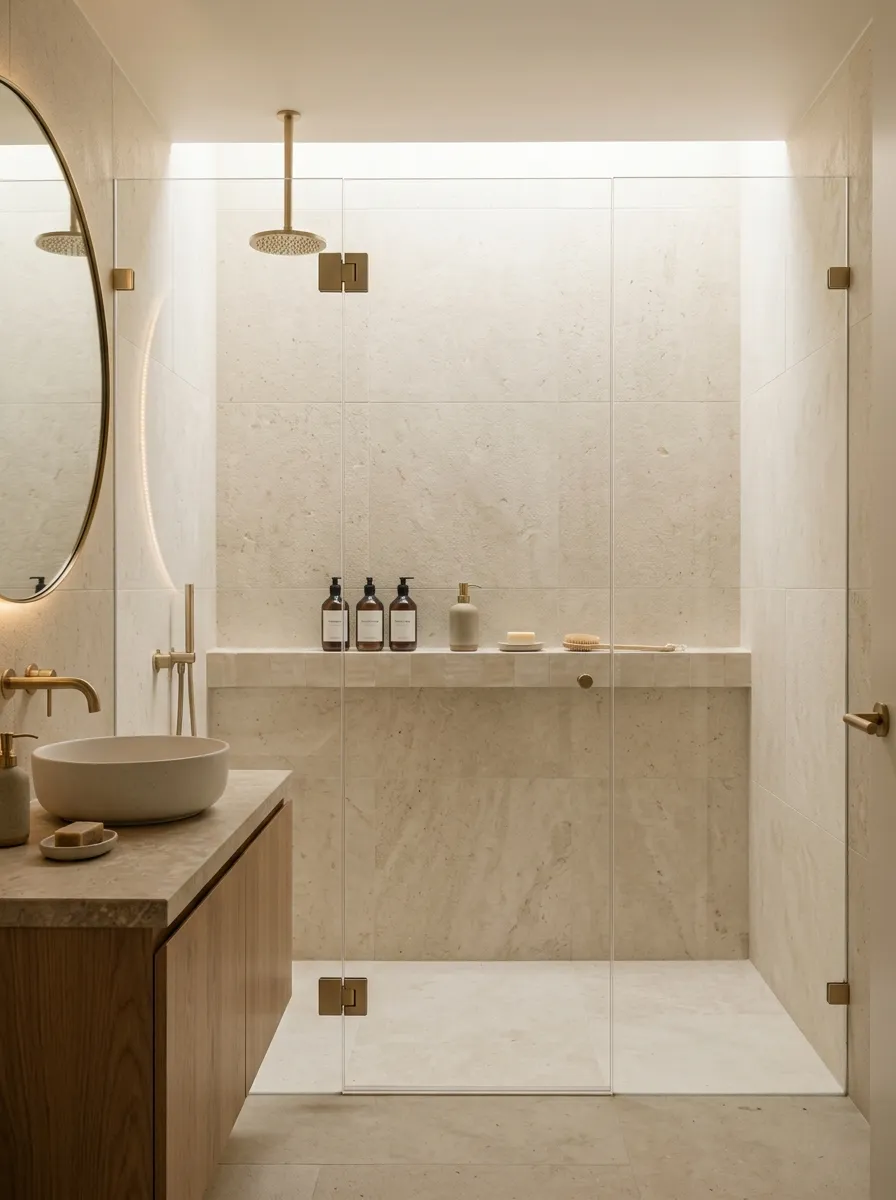
Those tiny plastic corner caddies and cheap stick-on baskets look terrible and clutter up your shower space.
Build a continuous low ledge running along the entire back shower wall instead of cutting out small individual cubbies.
It gives you plenty of room for all your soap and shampoo bottles without sticking out into your elbow space.
Slope and Pitch Warning
Always ensure your shower ledge pitched downward by a quarter-inch toward the shower drain. Flat or improperly angled ledges trap standing water, leading to grout discoloration and mildew build-up within weeks.
Use Corner Sinks in Awkward Narrow Footprints
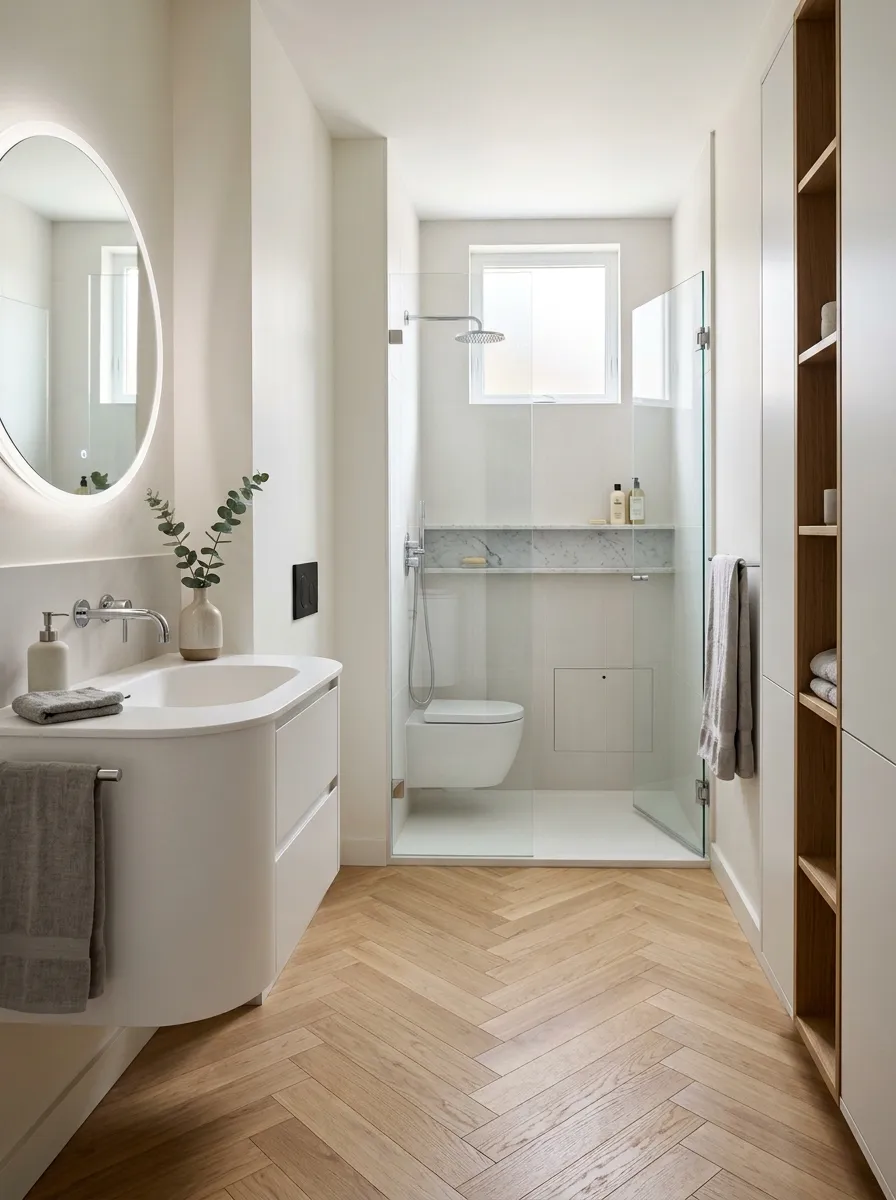
When an entry door swings right toward your vanity, putting a standard rectangular sink cabinet there turns your room into an obstacle course.
Tucking a curved or angled corner vanity into the far corner opens up central floor space instantly.
It frees up critical walking room, making it easy to move between your toilet and shower without bumping into hard edges.
Creates a narrow 22-inch pinch point near door entry. Constantly causes hip and elbow bumps.
Opens up a 36-inch walking path. Maximizes central floor clearance while keeping sink functional.
Anchor the Space with a Bold Patterned Floor Tile
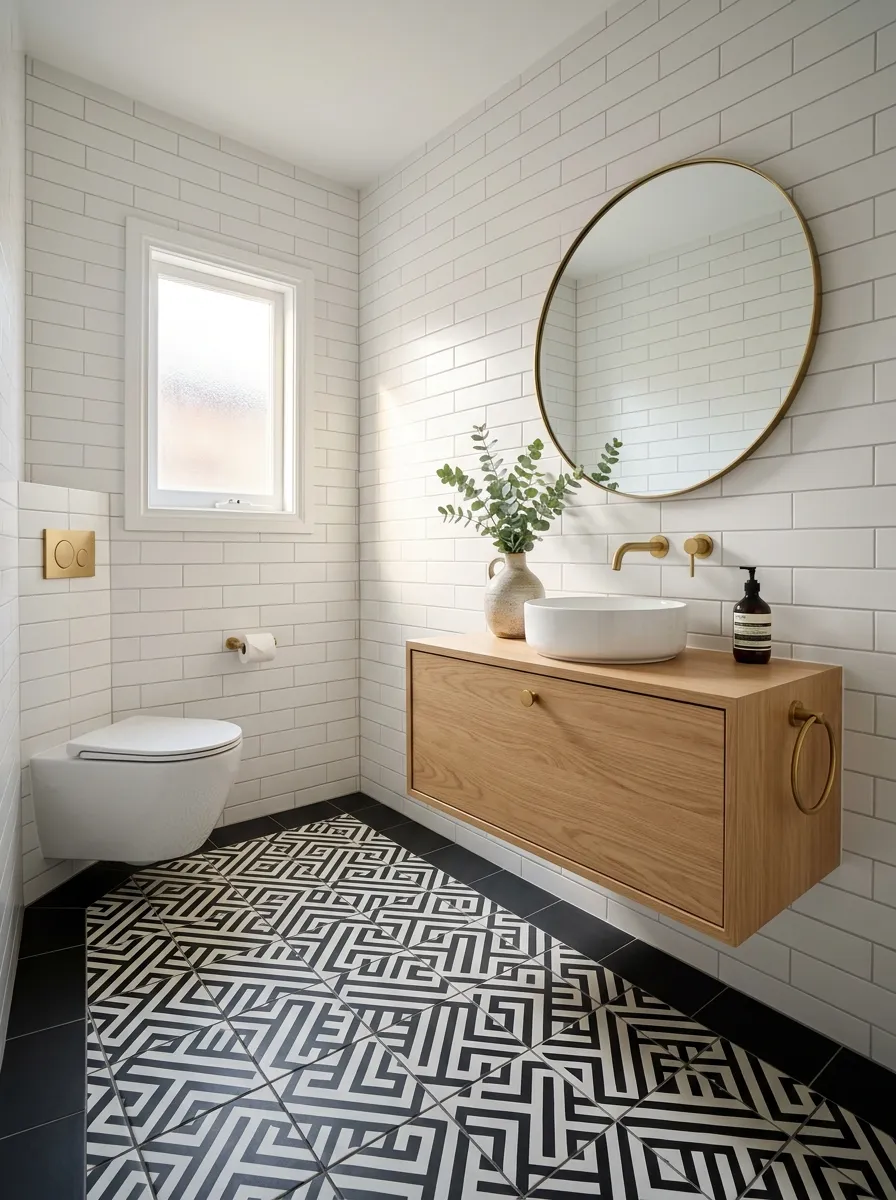
Placing plain, light-colored tiles across a tiny floor makes the room look flat and uninteresting.
A bold geometric or patterned floor tile draws your eyes down, turning your small floor into an intentional feature rather than an afterthought.
Pairing dynamic floor tile with simple white wall tile keeps the space balanced and striking without feeling overwhelming.
Pattern Scale Rules for Small Bathrooms
- Medium-Scale Prints: Choose patterns between 8 to 12 inches to prevent optical crowding.
- High-Contrast Borders: Keep outer edges solid to visually define room boundaries cleanly.
- Matte Finish: Select non-slip matte porcelain over glossy tiles to reduce harsh light glare.
Choose a Shallow-Depth Vanity with Off-Center Plumbing
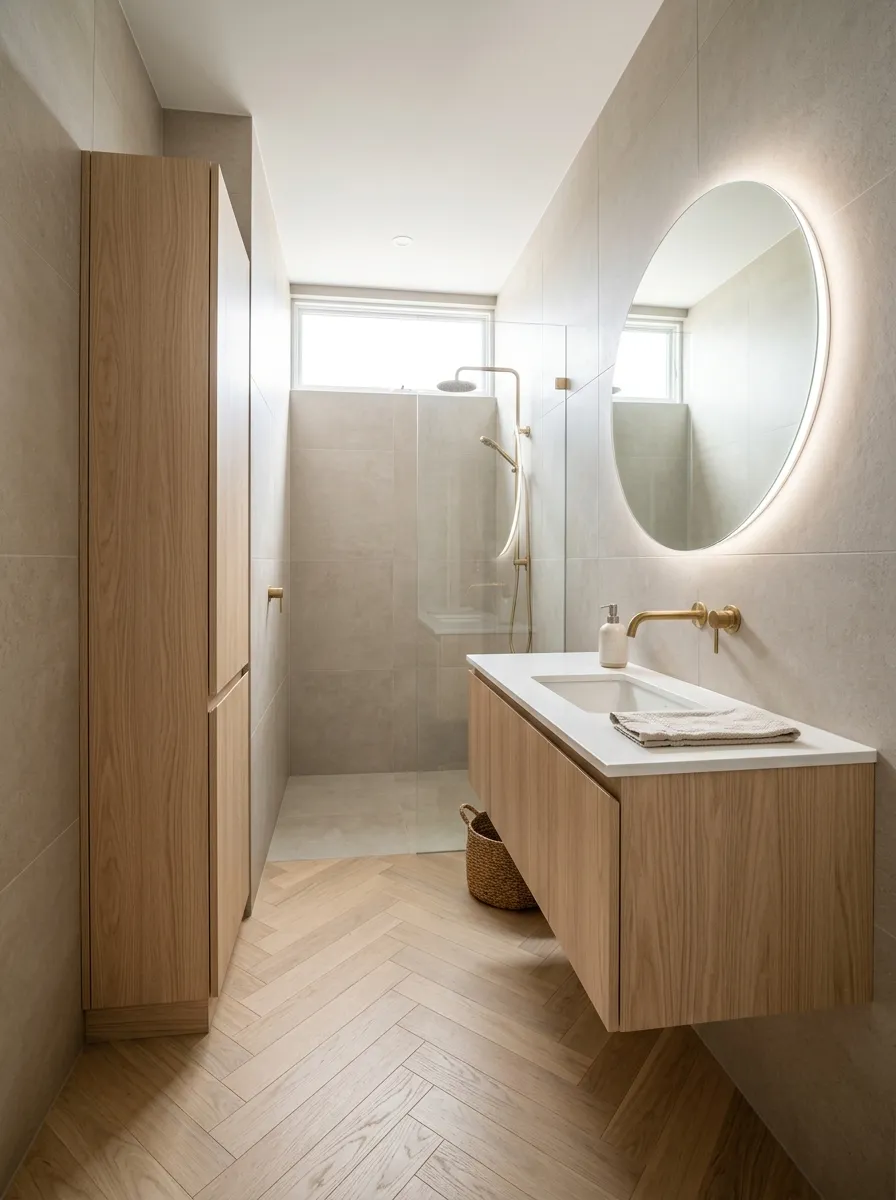
Standard vanities push twenty-one inches deep, eating up valuable floor space that you desperately need for walking.
Dropping your vanity depth down to fourteen or fifteen inches completely changes the ergonomics of the room.
Pairing that shallow cabinet with an off-center sink bowl leaves you with a wide, usable side counter instead of a cramped center bowl.
Continuous Floor Tile Straight Into a Curbless Shower
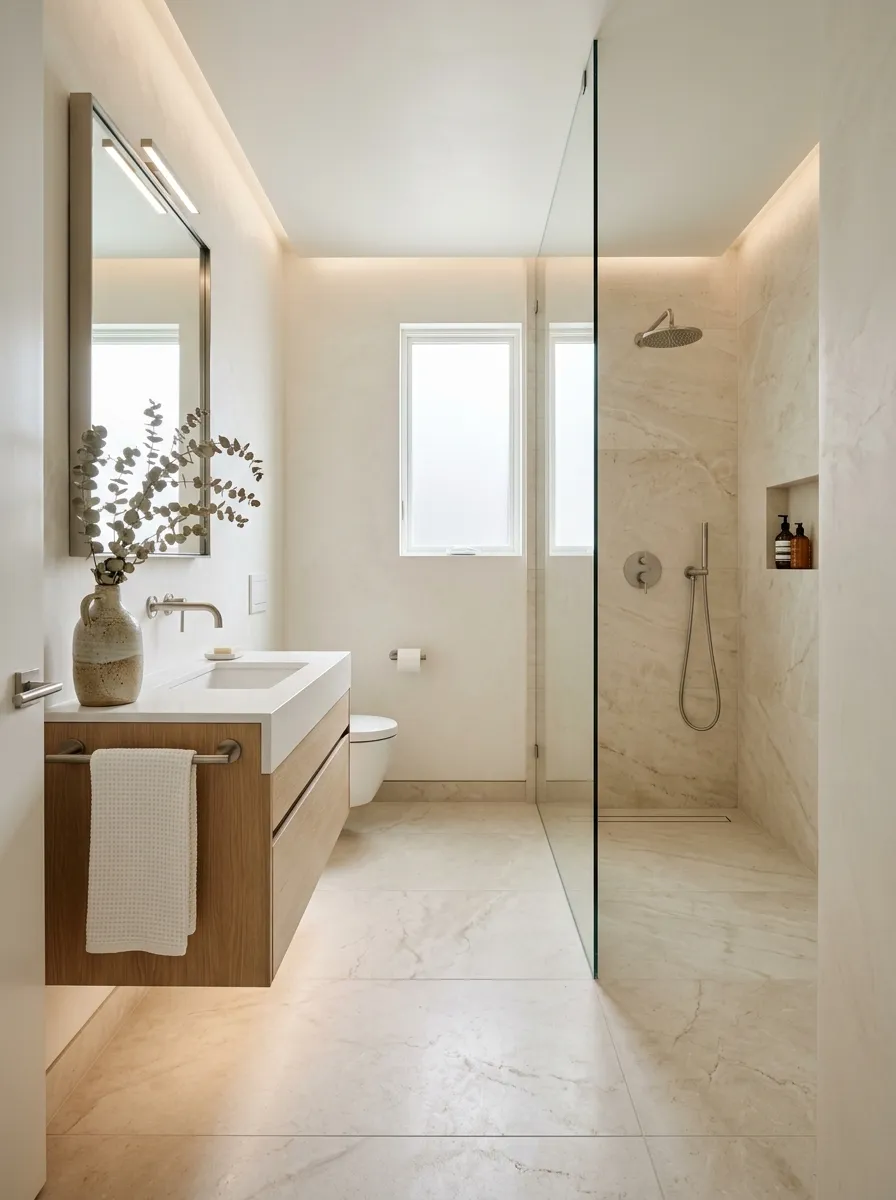
Stepping over a raised tile curb breaks up the floor plan and visually chops your shower zone into a cramped enclosure.
Eliminating the threshold altogether lets your main floor tile flow seamlessly right into the shower pan.
When your eyes register the entire floor as one continuous surface, the footprint expands instantly.
Recess Wall Niches Inside the Shower Interior
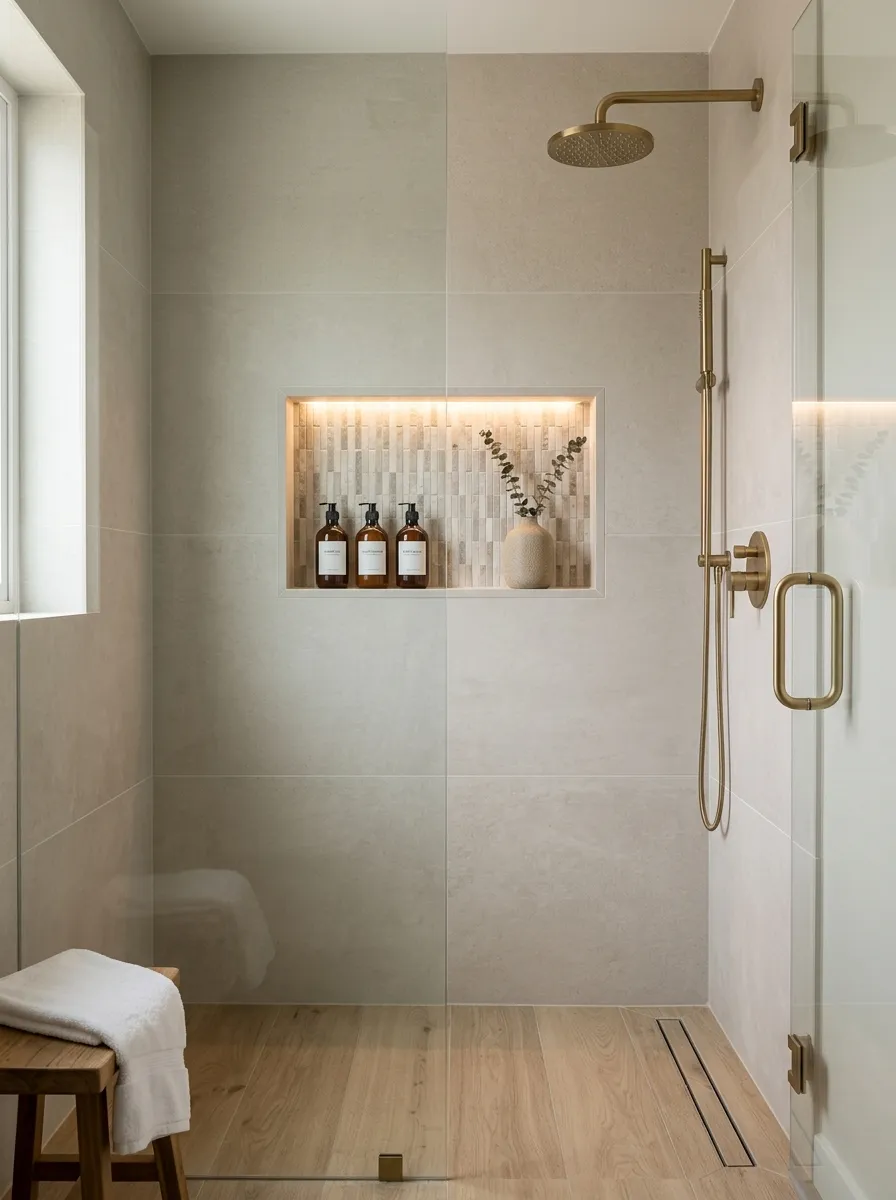
Protruding wire racks inside your shower steal physical inches and catch your elbows every time you turn around.
Cutting your storage niches directly between the wall studs creates flush pockets that hold all your essentials out of the way.
It keeps the shower walls completely clean and streamlined.
Install Floor-to-Ceiling Vertical Line Tiles
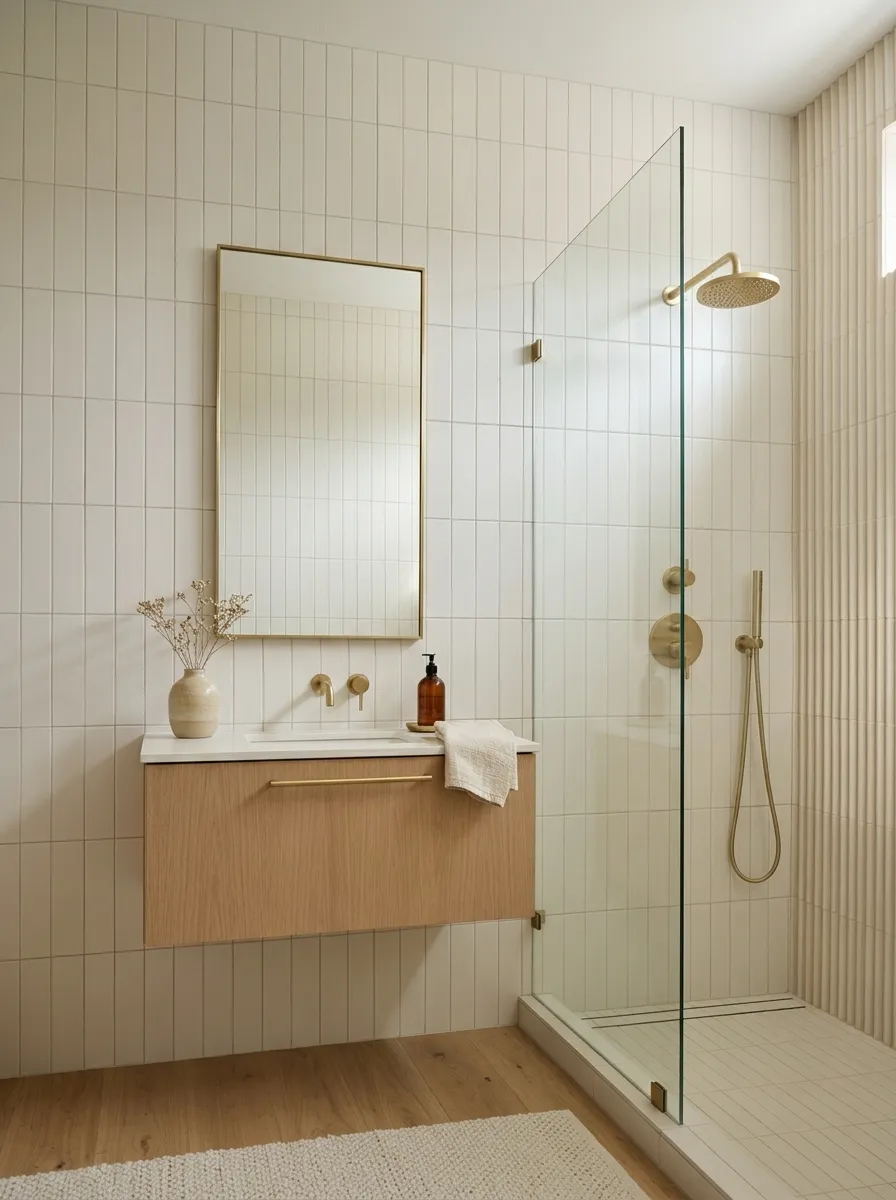
Horizontal accent stripes pull your eyes sideways, making narrow walls feel pinched and compressed.
Switching to vertical stacked tiles or slender fluted elements draws the gaze straight up toward the ceiling.
It adds immediate height to low-ceiling bathrooms without requiring any structural changes.
Grout Line Alignment Trick
Always align your vertical tile joints straight up from the floor grout lines to create an unbroken optical line that fools the eye into seeing extra height.
Mount Backlit LED Mirrors for Shadowless Scale
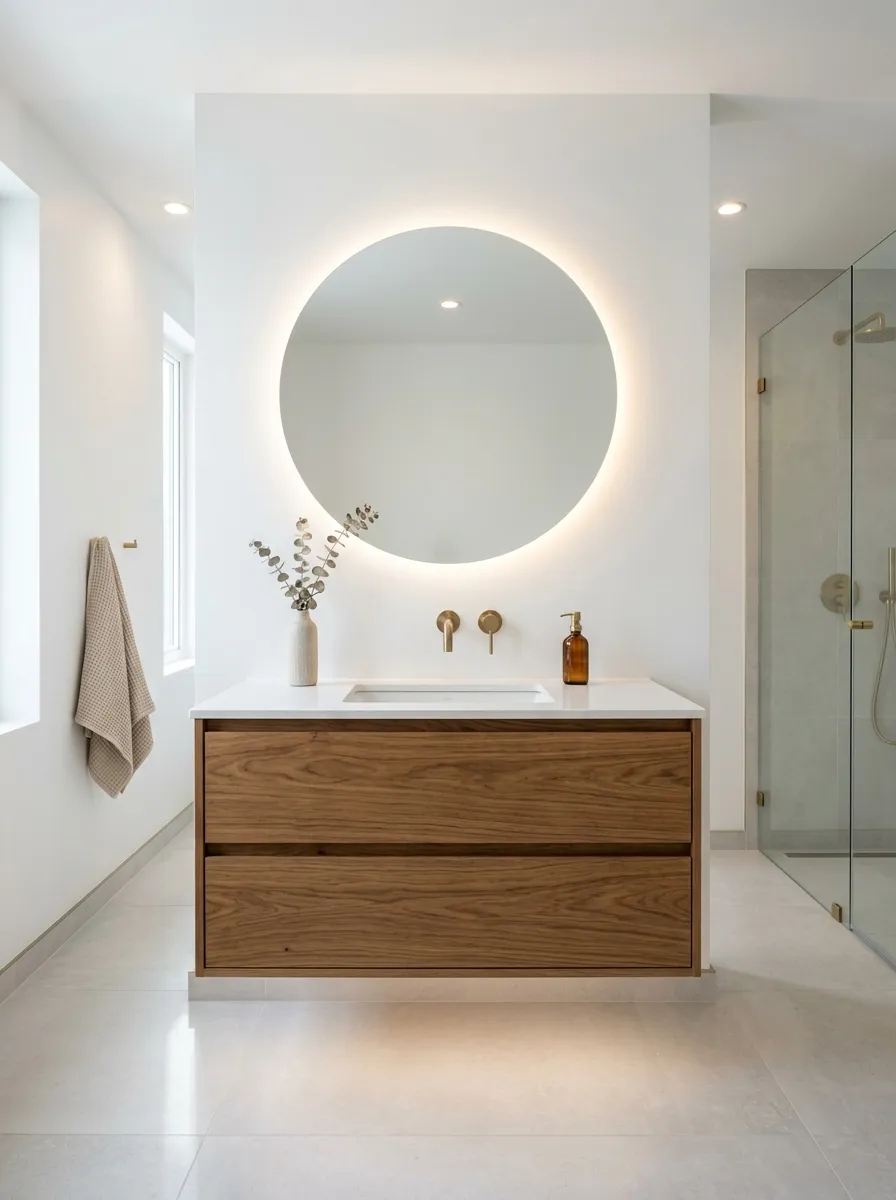
Hanging a heavy, dark-framed mirror on a small wall creates a heavy focal point that closes in the space.
A frameless backlit mirror casts a soft, diffuse glow against the drywall behind it.
That ambient halo effect separates the mirror from the wall, making the entire vanity area feel deeper and more open.
Backlit Halo vs Direct Sconce Glare
Washes wall evenly in 360 degrees. Eradicates harsh chin and nose shadows.
Pushes wall plane backward optically, giving the illusion of extra room depth.
Use Towel Bars Instead of Hooks on Empty Wall Stretches
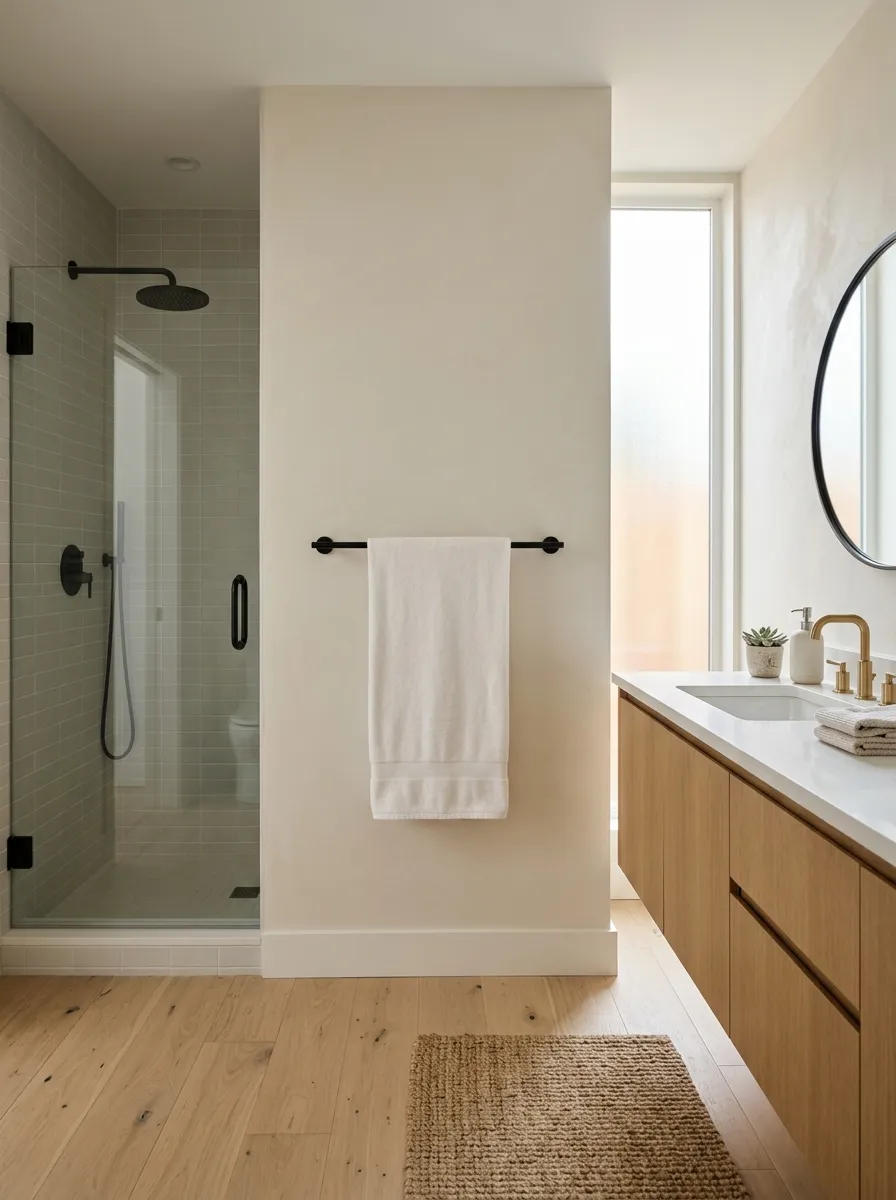
Hooks cause thick bath towels to bunch up and trap moisture against your wall paint.
Mounting a slim towel bar allows fabrics to hang flat and dry quickly.
It creates a neat horizontal line that visually widens narrow wall partitions.
Paint Ceilings and Walls in the Exact Same Sheen
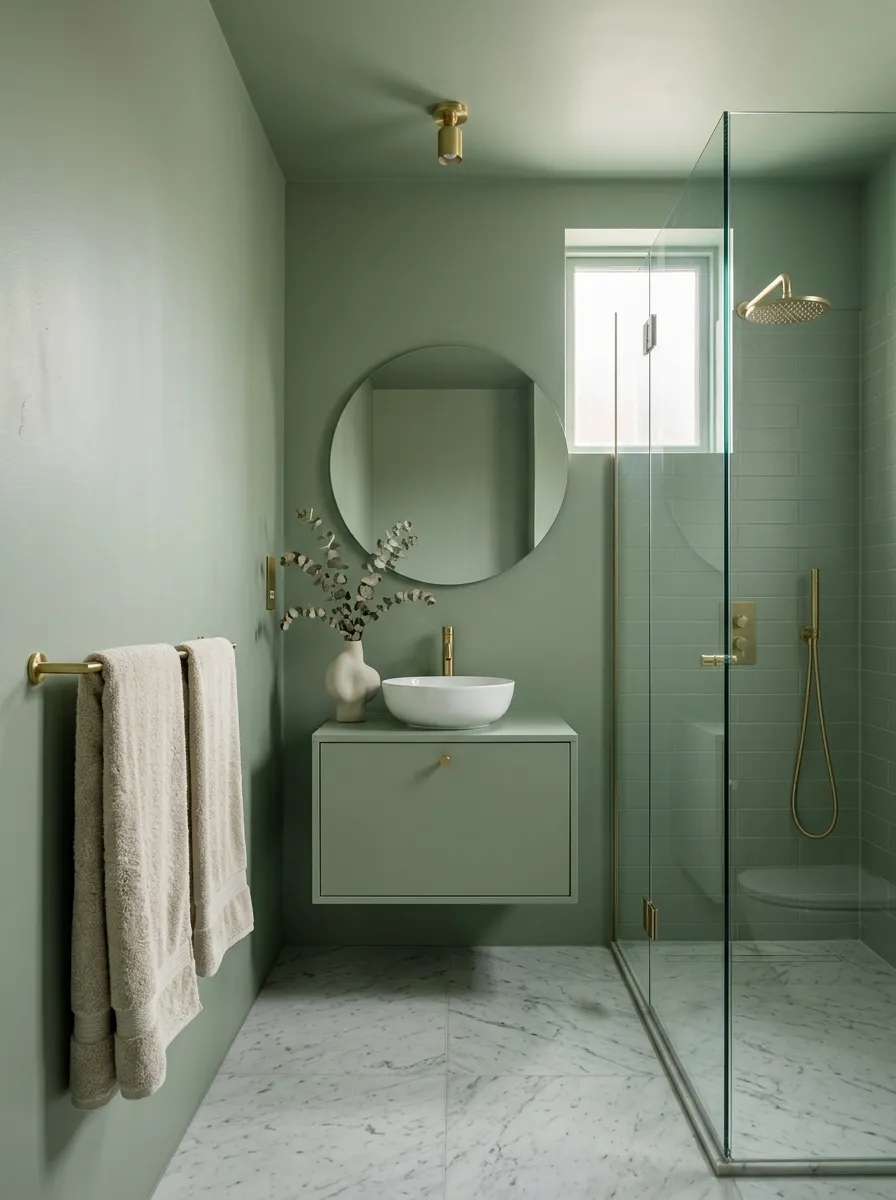
Painting your ceiling crisp white while your walls carry color creates a harsh border that lowers your roofline.
Drenching the entire room in the exact same hue dissolves the corners.
Your eyes lose track of where the walls stop and the ceiling starts, creating an illusion of expansive height.
Boundary Dissolve vs Contrast Framing
Blurs ceiling edges so vertical space feels limitless.
Wipes clean easily while reflecting soft ambient light.
Swap to a Compact Round-Front Toilet Bowl
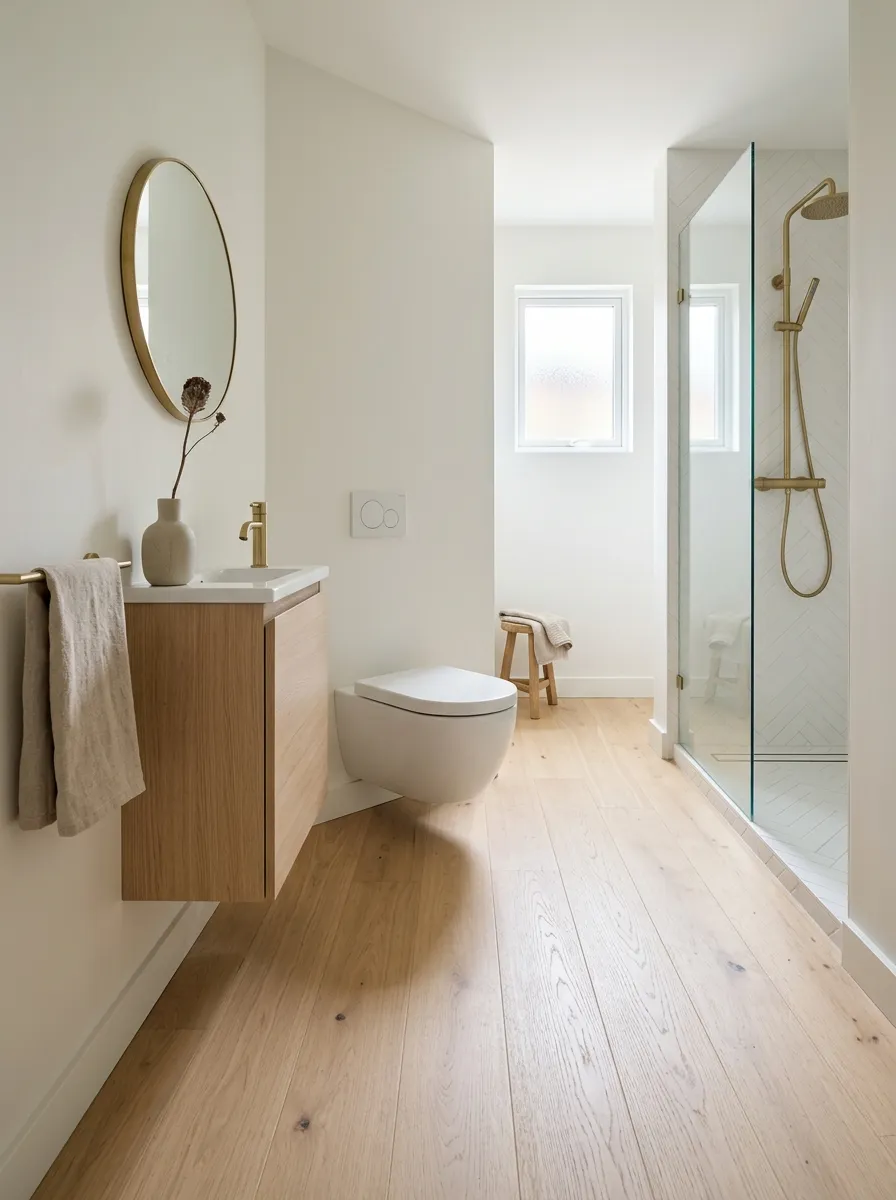
Elongated toilets project thirty inches into your walking path, creating an annoying bottleneck right between the vanity and the shower.
Switching to a compact round model saves several inches of precious floor clearance.
You get the exact same seating comfort without blocking your pathway.
Add Glass Shelving Directly Across Window Openings
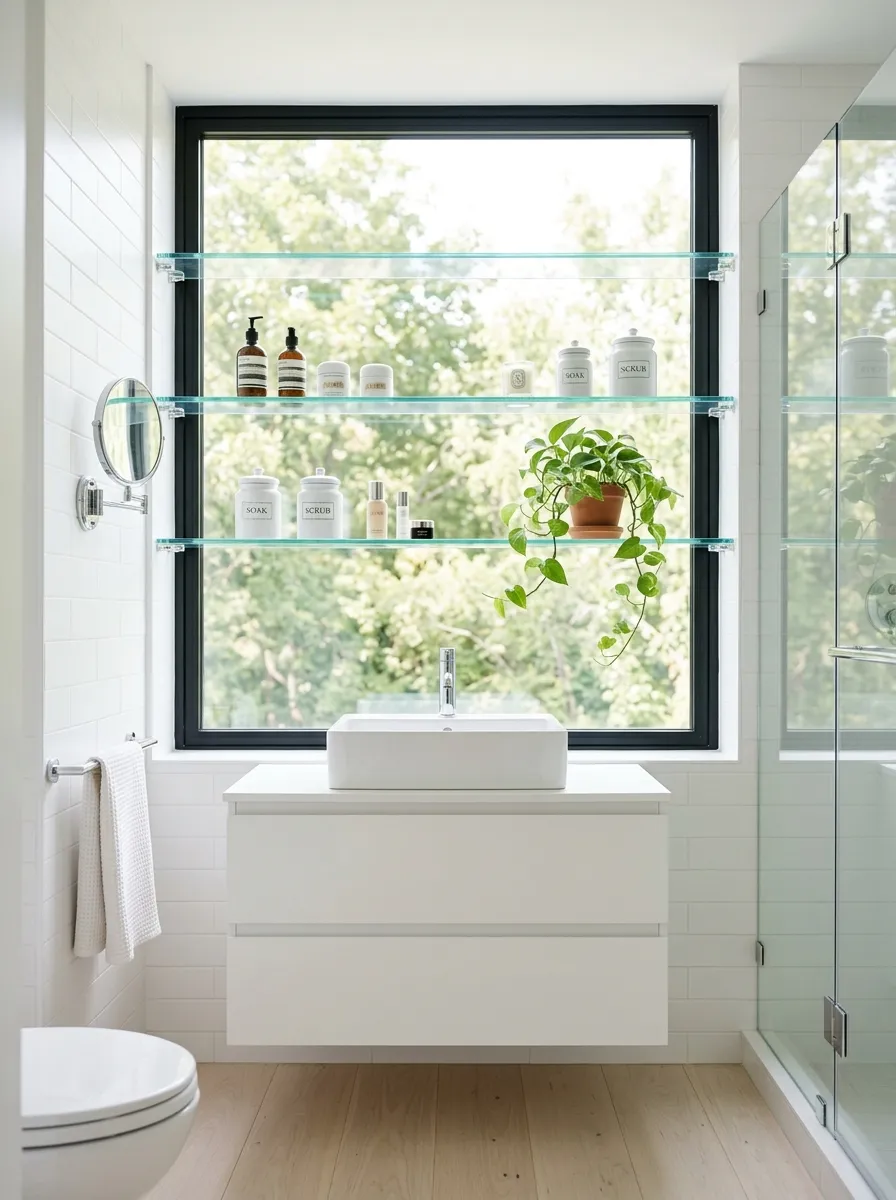
Putting solid storage shelves on window walls blocks valuable daylight and makes the room feel dark.
Running thick glass shelves across the window frame lets natural sunlight pour straight through.
You get functional display space without losing a single ray of daylight.
Tuck Storage Hampers into Unused Vanity Knee Walls
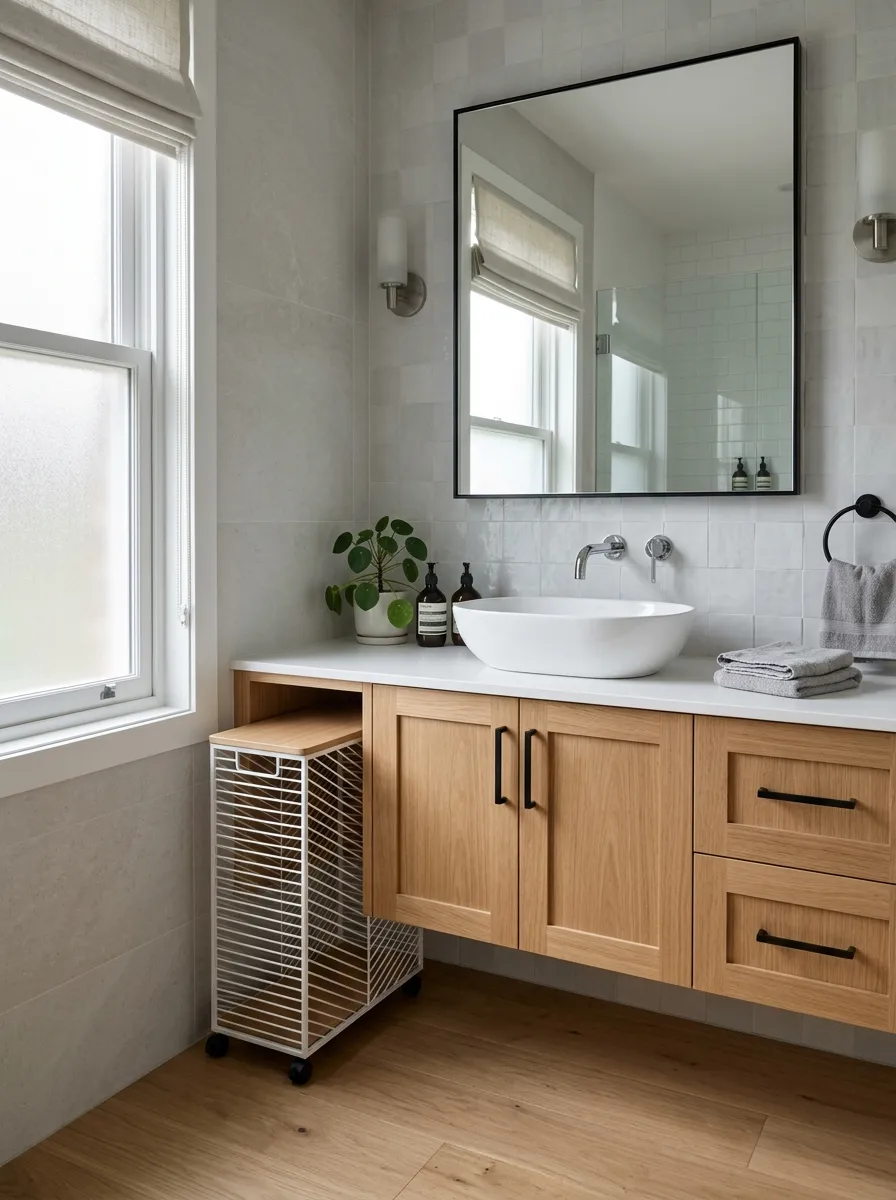
Leaving the side of your vanity open creates a dead zone that collects dust bunnies and wasted air.
Sliding a narrow rolling hamper into that custom gap keeps dirty laundry entirely out of sight.
It turns neglected negative space into a hidden storage powerhouse.
Ventilation Warning
Never use solid enclosed wooden doors for under-sink laundry hampers. Damp textiles need breathable wire or slatted fronts to prevent mold growth in humid bathroom environments.
Hang Double Towel Bars on the Back of the Entry Door
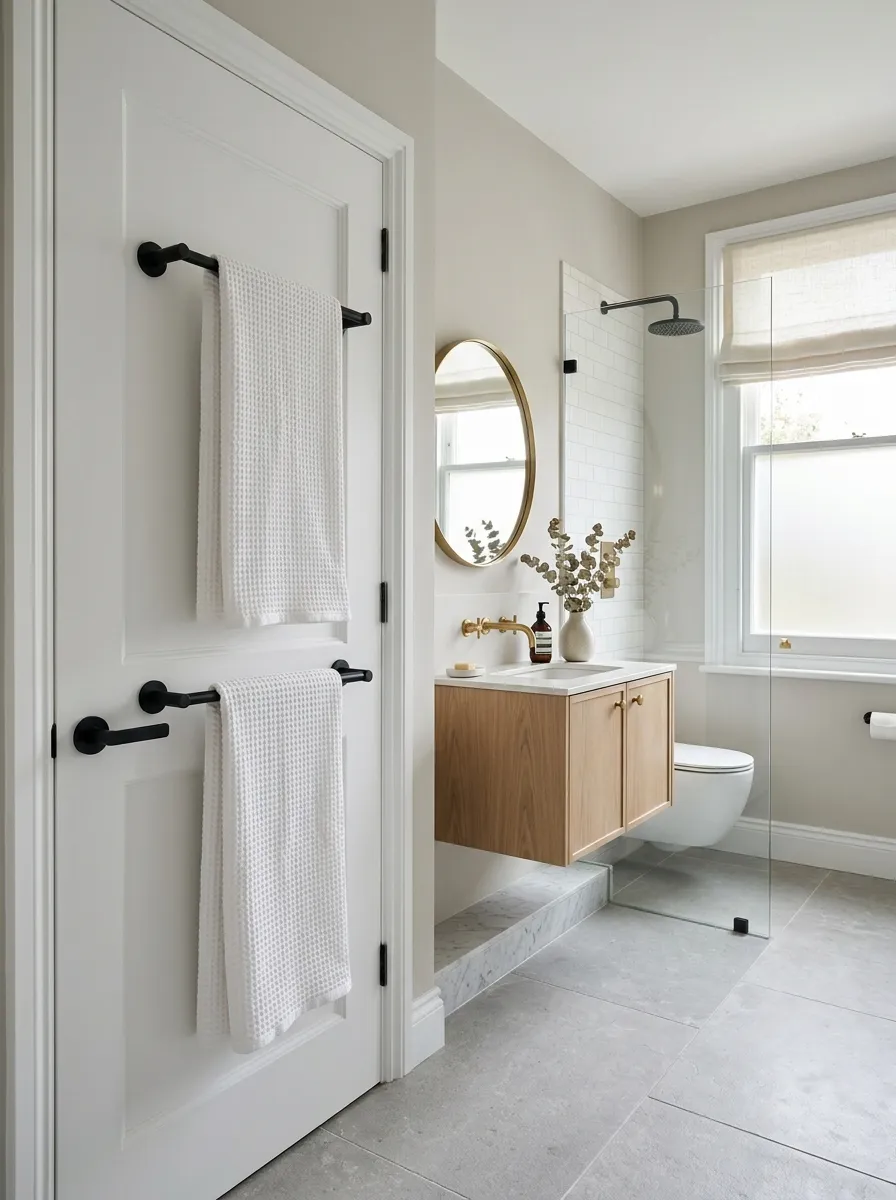
Wall space is too precious in a small bathroom to waste on single towel hooks.
Mounting double tiered bars directly onto the back of your entry door utilizes a massive vertical surface that usually sits empty.
It holds multiple bath sheets securely out of your main walking path.
Double Tier Storage Gain
Use Clear Acrylic Hardware to Minimize Visual Noise
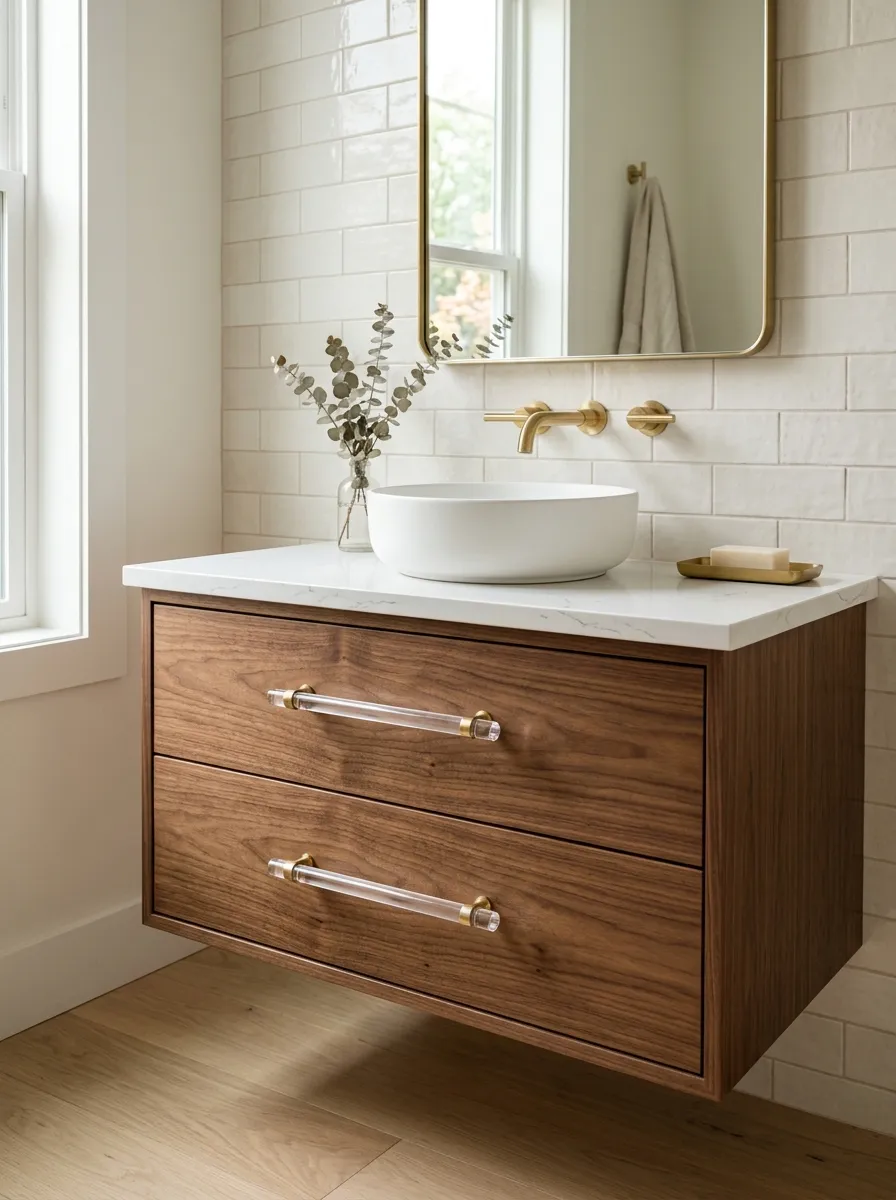
Heavy brass or black cabinet pulls create choppy visual dots across a small vanity face.
Switching to clear acrylic pulls lets the underlying wood grain or paint color shine through completely uninhibited.
It keeps drawers functional while eliminating visual clutter.
Hardware Selection Rules
- Match pull length to drawer width for balanced proportions.
- Select polished brass mounting screws for a subtle luxury finish.
Install a Sliding Barn Door Hardware Assembly on Glass
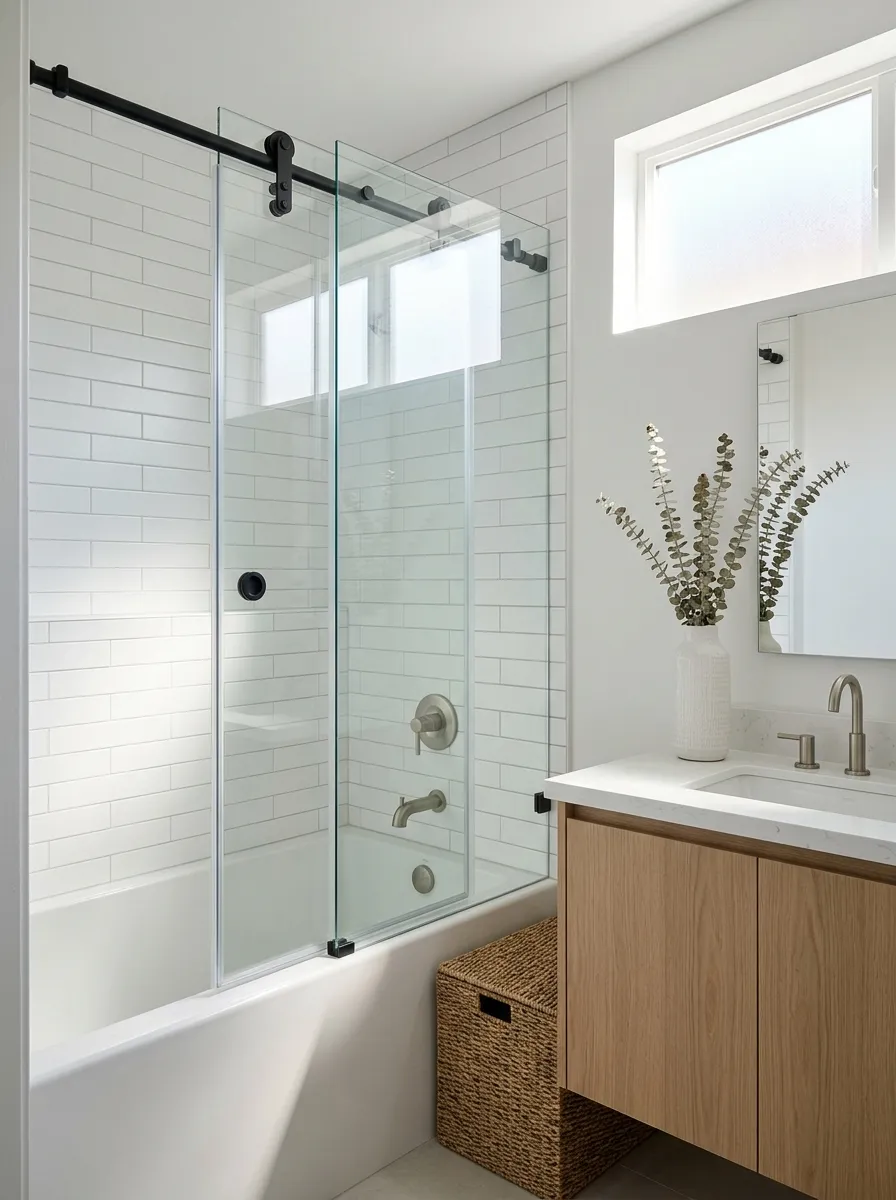
Swinging shower doors require massive clearance room that you simply do not possess in a tight layout.
Mounting a smooth sliding glass assembly keeps movement flat against the tub perimeter.
It lets you open and close your shower enclosure smoothly without bumping vanity corners.
Zero outward swing radius means you can place storage baskets right up against the tub edge safely.
Tile Up to the Ceiling in the Shower Zone Only
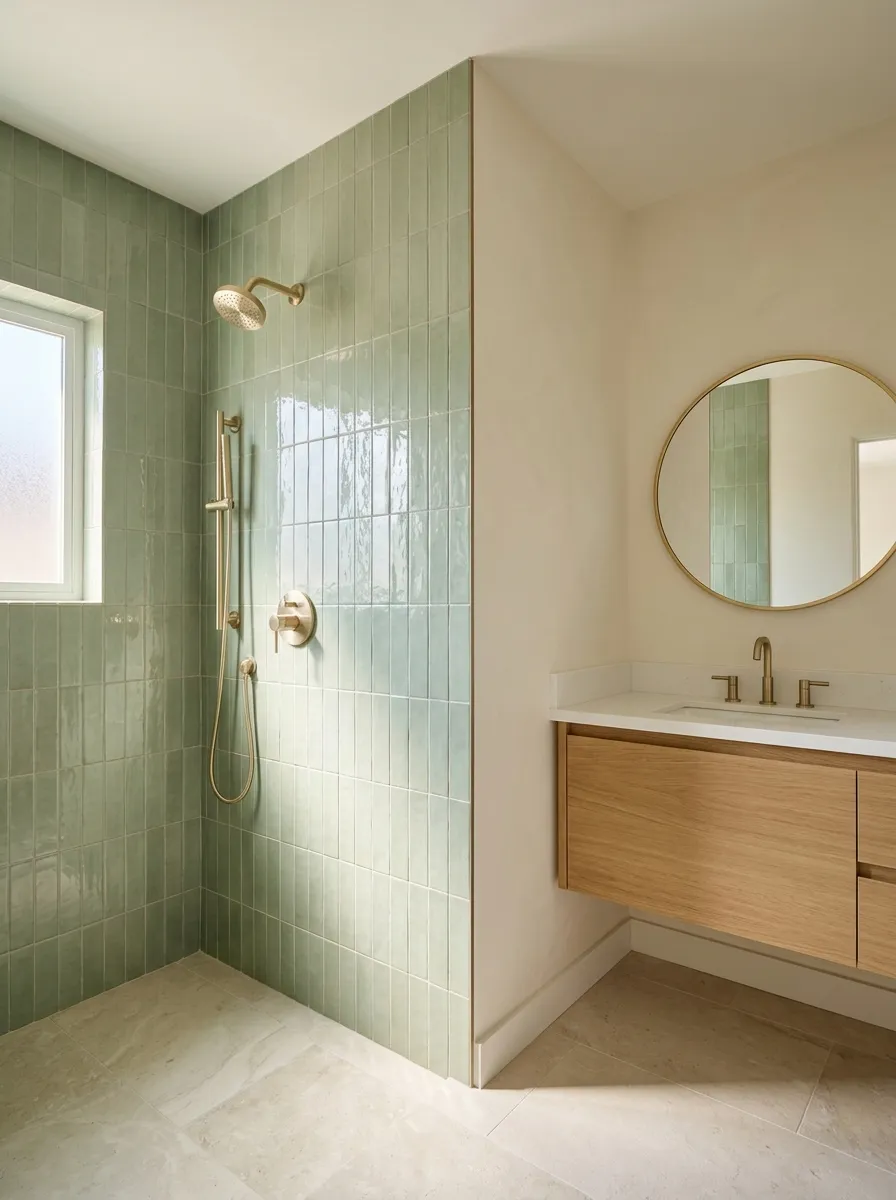
Tiling every single wall in a small bathroom to the ceiling makes the room feel like a sterile commercial locker room.
Limiting full-height tile strictly to the wet shower enclosure creates a striking focal point.
Paint the remaining walls in a warm, washable finish to add texture and softness.
Transition Grout Trick
End your tile runs cleanly inside interior wall corners so the transition to painted drywall looks deliberate and sharp rather than accidental.
Make Your Small Full Bathroom Work Harder
Designing a compact bathroom doesn’t mean compromising on style or settling for cramped fixtures. When you stop fighting your square footage and start utilizing vertical wall cavities, continuous sightlines, and smart floating hardware, your room transforms completely. You don’t need a massive footprint to create a space that feels luxurious and functions effortlessly. Save this list for the next time you plan a renovation project, and start building a bathroom that works for your actual daily life.