
The path to your front door is the only part of your property that every single visitor physically experiences. They don’t just glance at it from the street. They walk it. They feel the surface underfoot, register what’s growing beside them, notice whether things are tended or forgotten.
And yet most front walkways are an afterthought. A strip of concrete poured when the house was built, with whatever survived being planted alongside it. Nobody made a decision. Things just happened, and now you have a path that gets you from the sidewalk to the door without ever making you glad you arrived.
That’s a waste of one of the most loaded design opportunities in your entire property.
The difference between a walkway that works and one that doesn’t is rarely money. It’s intention. It’s knowing what you’re trying to say with the surface, the planting, and the light — and then actually saying it.
The Path and the Planting Are One Decision, Not Two
Most people pick their walkway surface, pour it, and then figure out the planting afterward. This is backwards. The planting vocabulary and the surface material are in constant conversation with each other, and if you don’t plan them together, one will always be fighting the other.
Formal Surfaces Demand Formal Planting Logic
A straight concrete or tile path with clean edges reads as architecture. It has geometric authority. The planting beside it either respects that authority or undermines it.
Clipped hedges, standard topiary, massed ornamental grasses in repeating groups — these amplify the formality. Sprawling cottage perennials, irregular shrubs, and mixed annuals fight it. Neither combination is wrong in principle, but mixing them without intention produces a path that looks unresolved.
When you lay a formal straight path, your planting brief writes itself: structured, repeated, symmetrical or close to it.
Curved Paths Create a Different Problem Entirely
A curved path gives you movement and informality. It invites the eye to travel rather than march. But curves are harder to plant well than straight paths because the relationship between the path edge and the bed changes constantly.
The common error is planting the beds beside a curved path as if they were straight — even rows of plants parallel to the path. Planting needs to follow the curve, not resist it. Masses of plant material should swell outward at the outside of the curve and tighten at the inside, the way a proper garden border behaves.
If the planting doesn’t read the curve, the curve stops looking intentional.
The Width Problem Nobody Talks About Until It’s Too Late
A path that’s too narrow looks like you ran out of materials. A path that’s too wide with nothing planted alongside it looks like a runway.
The relationship between path width, path length, and planting depth determines whether the walkway feels proportionate to the house it leads to. As a rough guide: a short path to a modest house needs to be at least three feet wide. A long path to a larger house needs four feet minimum, and the planting beds alongside need enough depth — eighteen inches at least — to register as intentional from the street.
If the path is wide but the border plantings are a single row of small annuals four inches deep, the proportions are wrong. Widen the beds or narrow the path.
What the Surface Material Is Actually Saying
Stone, brick, gravel, concrete, tile — each one carries a tone of voice before a single plant is added. If you don’t listen to what the surface is already saying, the whole thing ends up confused.
Natural Stone Says Things Plain Concrete Can’t
Flagstone, bluestone, and sandstone all have a quality that poured concrete lacks: variation. No two pieces are identical in size, colour, or texture. That variation gives a path warmth and a sense of permanence that reads as belonging to the landscape rather than being placed on top of it.
Dry-laid flagstone — set directly into a sand and grit bed without mortar — allows plants to creep into the joints. Thyme, Corsican mint, and baby’s tears all work well between flagstone joints, softening the hard line where stone meets stone and making the path look like it grew into its surroundings over time.
Mortared flagstone gives cleaner lines and longer-term stability. The tradeoff is that the mortar joints prevent joint planting, so all the softening has to come from the border beds.
Gravel Costs Less and Asks for More Commitment Than You Think
Gravel paths feel relaxed, garden-appropriate, and honest. They’re also the most demanding in terms of installation quality. Done poorly — laid too thin, without edging, without a proper sub-base — a gravel path is a weed bed by year two and a mud problem by year three.
Done properly, gravel is some of the best value you can get in a front garden path. Lay a compacted hardcore sub-base at least four inches deep. Install robust steel or concrete edging on both sides before any gravel goes down. Top with three to four inches of compacted gravel in the path zone. Any thinner and footprints remain.
The gravel colour matters as much as any other decision here. Honey-coloured pea gravel reads warm and cottage-like. White limestone reads clean and contemporary. Grey crushed granite reads urban and serious. Pick the one that speaks the same language as your house.
The Contrast Border Is the Underrated Workhorse of Paver Paths
Whether the path is brick, concrete paver, or stone, a contrasting border course does more visual work than almost any other single detail. It frames the surface, defines the edge where path meets planting, and makes the overall path look designed rather than simply poured.
A charcoal or dark grey border course around a buff or sandy main paver reads as contemporary. A red brick border around a mixed stone paver reads as traditional. A raised bullnose cap around a concrete paver reads as formal.
Without a border course, even a beautifully laid paver path can look unfinished. With one, the same path reads as considered from the street.
Walkway Landscaping Ideas
The Pea Gravel Path With Blue Fescue Grass Borders
Install a compacted gravel path in natural honey or buff tone between two steel-edged beds — each bed at least eighteen inches wide. Fill the beds with dark rubber or composted bark mulch to two inches depth.
Plant Blue Fescue — Festuca glauca — in clusters of three throughout both beds at two-foot spacings. This grass grows to twelve inches tall in a tight blue-silver hemisphere and requires no pruning, no watering after establishment, and no seasonal replanting. Cut the clumps back hard to four inches in early spring every two years to refresh the growth.
The blue-silver grass, dark mulch, and warm honey gravel work together as a palette: cool, warm, and dark. Against a natural cedar or warm timber facade, this combination looks exactly right.
The Dark Timber and White Gravel Stepped Path With Ferns That Found Its Own Atmosphere
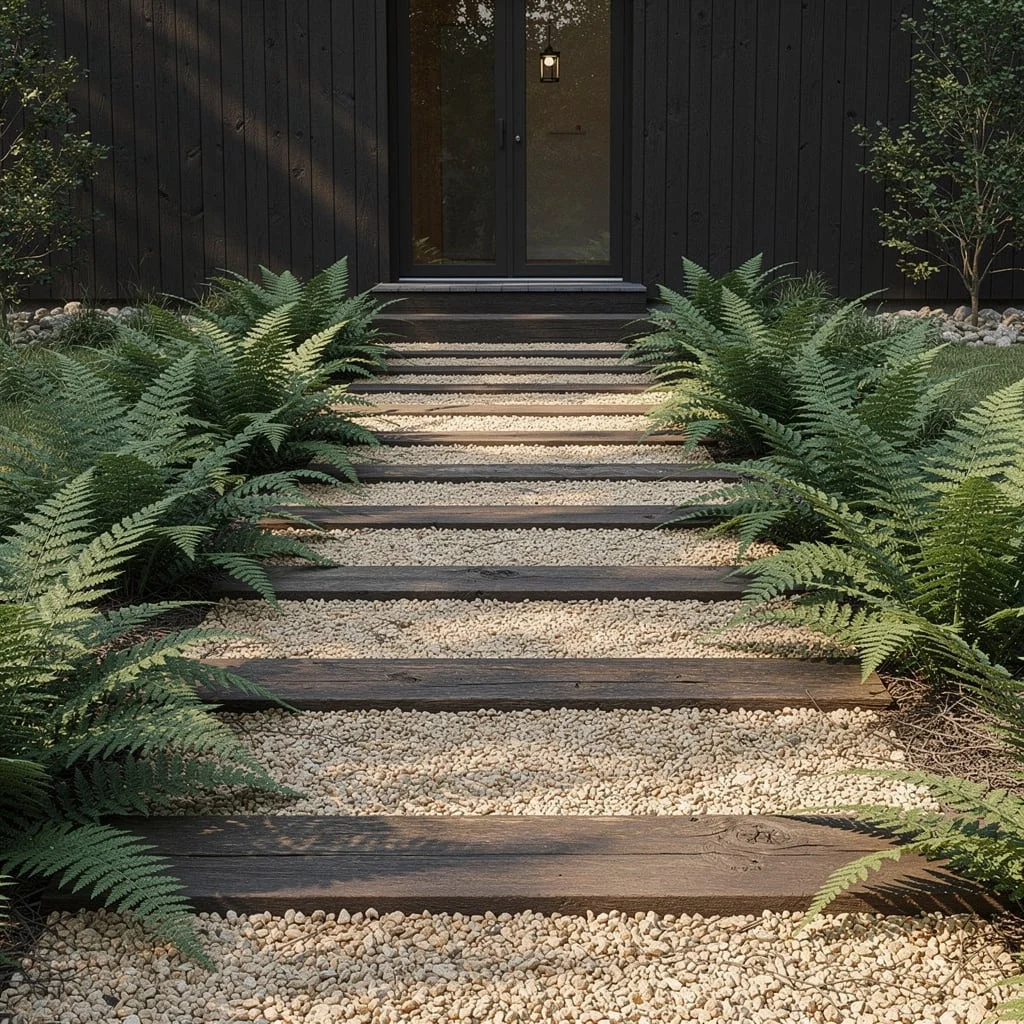
This path is for houses that sit on sloped ground, or for entrances that benefit from a grade change even if the ground is relatively flat. The steps create occasion.
Set reclaimed hardwood sleepers or dark-stained timber risers as step faces across the full width of the path at equal intervals — each riser twelve to sixteen inches high, each tread twenty-four inches deep filled with fine white pea gravel over compacted hardcore. The gravel treads crunch underfoot and drain freely.
Plant large fern varieties — Dryopteris or Osmunda, not the small decorative varieties — densely in the beds flanking both sides of the path. They should billow outward and slightly over the timber risers, softening the edge without covering the step face.
The combination of dark timber, white gravel, and lush green fern is an atmosphere more than a design. It reads as deliberate and unusual. Against a dark-stained or black timber facade, it’s one of the most resolved residential entries possible.
The Mixed Paver Path With Curved Stone Steps
A path with level changes, planted borders, and integrated lighting is asking a lot of itself visually. The way to keep it from reading as chaotic is to run a single design element consistently through every part of the scheme.
Here, the dark grey charcoal border course is that element. It appears on the path edge, on each step riser, and as the edging of the planting beds. The visual eye follows it continuously from street to door and reads the whole composition as connected.
Plant the beds on both sides with a single low-growing flowering perennial repeated throughout — Dianthus in pink works here, as do creeping Phlox or compact Catmint. The repetition of a single plant type across a complex path scheme imposes order that mixed planting would scatter.
Set low mushroom-cap pathway lights into the bed surface at the path edge — bronze or matte black, never chrome or polished. These illuminate the planting at night and make the curved steps visible and safe.
The Round Stepping Stone Path Through Flowering Thyme That Replaced the Lawn Entirely
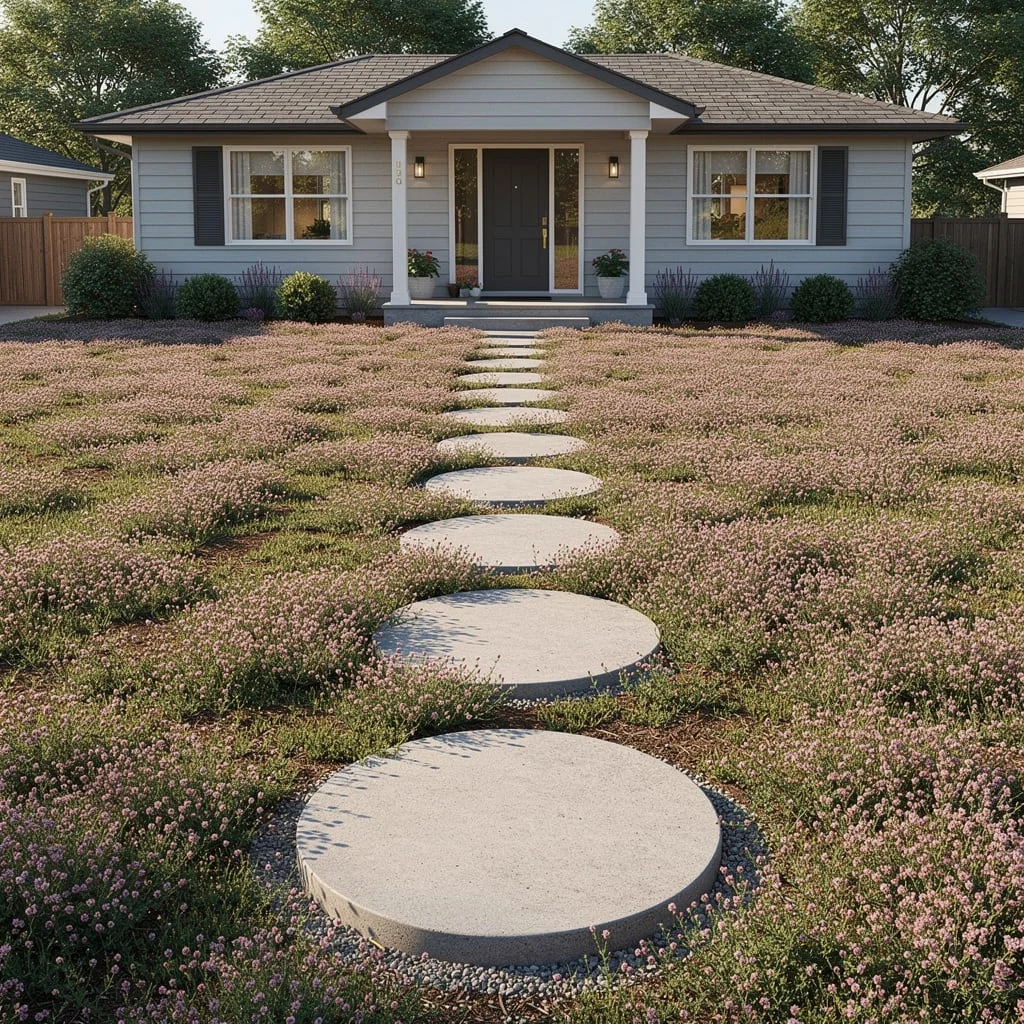
Remove all lawn from the front yard. Kill it completely. This is a commitment and it’s the right one for this path to work.
Cast or purchase large circular concrete stepping stones — a minimum of twenty-four inches in diameter, ideally larger — and set them in a single straight line from sidewalk to door at comfortable stride spacing. Check each stone for level before backfilling. Set them flush to the soil surface, not proud of it.
Plant the entire surrounding area with creeping thyme — Thymus serpyllum in a pink-flowering variety. Space plugs six to eight inches apart. Water consistently in the first season. The thyme will fill in completely within two growing seasons, creating a flowering carpet that blooms in late spring.
The round stone against the spreading thyme is a graphic that photographs from the street. The proportion of the stone to the planting matters enormously — stones too small disappear, stones too large read as stepping plates in a parking lot. Twenty-four to thirty inches is the range where they read as architecture.
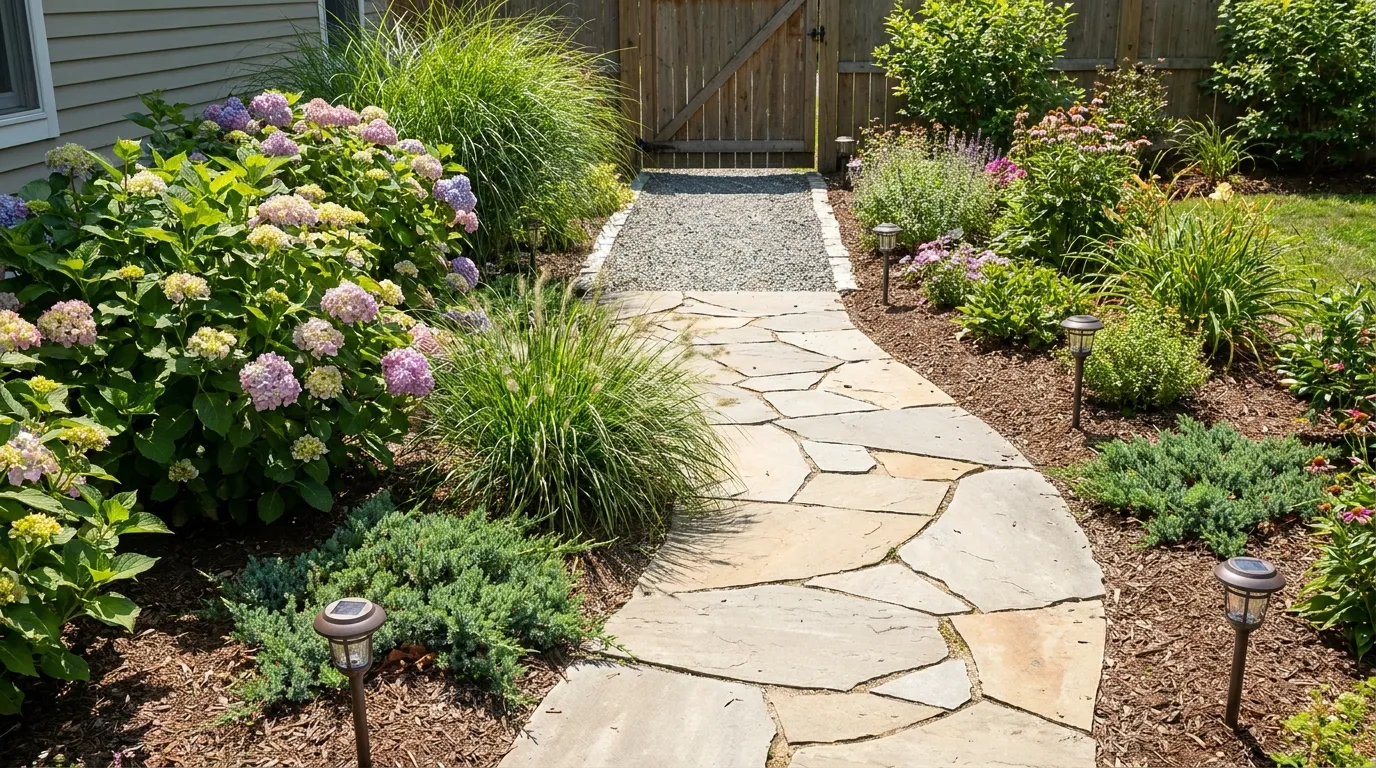
The Bluestone Flagstone Path With Mixed Seasonal Planting
Lay large irregular bluestone flagstone pieces in a dry-set configuration, fitting them together with two-inch planted joints in a slightly curved path. The pieces need to be substantial — smaller flagstone pieces used in large quantity look scattered rather than settled.
Plant a full and layered border on both sides: low annuals and perennials at the path edge, medium flowering shrubs in the middle depth, and taller structural plants at the back near the house foundation. The layering from front to back gives the border visual depth rather than a flat band of one height.
Set solar-charged stake pathway lights into the planting at the path edge at six-foot intervals. The solar units need to be positioned where they receive full sun during the day — check your path orientation before purchasing. The warm glow of path lights against bluestone and mixed flowers in the evening is a quality of light that justifies the path entirely.
The Herringbone Brick Path With Creeping Thyme in the Joints That Got Beautifully Out of Hand
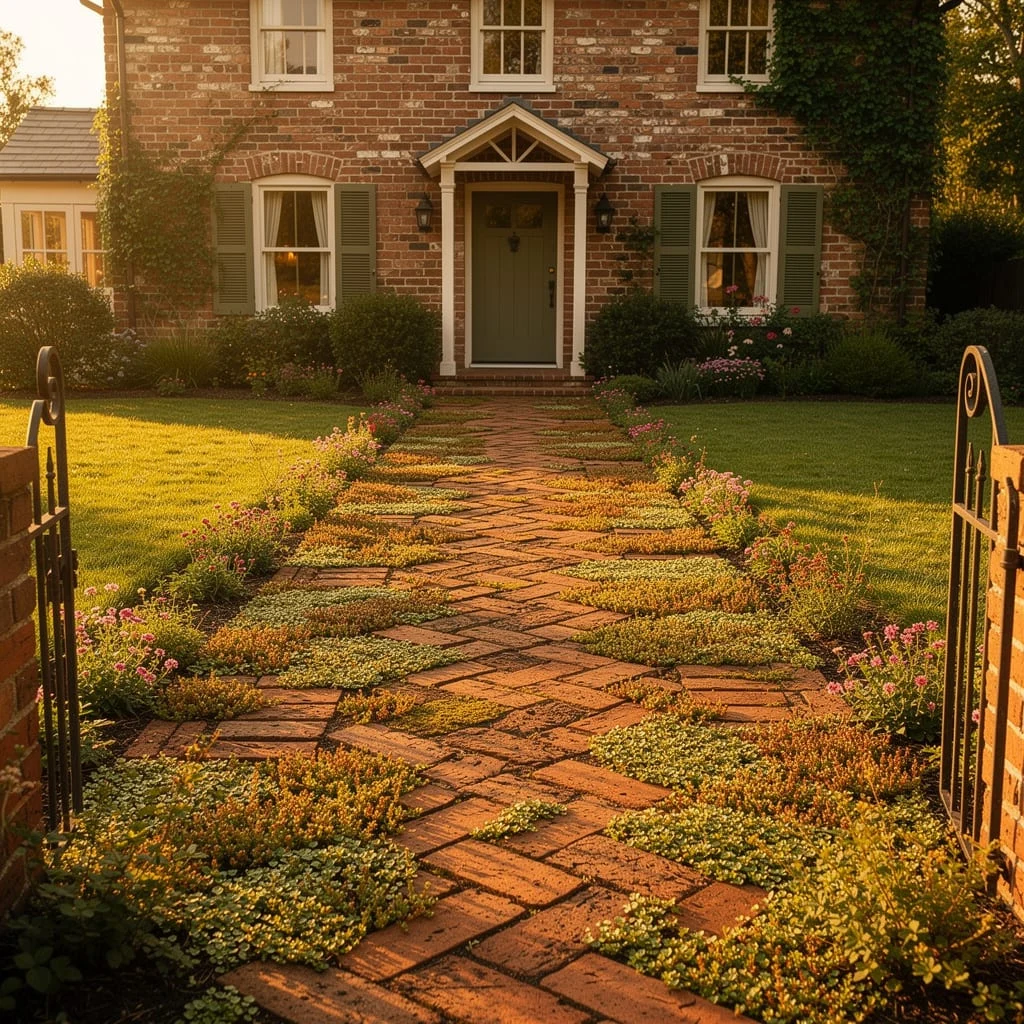
Lay reclaimed or weathered red clay brick in a herringbone pattern — the forty-five degree diagonal orientation that gives the surface visual energy without shouting. Set the bricks on a dry-sand bed rather than mortar, leaving two-inch gaps between each brick.
Once the path is laid, mix creeping thyme plugs — a blend of varieties for different foliage and flower colours — and plant them into every joint at twelve-inch intervals. Water well for the first season. After that, thyme fills the joints on its own through lateral spread.
The path will begin to look like it was installed twenty years ago within three seasons. That is the goal. Install low wrought iron or painted steel gate posts at the street entry if the property allows — the path demands an arrival moment that bare air on both sides doesn’t provide.
The Cobblestone Paver Path With Curved Retaining Steps
Where a path needs to rise in level, most people build a simple straight set of steps and consider the problem solved. This approach treats the grade change as the design opportunity it actually is.
Build curved retaining walls — using large concrete or natural stone cap blocks — on each side of the path as it rises, creating swelling planting areas above the retaining line. These raised pockets become the most prominent planted areas in the whole front garden, visible from the street.
Set the path itself in a modular cobblestone or tumbled concrete paver with a contrasting darker border course — the border course should wrap around each step riser as well as the path edges, tying the entire composition together visually.
Fill the raised planting pockets with river rock and compact globe shrubs — clipped Boxwood or Pittosporum balls — spaced at irregular intervals. Add low-voltage pathway lighting set into the retaining wall face. The lights make this entrance genuinely dramatic after dark.
The Large-Format Porcelain Tile Path With Terracotta Ball Topiary and White Gravel That Said Everything in Restraint
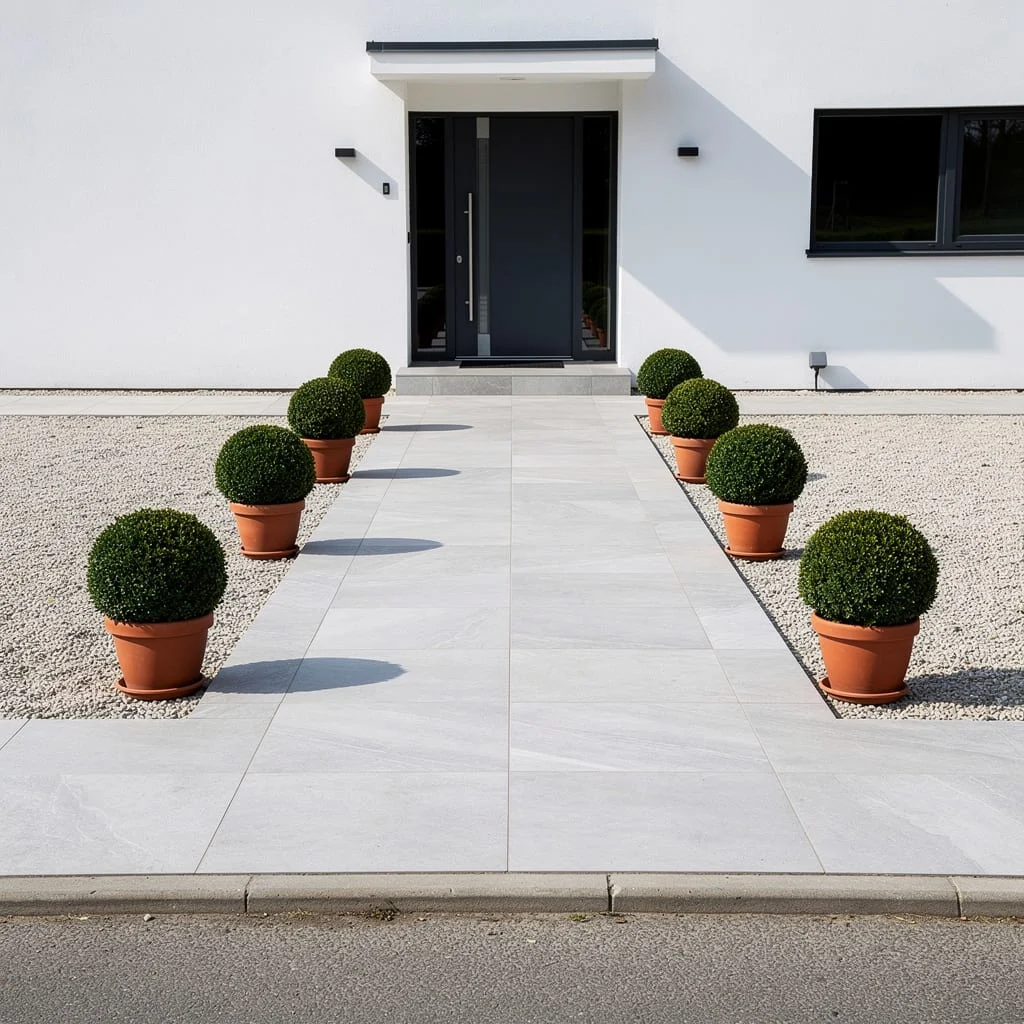
Lay large-format porcelain or concrete tiles — minimum twenty-four by twenty-four, ideally larger — in a continuous straight run from street to door. The tile surface must be perfectly level and perfectly aligned. Any wandering in the grid lines destroys the effect entirely. Use a long level and string line throughout installation.
Fill the space on both sides of the path with fine pea gravel or white limestone chip to a depth of three inches over a compacted hardcore sub-base and weed barrier.
Place identical terracotta or clay pots — the standard round garden centre variety, nothing decorative or patterned — at even intervals on both sides of the path, each containing a single clipped globe Buxus. The combination of the pale tile, white gravel, terracotta pots, and dark green spheres is a complete palette. Add nothing else.
Maintain the topiary balls twice yearly. Replace the pots with the same variety if any plant fails. Consistency is the entire design logic here.
The Winding Flagstone Path Through Roses, Lavender, and Foxgloves That Looked Accidental and Wasn’t
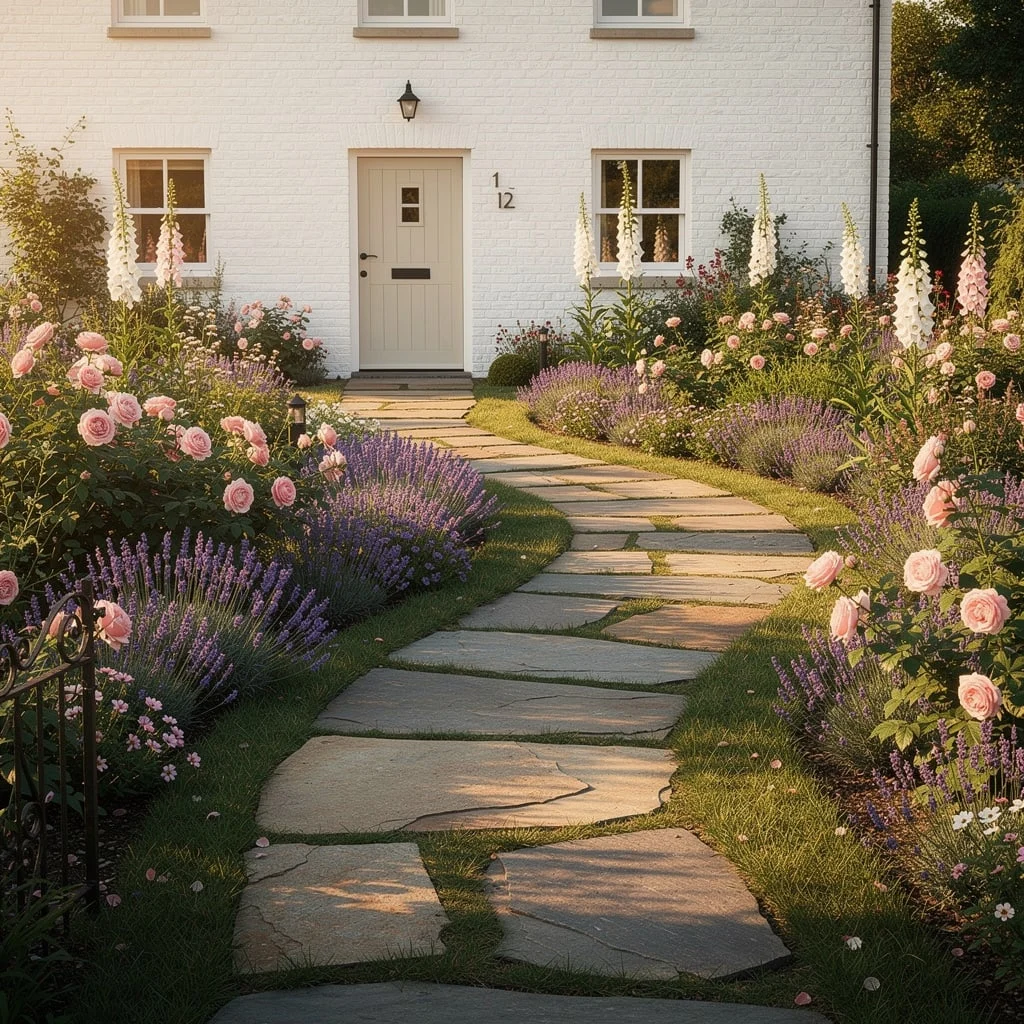
Source irregular flagstone pieces — York stone, limestone, or sandstone — in a range of sizes from roughly eighteen inches square upward. Avoid the pre-cut square and rectangular pieces: the irregular shapes are what give this path its cottage character.
Lay the stones as a dry-set path in a casual offset pattern, with gaps of two to three inches between pieces. Set them slightly below the surrounding lawn level so a mower can pass over the edges.
Plant both sides generously. The planting vocabulary here is English cottage: English roses in pink and cream, English Lavender in front of them, and Foxgloves (Digitalis) at the rear for height. These plants are the defining decision. Without them, irregular flagstone is just a rough path. With them, it looks like a garden that takes itself seriously in the best possible way.
Allow the lavender to spill slightly onto the stone edges. Allow the roses to lean toward the path. The path should feel like it passes through the garden, not beside it.
The Curved Concrete Path With Massed Annual Color Beds on Black Mulch That Works Because It Committed
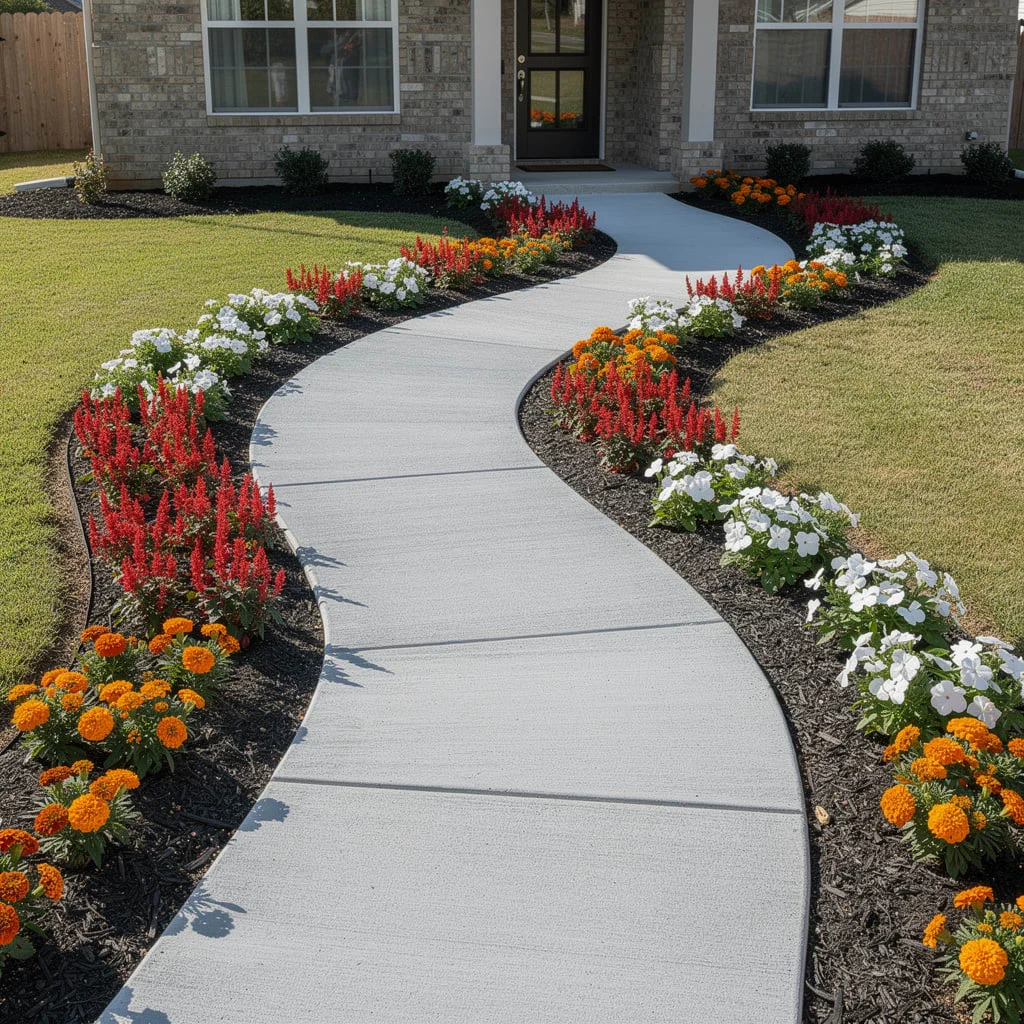
Pour a concrete path in a genuine curve — not a slight arc, but a substantial serpentine that actually changes direction from the sidewalk to the door. The curve needs to be wide enough that it reads as intentional from the street, not as a builder error.
Prepare wide beds on both sides — minimum twenty-four inches — and lay dark mulch to three inches depth. The mulch is as important as the planting: it provides the dark ground from which the color reads.
Plant in blocks of single color rather than mixed varieties — red Salvia in one block, orange African Marigold in the next, white Vinca in the next. Alternate the blocks on opposite sides of the path so the colors don’t directly mirror but do rhyme across the path width.
Replace the planting seasonally. This is the time commitment this path asks for. The reward is a front approach that looks different and genuinely cared for three seasons out of four.
The Curved Paver Path With Raised Steps
The trick to planting that looks established immediately is using plants at the right scale for the space rather than buying small and waiting. A compact blue spruce planted at eighteen inches tall beside a new path will look like a prop. The same specimen at four feet reads as belonging.
Install a curved paver path with a contrasting darker border course. Build the level changes as generous curved steps — each tread wide enough that two people can walk side by side without navigating each other. Set curved retaining walls along the bed edges in matching or complementary stone.
Plant immediately at the right size: blue spruce or silver blue conifers at two to three feet, variegated Euonymus at twelve to eighteen inches spread, and compact flowering perennials at the path edge. Set low-voltage mushroom lights into the bed at the path edge from the beginning.
The finished result should look like it was planted three years ago, not last Thursday. Size your plants to make that true on day one.
The Dark Granite Stepping Path With Black Mondo Grass Joints and White Gravel Ground That Lives in the Twenty-First Century
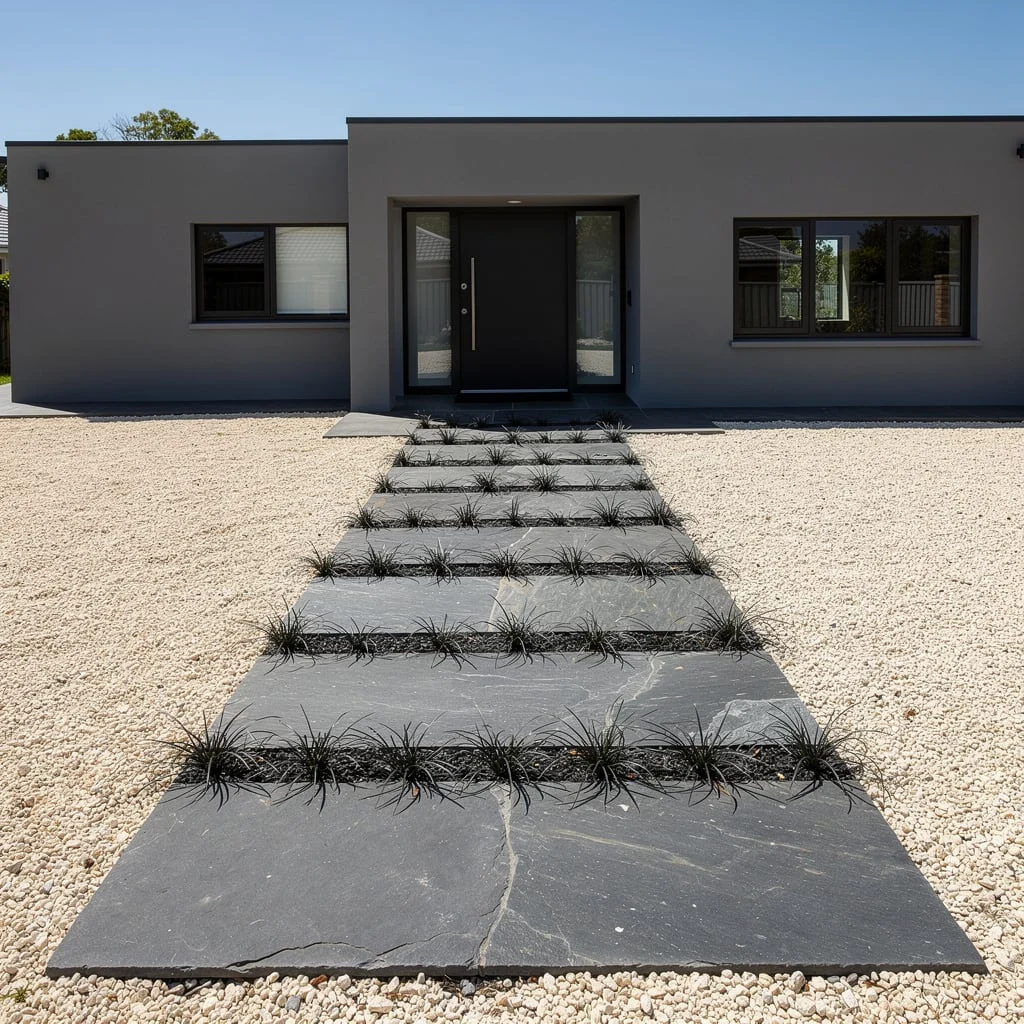
Set large dark grey granite or bluestone slabs as horizontal stepping bands across the full width of a central path area — each slab approximately six inches wide running the full path width, with a consistent three-inch gap between each one. This creates a ladder-like series of bands rather than a continuous surface.
Fill the gaps between each granite band with black Mondo grass planted densely — five to six plants per linear foot. This grows slowly and holds its position well once established.
Set the entire ground plane surrounding the path in fine white pea gravel or crushed white marble over weed barrier. The palette of dark grey granite, black grass, and white stone ground is deliberately stark and contemporary. It works because it refuses to compromise.
This path requires a house with equally clear architectural language to support it. Against a rendered flat-roofed contemporary, it reads as belonging. Against a traditional brick cottage, it would be entirely wrong.
The Paired Olive Tree Walk With Limestone Path and White Gravel That Doesn’t Need Anything Else
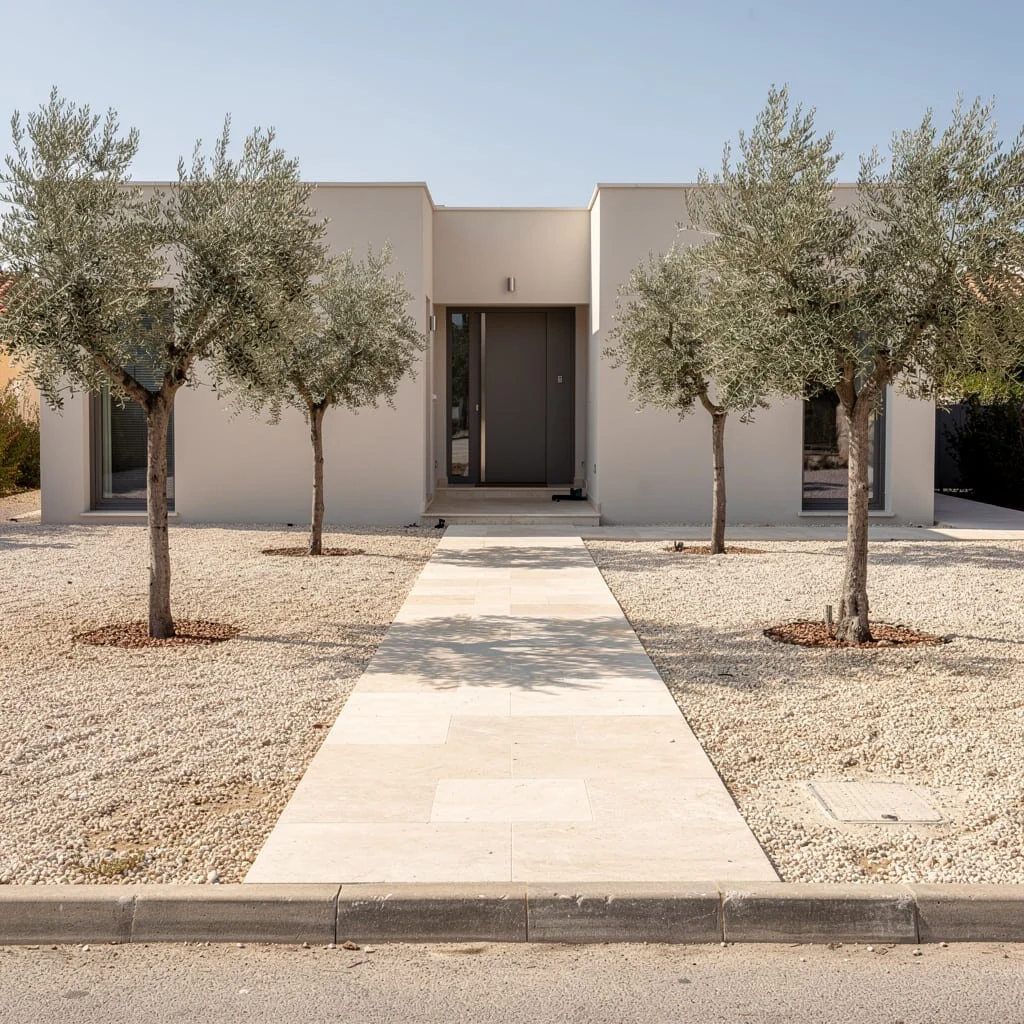
Set a limestone or pale sandstone tile path — honed finish, not polished — in a straight run from street to door. The tile width should be generous: at least four feet.
Source two mature olive trees in large terracotta or stone pots, or plant two semi-mature specimens directly into the ground on either side of the path midpoint, equidistant from the path edge and from each other. Olives are the decision here. Their silver-grey foliage, gnarled trunks even in semi-maturity, and relaxed canopy form create an atmosphere that no other tree produces.
Cover the ground plane on both sides with fine cream or buff gravel over weed barrier. No additional planting. The olives are sufficient. Adding more plants reduces the Mediterranean stillness that this combination achieves.
The Columnar Birch Allee on a Wide Stone Paver Path That Makes a Modest House Look Significant
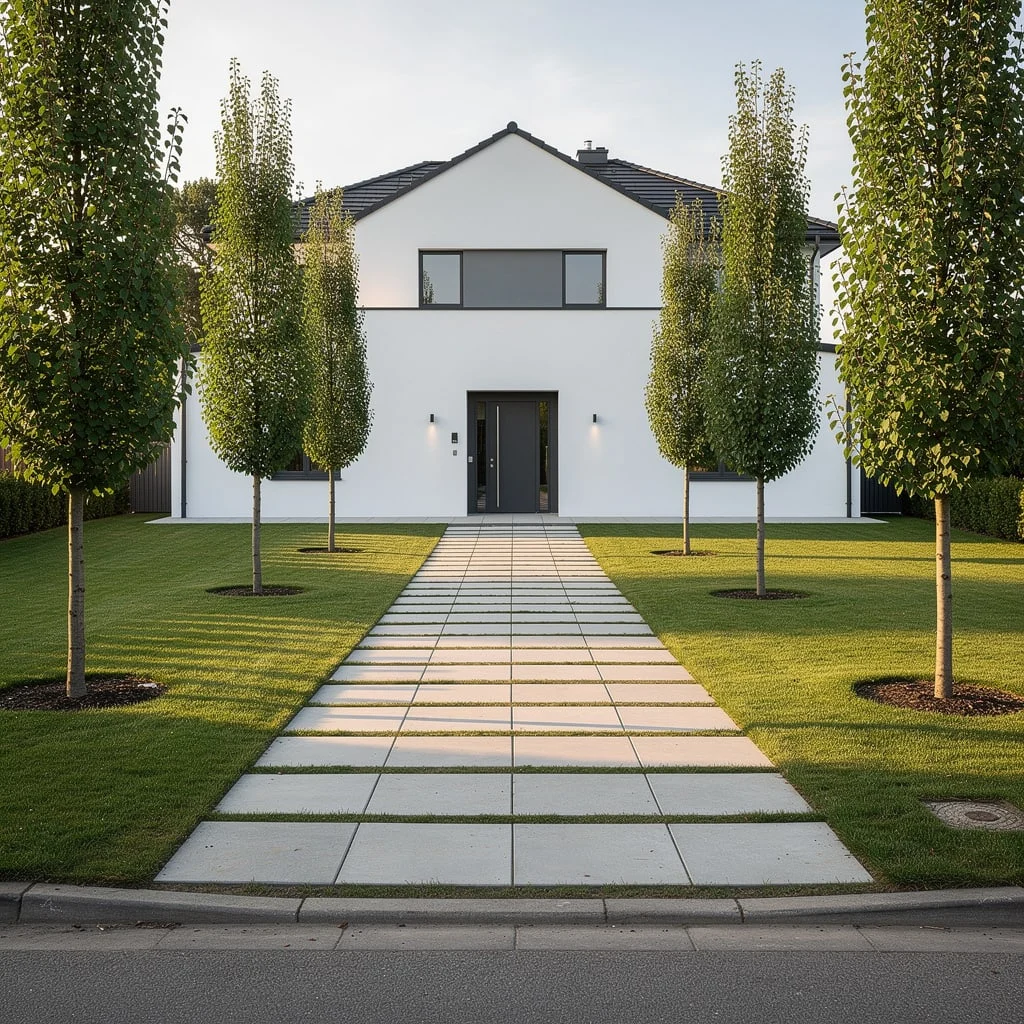
A path becomes an allee when the trees planted alongside it are tall enough and placed closely enough that they frame the walk architecturally rather than simply decorating it. Most residential properties never achieve this because the trees are planted too far apart or the path is too narrow.
Install a wide-format stone paver path — at least five feet wide — in a straight run. Plant columnar birch or columnar hornbeam in pairs on both sides, eight feet from the path edge and twelve to fourteen feet apart along the path length. Four trees minimum — two per side — for the allee effect to register.
Each tree gets a circular mulch ring at planting, maintained clean and bare of other plants. The lawn remains between the path and the tree rings, kept tight and edged.
The trees will take three to five years to develop enough canopy to frame the path convincingly. This is a long-game decision. The finished result makes even a modest house look like it was designed with the landscape, not placed inside it.
The Pink Rose Standard Allee on a Clay Brick Path That Made Romance Non-Negotiable
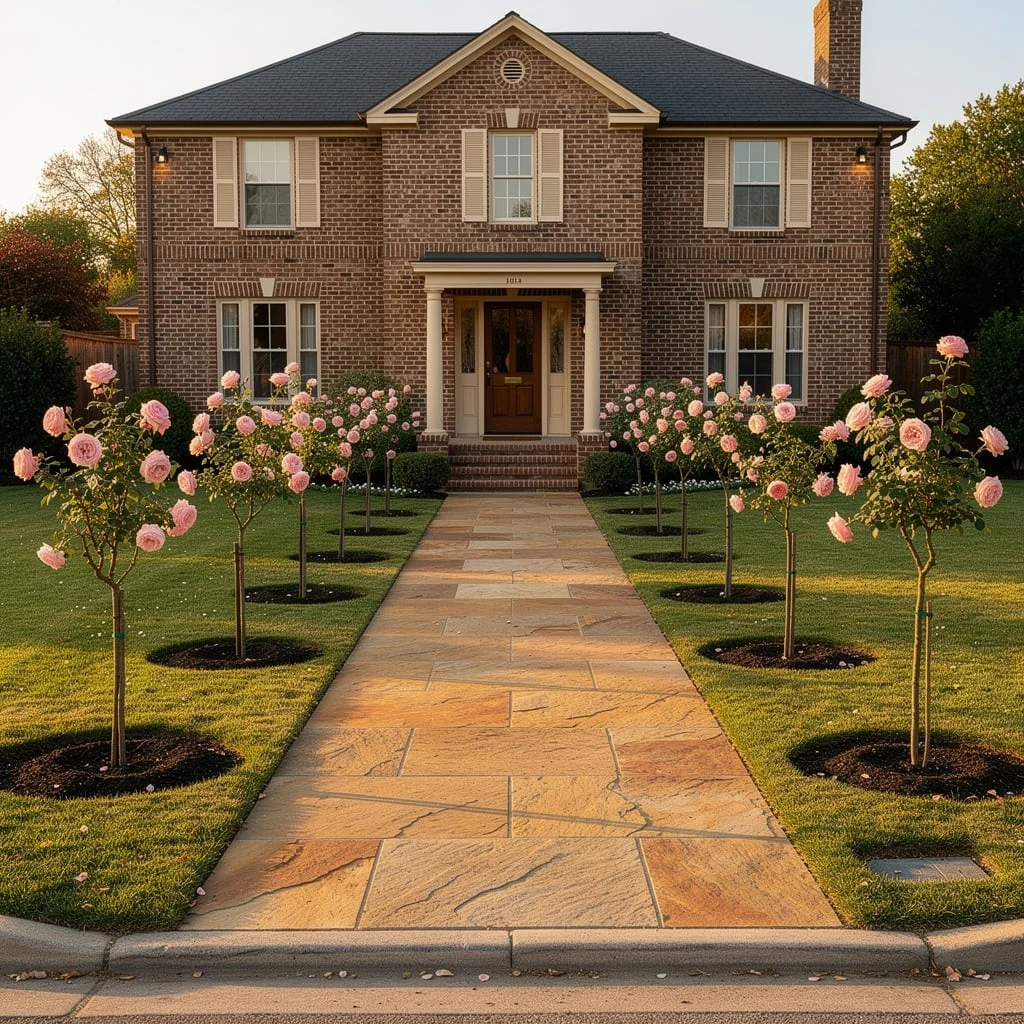
This path commits entirely to one idea and refuses to apologize. Lay clay brick in a running bond or basket weave pattern in a warm terracotta tone, running straight from the street to the door. The warmth of the brick is the foundation the planting builds from.
Plant grafted rose standards — full-ball headed, in a large-bloomed pink or blush variety — on both sides of the path in symmetrical pairs. Spacing should be consistent and relatively close: six feet between standards. The tightness of the spacing is what creates the avenue effect rather than scattered feature planting.
Mulch each tree ring with dark compost mulch in a perfect circle. Keep the lawn between the rings and the path edge tight and edged. The precision of the lawn maintenance directly determines how good the roses look — untidy grass diminishes the formal intent of the arrangement.
Prune the rose heads hard each year in early spring to maintain the ball form. This is the annual commitment. Beyond that, feed once in spring and deadhead spent blooms through summer to maintain continuous flowering.
A Path Is a Promise the Garden Makes Before the Door Opens
Every path in this collection made a choice. Some chose precision. Some chose abundance. Some chose contrast, or structure, or atmosphere. Each committed to its choice thoroughly enough that the result reads as coherent.
The paths that fail are the ones caught between choices. Half formal, half informal. Hard surface chosen without considering the planting. Plants placed without considering the light. No decision ever fully made.
Your front path is making a statement about your house every hour of every day, whether you’ve thought about it or not. The only question is whether the statement is intentional.
Make it intentional.